Hola queridos amigos!
A los que ya me conocen, saben que este es mi lugar favorito, donde siempre comparto mis tutoriales y a los que me leen por primera vez, también los invito a que me acompañen a ver este Paso a paso dedicado a los bebés.
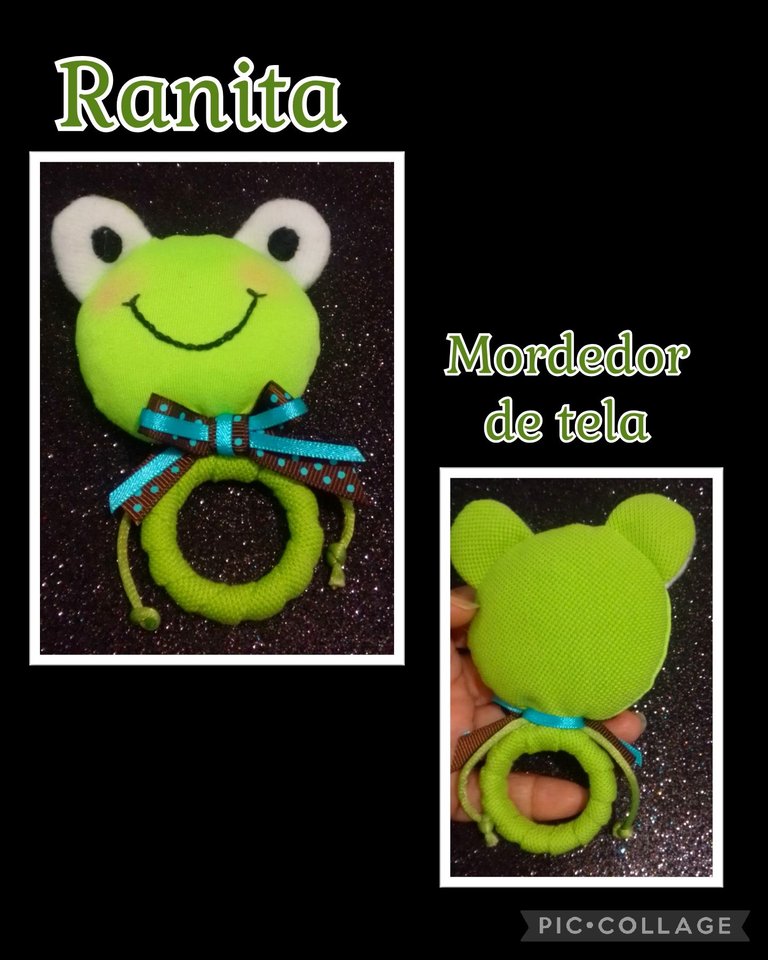
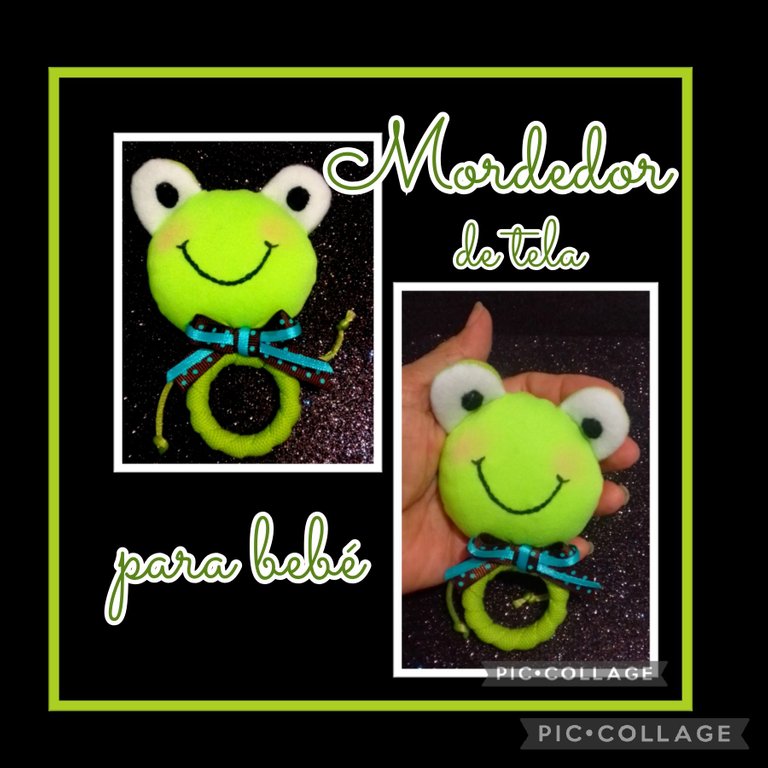
Hoy les mostraré como hacer un Lindo juguete Mordedor, es muy fácil y útil ya que servirá cuando empiecen a salir los dientes, está hecho con telas de algodón y con relleno antialérgico, cabe destacar, tener en cuenta las medidas de higiene, lavado y secado frecuente.
Antes las abuelas y mamás usaban los pañales de tela, les hacían nudos y se los daban a los bebés para que se rascaran las encías.
Pero bueno ya todo ha cambiado y ahora tenemos juguetes jajaja... como este que te mostraré.
¡Así que, si tienen un bebé en la casa esta es tu oportunidad de aprender a realizarlo!
Entonces te voy a mostrar y nombrar los materiales a utilizar:
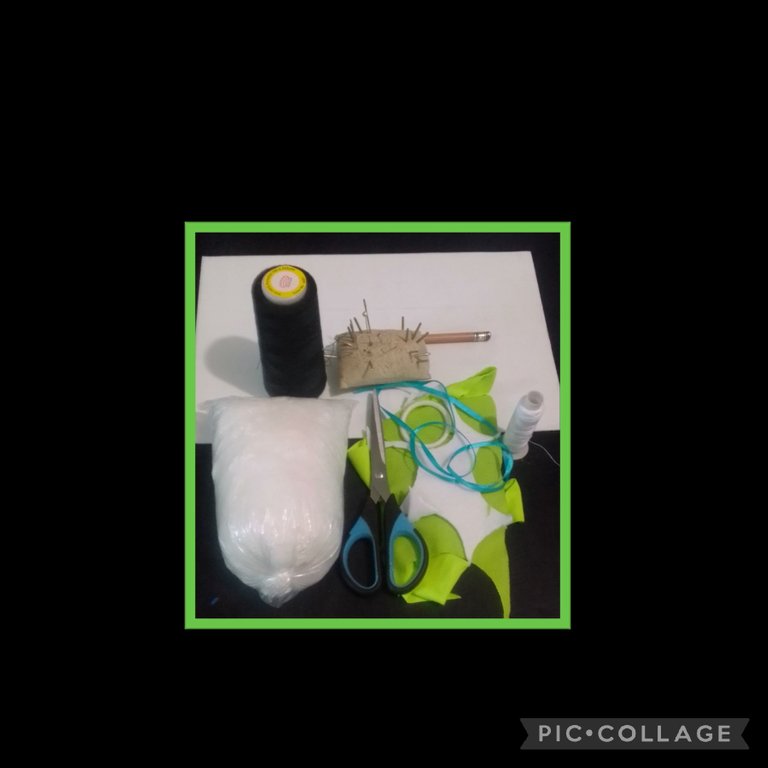
| Telas de algodón | Algodón antialérgico |
|---|---|
| Cintas de tela | hilos, agujas y alfileres |
| Tijera | Argollas plásticas |
| Lápiz | Papel |
| Cordón o Rabo de ratón |
Ahora comencemos con el procedimiento:
Paso 1
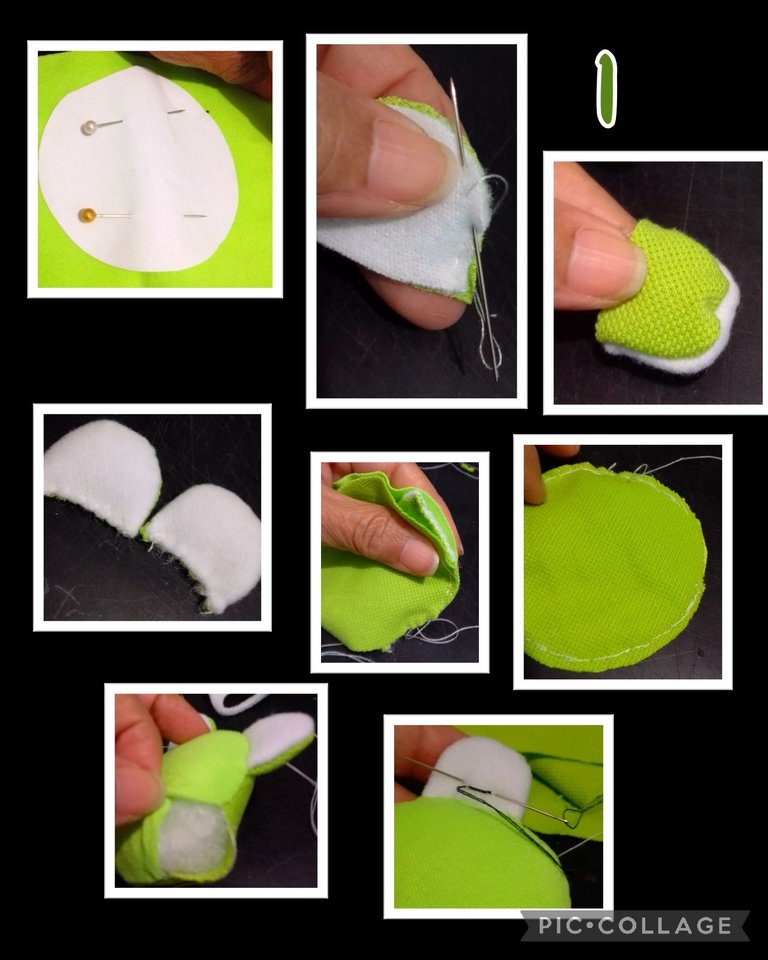
- Traza un círculo en el papel y recorta.
- Dobla la tela, fija el círculo con alfileres y recorta las dos piezas de la cabeza, luego recorta los ojos 2 piezas en blanco y 2 en verde.
- Comienza a coser uniendo los ojos, luego voltea, rellena y cose cerrando las piezas.
- Después marca colocando un punto medio de la cabeza y comienza a coser y cuando hayas cosido una cuarta parte de la cabeza, centra los ojos e insértalos y cose los ojos junto con las piezas de la cabeza y deja dos centímetros sin costura para voltear.
- Luego rellena la cabeza y ciérrala.
- Con hilo negro comienza a coser la pupila, puedes hacerlo de dos formas en este ojo comencé haciendo puntadas horizontales
muy pegaditas hasta rellenar y hacer la circunferencia.
Paso 2
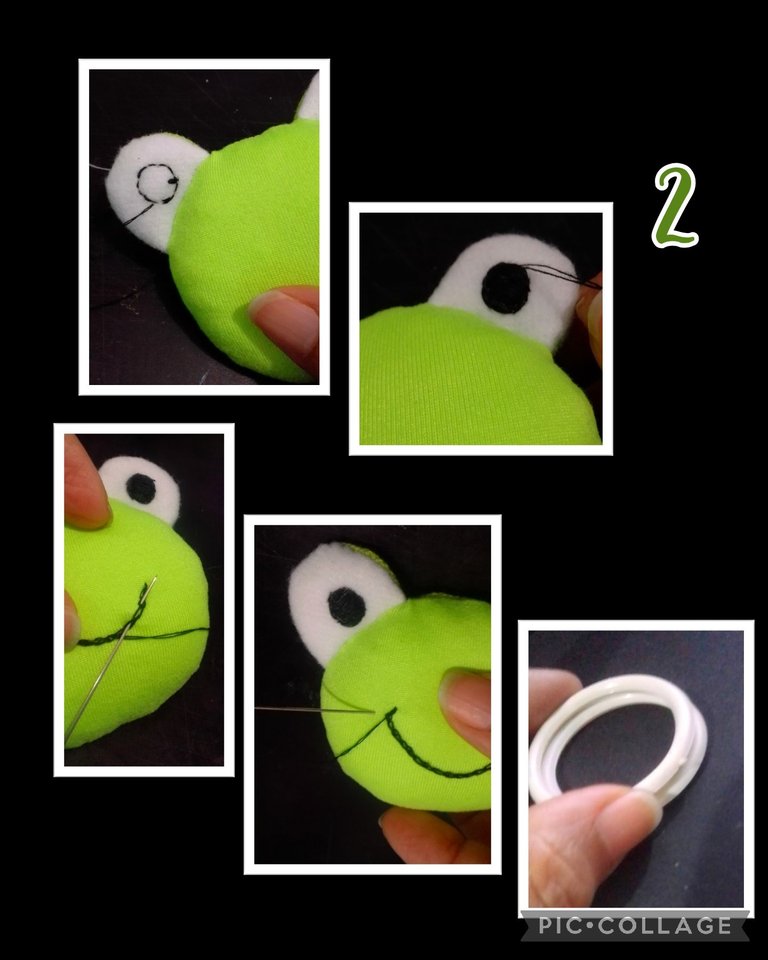
En el otro hijo, hilvané primero un círculo y luego rellené, son dos formas que te muestro para que escojas la que te sea más fácil.
Ahora le toca a la boca, para que tengas mayor precisión, puedes ayudarte dibujando con una tapa o algo redondo una media circunferencia.
Luego empieza a coser con hilo negro, desde un extremo a otro con punto cadeneta, o punto atrás y remata dibujando la sonrisa.
Aparte toma dos argollas.
Paso 3:
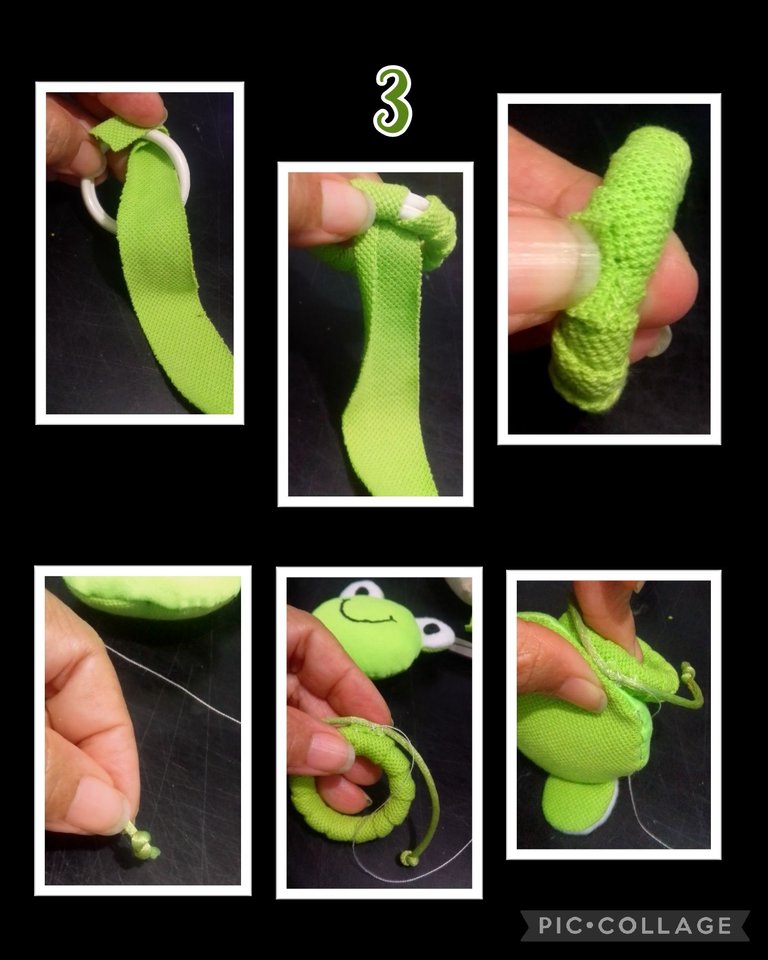
- Recorta una tira en tela de chemise, dobla una orilla y comienza a forrar las argollas halando la tela que quede bien ajustada, recorta y remata cosiendo en el centro.
- Para los brazos recorta 12 cms de cordón o rabo de ratón, haz un nudo en cada punta y cose en el medio de la argolla (ver foto).
- Ahora une la cabeza a el anillo o aro y cose ajustando bien las puntadas.
Paso 4

- Después de unir bien la cabeza al anillo y rematar las costuras, recorta un pedacito de cinta, pasa por el contorno del cuello y cose al frente.
- Arma un lazo y cose al frente.
- (Opcional) Por último pon un poquito de tiza (no tóxica) en los cacheticos y ya estará terminada esta Linda Ranita Mordedor.
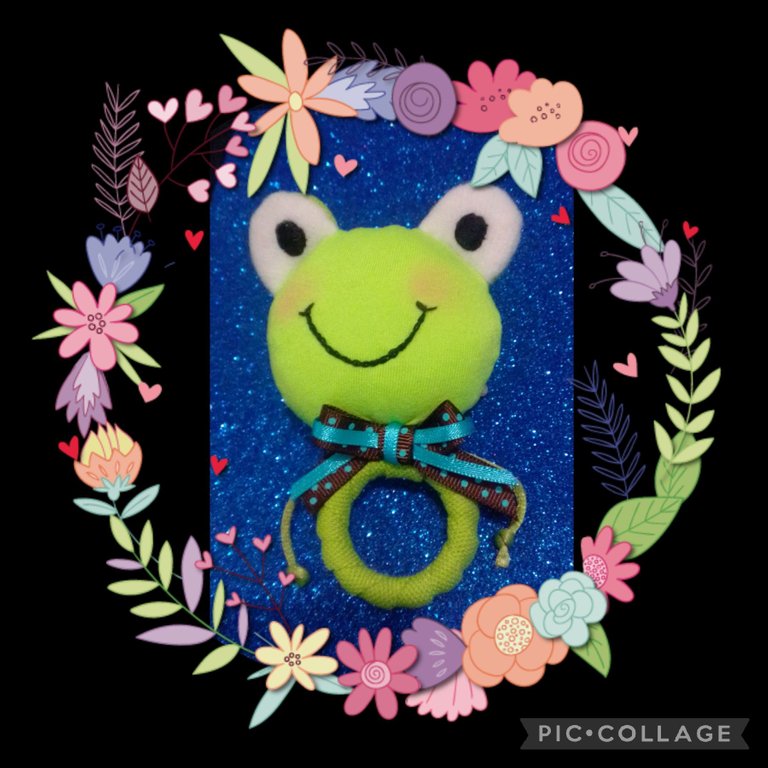
Espero les guste este lindo Mordedor en forma de Ranita.
Mi publicación la traduje con DeepL.
Etiquetas HTML.
Teléfono: Blu G5
Y las fotos capturadas y editadas con Pic Collage.
Fuente guía:
https://www.pinterest.es/pin/745345807061135141/
Me despido agradeciendo tu visita y si te gustó mi tutorial me encantará ver tu comentario.
Saludos y bendiciones para todos.
English:
Hola queridos amigos!
Welcome to all of you to my Blog!
Today I will show you how to make a cute teething toy, it is very easy and useful because it will be useful when teething begins, it is made with cotton fabrics and with anti-allergic padding, it is worth noting, take into account hygiene measures, washing and frequent drying.
Before, grandmothers and moms used to use cloth diapers, they tied knots in them and gave them to babies to scratch their gums.
But well everything has changed and now we have toys hahaha... like this one I'll show you.
So if you have a baby at home this is your chance to learn how to make it!
Then I will show you and name the materials to be used:
| Cotton fabrics | Anti-allergic cotton |
|---|---|
| Cloth ribbons | threads, needles and pins |
| Scissors | Plastic rings |
| Pencil | Paper |
| Cordon or Mouse Tail |
Now let's start with the procedure:
Step 1
- Trace a circle on the paper and cut out.
- Fold the fabric, pin the circle and cut out the two head pieces, then cut out the eyes 2 pieces in white and 2 in green.
- Start sewing by joining the eyes together, then flip, stuff and sew the pieces closed.
- Then mark by placing a middle point of the head and start sewing and when you have sewn a quarter of the head, center the eyes and insert them and sew the eyes together with the head pieces and leave two centimeters without sewing to turn over.
- Then stuff the head and close it.
- With black thread begin to sew the pupil, you can do it in two ways, in this eye I started by making horizontal stitches
very close to fill and make the circumference.
Step 2
In the other son, I basted a circle first and then filled in, there are two ways that I show you so that you can choose the one that is easier for you.
Now it's the mouth's turn, so that you have more precision, you can help yourself by drawing with a lid or something round a half circumference.
Then start sewing with black thread, from one end to the other with chain stitch or back stitch and finish by drawing the smile.
Apart take two rings.
Step 3
- Cut a strip of chemise fabric, fold one edge and start lining the rings by pulling the fabric tight, trim and finish by sewing in the center.
- For the arms, cut 12 cm of cord or mouse tail, tie a knot at each end and sew in the middle of the ring (see photo).
- Now attach the head to the ring and sew the stitches tightly.
Step 4
- After attaching the head to the ring and finishing off the seams, cut out a small piece of ribbon, thread it around the neck and sew to the front.
- Make a bow and sew to the front.
- (Optional) Finally put a little bit of chalk (non-toxic) on the cheeks and this cute teething frog is finished.
I hope you like this cute little frog teether.
I translated my publication with DeepL.
HTML tags.
Phone: Blu G5
And the photos captured and edited with Pic Collage.
Source guide:
I say goodbye thanking you for your visit and if you liked my tutorial I will love to see your comment.
Greetings and blessings to all.
Que hermoso quedo su trabajo amiga 😍😍
Esa ranita se ve super linda 😮 cuanto tiempo tardas en realizar un trabajo 😮
Muchas gracias amiga!
Que bueno saber que te gustó!
Depende de las piezas que tengo que cortar, coser y armar y como es costura a mano lleva más tiempo, a veces 3, 4,5 y hasta 6 horas todo depende...
Y a tí?
Saludos.
Has sido votado por
PROYECTO ENLACE
'Conectando Ideas y Comunidades'
PROYECTO ENLACE es un proyecto de curación de habla hispana enfocado en recompensar contenido de calidad y apoyar autores en su proceso de crecimiento en HIVE.
Creemos y apostamos por el futuro de esta gran plataforma, y estamos muy emocionados de poder hacerla crecer junto a esta comunidad. Así que te invitamos a usar nuestra etiqueta ENLACE y estar atento a todas las actividades que tenemos preparadas y que estaremos publicando en breve.
¿QUIERES AUTOMATIZAR TUS GANANCIAS DE CURACIÓN? SE PARTE DEL PROYECTO ENLACE APOYANDO A NUESTRO TRAIL EN HIVE.VOTE INGRESA AQUÍ PARA CONOCER LOS DETALLES.
¿QUIERES INVERTIR ENLACE? DESCUBRE COMO HACERLO Y GENERAR INGRESOS DE FORMA SEMANAL MEDIANTE TU DELEGACIÓN DE HP AQUÍ TE EXPLICAMOS COMO.
Te invitamos a participar en nuestro servidor de Discord: https://discord.gg/3S9y7BbWfS
Atentamente
EQUIPO ENLACE 2022
Muchas gracias por el apoyo y la invitación.