Feliz noche amigos y creadores de esta comunidad.
Les cuento que salí a comprar materiales que me hacían falta y me conseguí con algunos productos que no tenía, entre ellos Foami Moldeable y compré para probar. De verdad me gustó mucho, porque es muy suave, no mancha, ni es pegajoso, toma la forma que quieras dar y tiene un secado rápido.
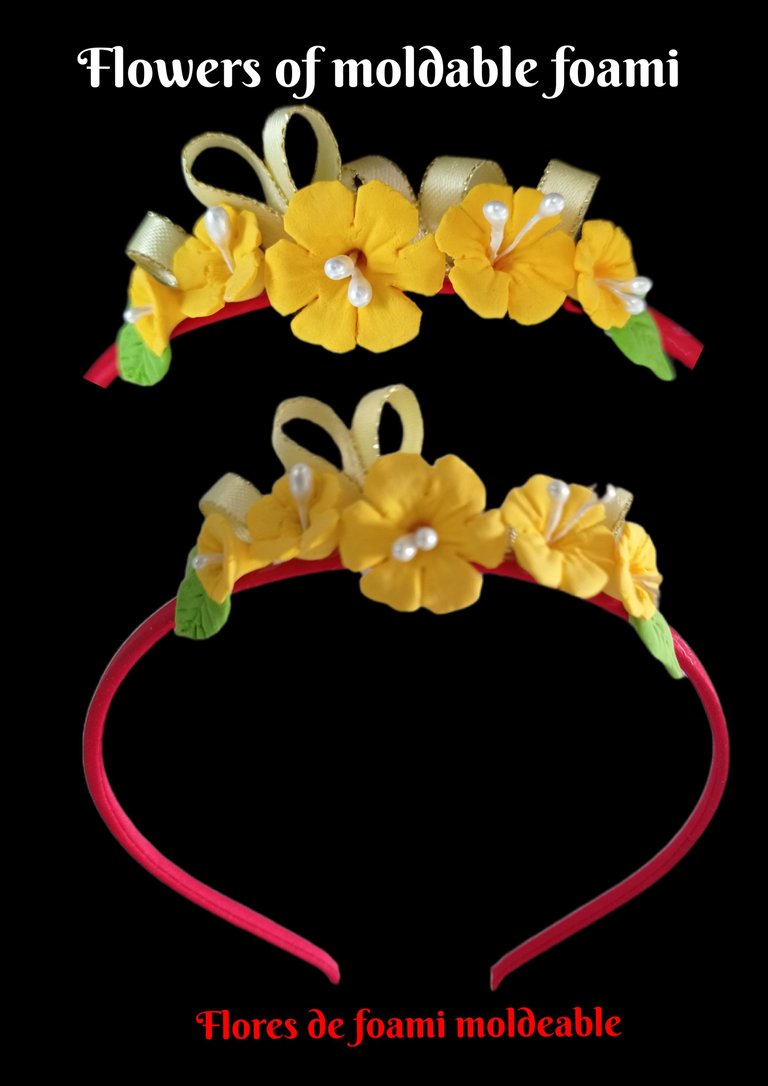
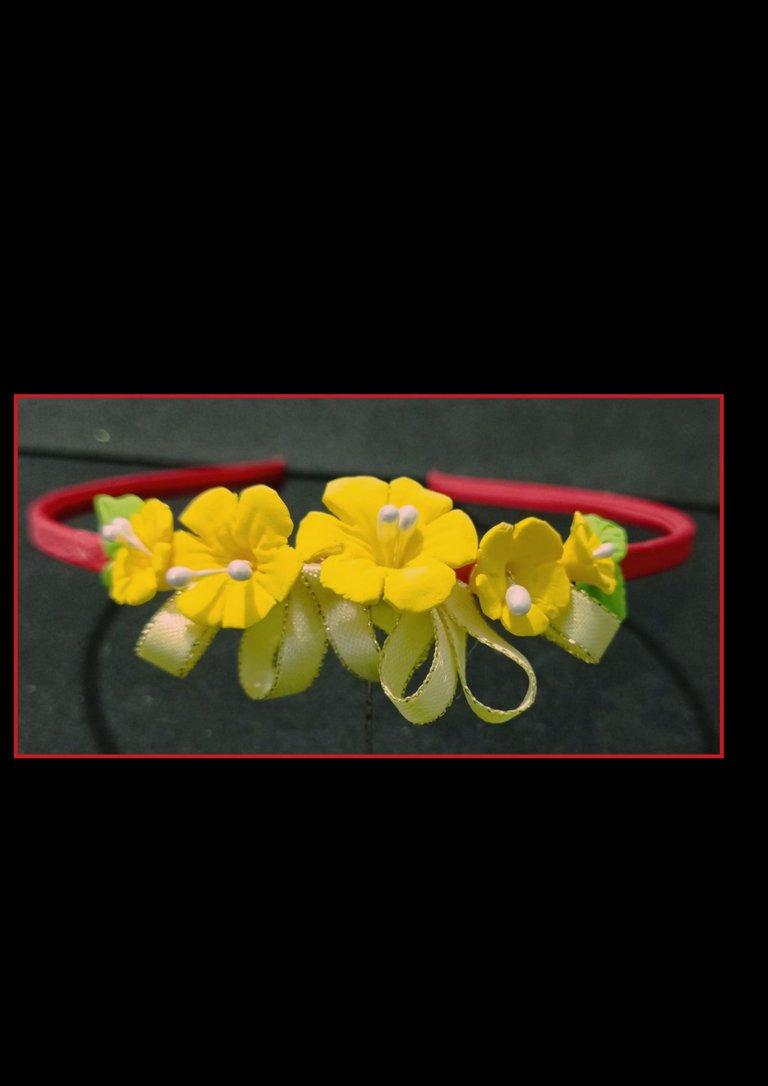
Lo probé para hacer unas florecitas las cuales usé para decorar un cintillo o diadema y ahora les compartiré como las realicé.
Por eso quiero invitarte a que me acompañes y aprendas.
Necesitarás:
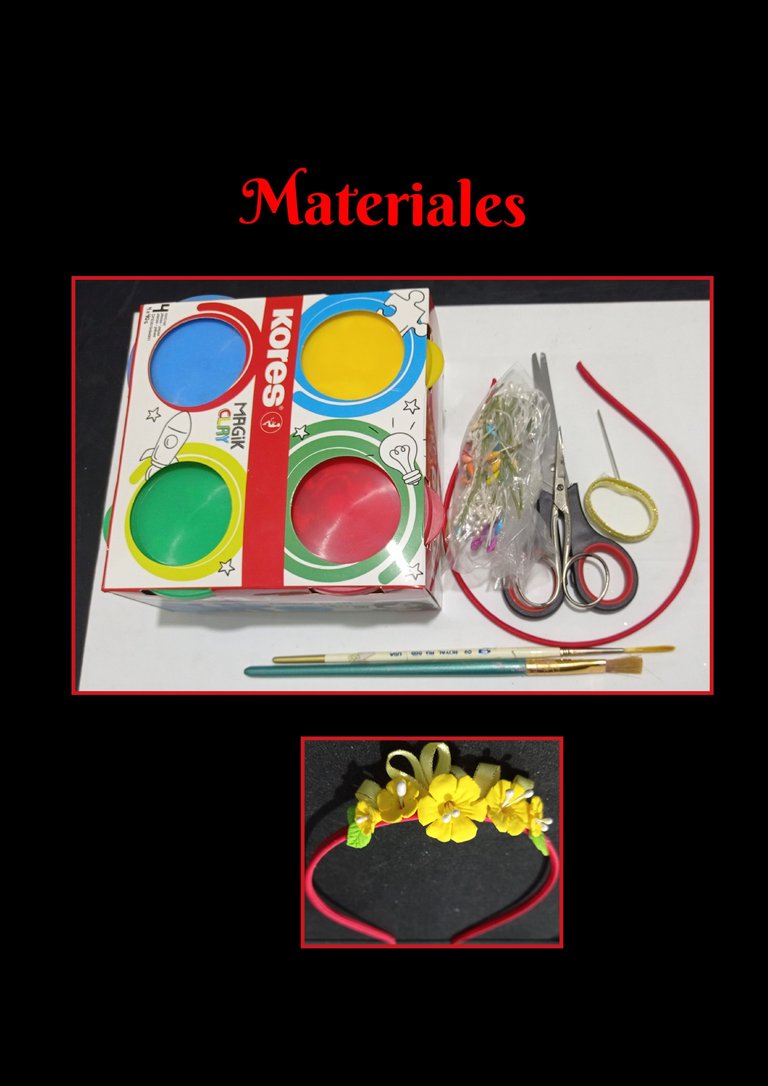
| Foami moldeable | Diadema |
|---|---|
| Pistilos | Cinta de raso |
| Tijera | Aguja |
| Pinceles | Silicón |
Empecemos:
Paso 1
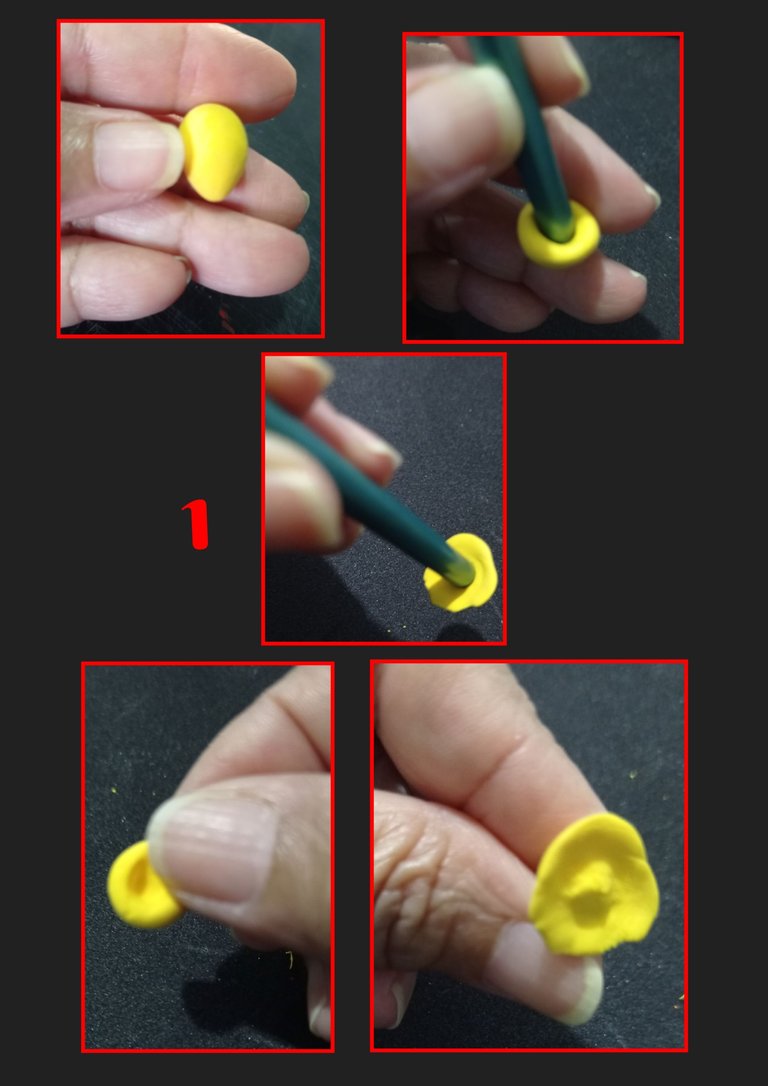
- Haz una bolita de foami con forma de gota, luego inserta el palito de un pincel grueso y haz un pequeño orificio, luego con los dedos indice y pulgar comienza a hacer presión por todo el borde.
Paso 2
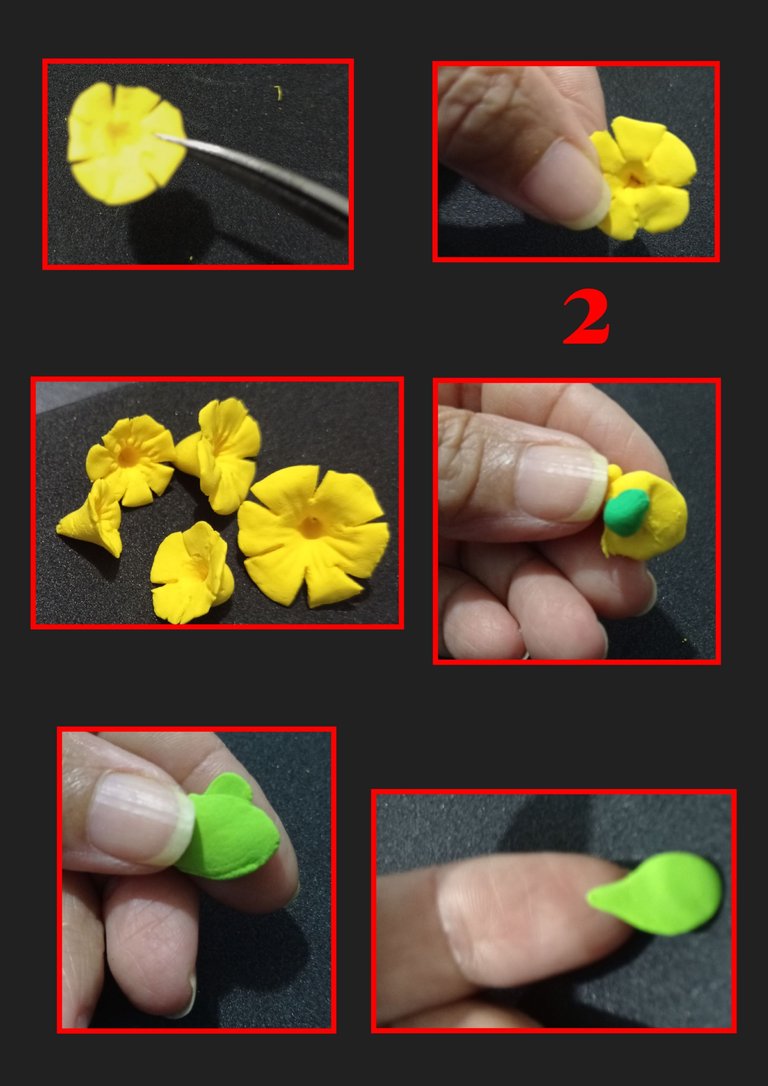
- Luego vuelve a insertar el pincel en el centro y haz nuevamente el orificio, luego con una tijera haz varios cortes que serán los pétalos, así armarás del tamaño que desees.
- Para hacer las hojas, toma un porción de foami amarillo y un poquito de verde para bajar el tono del verde, te quedará un tono verde manzana.
Luego haz una forma de gota y presiona hasta aplanar bien delgada la hoja.
Paso 3:
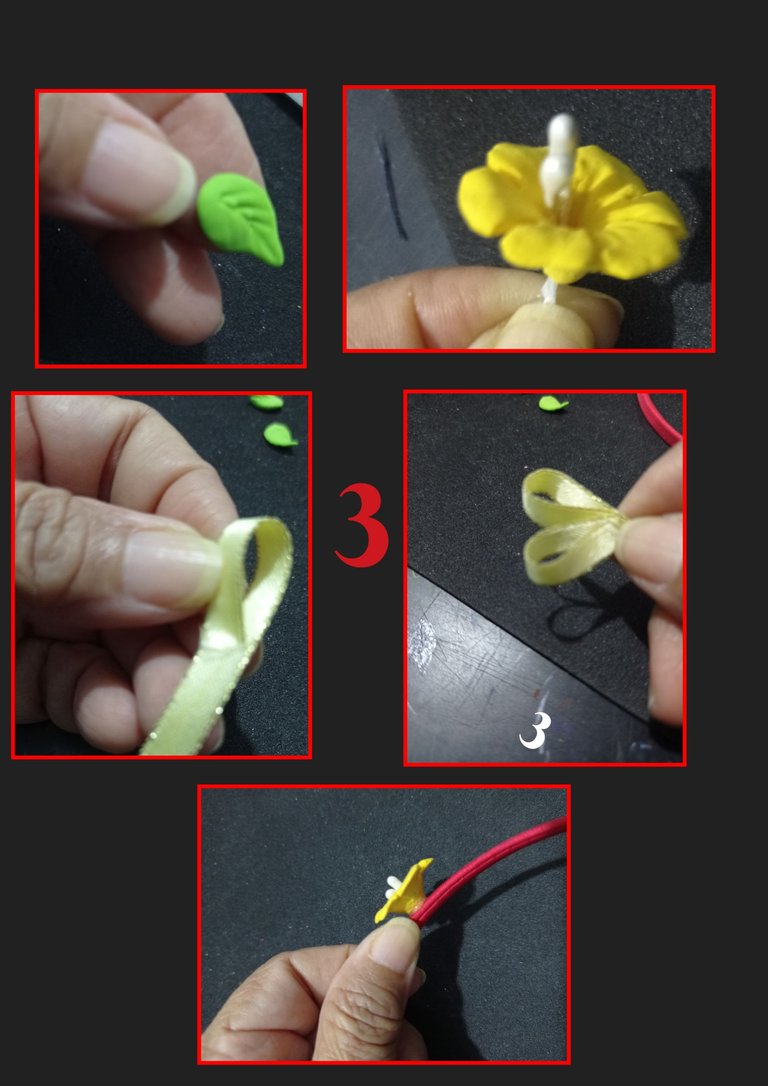
- Ahora con una aguja traza una línea en el centro de la hoja y haz las nervaduras.
- Luego con una aguja o alambre haz un orificio e introduce los pistilos, aplica silicón y pega.
- Aparte, con la cinta haz una lazada y pega en el centro, luego haz otra lazada, pega al lado de la primera y recorta la cinta restante, puedes realizar varias pares de lazadas para insertar en las separaciones de las flores.
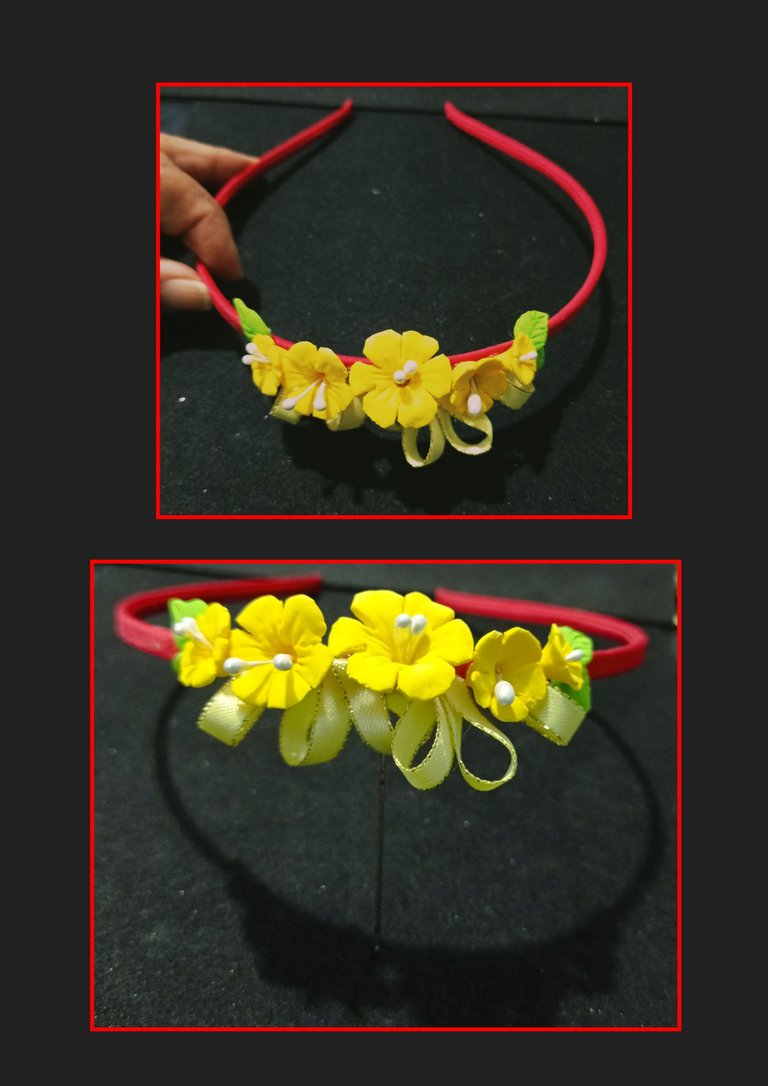
- Ahora comienza a pegar las flores al cintillo y decora a tu gusto.
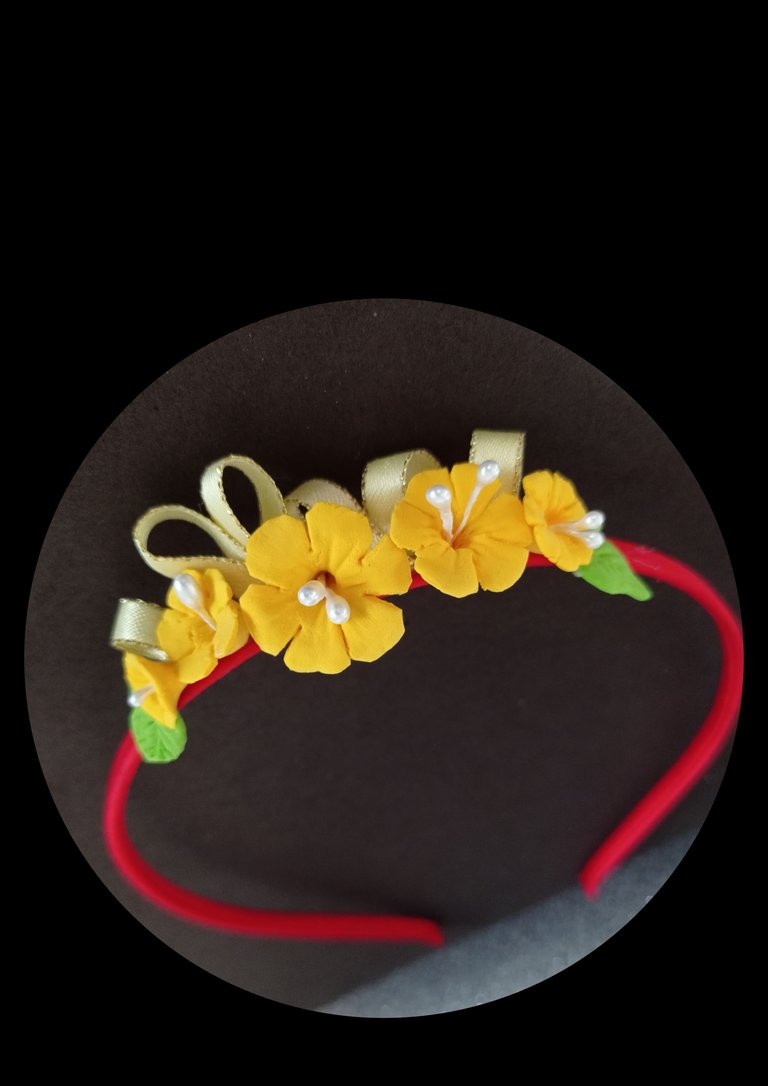
¡Aquí el resultado final!
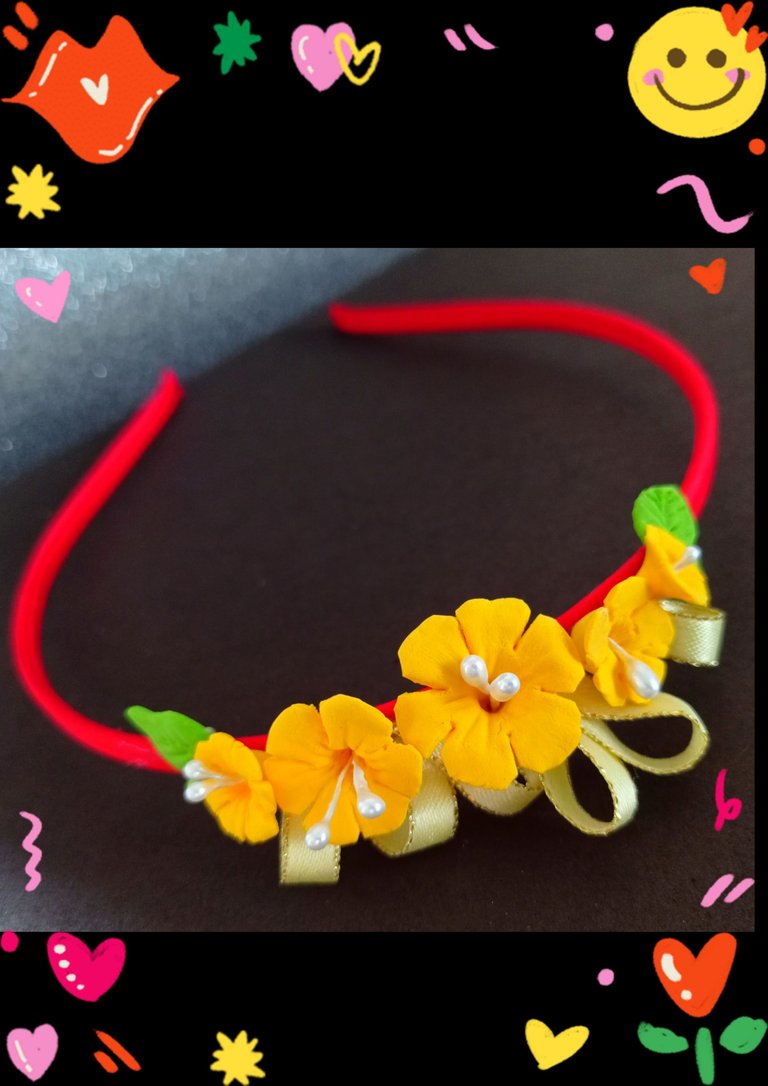
Deseo sea útil y de tu agrado mi paso a paso, como puedes ver es super sencillo y fácil de hacer, de verdad que me encantó trabajar con el foami moldeable.
Espero seguir compartiendo otros trabajos con este material.
Y muchas gracias por tu apoyo visita.
Editor de fotos: GridArt.
Teléfono: Redmi Note 9.
Saludos y hasta mi próxima publicación.
English:
Happy evening friends and creators of this community.
I went out to buy some materials that I needed and I found some products that I didn't have, among them Moldable Foami and I bought it to try it out. I really liked it a lot, because it is very soft, it does not stain, it is not sticky, it takes the shape you want to give and it dries quickly.
I tried it to make some little flowers which I used to decorate a headband and now I will share with you how I made them.
That's why I want to invite you to join me and learn.
You will need:
| Foami moldable | Diadema |
|---|---|
| Styles | Satin ribbon |
| Scissors | Needle |
| Brushes | Silicone |
Let's get started:
Step 1
- Make a little ball of foami in the shape of a drop, then insert the stick of a thick paintbrush and make a small hole, then with your thumb and forefinger start pressing all around the edge.
Step 2
- Then reinsert the brush in the center and make the hole again, then with a scissors make several cuts that will be the petals, so you will assemble the size you want.
- To make the leaves, take a portion of yellow foami and a little bit of green to tone down the green, you will get an apple green tone.
Then make a drop shape and press to flatten the leaf very thin.
Step 3:
- Now with a needle draw a line in the center of the leaf and make the ribs.
- Then with a needle or wire make a hole and insert the pistils, apply silicone and glue.
- Then, with the ribbon make a loop and glue it in the center, then make another loop, glue it next to the first one and cut the remaining ribbon, you can make several pairs of loops to insert in the separations of the flowers.
- Now start gluing the flowers to the headband and decorate as you like.
Here is the final result!
I hope my step by step guide is useful and to your liking, as you can see it is super simple and easy to do, I really loved working with the moldable foami.
I hope to continue sharing other works with this material.
And thank you very much for your support visit.
Photo editor: GridArt.
Phone: Redmi Note 9.
Greetings and until my next publication.
guao! Quedan tan perfectas y bellas!!! Creo que intentare probar este material. Gracias por contarnos tu experiencia, me pasa que con la masa fría no me va muy bien.
Hola amiga, si quedan muy bonitas. Ojalá te guste como a mi.
Siempre es un placer para mi compartir con ustedes.
Gracias por tu apoyo y comentario.
Feliz noche.
Preciosas quedaron esas florecitas y para adornar esa diadema excelentes. Están perfectas para darle múltiples usos. Gracias como siempre por dejarnos tu buen trabajo, saludos...
!discovery 30
Hola amiga, muchas gracias y sí, puedes usarlas para decorar muchas cosas.
Gracias a ti por el apoyo.
Saludos
This post was shared and voted inside the discord by the curators team of discovery-it
Join our Community and follow our Curation Trail
Discovery-it is also a Witness, vote for us here
Delegate to us for passive income. Check our 80% fee-back Program
Muchas gracias @discovery-it por el voto y apoyo a mi publicación.
you are welcome, if you can vote our witness it would help us a lot!!
A very nice and delicate work. As always, leaving us with a very neat post.These little flowers look beautiful and can be used in many ways. They look great on the headband.Thank you for sharing your creative process with us.
Siempre a su orden y con mucho gusto.Gracias por su apoyo @diyhub y comentario.