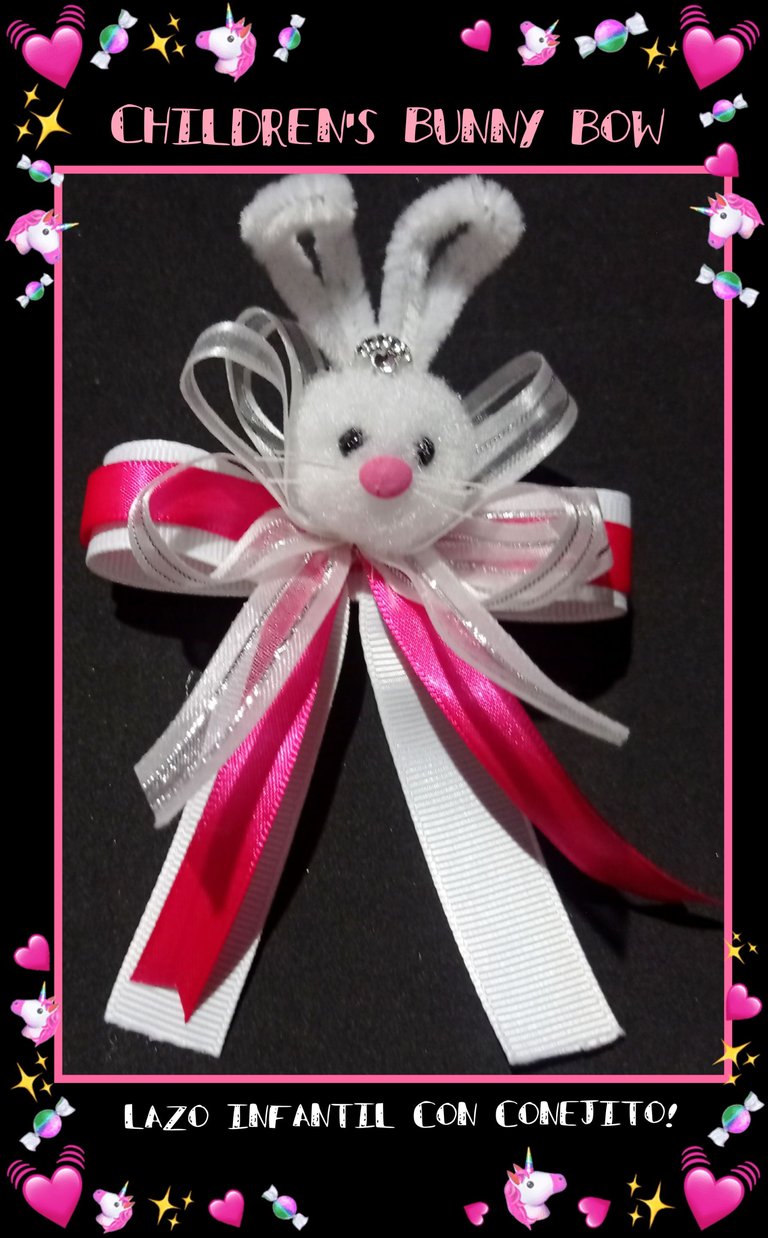

Buenas noches querida comunidad.
Saludos a todos los amigos y creadores que me visitan.
Así que no te pierdas mi paso a paso!
Te muestro la lista de materiales que necesitas.
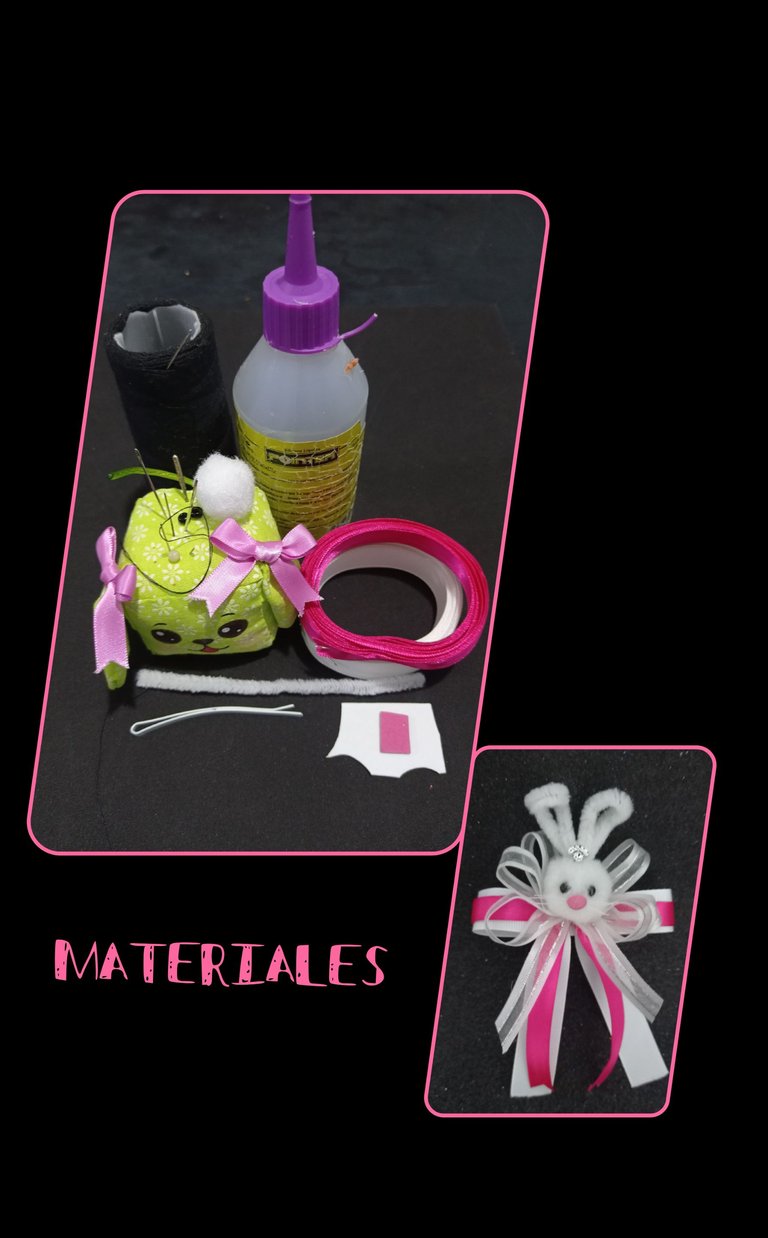
| Cintas de tela | Gancho de pelo |
|---|---|
| Pompón | Limpia pipas o chenille |
| Mostacillas | Aguja e hilos |
| Foami rosado y blanco | Tijera |
| Silicòn | Cola blanca |
| Adorno | Lana blanca o hilo estambre |
Para el pompón necesitas:
Lana o hilo estambre y cartón.
Comencemos:
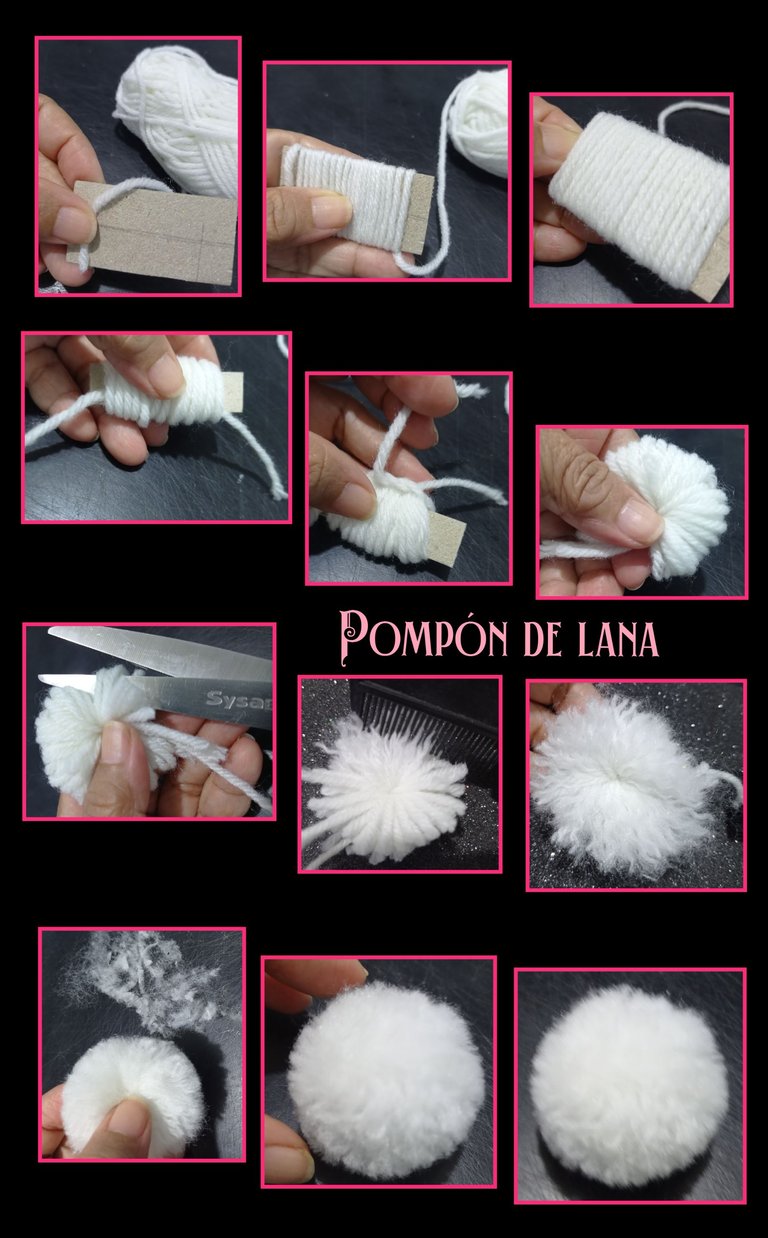
Para realizar el pompón debes recortar un rectángulo de cartón, - Para un pompón de 2 cm, el cartón tiene que tener de ancho 1cm, si lo quieres de 3cm debe medir 1,5cm de ancho, todo dependerá de tu necesidad.
- Luego enrolla alrededor del cartón 20 veces, la 2da 20 veces más hasta completar 4 vueltas.
- Ahora pasa un hilo por el centro de las vueltas y amarra en el centro.
- Retira el cartón y anuda bien, luego con la tijera recorta los hilos y peina hasta destorcer el hilo y empareja con la tijera hasta redondear bien y así quedará listo nuestro pompón.
Paso 1:
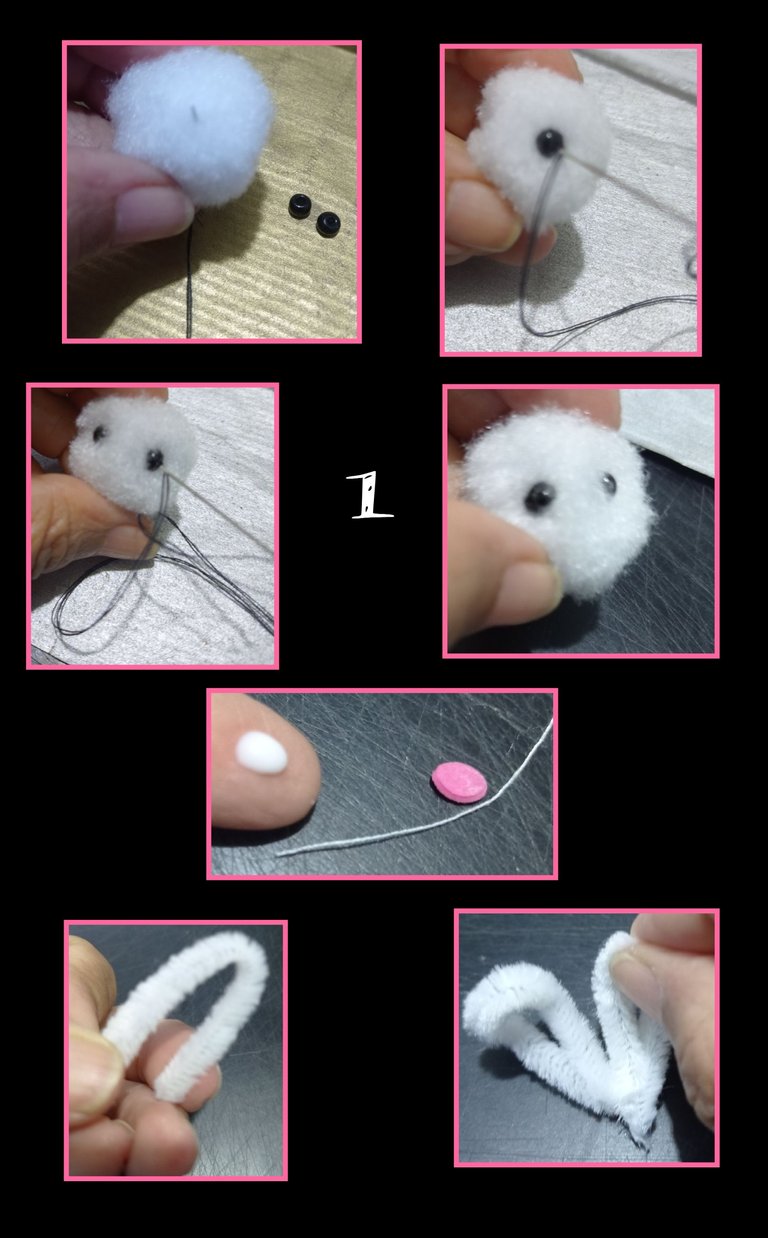
- Inserta una aguja con hilo negro en el pompón y cose los ojos,
para hacer los bigotes, coloca una gota de cola blanca en tu dedo y pasa un pedacito de hilo blanco deja secar y recorta la naríz en foami rosa. - Para hacer las orejas dobla el chenille haciendo como una U al revés, seguido haz al lado otra del mismo tamaño y entorcha en el centro para anudar como se muestra en la foto y si te gusta, puedes doblar las puntas de las orejas hacia el frente.
Paso 2:
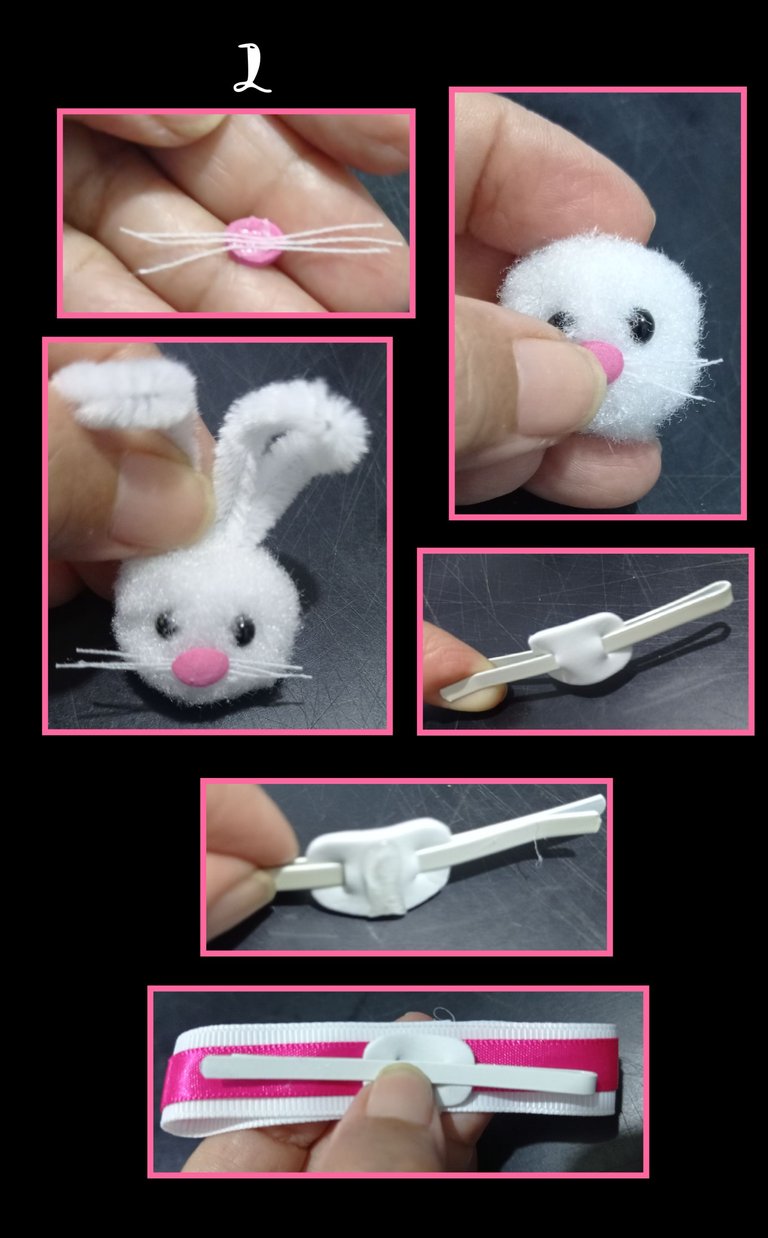
- Ahora recorta el hilo en 6 partes y pega en el centro de la nariz, luego aplica silicón y pega en el centro de la carita, después aplica silicón en la parte baja de las orejas y pega al pompón o cabecita del conejo.
- Recorta un rectángulo de foami, haz dos incisiones y pasa el gancho de pelo y pega en el centro.
- Aplica silicón en el centro.
- Aparte recorta 2 pedazos de cinta (blanca y fucsia) de 15 cms de largo, une las puntas con silicón y pega al gancho como se aprecia la foto.
Paso 3:
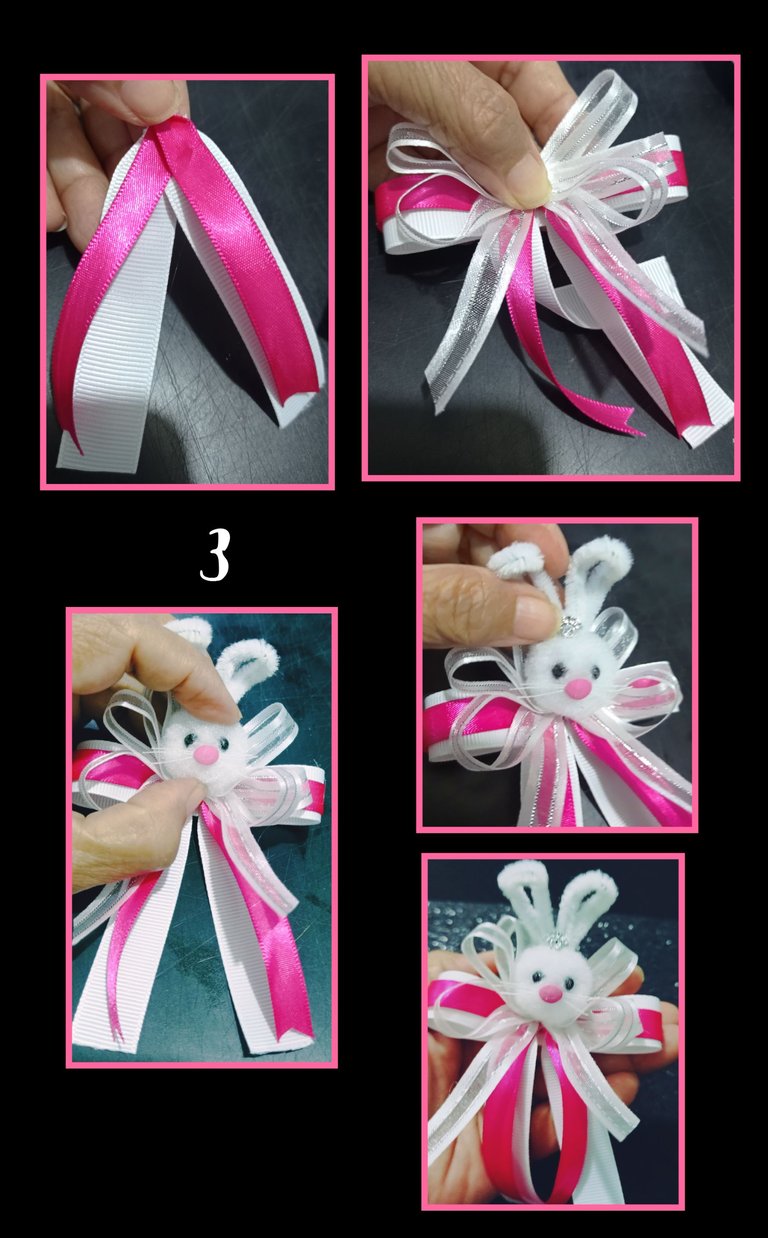
- Recorta dos tiras de cintas y anuda en el centro y pega al gancho. luego arma otro lazo de organza, pega al gancho y deja secar.
- Ahora aplica silicón en la cabecita del conejo y pega encima del lazo.
- Por último aplica silicón y pega la coronita en el centro de las oreja.
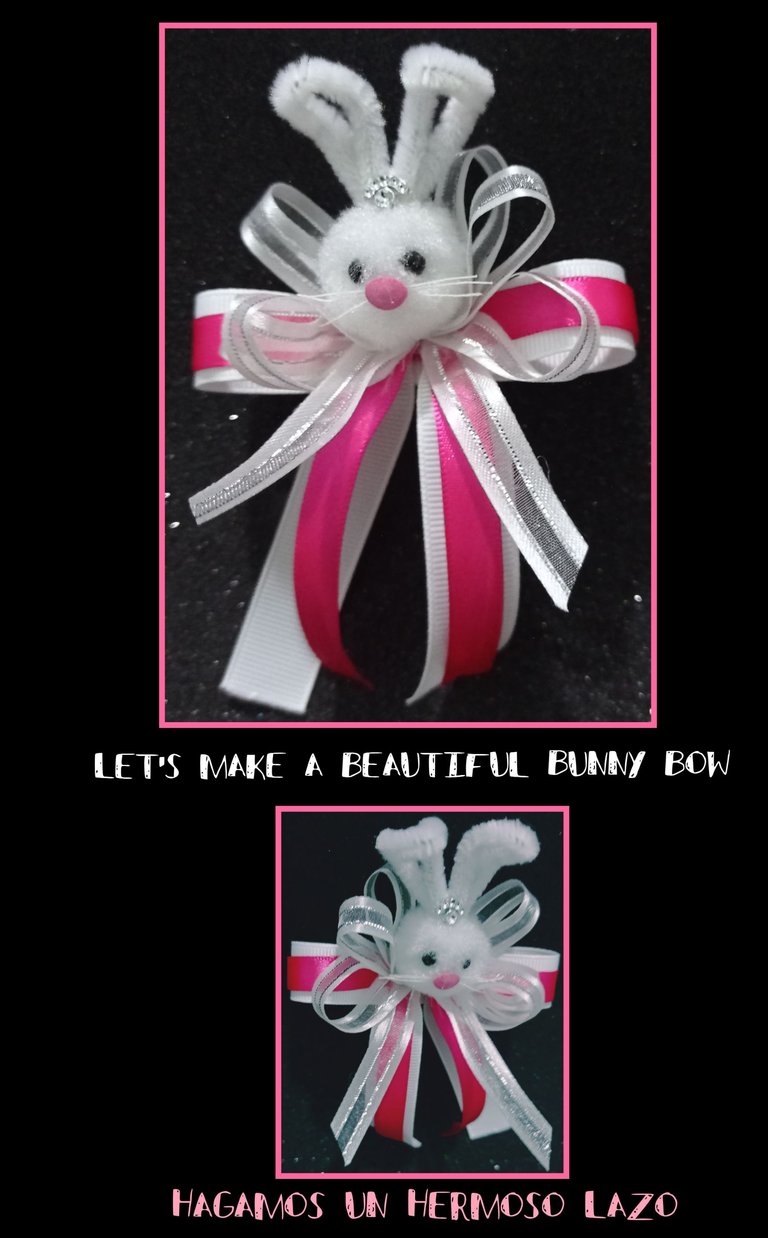
Así quedara Hermoso y listo.
Paso 4:
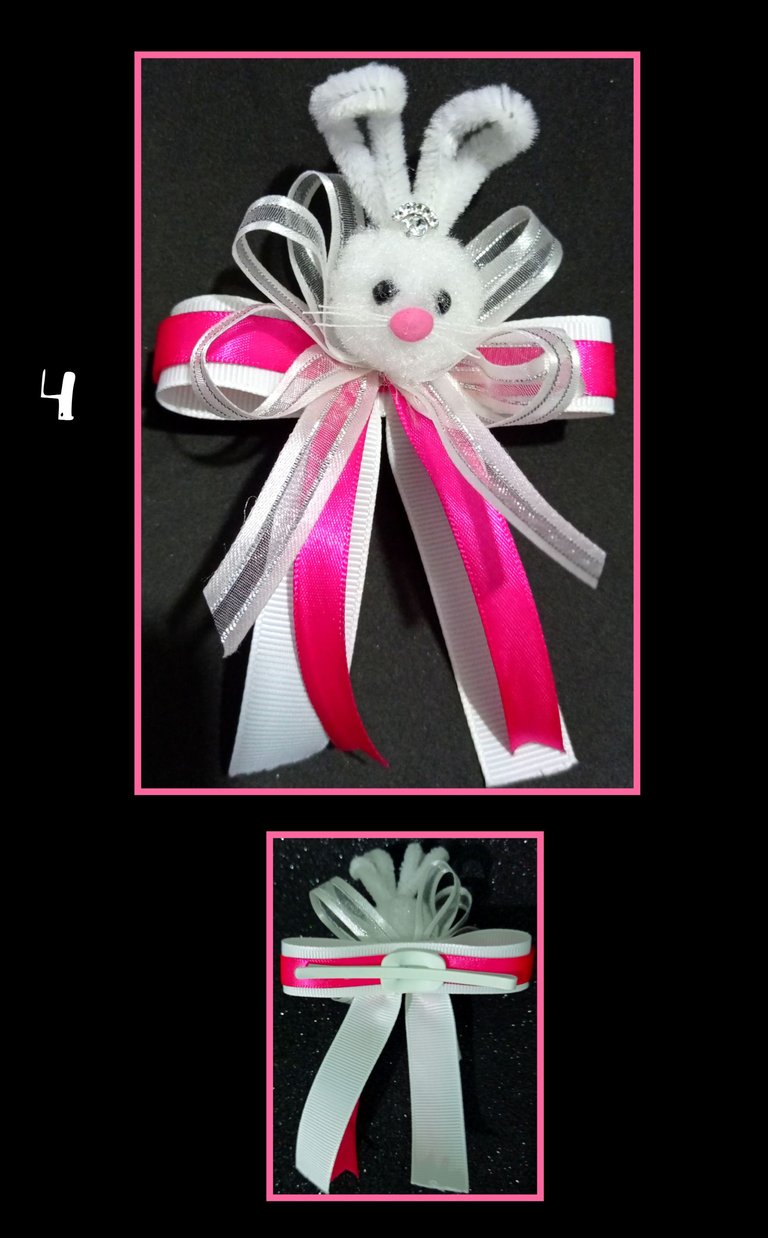

Teléfono Redmi Note 9
Editor de fotos GridArt.

Ahora mi despedida deseando sea de tu agrado y lo más importante, que sirva de guía.
Saludos y gracias por tu apoyo.
English:


Good evening dear community.
Greetings to all friends and creators who visit me.
So don't miss my step by step!
I show you the list of materials you need.

| Fabric ribbons | Hair clip |
|---|---|
| Pompom | Pipe cleaner or chenille |
| Stitches | Needle and thread |
| Pink and white Foami | Scissors |
| Silicone | White glue |
| White wool or worsted thread |
For the pompom you need:
Wool or yarn yarn and cardboard.
Let's get started:

To make the pompom you must cut out a rectangle of cardboard, - For a 2 cm pompom, the cardboard must be 1 cm wide, if you want a 3 cm pompom it must be 1.5 cm wide, everything will depend on your needs.
- Then wrap around the cardboard 20 times, the 2nd 20 times more to complete 4 turns.
- Now pass a thread through the center of the wraps and tie in the center.
- Remove the cardboard and knot well, then with the scissors trim the threads and comb until the thread is untwisted and match with the scissors until well rounded and our pompom will be ready.
Step 1:

- Insert a needle with black thread into the pompom and sew the eyes,
to make the whiskers, put a drop of white glue on your finger and pass a small piece of white thread, let it dry and cut out the nose in pink foami. - To make the ears, fold the chenille into an upside down U shape, then make another one of the same size next to it and twist in the center to knot as shown in the picture and if you like, you can fold the tips of the ears to the front.
Step 2:

- Now cut the yarn in 6 parts and glue in the center of the nose, then apply silicone and glue in the center of the face, then apply silicone in the lower part of the ears and glue to the pompom or bunny's head.
- Cut out a rectangle of foami, make two incisions and place the hair clip and glue in the center.
- Apply silicone in the center.
- Cut 2 pieces of ribbon (white and fuchsia) 15 cm long, join the ends with silicone and glue to the hook as shown in the photo.
Step 3:

- Cut two strips of ribbon and knot in the center and glue to the hook. Then make another organza bow, glue to the hook and let it dry.
- Now apply silicone to the bunny's head and glue on top of the bow.
- Finally apply silicone and glue the crown in the center of the ears.
It will be beautiful and ready.
Step 4:


Redmi Note 9 phone
GridArt photo editor.

Now my farewell wishing it is to your liking and most importantly, that it serves as a guide.
Greetings and thank you for your support.
Nuu que lindo el conejito, es muy adorable y el lazo te quedo bellisimo 😍😍
Gracias Buhito, que bueno que te gustó!
Y de nuevo gracias por siempre apoyarme.
From Venezuela, our witness drives decentralization and the adoption of Web3 technology, creating opportunities for the local community and contributing to the global ecosystem. // Desde Venezuela, nuestro testigo impulsa la descentralización y la adopción de la tecnología Web3, generando oportunidades para la comunidad local y contribuyendo al ecosistema global.
Sigue, contacta y se parte del testigo en: // Follow, contact and be part of the witness in:
Muchas gracias @hispapro por el voto y apoyo a mi publicación
Agradecida a la comunidad de @innerblocks por el apoyo.
!discovery 40
Muchas gracias @discovery-it por tu apoyo
This post was shared and voted inside the discord by the curators team of discovery-it
Join our Community and follow our Curation Trail
Discovery-it is also a Witness, vote for us here
Delegate to us for passive income. Check our 80% fee-back Program
This is cute, thanks for walking us through the creative process of your bow, well done.
Muchas gracias por el apoyo.@diyhub me alegra mucho que le haya gustado mi publicación, siempre lo haré con mucho gusto.
SaludosWuao que lindo @elmundodebetty, me gusto la carita y la piedrita que le pusiste entre las dos orejitas. Siempre te destacas con tus manualidades.
Hola amiga, muchas gracias por tan lindas palabras y me alegra mucho que te haya gustado mi tutorial.
Bendecida noche.
El arte de hacer pompones es todo un tema porque parece sencillo pero aquí yo veo mucha destreza, te quedo realmente lindo Betty, las cosas tan pequeñas y con fibras son difíciles de trabajar y tu has logrado este resultado tan lindo y limpio; por cierto mucha suerte en la encuesta de InLeo! 🦁 🧡
Hola amiga, muchas gracias por tu comentario y sí, tienes razón.
Y nuevamente gracias por tu apoyo.
Bendecida tarde.
Congratulations @elmundodebetty! You have completed the following achievement on the Hive blockchain And have been rewarded with New badge(s)
Your next target is to reach 2000 replies.
You can view your badges on your board and compare yourself to others in the Ranking
If you no longer want to receive notifications, reply to this comment with the word
STOPCheck out our last posts: