Saludos amigos y creadores que hoy me visitan.
Bienvenidos.
Así que te invito a que me acompañes y lo realices conmigo.
Necesitas:

Foami de colores
Cartón, cartulina.
Pinturas y pinceles
Tijera, cuchilla ó exacto
Regla y lápiz
Cinta y perla corrida
Silicón
Es hora de comenzar:
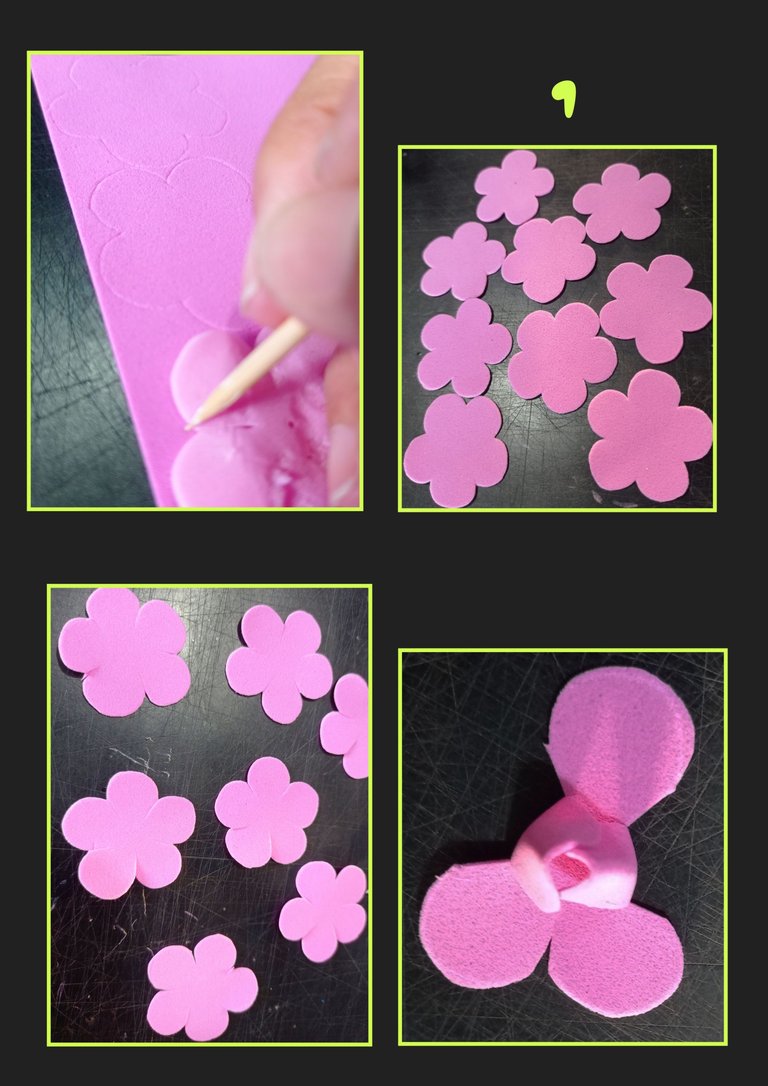
- Dibuja o marca las flores sobre el foami con la ayuda de un palito de madera y recorta por todo el borde. (Para cada rosa debes recortar 3 capas de pétalos) y reco
- Ahora haz un pequeño corte de afuera hacia el centro de la flor para dividir los pétalos.
- Aplica silicón en dos pétalos y pégalos juntando como se ve en la foto para comenzar a armar el capullo.
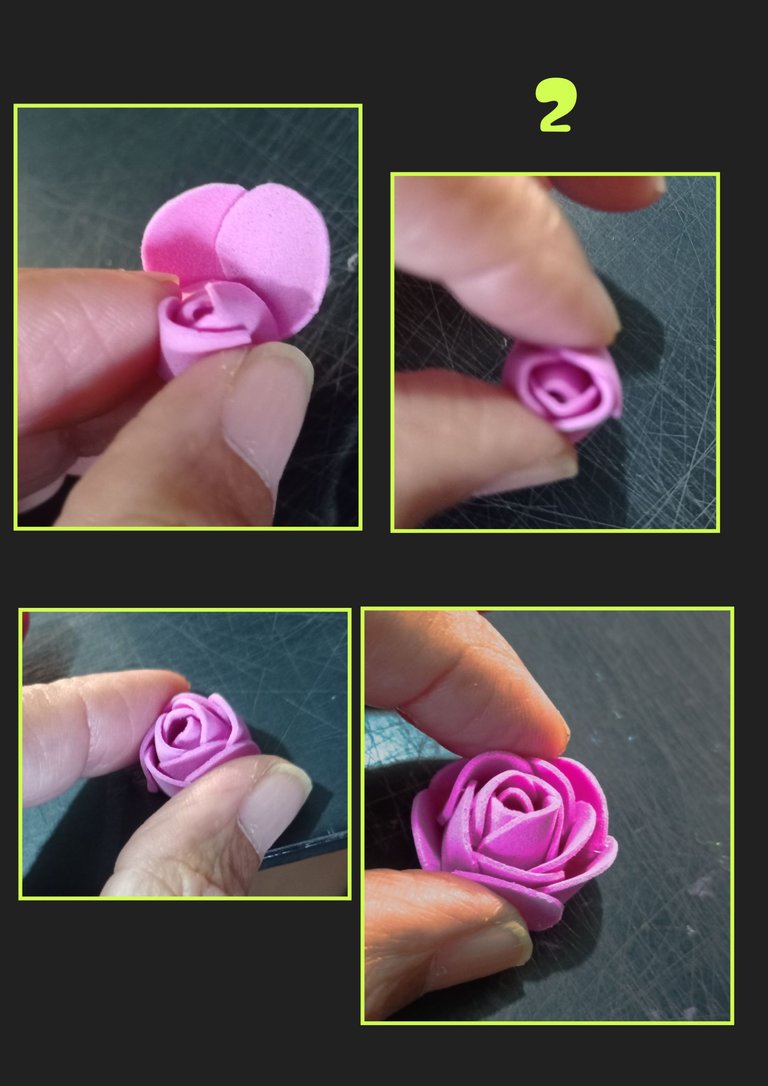
- Ahora sigue aplicando silicón a los otros pétalos, pegando el que queda solo y después los otros dos y sujeta un momento mientras se pega.
- Luego pega la segunda capa de pétalos, primero pega uno al capullo y luego sigues pegando siguiendo las agujas del reloj igualmente pegas las tercera capa.
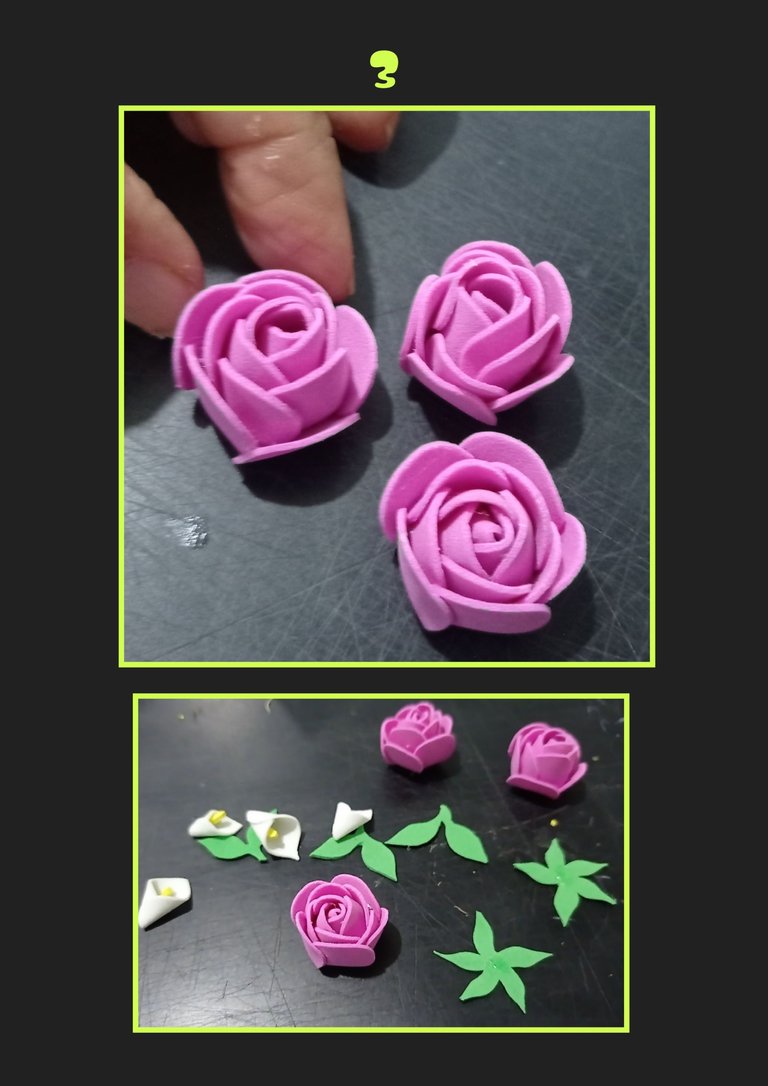
- Arma así las flores que quieras y recorta hojas y sépalos, también puedes hacer calas, recortando unos corazoncitos blancos, aplica silicón en uno de los lados y monta sobre el otro lado haciendo como un cono, luego recorta una tirita amarilla aplica silicón en una punta e inserta en el centro.
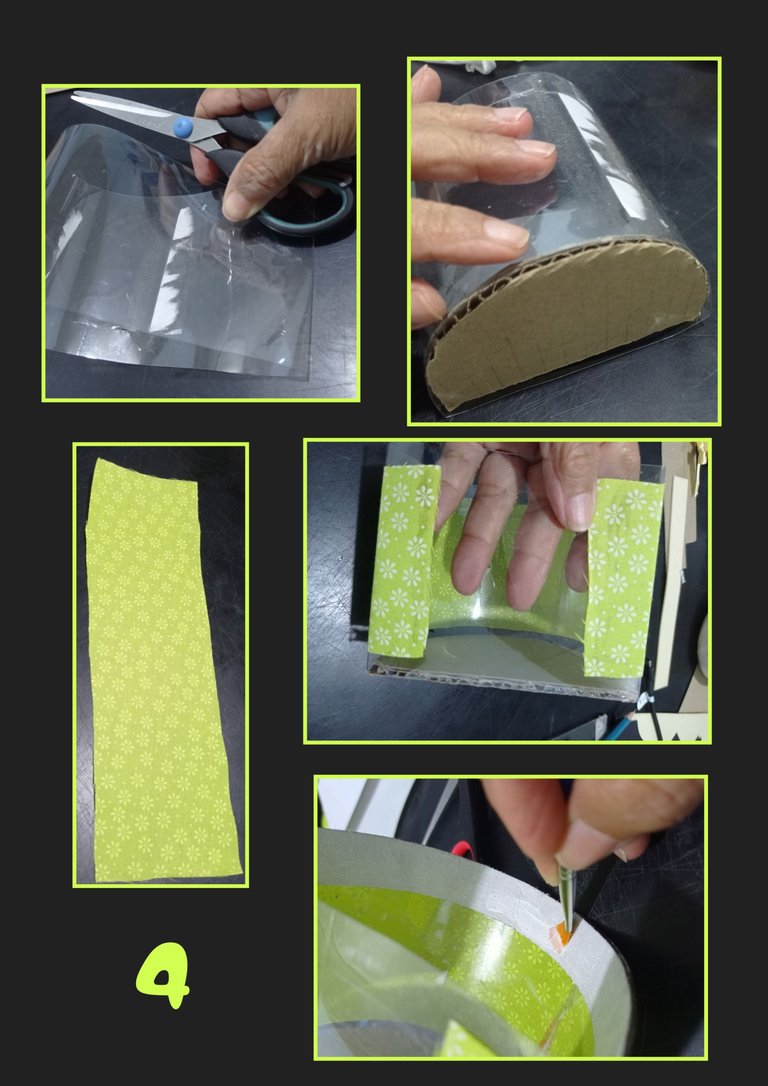
- Recorta la botella sacando el cilindro del centro, luego dobla y pasa la tijera por un lado, luego marca 10cm y vuelve a hacer otro doblez para armar una media luna.
- Luego coloca sobre un cartón, marca el borde y recorta, ahora aplica silicón por todo el borde del cartón y pega al acetato de la botella.
- Aparte recorta una tira de tela del color de tu preferencia , aplica un poco de silicón en los extremos y pega a acetato.
- Para darle firmeza al borde, recorta una tira de cartón de 1,5cm y pega por el contorno superior y aplica pintura blanca para tapar el cartón.
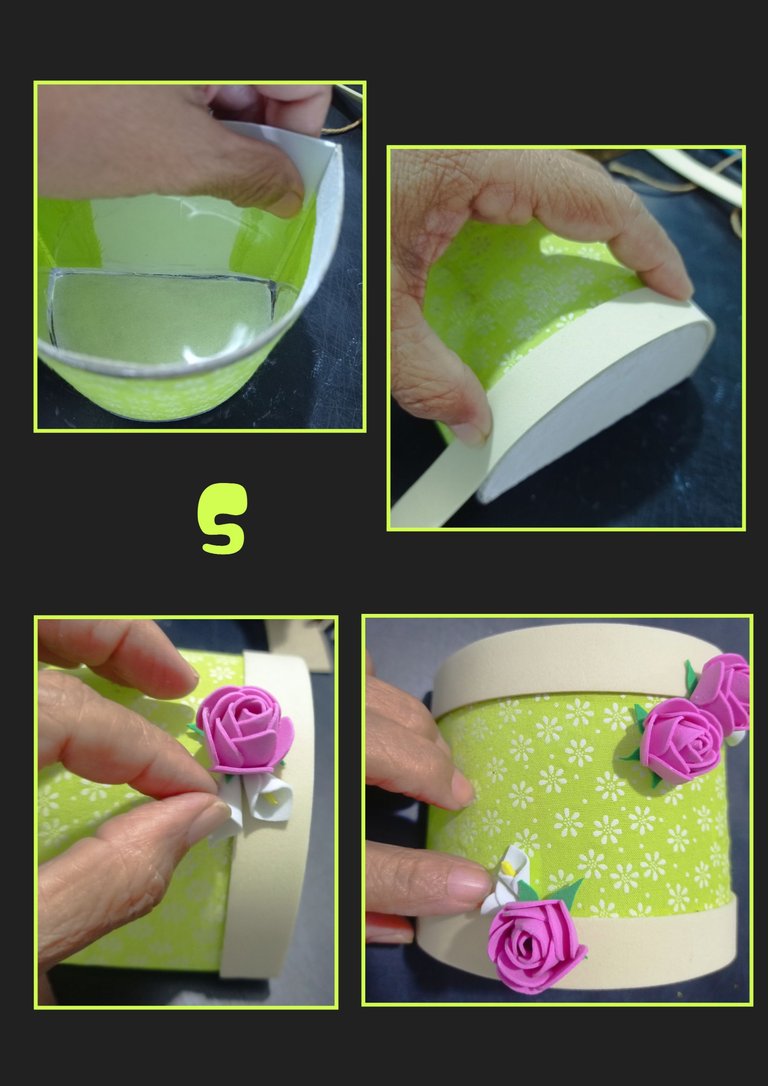
- Recorta ahora dos (2) tiras de foami beige y pega una en ambos extremos.
- Y comienza a adornar pegando las rosas y calas a tu gusto.

- Haz un lacito y pega en el centro, luego aplica silicón y pega la perla corrida en el contorno superior e inferior de este lindo

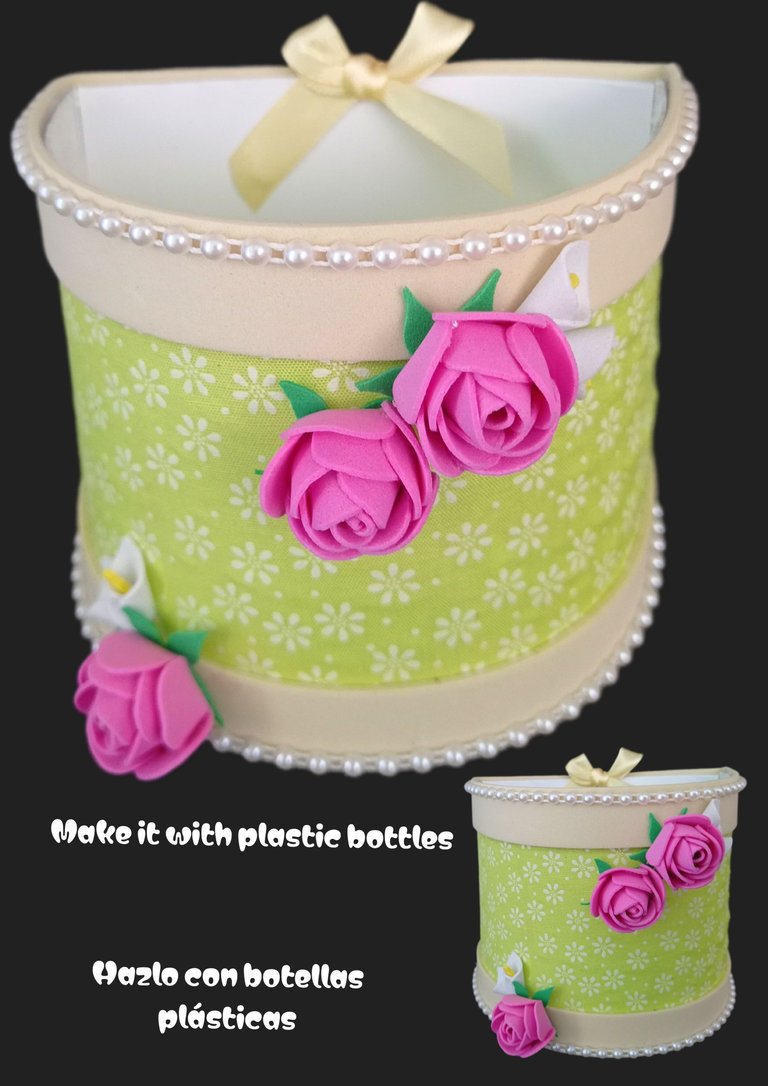
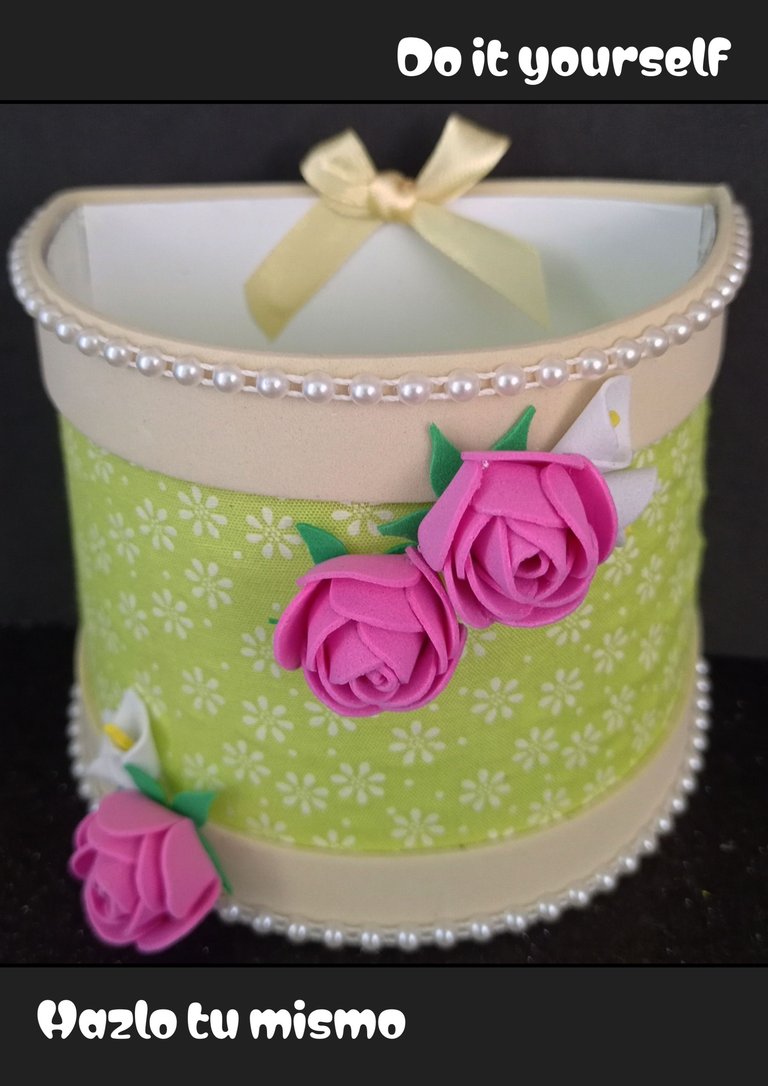
Así queda terminado este lindo adorno multiusos.
Editor de fotos: GridArt
Teléfono: Redmi Note 9.
Ahora me despido deseando te guste mi publicación y espero puedas sacarle provecho a estas botellas con las que podemos realizar infinidades de manualidades.
Muchas gracias por tu visita y apoyo.
¡Saludos y recuerda recicla!
English
Greetings friends and creators who visit me today.
Welcome.
So I invite you to join me and make it with me.
You need:
Colored Foami
Cardboard, cardboard.
Paints and brushes
Scissors, razor or exacto
Ruler and pencil
Tape and bead
Silicone
It's time to get started:
- Draw or mark the flowers on the foami with the help of a wooden stick and cut out all around the edge. (For each rose you should cut out 3 layers of petals) and cut out the petals.
- Now make a small cut from the outside to the center of the flower to divide the petals.
- Apply silicone on two petals and glue them together as shown in the photo to start assembling the bud.
- Now continue applying silicone to the other petals, gluing the one that is left alone and then the other two and hold for a moment while gluing.
- Then glue the second layer of petals, first glue one to the bud and then continue gluing clockwise and glue the third layer as well.
- You can also make calla lilies by cutting out white hearts, apply silicone on one side and mount on the other side making a cone shape, then cut out a yellow strip, apply silicone on one end and insert it in the center.
- Cut out the bottle by removing the cylinder from the center, then fold and pass the scissors on one side, then mark 10cm and make another fold to form a crescent.
- Then place it on a cardboard, mark the edge and cut it out, now apply silicone all around the edge of the cardboard and glue it to the acetate of the bottle.
- Cut out a strip of fabric in the color of your choice, apply a little silicone on the ends and glue to the acetate.
- To give firmness to the edge, cut a 1.5cm strip of cardboard and glue around the top and apply white paint to cover the cardboard.
- Now cut out two (2) strips of beige foami and glue one on both ends.
- And start decorating by gluing the roses and calla lilies to your liking.
- Make a bow and glue in the center, then apply silicone and glue the pearl run on the top and bottom contour of this cute
This is how this cute multipurpose ornament is finished.
Photo editor: GridArt
Phone: Redmi Note 9.
Now I say goodbye wishing you like my publication and I hope you can take advantage of these bottles with which we can make endless crafts.
Thank you very much for your visit and support.
Greetings and remember to recycle!
Hola, está supergenial muy hermoso para decorar.
Hola, muchas gracias.
Sí, y le puedes dar el uso que quieras.
Me alegra mucho que te haya gustado.
Una belleza me encanta la sutileza con la que trabajas, el reciclar es sorprendente, podemos crear tanto, que muchos no se imaginan.
Hola Laura, que bueno saber que me visitas.
Muchas gracias por tan lindas palabras, de verdad me alegra saber que te gusta mi trabajo.
Y sí, muchas cosas podemos realizar reciclando.
Feliz y bendecida noche.
Beautiful✨
thank you very much.
Welcome🎉
Qué bello! Me encanta el potecito y las florecitas
Muchas gracias amiga.
Que bueno que te gustó