
Saludos queridos amigos y creadores de esta comunidad.
Bienvenidos sean todos a este mi espacio favorito.
Para este tutorial necesitarás:
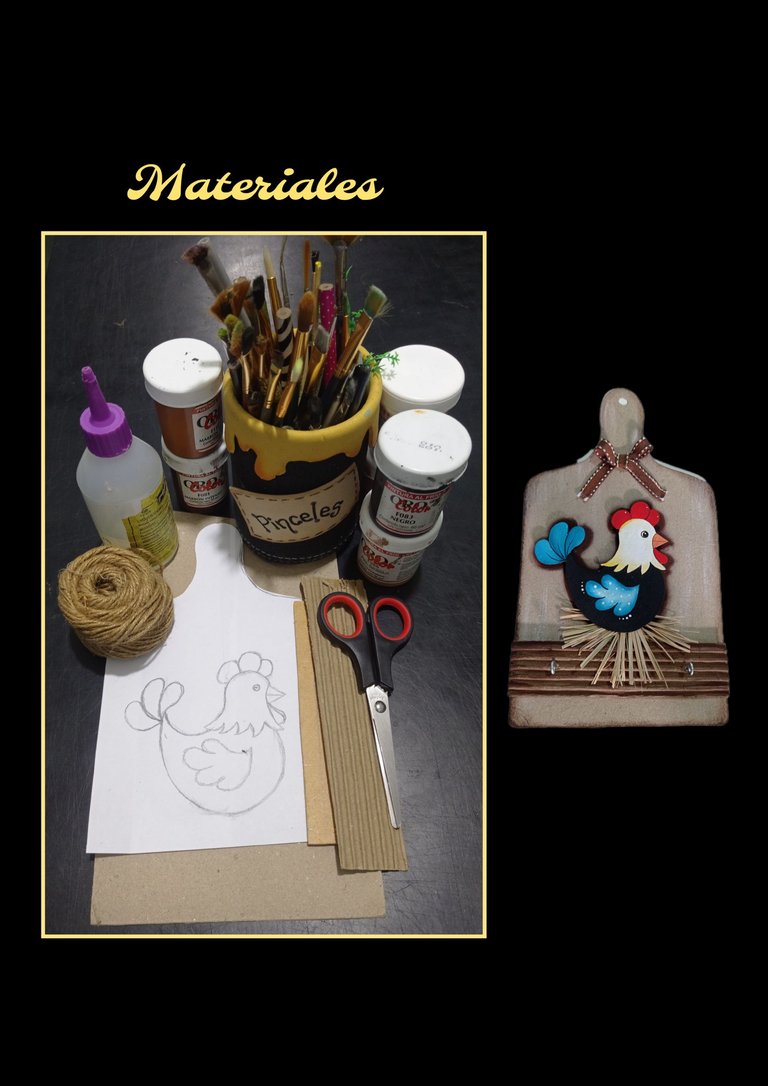
| Cartón de piñata o de caja | Tira de mdf |
|---|---|
| Pinturas y pinceles | Lápiz |
| Tijera | Cinta o mecatillo |
| Ganchos de metal | Silicón |
| Moldes | Palma seca |
Comencemos:
Paso 1:
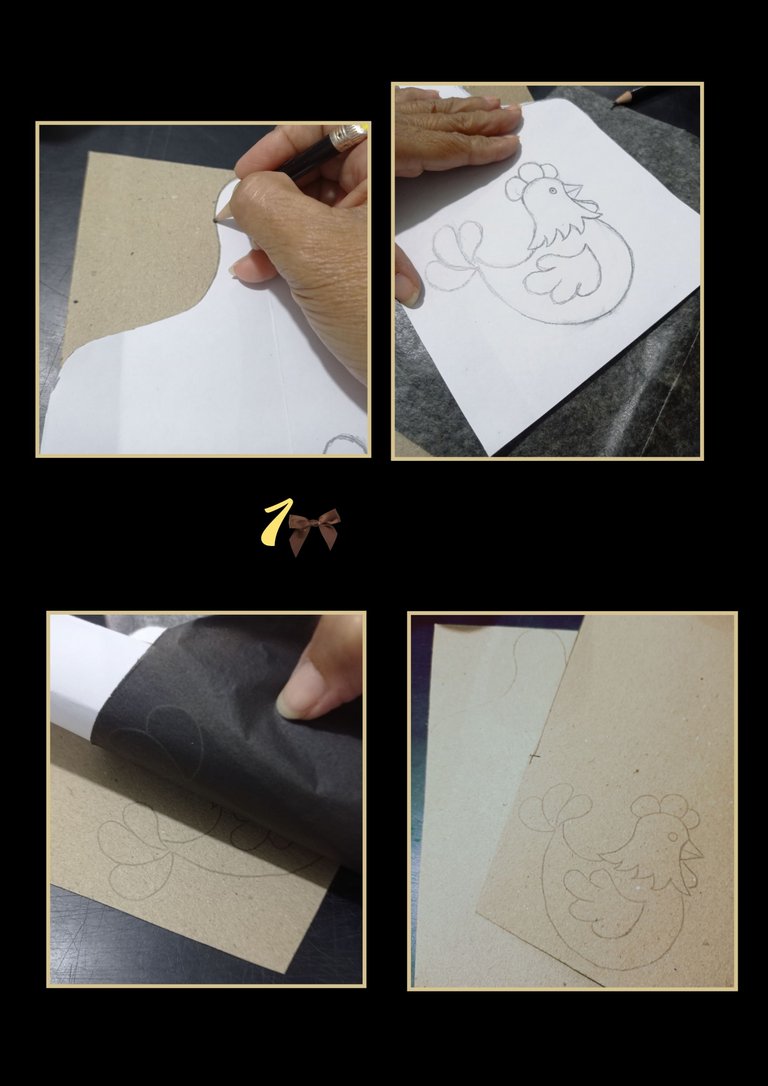
- Dibuja o marca la forma de la tabla sobre el cartón, luego usando papel carbón, transfiere el dibujo de la gallinita sobre otro pedazo de cartón como te muestro en las fotos.
Paso 2:
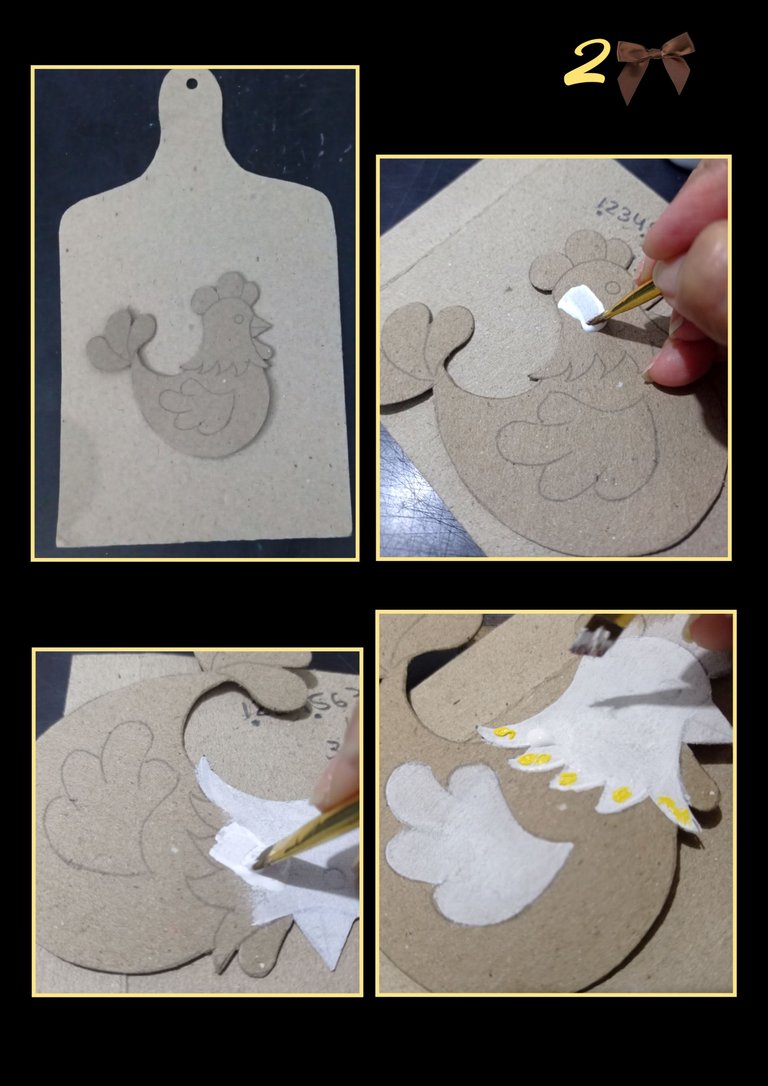
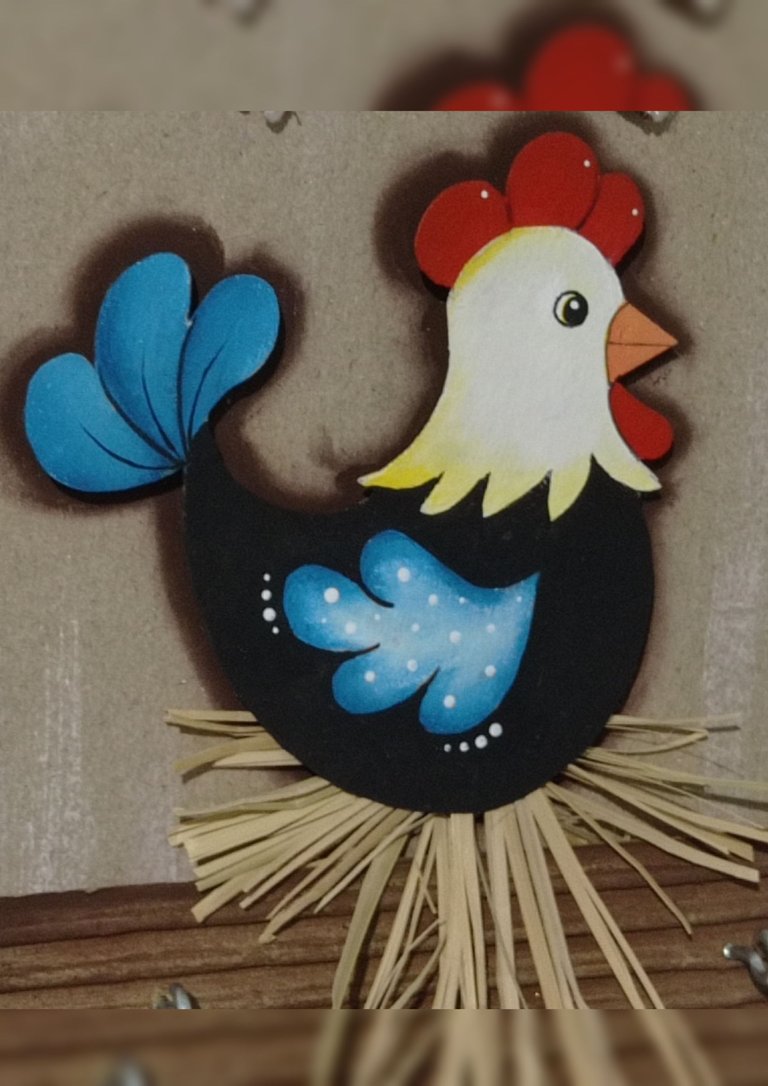
- Recorta la tabla y la gallina por todo el contorno, luego comienza a pintar la cabeza de la gallina aplicando una capa de pintura blanca, deja secar y pinta el ala, luego aplica otra y aún húmeda la pintura
aplica puntos de pintura amarilla.
Paso 3:
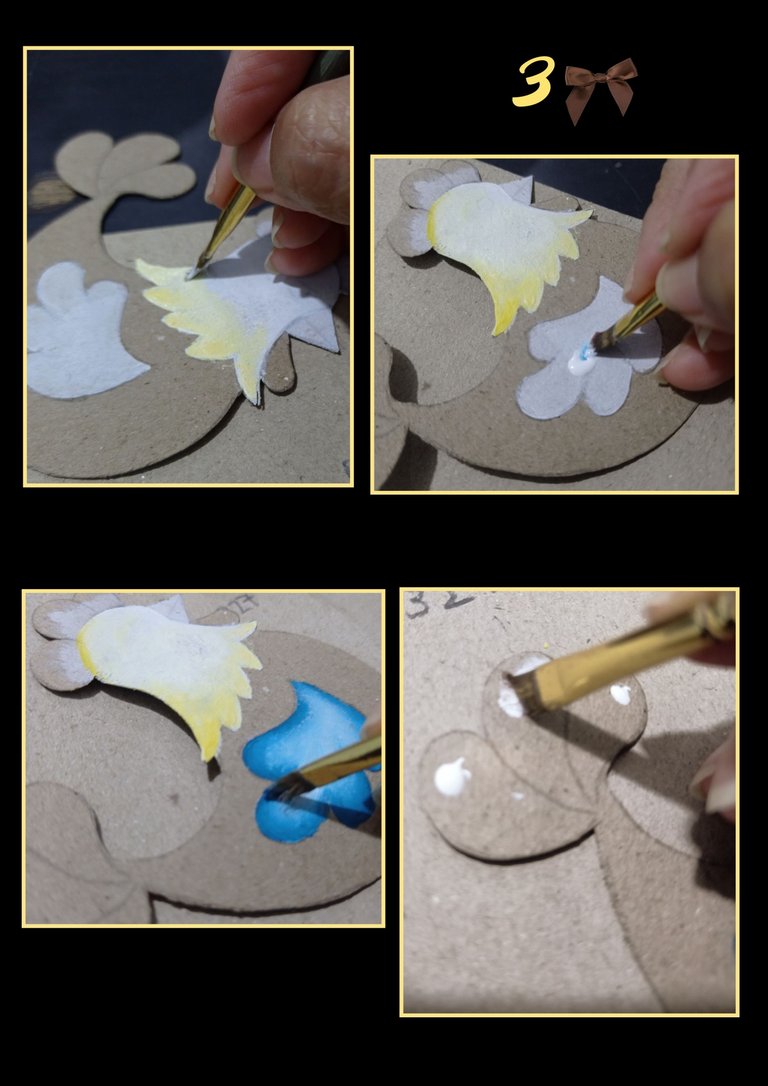
- Luego difumina la pintura amarilla uniendo con blanco.
- Luego repite este mismo paso uniendo blanco con azul para las alas.
- También pinta la cola con una capa de pintura blanca.
Paso 4:
- Pinta el pico con color naranja y la cresta con color rojo.
- Después con un pincel delgado comienza a pintar con negro para definir las plumas de la gallinita y luego rellena con un pincel más ancho.
Paso 5:
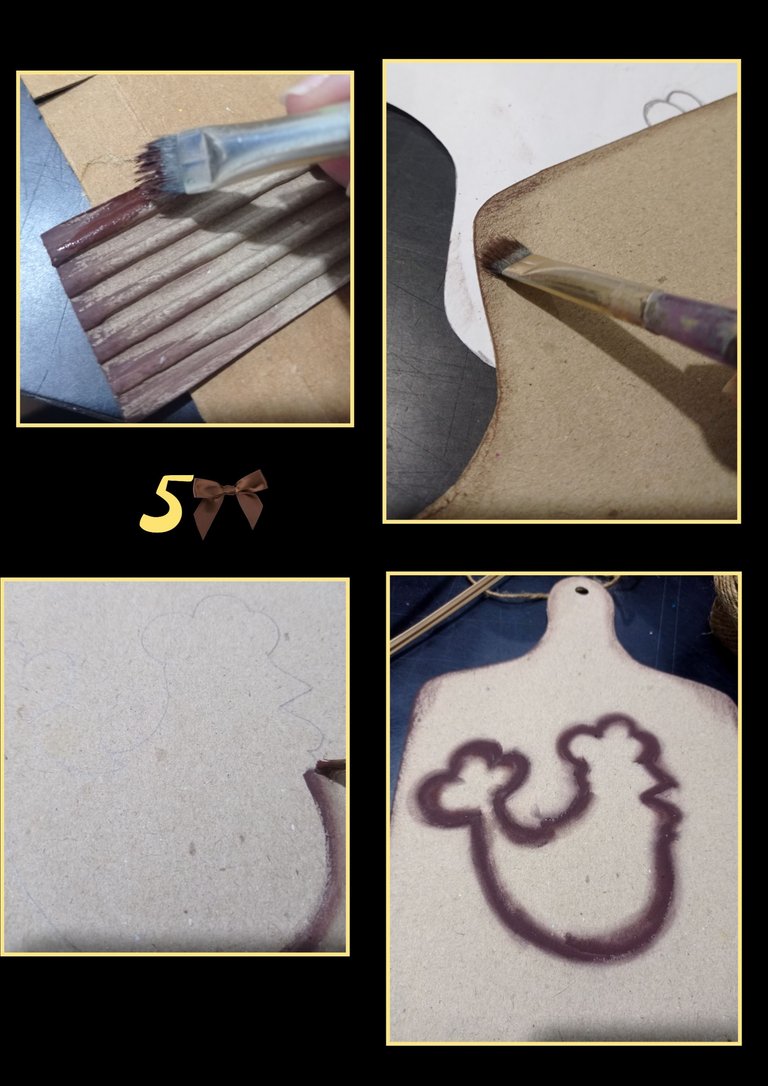
- Pinta un pedazo de cartón de caja con pintura marrón y deja secar.
- Luego moja un pincel de celda dura en pintura marrón y pasa por un pañito o cartón para quitar el exceso de pintura y pasa por todo el contorno de la tabla.
- Luego en el centro marca la silueta de la gallina y pinta con pintura marrón oscura para semejar la sombra.
Paso 6:
- Moja en pintura blanca el pincel y retira o deja casi seco el pincel y pasa de forma vertical en varias partes de la tabla.
- Luego pega el cartón al mdf e inserta los ganchos.
Paso 7:
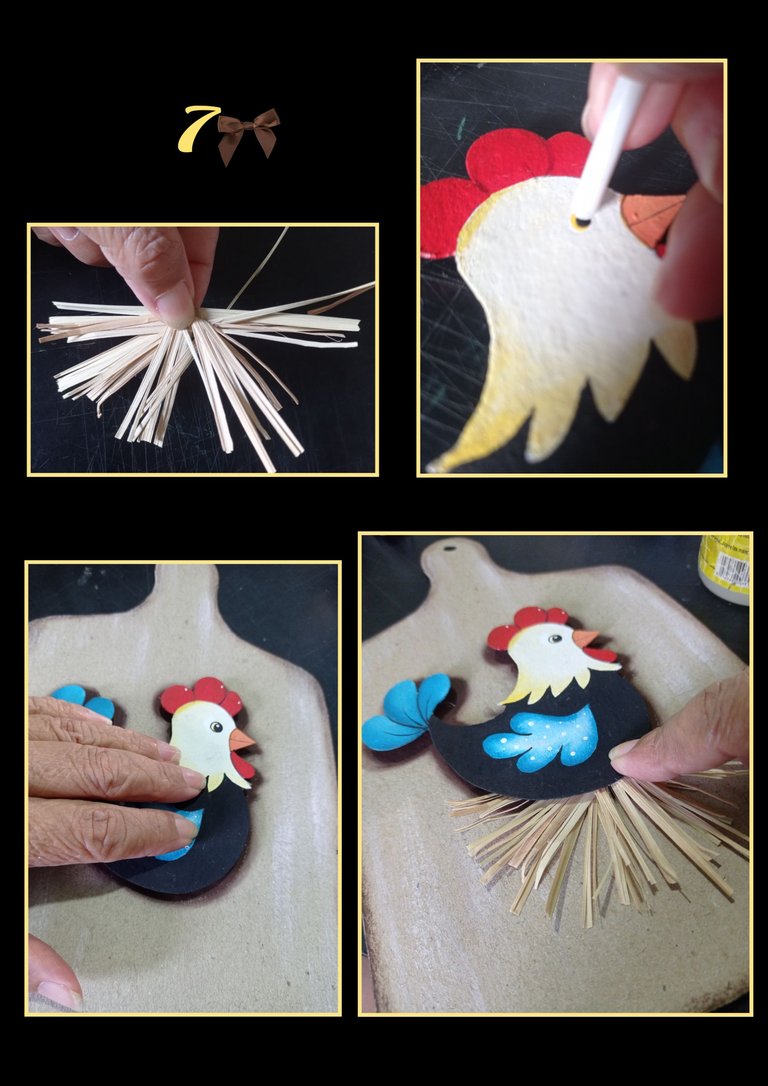
- Recorta en tiritas la palma seca y pega en el centro con un poco de silicón.
- Luego pinta el ojo y deja secar.
- Ahora pega taquitos de foami en el centro y pega la gallina que quede despegada del cartón (al relieve)
- Luego pega debajo de la gallinita las palmas secas.
Paso 8:
En el último paso, pega las tabla con los ganchos, haz presión hasta que pegue bien, luego haz un lazo y pega en la parte de arriba de la tabla y así quedará lista.
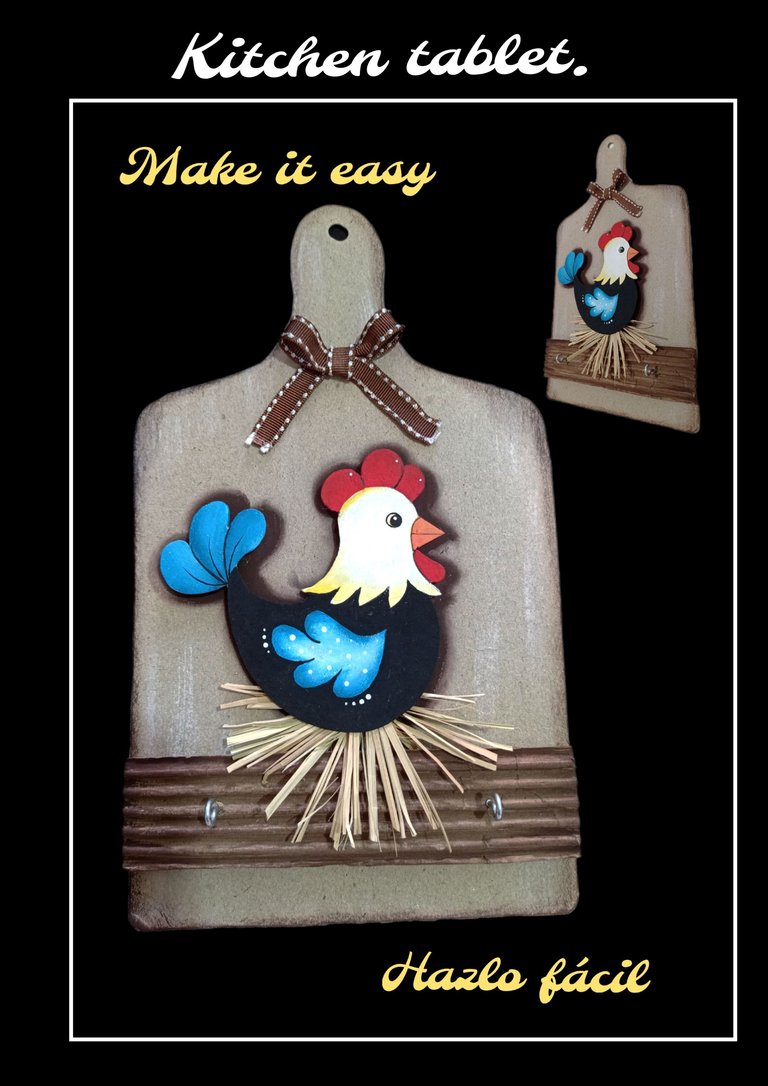
Ahora te muestro el resultado final.
Las fotos las tomé con mi Redmi Note 9
y las edité con GridArt.
Me despido no sin antes agradecer tu visita y apoyo a mi publicación.
Espero te guste mi publicación y te animes a realizar una para decorar tu cocina, también puedes usar una tabla de madera y pintarla y decorar teniendo mi paso a paso como guía.
Saludos y hasta mi próximo tutorial.
English:
Greetings dear friends and creators of this community.
Welcome to all of you to this my favorite space.
For this tutorial you will need:
| Piñata or box cardboard | MDF strip |
|---|---|
| Paints and paintbrushes | Pencil |
| Scissors | Tape or ribbon |
| Metal hooks | Silicone |
| Molds | Dry palm |
Let's get started:
Step 1:
- Draw or mark the shape of the board on the cardboard, then using carbon paper, transfer the drawing of the hen on another piece of cardboard as shown in the pictures.
Step 2:
- Cut out the board and the hen all around, then start painting the head of the hen by applying a coat of white paint, let it dry and paint the wing, then apply another coat and while the paint is still wet, apply dots of yellow paint.
apply dots of yellow paint.
Step 3:
- Then blend the yellow paint with white.
- Then repeat this same step joining white with blue for the wings.
- Also paint the tail with a coat of white paint.
Step 4:
- Paint the beak with orange and the crest with red.
- Then with a thin brush start painting with black to define the feathers of the hen and then fill in with a wider brush.
Step 5:
- Paint a piece of box cardboard with brown paint and let dry.
- Then dip a hard cell brush in brown paint and swipe across a tissue or cardboard to remove excess paint and go all around the outline of the board.
- Then in the center mark the silhouette of the chicken and paint with dark brown paint to resemble the shadow.
Step 6:
- Dip the paintbrush in white paint and remove or let the brush almost dry and swipe vertically on various parts of the board.
- Then glue the cardboard to the mdf and insert the hooks.
Step 7:
- Cut the dry palm into strips and glue in the center with a little silicone.
- Then paint the eye and let it dry.
- Now glue small pieces of foami in the center and glue the hen that is detached from the cardboard (in relief).
- Then glue the dried palms under the hen.
Step 8:
In the last step, glue the board with the hooks, press until it sticks well, then make a loop and glue on the top of the board and it will be ready.
Now I show you the final result.
I took the pictures with my Redmi Note 9
and I edited them with GridArt.
I say goodbye but not before thanking you for your visit and support to my publication.
I hope you like my publication and I encourage you to make one to decorate your kitchen, you can also use a wooden board and paint it and decorate having my step by step as a guide.
Greetings and see you in my next tutorial.
Verdaderamente que es ideal para decorar la cocina, y está muy divertida.
Buen día, muchas gracias amiga por tu comentario.
very beautiful, I like it👍
¡Que bueno! Saludos.
Me encantó este adorno para la cocina, bello y creativo, gracias por el tutorial 🤗 feliz día!
Me alegra mucho.
Muchas gracias a ti por comentar.
Igual para ti.