Hola, hola queridos amigos!
Bienvenidos sean todos a mi Blog.
Es por eso que hoy te quiero mostrar una forma de decorar sus lápices que seguro le van a encantar y estarán felices de mostrarlos a sus amiguitos.
Demás está decir que los puedes decorar con las imagenes que a él le gusten, yo solo te voy a mostrar como puedes hacerlo.
Y como siempre quiero invitarte a que veas como se hace.
Vas a necesitar:
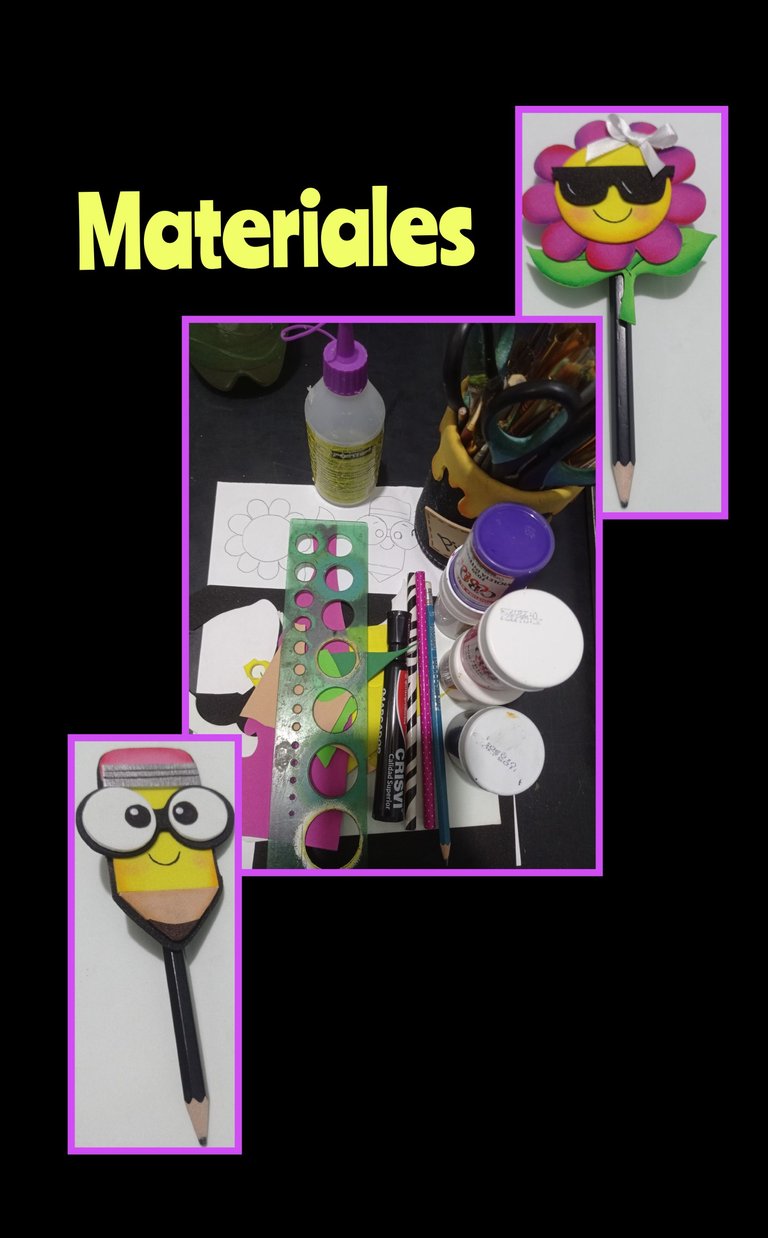
Recortes de foami de colores
Pinturas, pinceles y marcador.
Tijera, cuchilla y regla.
Silicón, cinta y tizas (opcional)
Molde o dibujo
Ahora comencemos:
PASO: 1
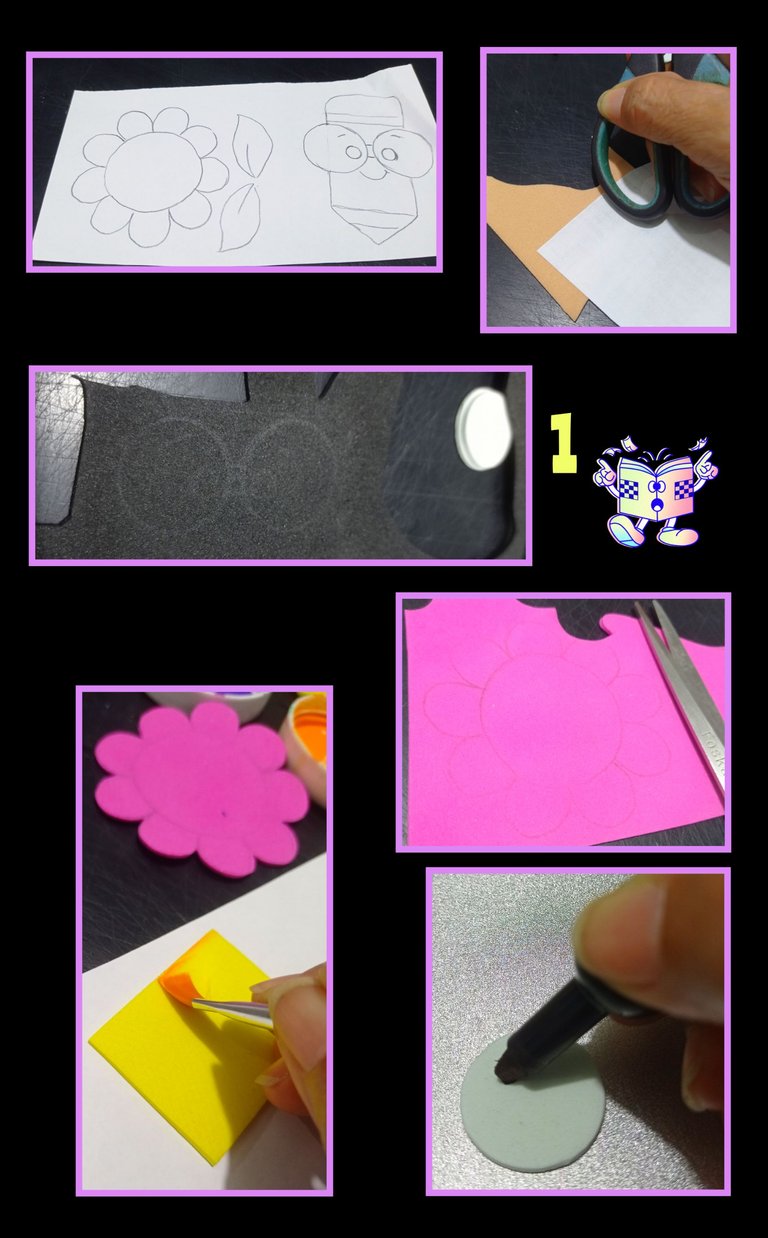
- Remarca el dibujo y coloca sobre el foami, después frota con la tijera para transferir el dibujo así lo harás con cada una de las piezas y recorta.
- Después moja el pincel en agua, quita el exceso y moja la punta en pintura y pasa por todo el contorno u orilla con el color correspondiente hasta pintarlas todas.
- Luego con el marcador pinta el centro del ojo.
PASO 2:
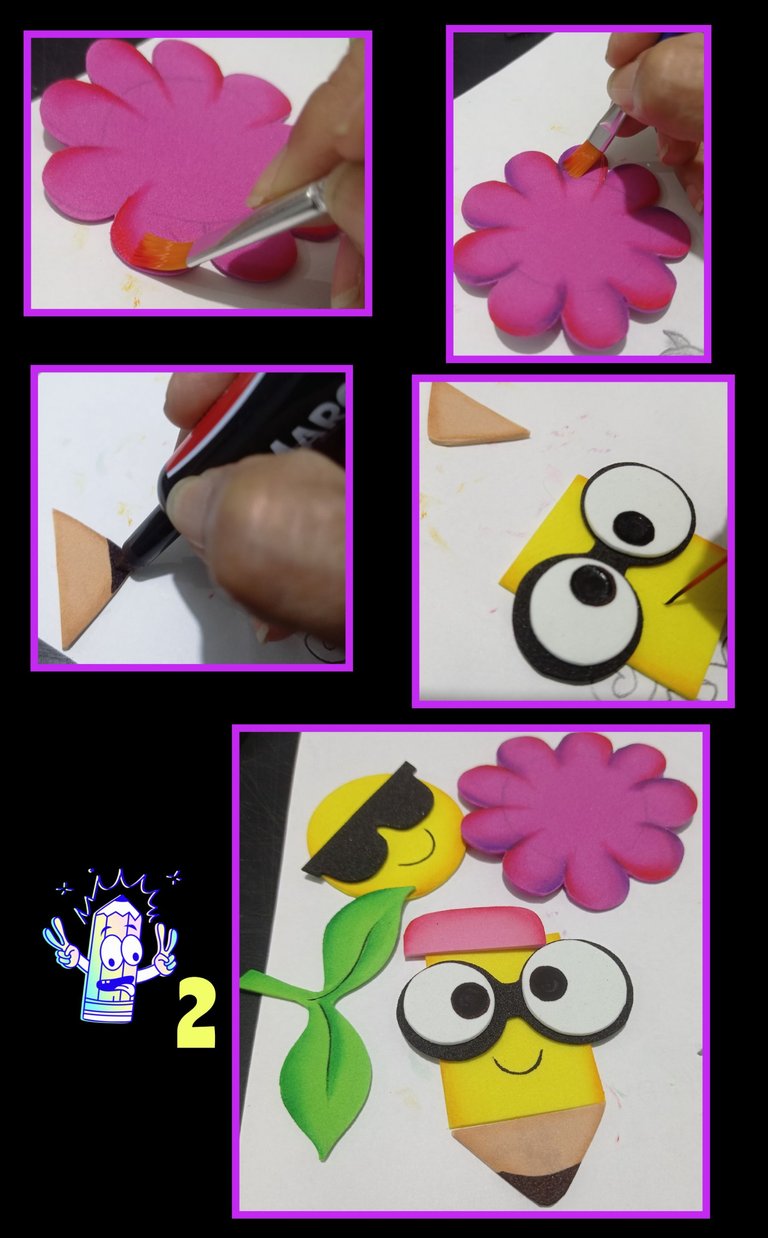
- Sigue pintando las orillas de los pétalos mitad rojo y mitad morado, luego pinta la punta del lápiz con marcador. luego pinta la boca con pincel fino o marcador punta fina.
- Así quedan las piezas pintadas, como puedes ver es fácil.
PASO 3:
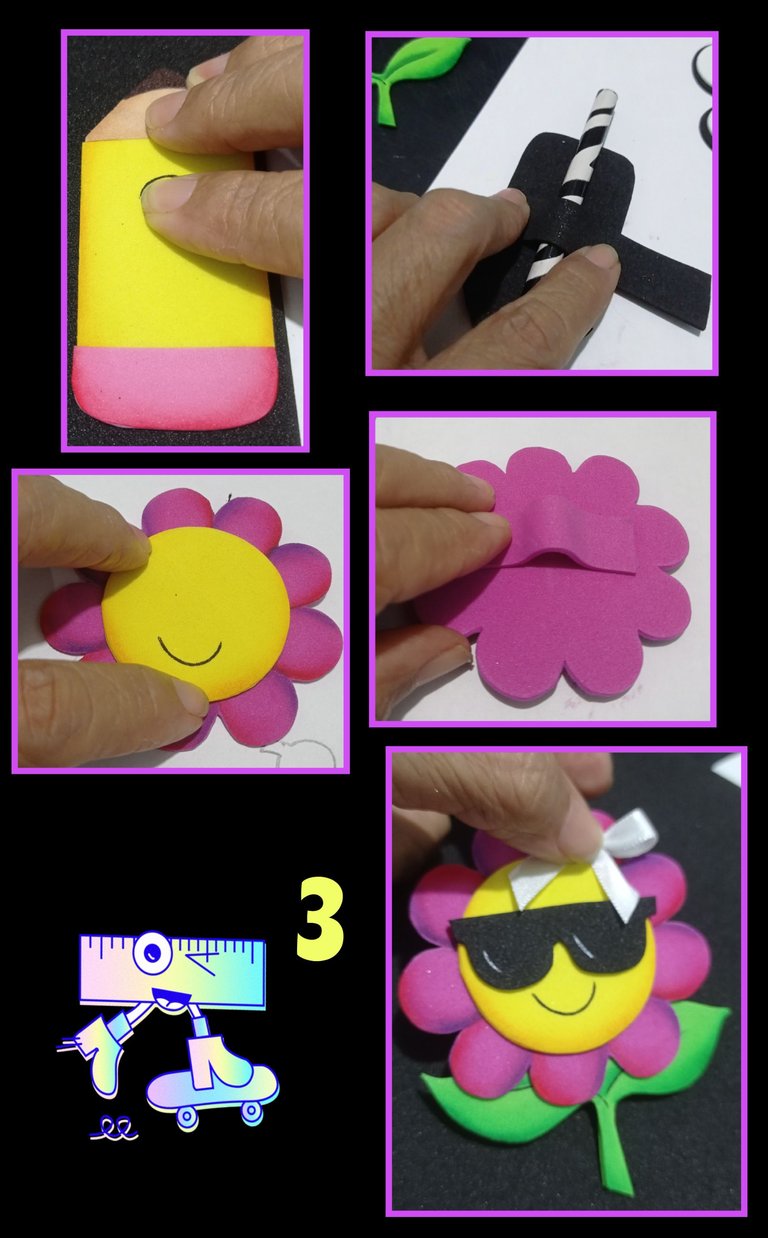
- Comencemos a armar, aplica silicón en las piezas del lápiz y pega sobre foami negro, deja secar y recorta, luego corta una tira de foami de 1,5cm de ancho y coloca el lápiz en la parte trasera de la figura de foami y pega la tira, después que seque recorta el restante.
- Para armar la flor aplica silicón al centro amarillo y pega, deja secar, luego recorta la tira y pega en la parte de atrás como te muestro en la foto.
- Pega los lentes, hojas un lacito y listo.
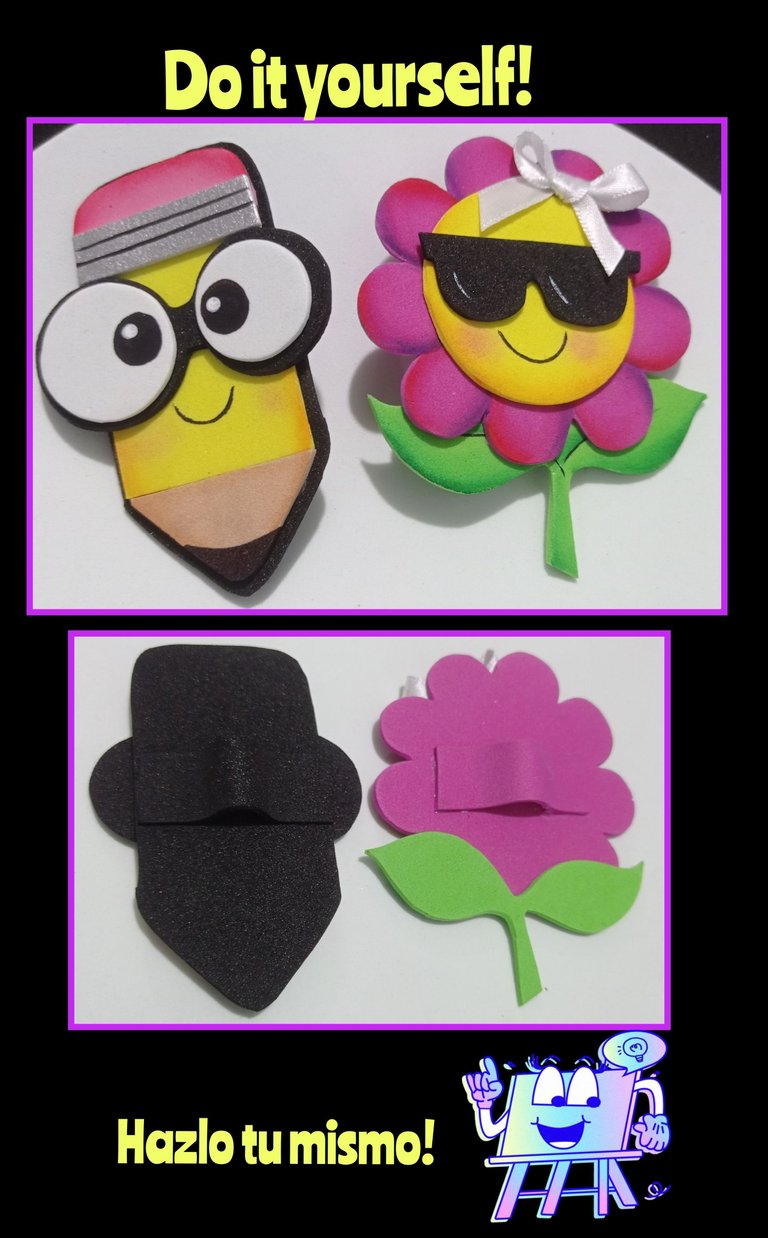
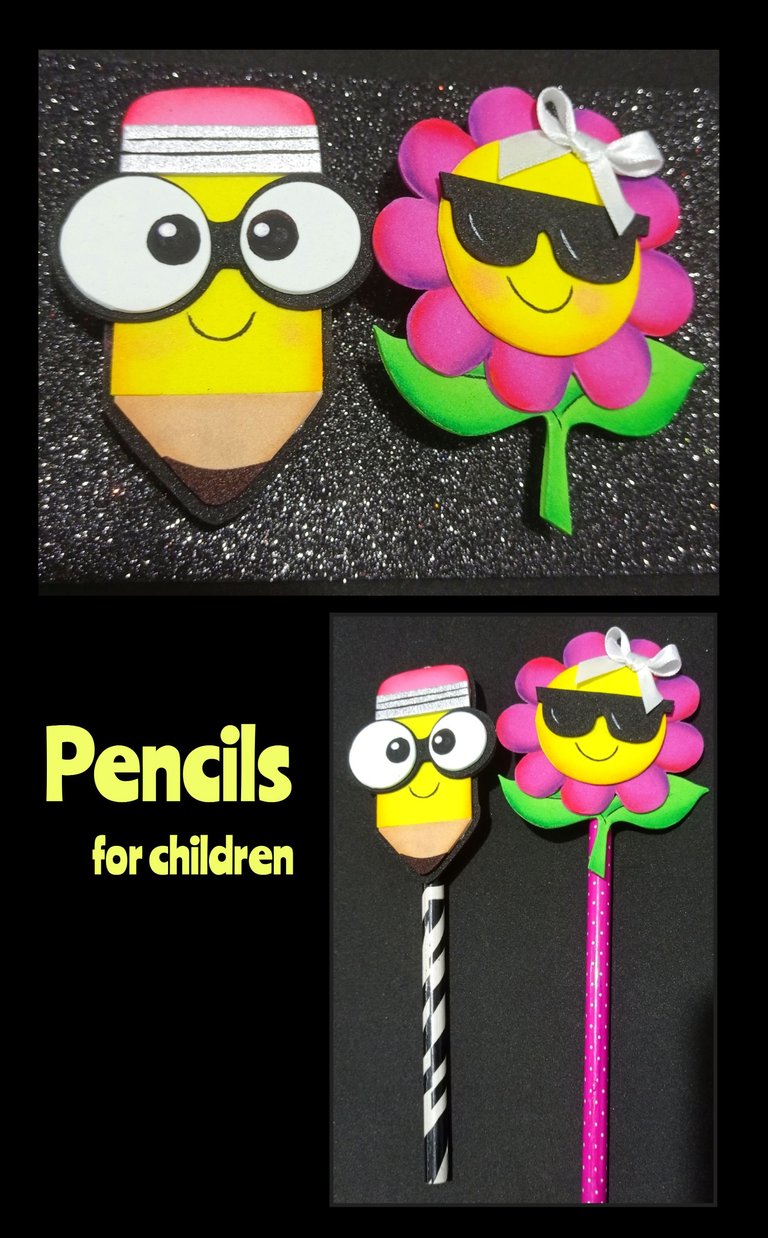
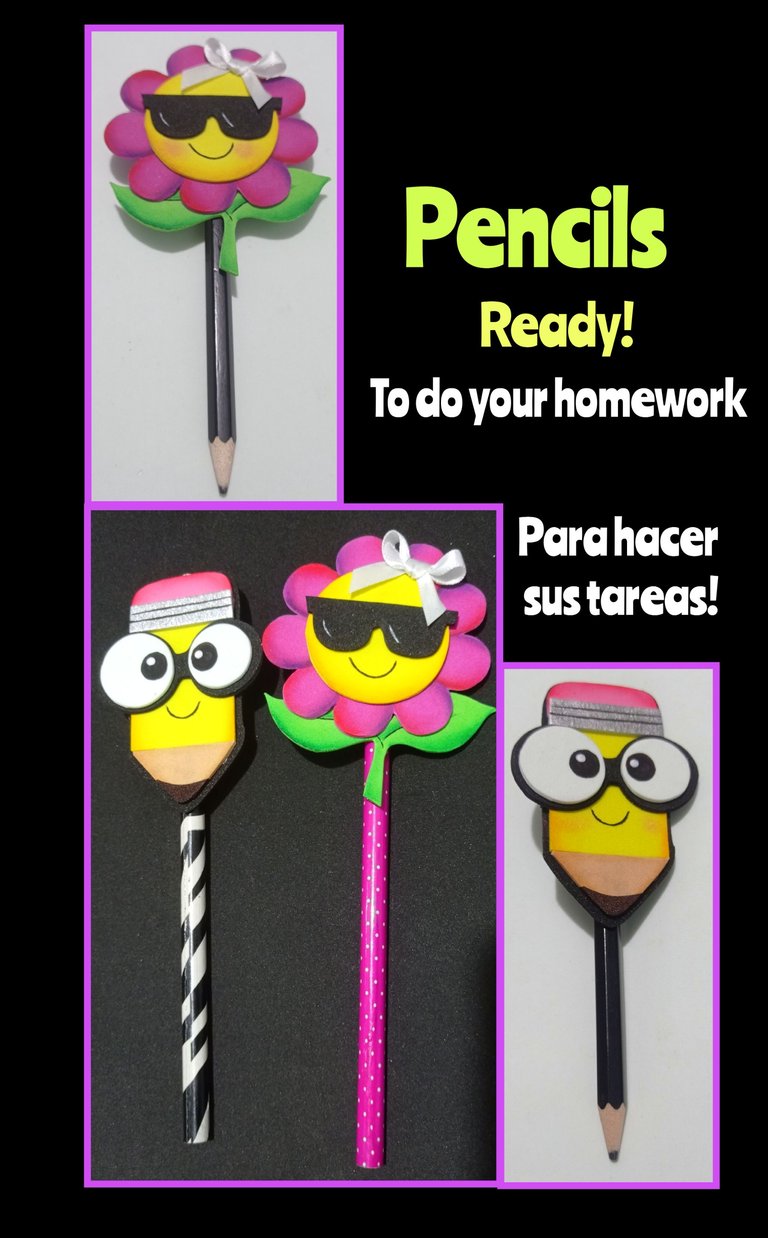
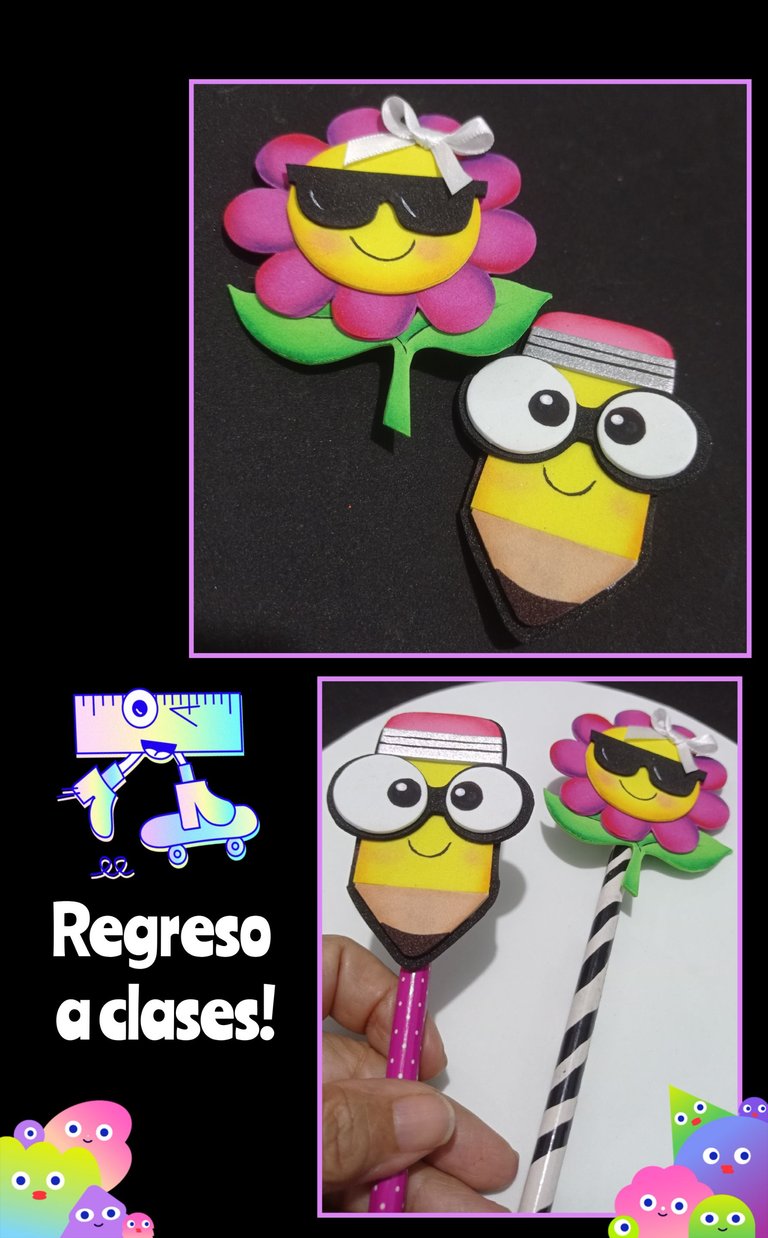
Ahora te mostraré como quedaron estos lindos adornos con los que puedes decorar Lápices para los pequeños.
https://es.pinterest.com/pin/476255729362324227/

Traductor: DeepL
Teléfono; Redmi Note 9
Editor de fotos: GridArt.
Llegó la hora de despedirme esperando hayas aprendido como se hace y deseando te sirva de guía a la vez, te haya gustado.
Es un tutorial fácil y sencillo para que lo realices tu mismo.
Si tienes alguna duda, escríbeme y te ayudaré.
Muchas gracias por tu visita y apoyo, espero me sigas visitando!
Saludos.


Hello, hello dear friends!
Welcome to my Blog
That's why today I want to show you a way to decorate their pencils that they will love and will be happy to show them to their friends.
Needless to say that you can decorate them with the images he likes, I'm just going to show you how you can do it.
And as always I want to invite you to see how it's done.
You will need:

Colored foami cutouts
Paints, brushes and marker.
Scissors, razor and ruler.
Silicone, tape and chalk (optional).
Mold or drawing
Now let's get started:
STEP: 1

- Outline the drawing and place on the foami, then rub with the scissors to transfer the drawing so you will do it with each of the pieces and cut out.
- Then dip the brush in water, remove the excess and dip the tip in paint and pass around the contour or edge with the corresponding color until all the pieces are painted.
- Then paint the center of the eye with the marker.
STEP 2:

- Continue painting the edges of the petals half red and half purple, then paint the tip of the pencil with a marker. Then paint the mouth with a fine brush or a fine tip marker.
- This is how the painted pieces look, as you can see it's easy.
STEP 3:

- Let's start assembling, apply silicone on the pencil pieces and paste on black foami, let dry and cut, then cut a strip of foami 1.5cm wide and place the pencil on the back of the foami figure and paste the strip, after it dries cut the remaining.
- To assemble the flower apply silicone to the yellow center and glue, let it dry, then cut the strip and glue on the back as shown in the picture.
- Glue the glasses, leave a bow and that's it.

Now I'll show you how these cute ornaments look like to decorate pencils for the little ones.
https://es.pinterest.com/pin/476255729362324227/


Translator: DeepL
Phone; Redmi Note 9
Photo Editor: GridArt.
It's time to say goodbye hoping you learned how it's done and wishing you a guide at the same time, you liked it.
It is an easy and simple tutorial for you to do it yourself.
If you have any questions, write me and I will help you.
Thank you very much for your visit and support, I hope you keep visiting me!
Greetings.
Your creativity is inspiring, these pencils look great and make anyone's day, thank you for sharing these extraordinary pencil decorating ideas.
Muchas gracias @diyhub por su comentario y apoyo.
Saludos.
Recuerdo que hacía estas decoraciones en mi infancia y luego perfeccioné mi técnica en la adolescencia jajaja, es impresionante lo hermoso que te han quedado, muchas gracias por compartirlo...
Que bueno saber que mi tutorial le trajo buenos recuerdos y me alegra mucho que te hayan gustado. Siempre con mucho gusto.
Te quedo preciosa la decoración, mi linda @elmundodebetty, me gustaría tener todos mis lápices decorados así.❤️
Hola mi amiga, que bueno que te gustaron.
Eso creo no sea problema ya que haces trabajos muy lindos y esto no te será dificil de realizar.
Gracias por tu apoyo y comentario.
Saludos.
Gracias a ti también amiga. Un abrazo.😊
🎉 Upvoted 🎉
👏 Keep Up the good work on Hive ♦️ 👏
❤️ @bhattg suggested sagarkothari88 to upvote your post ❤️
@hivecurators Muchas Gracias por el comentario, de verdad es un placer hacerlo y gracias también por su voto.
Qué chulitos te quedaron, están adorables, con gafas y todo 😍
Hola amiga, que bueno saber que te gustaron!
Saludos y bendiciones.