Buenos días mis queridos amigos.
Bienvenidos a mi espacio preferido.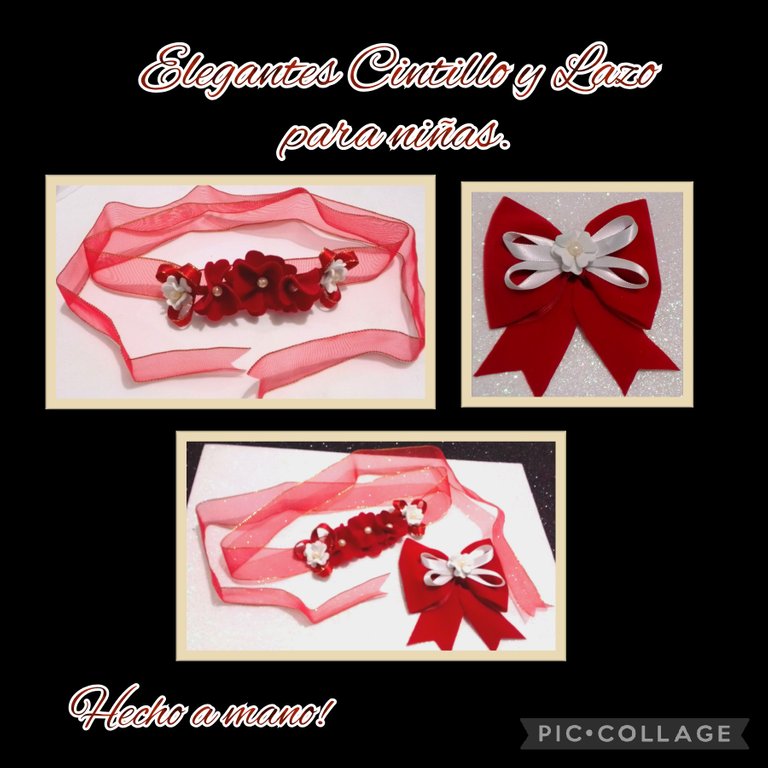
Hoy quiero compartirles un lindo paso a paso dedicado a las princesas más pequeñas de la casa, les mostraré como realizar un cintillo y un lazo que si te decides a hacerlo, ellas podrán lucir para estos próximos días de fin de año y mejor dicho en cualquier ocasión.
Están hechos con un retazo de tela gamuzada y decorados con flores de la misma tela y foami.
Entonces, te invito a realizarlos conmigo!
Para ello vas a buscar los siguientes materiales:
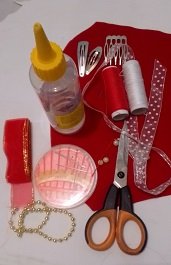
| Tela gamuzada o cinta | Cintas de tela |
|---|---|
| Retazo de foami blanco | Pinzas o gancheta |
| Hilos y aguja | Tijera |
| Perlitas blancas | Silicón liquido |
| Cortador de flores | Plancha de ropa |
Ahora comencemos el Procedimiento:
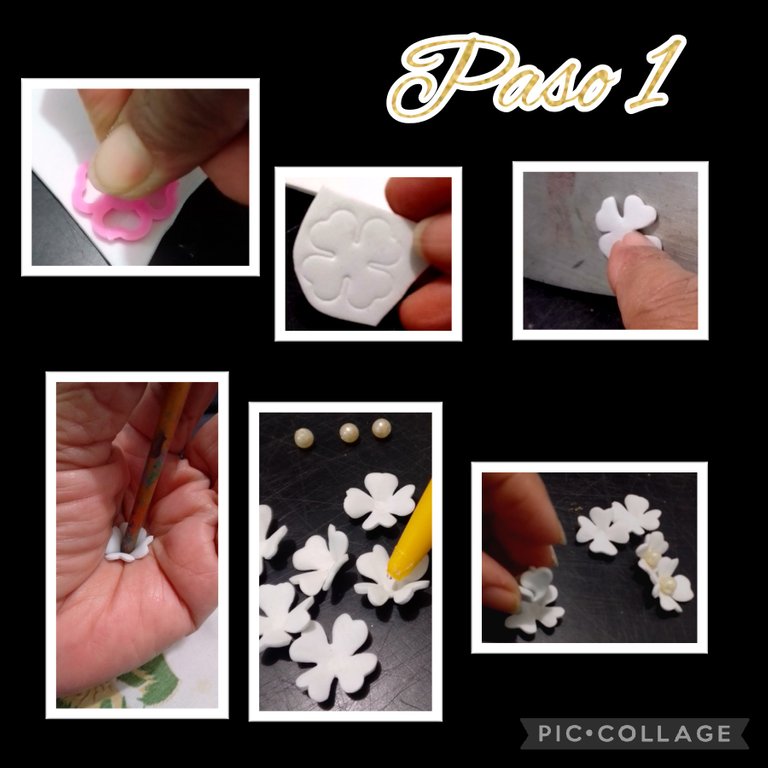
- Lo primero que harás es marcar las flores sobre el foami, esto será haciendo presión con el cortador, luego recorta y calienta con la plancha.
Luego si no tienes una esponjita, coloca sobre la palma de tu mano y con un palito de punta redonda, haz presión para que tome forma. - Ahora aplica silicón en el centro de la flor, pega la perlita, deja secar y luego pega sobre otra florecita.
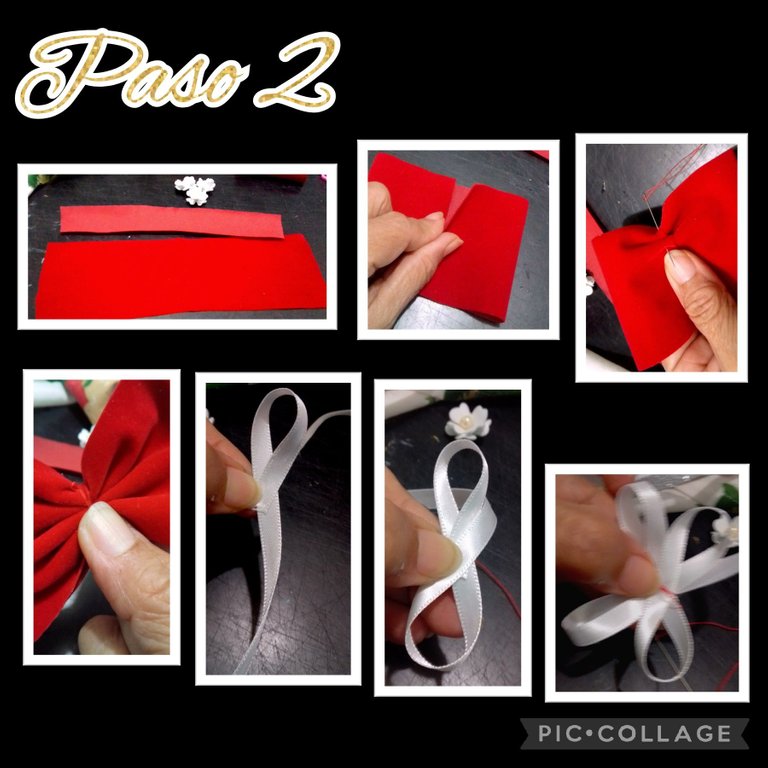
- Recorta en la tela un rectángulo de 15cms de largo x 6cms de ancho y una tira de 13x3cms.
- Ahora dobla las puntas hacia el centro e hilvana, luego hala el hilo para fruncir y cierra con un nudo para formar el lazo.
- Aparte en cinta blanca, haz dos (2) lazadas en forma de ocho y cose en el centro ajustando bien y repite el procedimiento y cose uniendo las cuatro lazadas.
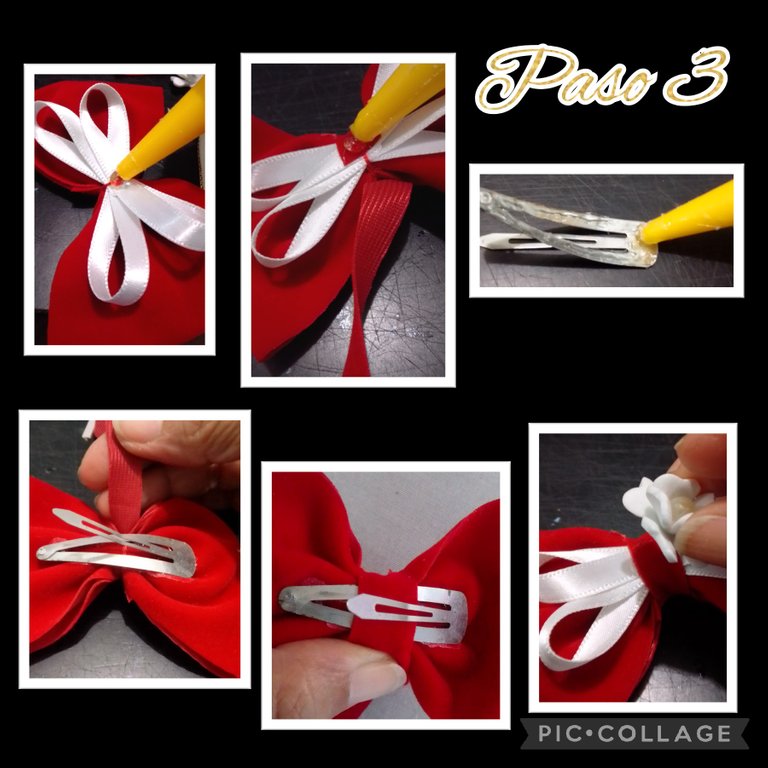
- Aplica silicón y une las dos piezas, recorta una tira de 1cm y pega una punta al centro, después aplica silicón por todo el borde de la pinza y pega en el centro del lazo, luego pasa la tira para sujetar la pinza y pega al frente y recorta el restante.
- Ahora decoramos pegando la flor.
Ya casi está terminado, nos falta muy poquito!
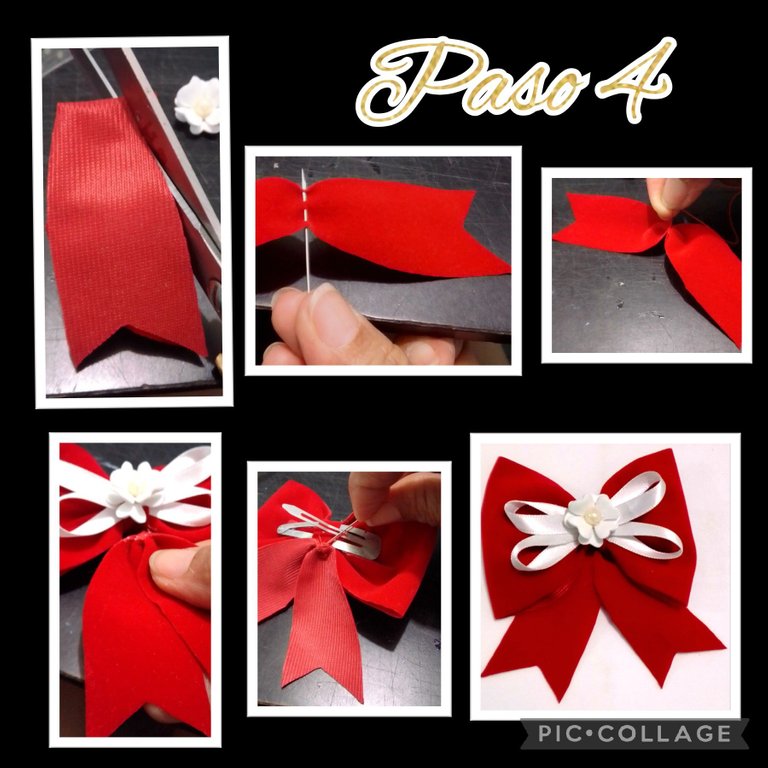
- Recorta dando forma a las tiras colgantes del lazo e hilvana en el centro, luego hala el hilo frunciendo y cose en la parte posterior del lazo y así queda listo este lindo y fácil Lazo.
Ahora comenzaremos con el cintillo
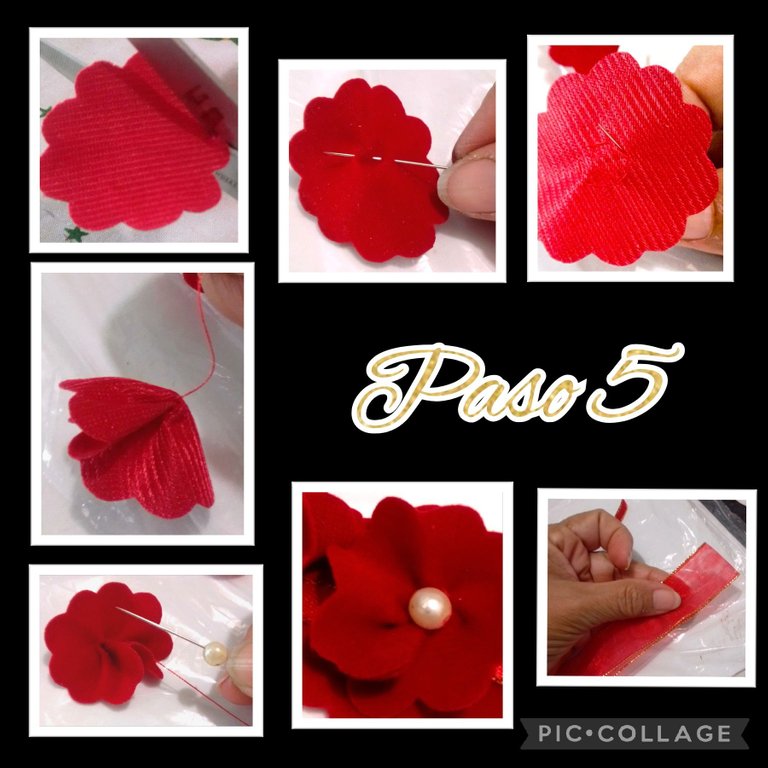
- Recorta cuatro (4) círculos y haz cortes de ondas por todo el contorno para formar las flores, estas miden 3,5cms.
- Hilvana formando un círculo pequeño en el centro de la flor y hala el hilo para dar forma a la flor, ajusta haciendo un nudo en la parte de abajo y luego sin recortar el hilo, mete la perlita en la aguja y cose en el centro de la flor, este paso lo repites con todas las flores.
- Aparte dobla a la mitad la cinta que quieras para el cintillo.
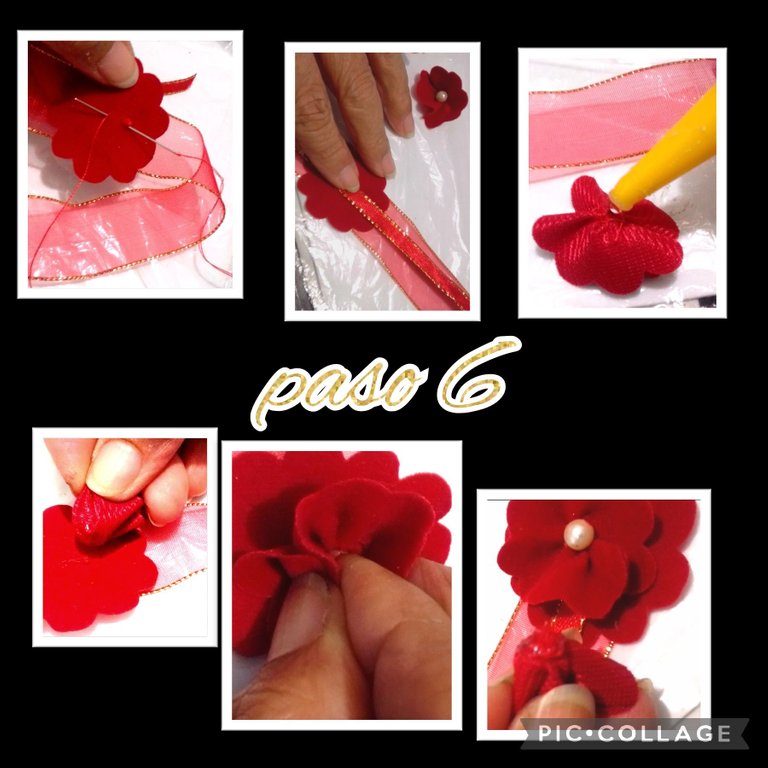
- Ahora toma una flor sin trabajar y cose a la cinta donde hiciste el dobles o centro de la cinta, después cose una cinta delgada de raso de 20 cms de largo.
- Aplica silicón a la flor y pega, haz un poco de presión y suelta, luego pega las dos restantes a los lados y deja secar.
Como puedes ver es rápido y muy sencillo!
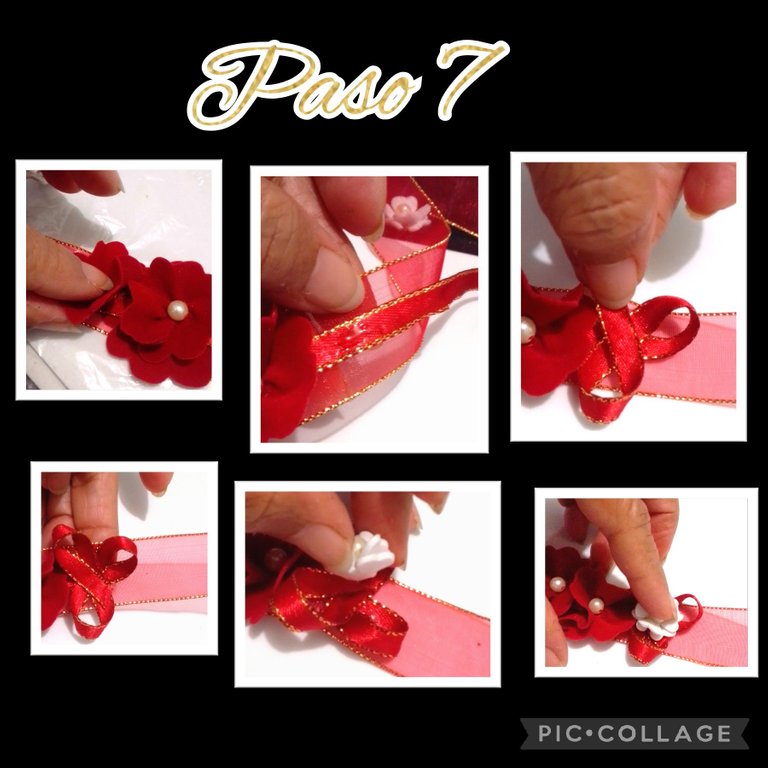
- Ahora con la cinta delgada que nos sobró haz 3 lazadas pegando una a una y por último pega una florecita de foami a los extremos.
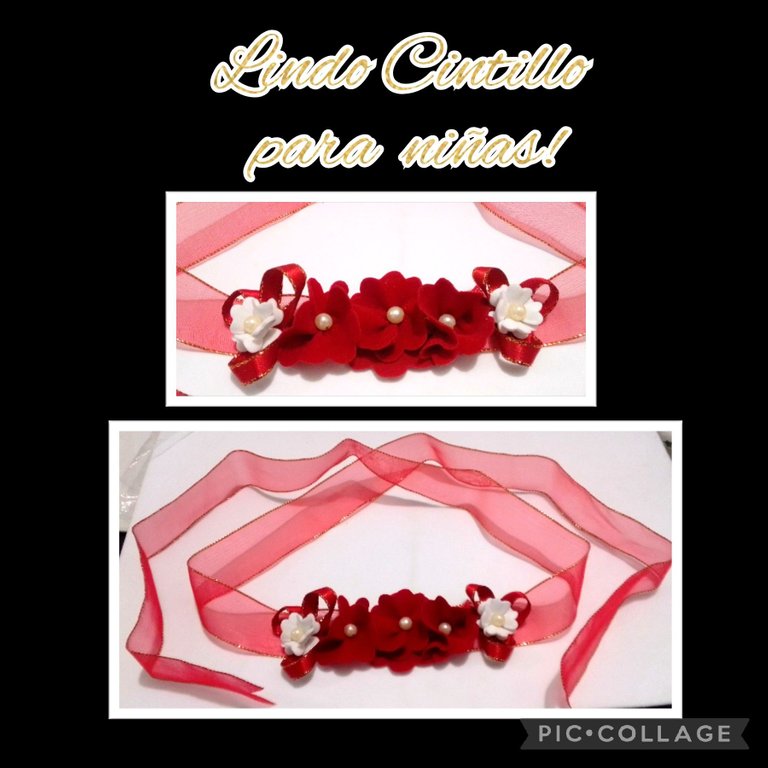
Mi publicación está traducida con DeepL, usando etiquetas HTML y las fotos son capturadas por mi Blu G5 editadas con Pic Collage.
Contenido original.
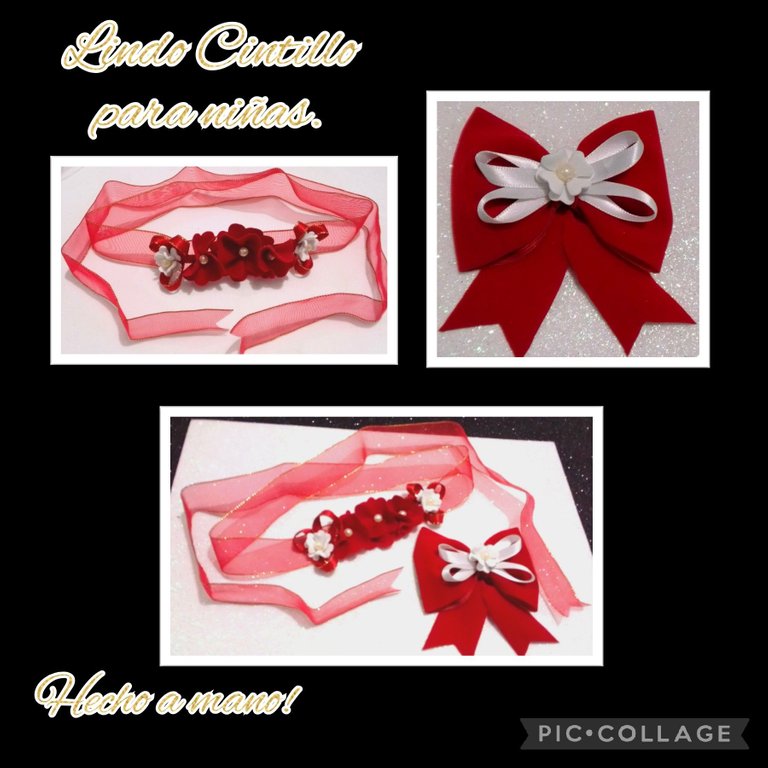
Ahora me despido deseando te sea útil mi paso a paso y disfrutes al igual que yo al realizarlo, te servirá para regalar y hacer feliz a una niña.
Y muchas gracias por el apoyo y si te gustó espero me des tu comentario.
Saludos y bendiciones.
English:

Buenos días mis queridos amigos.
Bienvenidos a mi espacio preferido.
Hoy quiero compartirles un lindo paso a paso dedicado a las princesas más pequeñas de la casa, les mostraré como realizar un cintillo y un lazo que si te decides a hacerlo, ellas podrán lucir para estos próximos días de fin de año y mejor dicho en cualquier ocasión.
Están hechos con un retazo de tela gamuzada y decorados con flores de la misma tela y foami.
Entonces, te invito a realizarlos conmigo!
Para ello vas a buscar los siguientes materiales:

| Tela gamuzada o cinta | Cintas de tela |
|---|---|
| Retazo de foami blanco | Pinzas o gancheta |
| Hilos y aguja | Tijera |
| Perlitas blancas | Silicón liquido |
| Cortador de flores | Plancha de ropa |
Now let's begin the Procedure:

- The first thing you will do is to mark the flowers on the foami, this will be done by pressing with the cutter, then cut and heat with the iron.
Then, if you don't have a sponge, place it on the palm of your hand and with a round-tipped stick, make pressure so that it takes shape. - Now apply silicone in the center of the flower, glue the pearlite, let it dry and then glue it on another flower.

- Cut out a rectangle 15 cm long x 6 cm wide and a 13x3 cm strip from the fabric.
- Now fold the ends to the center and baste, then pull the thread to gather and close with a knot to form the bow.
- Separately in white ribbon, make two (2) loops in the shape of eight and sew in the center tightly and repeat the procedure and sew joining the four loops.

- Apply silicone and join the two pieces, cut a 1cm strip and glue one end to the center, then apply silicone all around the edge of the clip and glue in the center of the loop, then pass the strip to hold the clip and glue to the front and cut the rest.
- Now decorate by gluing the flower.
It's almost finished, we are just a little bit away!

- Cut out the shape of the hanging strips of the ribbon and thread in the center, then pull the thread gathering and sew on the back of the ribbon and this is how this pretty and easy ribbon is ready.

Now we will start with the headband
- Cut out four (4) circles and make wave cuts all around to form the flowers, these measure 3.5cms.
- Thread forming a small circle in the center of the flower and pull the thread to shape the flower, adjust by tying a knot at the bottom and then without trimming the thread, put the bead in the needle and sew in the center of the flower, repeat this step with all the flowers.
- Fold in half the ribbon you want for the headband.

- Now take an unworked flower and sew to the ribbon where you made the double or center of the ribbon, then sew a thin satin ribbon 20 cm long.
- Apply silicone to the flower and glue, apply a little pressure and release, then glue the remaining two flowers to the sides and let dry.
As you can see it is quick and easy!

- Now with the thin ribbon that we have left over, make 3 loops gluing one by one and finally glue a little foami flower at the ends.

My post is translated with DeepL, using HTML tags and the photos are captured by my Blu G5 and edited with Pic Collage.
Original content.

Now I say goodbye wishing you my step by step will be useful and enjoy as I do to make it, it will serve to give and make a girl happy.
And thank you very much for your support and if you liked it I hope you give me your comment.
Greetings and blessings.
SourceHere is your Proof of Brian. I think you meant #ProofOfBrain