Bienvenidos queridos amigos que visitan mi blog.
Así que espero a ti también te guste y te animes a realizar una.
Ahora te invito a que busques:
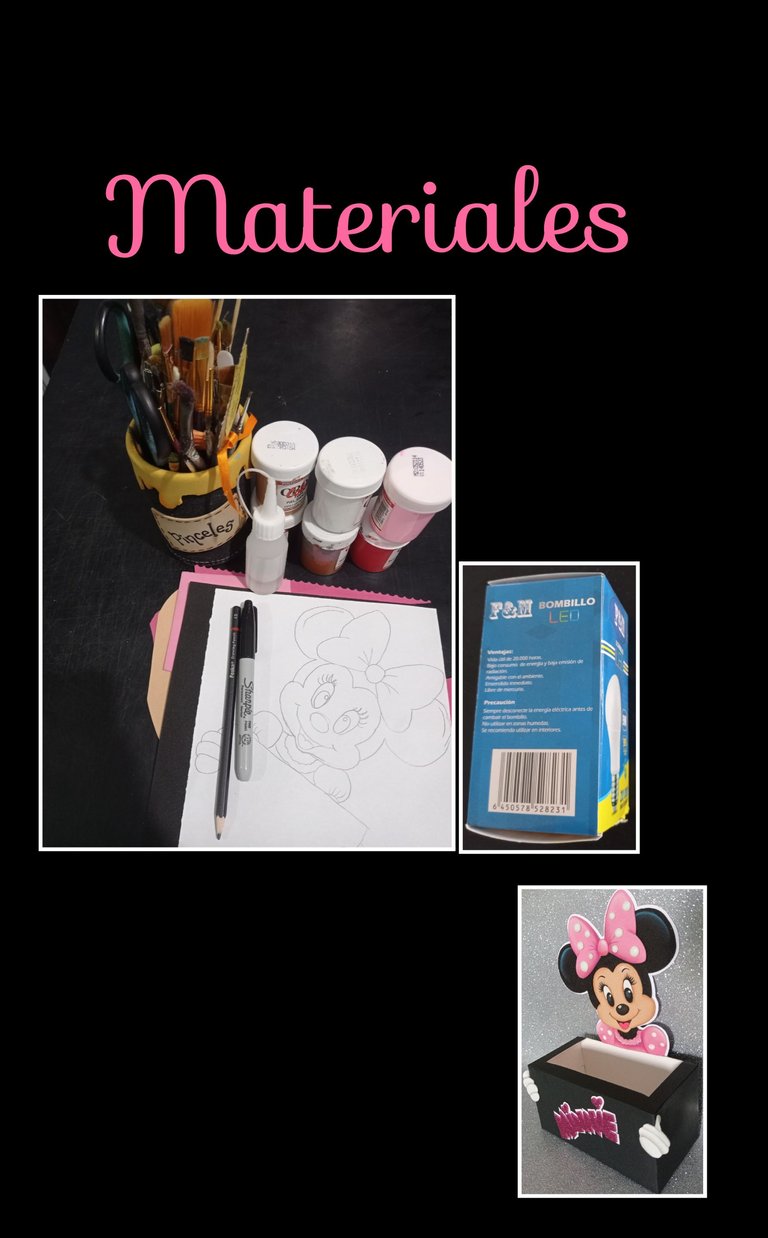
| Caja de cartón | Cartulina negra y blanca |
|---|---|
| Foami mate y escarchado de colores | Tijera |
| Dibujo o impresión | Lápiz de mina blanda |
| Pinturas y pinceles | Marcador punta fina |
| Silicón | Palito de madera |
| Plancha elèctrica | Type transparente |
Comencemos:
Paso 1:
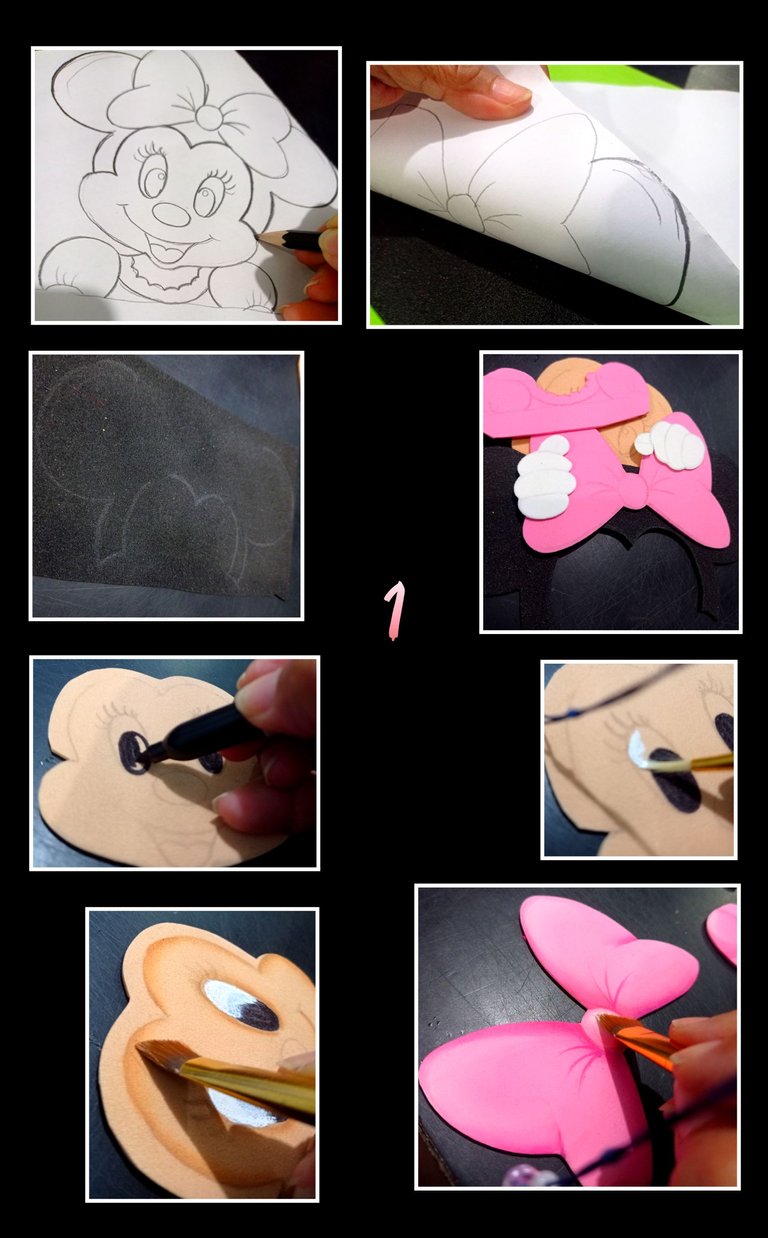
- Remarca el dibujo con el lápiz de mina oscura, después coloca sobre el foami negro y con los anillos de la tijera frota con presión para que se transfiera el dibujo.
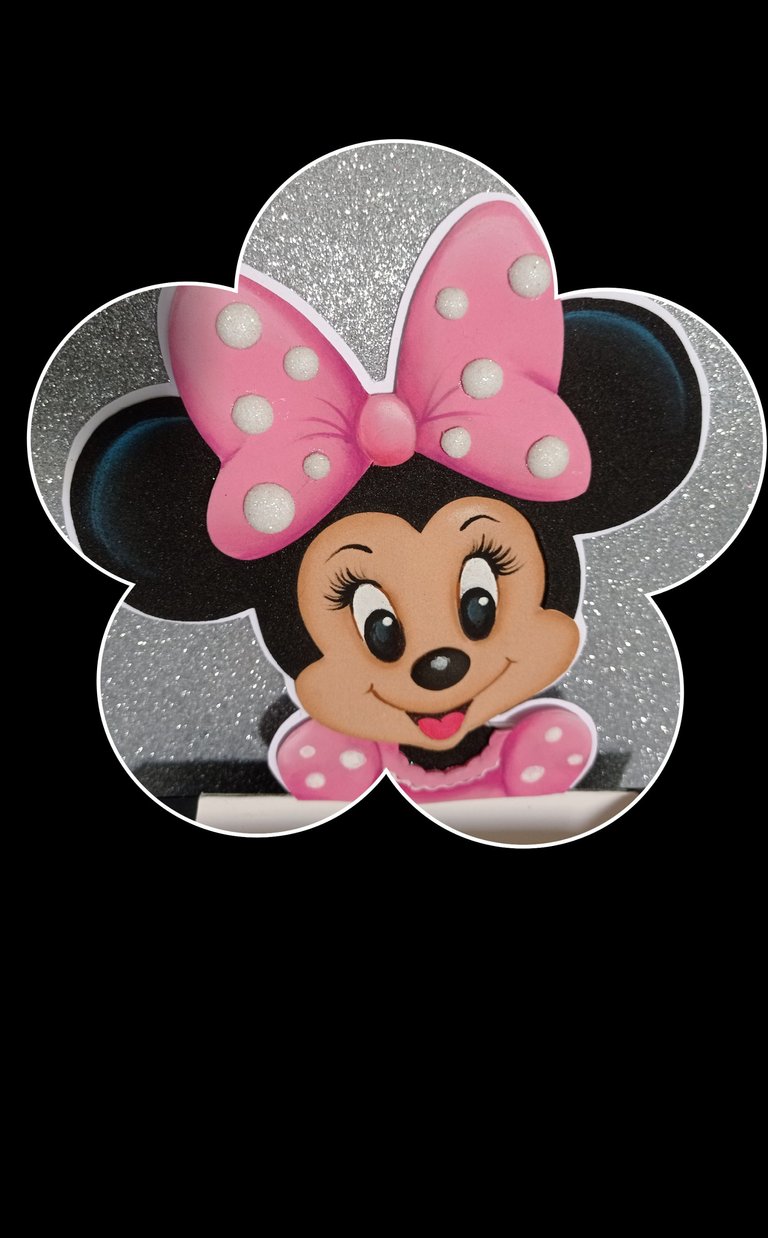
Recomendación: Para transferir al foami oscuro sea negro, marrón oscura, azul marino, etc usa un làpiz 4B o 6B ya que su mina es muy blanda y al frotar el dibujo se adhiere al foami fácilmente como se ven las orejas de minnie en el foami negro. - Luego transfiere las otras piezas al foami y recorta.
- Ahora rellena con marcador los ojos y deja secar bien, luego rellena con pintura blanca y deja secar.
- Para pintar el contorno de la cara moja el pincel en agua, quita el exceso y toma un poquito de pintura con la punta del pincel y comienza a pasar por el borde de todas las piezas.
Paso 2:
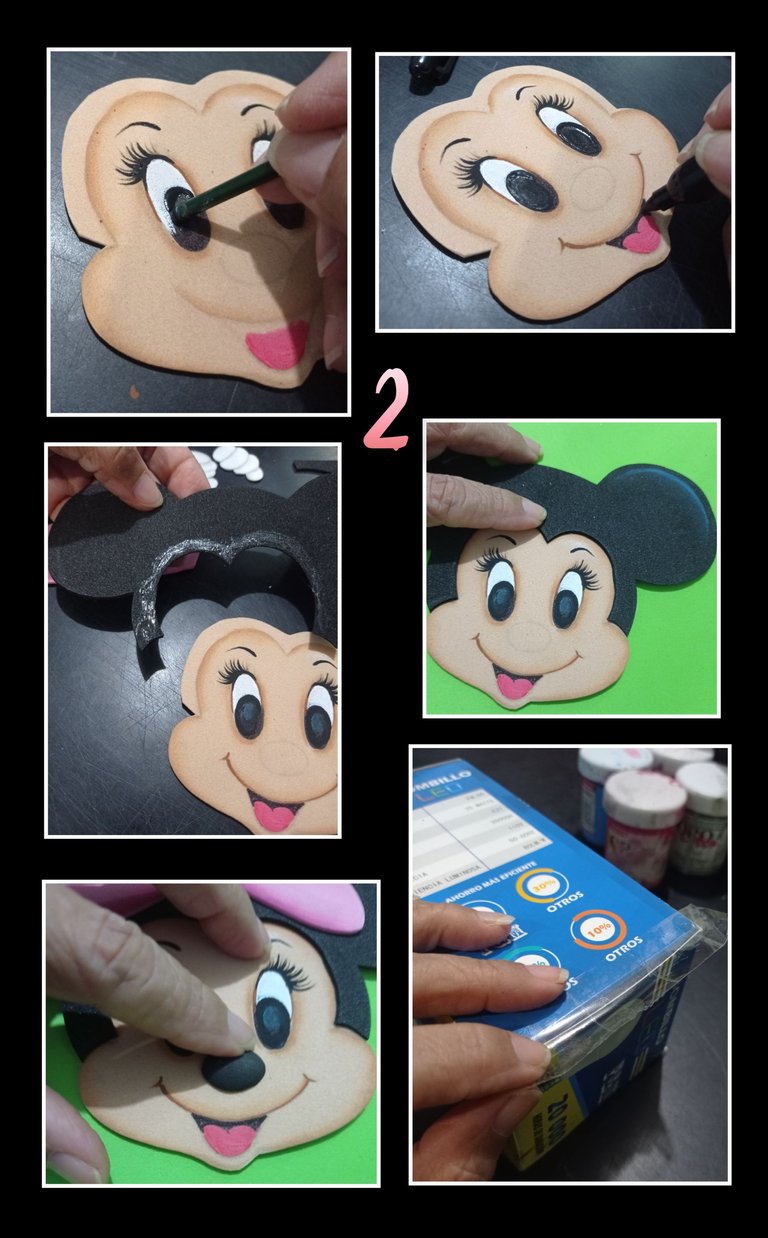
Luego con un marcador punta fina o pincel, pinta las cejas y pestañas.
Después con la parte trasera del pincel repasa las pupilas que habías rellenado con el marcador, pinta boca.
Ahora aplica silicón en la parte trasera de las oreja y pega sobre la carita y termoforma la nariz calentando la plancha y pega y arma toda la figura.
Ahora pega con silicón o type transparente las tapas de la caja.
Paso 3:

- Después de pegar las tapas de la caja, mide en la orilla y marca 1 cm a 3 de los lados y recorta con una cuchilla y deja pegada de un lado como se ve en la foto, luego esa tapa divide por la mitad y dobla, aplica silicón y pega hacia la parte trasera.
- Ahora toma las medidas de la parte superior y recorta exactamente igual en cartulina negra y pega para forrar, aparte recorta una tira de cartulina negra del ancho de la caja y aumenta 1 cm mas de altura para doblar en la parte inferior, dobla y pega la pestaña y por último recorta un rectángulo y pega debajo para tapar las figuras de la caja.
Así quedará forrada la caja.
Paso 4:
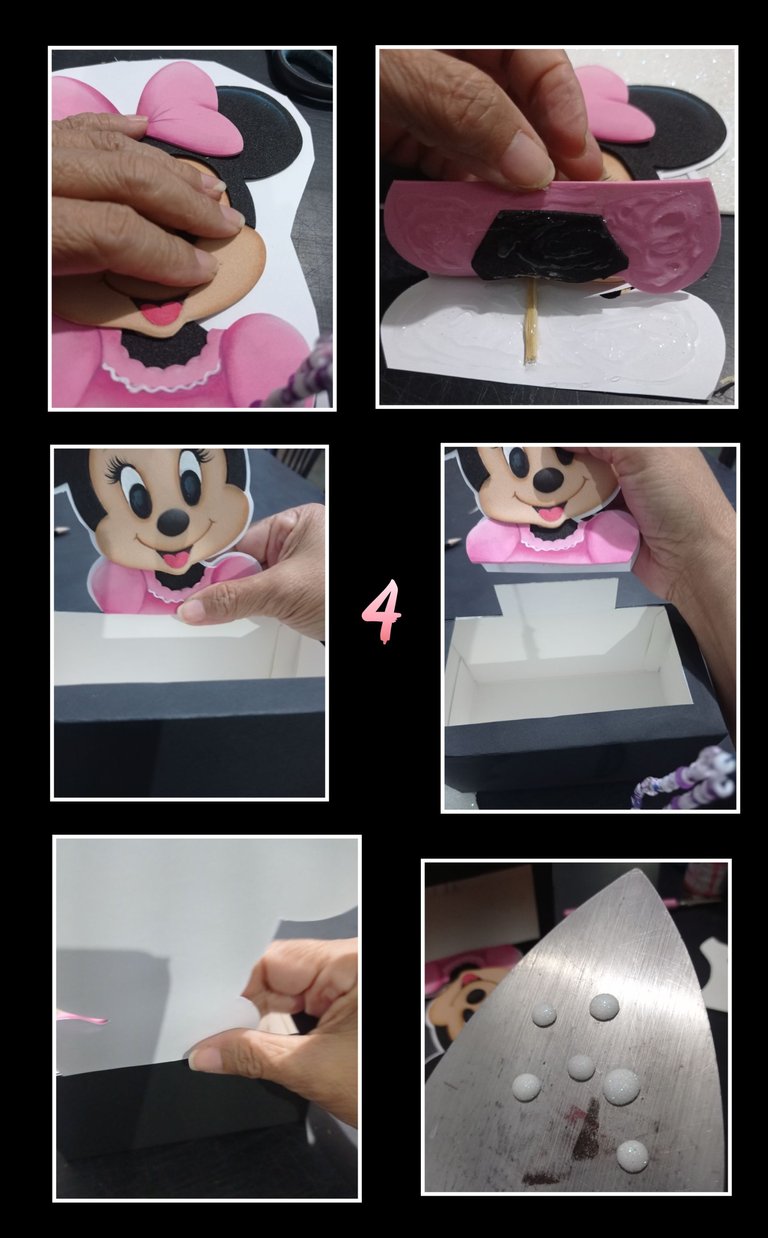
- Ahora aplica silicón en la parte superior de la minnie y pega sobre cartulina blanca y para que quede firme, inserta un palito de madera en el medio, luego aplica silicón en la parte del vestido y pega en la parte que doblamos de la caja y haz presión en la parte trasera hasta que pegue bien.
- Recorta unos círculos en foami escarchado blanco y termoforma con la plancha y pega al lazo.
Paso 5:
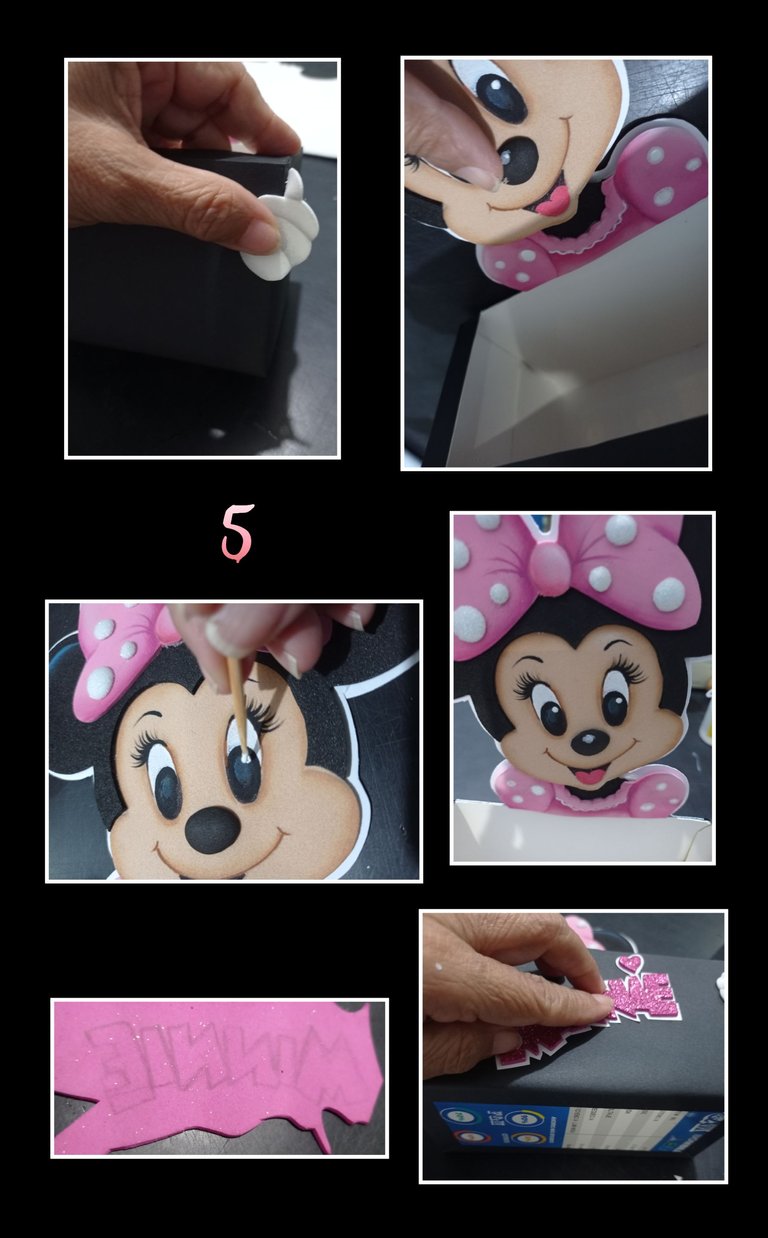
Aplica silicón en las manitos y pega a los lados en la de la caja.
Con un palito de altura, pon un punto de luz en cada ojo y por último marca en foami el nombre y recorta, luego pega sobre cartulina, recorta dejando un pequeño borde y pega en la parte del frente, también la puedes personalizar.
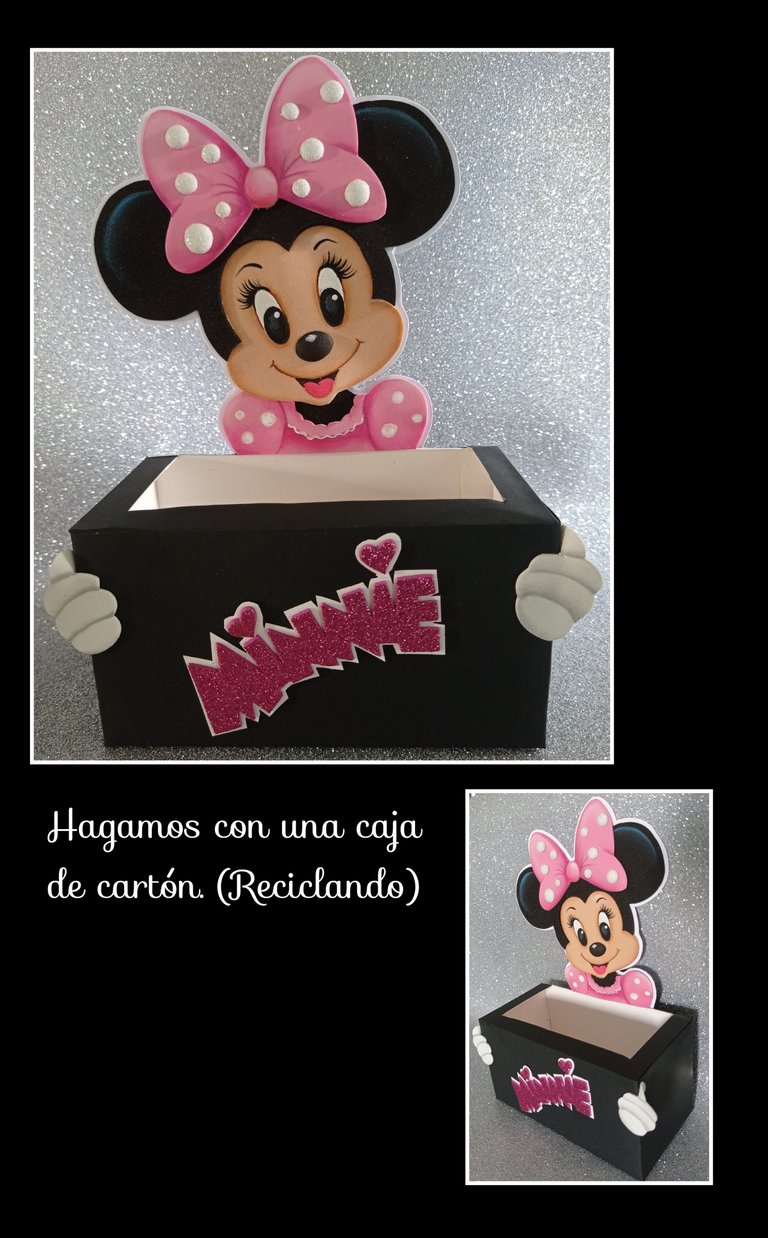
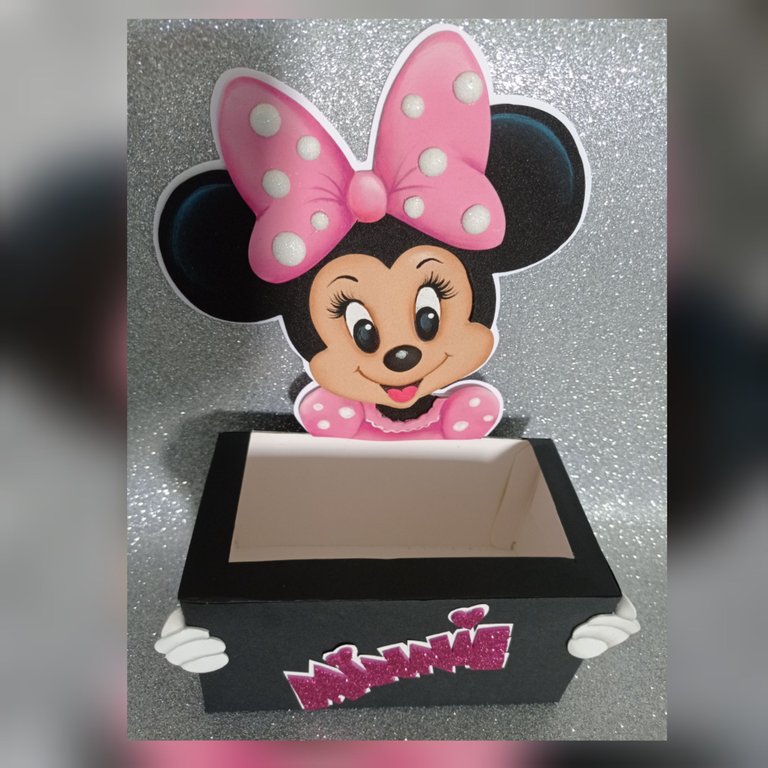
Así quedará lista para usar y decorar.
Fuente:https://www.pinterest.es/pin/476255729360927769/
- Mi publicación esta traducida con DeepL, usando etiquetas HTML y las fotos las capturé con mi Redmi Note 9 y las edité con GridArt.
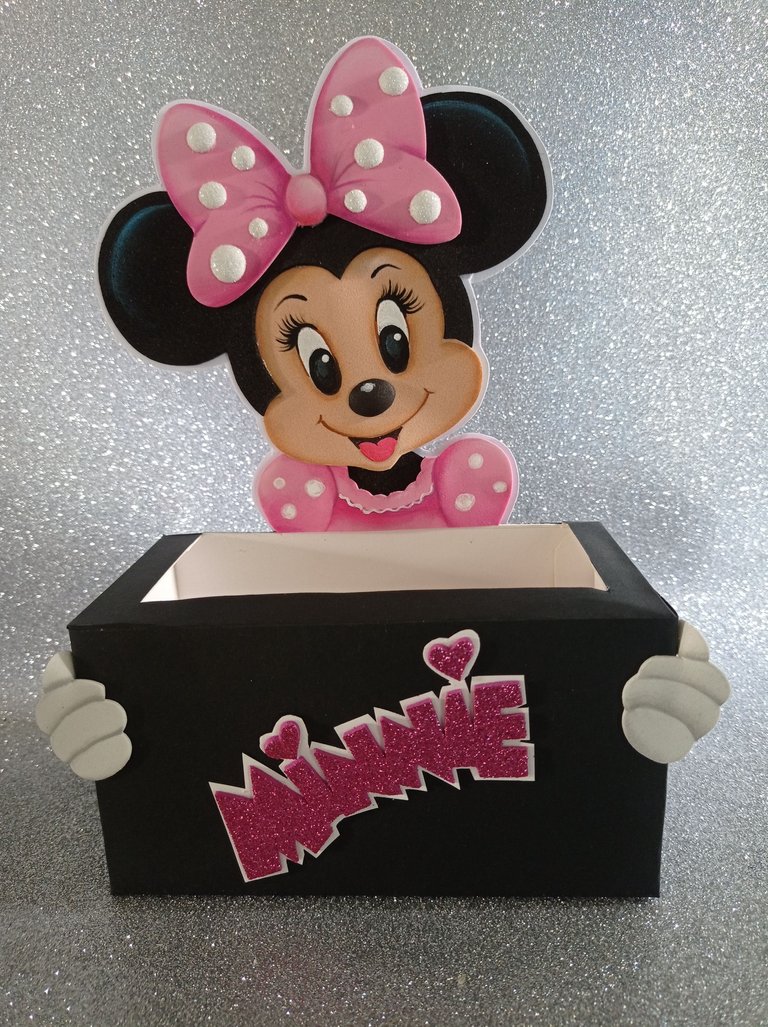
Y ahora quiero compartir unas fotos
Y llegó la hora de despedirme agradeciendo mucho tu compañía y el apoyo que me brindas.
English:
Welcome dear friends who visit my blog.
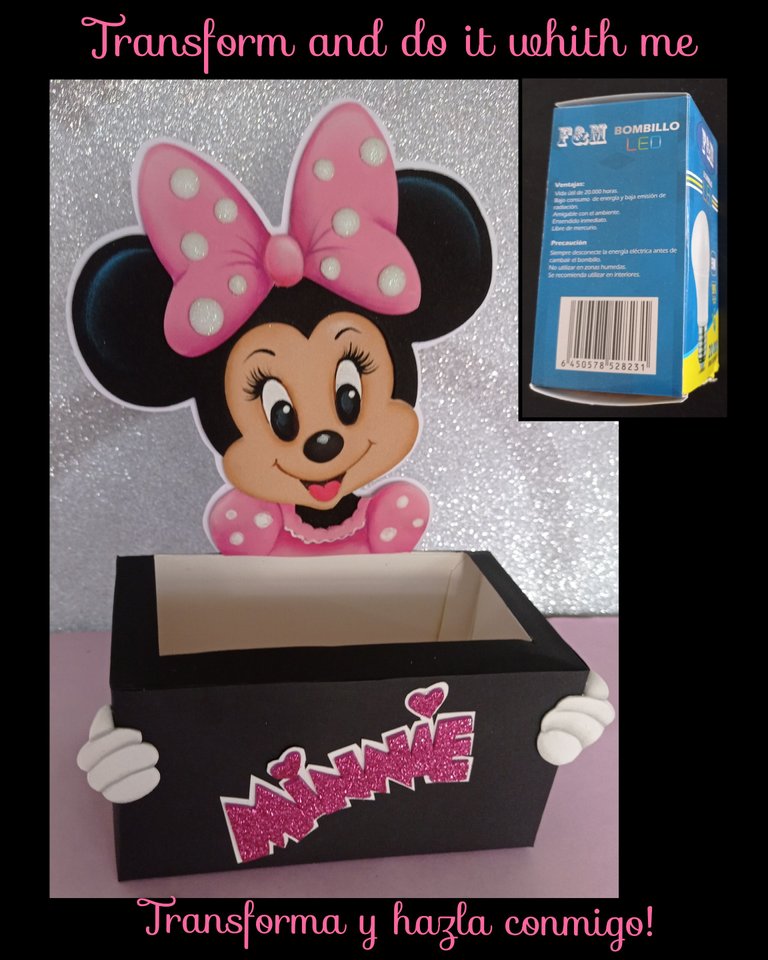
Here I come as always to show you a tutorial that I made with love for you.
So I hope you also like it and I encourage you to make one.
Now I invite you to search:
| Cardboard box | Black and white cardboard |
|---|---|
| Foami matte and frosted colored paper | Scissors |
| Drawing or printing | Soft lead pencil |
| Paints and brushes | Fine point marker |
| Silicone | Wooden stick |
| Electric iron | Type transparent |
Let's get started:
Step 1:
- Outline the drawing with the dark lead pencil, then place it on the black foami and with the rings of the scissors rub with pressure to transfer the drawing.
Recommendation: To transfer to the dark foami, be it black, dark brown, navy blue, etc. use a 4B or 6B pencil because its lead is very soft and when you rub the drawing it sticks to the foami easily as you can see the minnie's ears on the black foami. - Then transfer the other pieces to the foami and cut out.
- Now fill in the eyes with marker and let dry well, then fill in with white paint and let dry.
- To paint the outline of the face, dip the brush in water, remove the excess and take a little bit of paint with the tip of the brush and start going around the edge of all the pieces.
Step 2:
Then with a fine tip marker or brush, paint the eyebrows and eyelashes.
Then with the back of the brush go over the pupils that you had filled with the marker and paint the mouth.
Now apply silicone on the back of the ears and glue on the face and thermoform the nose by heating the iron and glue and assemble the whole figure.
Now glue with silicone or transparent type the lids of the box.
Step 3:
- After gluing the box lids, measure at the edge and mark 1 cm to 3 of the sides and cut with a knife and leave glued on one side as shown in the photo, then divide the lid in half and fold, apply silicone and glue to the back.
- Now take the measurements of the top and cut exactly the same in black cardboard and glue to cover, apart cut a strip of black cardboard the width of the box and increase 1 cm more in height to fold at the bottom, fold and glue the tab and finally cut a rectangle and paste underneath to cover the figures of the box.
This will cover the box.
Step 4:
- Now apply silicone on the top of the minnie and glue on white cardboard and to make it firm, insert a wooden stick in the middle, then apply silicone on the part of the dress and glue on the part that we folded the box and press on the back until it sticks well.
- Cut out some circles in white frosted foami and thermoform with the iron and glue to the bow.
Step 5:
Apply silicone on the little hands and glue on the sides of the box.
With a height stick, put a point of light in each eye and finally mark on foami the name and cut out, then paste on cardboard, cut out leaving a small border and paste on the front, you can also customize it.
This way it will be ready to use and decorate.
Fuente:https://www.pinterest.es/pin/476255729360927769/
- My publication is translated with DeepL, using HTML tags and the photos were captured with my Redmi Note 9 and edited with GridArt.
And now I want to share some pictures
And now it's time to say goodbye, thanking you very much for your company and the support you give me.
Congratulations @elmundodebetty! You have completed the following achievement on the Hive blockchain And have been rewarded with New badge(s)
Your next target is to reach 1500 replies.
You can view your badges on your board and compare yourself to others in the Ranking
If you no longer want to receive notifications, reply to this comment with the word
STOPTo support your work, I also upvoted your post!
Hola @elmundodebetty, que hermoso trabajo, es genial como transformaste una sencilla caja en un lindo y útil objeto, gracias por compartir.
Saludos!
Hola amiga, disculpa lo tarde, pero agradecida de tu visita y comentario.
Un placer para mi compartir con ustedes.
Igual🌹
Amiga pero que preciosura, esa Minnie te quedó super cuchi y hermosa 🥰 Esta idea es perfecta para usar de cotillón o como algún detalle para fiestas temáticas de Minnie, que buen trabajo 😊
Hola amiga, que lindo mirar tus palabras, me alegra que te haya gustado.
Si quda muy bonita para cotillón.
Gracias amiga.
Que hermosura, se ve muy perfecto cada detalle💕✨
Hola amiga, muchas gracias, que bueno que te gustó.
Saludos.
Está preciosa y muy tierna!
Gracias amiga, me contenta que te haya gustado.
Saludos.
¡¡¡Buen trabajo!!! Gracias por publicar tu excelente contenido en Hive Diy, el arte del reciclaje es hermoso, se pueden hacer miles de cosas asombrosas con estos materiales, lo que hiciste con la caja de bombillos fue muy tierno
Tu comunidad artesana ahora es testigo

Y reciclar siempre es bueno!Muchas gracias @hivebuzz por tus palabras y es un placer para mi compartir con ustedes y demás está agradecerles el apoyo que siempre me han brindado.