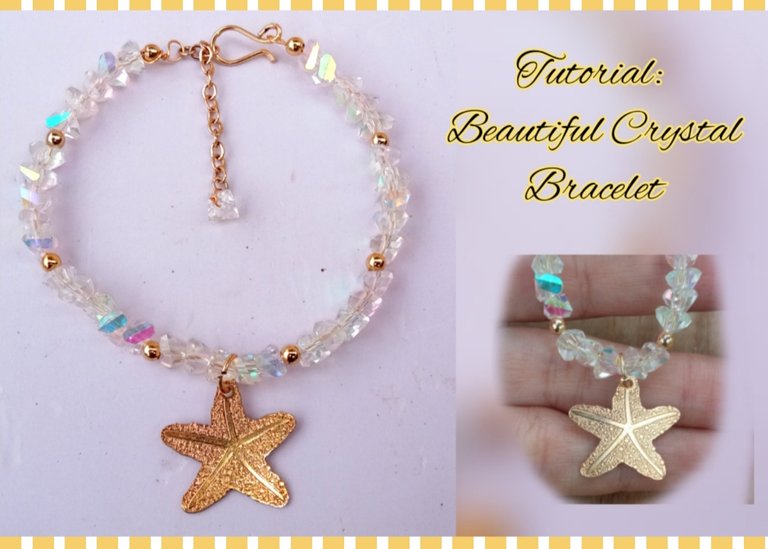
feliz y bendecido día tengan todos ustedes, es un gran placer para mí Como cada semana pasar por esto hermosa y creativa comunidad para compartir con todos ustedes una de mis más recientes creaciones, en esta oportunidad les traigo un hermoso tutorial para la elaboración de una muy sencilla pero hermosa pulsera realizada con cristales.
Happy and blessed day to all of you, it is a great pleasure for me. Like every week I go through this beautiful and creative community to share with all of you one of my most recent creations, on this occasion I bring you a beautiful tutorial for making of a very simple but beautiful bracelet made with crystals.
Les cuento que hace un par de días cuando realizaba algunas compras de pedrería miré estos hermosos y diferentes cristales con forma triangular que más bien parecen pequeños corazones los cuales me encantaron además de ser tornasol lo que los hace aún más llamativo y pues no pude evitar comprar una tira de estas hermosas piedras para elaborar un hermoso diseño con ellas.
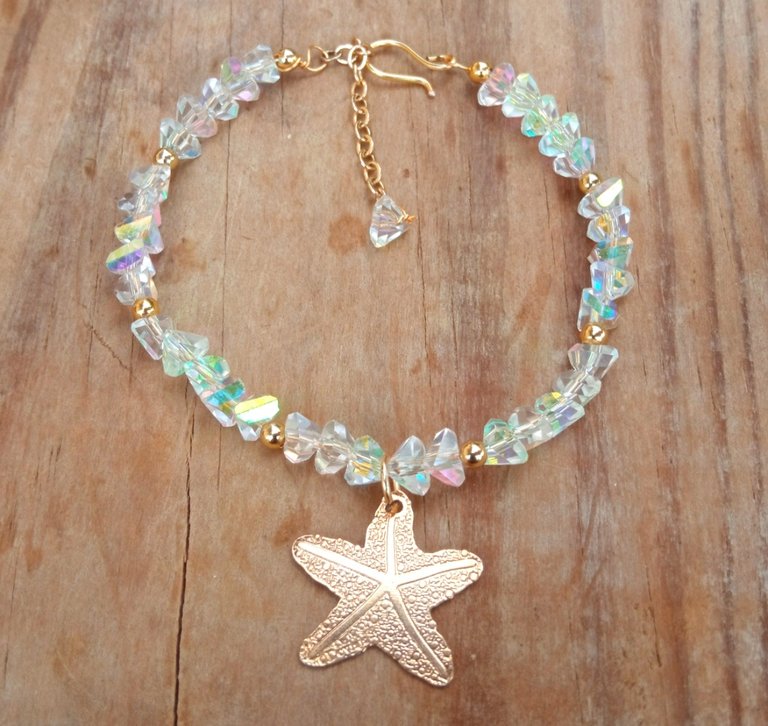
Este hermoso diseño que les comparto el día de hoy es de Gran elegancia y delicadeza ideal para lucir en ocasiones especiales, los invito a acompañarme en este tutorial y paso a paso elaboraremos este hermoso diseño.
I tell you that a couple of days ago when I was making some rhinestone purchases I looked at these beautiful and different triangular-shaped crystals that look more like small hearts which I loved in addition to being iridescent which makes them even more striking and well I couldn't help but buy a strip of these beautiful stones to make a beautiful design with them. This beautiful design that I share with you today is of great elegance and delicacy, ideal to show off on special occasions.
I invite you to join me in this tutorial and step by step we will create this beautiful design.
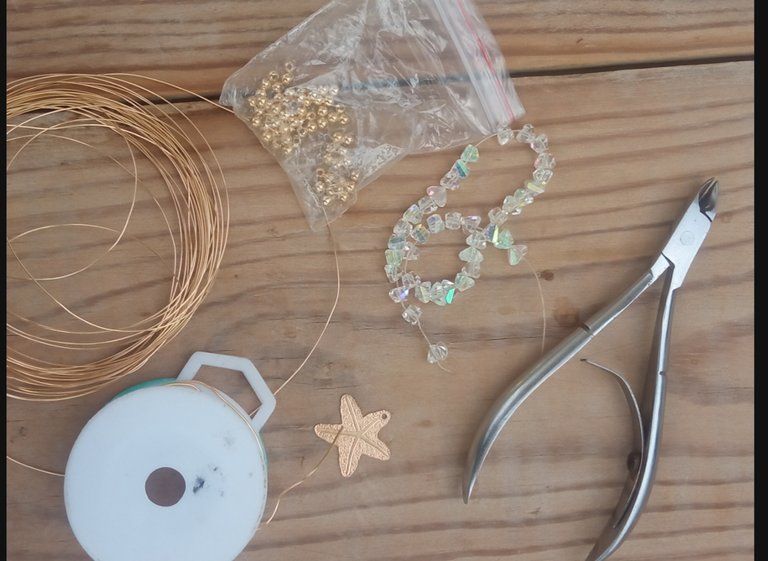
Alambre de bisutería calibre 20.
Alambre de bisutería calibre 26
Cristales triangulares tornasol.
Dije de Estrella.
balín dorado.
pinza de bisutería.
un pedacito de cadena.
- 20 gauge jewelry wire.
- 26 gauge jewelry wire
- Triangular iridescent crystals.
- Star pendant.
- golden pellet.
- jewelry clamp.
- a little piece of chain.
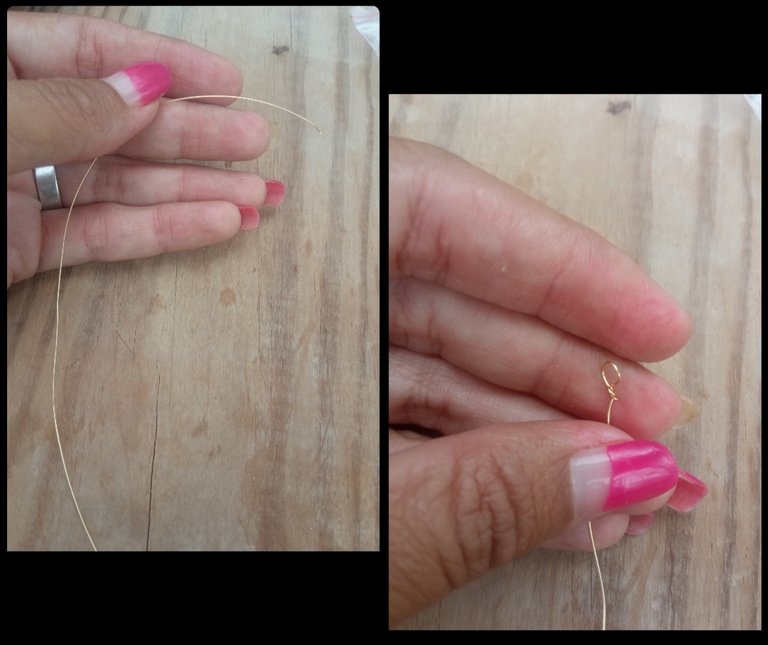
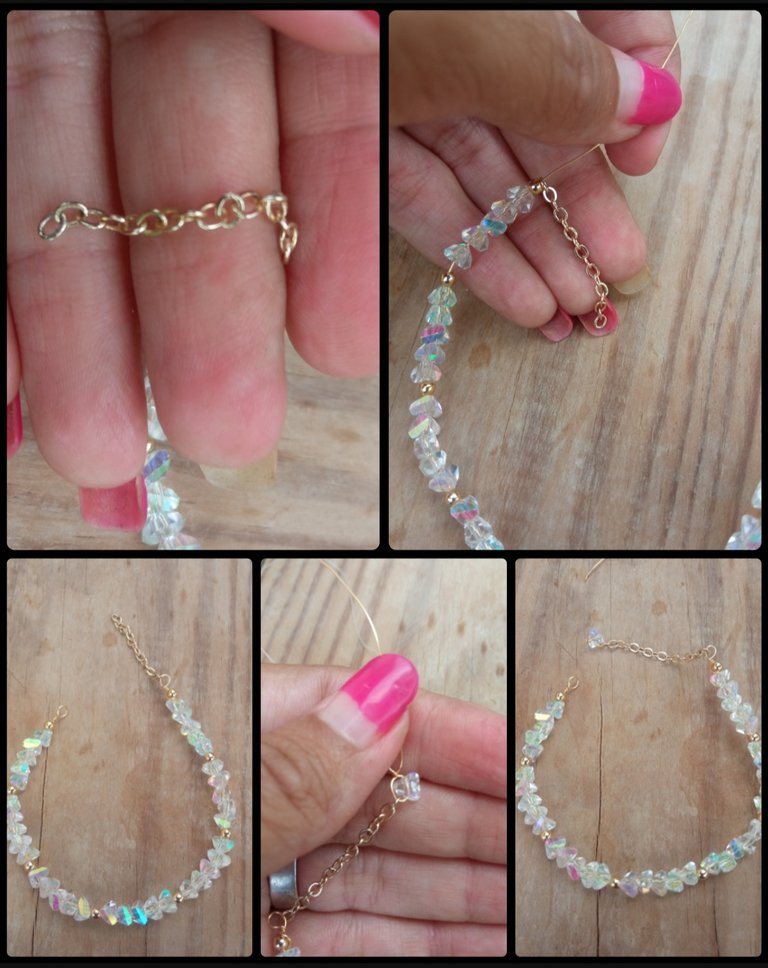
⭐ Paso 1: para iniciar la elaboración de este hermoso diseño tomaremos un pedazo de alambre de bisutería calibre 26 de aproximadamente 15 cm y con ayuda de la punta de nuestra pinza de bisutería o en su defecto con un pequeño palillo elaboraremos una pequeña forma circular en la punta de alambre tal cual pueden observarlo a continuación.
⭐ Step 1: to start making this beautiful design we will take a piece of 26 gauge jewelry wire approximately 15 cm and with the help of the tip of our jewelry tweezers or failing that with a small toothpick we will make a small circular shape at the tip of the wire as you can see below.
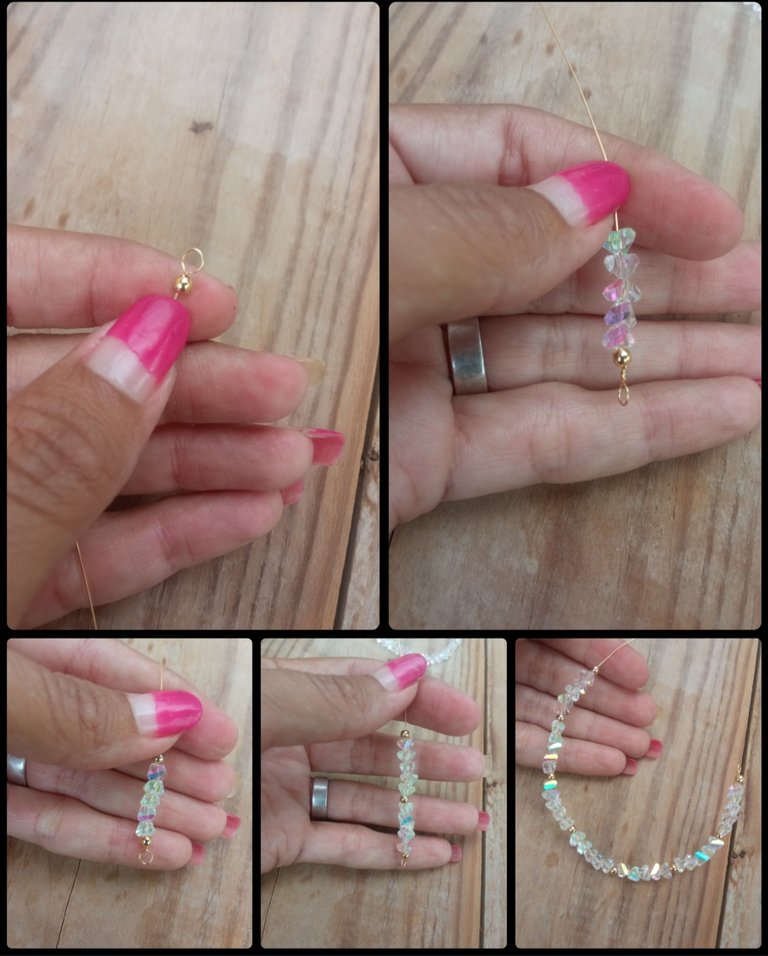
⭐ Paso 2: seguidamente introduciremos un balín dorado y cinco hermosos cristales tornasol luego otro balín y cinco cristales más y así sucesivamente hasta lograr el tamaño deseado secando con un balín dorado.
⭐ Step 2: Next we will introduce a golden ball and five beautiful iridescent crystals, then another ball and five more crystals and so on until we achieve the desired size, drying with a gold ball.
⭐ Paso 3: para cerrar la forma de la pulsera tenemos que elaborar una argolla circular de la misma forma que la que realizamos a principio pero antes de ello tomaremos un pedacito de cadena de bisutería de aproximadamente 6 cm la introduciremos por el alambre de bisutería donde estamos elaborando la pulsera y ahora realizaremos la argolla de manera que nos quede el pedacito de cadena integrado a esta pequeña argolla y cortaremos el exceso del alambre de bisutería. Siempre procuro colocarle un pedacito de cadena pues puede hacer que la pulsera sea un poco pequeña y esta nos puede servir para ajustarla, para realizarle un detalle de elegancia la pulsera tomé un pedazo de alambre de bisutería calibre 26 y al final de la pedacito de cadena la introduce por la última argollita de la cadena sujeté el alambre en ella e introduje una pequeña piedra de cristal y luego doble el alambre hacia el inicio de la piedra y lo volví a sujetar cortando el exceso del mismo.
⭐ Step 3: to close the shape of the bracelet we have to make a circular ring in the same way as the one we made at the beginning but before doing so we will take a small piece of jewelry chain of approximately 6 cm and insert it through the wire of jewelry where we are making the bracelet and now we will make the ring so that we have the little piece of chain integrated into this small ring and we will cut the excess of the jewelry wire.
I always try to add a small piece of chain because it can make the bracelet a little small and this can be used to adjust it. To make the bracelet a detail of elegance I took a piece of 26 gauge jewelry wire and at the end of the small piece of chain I inserted it through the last ring of the chain, I held the wire in it and introduced a small glass stone and then I folded the wire towards the beginning of the stone and I held it again, cutting off the excess.
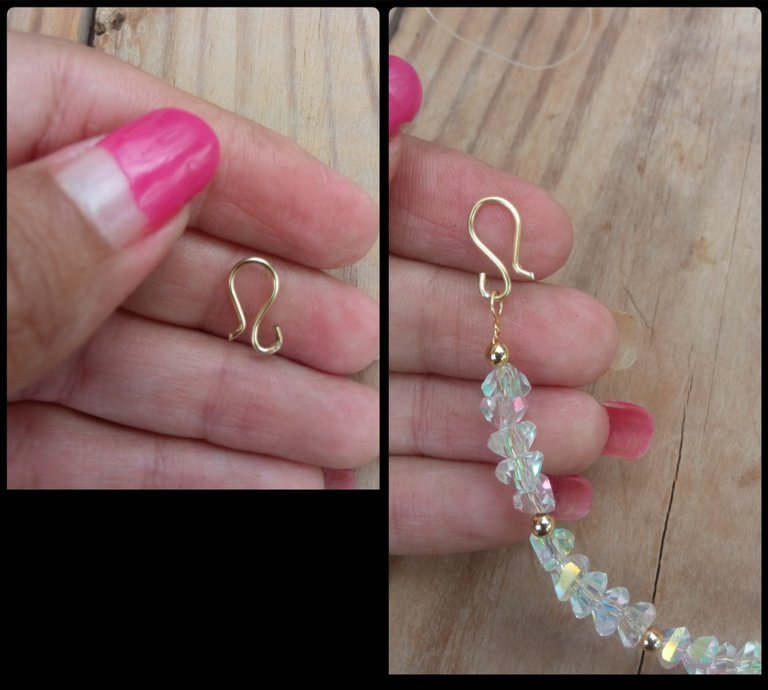
⭐ Paso 4: para el otro extremo de la pulsera tomaremos un pedazo de alambre bistería calibre 20 y elaboraremos una pieza en forma de gancho la cual sujetaremos al principio de nuestra pulsera en la argollita que dejamos allí al inicio.
⭐ Step 4: for the other end of the bracelet we will take a piece of 20 gauge bisteria wire and make a hook-shaped piece which we will attach to the beginning of our bracelet in the little ring that we left there at the beginning.
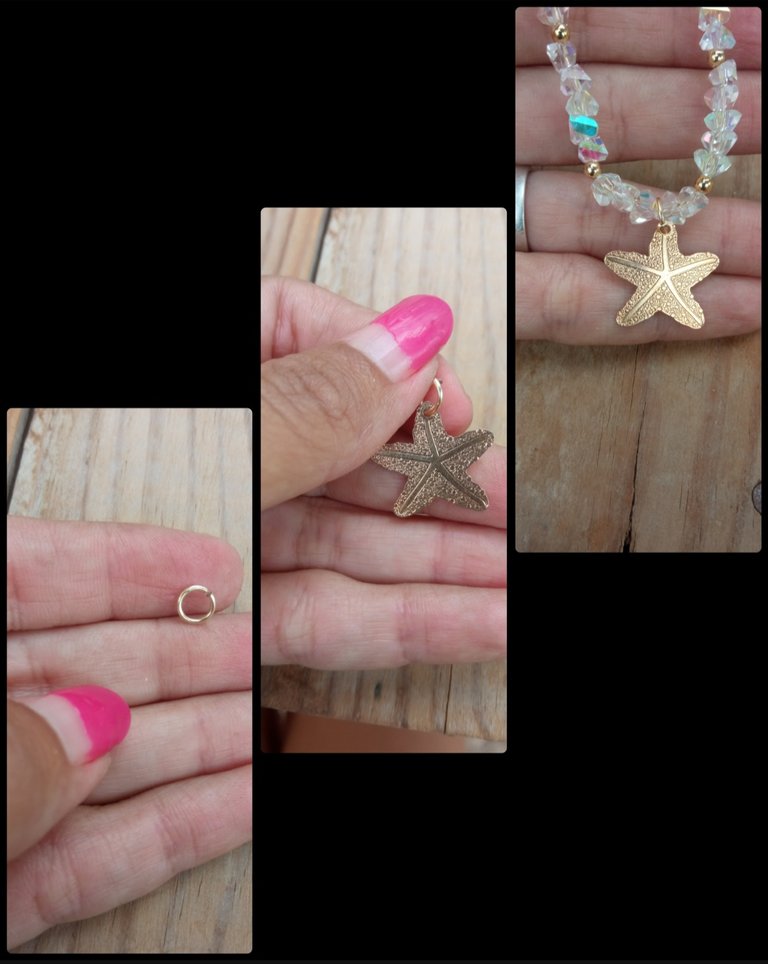
⭐ Paso 5: para finalizar tomaremos un pedacito de alambre bisutería calibre 20 y elaboraremos una pequeñita forma de argolla circular en la cual colocaremos el dije dorado en forma de estrella de mar y luego lo llevaremos y lo colocaremos en la mitad o parte central de la pulsera se estaremos la argolla para que esta no pueda moverse de este lugar y así culminamos nuestra hermosa pulsera.
⭐ Step 5: to finish we will take a small piece of 20 gauge jewelry wire and make a small circular ring shape in which we will place the golden pendant in the shape of a starfish and then we will take it and place it in the middle or part In the center of the bracelet we will place the ring so that it cannot move from this place and thus we complete our beautiful bracelet.
Todas las Fotos son de mi autoría y fueron tomadas con mi Celular Redmi 9.And so in an easy and very simple way we can make a very beautiful, delicate and elegant bracelet. My dear friends, this has been my creation today for all of you, which I hope is to your total liking and this simple tutorial can be useful and advantage.
I say goodbye to this opportunity, wishing you an excellent weekend.
All Photos are my authorship and were taken with my Redmi 9 Cellphone
Posted Using InLeo Alpha
Te quedo muy hermosa y elegante
Gracias amiga ☺️
Es una linda prenda la que nos compartes. Me gusta mucho el dije.
!discovery 40
Muchas gracias, A mí también me encantó el dije, le da un toque muy lindo.
This post was shared and voted inside the discord by the curators team of discovery-it
Join our Community and follow our Curation Trail
Discovery-it is also a Witness, vote for us here
Delegate to us for passive income. Check our 80% fee-back Program
Hermoso diseño y toda la publicación...como siempre
Gracias amiga ☺️, me alegra mucho que te haya gustado. Es la primera vez que publico por inleo y tenía miedo que no me quedara bien.
Hola amiga muy bonita tu creación
Muchas gracias amigo.
Saludos.
It is shining, elegant, and beautiful. It shows your creativity and skills. Well done!
Thank you very much, I'm glad you liked it, grateful for your nice comment.
Congratulations @emmaris! You have completed the following achievement on the Hive blockchain And have been rewarded with New badge(s)
You can view your badges on your board and compare yourself to others in the Ranking
If you no longer want to receive notifications, reply to this comment with the word
STOPCheck out our last posts:
Está hermosa esta pulsera , se ve muy delicada .
Amé el dije de estrella de mar 🌟
wow this look so elegant. I love beat color
Hola está muy linda la pulsera muchas gracias por compartir este proyecto en la comunidad para que todos aprendan
Que bueno saber que te gustó, gracias por comentar.
Hermosa!! Me encanta!
¡Felicitaciones!
1. Invierte en el PROYECTO ENTROPÍA y recibe ganancias semanalmente. Entra aquí para más información.
3. Suscríbete a nuestra COMUNIDADEntra aquí para más información sobre nuestro trail., apoya al trail de @Entropia y así podrás ganar recompensas de curación de forma automática.
4. Creación de cuentas nuevas de Hive aquí.
5. Visita nuestro canal de Youtube.
Atentamente
El equipo de curación del PROYECTO ENTROPÍA