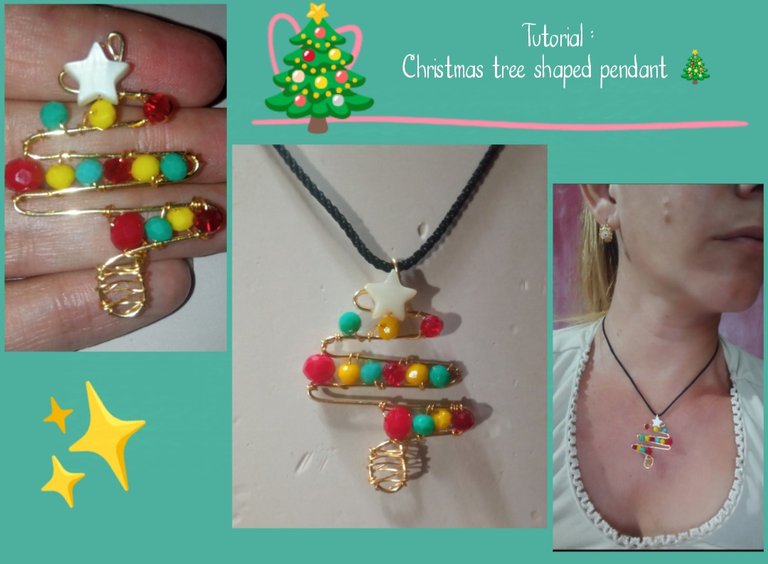
Greetings my dear and appreciated friends, now that the most beautiful time of the entire year is approaching, which we always receive with great joy and enthusiasm, above all for the joy of the little ones, this is a time of family unity in which we usually tradition to decorate the home with lights, flowers and Christmas trees, creating a magical atmosphere.
That's why today I wanted to adapt my creation to this Christmas season by making a very pretty Christmas tree-shaped pendant to embellish our necklaces and look very beautiful at this time.</center
And for this I used the wire technique, decorating it with beautiful rhinestones, resulting in a beautiful Christmas pendant which I want to invite you to accompany me in making it in this simple step by step so that you can make a beautiful Christmas tree out of wire from home.
- alambre de bisutería calibre 20.
- alambre de bisutería calibre 26.
- estrellita de nacar.
- cristales rojos, verde y amarillo.
- pinzas de bisutería
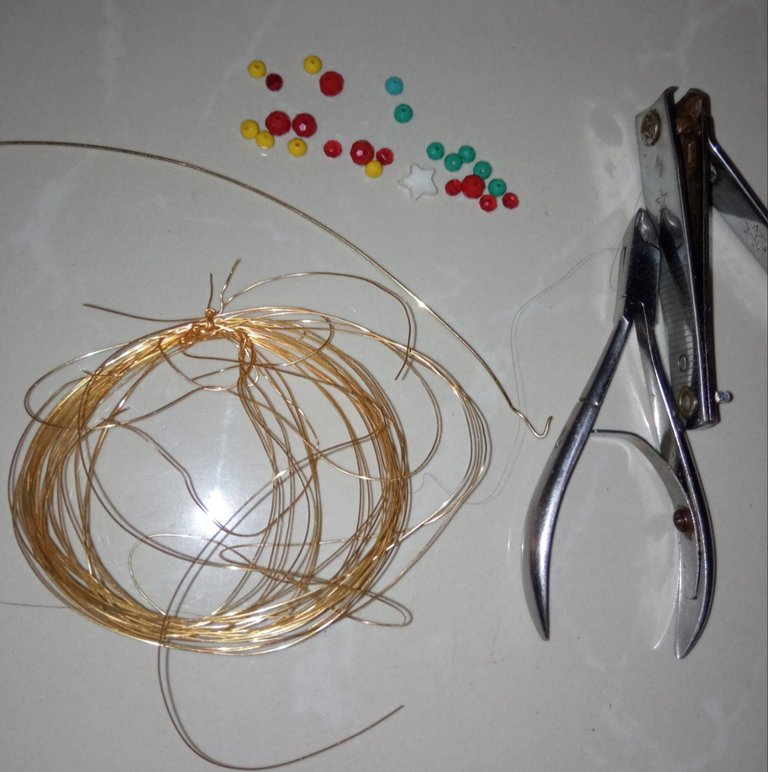
⭐Materials
- 20 gauge jewelry wire.
- 26 gauge jewelry wire.
- mother of pearl star.
- red, green and yellow crystals.
- jewelry tweezers
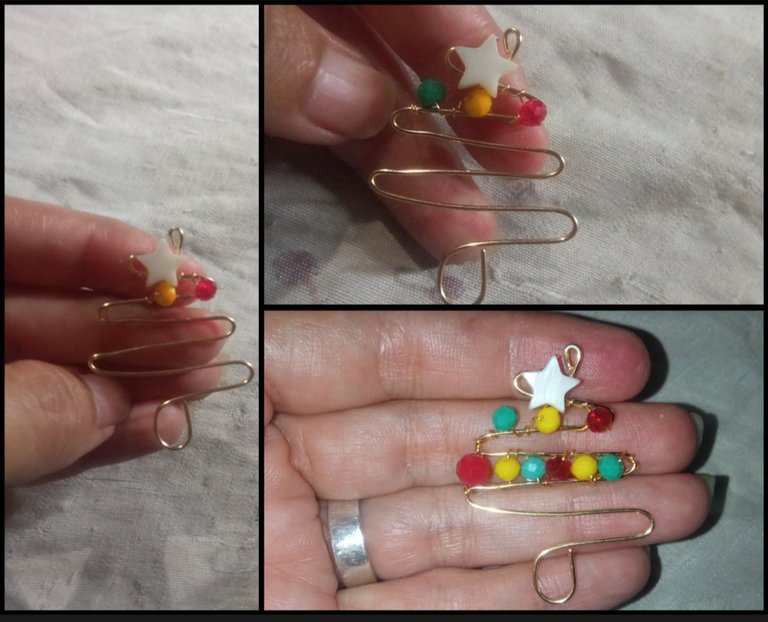
🌟Paso 1: para iniciar la elaboración de este sencillo diseño lo primero que debemos hacer es tomar un pedazo de alambre de bisutería calibre 20 el cual nos servirá para hacer la base principal de nuestro colgante podemos utilizar un aproximado de 25 cm.
Primeramente tomaremos la pinza de bisutería y realizaremos un pequeño doblez en uno de los extremos de este alambre y seguidamente debajo de este doblez doblaremos el alambre hacia uno de los lados y apoyándonos en un objeto delgado volveremos a doblar el alambre hacia el extremo contrario y así realizaremos varios dobles en forma de Zig zag hasta realizar las puntas que consideremos necesarias y para culminar sin terminar la última línea llegaremos hasta la mitad y doblaremos hacia abajo elaborando una pequeña forma cuadrada con el mismo alambre como pueden observar a continuación y así tendremos la base principal de nuestro colgante en forma de árbol.
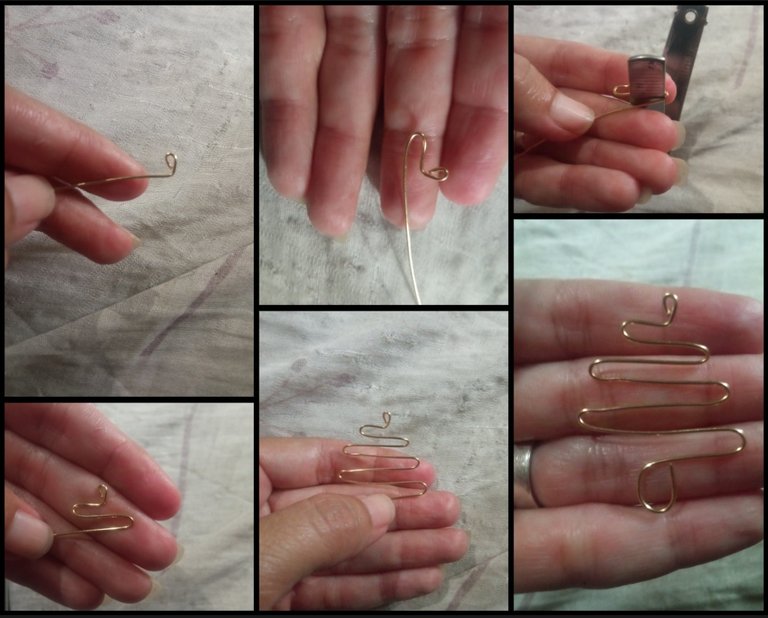
🌟Step 1: to start making this simple design, the first thing we must do is take a piece of 20 gauge jewelry wire which will help us make the main base of our pendant, we can use an approximate length of 25 cm.
First we will take the jewelry pliers and make a small bend in one of the ends of this wire and then under this bend we will bend the wire towards one of the sides and leaning on a thin object we will bend the wire again towards the opposite end and so on. We will make several doubles in a Zig zag shape until we make the points that we consider necessary and to finish without finishing the last line we will reach halfway and fold downwards, creating a small square shape with the same wire as you can. look below and thus we will have the main base of our tree-shaped pendant.
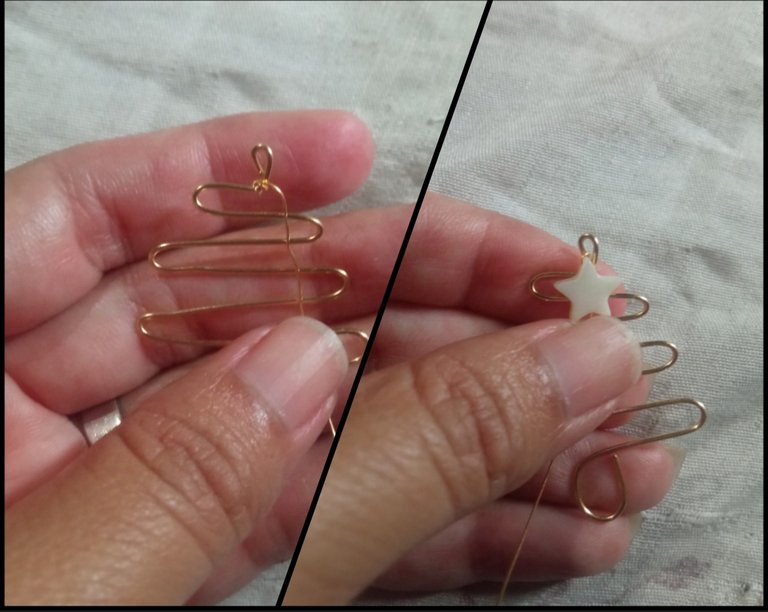
🌟Step 2: to continue we will take a 30 cm piece of 26 gauge jewelry wire and we will roll it at the top under the fold of the base and then through the 26 wire we will introduce the small star which we will take until it joins with the base and With wire 26 we will attach another turn of wire 26 to the main base to hold the star on top of it.
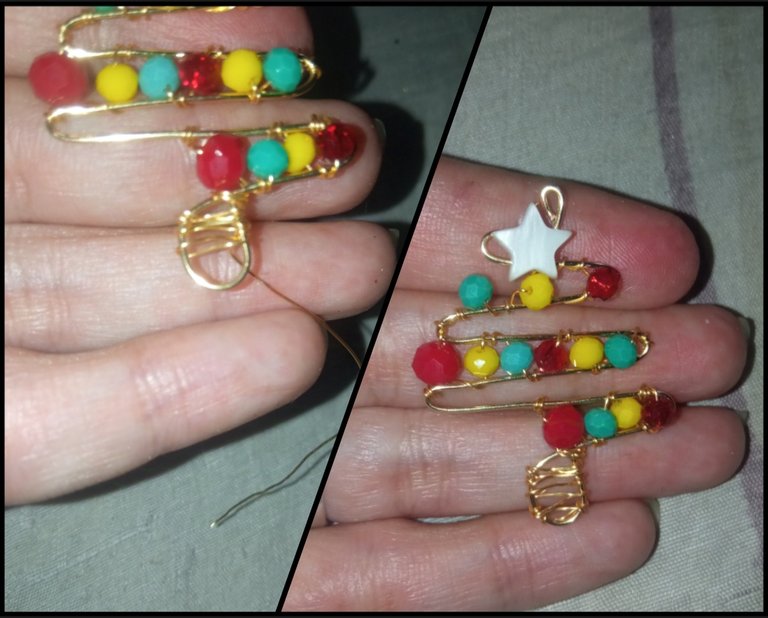
🌟Step 3: then with the same strand of wire 26 we will begin to decorate by introducing the crystals in the order you want, interspersing them so that they look like beautiful Christmas lights. For this we will introduce a crystal and hold it with the wire at the base between the doubles of the Zig zag of our beautiful Christmas tree little by little we will introduce crystals, leaving a fold between them if it is to our liking. We will decorate a double yes and a fold no so that the decoration can be better perceived until we reach the last fold where we will reach the middle of it as you can see below.
🌟Step 4: Finally, in order not to leave the foot or base of our tree undecorated, we will take a piece of 26 gauge wire and weave it from one side to the other until we cover our base of the tree as you can see below and thus we will complete our beautiful tree Christmas Now we just have to insert the chain or leatherette that we have selected to hang this beautiful Christmas tree charm through the upper double of our pendant.
Colgante con forma de Árbol de navidad 🎄
Christmas Tree-shaped pendant 🎄


And so in this creative and very easy way we will achieve the creation of a beautiful pendant for this festive occasion which is a creative and wonderful idea that we can make to make a beautiful present for a special person, in addition we can also adapt it to our taste. if we want to place any other decoration that we consider relevant.
My dear and appreciated creative friends, I hope that this very simple preparation has been to the taste and satisfaction of all of you. I will be eager to receive your comments and suggestions. I say goodbye until a new opportunity. greetings and blessings
The content in this publication is completely original and all the photos are my own and were taken with my Redmi 9 cell phone.
Posted Using InLeo Alpha
Impressive work friend, well done and thanks for sharing.
Thank you very much for your comment, I'm glad you liked it.
Amiga que collar tan bonito, un arte me encantó. Bendiciones 🤗.
Muchas gracias amiga, me alegra que te haya gustado.
It looks great, it shows the talent you have. Very good step by step.
Please don't forget to support the work of other users, so we all grow as a community.
Thank you very much. of course, I will take your suggestion into account ☺️
Wuaooo! Qué hermoso! Me encantó
Que bueno, me alegra que te haya gustado 😊
Que belleza, está perfecto para estas épocas😍😍
Gracias amiga ☺️
Wao que hermosos colores y que elegante diseño 😍 como colgante luce realmente muy bien y facil de combinar con cualquier tipo de ropa ❤️
Me alegra que te haya gustado amiga, muchas gracias por pasar.
Que bonito te quedó el dije, me gustó. Saludos @emmaris😍