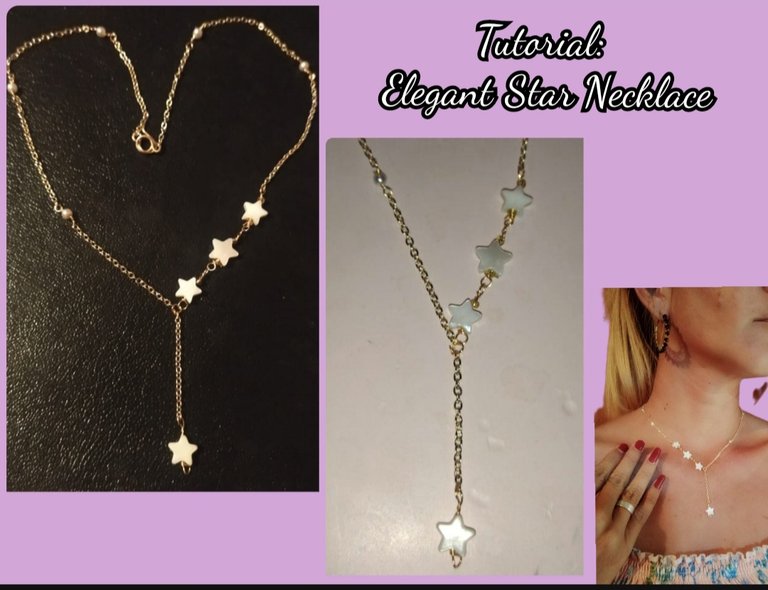
feliz y bendecido día tengan todos ustedes, espero todos estén pasando una excelente semana, yo por mi parte puedo comentarles que he estado un poco ocupada pues ya estamos en el cierre del año escolar y como soy docente estoy en todos los preparativos, sin embargo el día de hoy quise pasar por esta hermosa comunidad para compartir con ustedes un muy hermoso tutorial para la elaboración de un muy elegante collar en donde utilizamos la técnica del alambrismo y lo decoramos con hermosas estrellas de nácar. Este es un diseño muy elegante el cual podemos usar para ocasiones especiales y lucir muy hermosas.
Have a happy and blessed day all of you, I hope you are all having a great week, I for one can tell you that I have been a little busy since we are already at the end of the school year and since I am a teacher I am in all the preparations, However, today I wanted to stop by this beautiful community to share with you a very beautiful tutorial for making a very elegant necklace where we use the wire technique and decorate it with beautiful mother-of-pearl stars.
This is a very elegant design which we can use for special occasions and look very beautiful.
As always, this is a very easy design to make and also super economical because with very few materials we can obtain a very elegant result. Here I invite you to accompany me in this step by step so that together we can create this beautiful design that I bring you today and that I hope you like completely.
I also wanted to make it so that we can combine it with any outfit.
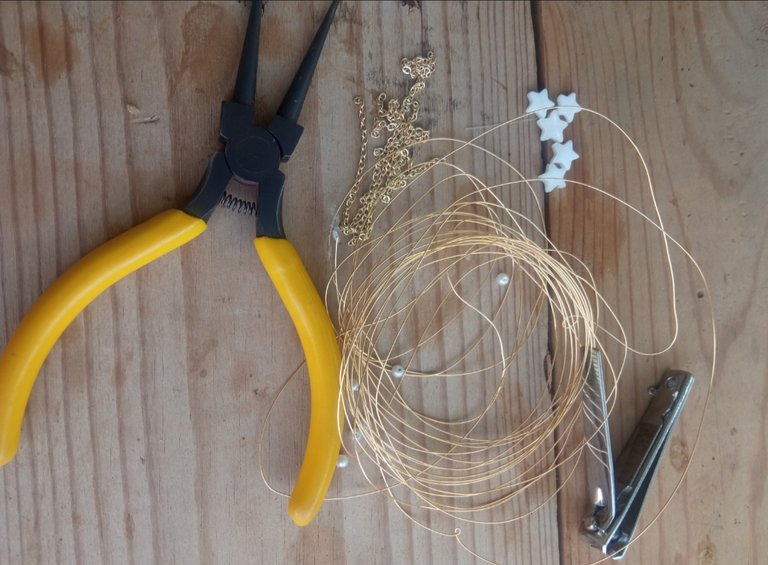
alambre de bisutería calibre 20.
alambre de bisutería calibre 26.
un metro de cadenita de bisutería.
estrellitas de nácar.
piedras perladas pequeñas.
mostacillas pequeña amarillas
pinza de bisutería.
What we need
- 20 gauge jewelry wire.
- 26 gauge jewelry wire.
- one meter of jewelry chain.
- mother-of-pearl stars.
- small pearl stones.
- small yellow beads
- jewelry clamp.
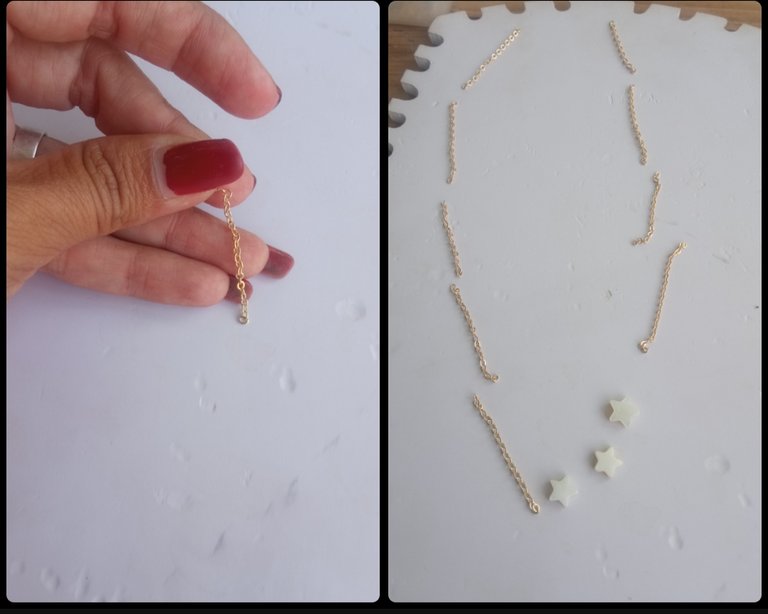
⭐ Paso 1: para iniciar la elaboración de este hermoso diseño lo primero que debemos realizar es tomar el metro de cadena que podemos encontrar en cualquier tienda de bisutería, esta podemos conseguirla por rollo pero es un poco más costosa o también podemos adquirirla por metros y comprar solo lo que necesitamos para el diseño. Tomaremos el metro de cadena y con ayuda de una pinza para cortar o simplemente un corta uñas cortaremos pedacitos de cadena de un mismo tamaño yo decidí cortar pedacitos de 5 cm cada uno. En total corte 8 piezas.
⭐ Step 1: to start making this beautiful design, the first thing we must do is take the meter of chain that we can find in any jewelry store, we can get it by the roll but it is a little more expensive or we can also purchase it by meters and buy only what we need for the design.
We will take the meter of chain and with the help of a cutting pliers or simply a nail clipper we will cut pieces of chain of the same size. I decided to cut pieces of 5 cm each.
In total I cut 8 pieces.
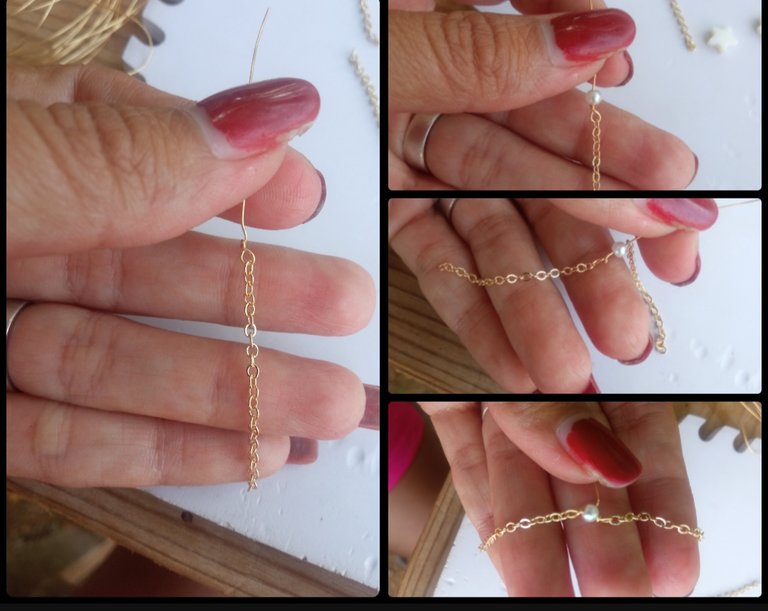
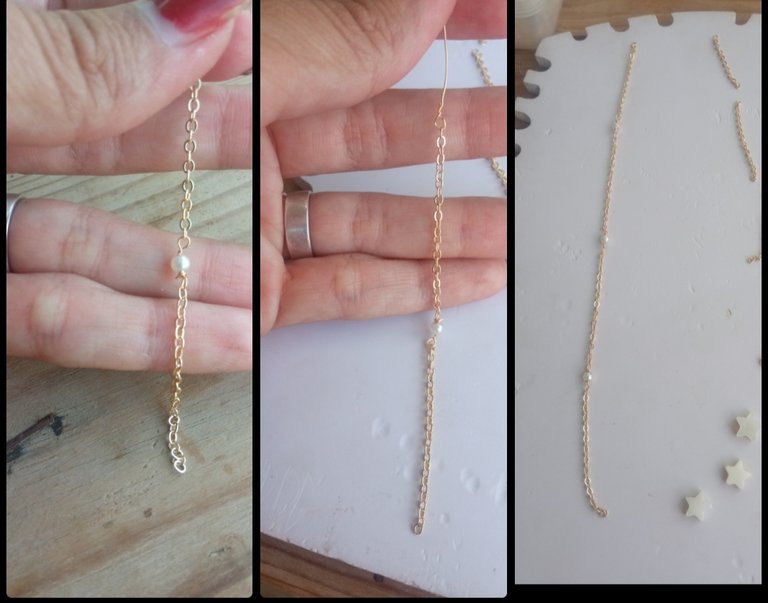
⭐ Paso 2: ahora comenzaremos a unir cada una de las piezas para ello tomaremos el alambre de bisutería calibre 26, es que lo introduciremos por la última argollita de la primera pieza de cadena y con la punta de la pinza de bisutería elaboraremos una pequeña argollita en el alambre como pueden observar en las fotografías a continuación seguidamente por el alambre de bisutería introduciremos una piedra cerrada pequeña seguidamente introduciremos la segunda pieza de cadena y realizaremos una nueva argolla que unirá estas piezas. Y así de esta manera iremos uniendo las piezas de la cadena uniremos primeramente cuatro piezas de cadena las cuales conformarán un lado de nuestro collar.
⭐ Step 2: now we will begin to join each of the pieces to do this we will take the 26 gauge jewelry wire, we will insert it through the last ring of the first piece of chain and with the tip of the jewelry pliers we will make a small ring on the wire as you can see in the photographs below, then with the jewelry wire we will insert a small closed stone, then we will insert the second piece of chain and we will make a new ring that will join these pieces.
And so in this way we will join the pieces of the chain. We will first join four pieces of chain which will make up one side of our necklace.
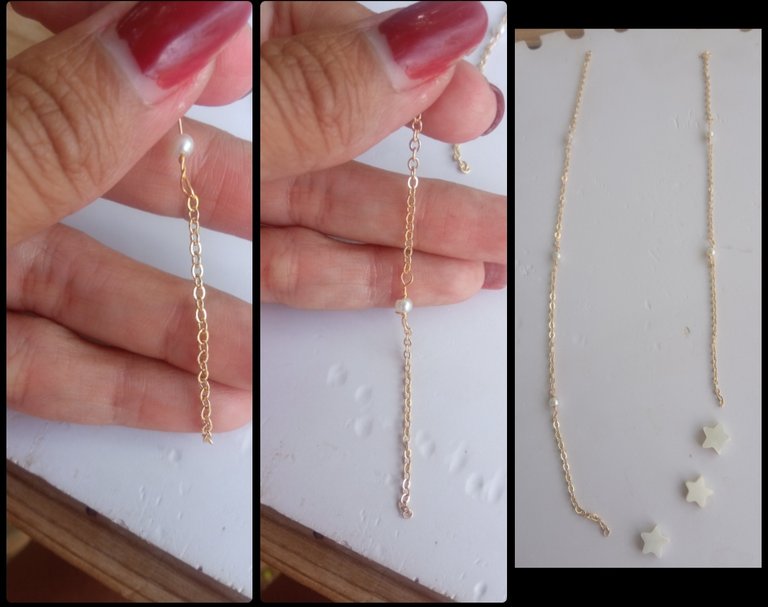
⭐ Paso 3: teniendo ya la primera lado del collar pasaremos a unir el otro lado del collar Para ello elaboraremos el mismo procedimiento tomaremos una pieza de cadena y introduciremos el alambre de bisutería calibre 26 por la última argollita realizaremos una pequeña argolla en el alambre y por el exceso de alambre de bisutería introduciremos la piedra perlada blanca pequeña de igual manera introduciremos la segunda pieza de cadena y la uniremos realizando una pequeña argolla para este lado solo uniremos tres piezas de cadena.
⭐ Step 3: Having already got the first side of the necklace, we will join the other side of the necklace. To do this, we will carry out the same procedure.
We will take a piece of chain and insert the 26 gauge jewelry wire through the last ring. We will make a small ring in the wire and, using the excess jewelry wire, we will introduce the small white pearly stone. In the same way, we will introduce the second piece of chain and join it by making a small ring.
For this side, we will only join three pieces of chain.
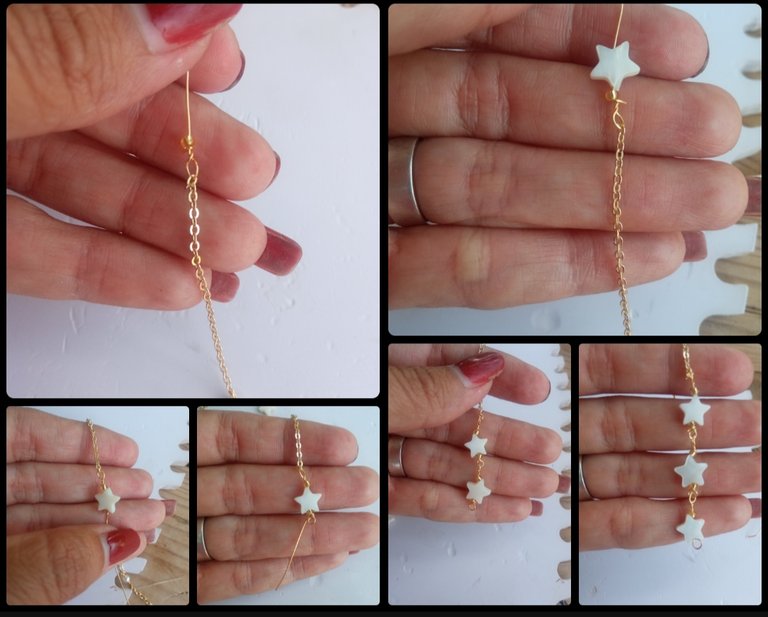
⭐ Paso 4: ahora elaboraremos la pieza que tenemos con tres pedazos de cadena e introduciremos por la última argollita el alambre de bisutería calibre 26 y elaboraremos una pequeña argolla para unir el alambre a la cadena en esta ocasión introduciremos por el exceso del alambre una mostacilla pequeña amarilla una estrellita de naca y una mostacilla y secaremos elaborando una argolla en la parte posterior de la última mostacilla tal cual pueden observarlo a continuación. Seguidamente introduciremos otro pedazo de alambre calibre 26 por la argolla elaborada debajo de la primera estrella realizaremos una pequeña argollita para unirla a la cadena introduciremos una mostacilla una estrellita y otra mostacilla y cerraremos elaborando una argollita de la misma manera introduciremos la tercera estrellita.
⭐ Step 4: now we will make the piece we have with three pieces of chain and we will insert the 26 gauge jewelry wire through the last ring and we will make a small ring to attach the wire to the chain. This time we will insert it through the excess. wire a small yellow bead, a naca star and a bead and we will dry making a ring on the back of the last bead as you can see below.
Next we will introduce another piece of 26 gauge wire through the ring made under the first star, we will make a small ring to attach it to the chain, we will insert a bead, a little star and another bead and we will close by making a little ring in the same way we will introduce the third little star.
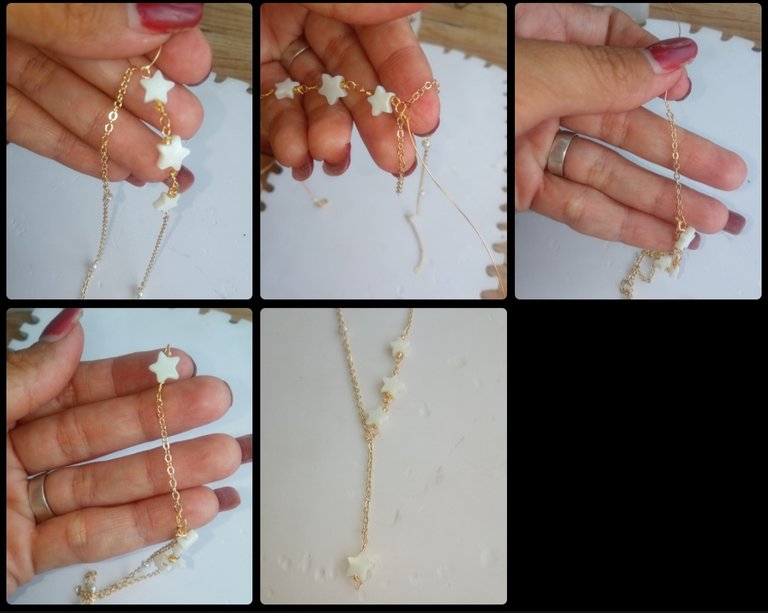
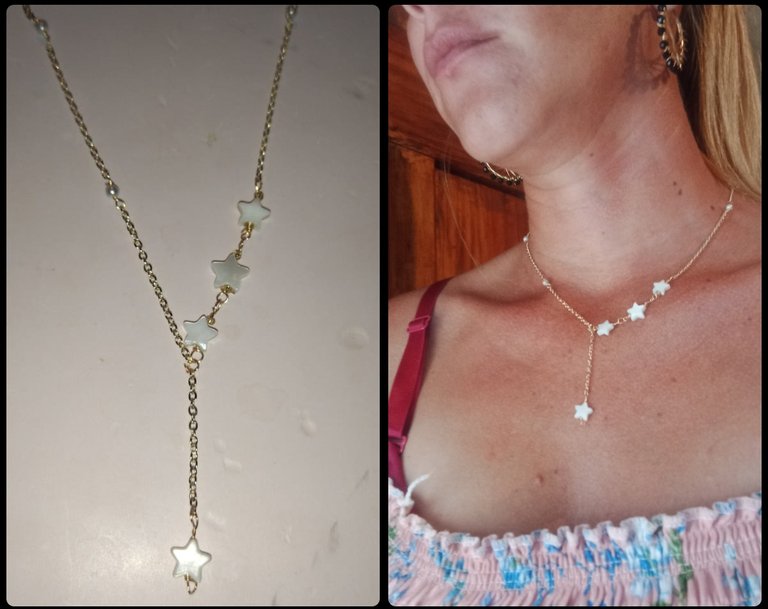
⭐ Paso 5: ya sí tendremos las dos piezas colados en nuestro collar listo solo tenemos que unir la parte central para ello tomaremos un pedazo de alambre de bisutería calibre 26 e introduciremos el lado que tenemos de cuatro piezas de cadena y el lado donde colocamos las estrellitas también introduciremos la última pieza de cadenita que nos queda y realizaremos una pequeña argolla circular la cual unirá estas tres piezas( los dos lados y un pedacito de cadena que quedará colgando en la parte central) En este pedacito de cadena que quedará colgando en la parte central en la punta de abajo introduciremos un pedacito de alambre de bisutería calibre 26 realizaremos una pequeña argolla para unirlo a la cadena e introduciremos una pequeña estrella la cual sujetaremos a la forma elaborando una pequeña argolla en la parte de abajo de esta estrella y así tendremos casi listo nuestro hermoso collar.
⭐ Step 5: Now we will have the two pieces cast into our necklace ready, we only have to join the central part to do this we will take a piece of 26 gauge jewelry wire and we will insert the side that we have four pieces of chain and the side Where we place the little stars we will also insert the last piece of chain that we have left and we will make a small circular ring which will join these three pieces (the two sides and a small piece of chain that will be hanging in the central part)
In this small piece of chain that will be hanging in the central part at the bottom tip we will insert a small piece of 26 gauge jewelry wire, we will make a small ring to attach it to the chain and we will insert a small star which we will attach to the shape making a small ring at the bottom of this star and thus we will almost have our beautiful necklace ready.
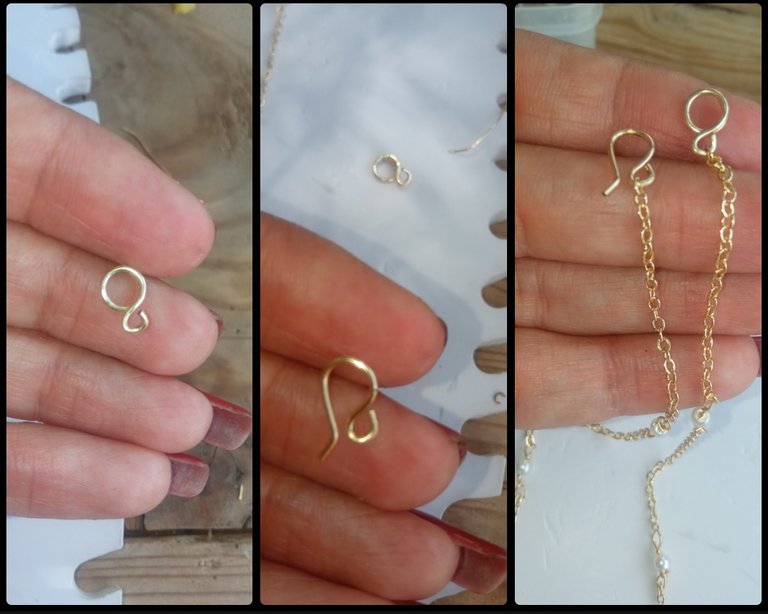
⭐ Paso 6: por último colocaremos los terminales de nuestro collar para ello con alambre de bisutería calibre 20 elaboraremos dos piezas una en forma de gancho y otra con una pequeña forma circular esta la engancharemos en cada uno de los terminales de la cadena y así culminaremos nuestro collar.
⭐ Step 6: finally we will place the terminals of our necklace to do this with 20 gauge jewelry wire we will make two pieces, one in the shape of a hook and the other with a small circular shape, we will hook this on each of the terminals of the chain and thus we will complete our necklace.
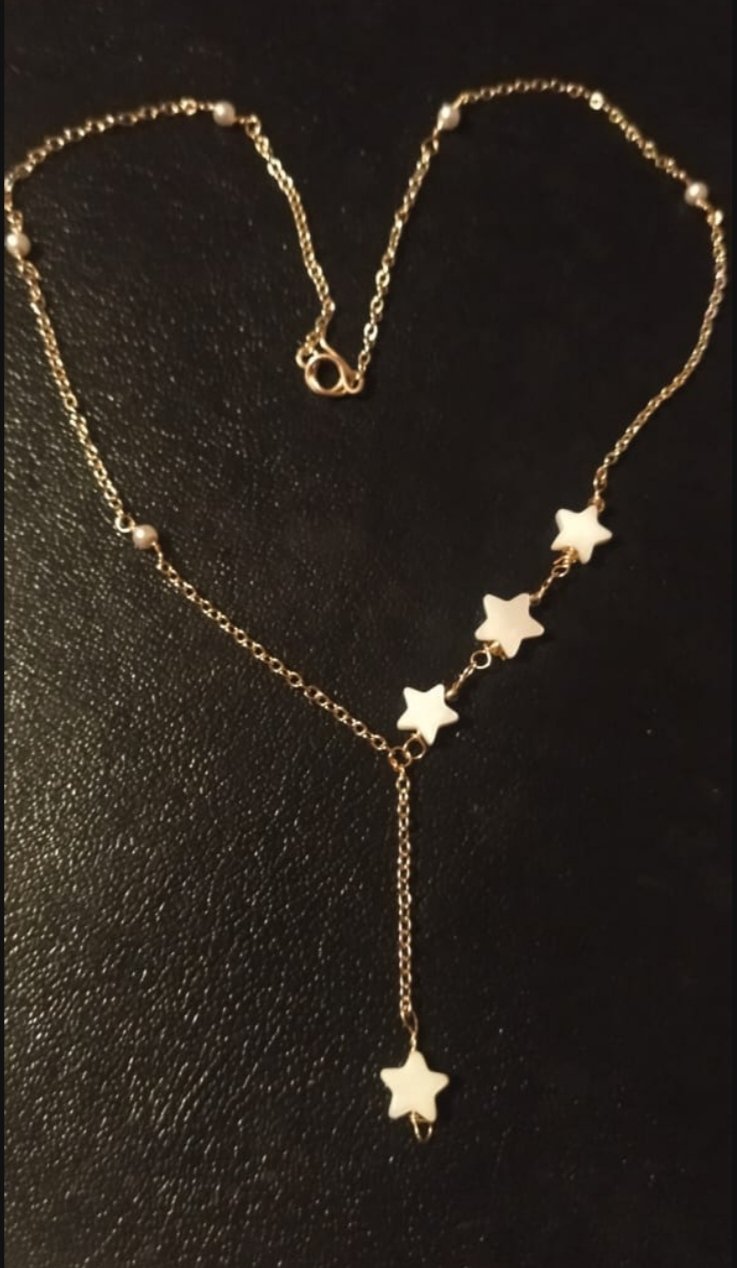
Todas las Fotos son de mi autoría y fueron tomadas con mi Celular Redmi 9.And so with these simple steps, which I hope you have understood my explanation, we can obtain this beautiful result, a very beautiful and elegant necklace, ideal to wear on a special occasion or to make a beautiful present for a special person.
And this, my dear friends, has been my preparation today to share with all of you, which I hope has been to your complete liking and I trust that this tutorial can be useful and beneficial to you, I say goodbye but not before thanking you for joining me in this occasion, Greetings and blessings.
All Photos are my authorship and were taken with my Redmi 9 Cellphone
Posted Using InLeo Alpha
Emma,esto es una belleza. Amiga estoy interesada en una así tal cual, yo se que aceptas hbd así que por fin dame precio a ver si puedo. Está demasiado bella te felicito
Gracias amiga, me alegra mucho que te haya gustado, claro que acepto hbd 😁😁
Hermoso amiga. Bello trabajo 🤗
Gracias amiga.
The necklace looks good on you. It is a very beautiful one.
thank you, I'm glad you liked it, thank you very much for your support.
Amiga!! qué lindo!!! Tuviste mucha creatividad para hacer este hermoso collar tan delicado, y con esas estrellitas de nácar que le dan el toque llamativo, parece fácil de hacer, solo hay que tener una buena pinza y a crear. Gracias por compartir.💖✨
Muchas gracias amiga, me alegra mucho que se de tu agrado.
🤗😘
@emmaris, thank you for supporting the HiveBuzz project by voting for our witness.
Click on the badge to view your board.
Once again, thanks for your support!
👏 Keep Up the good work on Hive ♦️ 👏
sagarkothari88 to upvote your post ❤️
❤️ @equipodelta suggested
Quedo lindo amiga..! Saludos
Que bello! Me encantó el diseño se ve tan delicado ✨