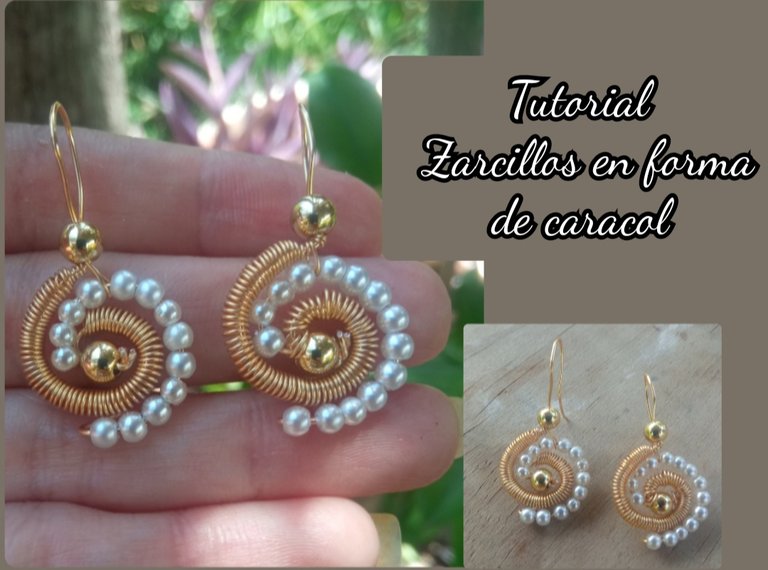
feliz y bendecido día tengan todos ustedes, Espero que estén pasando una excelente semana es para mí un gran placer volver a compartir una de mis sencillas creaciones con todos ustedes después de unos días de ausencia por esta comunidad. Y no es que haya dejado de lado mis creaciones en bisutería es solo que con tantas preocupaciones en casa no había tenido lugar para realizar un buen tutorial que querías y compartir con todos ustedes.
Have a happy and blessed day all of you, I hope you are having an excellent week, it is a great pleasure for me to share one of my simple creations with all of you again after a few days of absence from this community.
And it's not that I have left aside my jewelry creations, it's just that with so many worries at home I hadn't had time to make a good tutorial that you wanted and share with all of you.
Sin más quiero invitarlos a seguirme en este tutorial para juntos crear estos bellos accesorios.
On this occasion I bring you a simple step by step to make very creative ones in the shape of a snail shell. This is a very easy design to make and we will obtain a super elegant and different accessory, ideal to wear on any occasion.
Without further ado, I want to invite you to follow me in this tutorial so that together we can create these beautiful accessories.
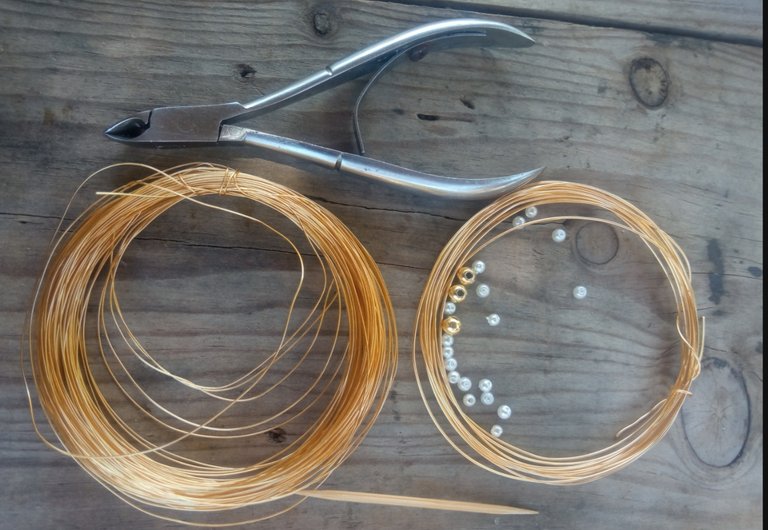
- alambre de bisutería calibre 20.
- alambre de bisutería calibre 26.
- piedras perladas pequeñas (polvo de nácar)
- balín dorado mediano.
- palillo de madera.
- Pinza de bisutería.
- 20 gauge jewelry wire.
- 26 gauge jewelry wire.
- small pearl stones (mother of pearl powder)
- medium gold pellet.
- wooden stick.
- Jewelry clamp.
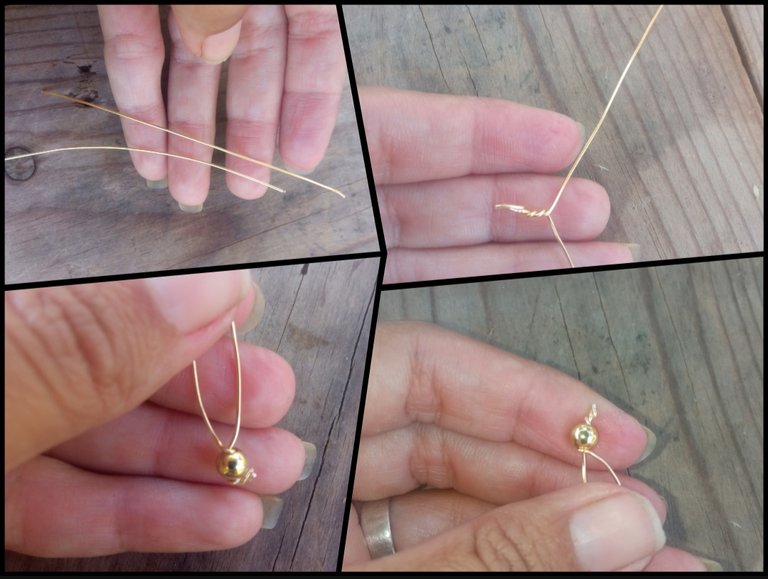
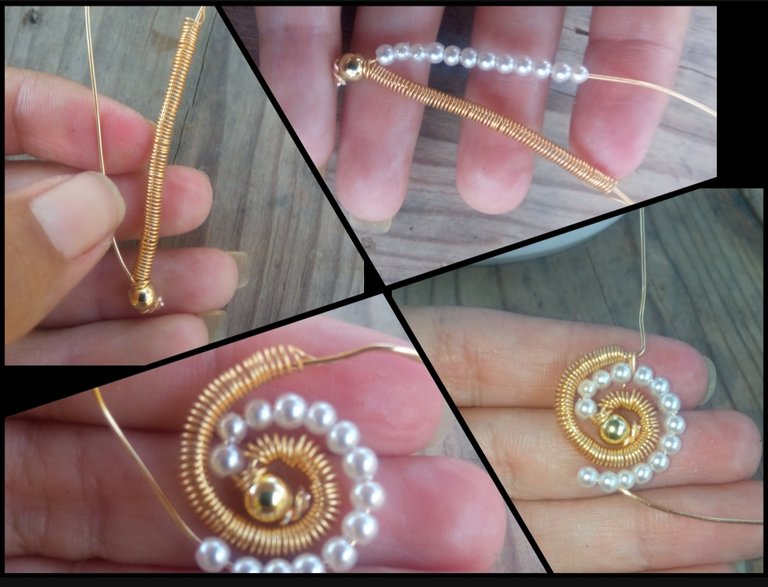
⭐ Paso 1: para iniciar la elaboración de este hermoso diseño primeramente tomaremos el alambre de bisutería calibre 20 y cortaremos dos pedazos de aproximadamente 10 cm cada uno y luego con ayuda de la pinza los uniremos en sus extremos dando un par de vueltas como pueden observar en las siguientes imágenes. Debemos tratar de que estas huertas nos queden súper juntas para luego por estas pequeñas Unión de aproximadamente 2 cm introduciremos El balín dorado con la punta del alambre que excede por este la doblaremos para sostener el balín en este extremo.
⭐ Step 1: to start making this beautiful design, we will first take the 20 gauge jewelry wire and cut two pieces of approximately 10 cm each and then with the help of the tweezers we will join them at their ends making a couple of turns as you can see in the following images. We must try to make these gardens super close together and then through these small Unions of approximately 2 cm we will introduce the golden ball with the tip of the wire that exceeds this one, we will bend it to hold the ball at this end.
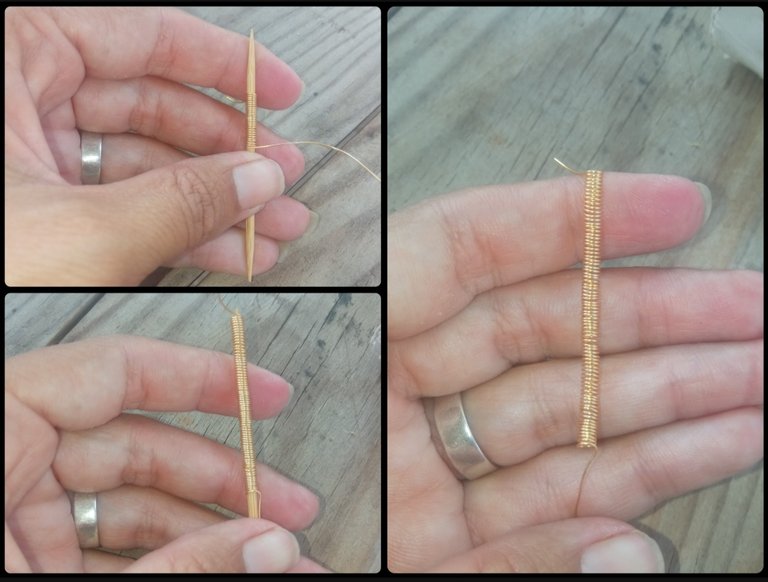
⭐ Paso 2: para continuar debemos separar los dos alambres que nos quedan luego del balón dorado. Tomaremos el alambre de bisutería calibre 26 y lo enrollaremos en el palillo realizando muchas vueltas seguidas como pueden ver en las siguientes imágenes creando una pequeña forma de resorte, al lograr tener un tamaño de aproximadamente 7 cm sacaremos estas vueltas de nuestra base que ha sido un palillo y nos quedará como pueden ver en las siguientes imágenes dejando un pedacito de alambre 26 sin darle vuelta cortaremos del rollo de alambre. Esta pieza que hemos elaborado la introduciremos por uno de los alambres de la base de nuestro zarcillos incluyendo la punta luego del barín dorado para sostener así la forma en este alambre y por la otra hebra de alambre calibre 20 introduciremos las pequeñas piedras perladas las cuales son conocidas con el nombre de polvo de nacar, yo utilicé una tamaño muy pequeño y utilicé un total de 13 piedritas,
⭐ Step 2: to continue we must separate the two wires that remain after the golden ball. We will take the 26 gauge jewelry wire and we will wind it on the toothpick making many turns in a row as you can see in the following images creating a small spring shape. Once we achieve a size of approximately 7 cm we will take these turns from our base that has been a toothpick and it will look like you can see in the following images, leaving a small piece of wire 26 without turning it, we will cut it from the wire roll.
We will introduce this piece that we have made through one of the wires at the base of our earrings, including the tip and then the golden barin to hold the shape in this wire, and through the other strand of 20 gauge wire we will introduce the small pearlized stones which are known as mother of pearl powder, I used a very small size and I used a total of 13 pebbles,
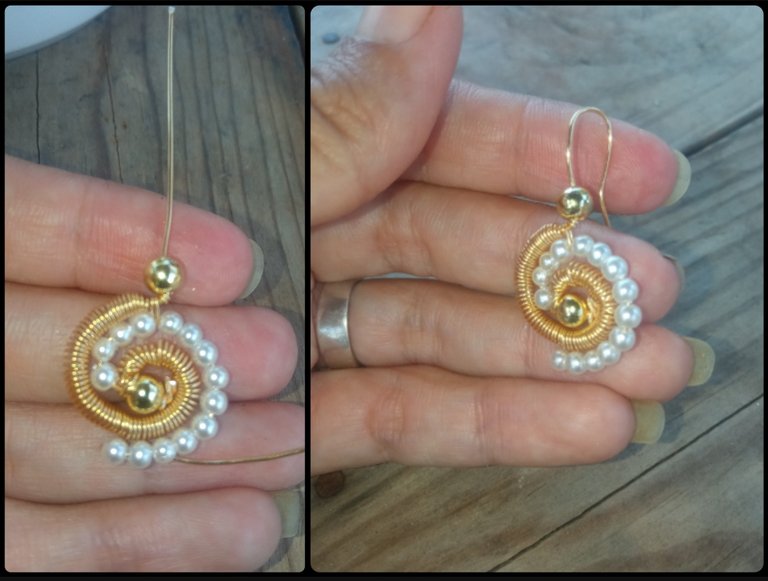
⭐ Paso 3: seguidamente comenzaremos a enrollar las dos hebras del alambre en forma circular alrededor de la piedra o balín dorado, dando así una forma de caracol. Dejaremos una hebra con su final en la parte posterior y llegaremos la otra hebra de alambre hasta la parte superior, la de la parte posterior doblaremos el alambre calibre 20 hacia la parte de atrás para así sostener las piedras en su lugar indicado en cuánto a la hebra de alambre en la parte superior por esta introduciremos un balín dorado idéntico al colocado en la parte central y subiremos el alambre hacia la parte superior en forma recta.
⭐ Step 3: Next we will begin to wind the two strands of the wire in a circular manner around the stone or golden ball, thus giving a snail shape.
We will leave a strand with its end at the back and we will reach the other strand of wire to the top, the one at the back we will bend the 20 gauge wire towards the back to hold the stones in their indicated place as to the strand of wire at the top, through this we will introduce a golden ball identical to the one placed in the central part and we will raise the wire towards the top in a straight way.
⭐ Paso 4: para culminar nuestra elaboración el exceso de alambre que nos queda por encima de nuestra elaboración con ayuda de la pinza y de nuestros dedos lo moldearemos dándole forma de anzuelo para zarcillo y así culminaremos nuestra hermosa elaboración. Solo debemos repetir el procedimiento para elaborar la segunda pieza.
⭐ Step 4: to complete our elaboration, we will shape the excess wire that remains above our elaboration with the help of the tweezers and our fingers, giving it the shape of a hook for a tendril and thus we will complete our beautiful elaboration. We just have to repeat the procedure to make the second piece.
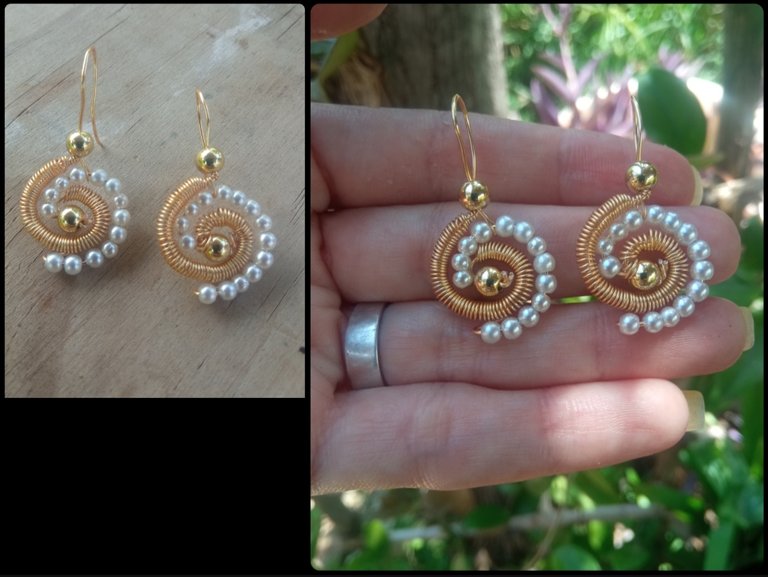
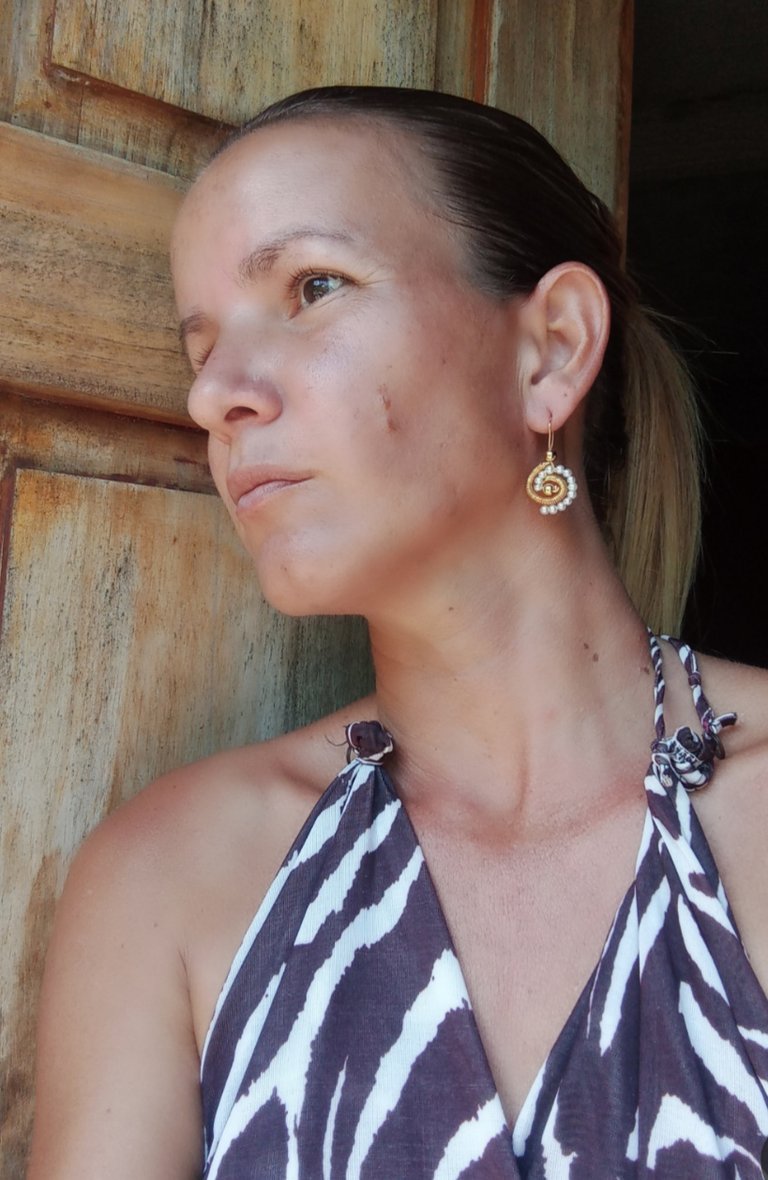
Todas las Fotos son de mi autoría y fueron tomadas con mi Celular Redmi 9.And in this very easy, quick and simple and above all economical way we will be able to make some beautiful tendrils with a very beautiful design, which I made with great love to share with all of you and so I hope you have totally liked this and this simple tutorial I can make useful and beneficial.
I say goodbye until a new opportunity.
All Photos are my authorship and were taken with my Redmi 9 Cellphone
Posted Using InLeo Alpha
Beautiful earrings
Thank you, I'm glad you liked it
From your tutorial we all can see that a lot of effort was put into making this earring and you nailed it. Good job!
Thank you very much
Este diseño de caracol quedó precioso, el balín dorado le da un toque muy elegante , incluso quedó muy muy bien esa combinación dorado perlado. Haces maravillas con los alambres.
This is one of the most beautiful earring I've seen, you really did a great job
Un diseño original y hermoso, la felicito amiga le quedaron muy bien, saludos 🥰
Que lindos amiga. 🤗🤗🤗
Wow amiga están perfectos para ir a la playa se ven bellísimos 😍🤭lindo trabajo