
[Esp]
¡Saludos comunidad!
Hoy vamos a hablar un poquito técnico, según mis estudios de informática y mantenimiento de micros, los consejos o tips que daré, podrías hacerlo tú mismo, sin embargo, hay muchas cosas que debes tener en cuenta en cuanto a dispositivos y compatibilidad, por lo cual recomiendo ir con un especialista, pero si eres amante del DIY, aquí te dejare unos pasos de cómo reemplazar el fan cooler de tu procesador cuando esté ya dio la vida útil. Son muchas las cosas que matan lentamente una computadora es el exceso de calor, el polvo y que tengas tu CPU cerca de la cocina, este ultimo es porque toda la grasa y frituras que cocinas va directamente a pegarse en los dispositivos de tu pc y en los disipadores de calor, afectando su correcto funcionamiento.
Cuando tu computadora comienza a apagarse abruptamente pueden ser dos causas, mal funcionamiento de la fuente de poder o el disipador que va sobre el procesador no está girando a las revoluciones adecuadas, ha perdido potencia, velocidad.
Si tienes la suerte, y digo "suerte" que sea el fan cooler del procesador el cambio puede ser menos costoso y más fácil de reemplazar.
A continuación presento lo que necesitarás.
English version
Greetings community!
Today we are going to talk a little technical, according to my studies of computer science and maintenance of micros, the tips or tips that I will give, you could do it yourself, however, there are many things that you must take into account in terms of devices and compatibility, so I recommend going with a specialist, but if you are a DIY lover, here I will leave you some steps on how to replace the fan cooler of your processor when it has already given its useful life. There are many things that slowly kill a computer is excess heat, dust and you have your CPU near the kitchen, the latter is because all the grease and fried food you cook goes directly to stick on the devices of your pc and heat sinks, affecting its proper functioning.
When your computer starts to shut down abruptly there can be two causes, malfunction of the power supply or the heatsink that goes over the processor is not spinning at the right revolutions, it has lost power, speed.
If you are lucky, and I say "lucky" that it is the processor fan cooler, the replacement can be less expensive and easier to replace.
Here's what you'll need.

| Spanish | English | |
| Fan cooler / disipador | Fan cooler / heatsink | |
| Pasta térmica color gris | Pasta térmica color gris | |
| Paño de algodón o papel higiénico | Cotton cloth or toilet paper | |
| Brocha, secador de cabello o soplador o aspiradora | Brush, hair dryer or blower or hoover |
Paso a paso / Step by Step
Step 1️⃣/ Paso 1️⃣
 |  |
[Esp]
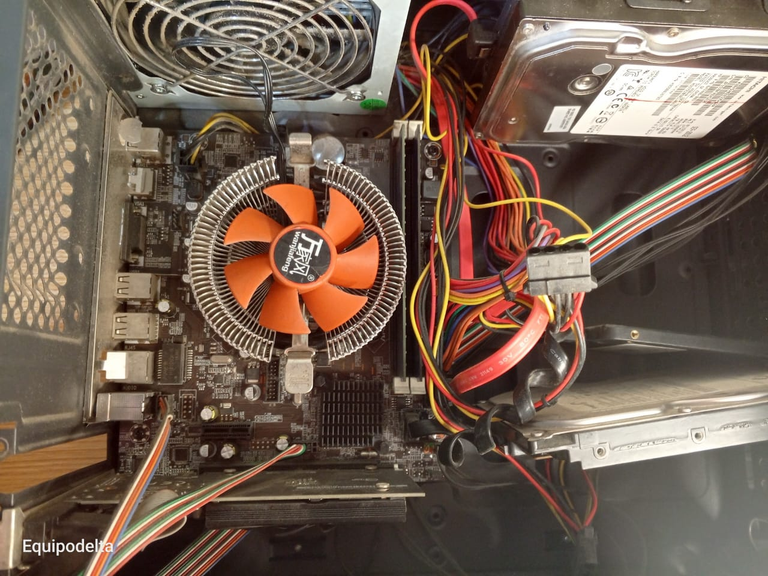
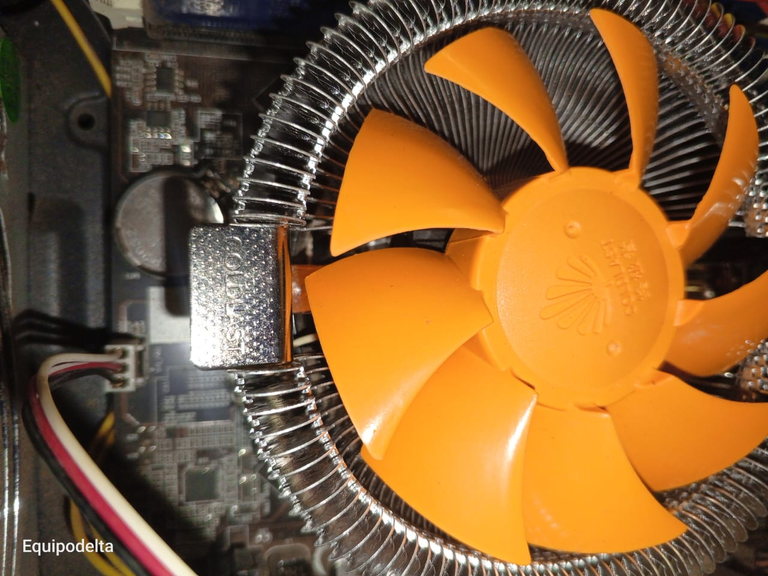
Para que tengan una idea, no hace mas de dos meses que hice mantenimiento a mi CPU y está cubierta de polvo nuevamente.
Para empezar, debes cerciorarte que la computadora no esté conectada de la toma corriente de la pared, si es así, desconéctala.
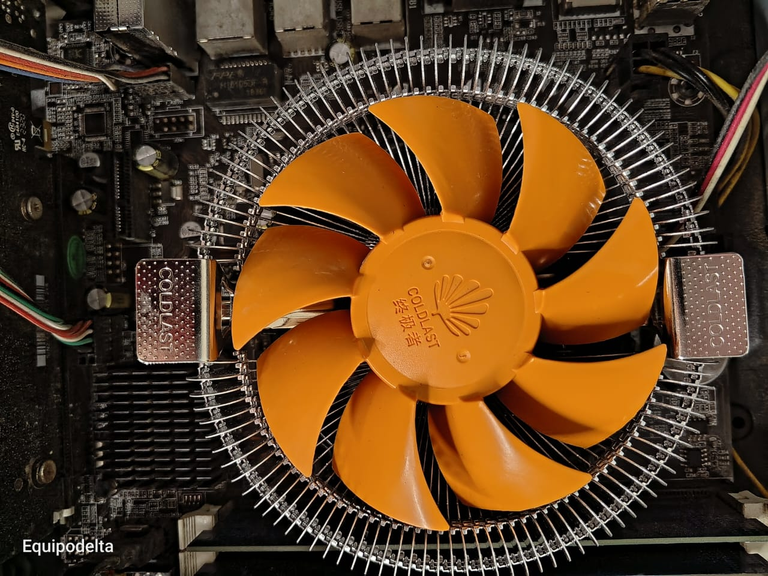
Este procedimiento solo aplica a fan coolers compatibles con Cpu Intel sockerts: 775/1150/1155/1156 Amd Am2/am2/am3, mi PC es socket 1155, este disipador que cambiaré tenía tiempo guardado, es nuevo y estuve agradecida porque es compatible. Siendo entonces mi Tarjeta Madre marca Arktek H61m Intel Socket 1155 Ddr3.
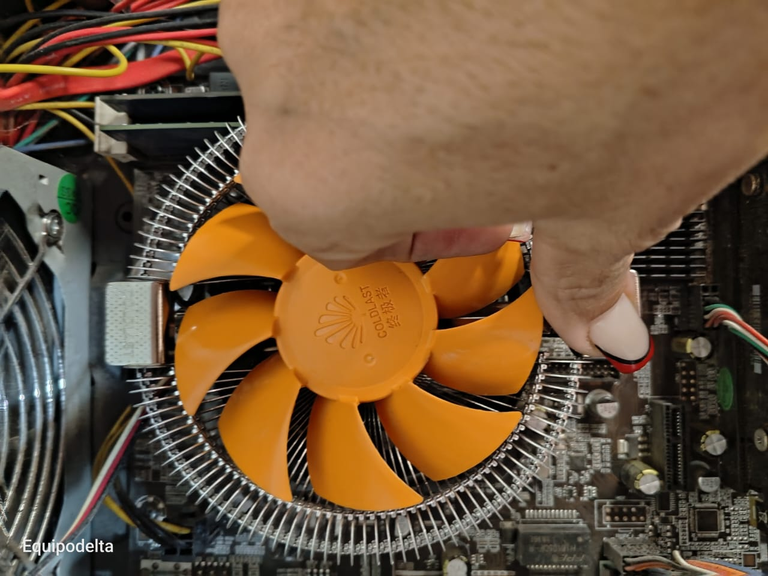
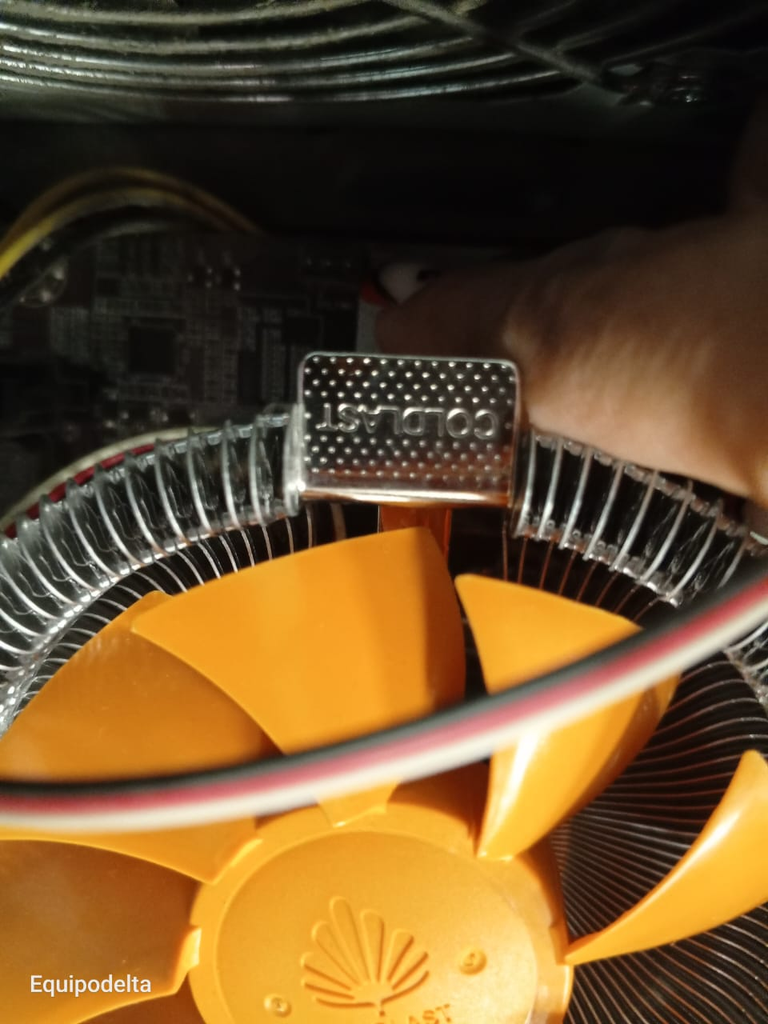
Para los socket Intel, generalmente se fijan en la placa madre con un gancho que atraviesa el fan cooler. para retirarlo, debes hacer presión en cada una de sus pestañas con mucho cuidado hacia abajo.
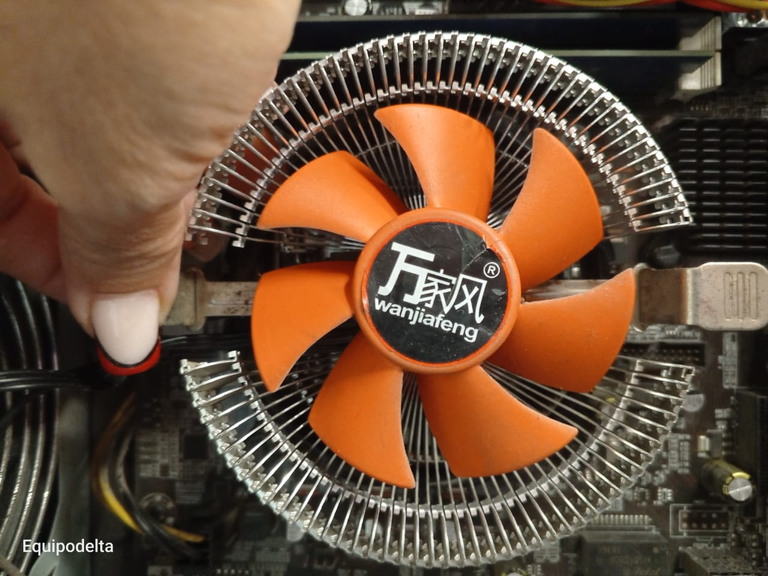
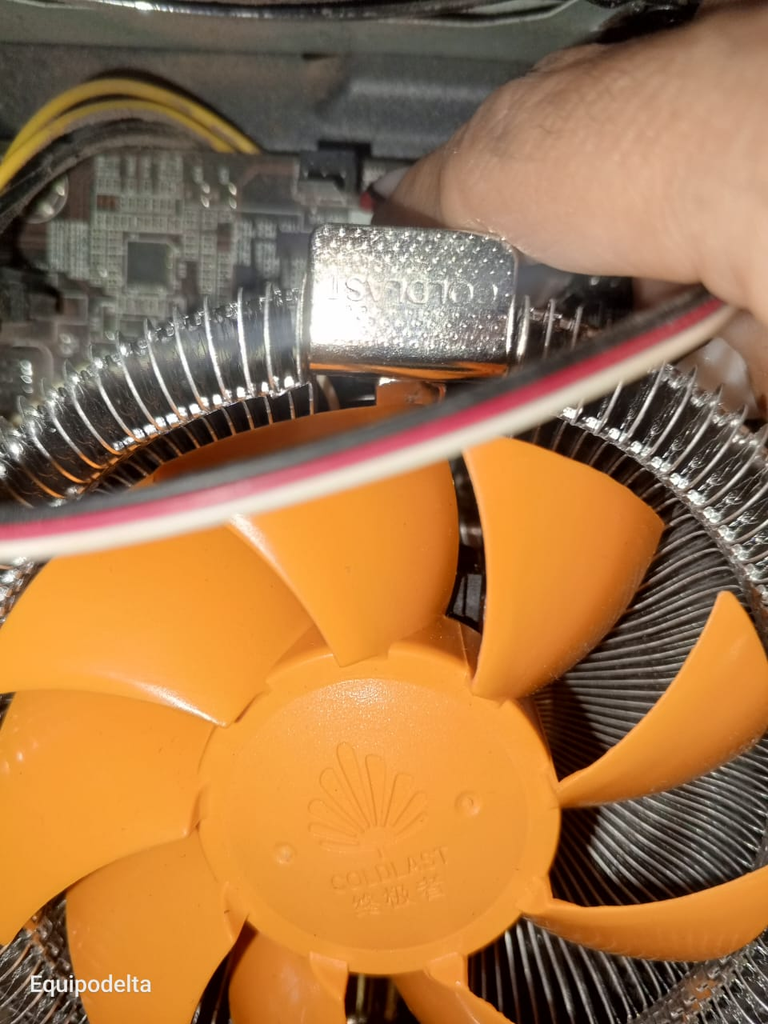
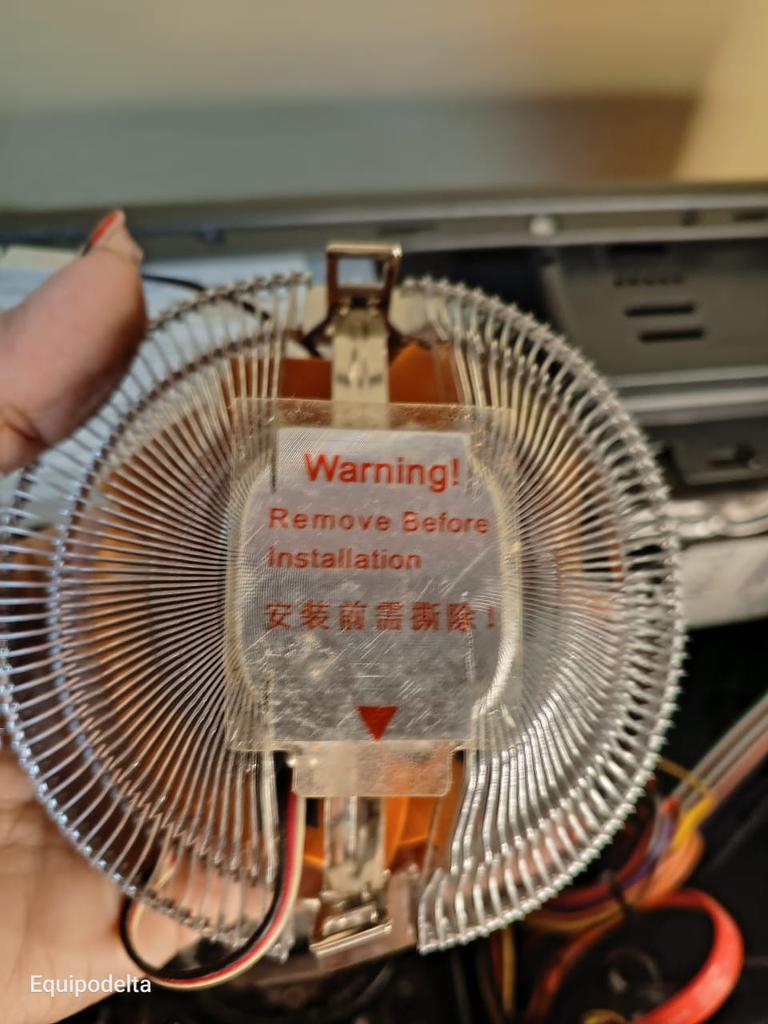
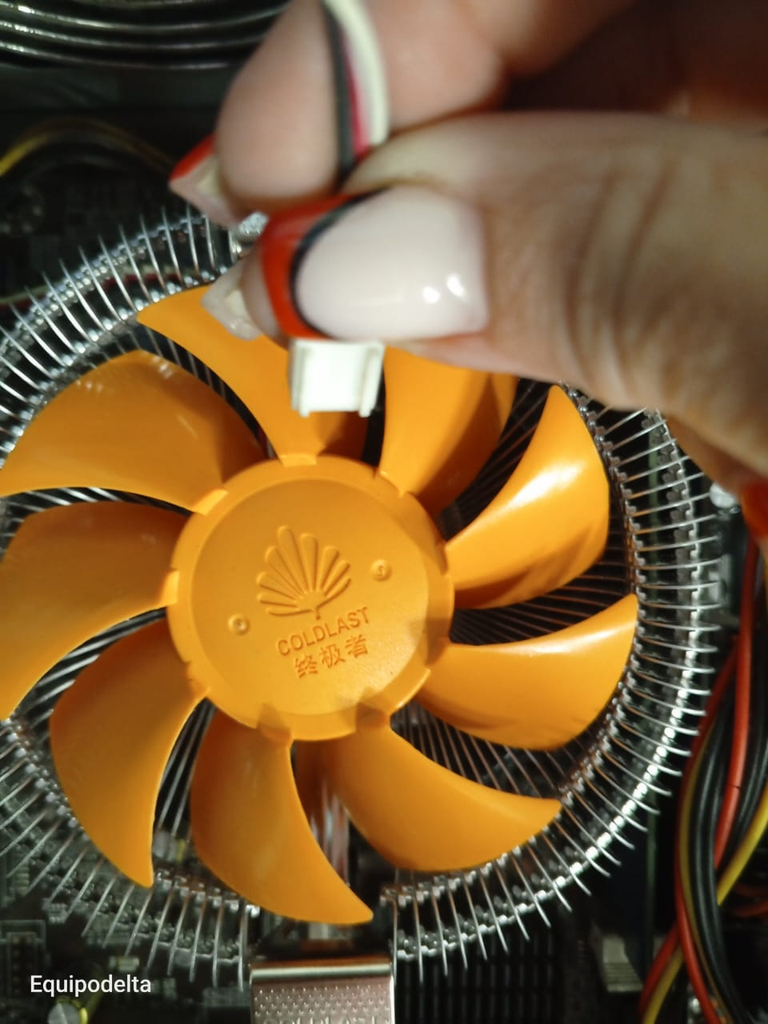
Con mucho cuidado retira el cable del fan cooler que se encuentra pegado a la tarjeta madre. Retiré la calcomanía del frente del fan cooler, pues algunos, vienen con la dicha que puedes hacerle mantenimiento y colocarle una gota de aceite 3 en 1 en el rodamiento, en este caso, viene sellado.
Lo reemplacé porque mi computadora se estaba apagando PC recalentamiento y el fan cooler estaba haciendo demasiado ruido.
English version
To give you an idea, it's not more than two months since I serviced my CPU and it's covered in dust again.
To begin with, you should make sure that the computer is not plugged into the wall socket, if it is, unplug it.
This procedure only applies to fan coolers compatible with Intel Cpu sockerts: 775/1150/1155/1156 Amd Am2/am2/am3, my PC is socket 1155, this heatsink that I will change had some time in storage, it is new and I was thankful because it is compatible. So my motherboard is Arktek H61m Intel Socket 1155 Ddr3.
For Intel sockets, they are usually attached to the motherboard with a hook that goes through the fan cooler. To remove it, you must press down very carefully on each of its tabs.
Carefully remove the fan cooler cable that is attached to the motherboard. I removed the sticker from the front of the fan cooler, as some fan coolers come with a sticker saying that you can do maintenance and put a drop of 3 in 1 oil on the bearing, in this case, it is sealed.
I replaced it because my computer was shutting down PC overheating and the fan cooler was making too much noise.
Step 2️⃣/ paso 2️⃣
 |  |  |  |
[Esp]
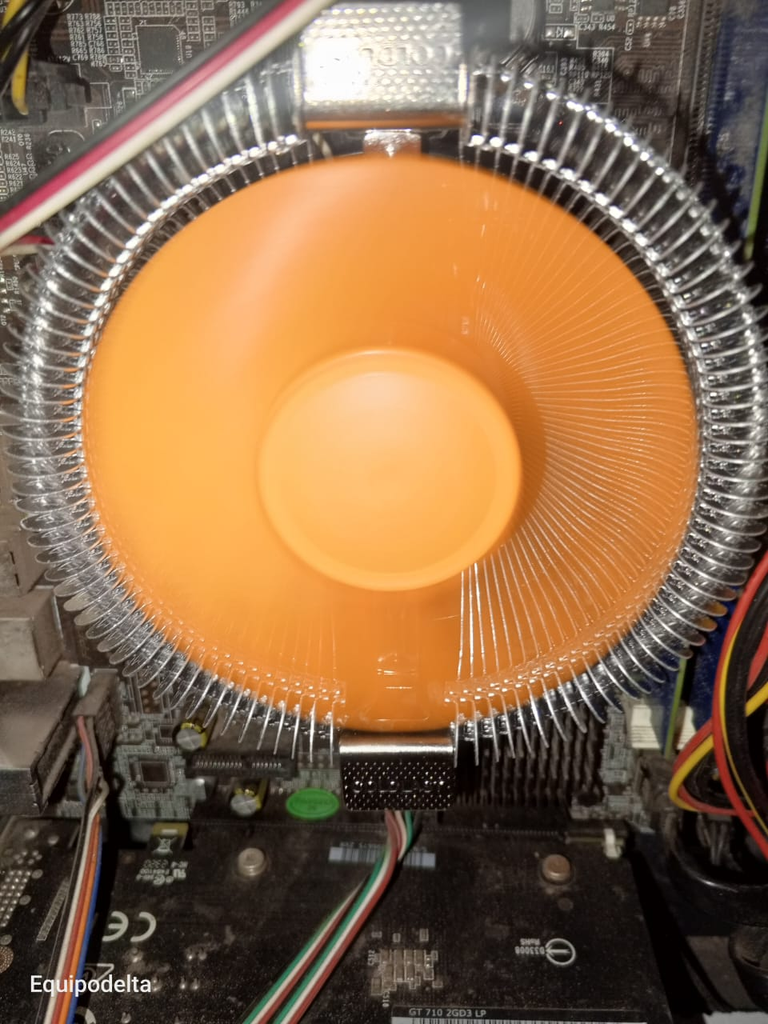
Limpia el polvo acumulado en la tarjeta madre con mucho cuidado con una brocha, puedes usar una secador de cabello y ponerte un cubrebocas, también puedes usar una aspiradora con cuidado no halar cables. Yo prefiero usar un secador de cabello.
Con cuidado limpia la pasta térmica antigua del procesador, no necesitas desinstalarlo, tan solo limpia con cuidado con un paño seco o papel higiénico, no hagas presión excesiva.
Retira el presunto de seguridad (Si lo tuviera) en la parte de abajo del fan cooler.
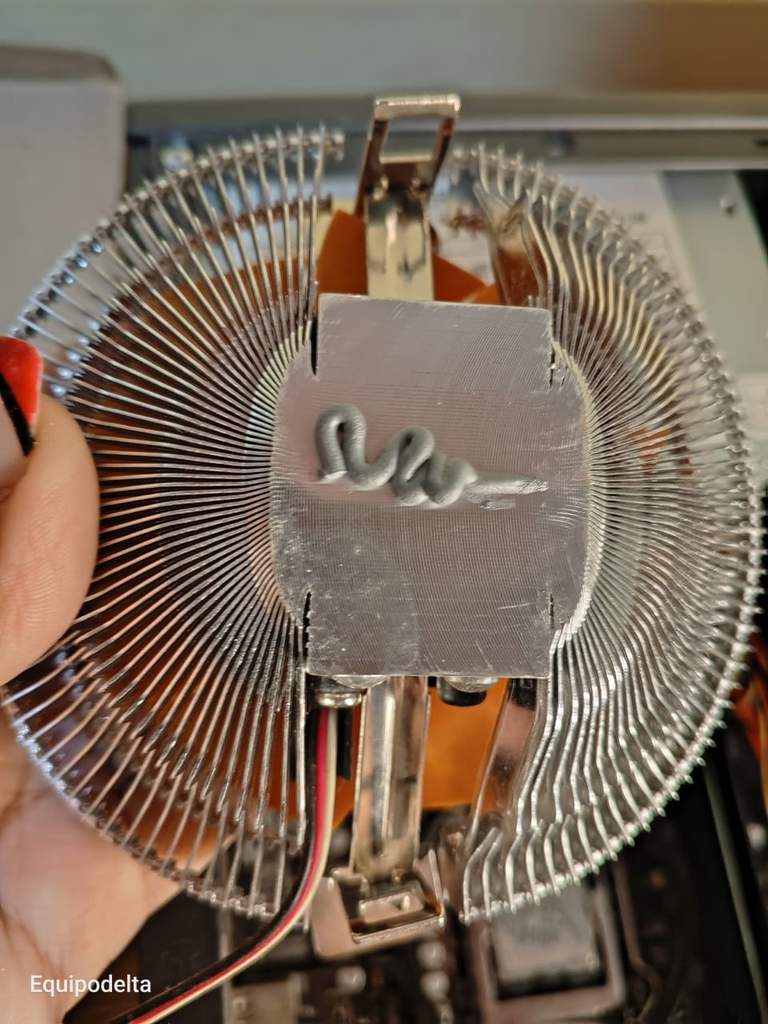
Recomiendo usar pasta térmica de color gris porque estas pueden durar mucho tiempo sin necesitar cambio, lo más recomendable son 6 meses, mientras que la pasta térmica blanca, puede durar 3 meses. Aplica un punto de pasta térmica en el centro del disipador o si prefieres colocas la pasta sobre el procesador.
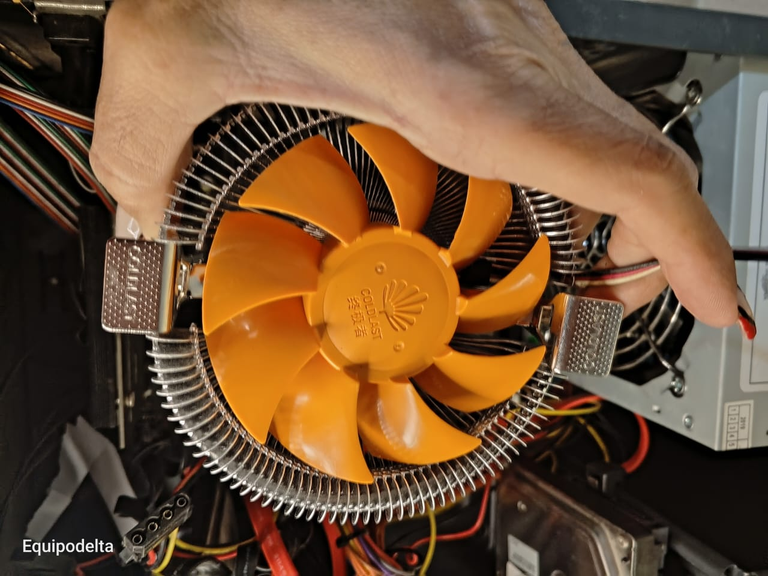
Ahora presenta el fan cooler a la tarjeta madre para colocar en posición los ganchos.
Ajusta uno haciendo presión hacia abajo hasta que quede fijo de un lado y luego repites el procesamiento del otro lado.
English version
Clean the dust accumulated on the motherboard very carefully with a brush, you can use a hairdryer and wear a mask, or you can use a hoover, being careful not to pull on the wires. I prefer to use a hair dryer.
Carefully wipe the old thermal paste off the processor, you don't need to uninstall it, just wipe it carefully with a dry cloth or toilet paper, don't use excessive pressure.
Remove the safety catch (if present) on the bottom of the fan cooler.
I recommend using grey thermal paste because it can last for a long time without needing to be changed, 6 months is recommended, while white thermal paste can last for 3 months. Apply a dot of thermal paste in the centre of the heatsink or if you prefer, place the paste on the processor.
Now attach the fan cooler to the motherboard to position the hooks.
Adjust one by pressing down until it is fixed on one side and then repeat the processing on the other side.
Step 3️⃣/ paso 3️⃣
 |  | |
[Esp]
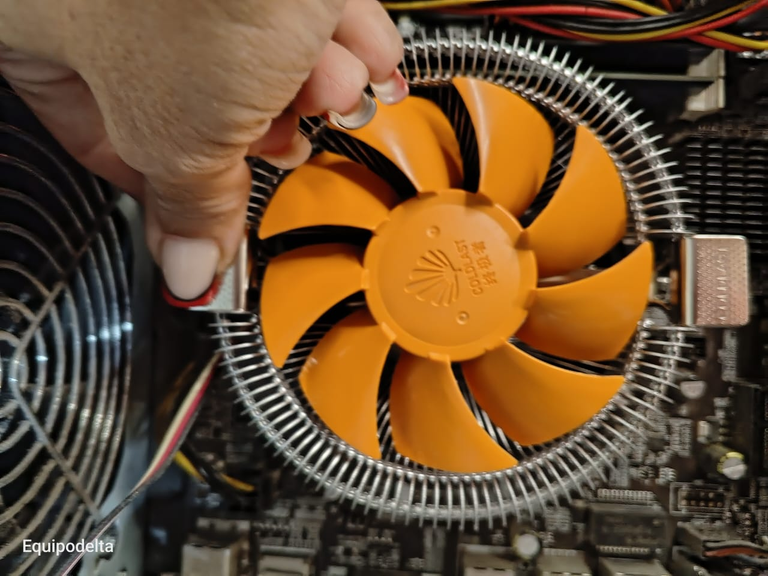
Conecta el cable del fan cooler a la tarjeta madre, este tiene una ranura, revisa la tarjeta la posición en la que encaja y luego lo conectas haciendo una ligera presión hacia abajo. Debes tener mucho cuidado con no doblar los pines.
Asegúrate que los cables no estén cerca de ningún fan cooler que puedan enredarse cuando encienda.
Conecta el cable de corriente a la PC y enciende.
Recuerda, aunque el procedimiento es muy fácil recomiendo siempre todo esto bajo supervisión de un técnico especializado.
English version
Connect the fan cooler cable to the motherboard, it has a slot, check the board for the position in which it fits and then connect it by pressing down slightly. Be very careful not to bend the pins.
Make sure the wires are not near any fan coolers that might get tangled when powering up.
Connect the power cable to the PC and switch on.
Remember, although the procedure is very easy, I recommend that you always do this under the supervision of a qualified technician.


Créditos / Credits
Encendido eficiente / Efficient start-up.

💜💜💜
![]() 👉
👉  👉
👉 ![]() 👉
👉 ![]() 👉
👉 
Here / Bríndame un café

Una de mis primeras PC tuve un problema de rendimiento, la misma se calentaba y se ponía lenta la computadora, siendo el problema el ventilador del procesador. Por eso es importante estar pendiente de estos detalles, de hacerle los debidos mantenimiento, observar estos detalles y cambiar la pasta térmica.
No tengo dudas que estas recomendaciones serán de mucha ayuda para varias personas. Gracias por los consejos.
Espero que estés bien cariño. Un fuerte abrazo.
Congratulations @equipodelta! You have completed the following achievement on the Hive blockchain And have been rewarded with New badge(s)
Your next target is to reach 460000 upvotes.
You can view your badges on your board and compare yourself to others in the Ranking
If you no longer want to receive notifications, reply to this comment with the word
STOPI could need that fan right about now cause its hell over here. Electrical was one of my passions during childhood as i love to connect wires and solve faults that way
¡Genial tutorial! 🛠️ Me encantó cómo detallaste cada paso, incluso para los que nos gusta el DIY. ¿Y el tip de la pasta térmica gris? ¡Top! A ver si ahora mi PC deja de sonar como un avión despegando. ¡Gracias por compartir tus conocimientos! 💻👍
Hola😘, no sabía que también conocías de la parte técnica, está extraordinario este post te. Felicito realmente un gran abrazote
Excelente amiga!!, has hecho una detallado paso a paso con recomendaciones claras que son fundamentales a la hora de realizar este tipo de trabajos, siguiendo tus pasos no hay razón alguna para equivocarse. Me gustó que mostraras la cantidad de pasta a emplear, porque hay personas que por desconocimiento piensan que mientras más pasta le pongan mejor será y al final terminan derrochando pasta y vertiendose el exceso sobre los componentes que rodean el micro. Saludos
wow so technical , i personally am not technical in engineering forms, kudos to you for taking up this project.