

Many times, a great job of video creation and editing is thrown down by some mistake or image failure...
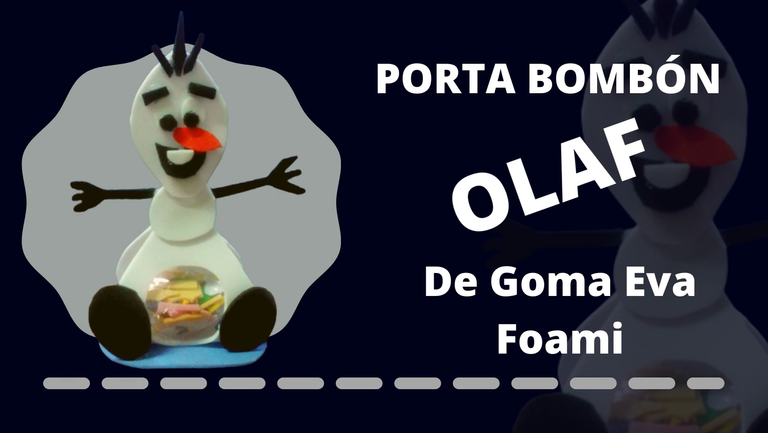
Hello my dears, today I show you how to create this cute bonbon holder, I tell you that I made a video of it and I loved how it looked after editing, but it turns out that my camera captures in an exaggerated way the pores of my arms and the video looked too scary, it looked like I had some disease in my arms, it's just my hairs and the camera exaggerating.
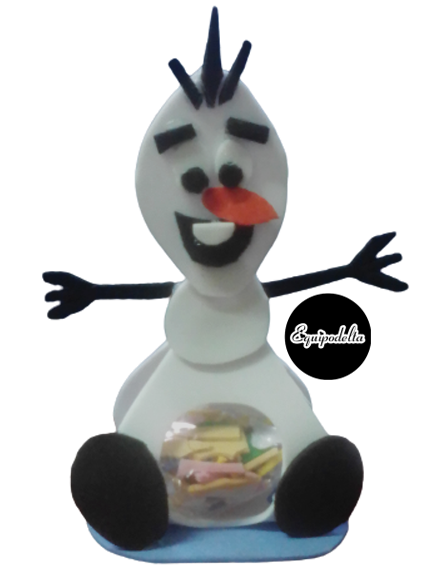
Anyway, I do the tutorial, because the project turned out beautiful, a nice detail to give as a gift, I just won't be able to share the video.
I hope you like it.

Muchas veces, un gran trabajo de creación de vídeo y edición es lanzado abajo por algún error o falla de imagen...
Hola mis queridos, hoy te enseño a crear este lindo porta bombón, te cuento que hice un vídeo de él y me encantó cómo quedó tras la edición, pero resulta que mi cámara capta de forma exagerada los poros de mis brazos y el vídeo se veía demasiado terrorífico, parecía que tuviera alguna enfermedad en los brazos, son solo mis vellos y la cámara exagerando.
De todas maneras, hago el tutorial, pues el proyecto ha quedado hermoso, un lindo detalle para regalar, solo que no podré compartir el vídeo.
Espero que les guste.
Paso a paso. / Step by Step
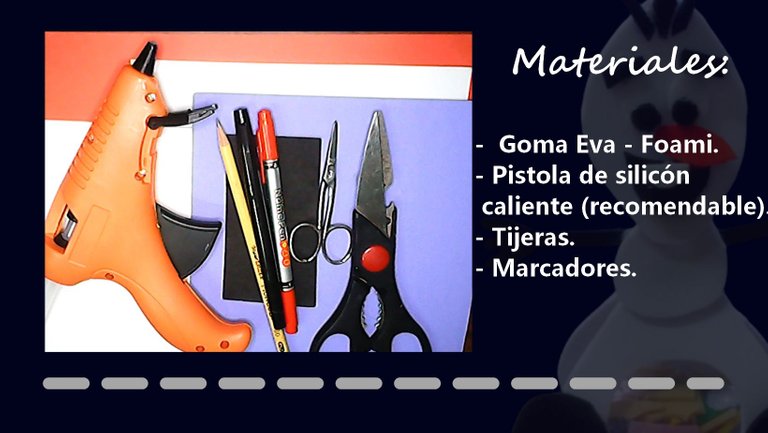
Materials:
- Eva rubber - Foami.
- Hot silicone gun (recommended).
- Scissors.
- Markers.
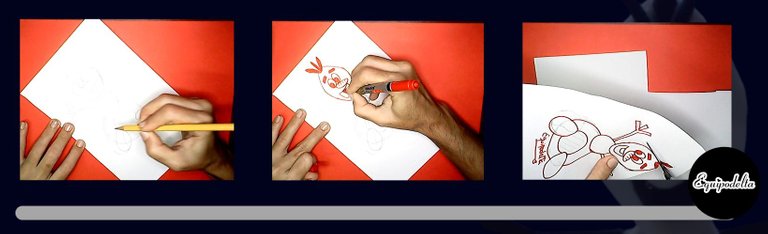
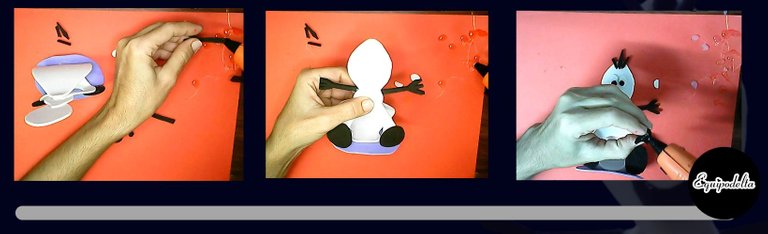
Step 1:
Make a pencil sketch, optional, outline the figure with the marker, then cut out each piece.
Paso 1:
Realiza el boceto a lápiz, opcional, bordea la figura con el marcador, seguidamente recorta cada pieza.
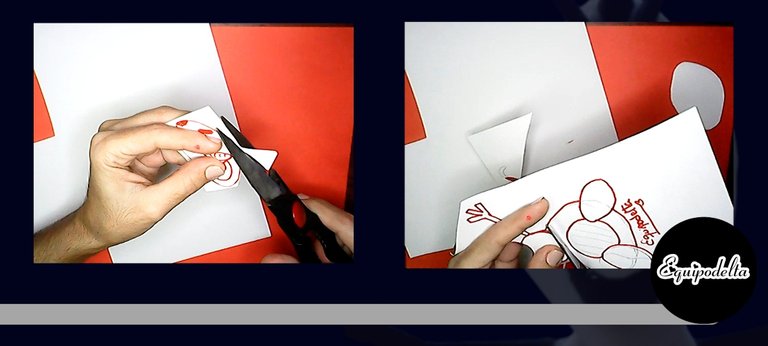
Step 2:
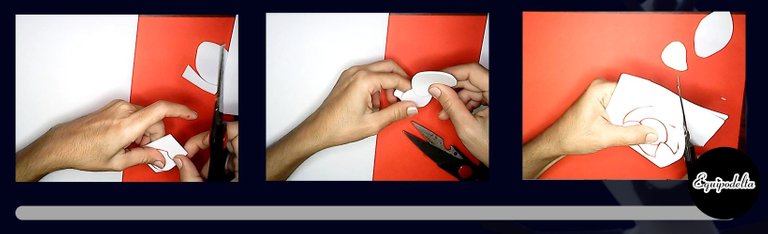
Use the mold to cut out the figures in the foami, you must cut out each piece.
The final piece, which will carry the bonbon, you must fold the foami in two and then cut out using the mold. Remember not to cut the joint.
Paso 2:
Usa el molde para recortar las figuras en el foami, debes recortar cada pieza.
La pieza final, que llevará el bombón, debes doblar en dos el foami y luego recortar usando el molde. Recuerda no recortar la unión.

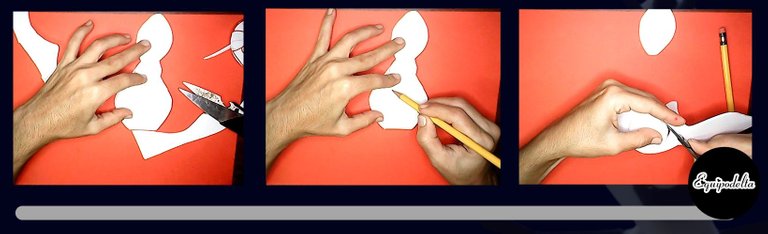
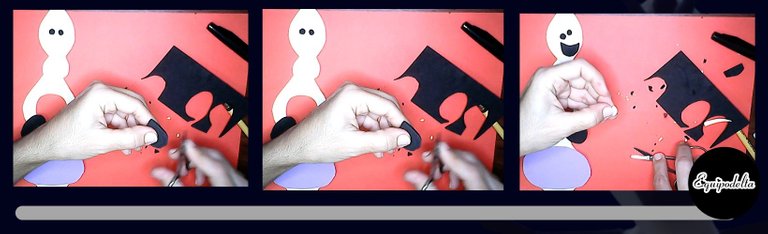
Step 3:
With the help of a graphite pencil, draw a circle on the belly of the figure on one side only, then cut it out with the help of a scissors.
Paso 3:
Con ayuda de un lápiz de grafito, dibuja un círculo en la barriga de la figura por un solo lado, luego recorta con ayuda de una tijera.
Step 4:
Draw an oval and cut out two equal pieces, these will be the feet.
Draw what will be the eyes, cut out the piece.
Draw a smiling mouth, proceed to cut out the piece.
Cut out two small pieces that will be the eye sockets.
Paso 4:
Dibuja un óvalo y recorta dos piezas iguales, estos serán los pies.
Dibuja lo que serán los ojos, recorta la pieza.
Dibuja una boca sonriente, procede a recortar la pieza.
Recorta dos piezas pequeñas que serán las cuencas de los ojos.
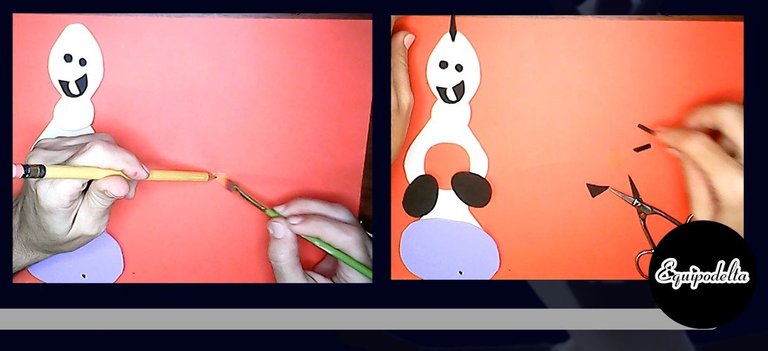
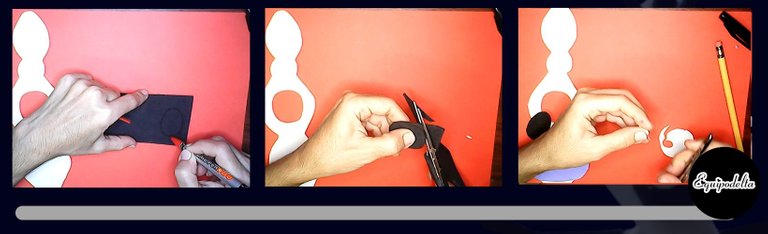
Step 5:
For the nose, I didn't have orange foami, so I cut out a white piece and painted it with acrylic paint, this is optional, in case you don't have this color. let it dry and take the opportunity to cut out what will be the teeth.
Draw an oval and cut it out, this will be the base of the floor.
Cut out two equal rectangles, this will be the arms, it has the shape of a fork or broom, look at the image.
Paso 5:
Para la nariz, no tenía foami color naranja, así que recorté una pieza de color blanco y pinté con pintura acrílica, esto es opcional, por si no tienes de este color. déjalo secar y aprovecha recortar lo que serán los dientes.
Dibuja un óvalo y recorta, esto será la base del piso.
Recorta dos rectángulos iguales, esto serán los brazos, tiene la forma de un tenedor o escoba, observa la imagen.

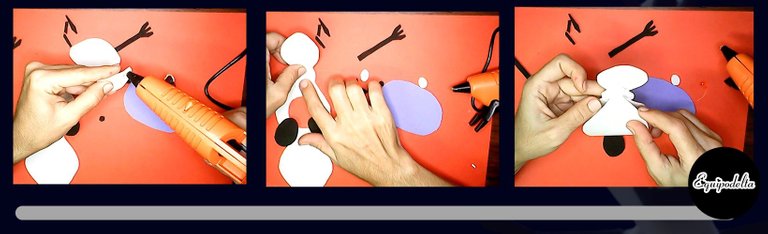
Step 6:
We proceed to glue with the hot silicone gun:
The body. When gluing the last piece remember to leave an opening, only glue the top base, then glue it on the base.
Then glue the two little feet.
Paso 6:
Procedemos a pegar con la pistola de silicón caliente:
El cuerpo. Cuando pegues la última pieza recuerda dejar una abertura, solo pegar la base de arriba, luego pégalo en la base.
Seguidamente pega los dos piecitos.
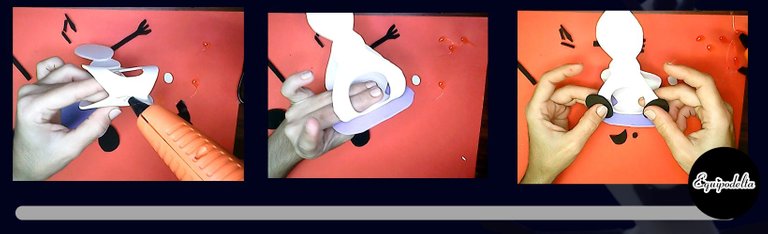
Step 7:
Glue the arms at the back.
Proceed to glue the eyes, mouth, and hair.
We have finished our project.
Paso 7:
Pega los brazos por la parte de atrás.
Procede a pegar los ojos, la boca, y el cabello.
Hemos terminado nuestro proyecto.

Detalles Técnicos / Technical Details

Mi canal Youtube, tiene un montón de tutoriales muy útiles para ti.
My Youtube channel, has a lot of very useful tutorials for you.

Hacks, DIY, Crafts, handmade arts Community
Discord

![]() 👉
👉 ![]() 👉
👉 ![]() 👉
👉  👉
👉 ![]() 👉
👉 
Que hermosa creación, mi querida Isa. Me encanta el resultado final y , como siempre, el paso a paso y la presentación, una belleza. Hasta ganas me dan de intentarlo, yo que no sé nada de este campo, viendo tu explicación, provoca animarse. Gracias por compartir conocimiento de una forma tan bonita y bien presentada. Un abrazote! 😘🤗❤ @equipodelta
Feliz que sea de tu agrado mamita
Que hermosa bombonera 😍 y todo explicado detalladamente es bonito ver publicaciones de este tipo 😍 Olaf es uno de mis favoritos. 🤗
Hola linda muchas gracias, Olaf es un roba corazones, tiene una personalidad muy hermosa, por eso nos inspira mucho.
Bonito trabajo como siempre... Besos 😘 y abrazos!!! 🤗
Gracias mi corazon de melon
Congratulations, your post has been upvoted by @dsc-r2cornell, which is the curating account for @R2cornell's Discord Community. Enhorabuena, su "post" ha sido "up-voted" por @dsc-r2cornell, que es la "cuenta curating" de la Comunidad de la Discordia de @R2cornell.
Me encanta Olaf, quedó muy bonito. seguiré estos pasos para realizar uno.
Congratulations @equipodelta! You have completed the following achievement on the Hive blockchain and have been rewarded with new badge(s) :
Your next target is to reach 7750 replies.
You can view your badges on your board and compare yourself to others in the Ranking
If you no longer want to receive notifications, reply to this comment with the word
STOP