
¡Hola Chicos!
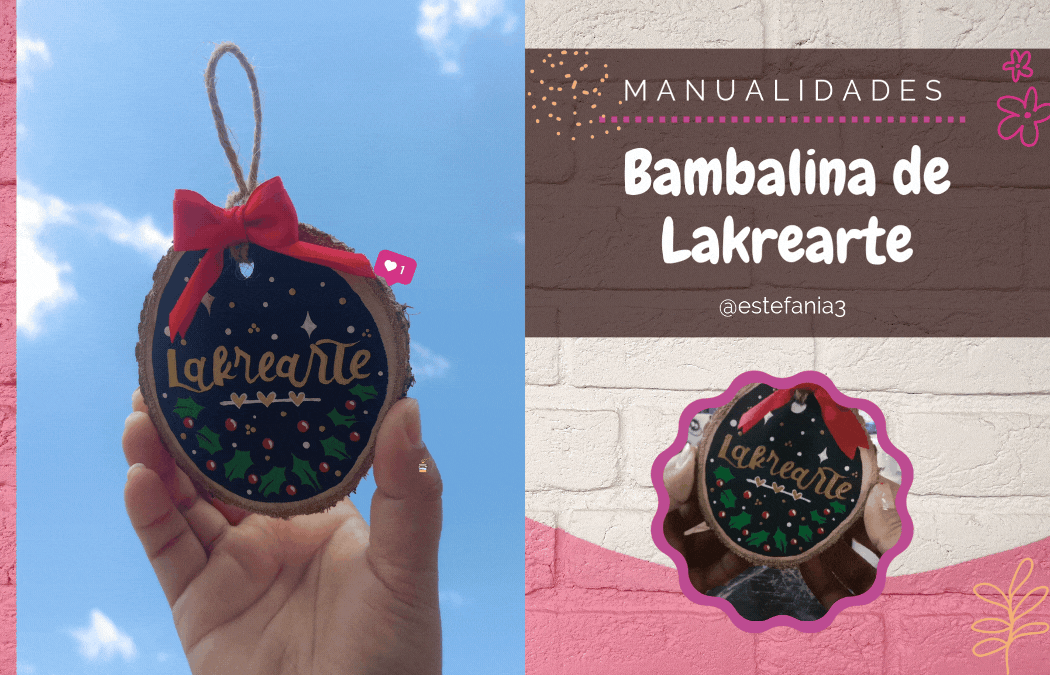
Siguiendo con la serie navideña atrasada 😅😂 hoy quiero compartirles una bambalina que hice con el nombre de nuestra marca Lakrearte.
El motivo por el que la pinté es que iba a realizar una actividad donde las personas tendrían la oportunidad de pintar las suyas propias, y para promocionarla decidí pintar una para mostrarle a las personas lo que podrían hacer a través de un vídeo.
Por supuesto debía involucrar nuestro nombre, y el resultado me encantó la verdad, lastima que no se puede mostrar todo el año, pero espero pronto hacer una atemporal.
Así que ahora les comparto el paso a paso de como la pinté.
Hello Guys!
Continuing with the overdue Christmas series 😅😂 today I want to share with you a backdrop I made with the name of our brand Lakrearte.
The reason I painted it is because I was going to do an activity where people would have the opportunity to paint their own, and to promote it I decided to paint one to show people what they could do through a video.
Of course it had to involve our name, and I really loved the result, too bad it can't be shown all year round, but I hope to make a timeless one soon.
So now I share with you the step by step of how I painted it. how I painted it.
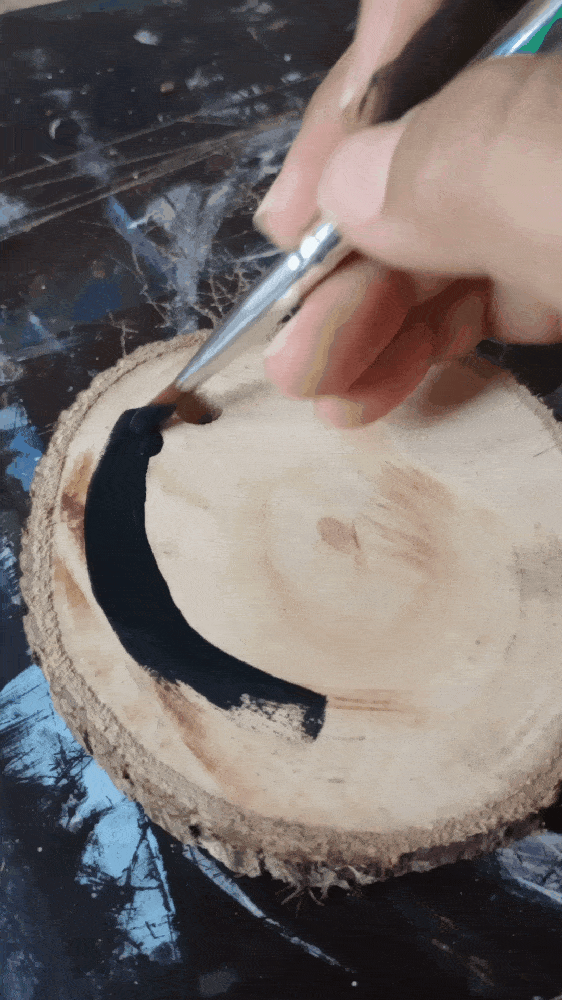
Primero fui pintando poco a poco la base de color negro, dejando un pequeño borde de separación para darle un toque más limpio a los acabados.
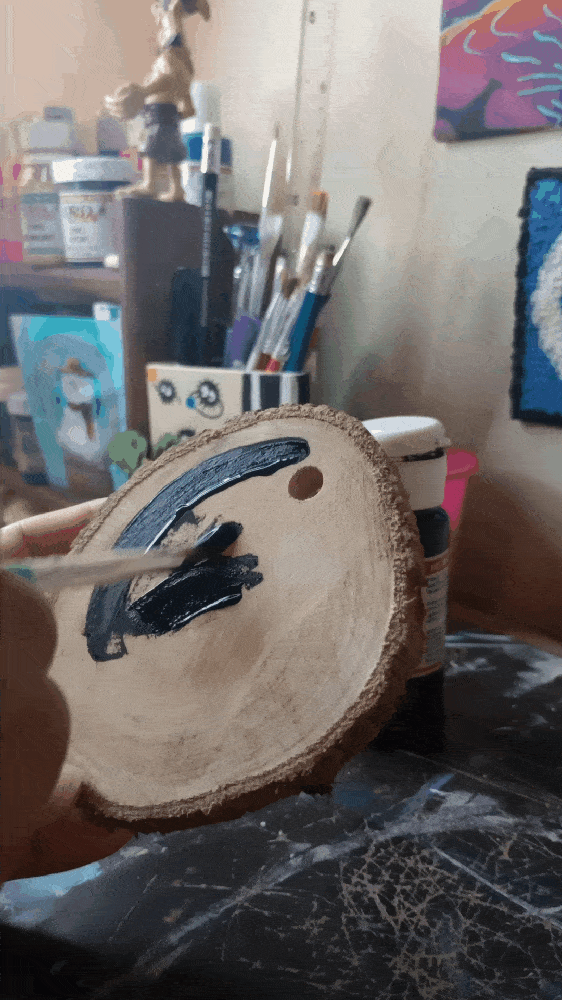
First I gradually painted the base black, leaving a small border to give a cleaner touch to the finish.
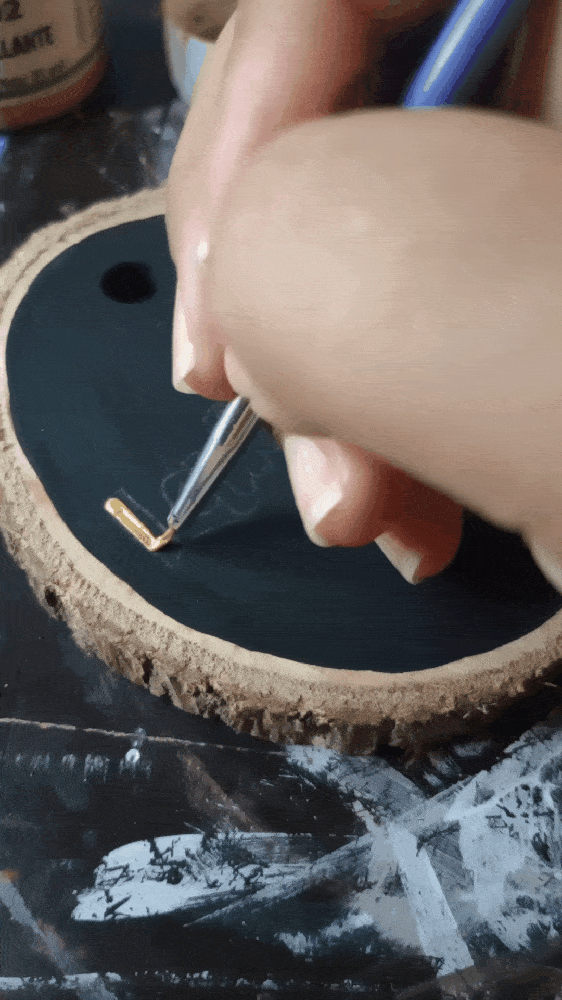
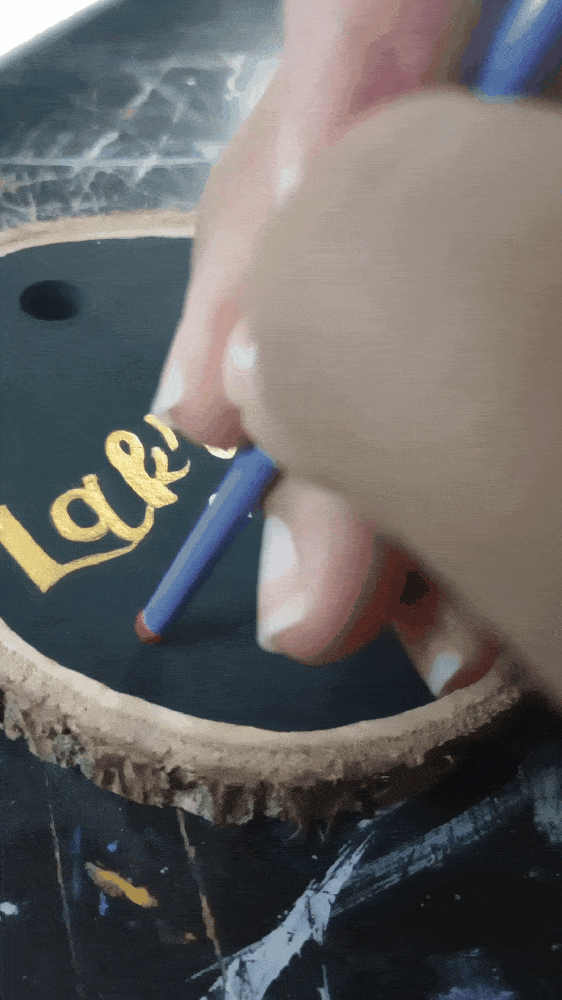
Una vez estuvieron aplicadas dos capas de pintura y hubieran secado, tracé con lápiz las letras de nuestro nombre Lakrearte.
Con pintura dorada y un pincel delineador, fui pintando poco a poco las letras, todo se hace con sumo cuidado para lograr un acabado perfecto.
Al terminar comencé a agregar detalles, como esa línea en la parte inferior de color blanco.
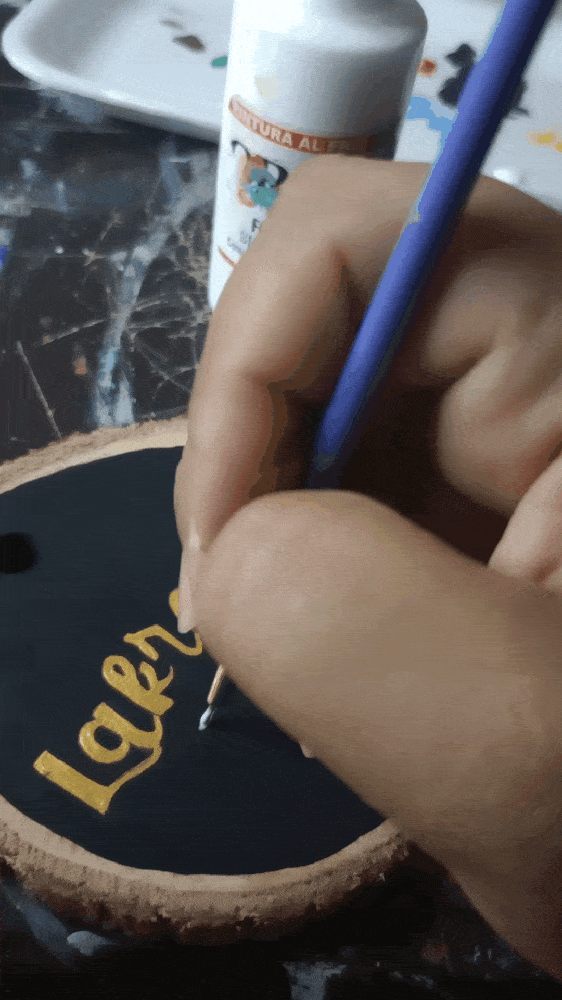
Once two coats of paint had been applied and had dried, I traced the letters of our name Lakrearte with a pencil.
With gold paint and an eyeliner brush, I painted the letters little by little, everything is done very carefully to achieve a perfect finish.
When I finished I started to add details, like that line at the bottom in white.
Pinté varias cerecitas y hojitas para darle un toque bien navideño.
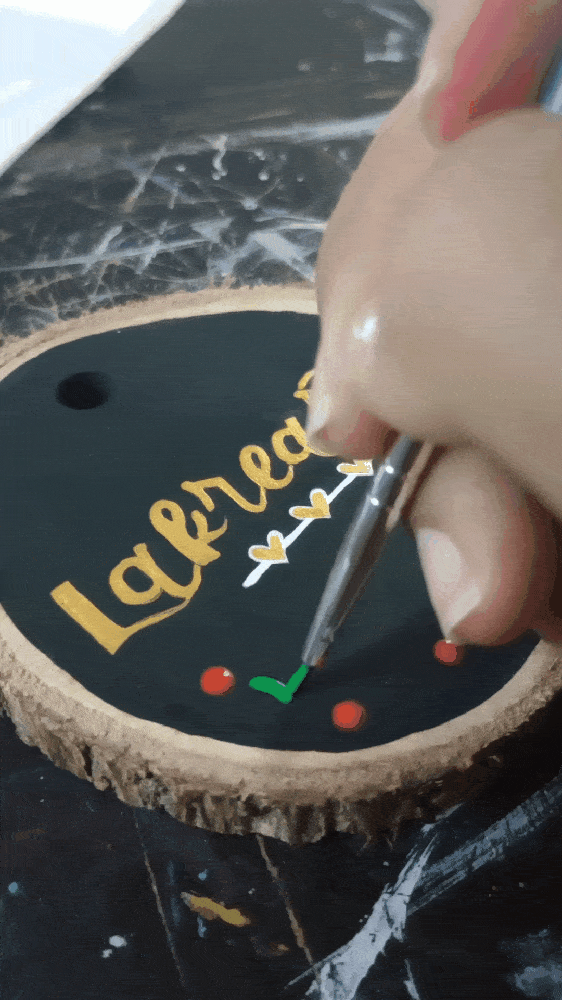
I painted some little cherries and leaves to give it a Christmas touch.

Haciendo puntitos en el cielo simule algunas estrellas y también le hice unos detalles de luz a las cerecitas para que tuvieran un mejor aspecto.
Usando esta mezcla de rojo, verde y blanco logré darle un aspecto bien navideño a la bambalina.
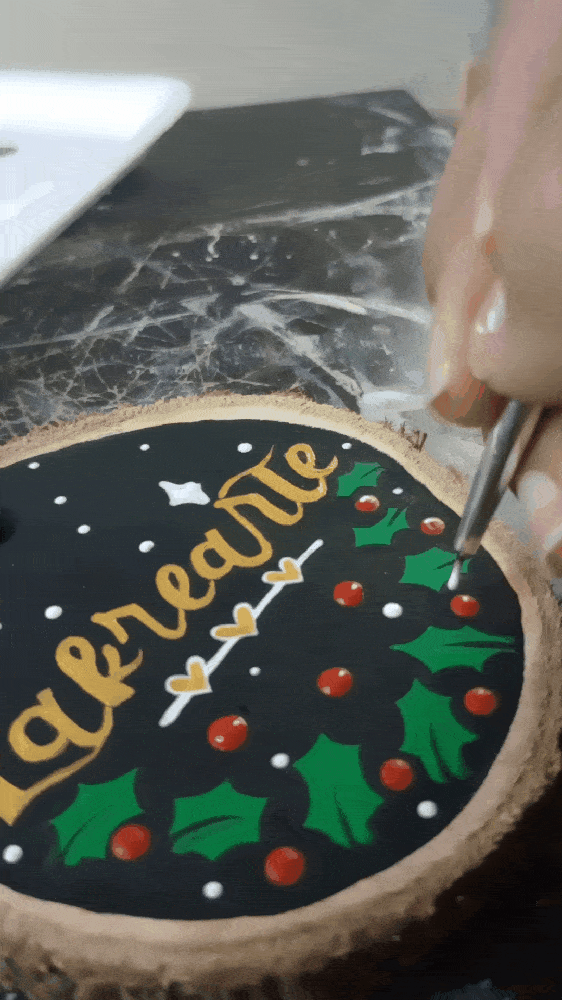
By making dots in the sky I simulated some stars and I also made some light details on the little cherries to give them a better look.
Using this mix of red, green and white I managed to give a very christmassy look to the backdrop.
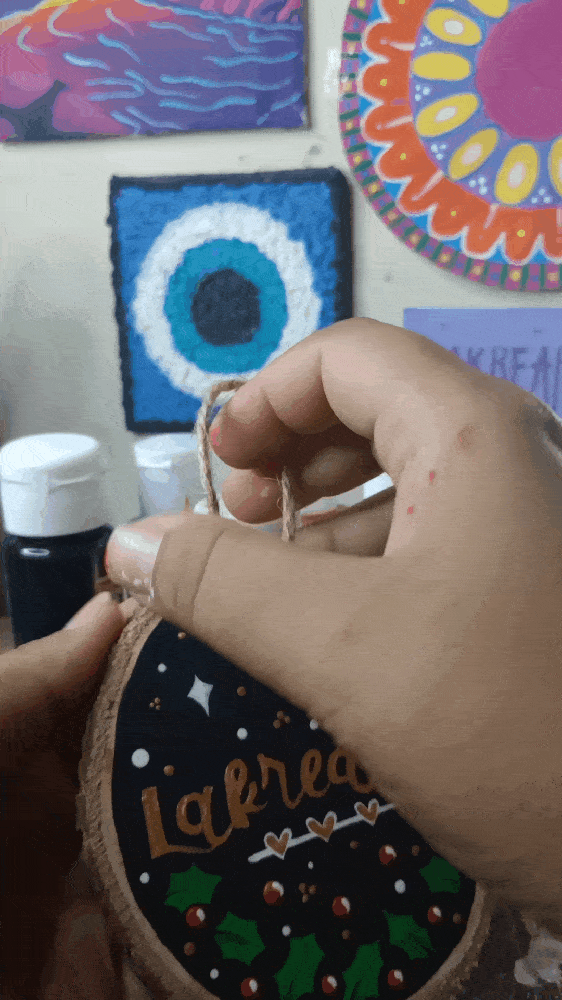
Con un hilo de.yute hice una pequeña cinta desde donde se colgaría la bambalina. Las bases de madera tenían un agujero, así que introduje el hilo por ahí y luego lo aseguré dandole unas vueltas.
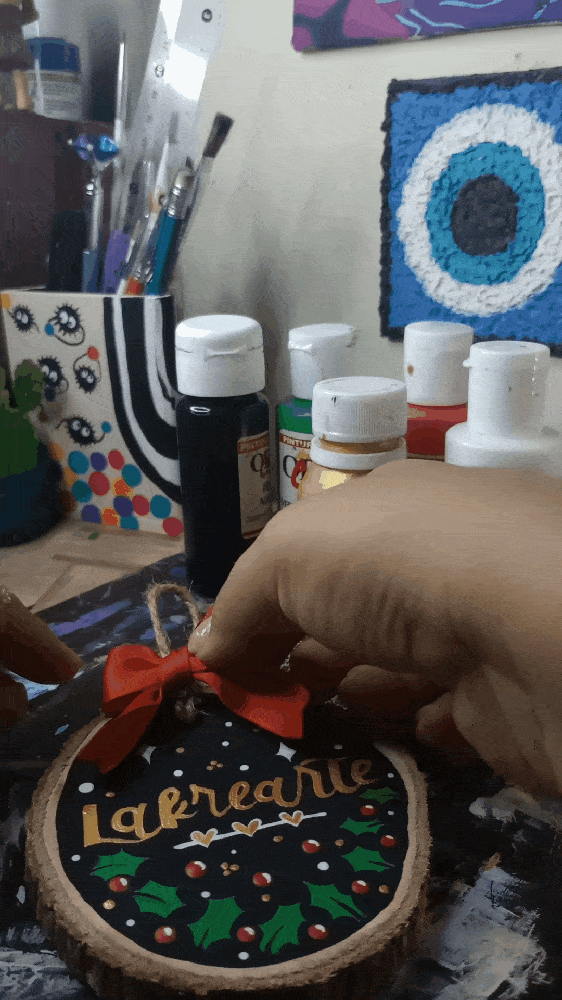
Luego con silicón le pegue un lazo rojo, el cual debo confesar que no tenía ni idea como hacerlo hasta que hice las primeras bambalinas jajaja. Me quedó bien bonito la verdad.
Lo aseguré muy bien para que no se fuera a caer con el movimiento.
With a jute thread I made a small ribbon from which the scrim would be hung. The wooden bases had a hole in them, so I put the thread through there and then secured it with a few turns.
Then with silicone I glued a red ribbon, which I must confess I had no idea how to do it until I made the first scrims hahaha. It turned out really nice.
I secured it very well so that it wouldn't fall off with the movement.

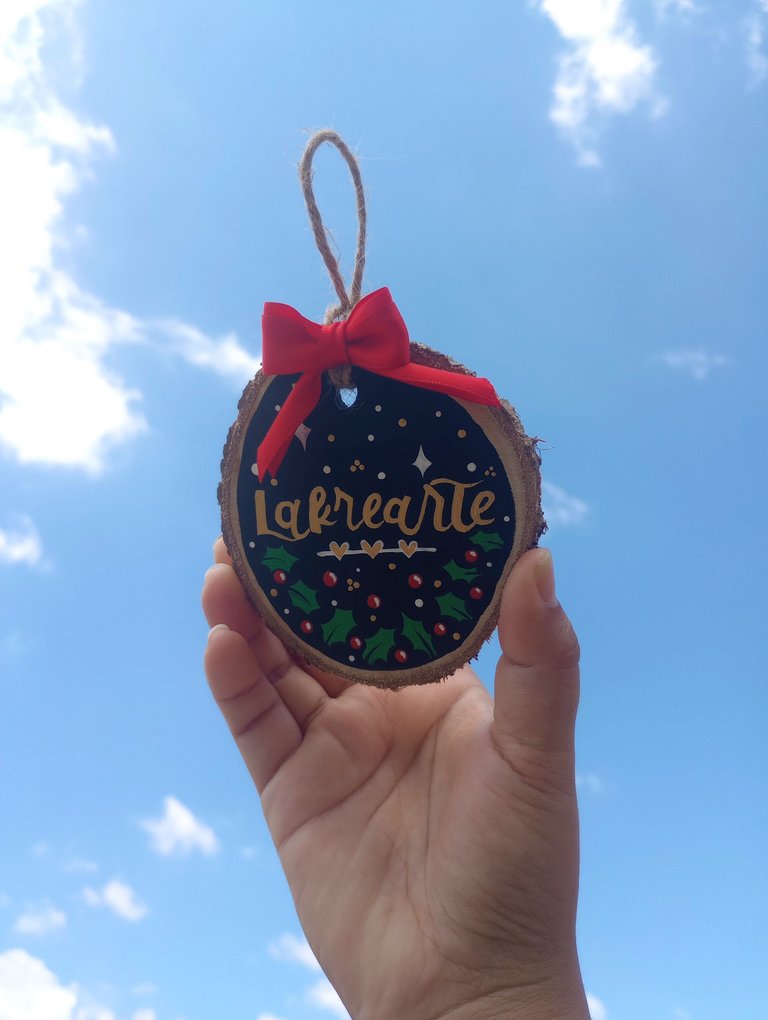
Y así quedó lista la bambalina de muestra para promocionar mi evento. La verdad me gustó bastante y disfruté mucho el pintarla. Espero que les guste y tomen esa idea para algún proyecto futuro, no necesariamente navideño jaja
Lo chevere es que se puede pintar un paisaje y otra cosa en estas decoraciones.
En un próximo post comenzaré a compartirles lo que fue nuestra actividad de Pinceladas Navideñas.
And that's how the sample backdrop was ready to promote my event. I really liked it and I enjoyed painting it a lot. I hope you like it and take this idea for a future project, not necessarily for Christmas haha.
The cool thing is that you can paint a landscape and something else on these decorations.
In a next post I will start sharing with you what our Christmas Brushstrokes activity was like.

Espero haya sido de tu agrado y provecho.
Un gran abrazo a todos, y nos leemos en un próximo post
• Lakrearte en Hive •
Att: Estefania Garcia ♥
Imágenes y separadores de mi autoría
Portada editada en Canva
Fotografías tomadas con un Moto G31
Texto traducido en Google ImTranslate v.14.27
Thanks for your support 💜
Congratulations @estefania3! You have completed the following achievement on the Hive blockchain And have been rewarded with New badge(s)
Your next target is to reach 180000 upvotes.
You can view your badges on your board and compare yourself to others in the Ranking
If you no longer want to receive notifications, reply to this comment with the word
STOPCheck out our last posts:
Saludos @estefania3, que lindo te quedó, el fondo negro le da un estilo elegante.
Feliz domingo!
the results are simply spectacular♥️
Thanks ♥