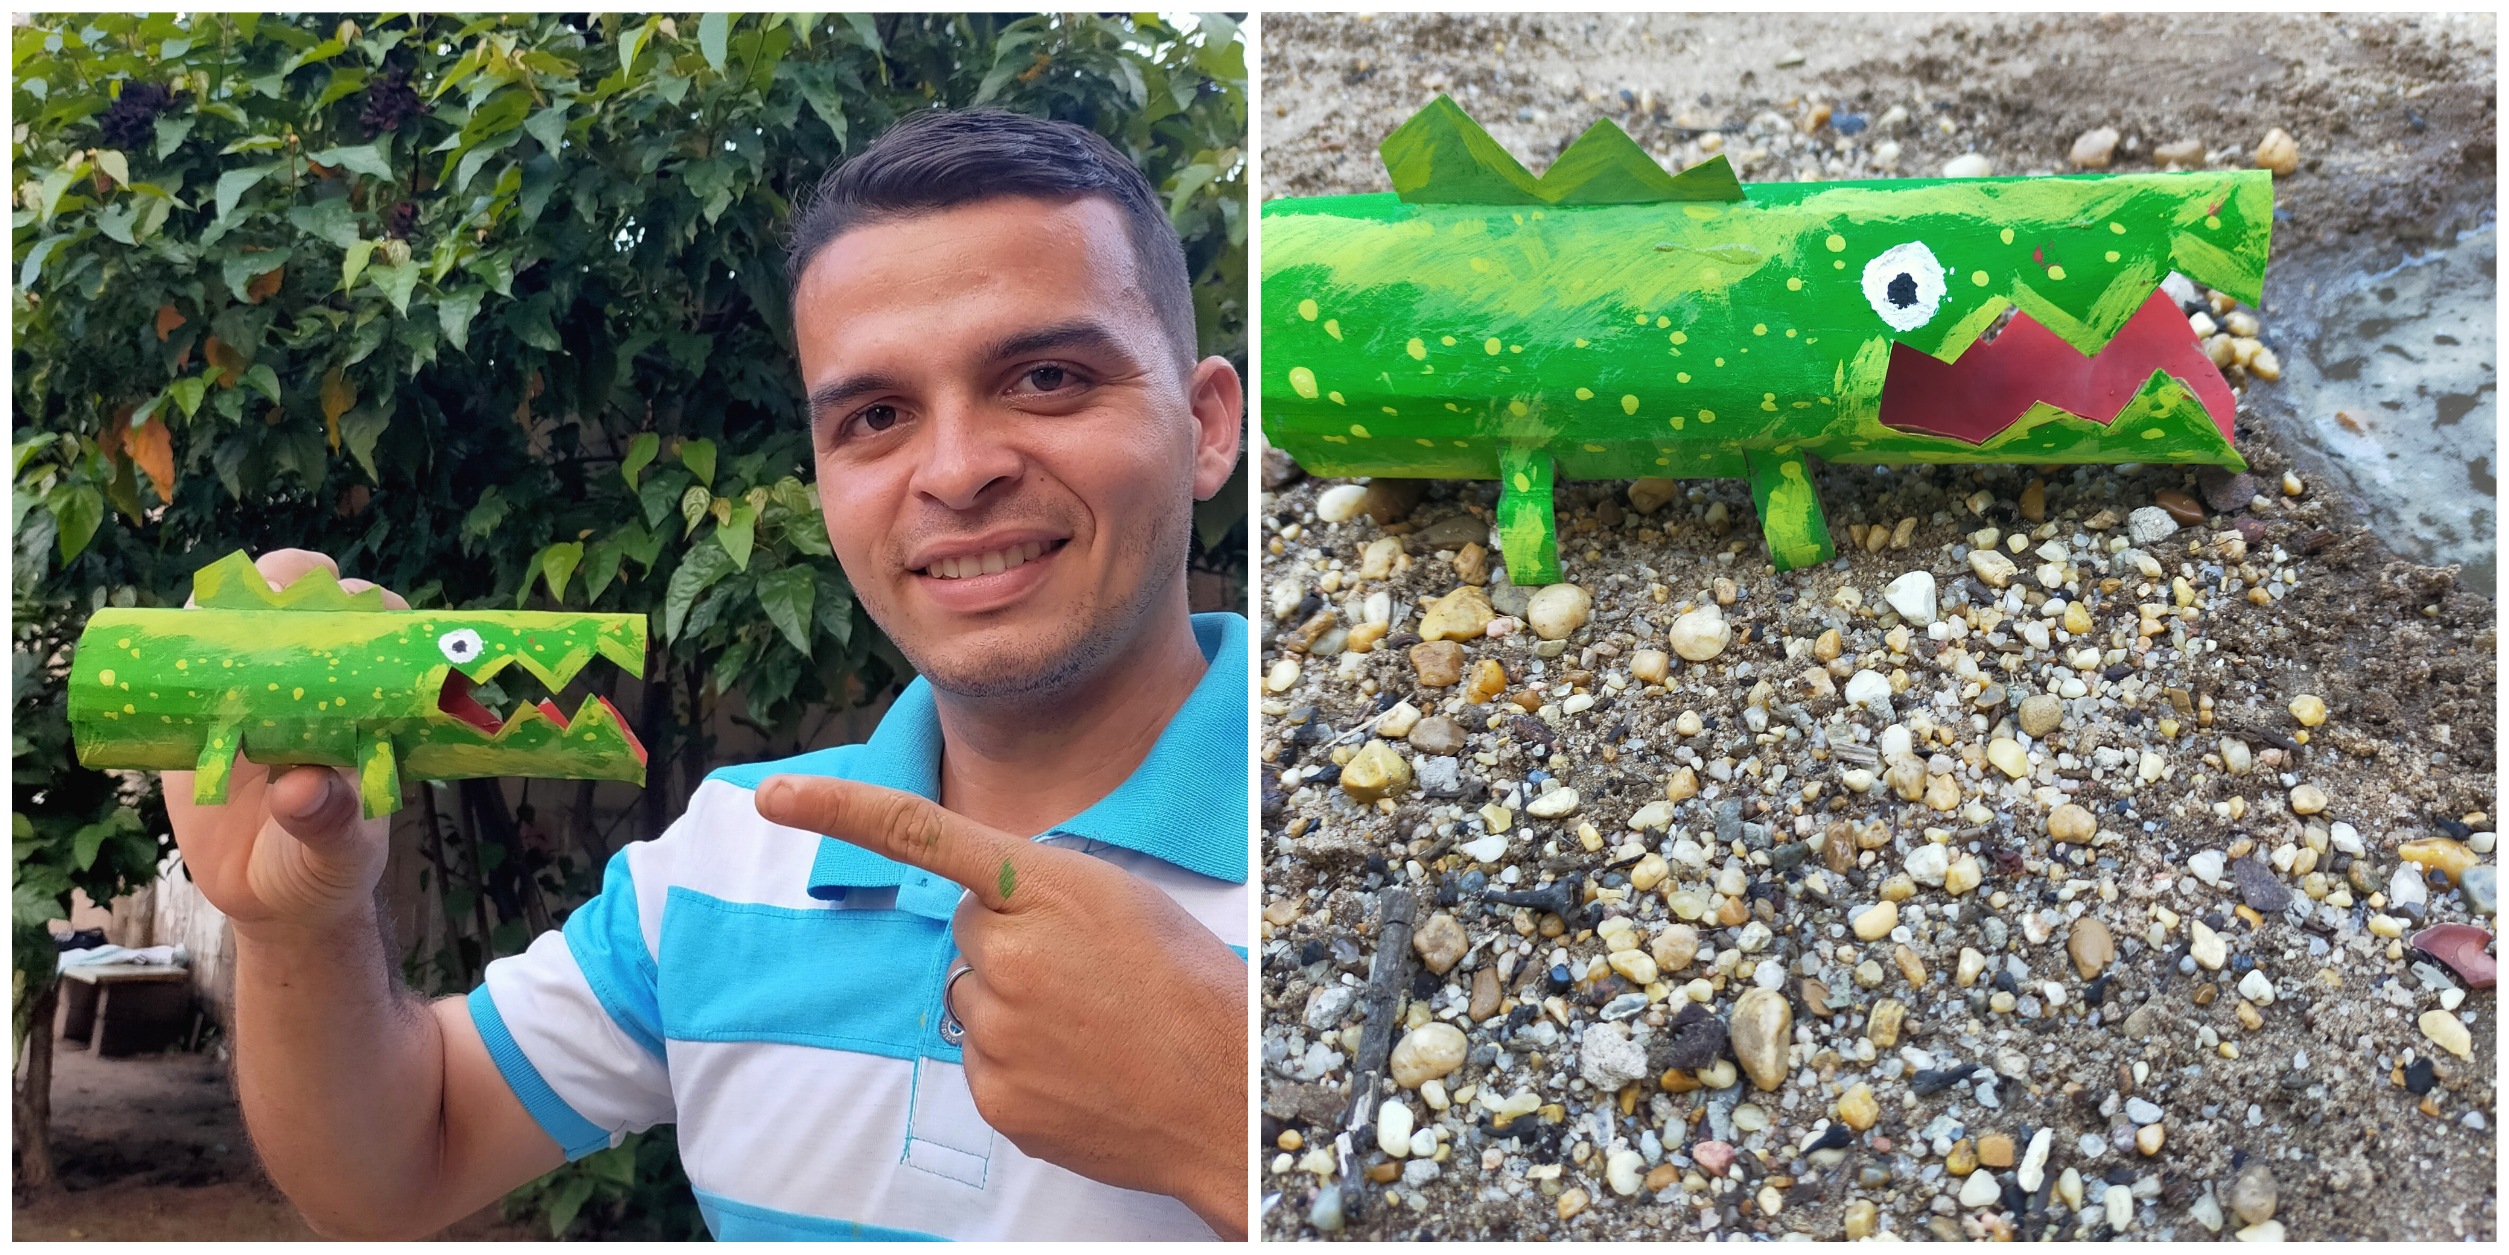
BIENVENIDOS ✨🤗✨🐝🐳🐊🐠
¡Hola! ¡Hola! Amigos de hive blog, espero se encuentren muy bien en este día. Son bienvenidos a mi blog. Realicé una manualidad sencilla, pero creativa para mostrar a ustedes. Espero sea de su agrado.
Hello! Hello! Friends of hive blog, I hope you are very well on this day. You are welcome to my blog. I made a simple, but creative craft to show you guys. I hope you like it.
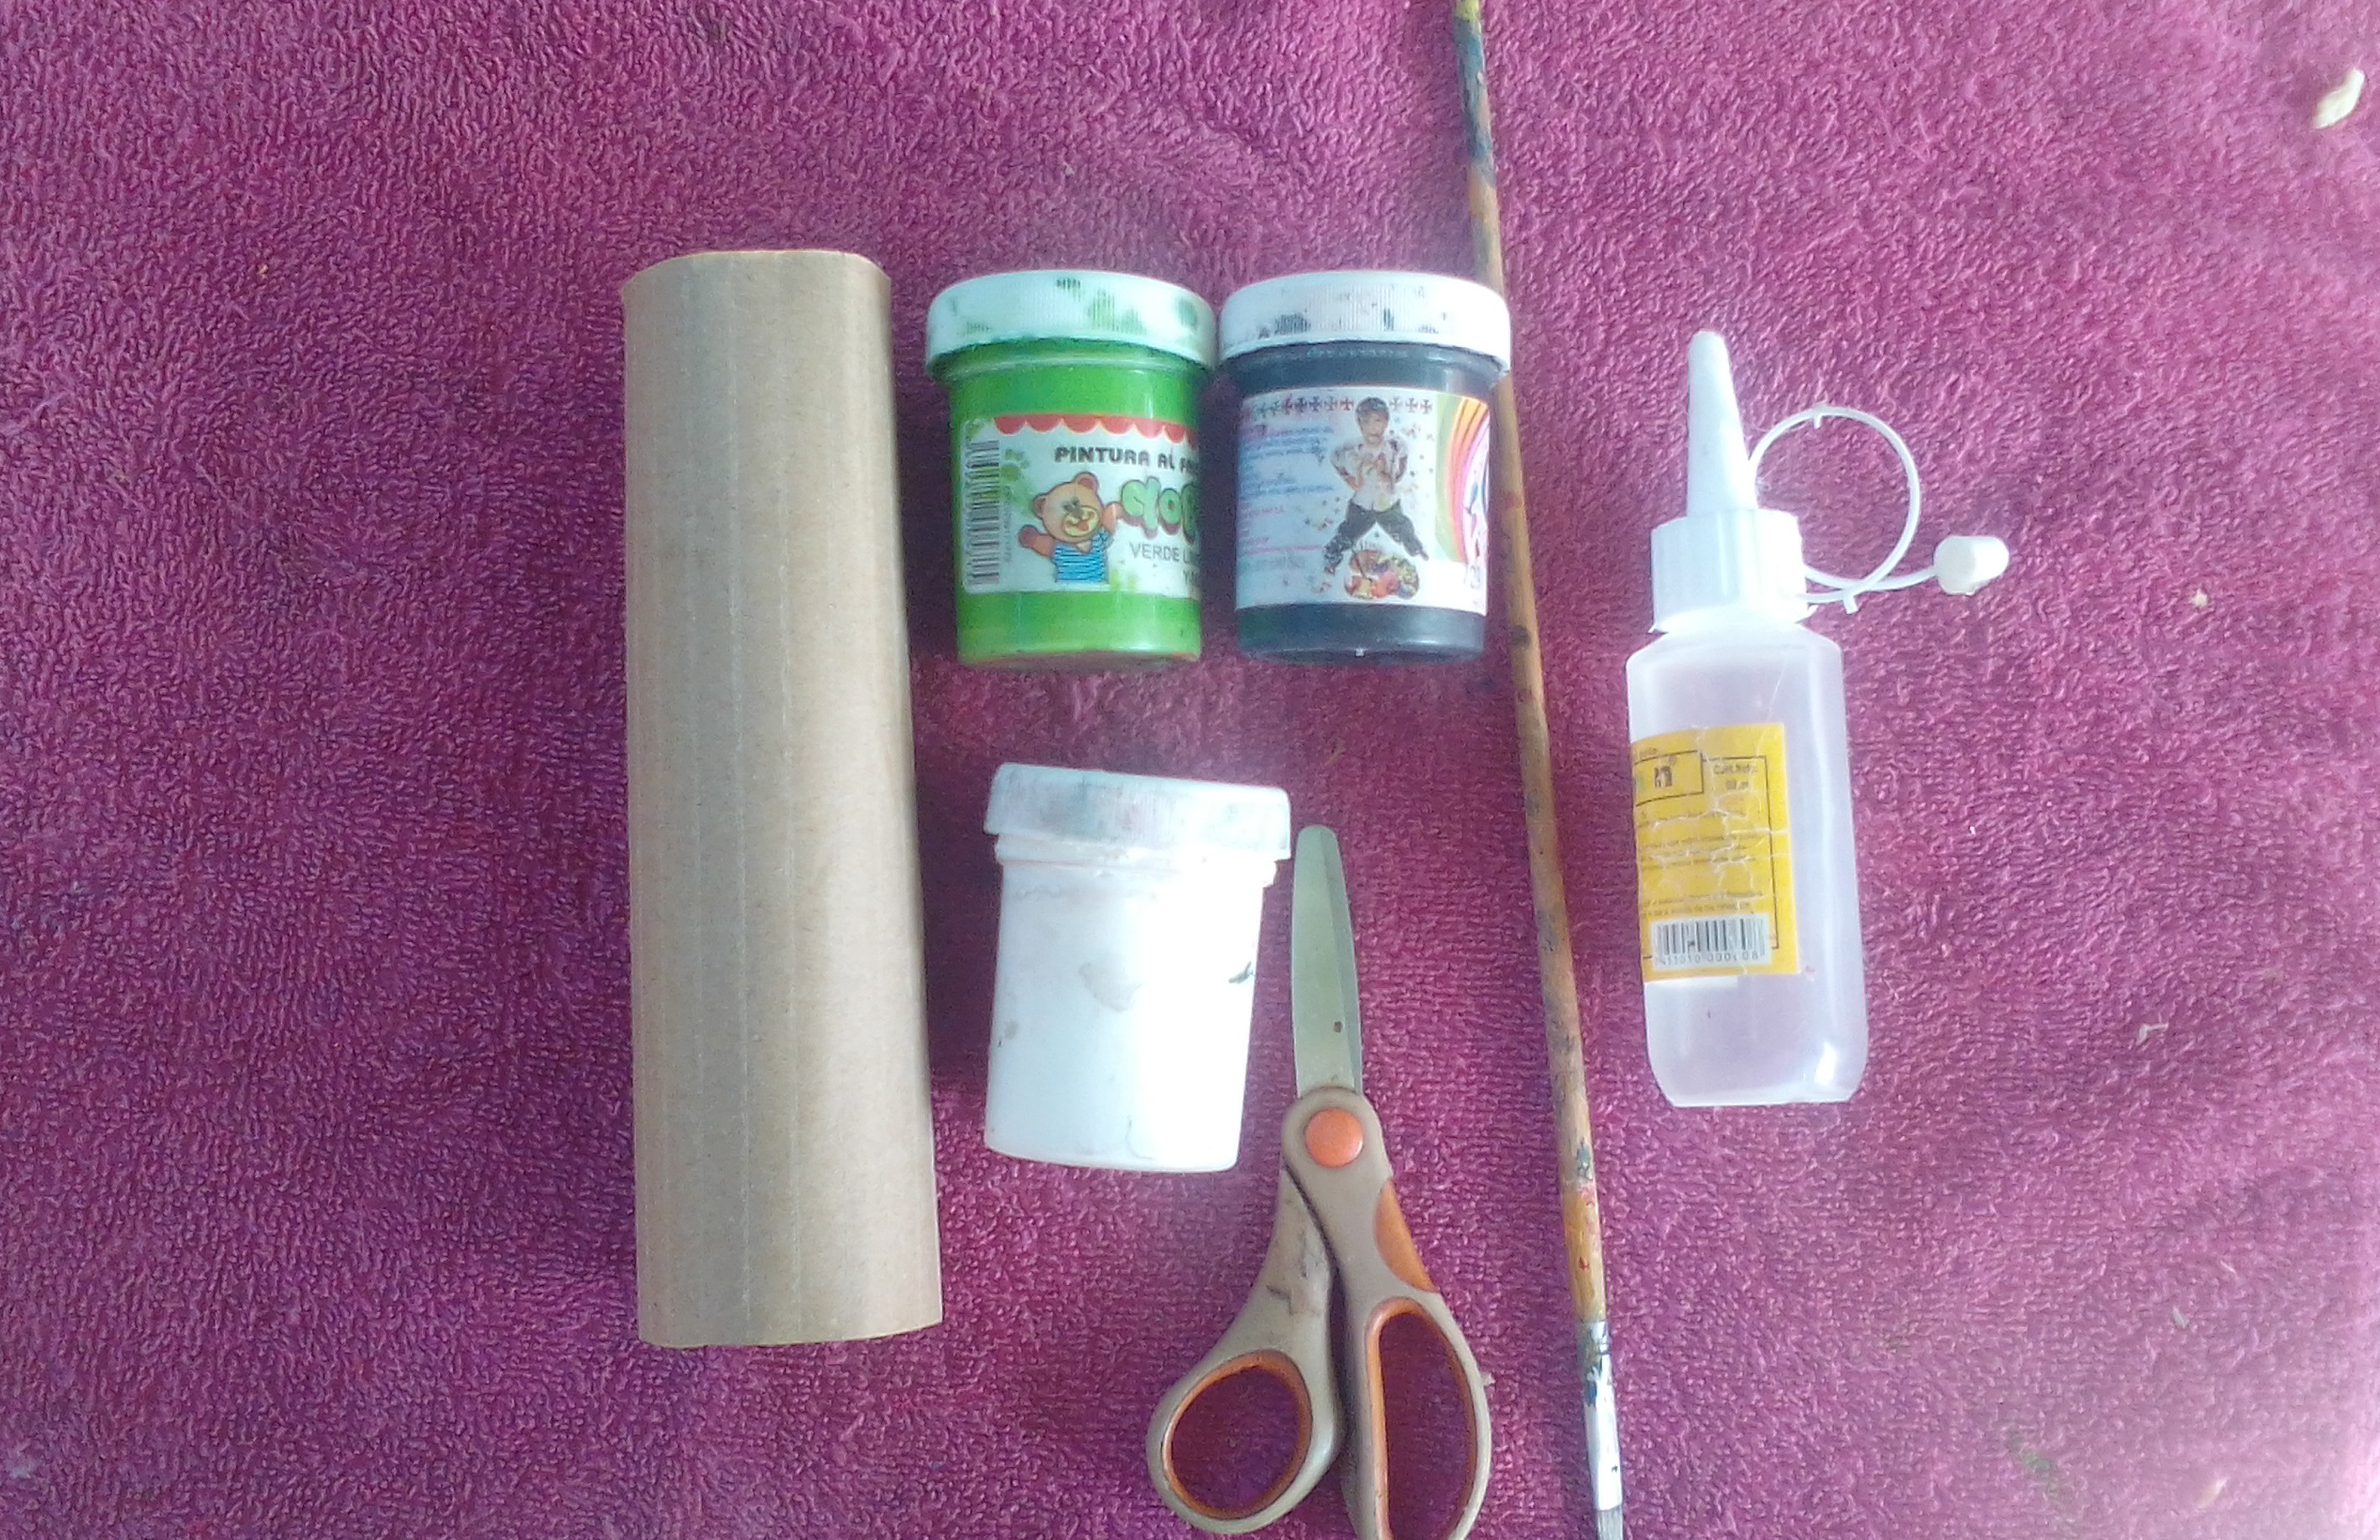
Solo necesitas//You only need
-Rollo de cartón
-Pinturas al frío
-Silicon
-Tijeras
-Pincel
-Cardboard roll
-Cold paintings
-Silicon
-Pair of scissors
-Brush
Empecemos//Let us begin
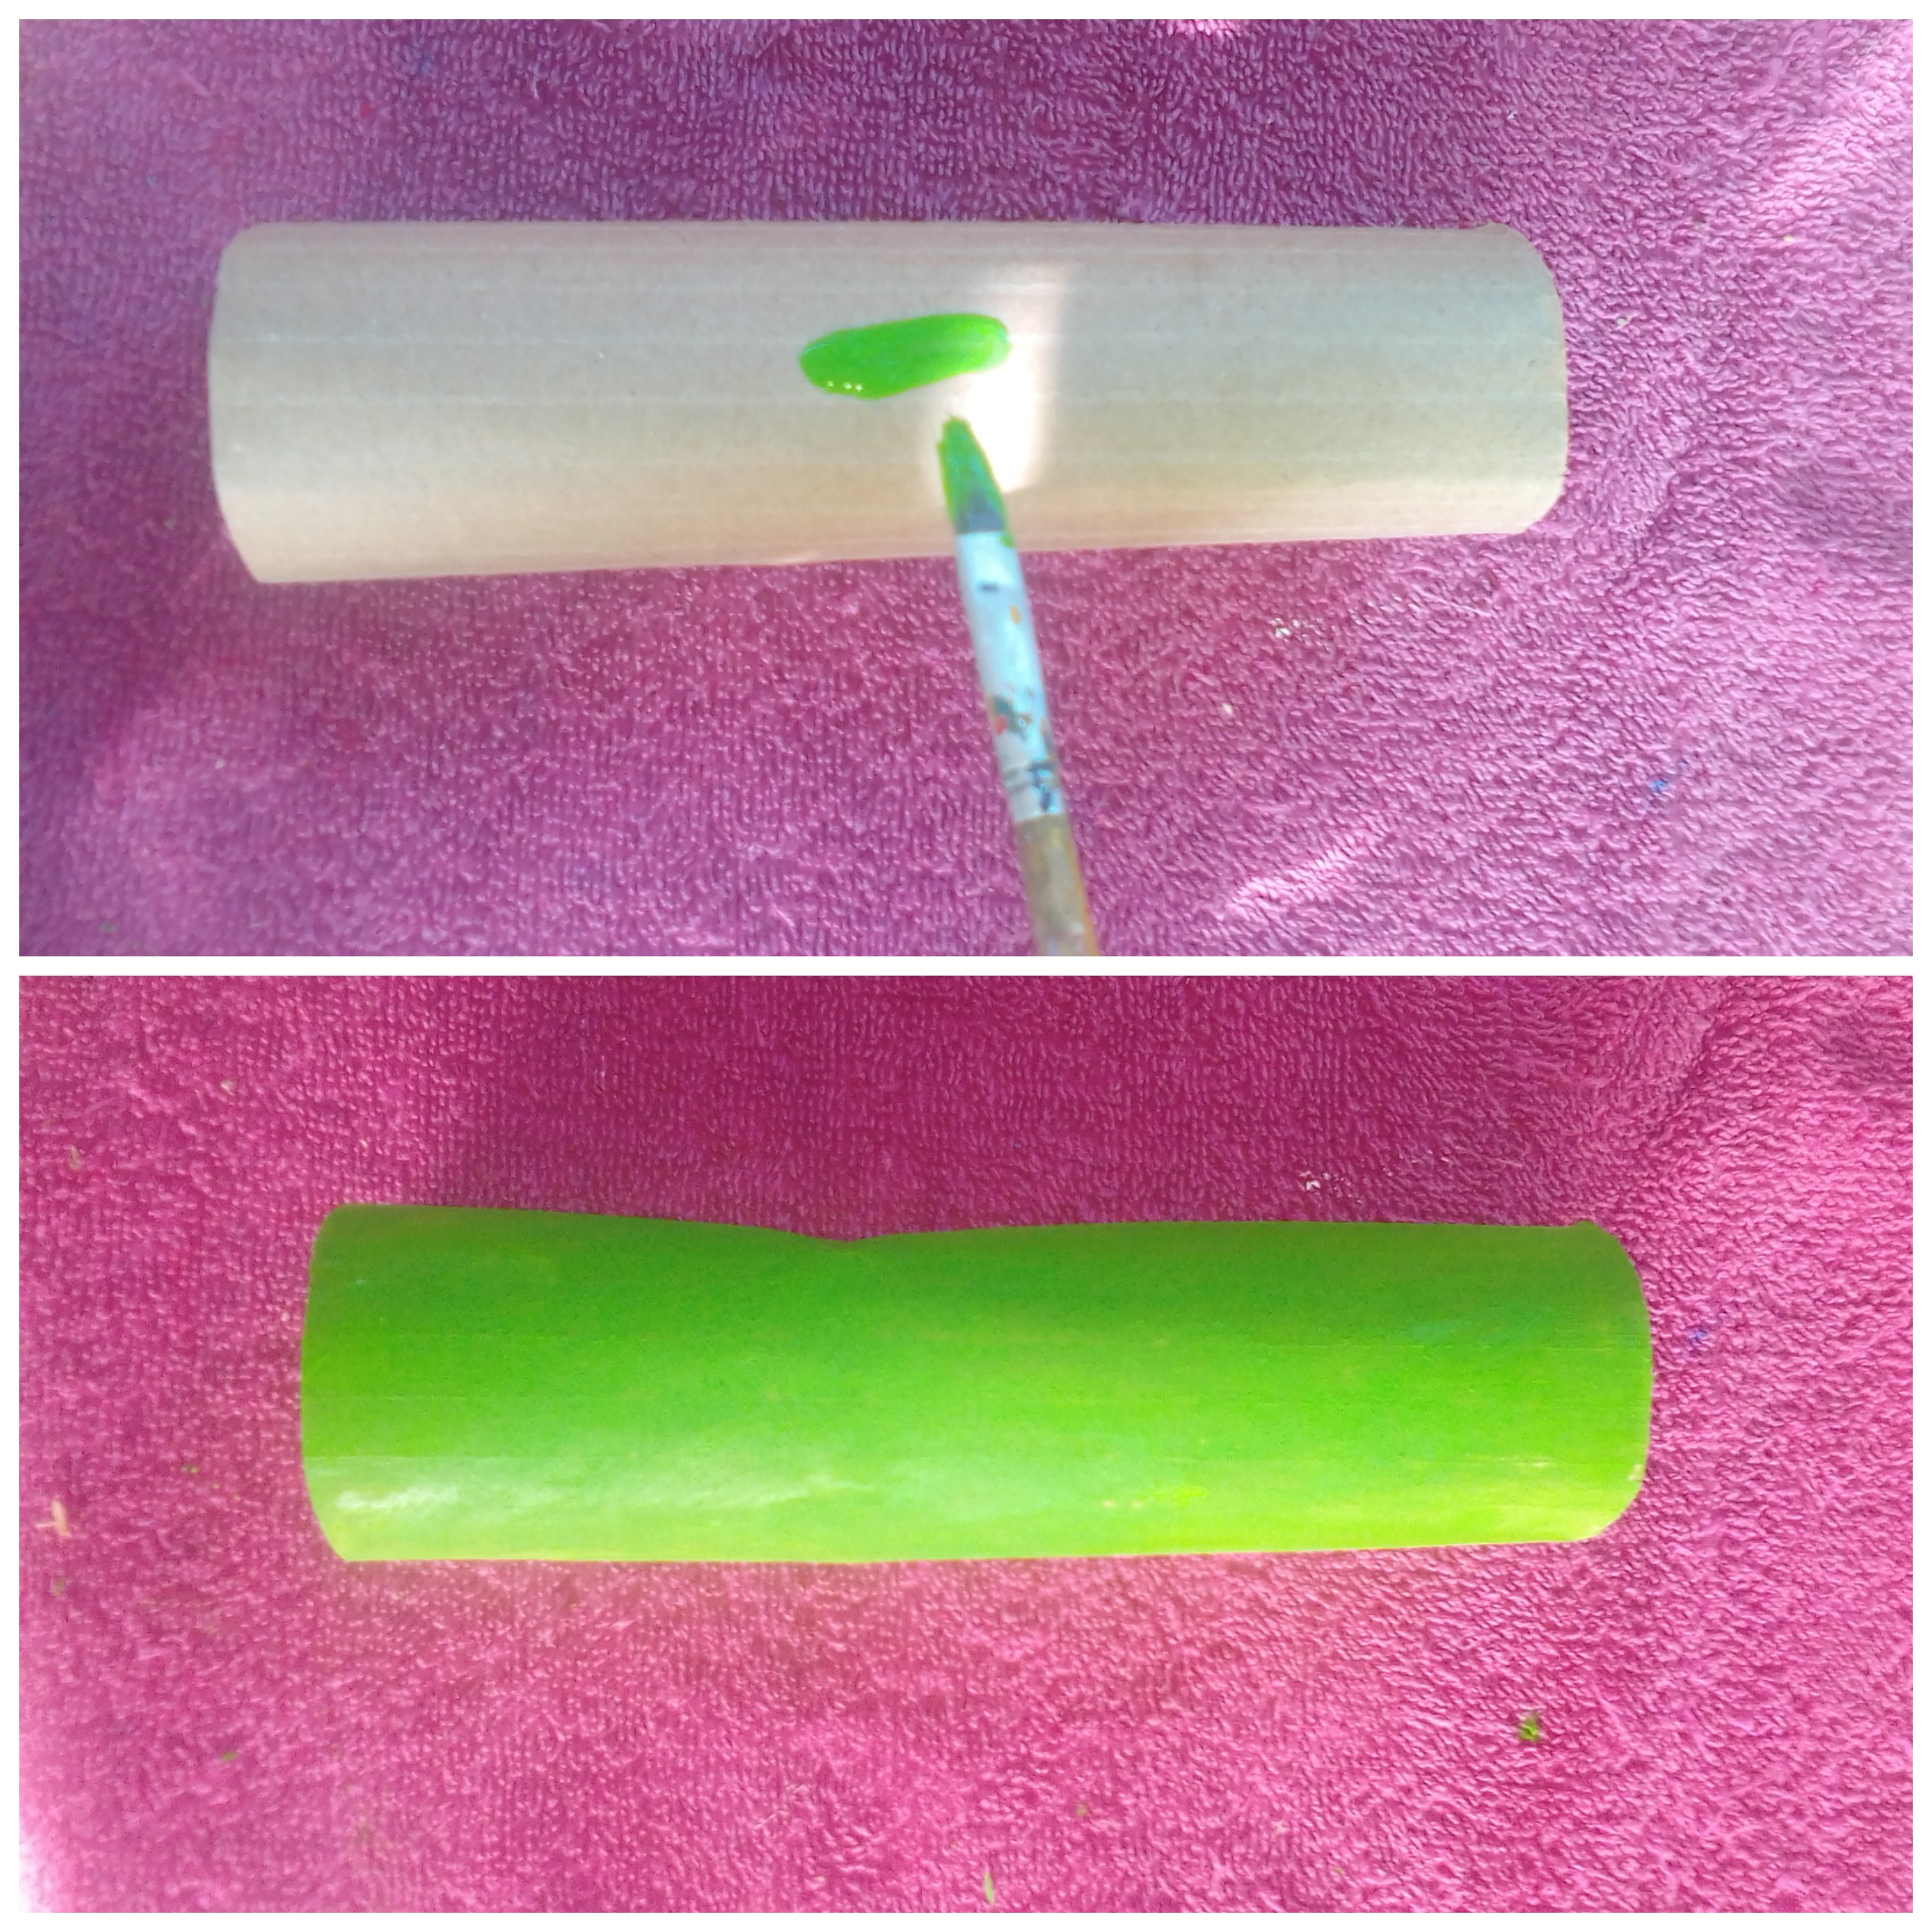
Paso 1: El rollo de cartón deberás pintar de color verde
Step 1: The cardboard roll must be painted green
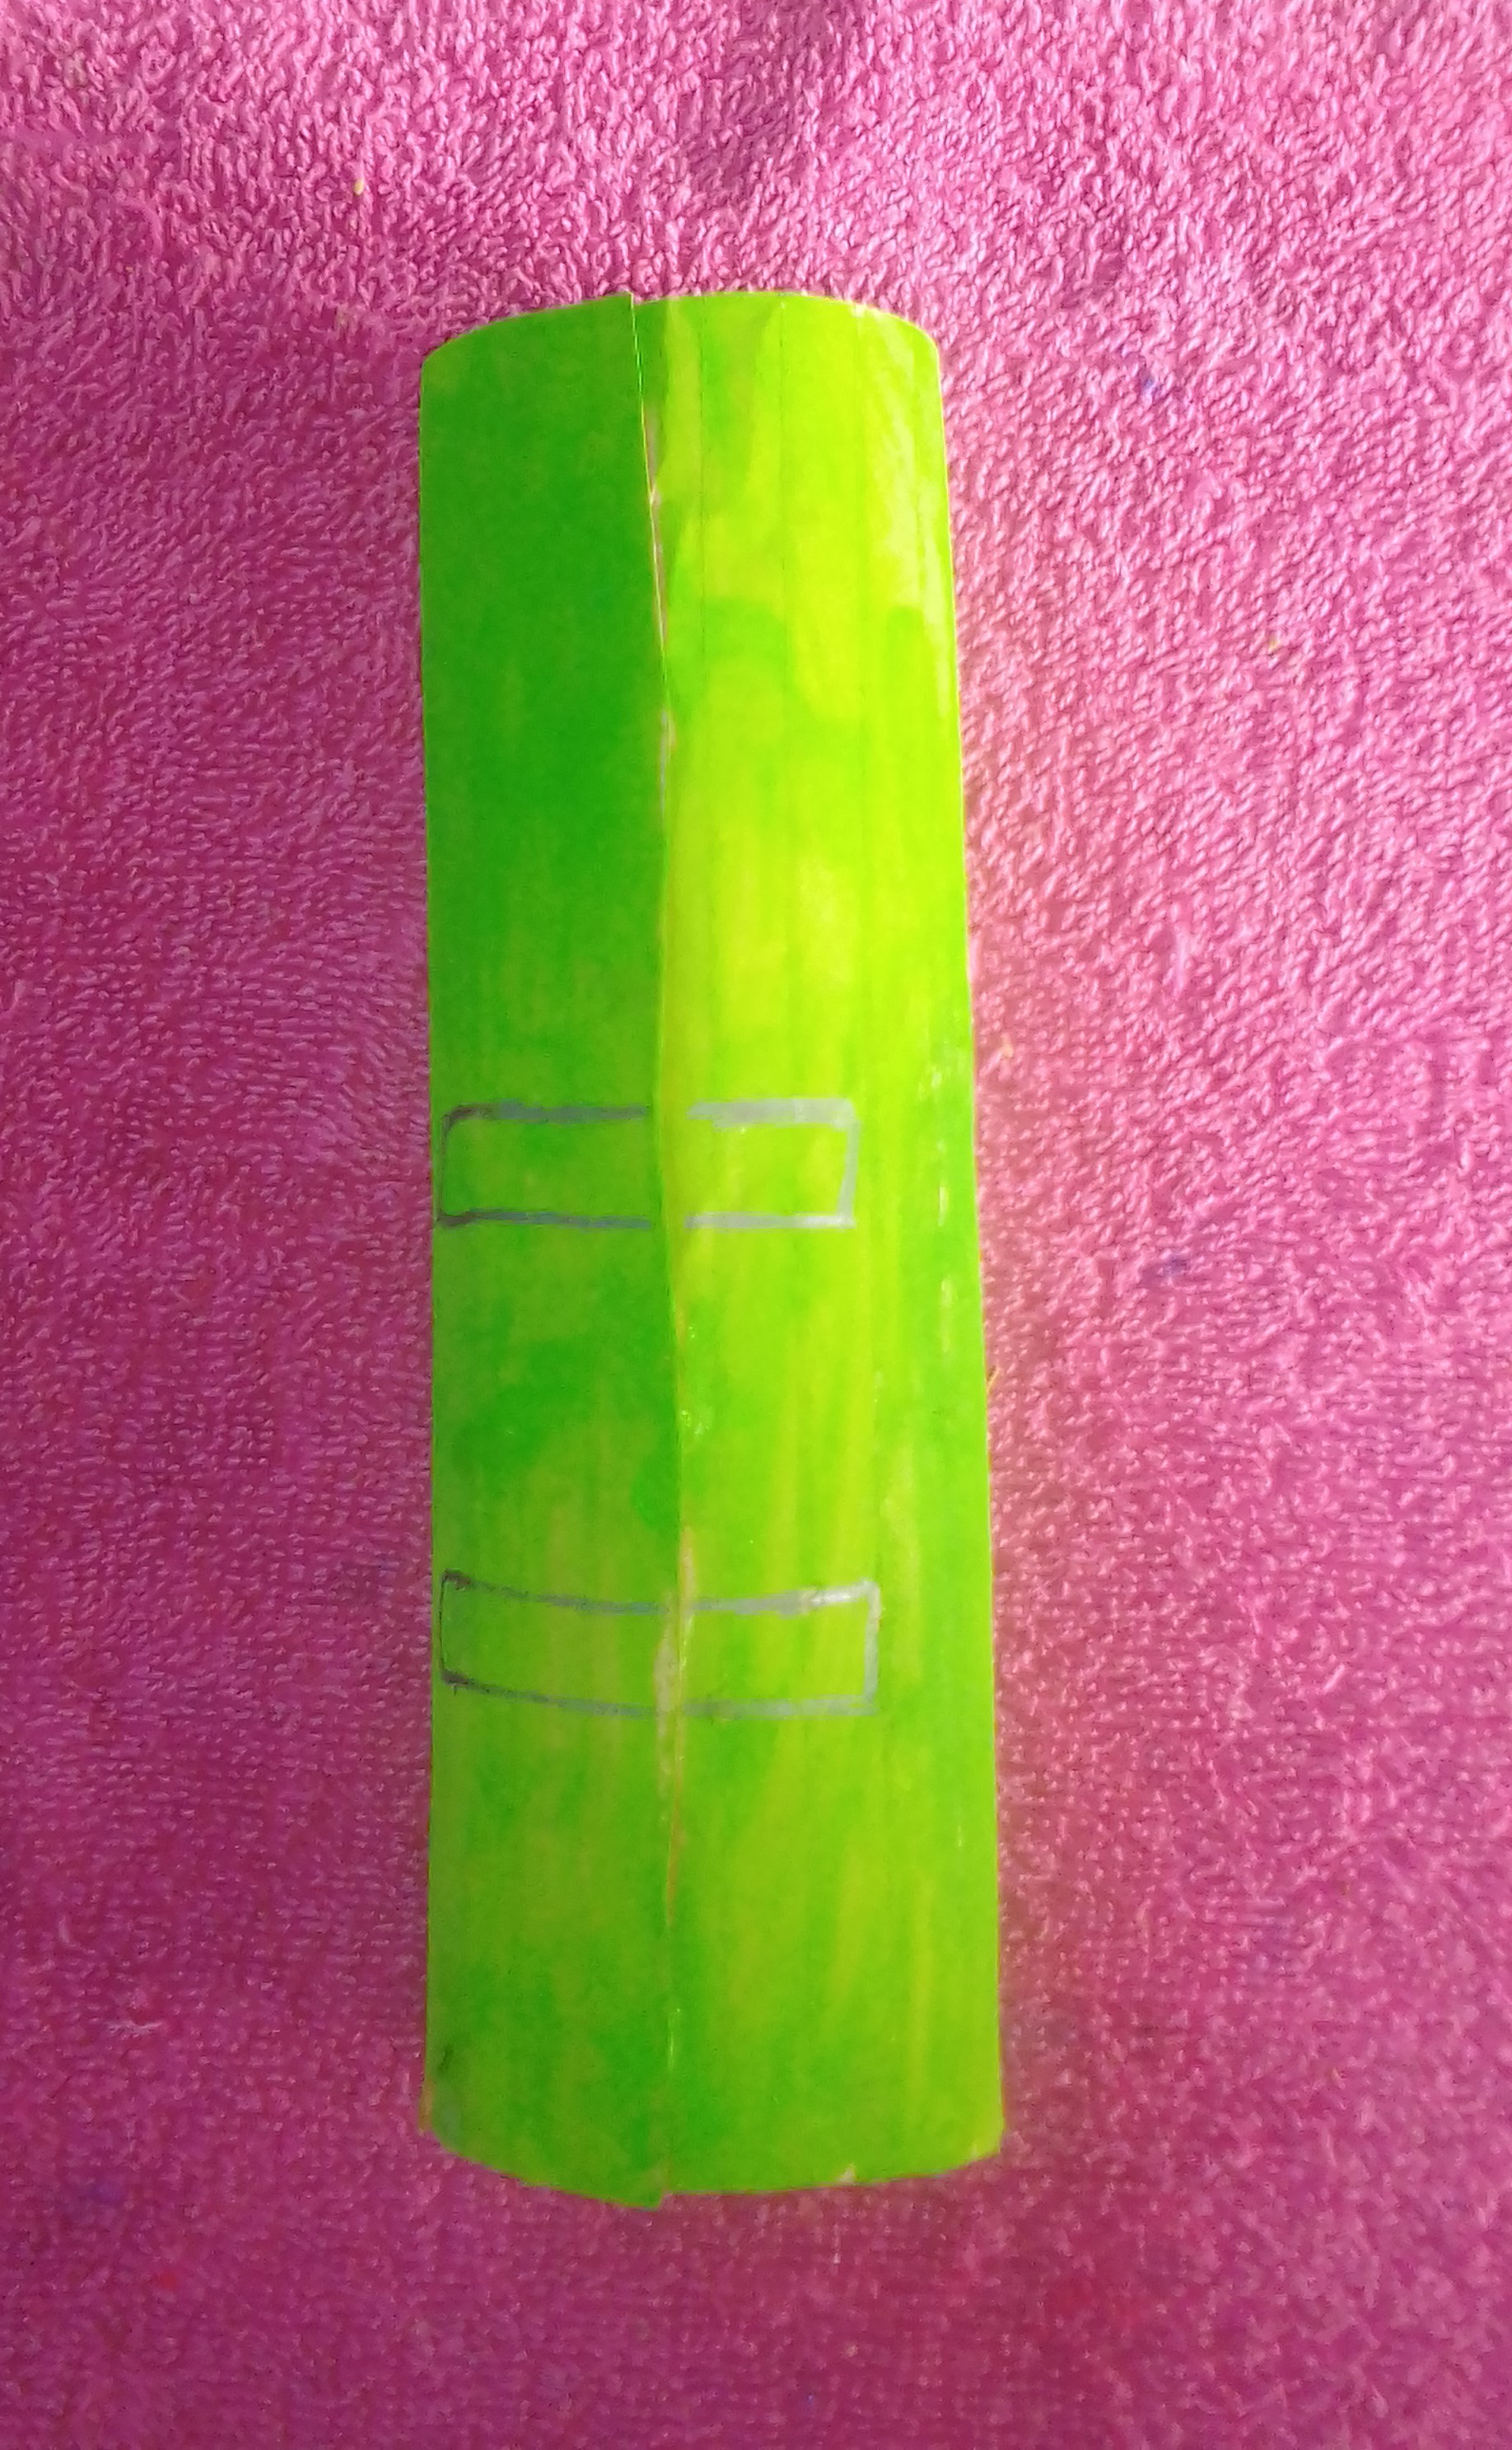
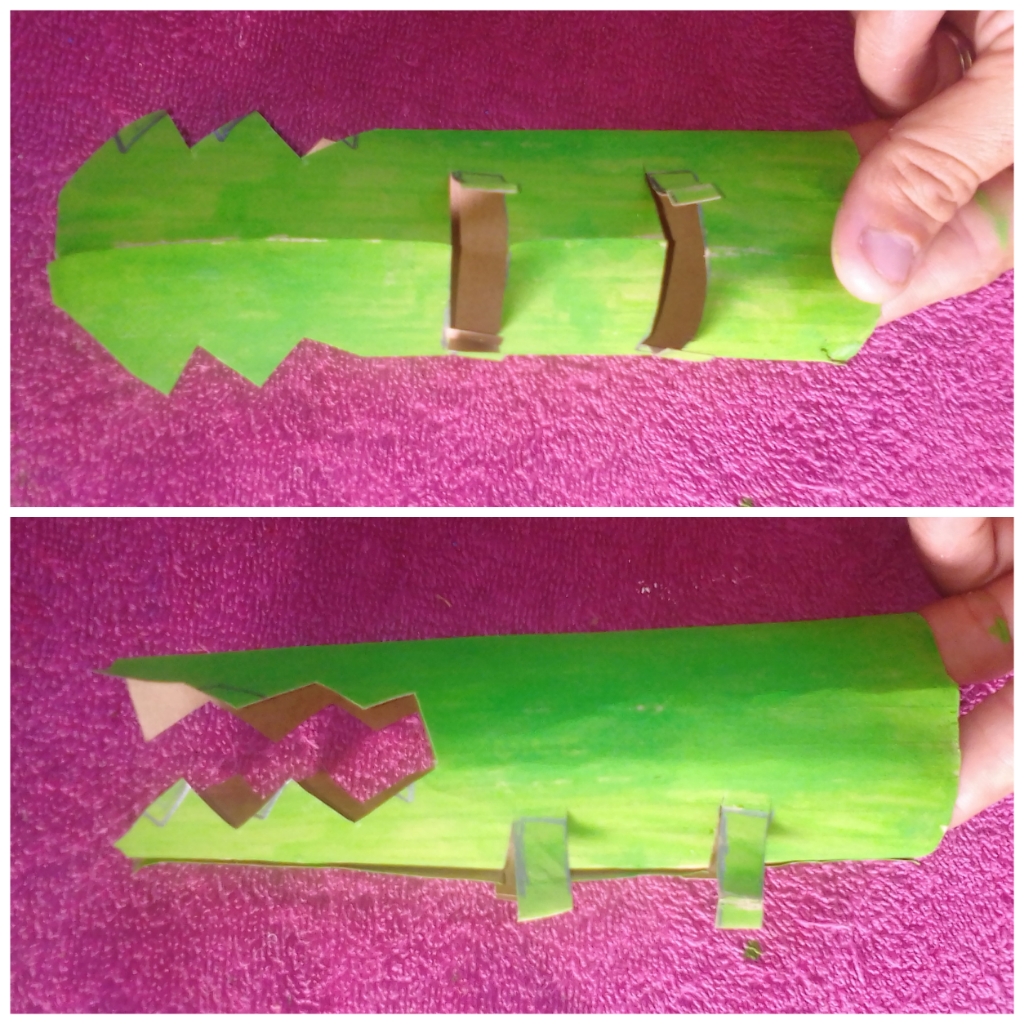
Paso 2: Trazaras en el rollo, luego de estar seco dos espacios de alrededor de 3cmx1cm c/u no tan separados entre si
Step 2: You will trace on the roll, after being dry, two spaces of about 3cmx1cm each not so far apart
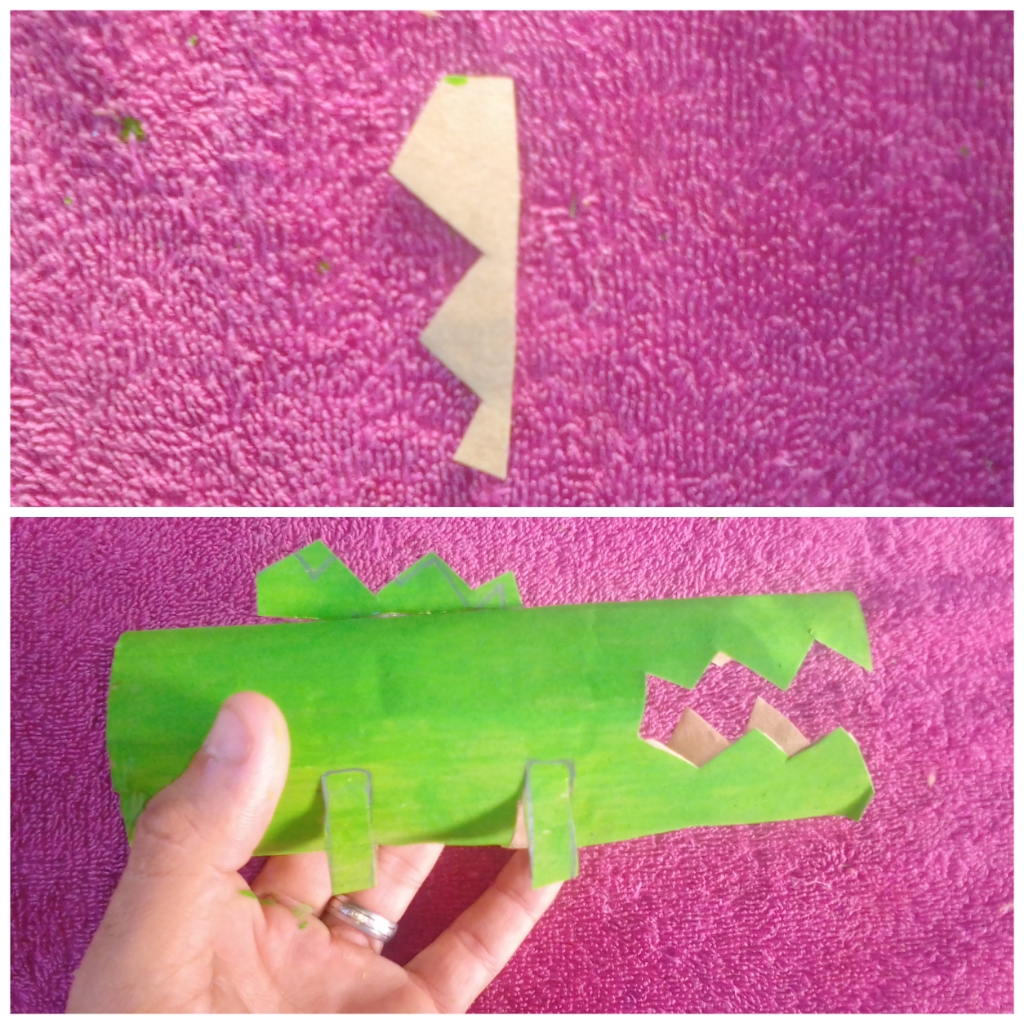
Paso 3: La marca trazada, cortadas con la ayuda de tijeras; también la parte de adelante del rollo cortarás en forma de zig zag que será la forma de los dientes de nuestro cocodrilo
Step 3: The traced mark, cut with the help of scissors; You will also cut the front part of the roll in a zig zag shape that will be the shape of the teeth of our crocodile
Paso 4: De los recortes sobrantes, utilizarás uno para pegar en el lo de nuestro animalito, utilizando el silicon
Step 4: From the leftover cutouts, you will use one to stick on the one of our little animal, using the silicone
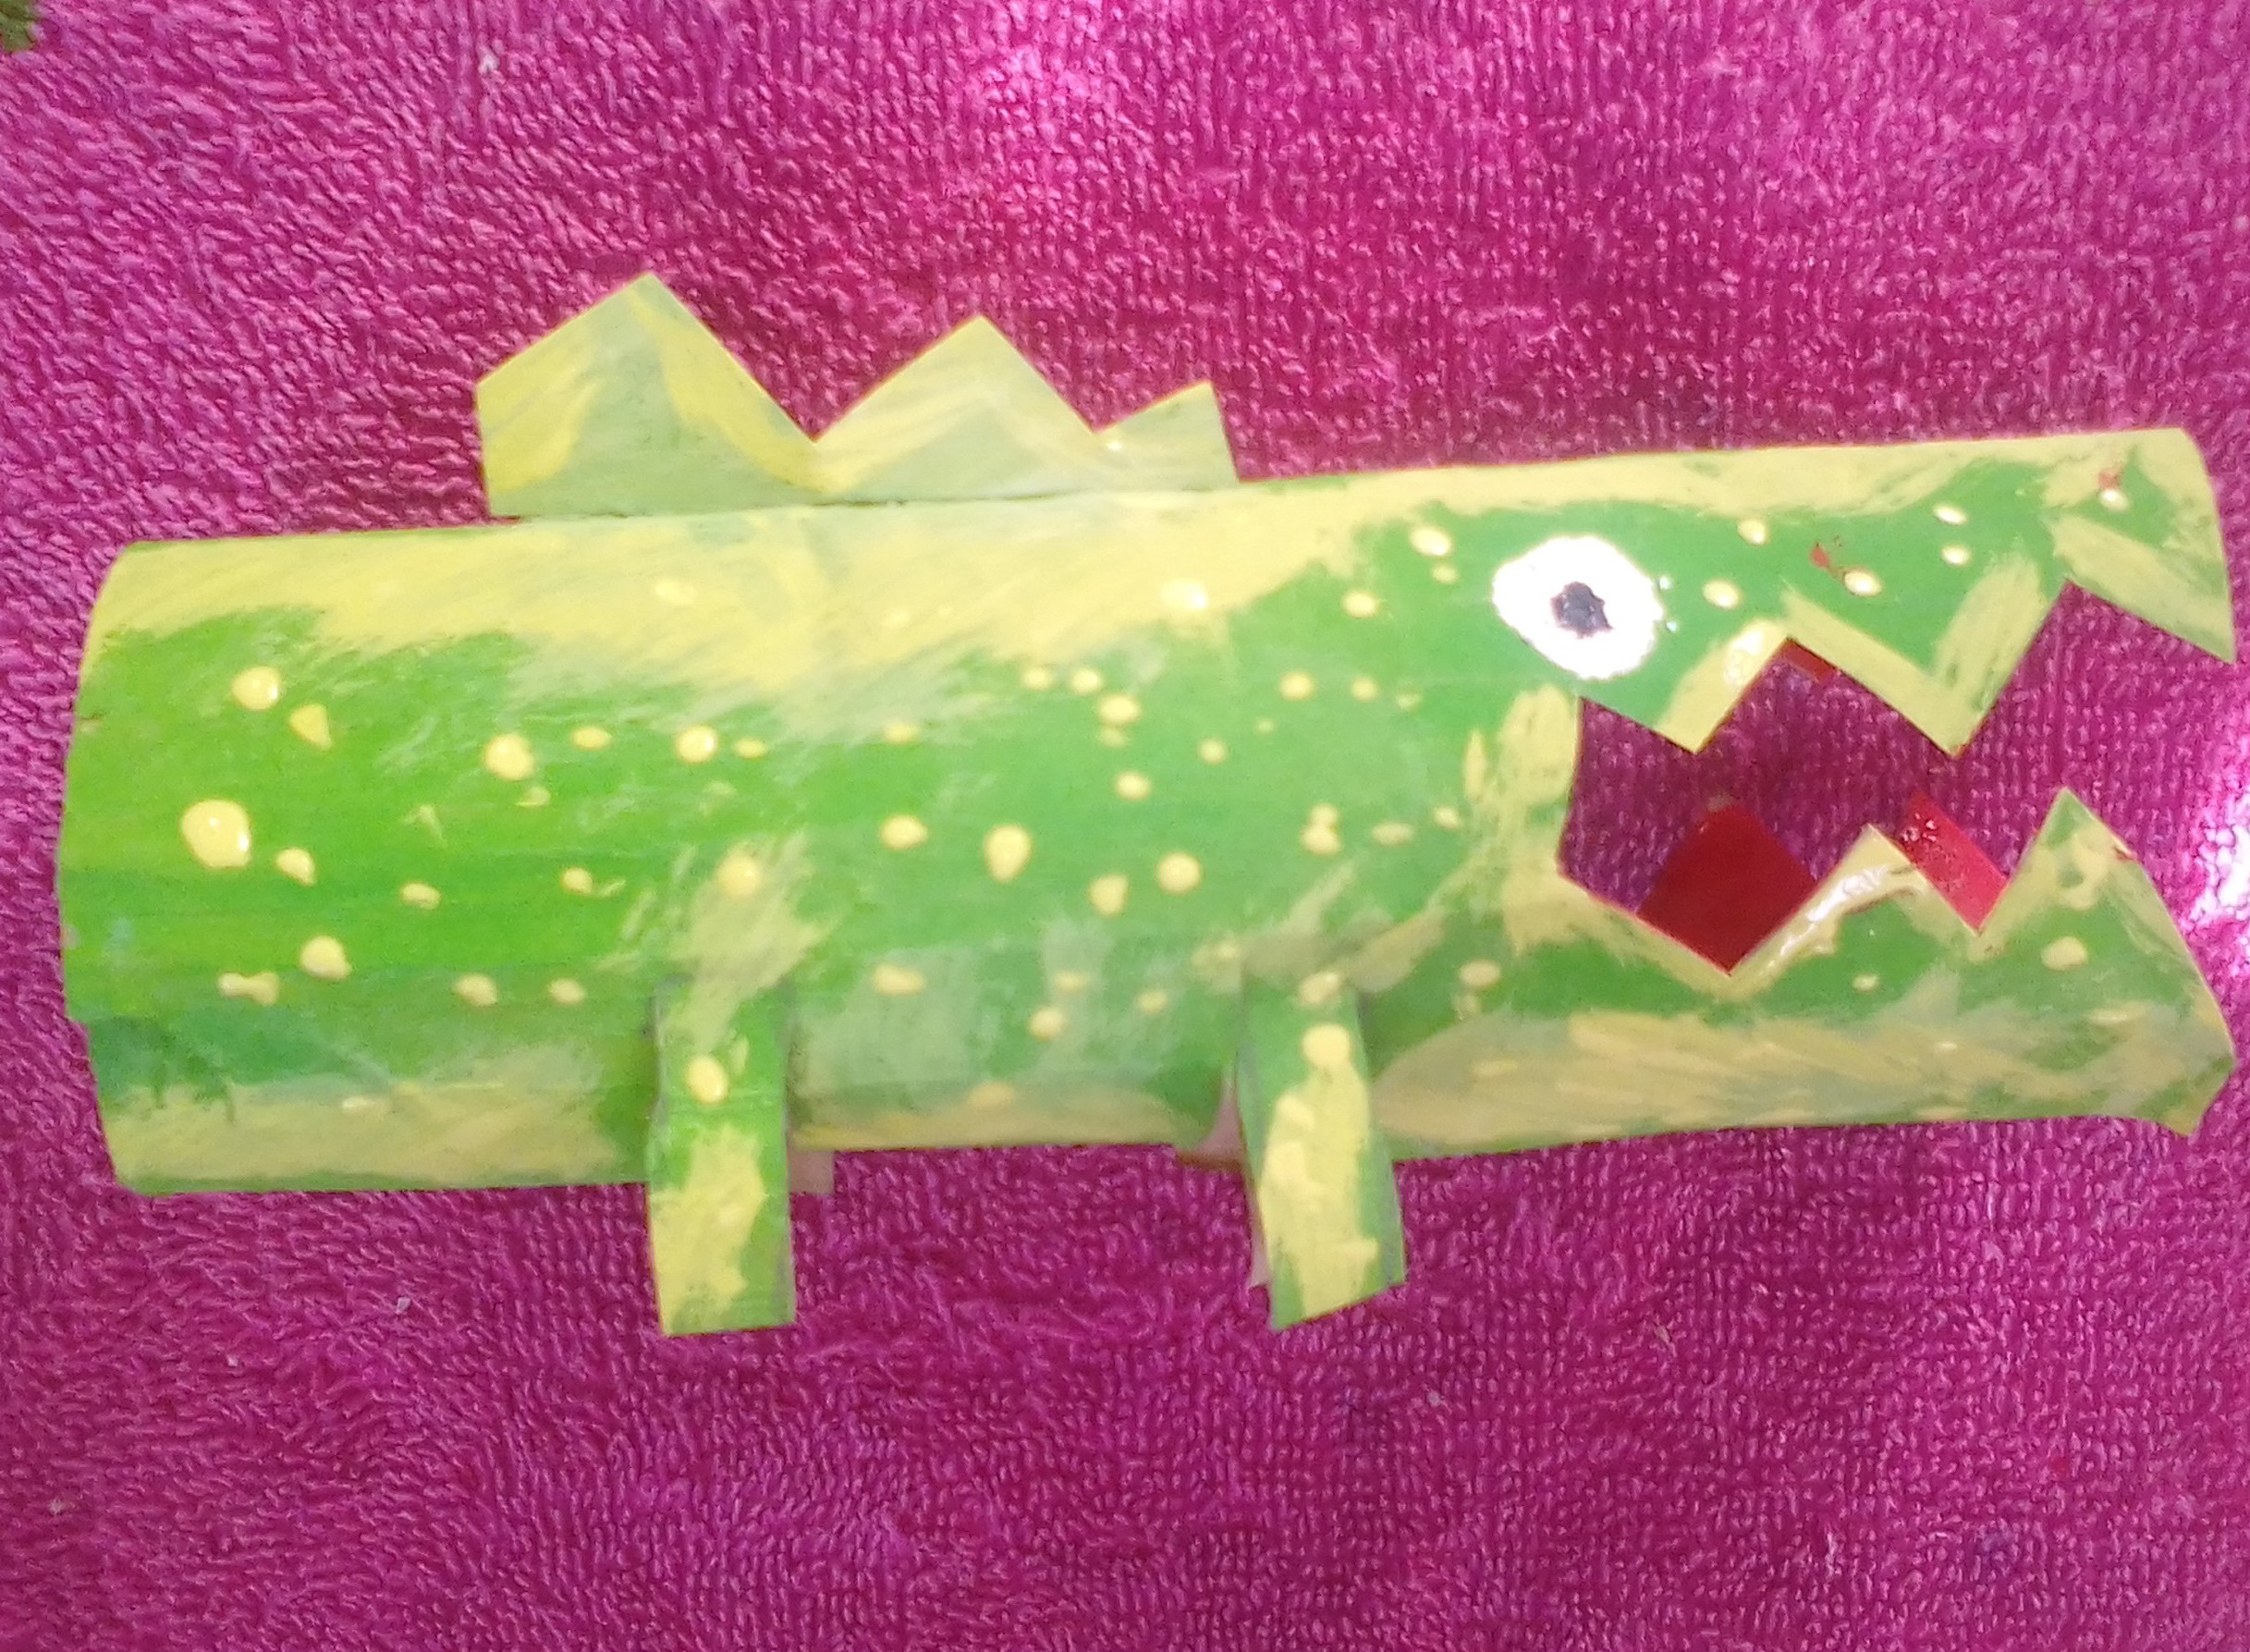
Último paso: Aplicaras cada detalle, con pintura al frío; será totalmente a tu gusto. Estos yo le coloque:
Last step: You will apply every detail, with cold paint; it will be totally to your liking. These I will place:
Ese fue mi trabajo amig@s espero te haya gustado. ¡Recuerda! "Nada es imposible, si lo crees". ¡Adelante!
That was my work, friends, I hope you liked it. Remember! "Nothing is impossible if you believe". Go ahead!
.jpg)