VERSION EN ESPAÑOL
Hola amigos de Hive
Bienvenidos a mi blog

Hoy vengo con algo no tan común en mi blog, he querido un forro para mi teléfono pero como no he podido comprarlo por distintos motivos me dije a mi mismo ¿por qué no hacer uno? Y me puse a investigar como hacer forros para teléfonos. Y después de ver decenas de videos me propusé hacer mi propio forro con materiales muy sencillos. Les contaré a continuación como lo hice, no será propiamente un turorial, pero intentaré explicarles lo más detalladamente posible como fuí elaborando mi forro.
Tomé las fotos necesarias para mostrarles cada paso, gracias a mi esposa @zullyscott por hacerme el favor de tomar las fotos cuando yo tenía las manos ocupadas.
Sin más preambulo, vamos con el proceso creativo:
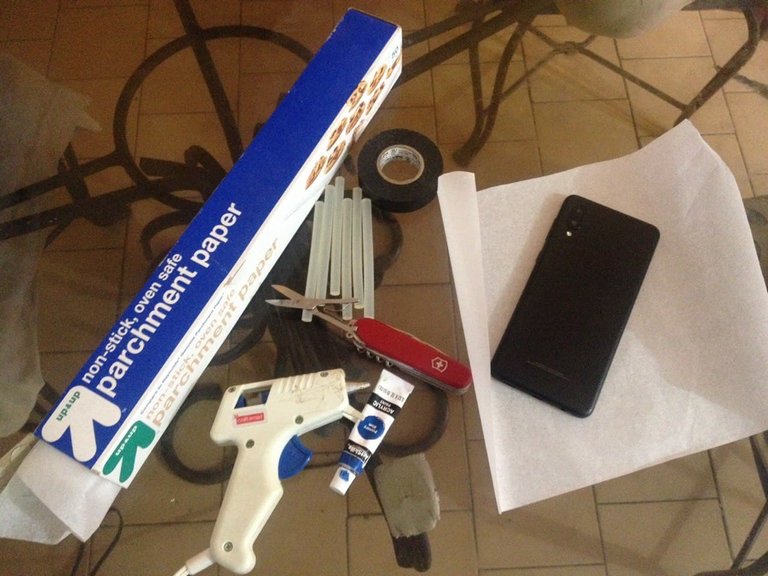
Los materiales que ocupé fue:
-Tijeras
-Papel encerado (el que se usa para hornear)
-Adhesivo
-Pintura
-Pistola de silicón
-Barras de silicón
-Marcador
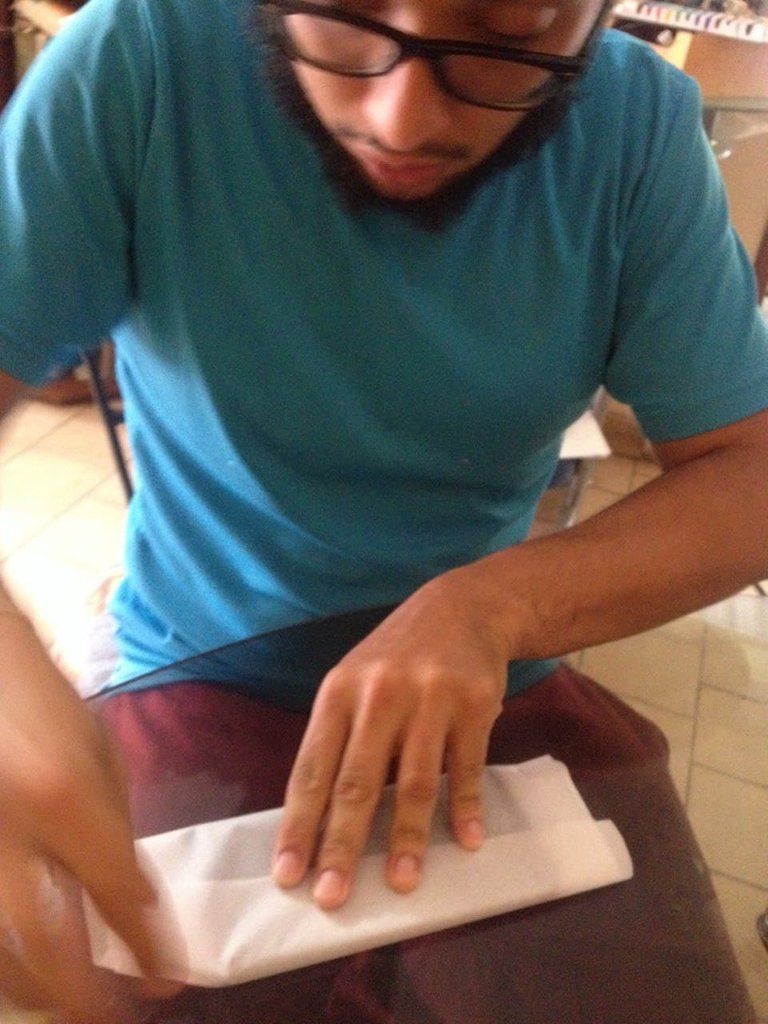
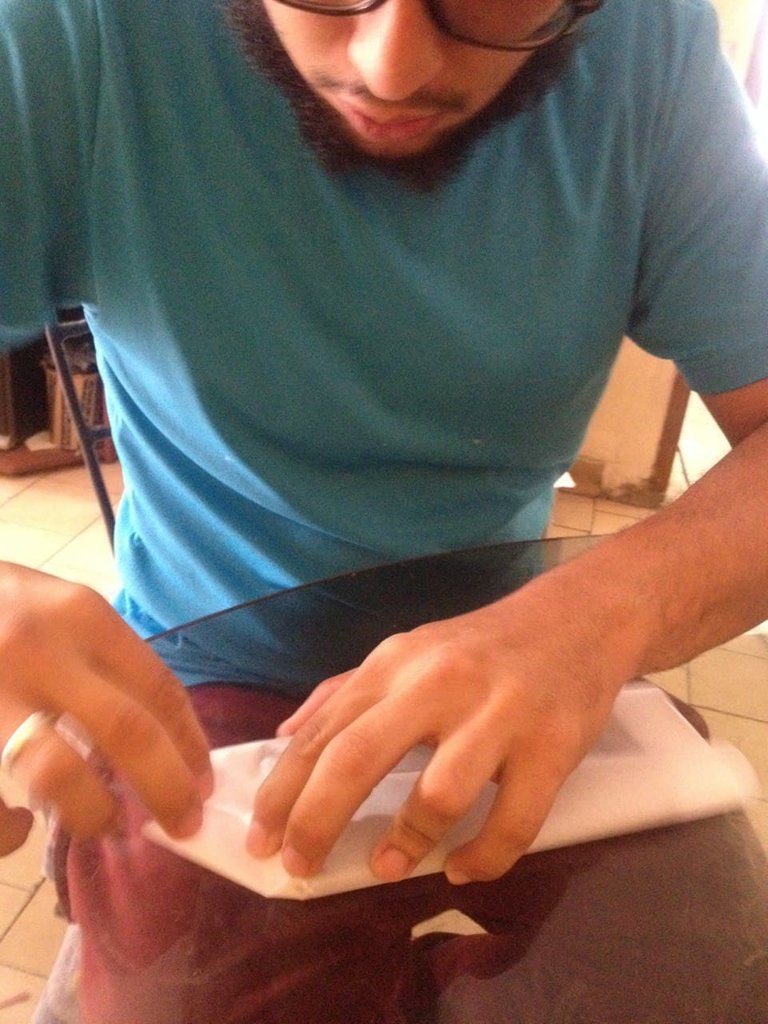
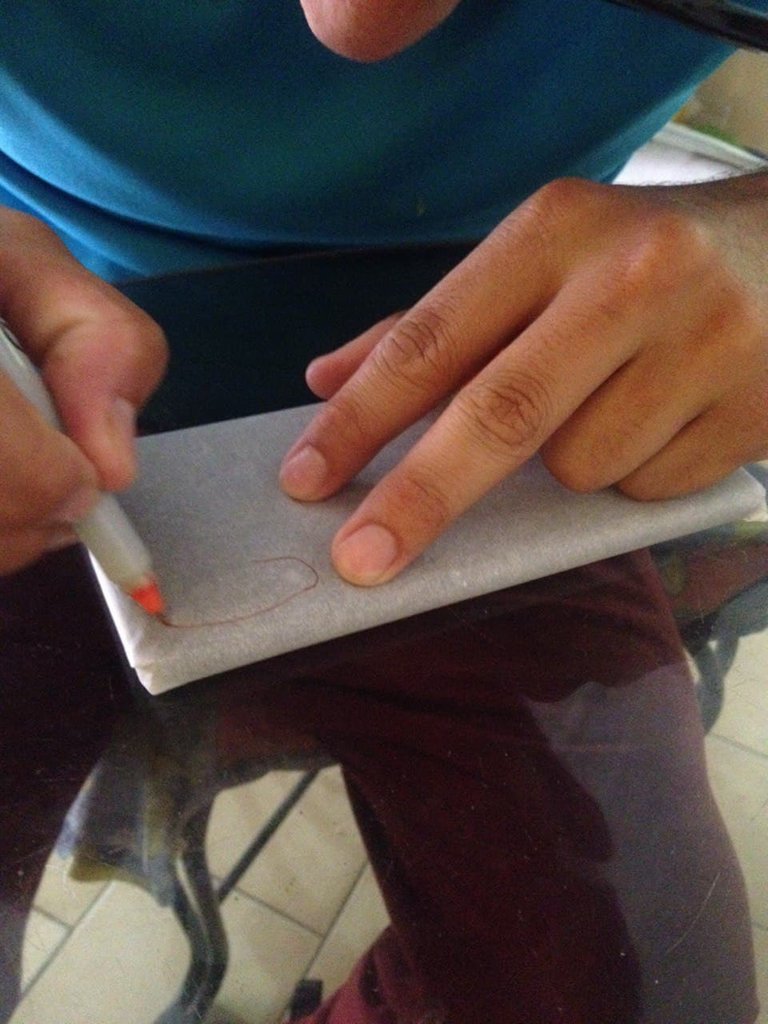
Lo primero que hice fue envolver mi smartphone en el papel encerado y lo sujeté con cinta para pegar.

Después con el marcador dibujé las zonas de mi equipo que no debian quedar cubiertas, tales como la cámara o el puerto de carga.
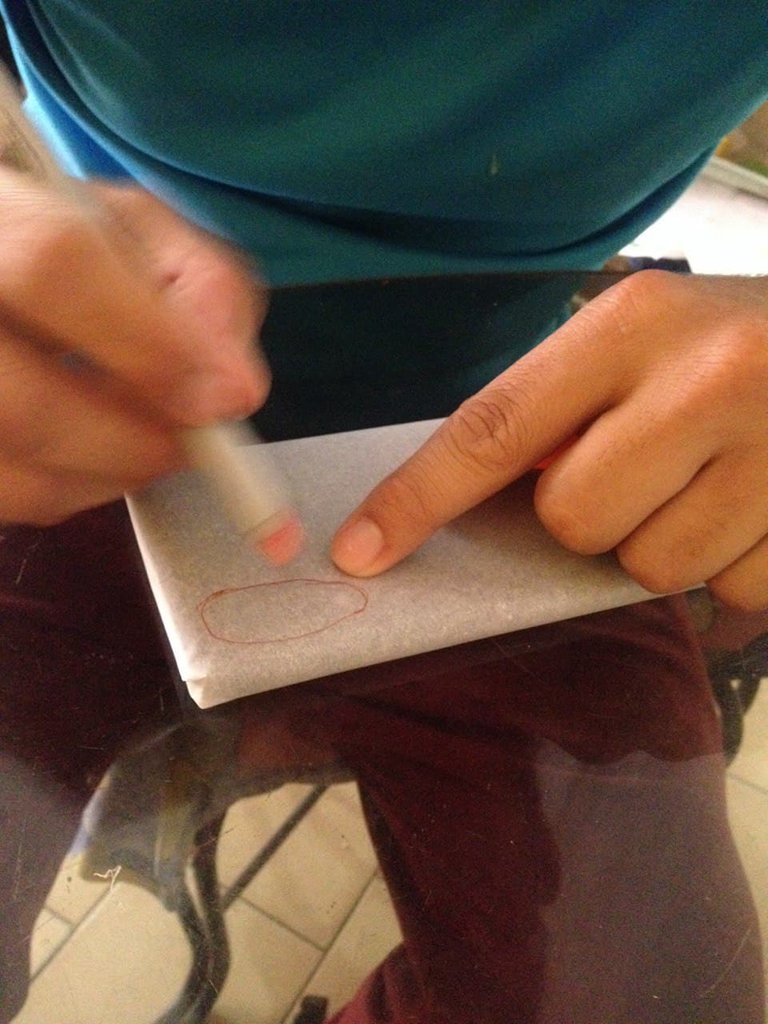
Seguidamente dibujé sobre el papel el diseño que deseaba
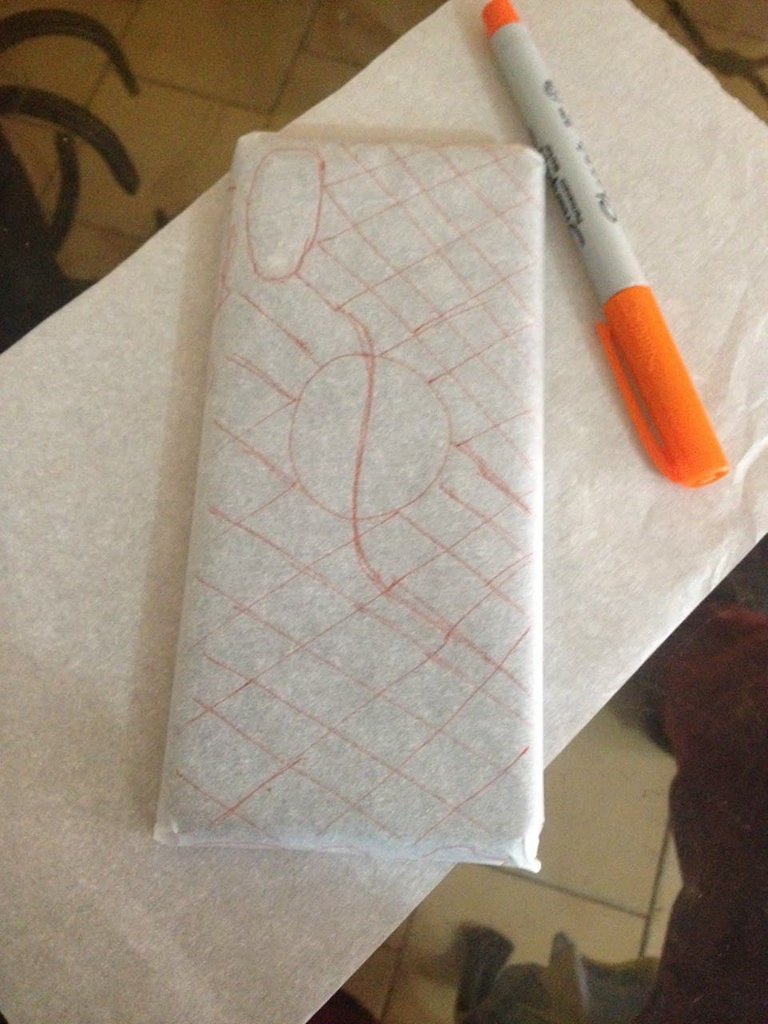
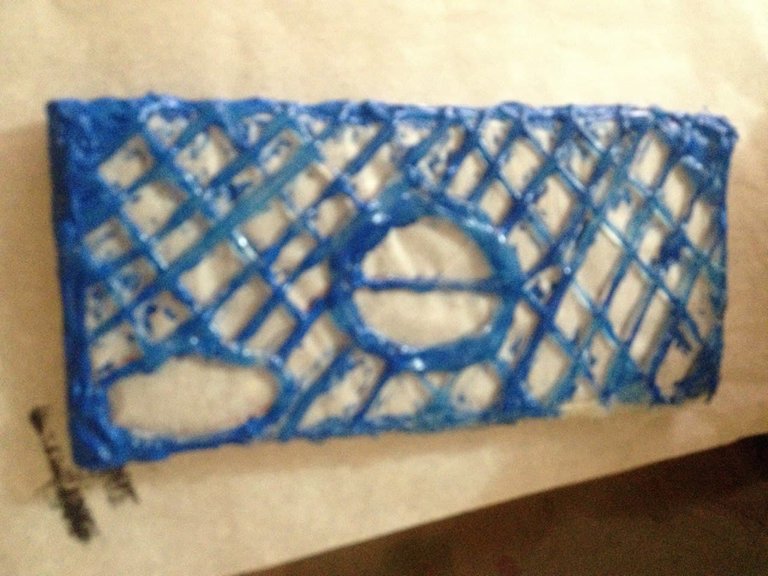
Ya con el diseño prestablecido me propuse a remarcar con el silicón todo el diseño teniendo el cuidado suficiente de no cubrir con silicón las zonas que no debía.
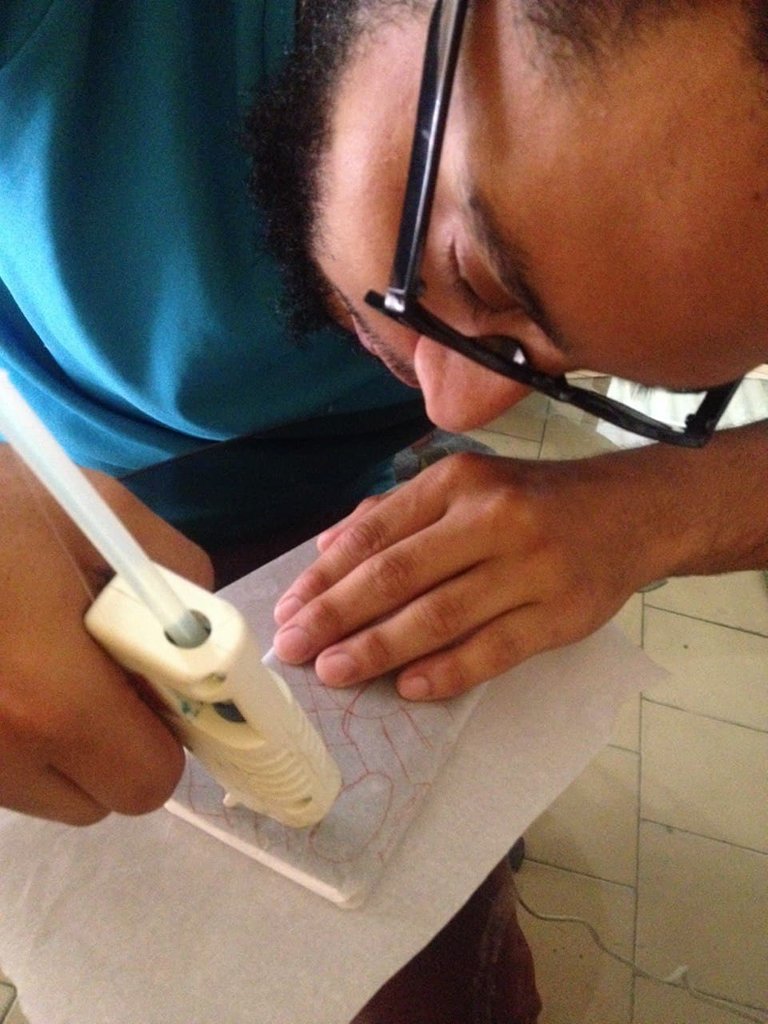
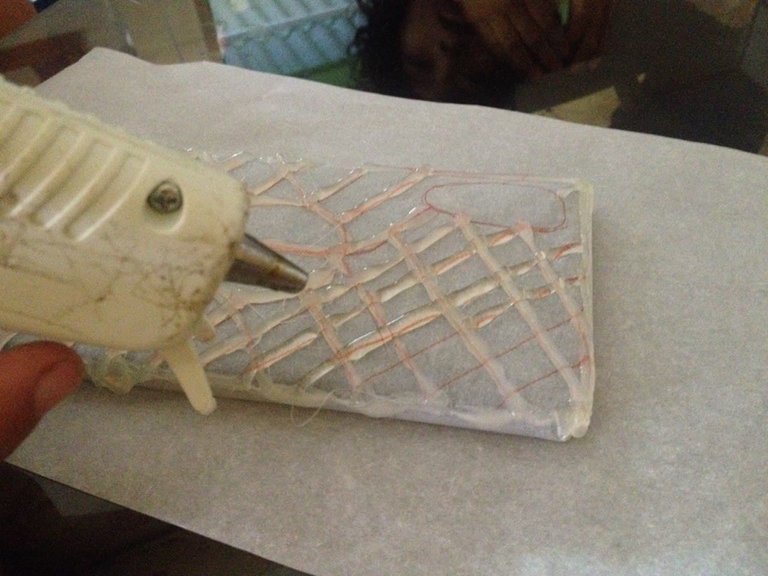
Al secarse por un lado, volveé el teléfono para seguir cubriendo con el silicón la zona
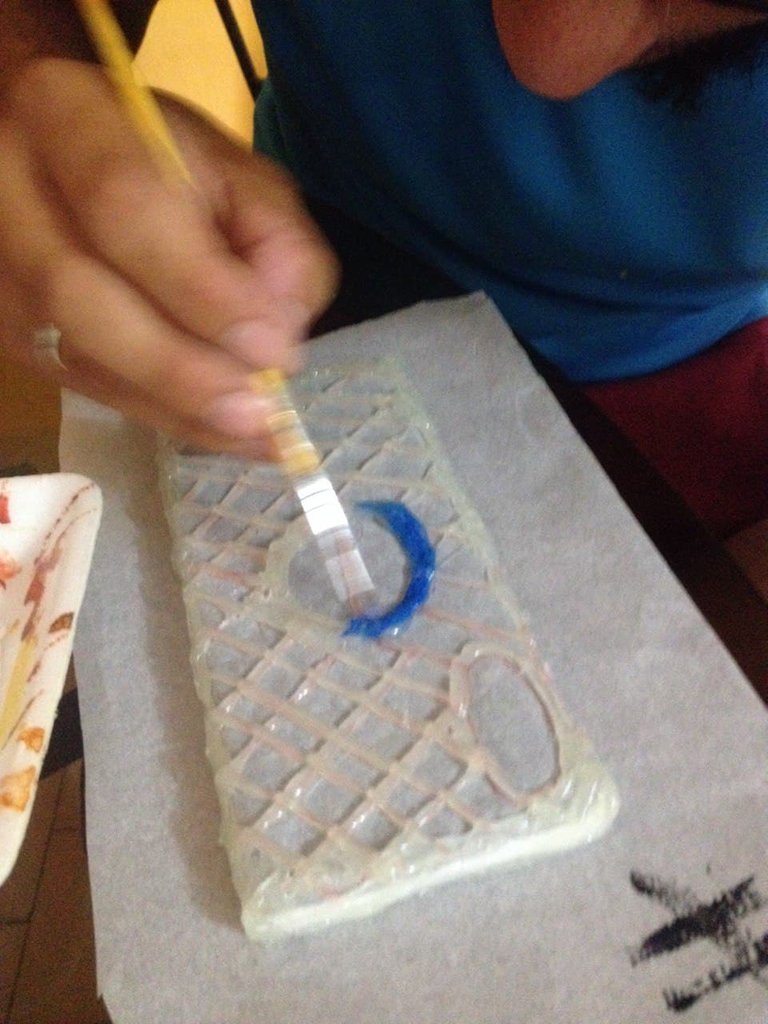
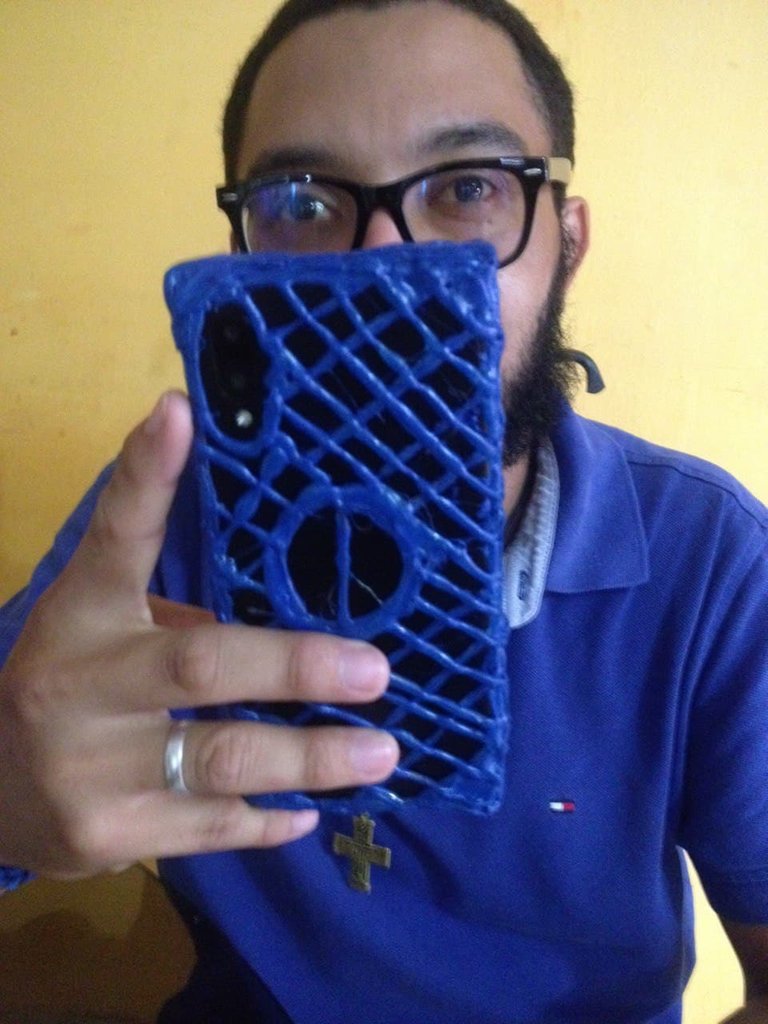
Al terminar por ambos lados y después de haber esperado un tiempo, no mucho en realidad unos minutos son suficiente para que el silicón se seque por completo, para así comenzar a pintar, yo escogí el azul porque es mi color favorito.
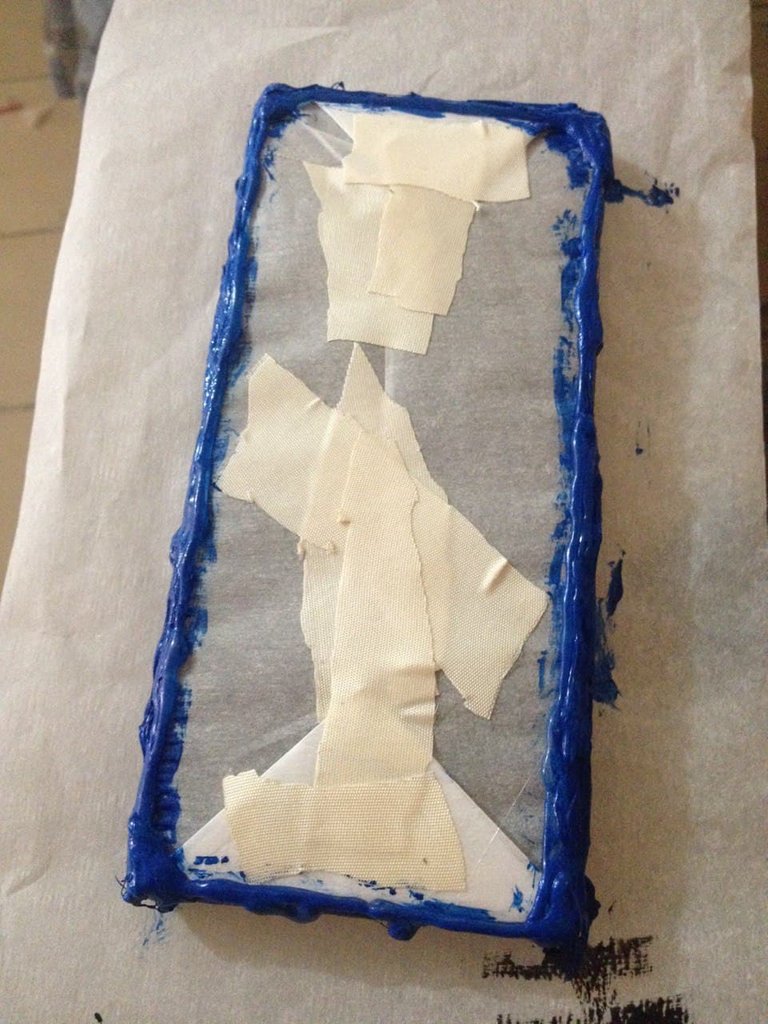
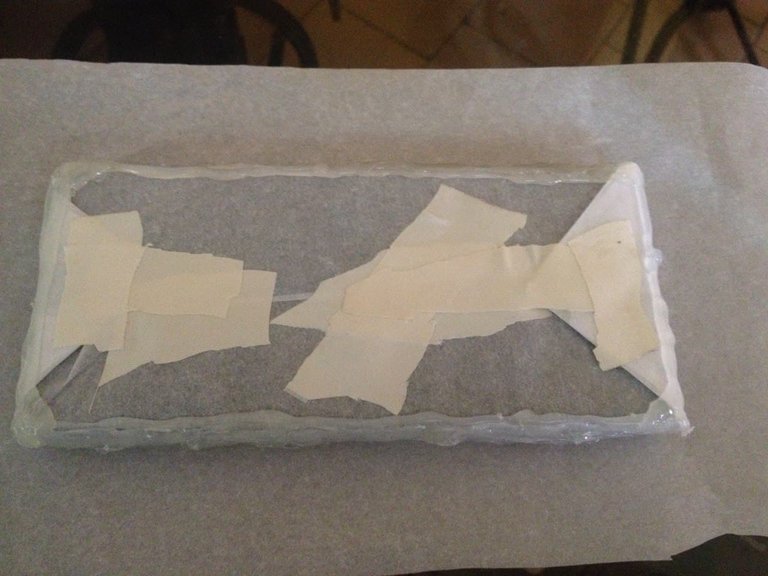
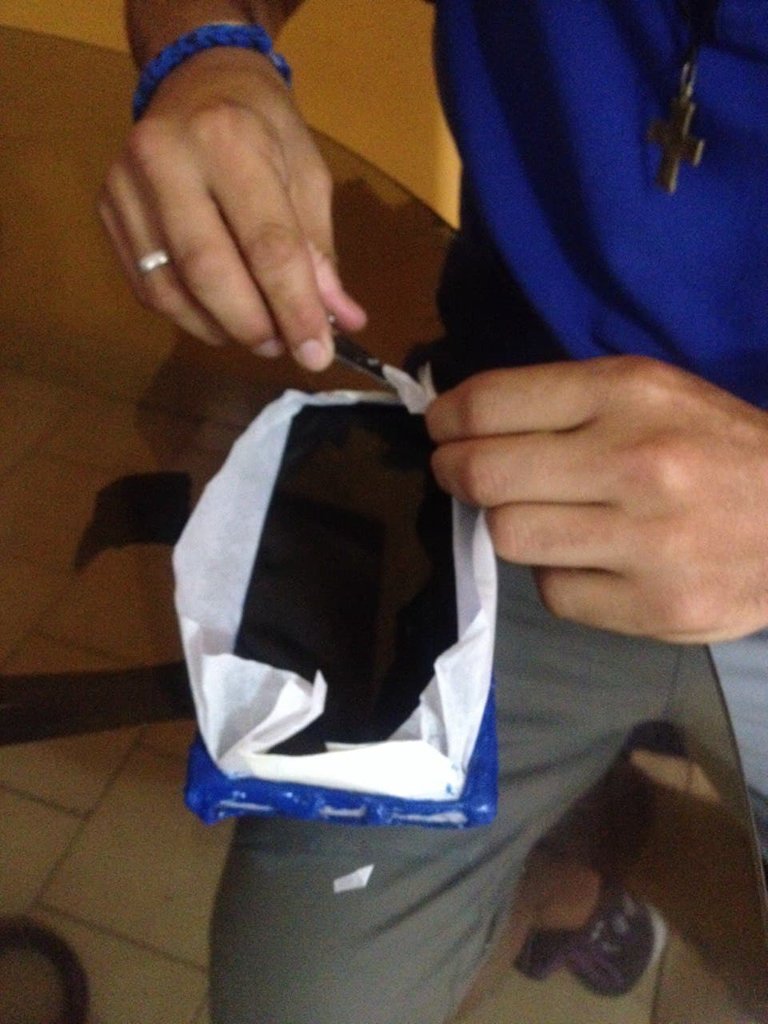
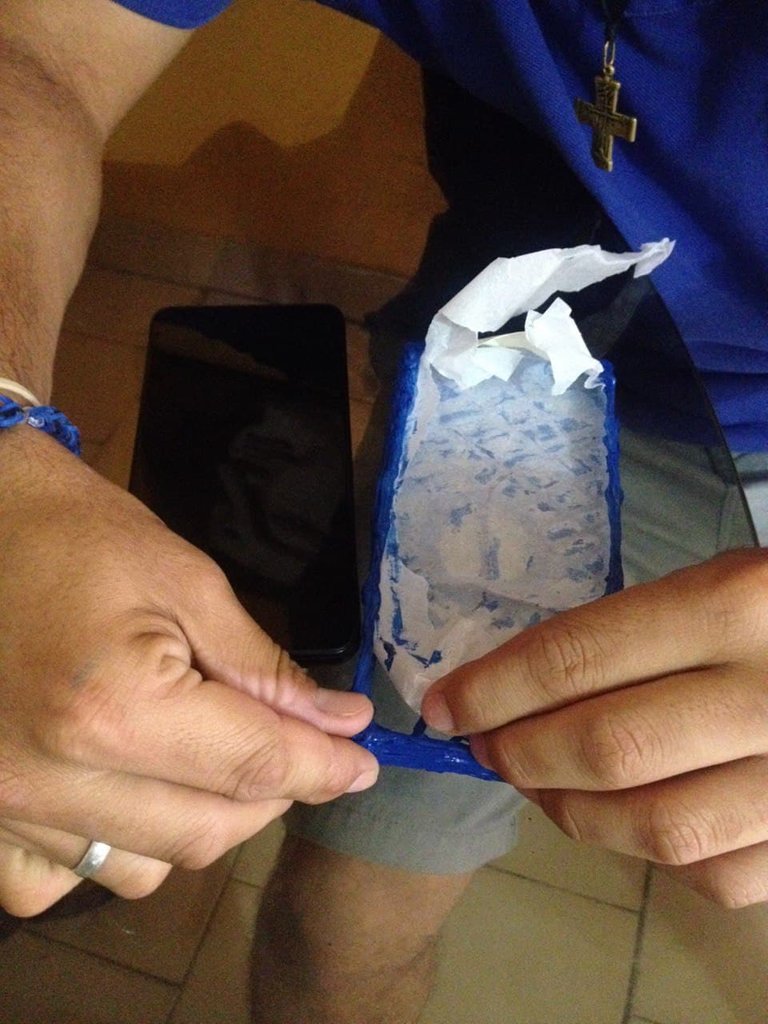
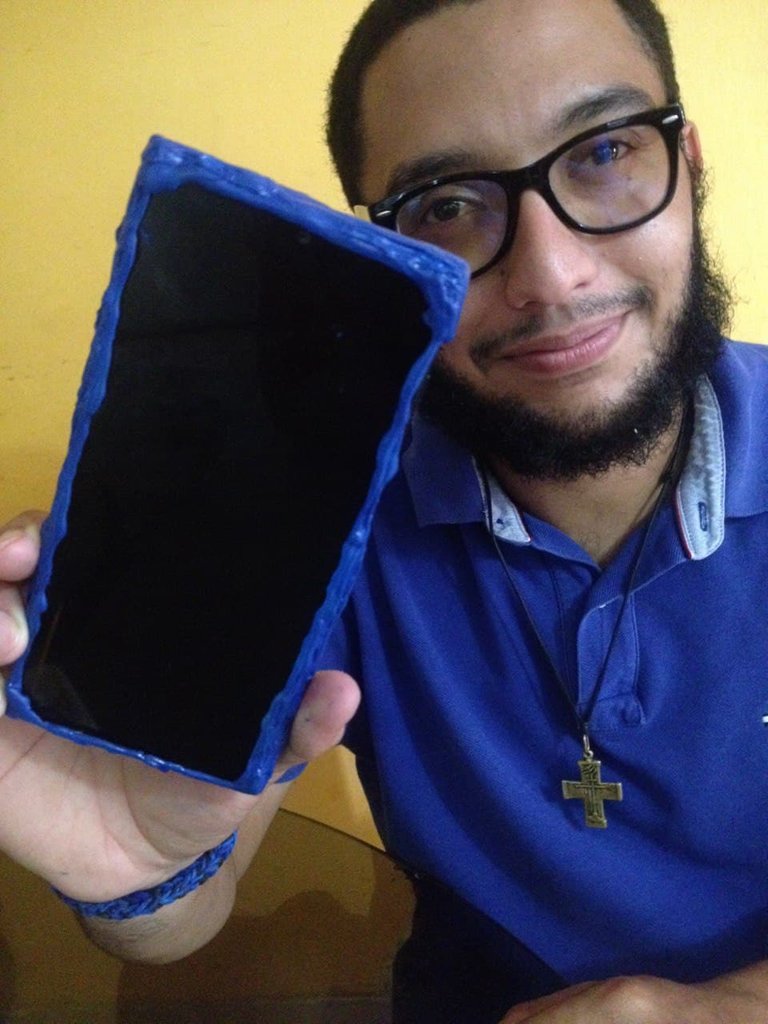
Después de esperar que se seque por completo, con mucho cuidado debes quitar un poco del papel encerado y sacar el smartphone, y seguidamente poder quitar por completo y con cuidado el papel encerado. Lo bueno de este papel es que no se adiere al silicón.
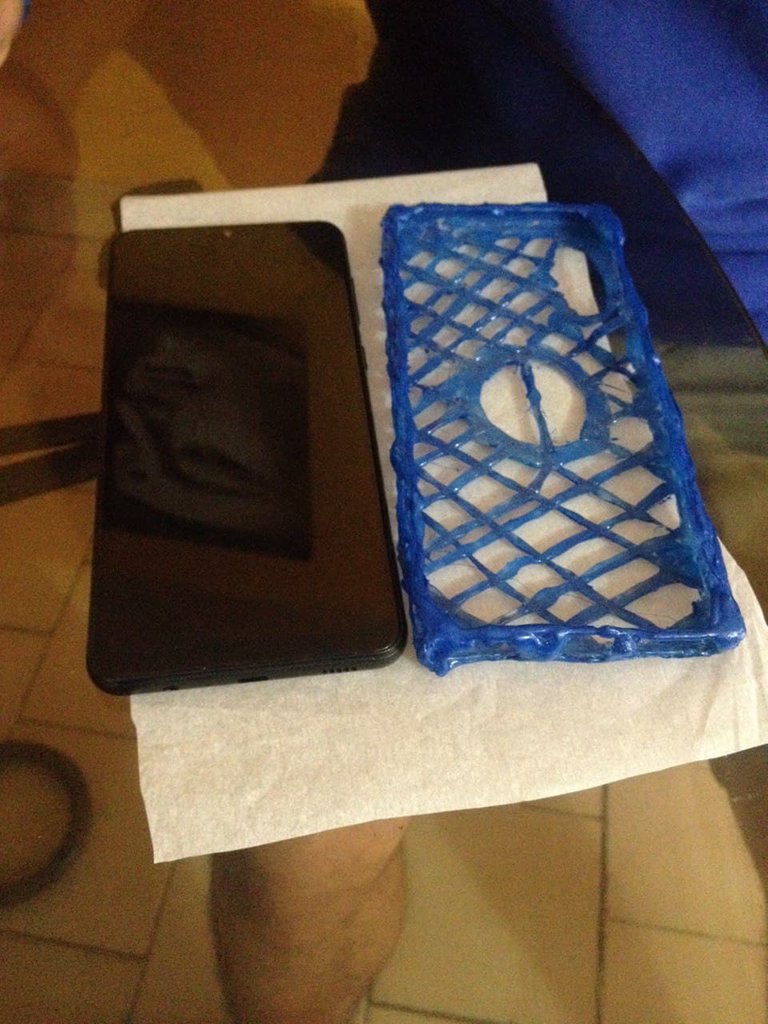
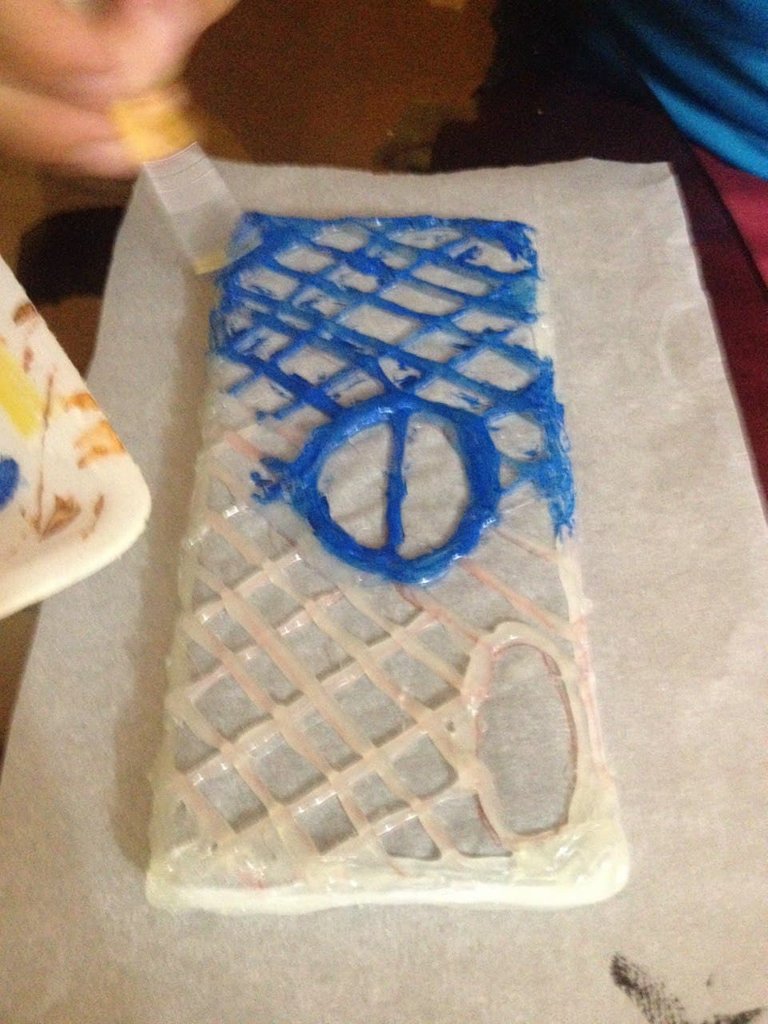
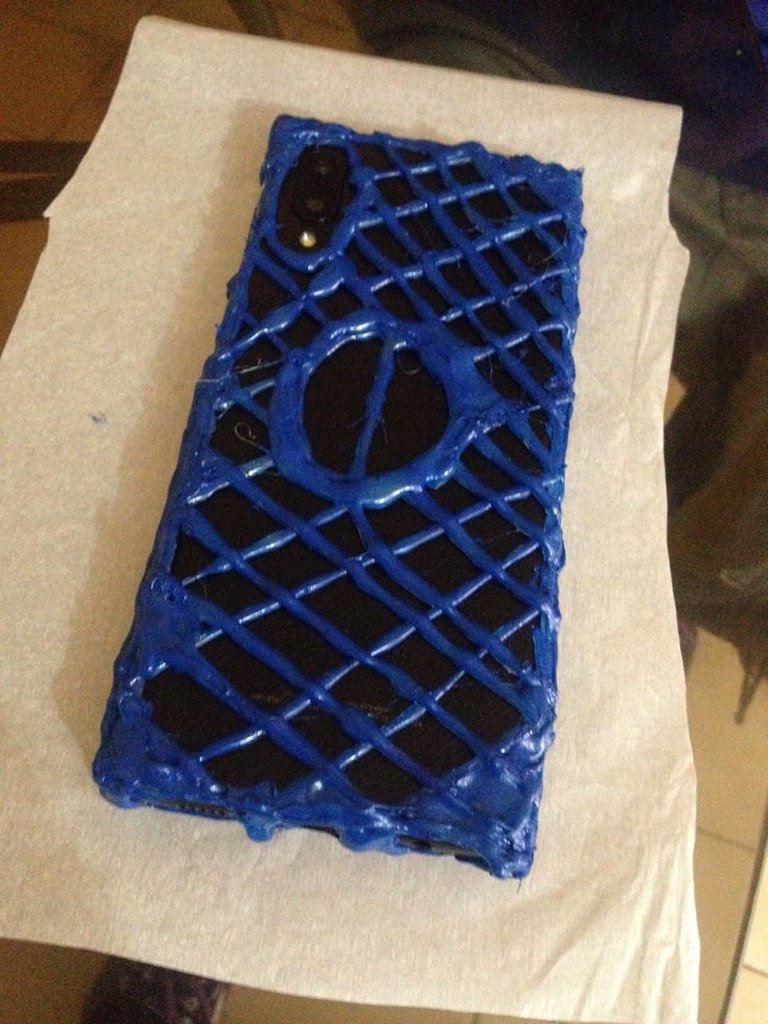
Y listo ya tienes un forro para tu smartphone totalmente funcional, quizá no sea muy bonito, pero admito que no poseo una gran destreza para las manualidades. Pero seguramente a ti te quedará mucho mejor y puedes hacer el modelo que imagines. Yo por mi parte, hice la letra Fi del alfabeto griego ya que es el símbolo de la filosofía, la carrera que estudio y de la cual estoy enamorado.
Este fue el resultado final, y como todos los materiales los tenía en casa, no gasté ni un centavo de dólar para fabricarlo, y me ahorré los $5 dólares que me cuesta un forro para mi equipo. Quizas no suene muy costoso, pero acá en Venezuela $5 pueden representar el almuerzo de una familia de 4 personas aproximadamente. Pero eso es otro temá que abordaré en otro momento
Gracias por Visitar mi Blog
Hasta pronto...


ENGLISH VERSION
Hello Hive friends
Welcome to my blog
Today I come with something not so common in my blog, I have wanted a liner for my phone but since I have not been able to buy one for different reasons I said to myself why not make one? And I started researching how to make phone covers. And after watching dozens of videos I set out to make my own cover with very simple materials. I'll tell you how I did it, it won't be a tutorial, but I'll try to explain as detailed as possible how I went about making my lining.
I took the necessary pictures to show you each step, thanks to my wife @zullyscott for doing me the favor of taking the pictures when I had my hands full.
Without further ado, let's go through the creative process:
The materials I used were:
-Scissors
-Waxed paper (the one used for baking)
-Adhesive
-Paint
-Silicone gun
-Silicone sticks
-Marker
The first thing I did was wrap my smartphone in the wax paper and taped it down with tape.
Then with the marker I drew the areas of my device that should not be covered, such as the camera or the charging port.
Then I drew the design I wanted on the paper.
Once the design was ready, I decided to mark with the silicone the whole design, being careful not to cover with silicone the areas that should not be covered.
After drying on one side, I turned the phone over to continue covering the area with silicone.
When finished on both sides and after having waited a while, not long, actually a few minutes are enough for the silicone to dry completely, and then start painting, I chose blue because it is my favorite color.
After waiting for it to dry completely, carefully remove some of the wax paper and take out the smartphone, and then you can remove the wax paper completely and carefully. The good thing about this paper is that it does not adhere to silicone.
And now you have a fully functional cover for your smartphone, it may not be very pretty, but I admit that I do not have a great skill for crafts. But surely it will look much better for you and you can make any model you can imagine. I for my part, I made the letter Fi of the Greek alphabet since it is the symbol of philosophy, the career I study and of which I am in love.
This was the final result, and since I had all the materials at home, I didn't spend a penny to make it, and I saved the $5 dollars that a lining for my equipment costs me. It may not sound very expensive, but here in Venezuela $5 can represent the lunch of a family of 4 people approximately. But that's another topic that I'll deal with another time.
Thanks for visiting my Blog
See you soon...
Me gusta tu idea, nada fácil para un pulso cafecero como el mío, jijiji!, me gustaría gacer uno para mi teléfono, lo necesita. Me has animado, voy a ver cómo me sale y te aviso.
Congratulations @filoriologo! You have completed the following achievement on the Hive blockchain and have been rewarded with new badge(s) :
Your next target is to reach 1500 replies.
You can view your badges on your board and compare yourself to others in the Ranking
If you no longer want to receive notifications, reply to this comment with the word
STOPCheck out the last post from @hivebuzz:
Congratulations, your post has been upvoted by @dsc-r2cornell, which is the curating account for @R2cornell's Discord Community. Enhorabuena, su "post" ha sido "up-voted" por @dsc-r2cornell, que es la "cuenta curating" de la Comunidad de la Discordia de @R2cornell.