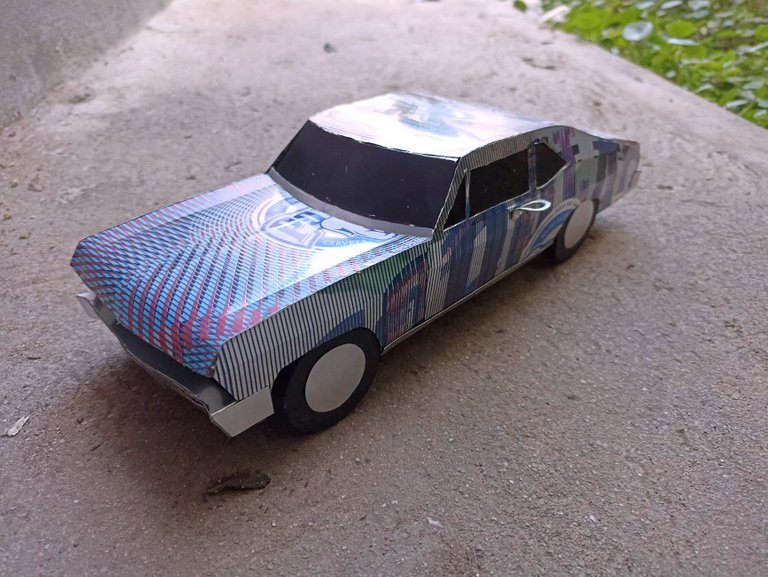
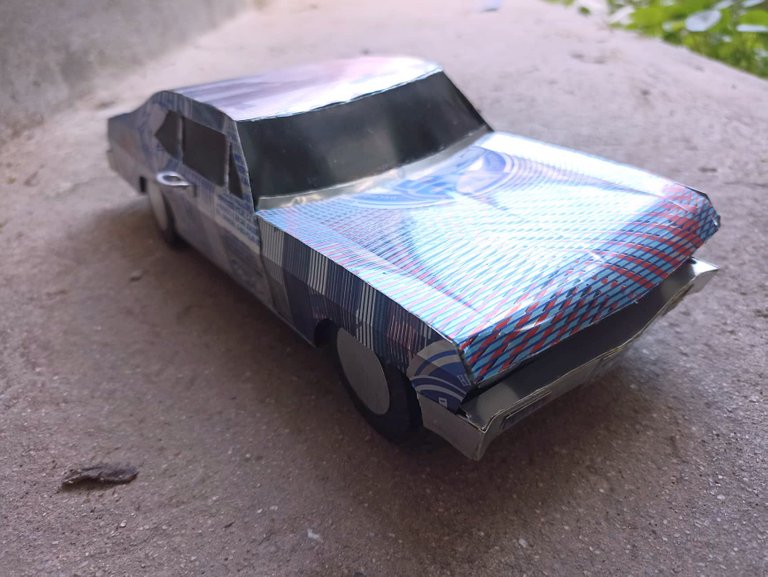
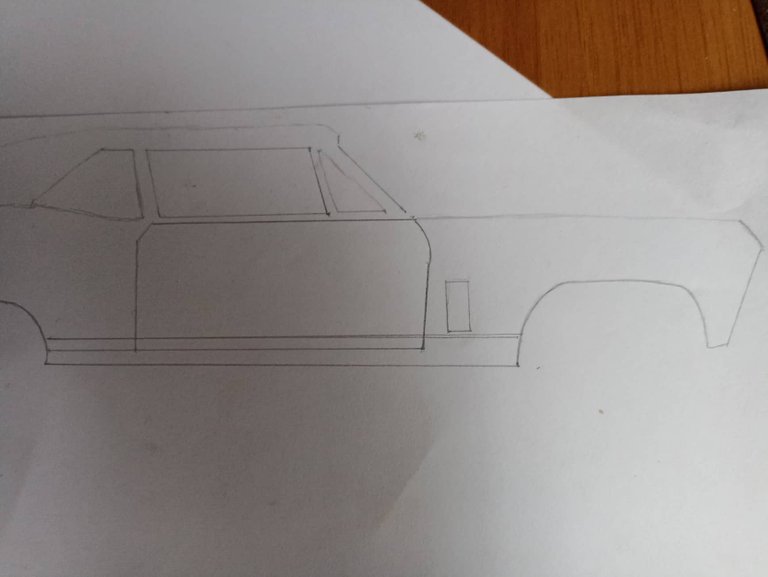
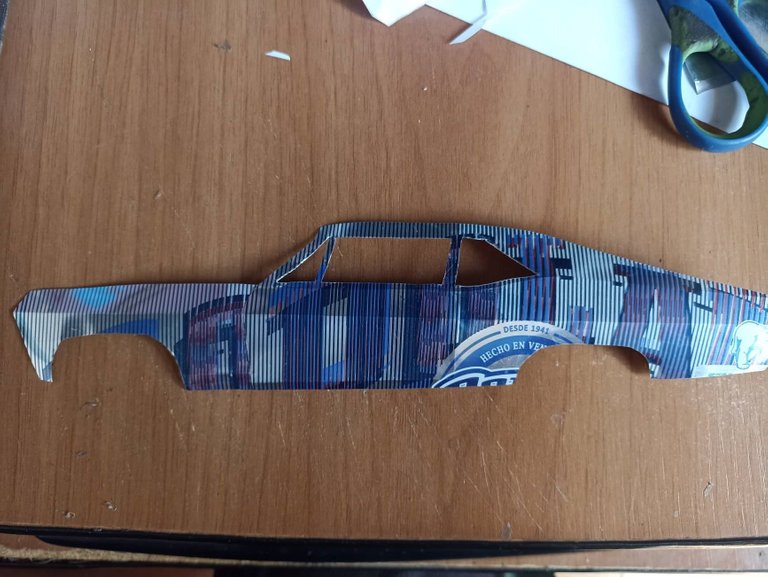
Hello friends, good morning I hope you are very well. This time I want to share a craft with you that I have been used to doing, now I am not as active as before since it has been somewhat difficult for me to get material, especially cans, which are the ones I like to use the most. However, this time I found some and so I started doing some modeling and what came out was a 1969 Chevy Nova, I really like this model, especially the one I made since it has two doors, I'm not very attracted to the 4 doors. I made this model using some cans, I also used cardboard and plastic, I hope you like it.
Hola amigos, muy buenos dias espero que se encuentren muy bien. En esta oportunidad quiero compartir una manualidad con ustedes de las que he acostumbrado hacer, ahora no estoy tan activo como antes ya que se me ha hecho algo dificil conseguir material, especialmente las latas, que son las que más me gusta usar. Sin embargo ene sta oportunidad encontré algunas y pues me puse hacer algo de modelismo y lo que salió fue un chevy Nova del año 1969, me gusta mucho este modelo, especialmente el que hice ya que tiene dos puertas, no me atraen mucho los de 4 puertas. Este modelo lo hice utilizando algunas latas, también usé cartó y plástico, espero que les guste.

 |  |  |
|---|---|---|
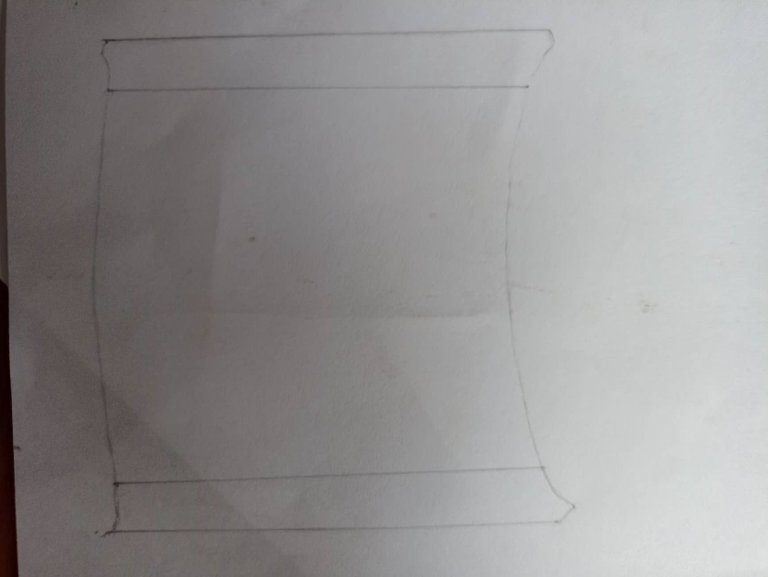 |  | 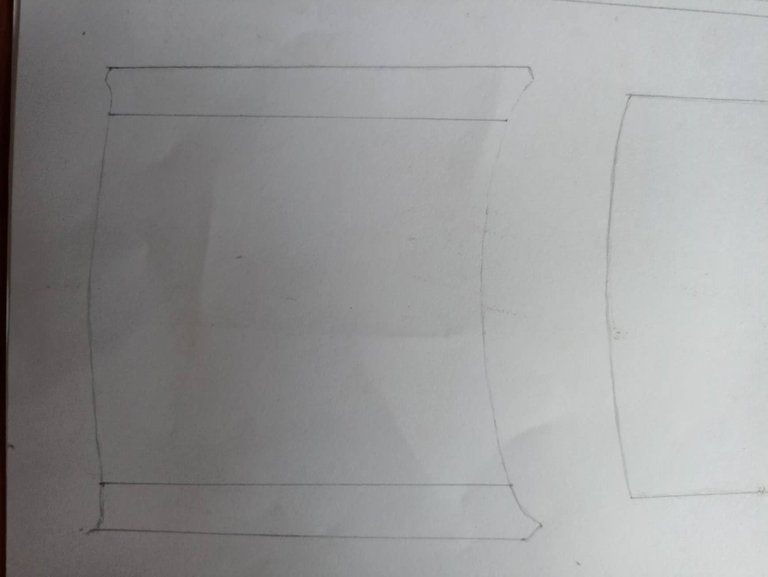 |
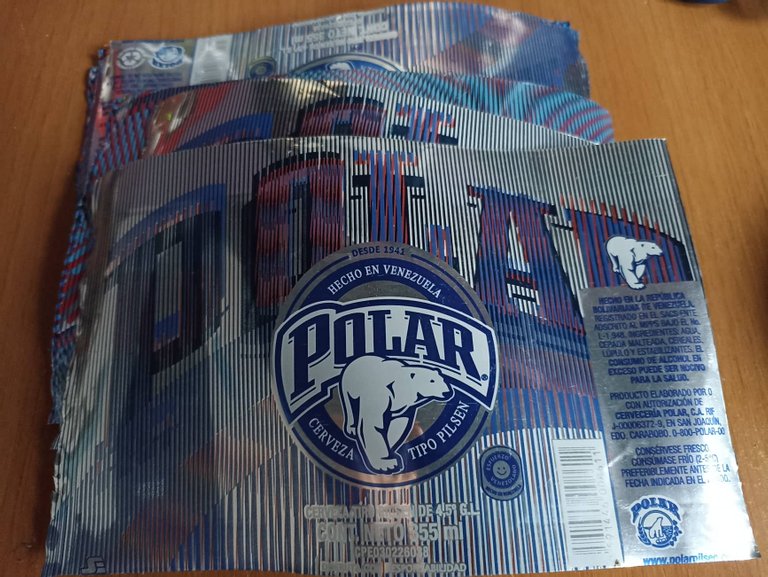
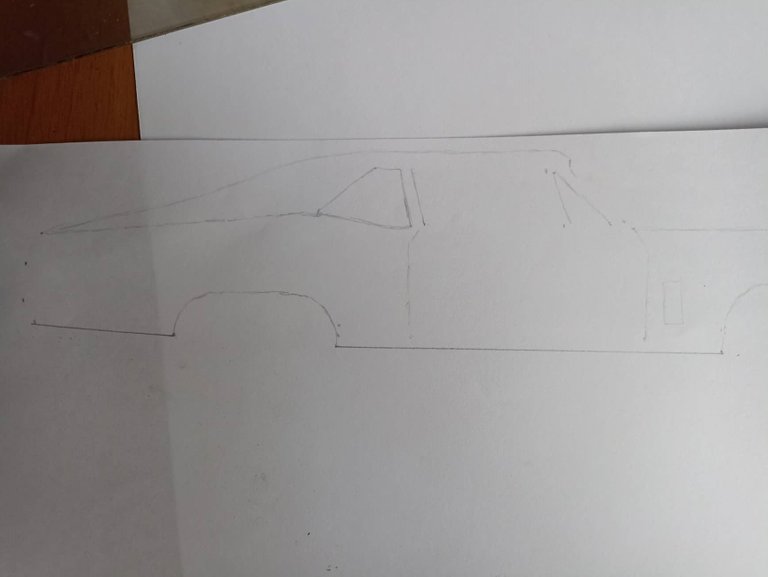
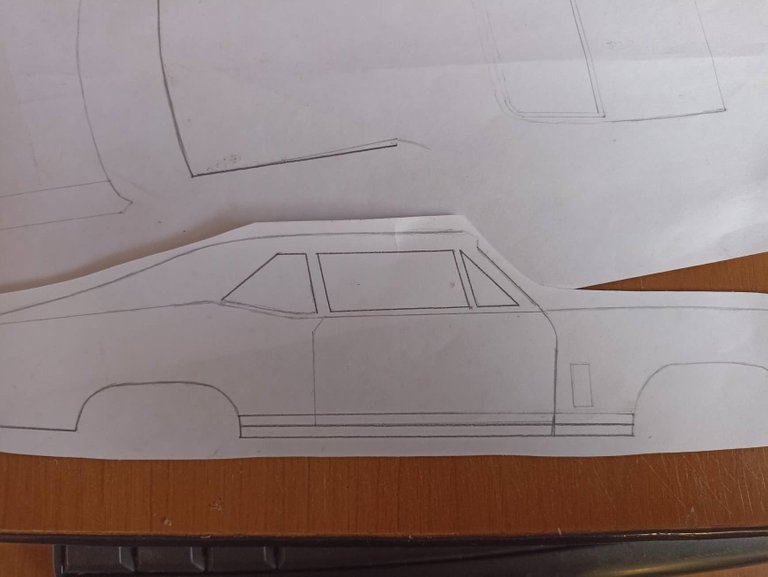
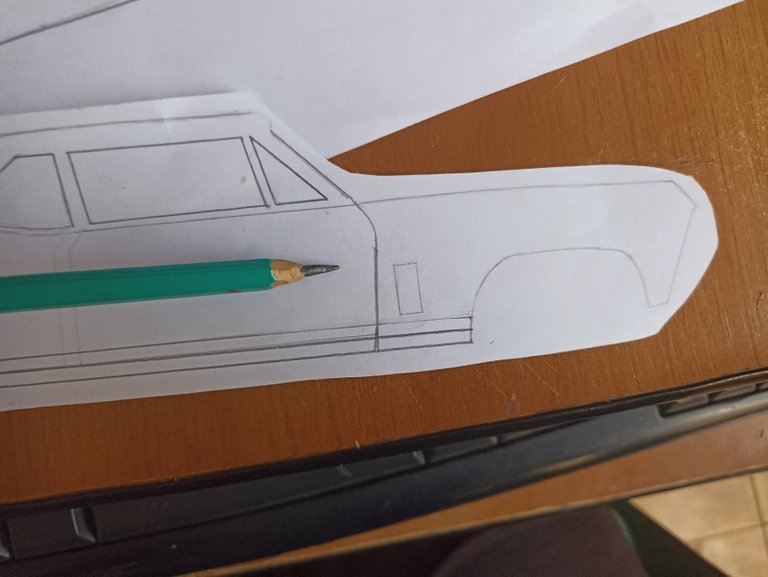
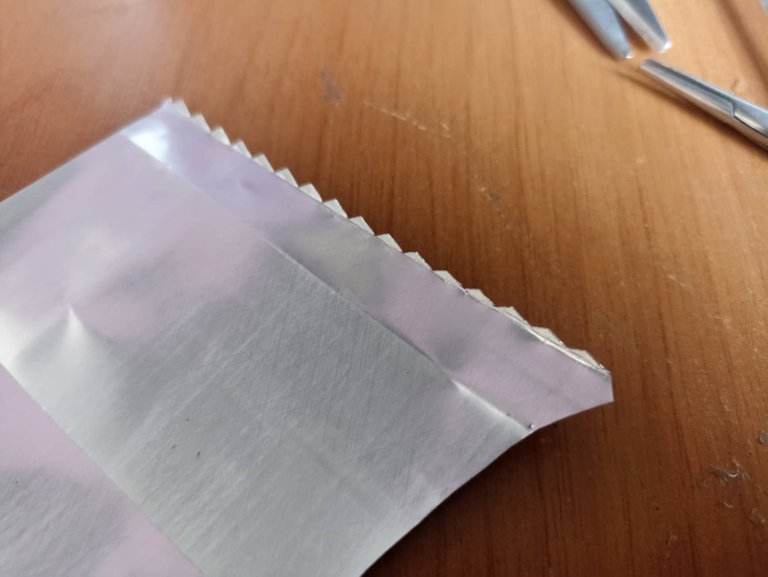
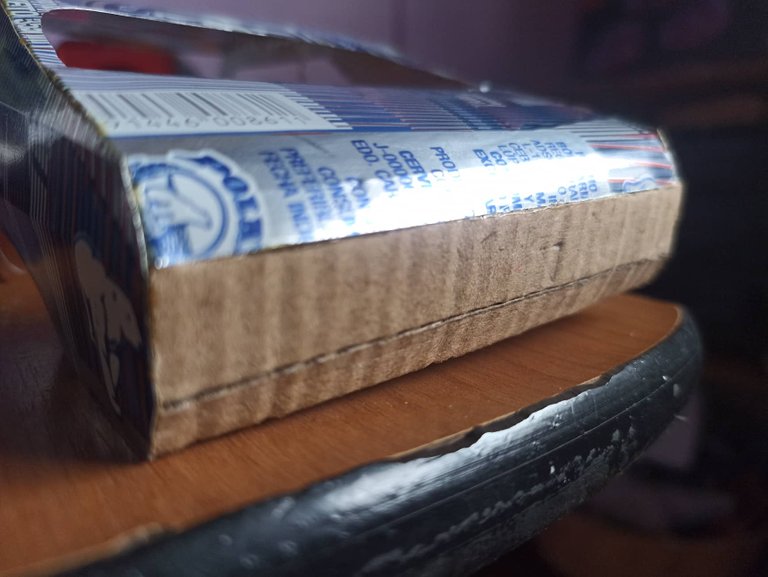
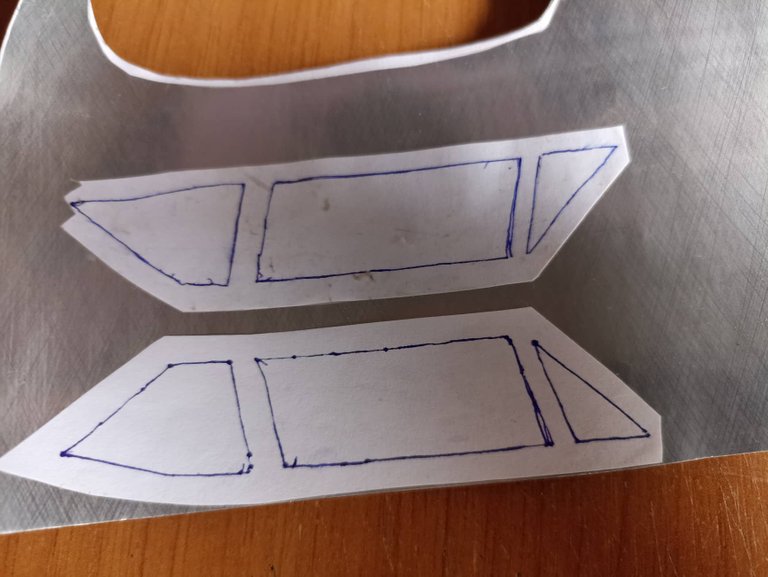
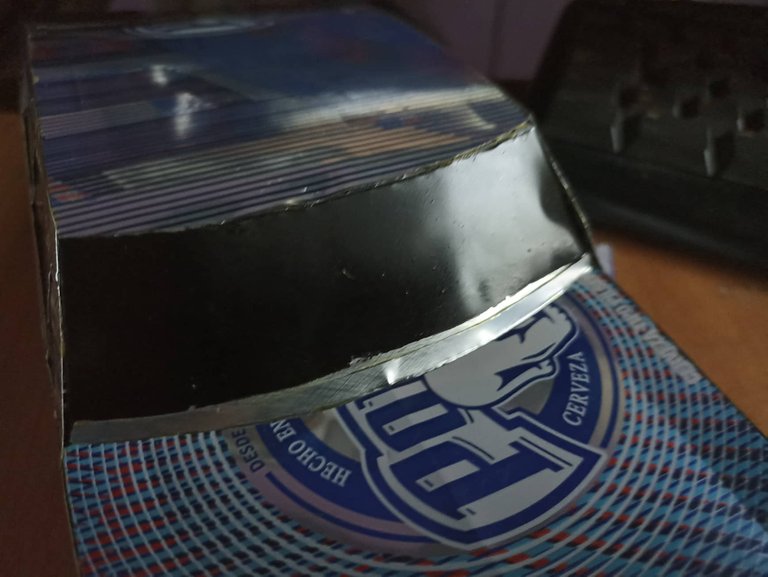
For this craft I used a total of 7 cans, this presentation is 12 centimeters high, so when you cut it the resulting sheet is large and wide and is very useful for making car parts. I drew the templates on normal white paper, simply drawing the parts of the Chevy Nova, it was not difficult, it was just giving the measurements within the dimensions of the cans that I cut so as not to use more. It could be said that I made the templates like when we draw a house, where we only make the walls and the roof, the same principle worked here.
Para esta manualidad utilicé un total de 7 latas, esta presentación mide 12 centímetros de alto, así que al cortarla la lámina resultante es grande y ancha y es muy útil para hacer piezas de carros. Las plantillas las dibuje sobre papel blanco normal, simplemente dibujando las partes del Chevy Nova, no fue dificil, solo fue darle las medidas dentro de las dimensiones de las latas que corté para no utilizar de más. Podría decirse que las plantillas las hice como cuando dibujamos una casa, donde solo hacemos las paredes y el techo, aquí funcionó el mismo principio.
 |  |  |
|---|---|---|
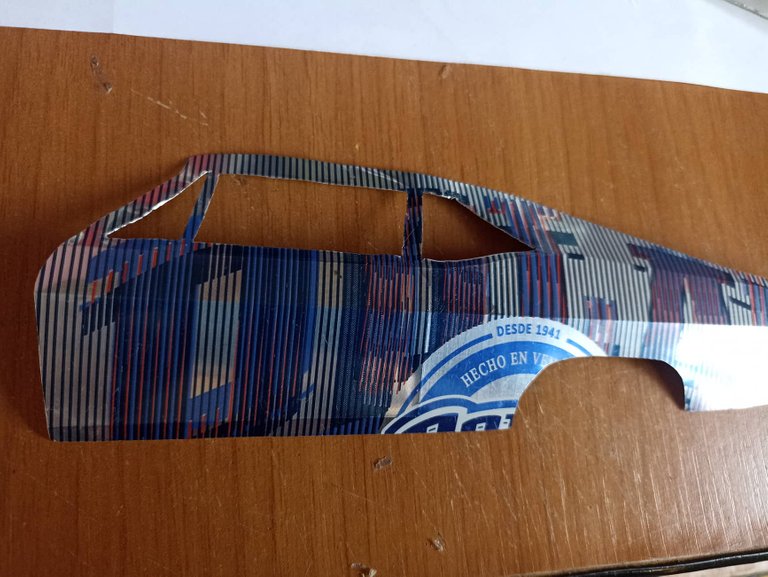 | 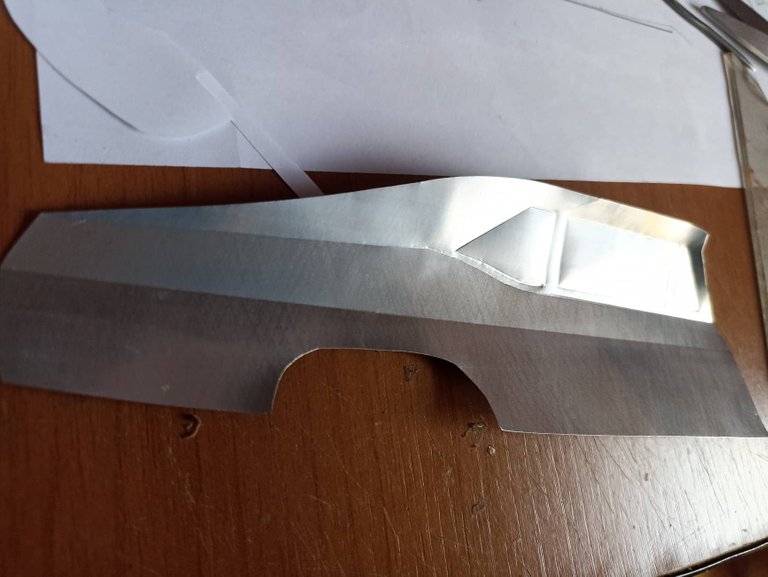 |  |
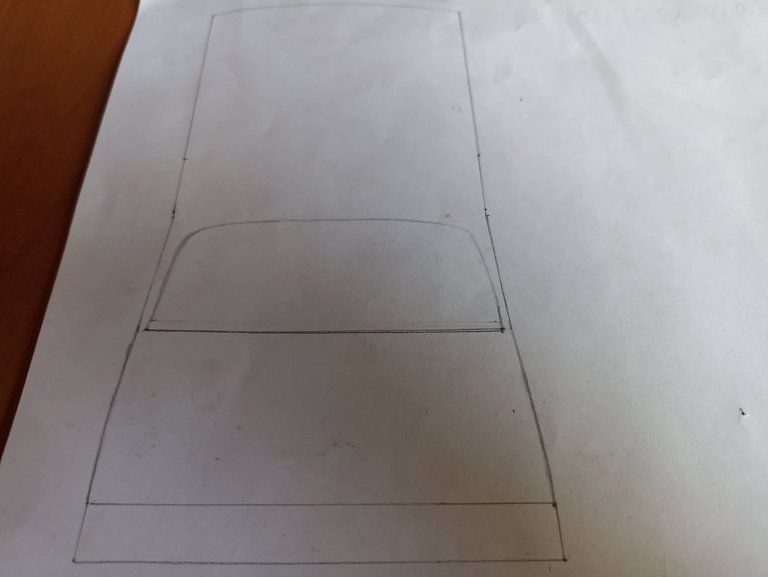
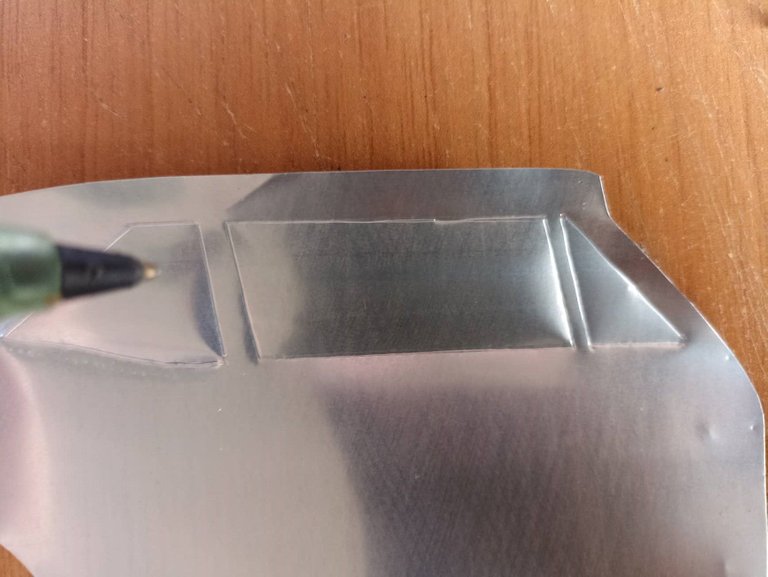
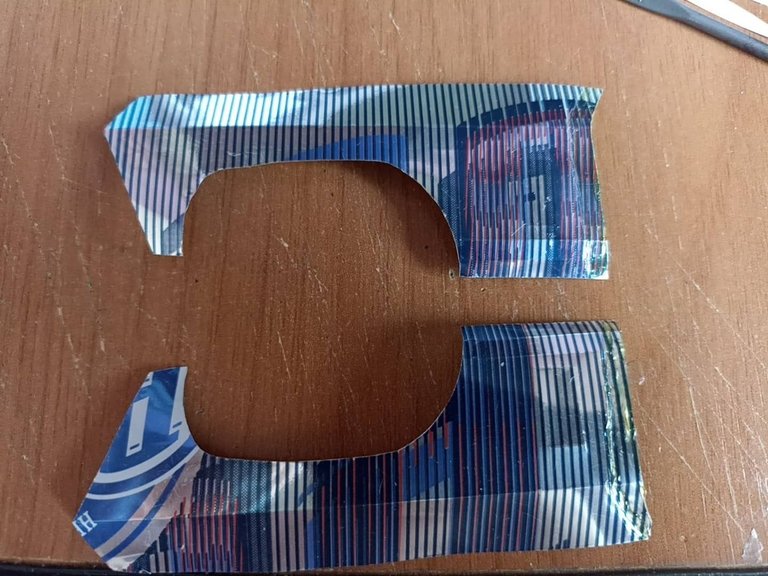
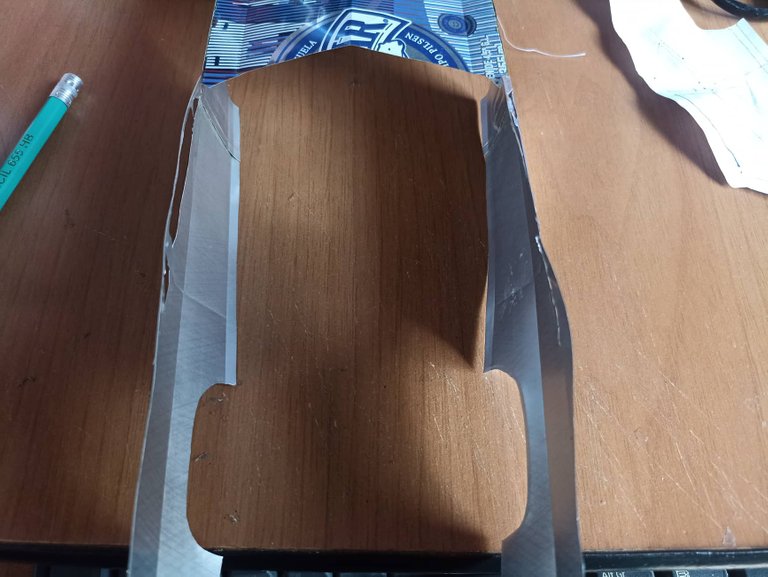
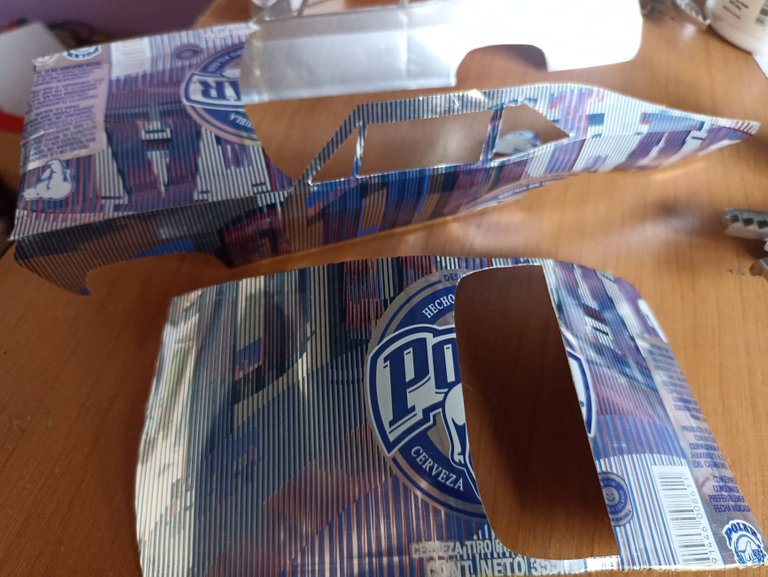
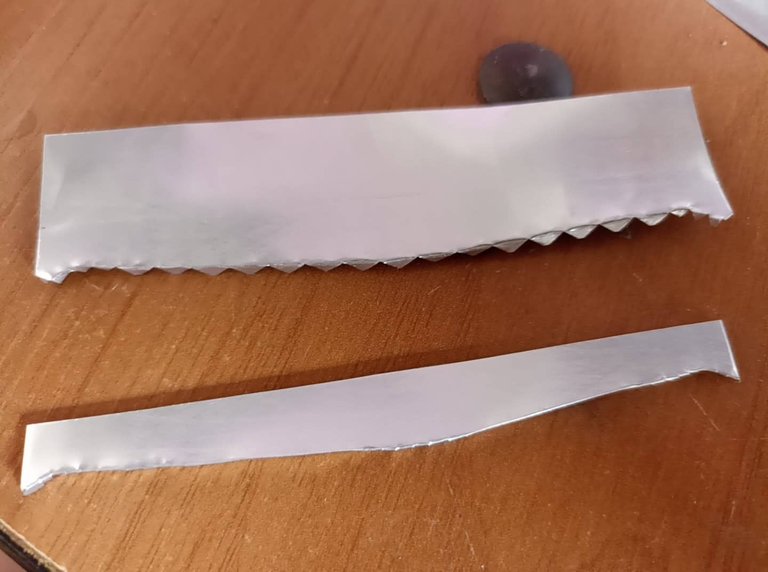
The first step to assemble the car is to cut all the side pieces, I made them complete, from the front bumper to the rear bumpers. So to make it reach the template on the can, I cut the front part, and from there I made the mold, after cutting it I made the lines for the window panes and then I outlined with a pen and then with some pocket knives I removed those parts. I did so later until I got the two parts for the two doors.
EL primer paso para armar el carro es cortar todo los que son las piezas laterales, yo las hice completas, desde la defensa delantera hasta las defensas traseras. Así que para que alcanzara la plantilla en la lata, corte la parte delantera, y desde ahí hice el molde, luego de cortarla hice las líneas de los vidrios de las ventana y luego remarqué con un bolígrafo y después con unas navajas quité esas partes. Así hice luego hasta obtener las dos partes para las dos puertas.
|  |  |
|---|---|---|
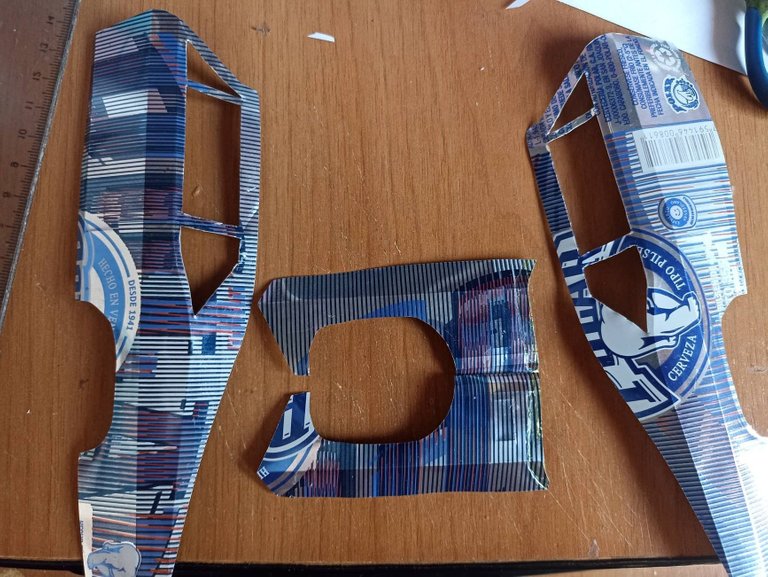 |  |  |
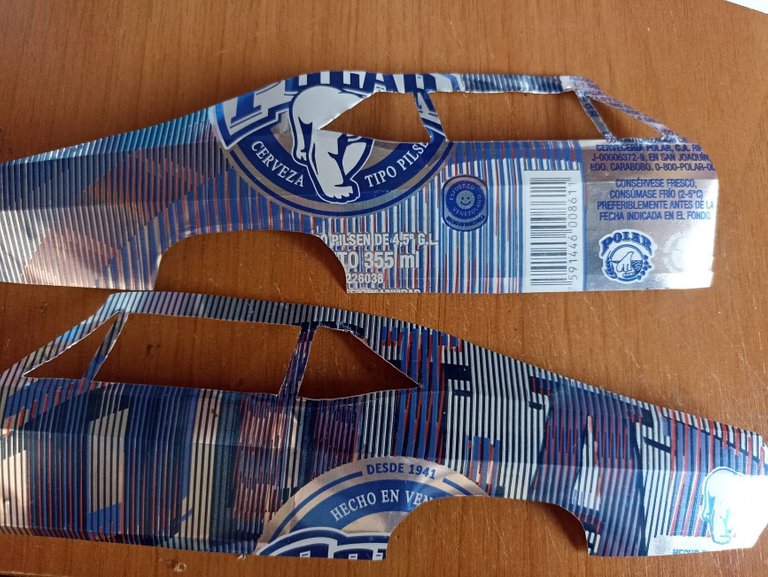
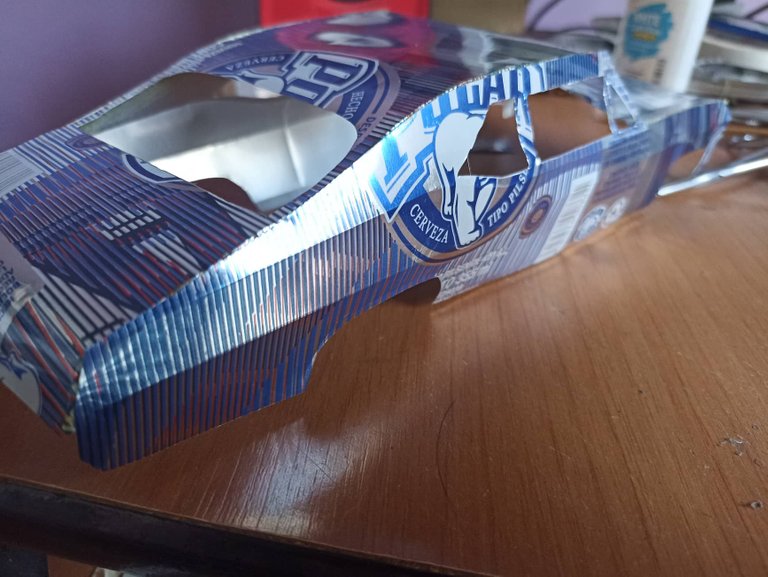
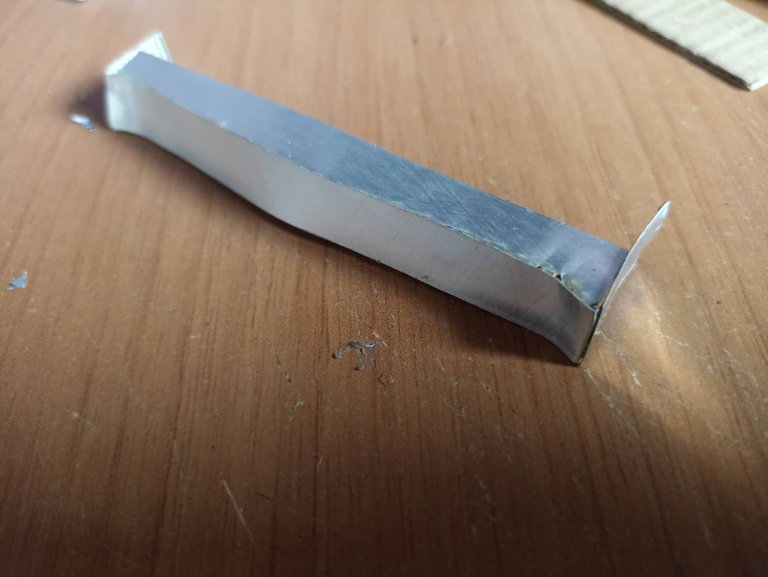
Then to finish the first step I trimmed the missing front part of the previous pieces, I cut 2 and made two molds, then I put glue, let dry a few minutes and then joined them. As you can see I removed both pieces and you can see how the Chavy Nova will look on the sides of the doors.
Luego para terminar el primer paso recotré la parte delantera que faltaba de las piezas anteriores, corté 2 he hice dos moldes, luego puse pegamento, dejé secar unos minutos y luego las uní. Como pueden observar saqué ambas piezas y puede apreciarse como quedará el Chavy Nova por los lados de las puertas.
 |  |  |
|---|---|---|
 |  |  |
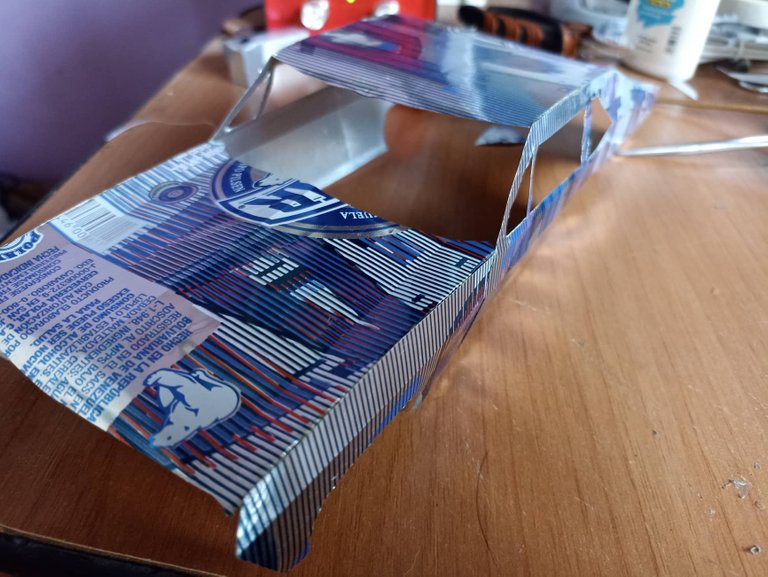
The next step is to make the front part, in this case the engine hood, this will help us to provide the basis for lifting the bodywork. I cut out the template, glued it on the can and then made the mold, not forgetting to mark the stripes that this car model has on the hood, to mark them I also made them with a pen, I made the strong line to sink the can and so on went well. After that, I gave it a circular shape on the tip, just like this model of car has it. Once everything was ready, I put glue on the pieces that I made previously and also on the hood, then I joined them.
El siguiente paso es hacer la pieza delantera, en este caso el capó del motor, este nos ayudará a dar las bases para levantar la carrocería. Recorté la plantilla, la pegue sobre la lata y luego hice el molde, sin olvidar de marcar las rayas que tiene este modelo de carro en el capó, para marcarlas las hice tambien con un lapicero, hice el trazo fuerte para hundir la lata y así saliera bien. Después de eso en la punta le di forma circular, tal cual este modelo de carro lo posee, una vez listo todo puse pegamento en las piezas que hice anteriormente y también en el capó, luego las uní.
|  |  |
|---|---|---|
 |  |  |
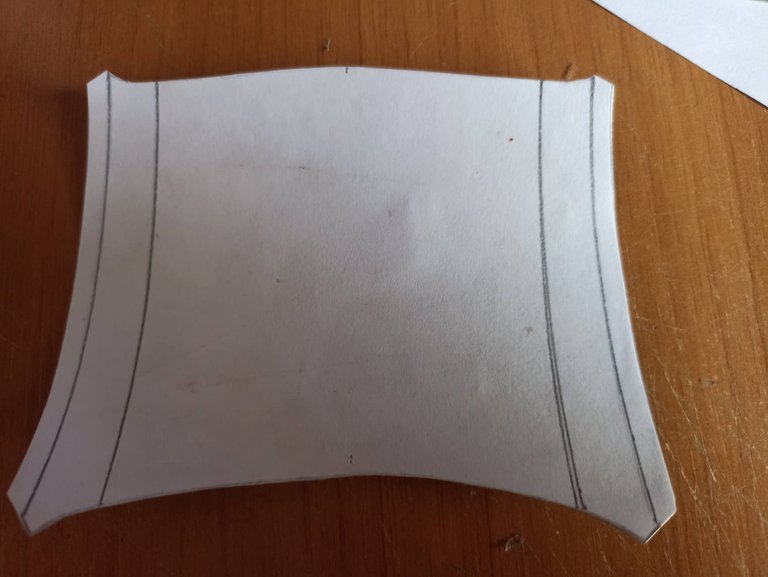
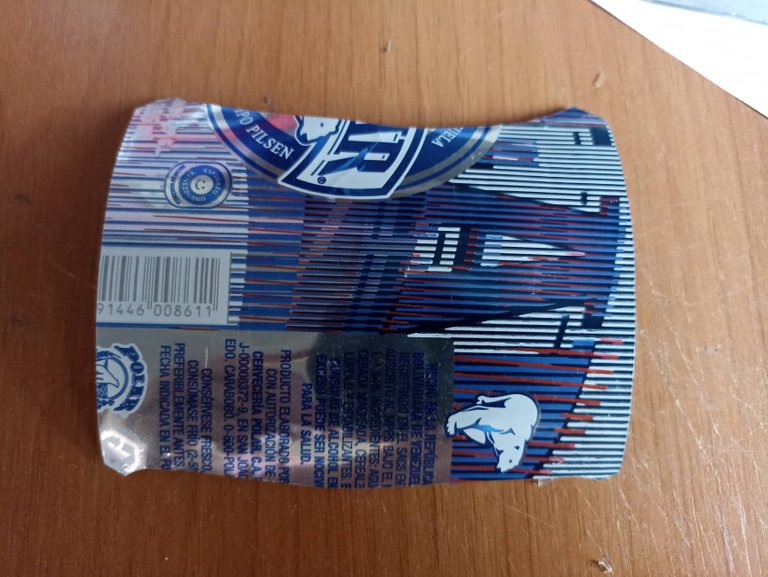
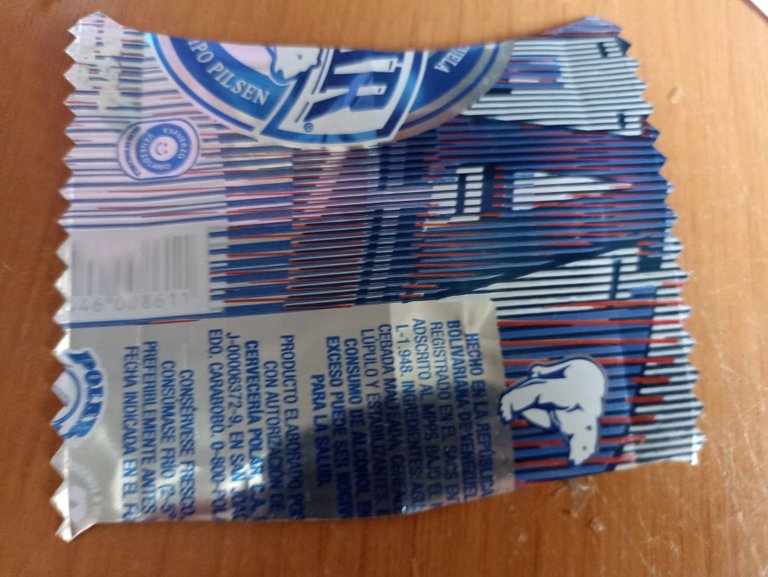
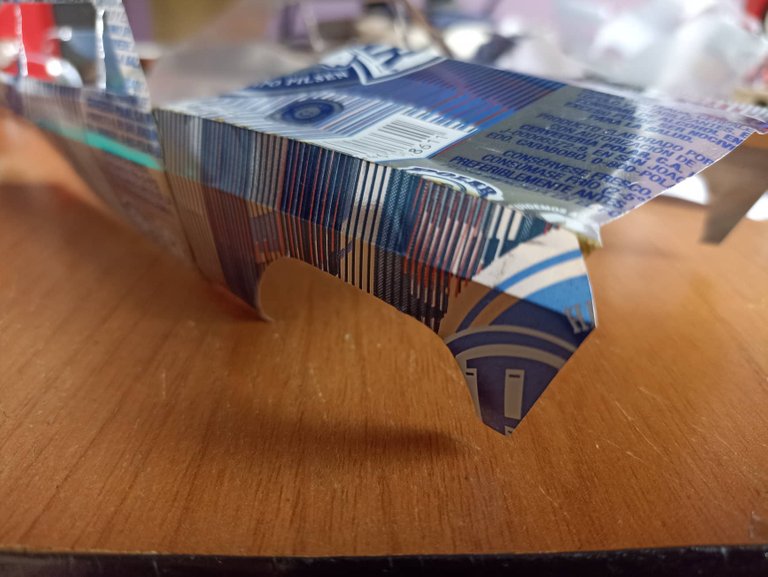
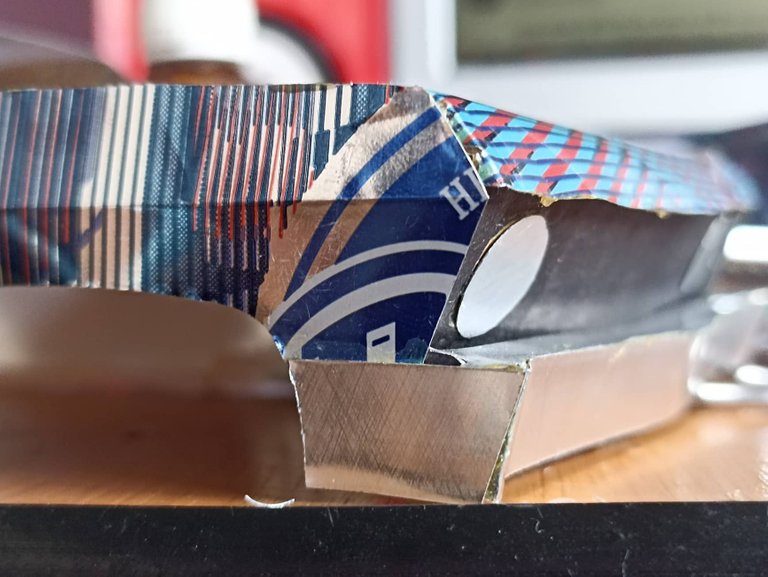
After this I started to make the roof, this part was a little more difficult because the Chevy Nova model has a rounded roof and it is difficult to mold the can to achieve this effect, even so I did my best to make it fit. same shape. Another thing was that from a single cut I took out two pieces, that is, I made both the roof and the rear part where the division is the rear glass, once this was done I took out the template and put glue on it to later start joining it to the rest of the bodywork. As you can see now if you can see the shape of the work I am doing, it is at this point where you decide to continue or destroy everything and start over.
Despues de esto comencé a hacer el techo, esta parte fue un poco más dificil porque el modelo del Chevy Nova tiene el techo de forma redondeada y es dificl moldear la lata para conseguir este efecto, aún así hice mi mejor esfuerzo para que quedara de la misma forma. Otra cosa fue que de un solo corte saqué dos piezas, es decir, hice tanto el techo, como la parte trasera donde la división en es el vidrio trasero, una vez hecho esto saqué la plantilla y le puse pegamento para posteriormente comenzarla a unir al resto de la carrocería. Como pueden observar ahora si se le ve forma al trabajo que voy haciendo, es en este punto donde decides continuar o destruir todo y comenzar de nuevo.
 |  |  |
|---|---|---|
 |  |  |
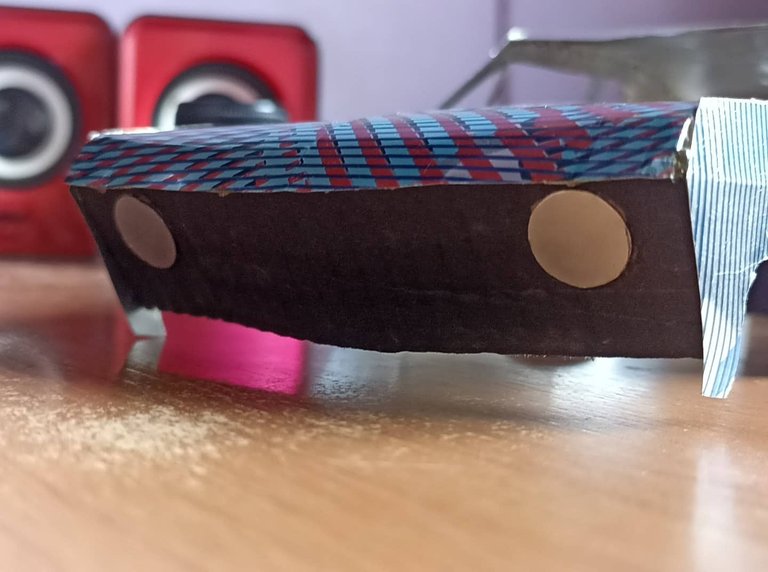
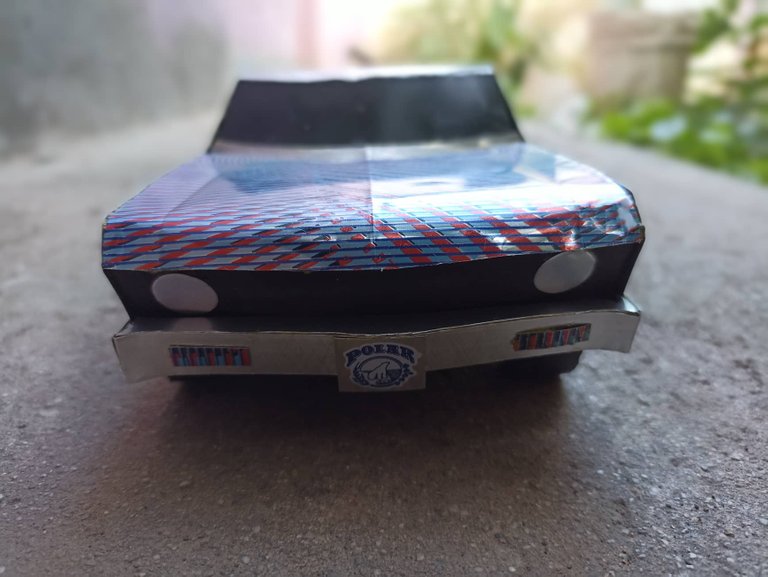
Once most of the car was done, I started with the accessories and other parts such as the headlights, the bumpers and also the grill that it has on the front. I made this pate out of cardboard and then I painted it, and for the headlights I put two aluminum circles. I drew the bumpers directly on top of the can, took out the mold and then glued them in the corresponding areas.
Una vez hecho la mayor parte del carro comecé con los accesorios y otras partes como los faros, las defensas y tambien la parrilla que lleva en la parte de frontal. Esta pate la hice de cartón y luego la pinté, y para los faros puse dos círculos de aluminio. Las defensas las dibujé encima de la lata directamente, saqué el molde y después las pegué en las zonas que le corresponde.
 |  |  |
|---|---|---|
 |  | 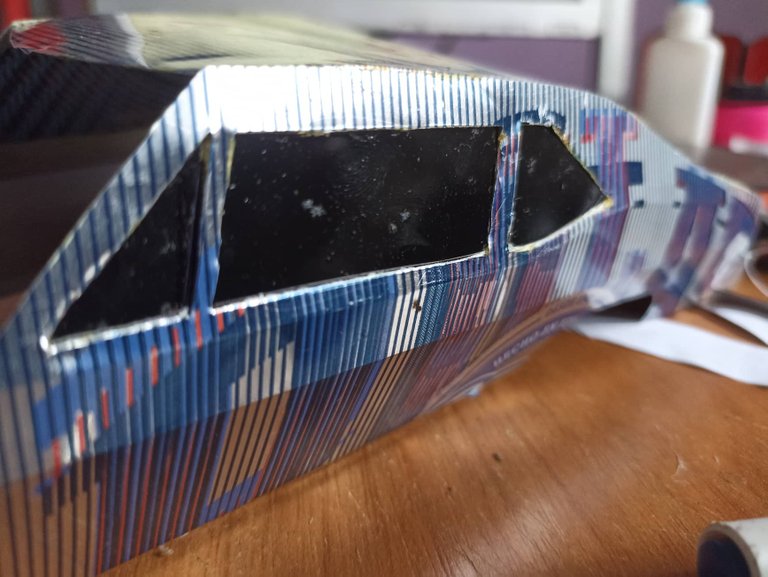 |
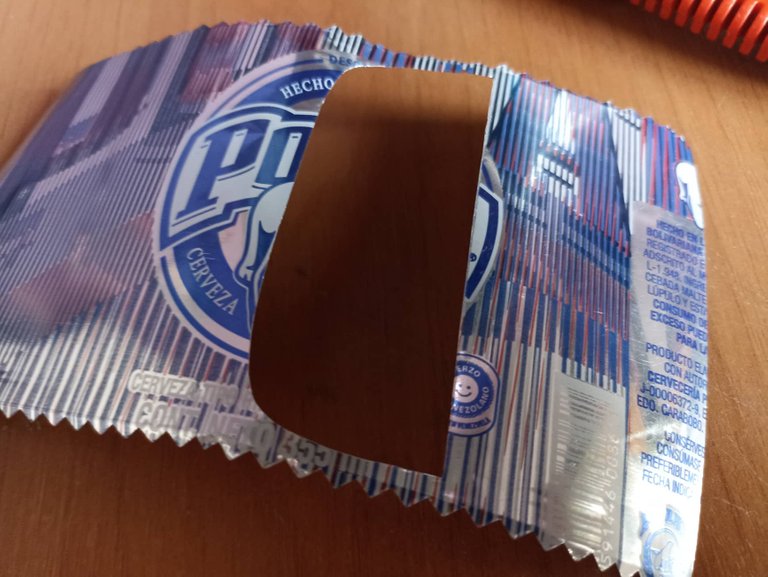
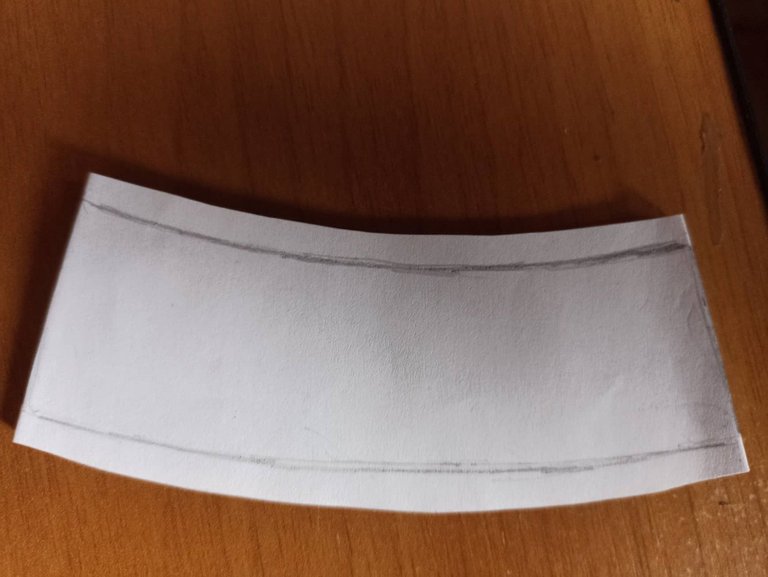
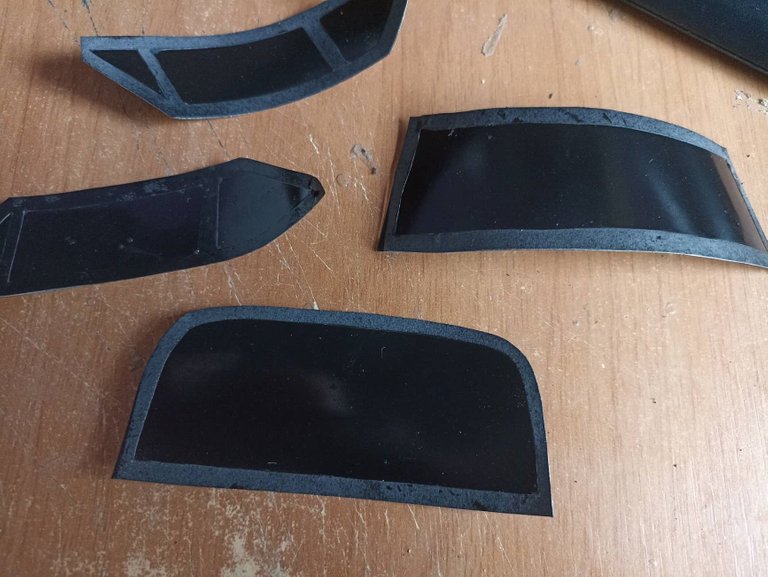
The next step was to make the glass for the windows, which I painted black. I made the templates and glued them on the can, then I cut out the parts that do not need to be painted from the paper, leaving only the glass frame where I will put the glue to stick it on each window as you can see. I made 4 pieces, the front windshield, the rear and both sides.
El siguiente paso fue hacer los vidrios para las ventanas, los cuales los pinté de negro. Hice las plantillas y las pegue sobre la lata, luego recorté las partes que no es necesario pintar del papel, quedando solo el marco de los vidrios donde pondré el pegamento para así pegarlo en cada ventana como se puede ver. Hice 4 piezas, el parabrisas delanetero, el trasero y el de ambos lados.
 |  |  |
|---|---|---|
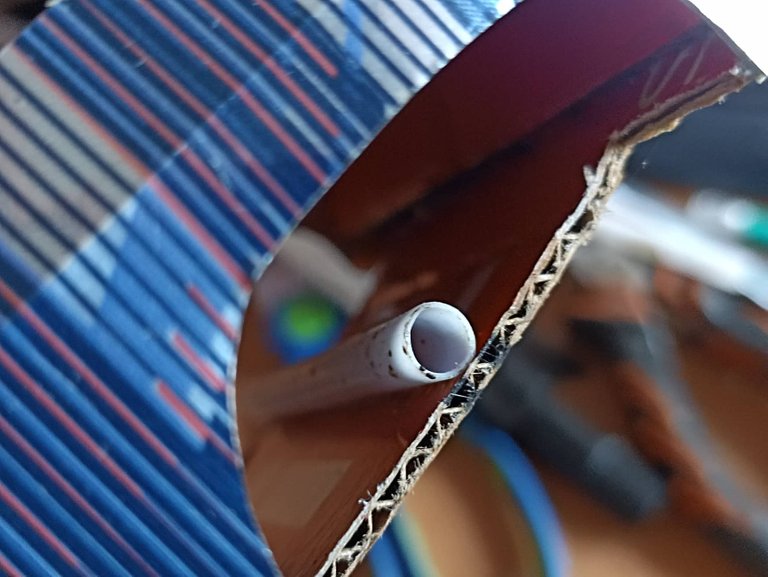 |  | 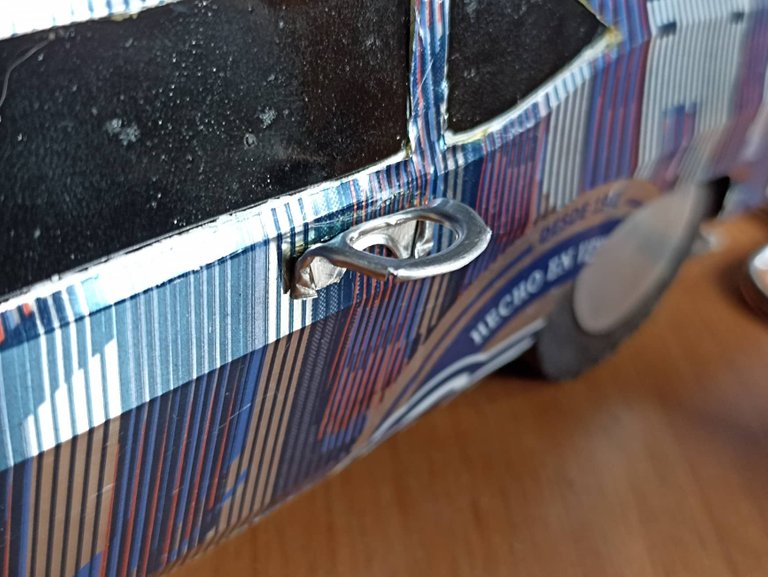 |
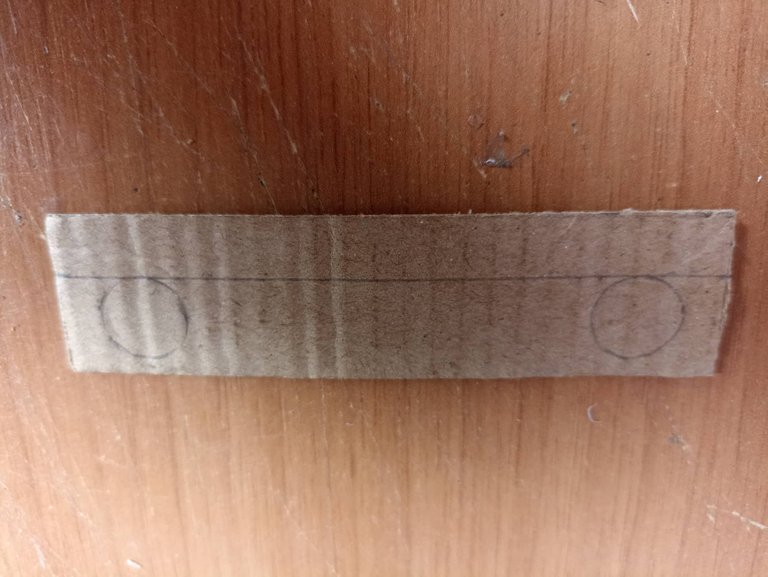
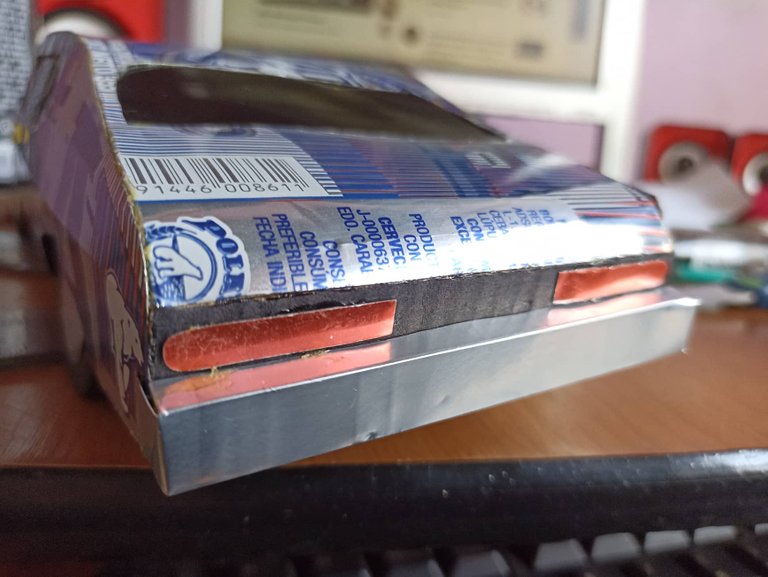
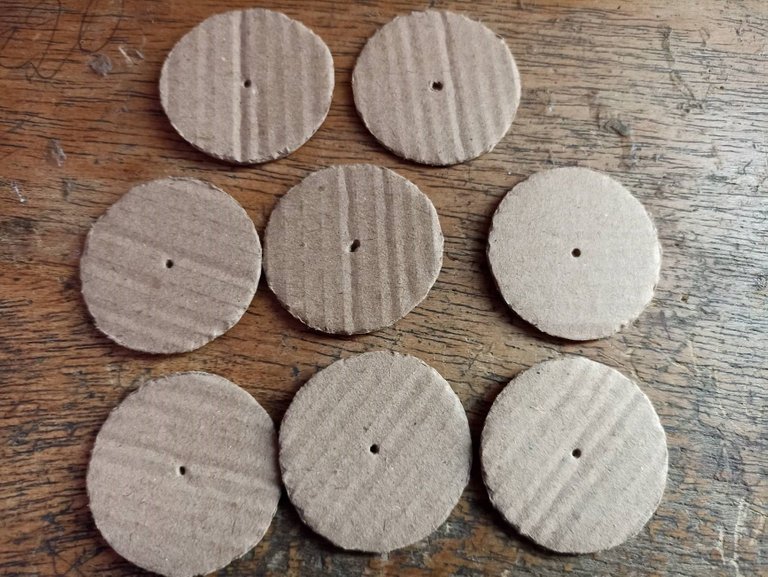
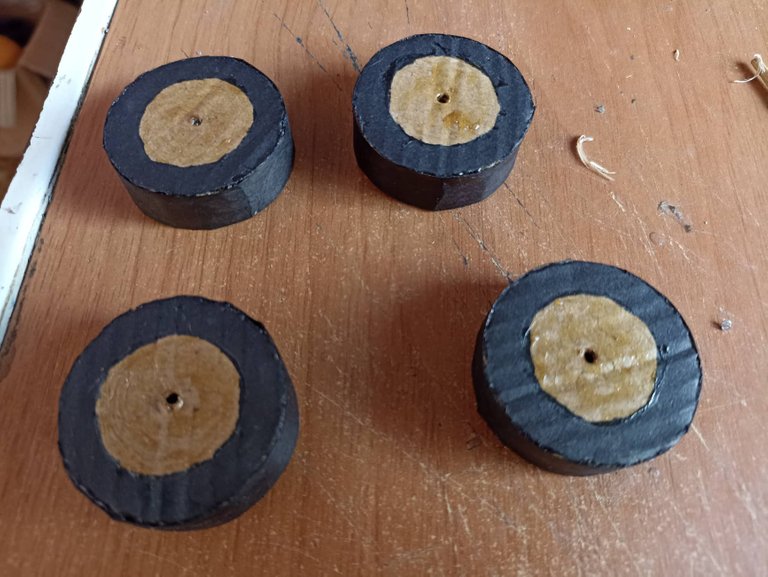
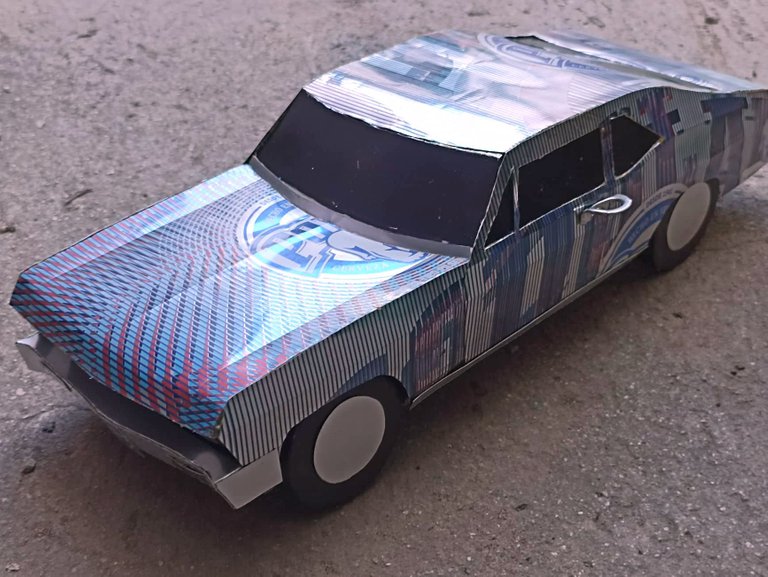
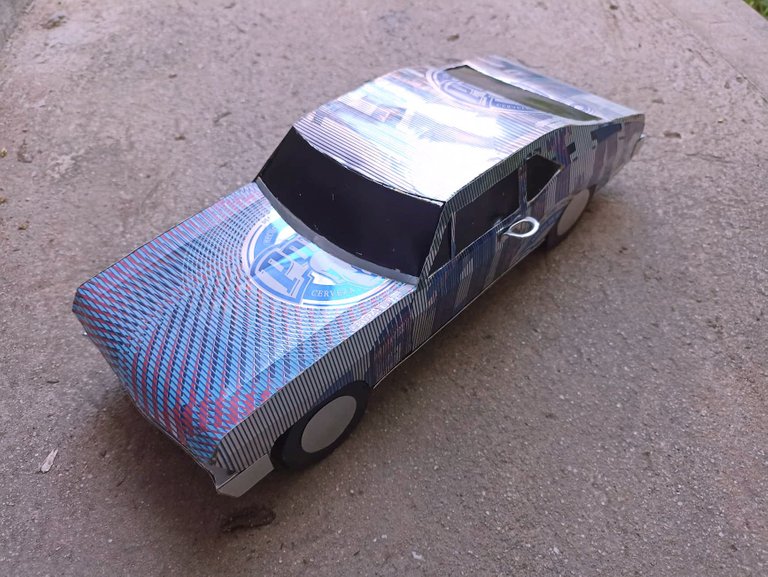
Then I did the final parts, I finished the rear by putting on the bumper and also the red lights. I made the wheels with cardboard cutting 8 circles, 2 circles for each side of the wheel, then I also joined them with a strip of cardboard, I painted them black except for the inner circle because I put some aluminum circles there. After the part of the floor I used a piece of cardboard, and then on the inside I put two hollow plastic tubes to pass the axle of the wheels through. After this I made the handles for the doors with the security rings that the soda cans have to open. With these details I finished the Chevy Nova 69.
Luego hice las partes finales, terminé la parte trasera colocando la defensa y también las luces de color rojo. Las ruedas las hice con cartón cortando 8 círculos 2 círculos para cada lado de la rueda, luego las uní también con una tira de cartón, las pinte de negro menos el círculo interno porque ahí puse unos círculos de aluminio. Despues den la parte del piso utilicé un cartón, y luego en la parte interior puse dos tubos de plásticos huecos para pasar por ahí el eje de las ruedas. Después de esto hice las manillas para las puertas con los anillos de seguridad que tienen las latas de refresco para abrir. Con estos detalles di por finalizado el Chevy Nova 69.
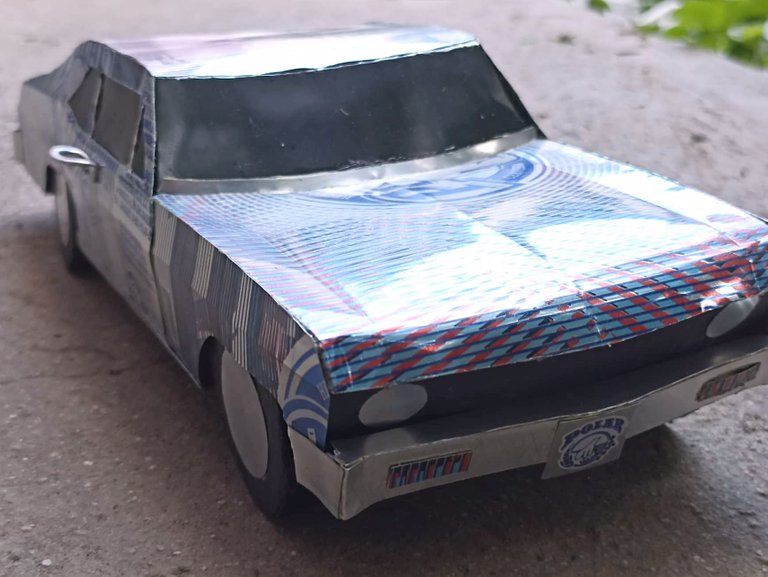
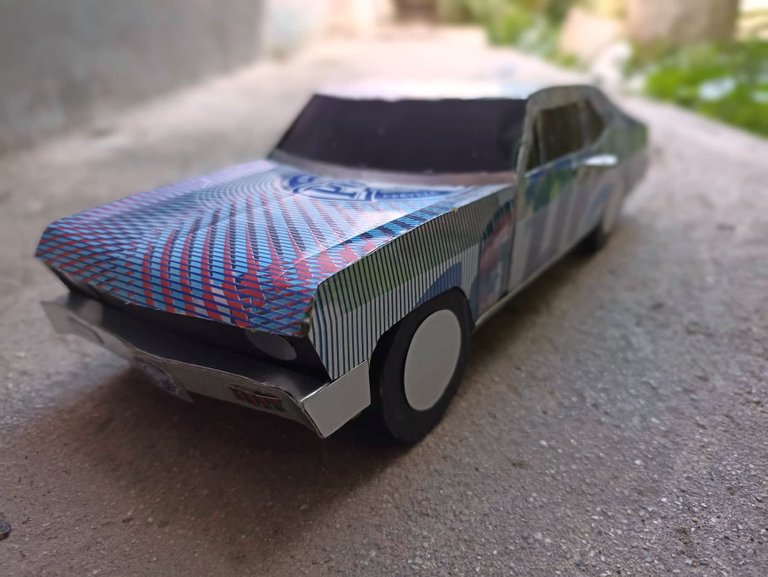
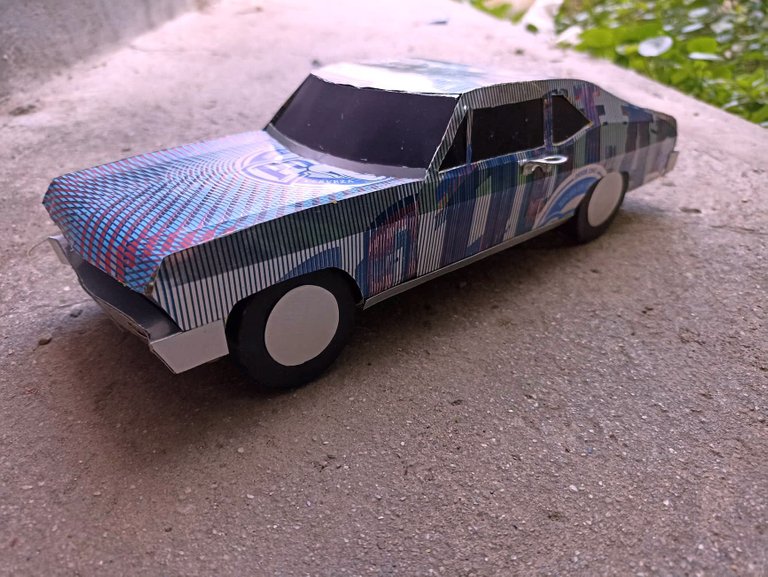
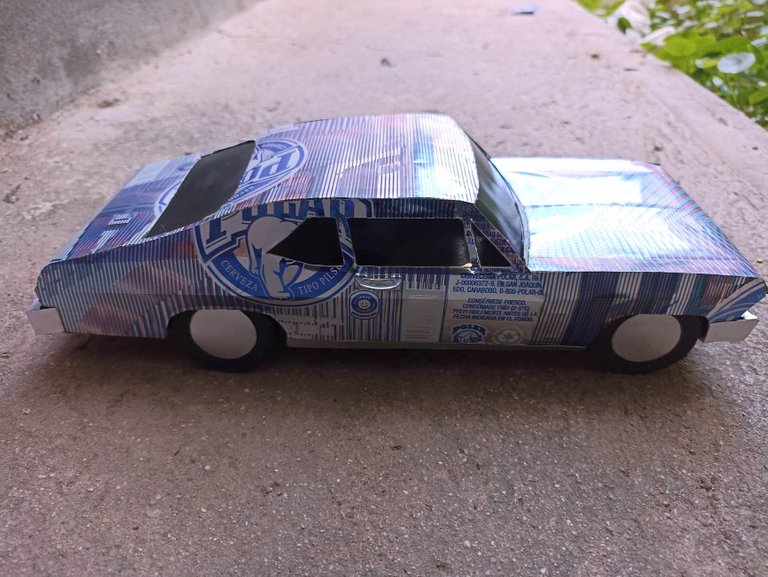
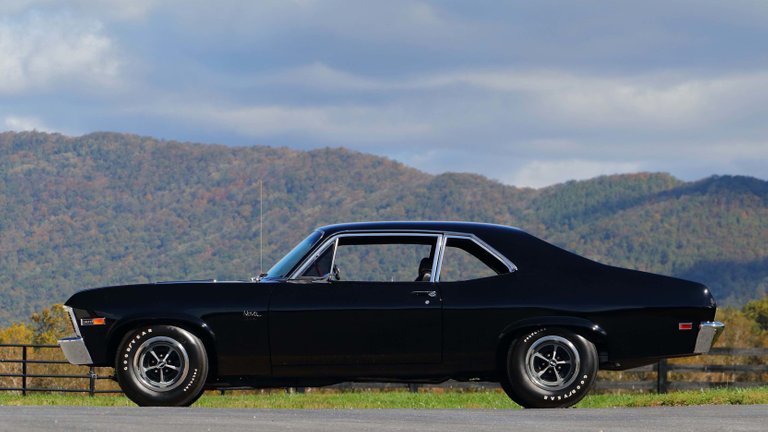
This is how the 1969 Chevy Nova was finished, I like this model a lot, especially that whole line of Muscle Cars that came out in the 60s, they have always seemed like authentic powerful machines to me, this one in particular is something reserved in the design although it also retains that part of the other cars. In Venezuela it is very common but the one with 4 doors, I have never seen one with two doors. I hope you liked how it turned out, I hope to come back soon and share more models, the older the better. Do not forget to leave your opinion that you have found. I say goodbye until a new opportunity!
Así quedó finalizado el Chevy Nova 1969, este modelo me gusta mucho, especialmente toda esa línea de Muscle Car que salieron en la década de los 60, siempre me han parecido auténticas máquinas poderosas, este en especial es algo reservado en el diseño aunque conserva también esa parte de los demás autos. En Venezuela es muy común pero el que tiene 4 puertas, nunca he visto uno de dos puertas. Espero que les haya gustado como quedó, espero volver pronto y compartir más modelos, mientras más antiguos mejor. No olviden dejar su opinión que les ha parecido. Me despido hasta una nueva oportunidad!
~~~ embed:1587821347526348801 twitter metadata:MTQ5MDc5MjczNjE2OTExMTU2Mnx8aHR0cHM6Ly90d2l0dGVyLmNvbS8xNDkwNzkyNzM2MTY5MTExNTYyL3N0YXR1cy8xNTg3ODIxMzQ3NTI2MzQ4ODAxfA== ~~~
The rewards earned on this comment will go directly to the people( @fixie, @valenpba ) sharing the post on Twitter as long as they are registered with @poshtoken. Sign up at https://hiveposh.com.
Muy hermoso tu trabajo. De verdad que tienes mucho talento.
Saludos y Bendiciones.
Oh amigo! está increíble tu trabajo, está lleno de detalles, se nota que debes tener mucha paciencia a la hora de realizar uno de tus trabajos.
Gracias por compartir, saludos.✨👋🏻
Así es, aunque cuando lo doy por terminado y luego pasan días, me pongo a observar que me faltaron mas detalles, sin embargo quedé satisfecho ejeje. Gracias por pasar!
Wow que creativo, me encantó esta idea demasiado original y lo prolijo que quedó, esto es arte 💜
holaaa, muchas gracias, de verdad me alegra que te haya gustado y que lo hayas encontrado artístico.. Saludos
Es un muy buen carro. Le ha quedado genial la maqueta, amigo. Muy buen detalle la placa.
Saludos amigos, esta es un modelo clásico, los novas son tremendas máquinas.. Que bueno que le haya gustado como quedó.