Bienvenidos Queridos Amantes de la Artes Manuales
Welcome Dear Manual Arts Lovers
Mis hijas son mi mayor tesoro y el motor que le da sentido a mi existencia, cada día, me levanto y doy el 1000% porque ellas estén lo mejor posible, por supuesto, cuando se aproxima la fecha de celebrar sus cumpleaños, trato de llenarlas de detalles. Y bueno, si está a mi alcance realizar con mis propias manos, algunos de esos detalles, para mi es lo máximo y me hace sentir muy feliz, al ver el brillo de alegría en sus ojitos.
My daughters are my greatest treasure and the engine that gives meaning to my existence, every day, I get up and give 1000% because they are the best possible, of course, when the date approaches to celebrate their birthdays, I try to fill them with details. And well, if it is within my reach to make with my own hands, some of those details, for me it is the best and it makes me feel very happy to see the gleam of joy in their eyes.
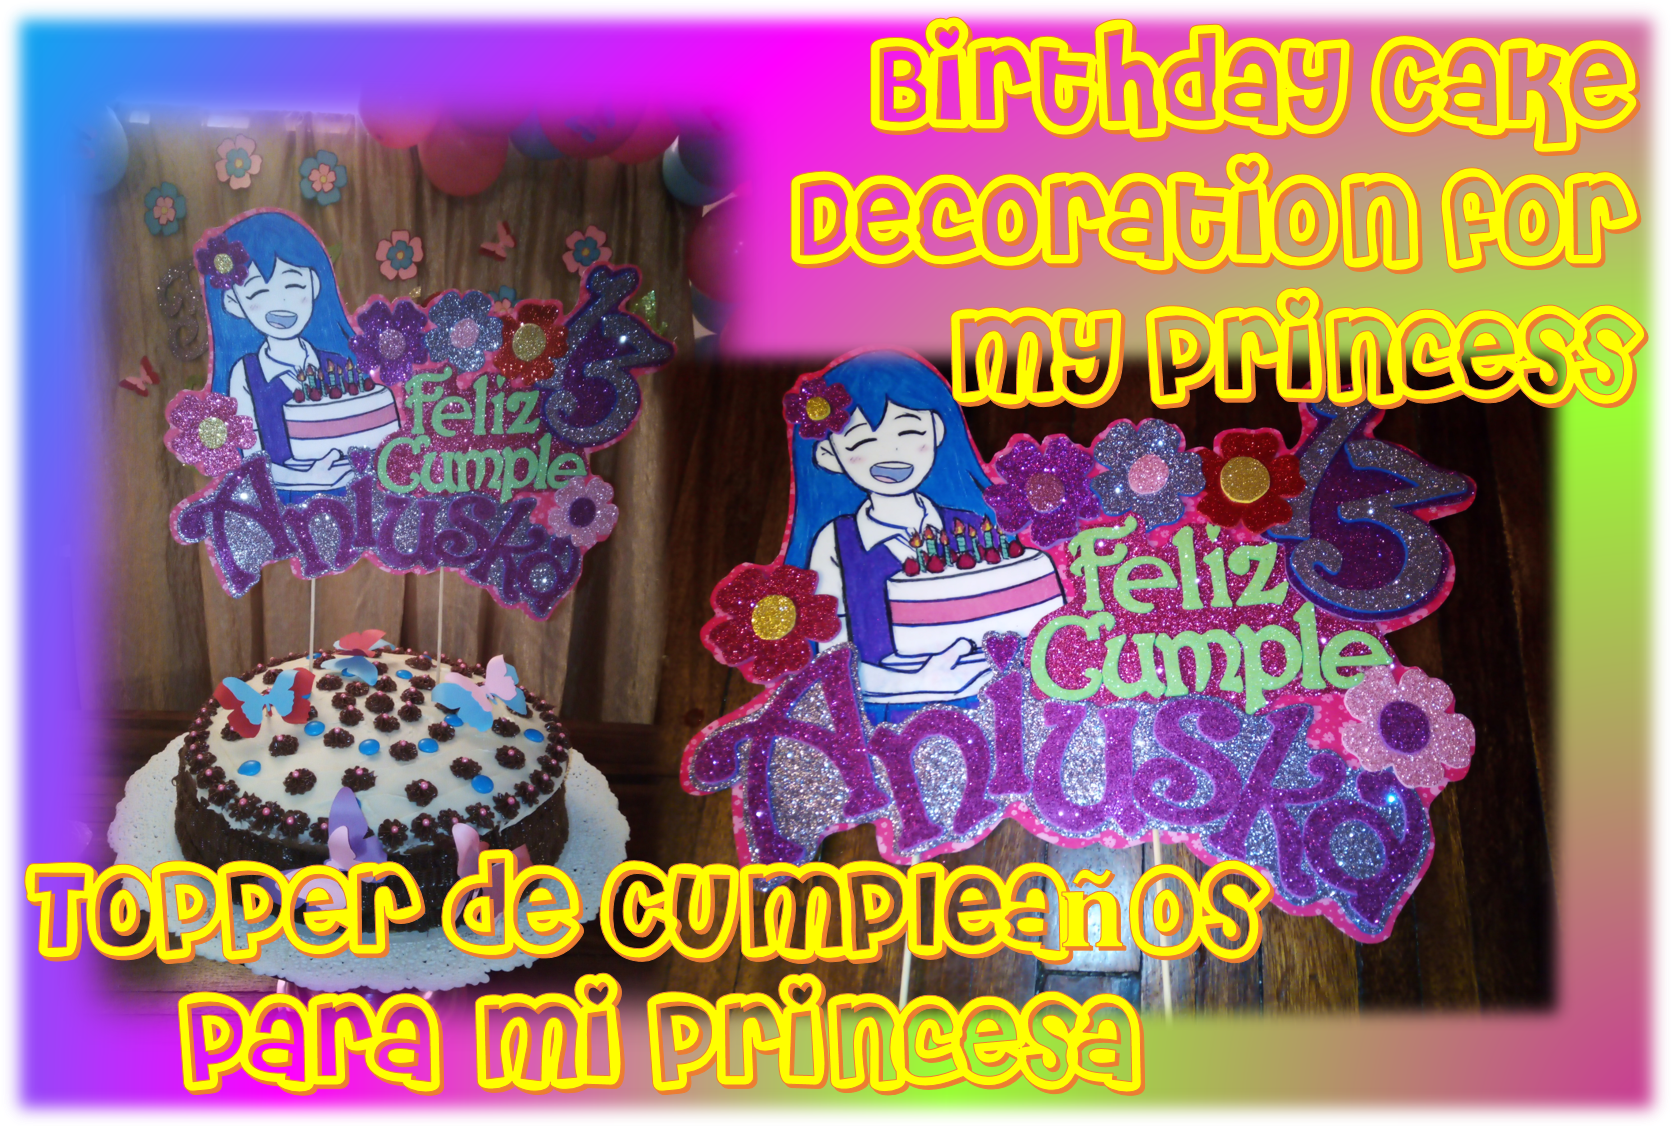

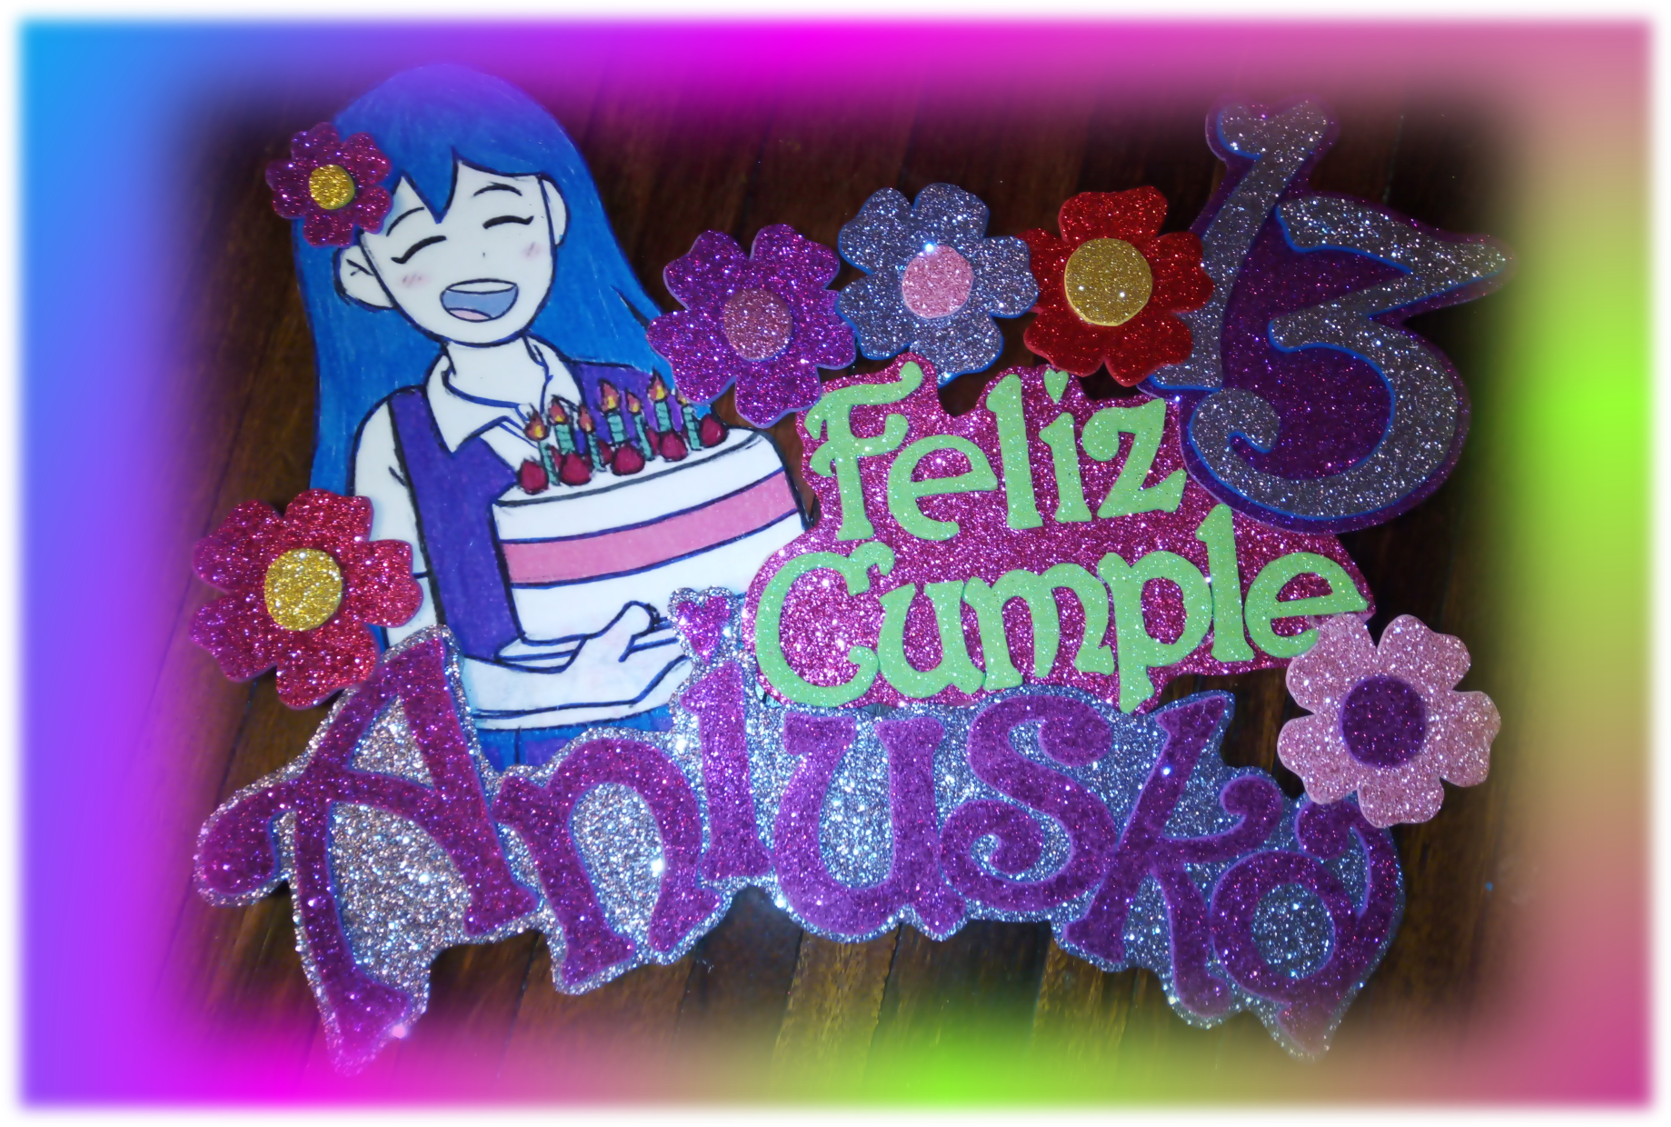
Por ello, este es uno de esos proyectos que adoro realizar, ya que, puedo disfrutar el crear algo con mis propias manos y, además, complacer a mi princesa mayor. En esta oportunidad, mi niña grande quería para ambientar su cumpleaños un tema referente a un juego de video que le gusta mucho. Por supuesto, puse manos a la obra, y entre los varios detalles que realice, hoy les quiero compartir el topper o decoración para torta de cumpleaños personalizado que elaboré para tan especial ocasión.
Therefore, this is one of those projects that I love to do, because I can enjoy creating something with my own hands and, also, please my eldest princess. This time, my big girl wanted a theme related to a video game that she loves to play for her birthday. Of course, I got to work, and among the various details that I made, today I want to share with you the personalized birthday cake topper or decoration that I made for such a special occasion.

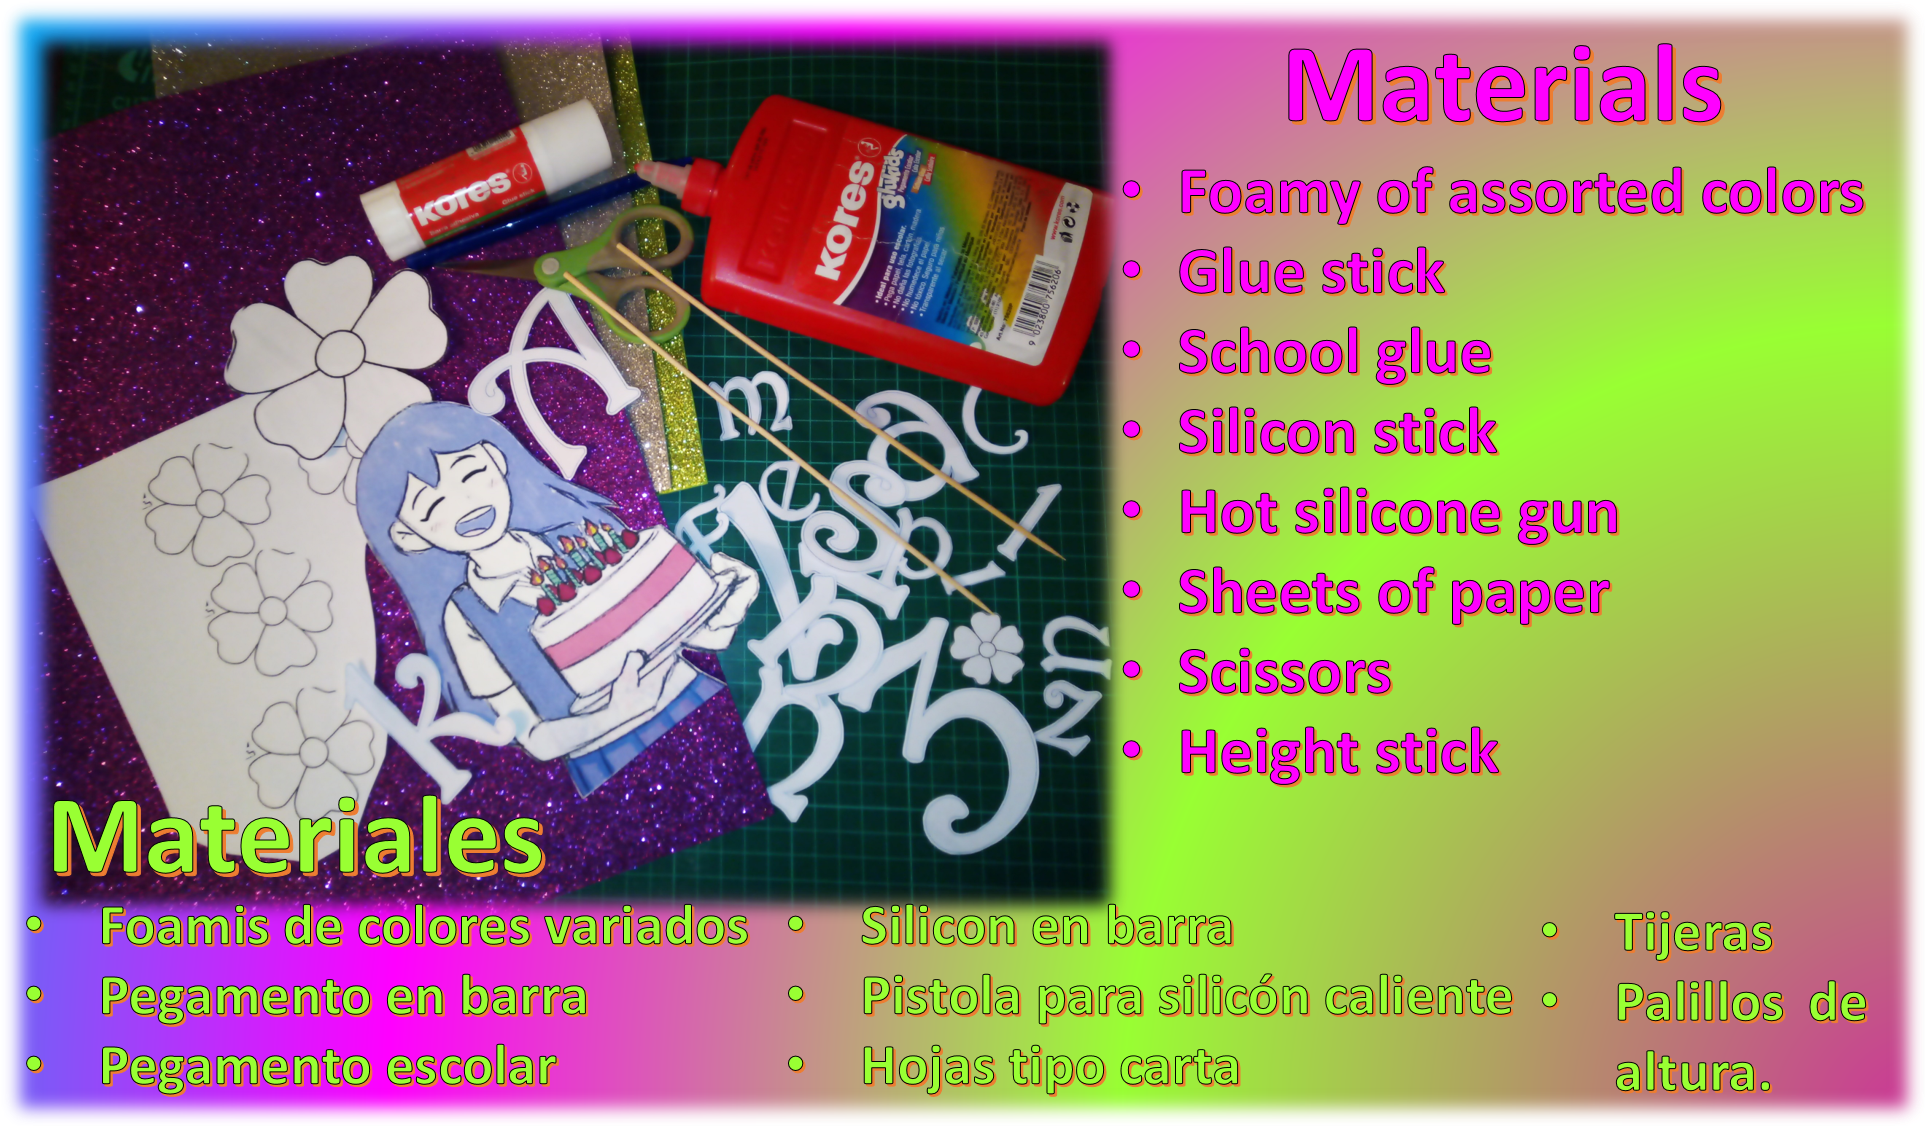

Utilicé varios materiales, que no son nada complicados de encontrar, y como pueden ver en la imagen, utilicé además de distintos pegamentos, tijera, papel, foami de colores variados. Algo que olvide colocar en la lista de materiales, fue la cartulina estampada, que más adelante verán en donde la utilice. Pero, claro, si no la tienen no importa, pueden usar cualquier cartulina, de un color que combine con la combinación de colores que estén utilizando.
I used several materials, which are not at all difficult to find, and as you can see in the image, I used not only different glues, but also scissors, paper, foami of different colors. Something I forgot to include in the list of materials was the stamped cardboard, which you will see later where I used it. But, of course, if you don't have it, it doesn't matter, you can use any cardboard, in a color that matches the combination of colors you are using.


Lo Primero que debemos realizar en este proyecto, es el diseño de lo que queremos, como ya les comenté, mi hija quería algo relacionado con un juego de video, entonces nos fuimos a internet y ella selecciono una imagen. Ya con la imagen, me fui al Power Point y seleccioné algunos tipos de letras y decidí las palabras que colocaría además del típico, “Feliz Cumpleaños”, también incluí en número 13 y algunas flores para complementar. Con todos los elementos, procedí a organizarlos, de la forma más linda que me pareció. Finalmente, procedí a imprimir cada uno de los elementos.
The first thing to do in this project, is the design of what we want, as I told you, my daughter wanted something related to a video game, so we went to the internet and she selected an image. Already with the image, I went to Power Point and selected some fonts and decided the words that I would place besides the typical, "Happy Birthday", I also included the number 13 and some flowers to complement. With all the elements, I proceeded to arrange them in the prettiest way I could think of. Finally, I proceeded to print each of the elements.

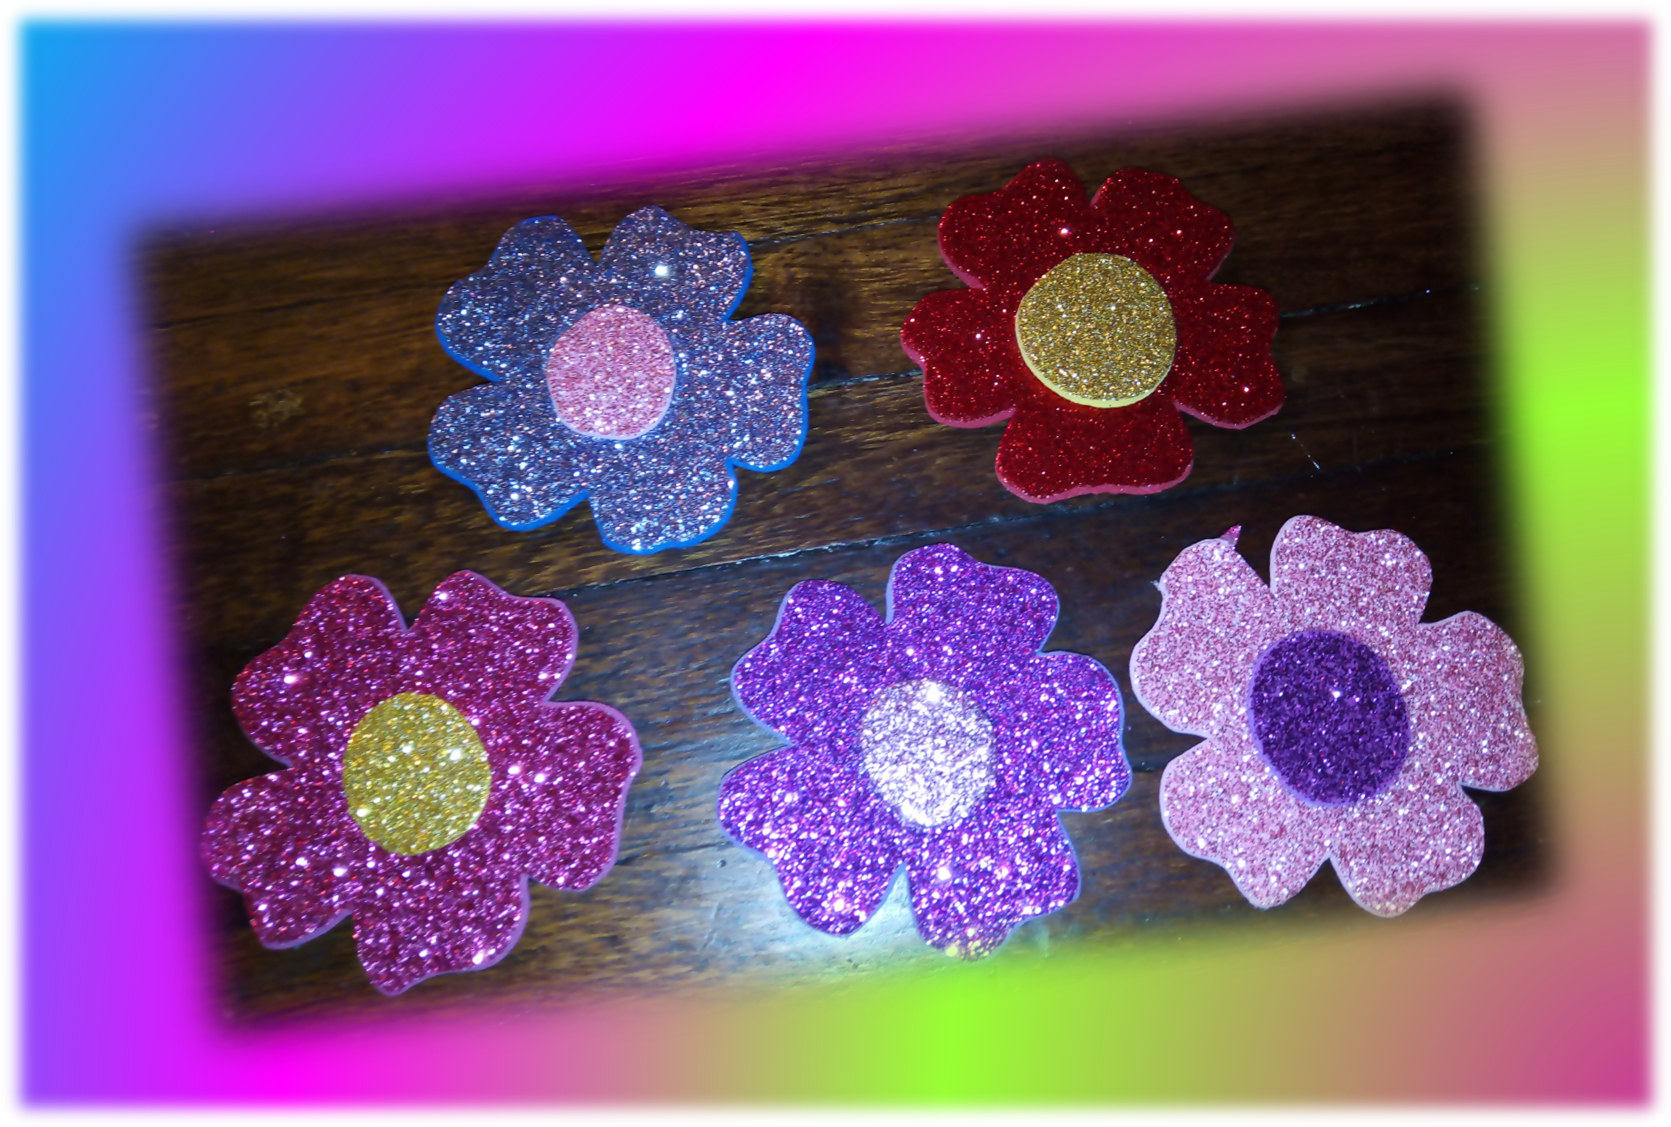

Ya con los moldes impresos, los recorté y empecé transfiriendo al foami las florecitas, como pueden ver en la imagen, realicé varias de distintos colores.
Once the molds were printed, I cut them out and started transferring the little flowers to the foami, as you can see in the image, I made several in different colors.


Después de terminar las flores, empezó quizás el trabajo más largo y quizás un poco fastidioso, recortar cada una de las letras. Ya tenía las letras impresas, así que, las recorté para poder tener los moldes que transferir al foami, con un lapicero fui remarcando cada una de las letras. Luego, el proceso consistió en recortar nuevamente cada una de las letras, pero ahora en foami.
After finishing the flowers, perhaps the longest and perhaps a bit tiresome work began, cutting out each one of the letters. I already had the letters printed, so I cut them out in order to have the molds to transfer to the foami, and with a pencil I marked each one of the letters. Then, the process consisted of cutting out each of the letters again, but now in foami.

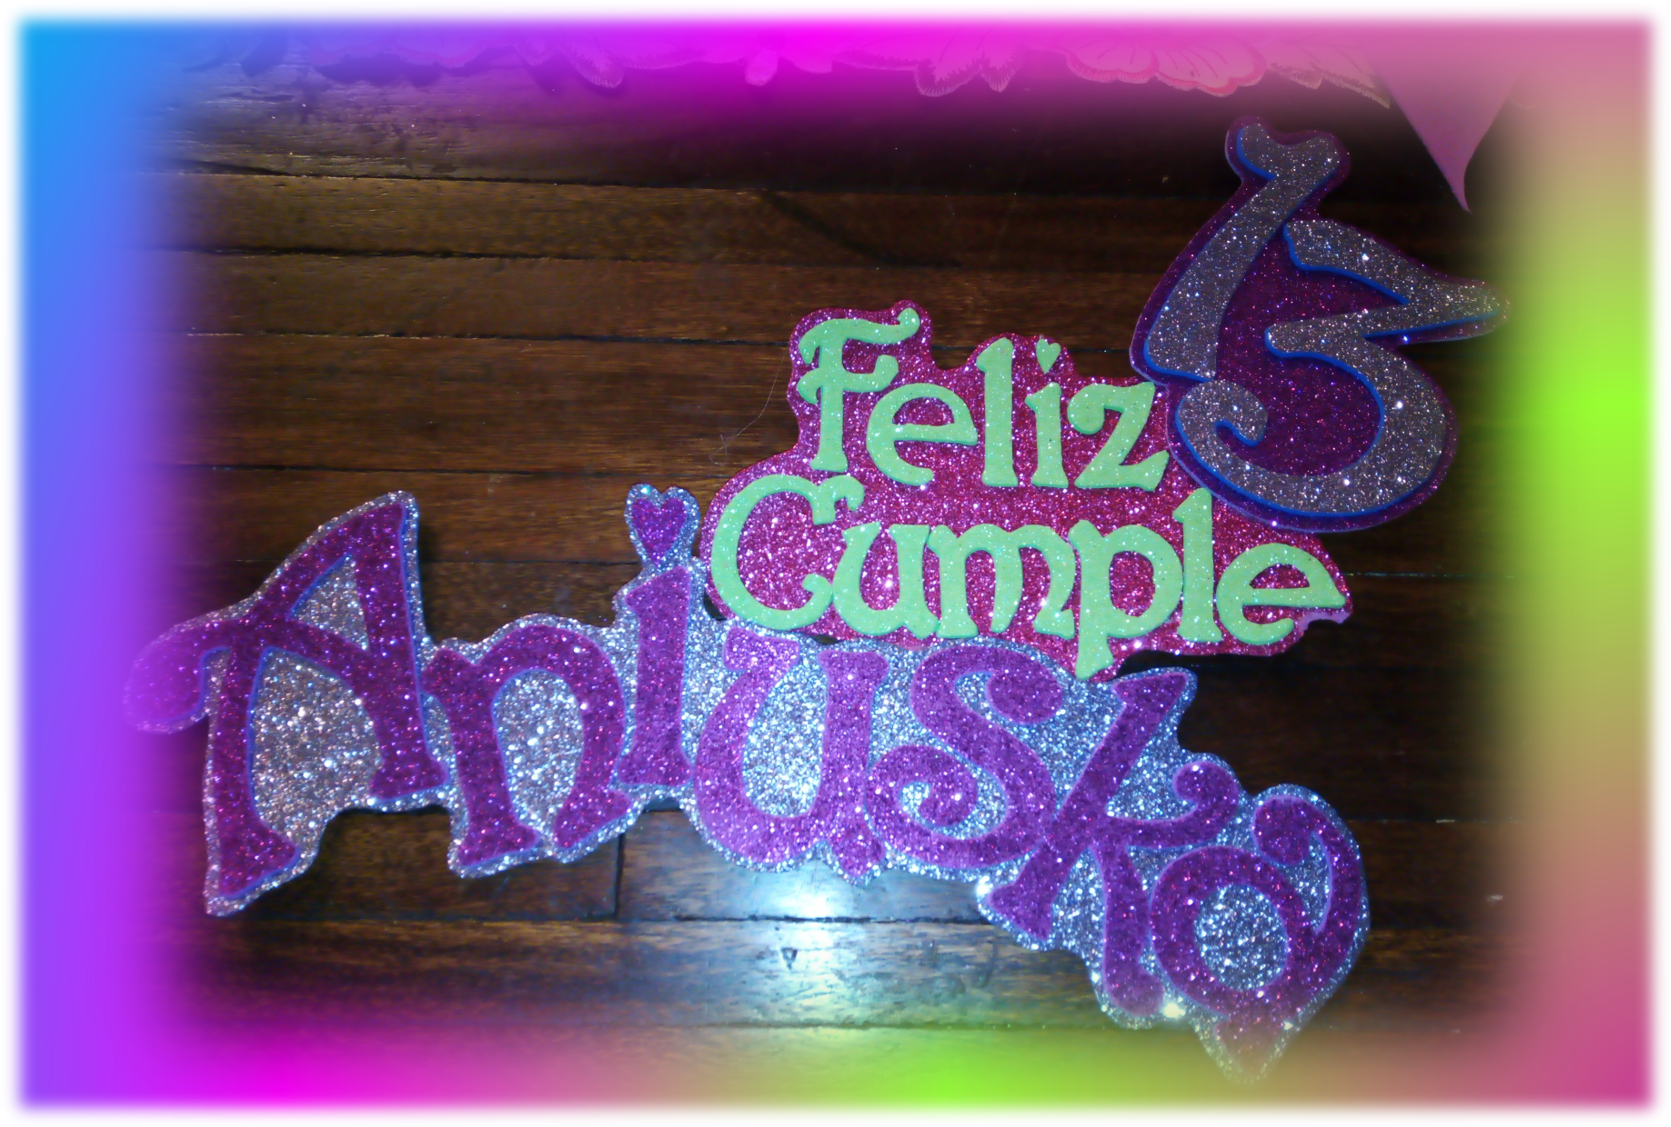

Seguidamente, armé las distintas palabras que utilizaría, pegando las letras con silicón caliente sobre un fondo en foami, traté que el fondo fuera en un color contrastante, para que resaltaran dichas palabras. Luego lo recorte dejando un pequeño borde, este borde, me serviría para interconectarlas entre ellas, como pueden ver en la imagen.
Next, I assembled the different words that I would use, gluing the letters with hot silicone on a foami background, I tried to make the background in a contrasting color, so that the words would stand out. Then I cut it out leaving a small border, this border would be used to interconnect them, as you can see in the image.


Llego el momento de agregarle al conjunto la imagen que seleccionó mi hija además de las florecitas. Pero antes, para que la imagen que había impreso no se viera tan opaca y desentonara con el resto de los elementos, le coloque una capa de papel Contac trasparente, con ello quedo mucho mas linda. Ahora sí, simplemente la ubiqué en el lugar correspondiente, siguiendo el diseño inicial, e igualmente, lo hice con las flores.
It was time to add the image that my daughter had selected to the set, in addition to the little flowers. But first, so that the image I had printed would not look so opaque and clash with the rest of the elements, I put a layer of transparent Contac paper, which made it look much prettier. Now I simply placed it in the corresponding place, following the initial design, and I did the same with the flowers.

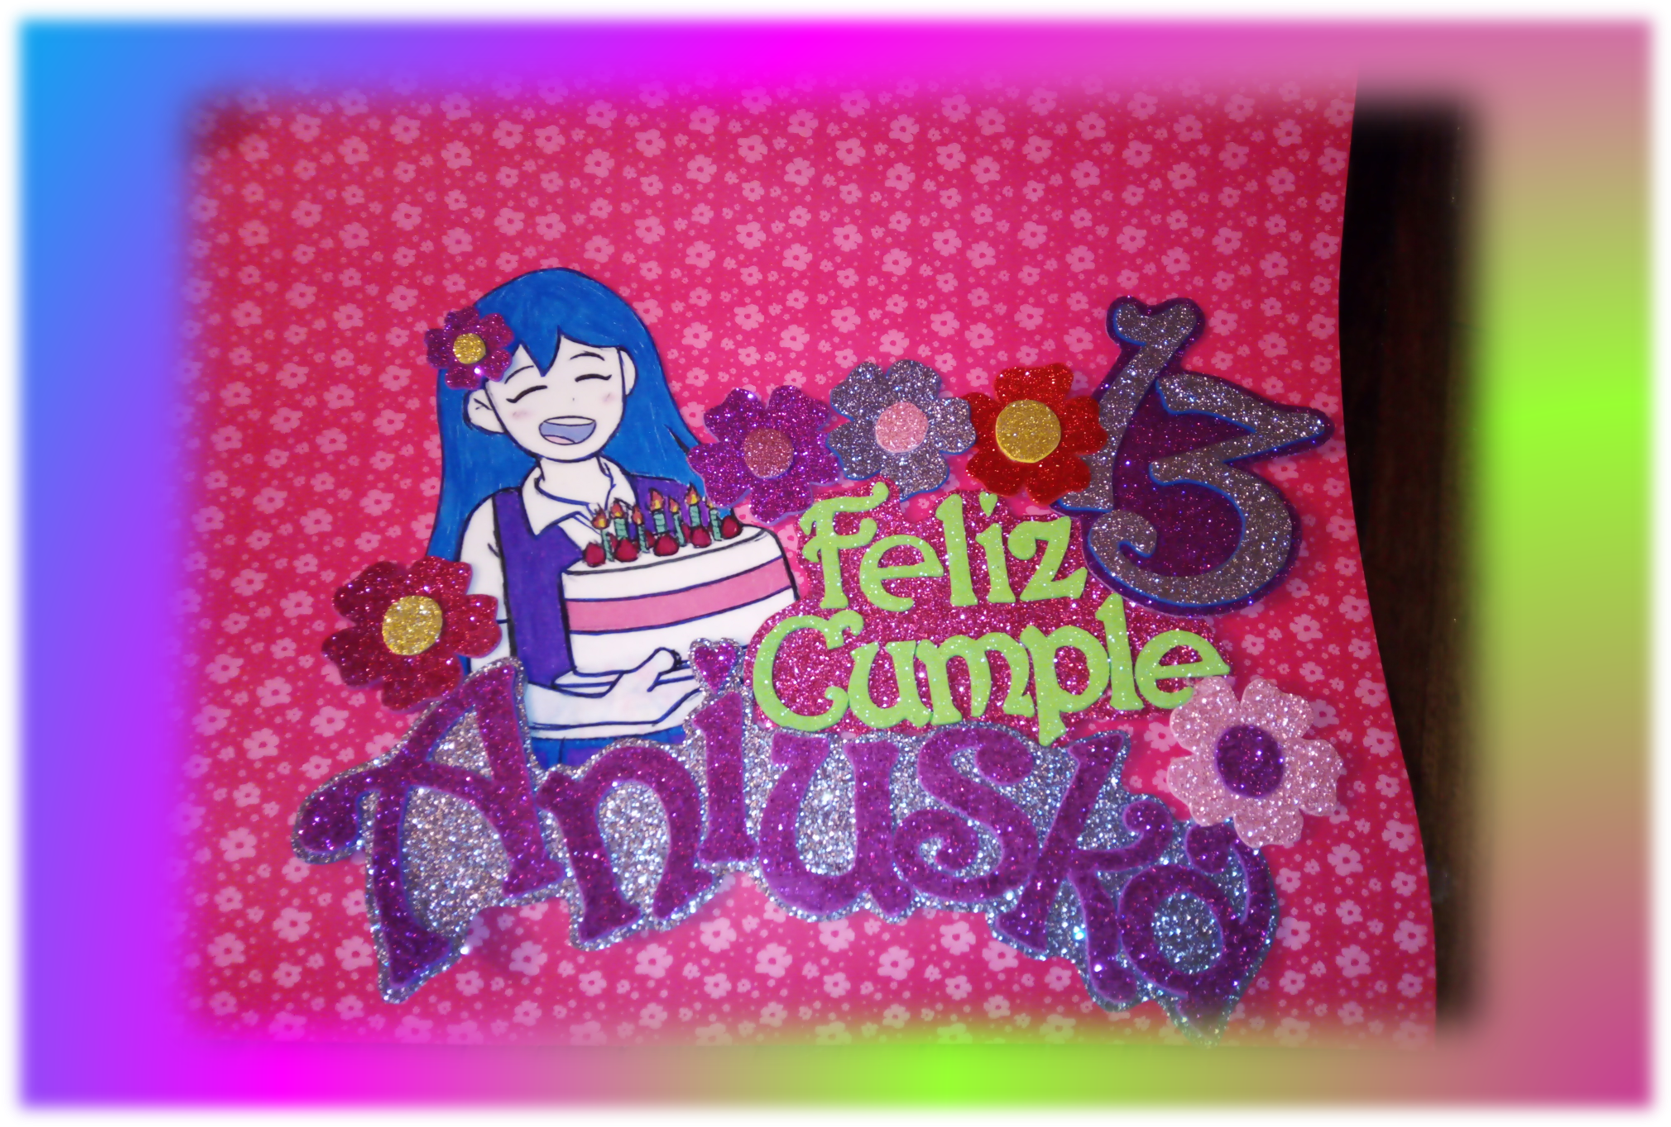

Ya mi diseño está completamente armado, ahora el siguiente paso fue colocarle un fondo, yo utilice una cartulina estampada para ello. Coloque encima de la cartulina el diseño y con in lapicero remarque la silueta, pero dejando un pequeño borde. Luego lo recorte y lo reserve para usarlo luego.
Now my design is completely assembled, the next step was to place a background, I used a stamped cardboard for it. Place the design on top of the cardboard and with a pencil outline the silhouette, but leaving a small border. Then cut it out and save it for later use.

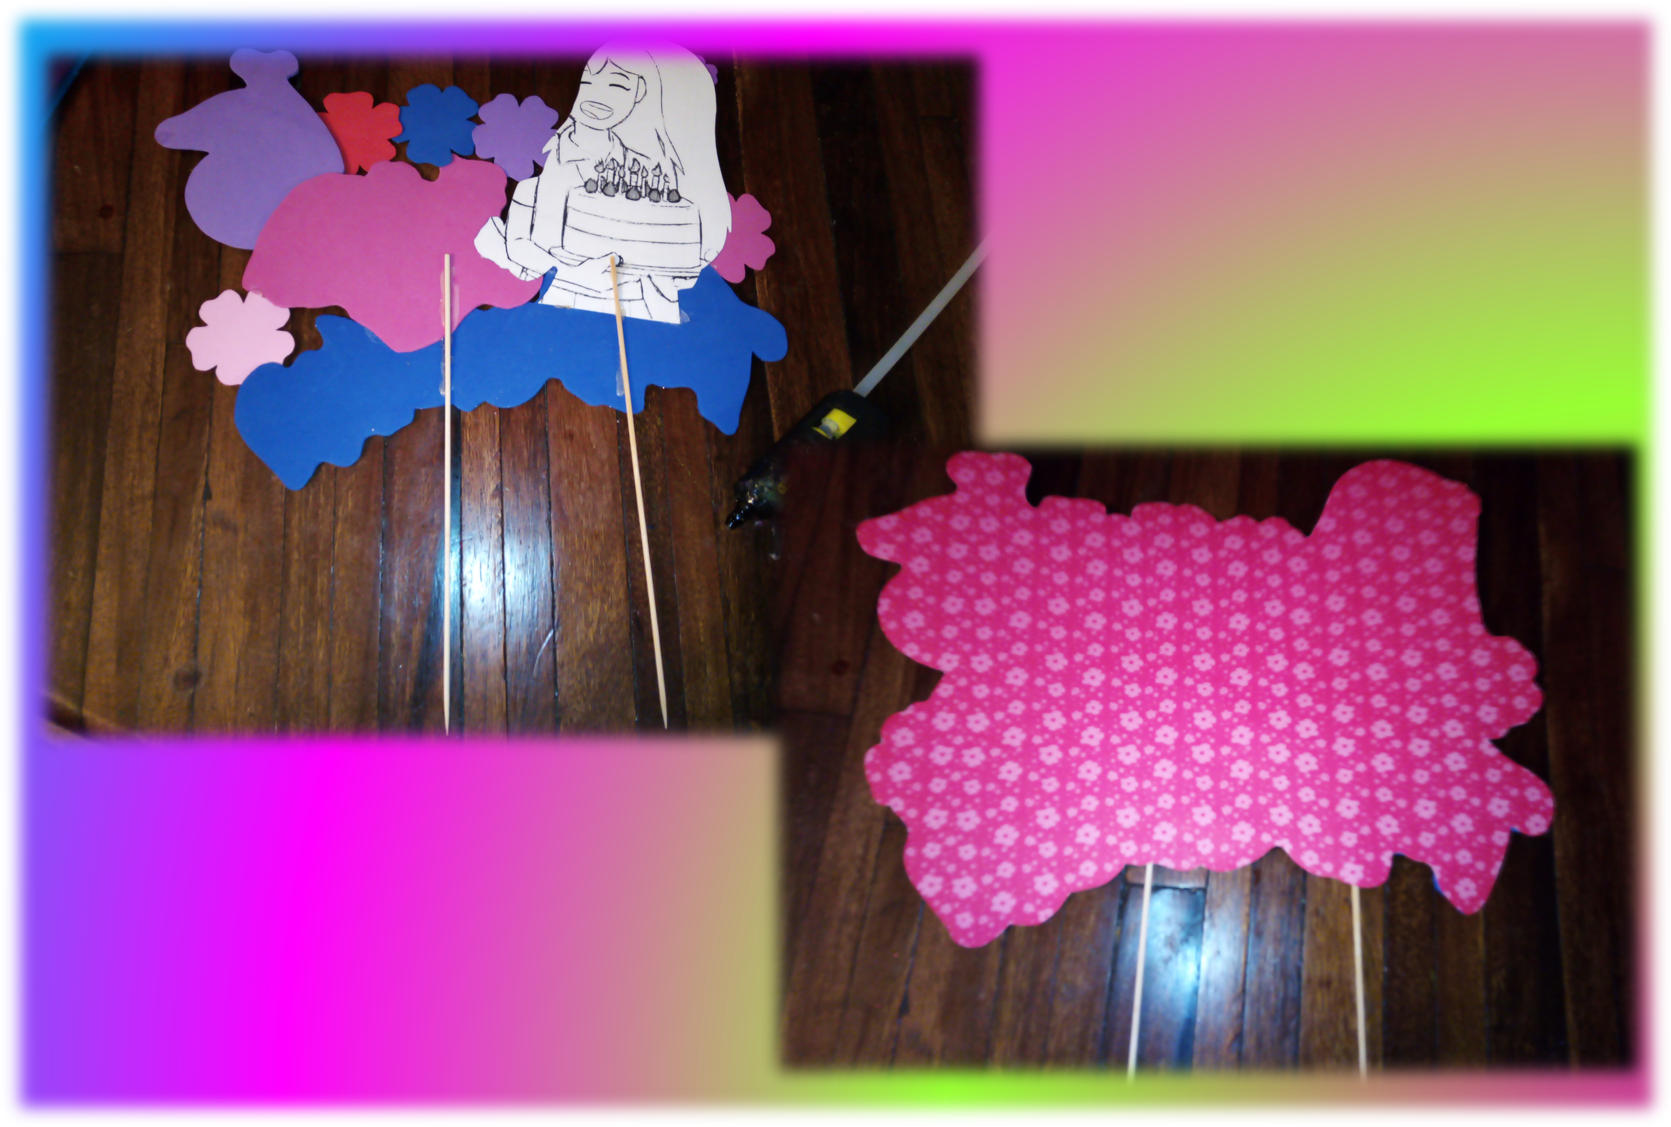

Antes de colocar el fondo, el cual, además de permitir que se viera mi proyecto más prolijo, tiene una función muy importante, y esta es, el poder fijar los palitos de altura, que luego, serviría para fijarlo a la torta. Así que, primero fijé con pegamento caliente, los palillos de altura al foami y finalmente pegué encima la cartulina, dando con ello mayor fortaleza a todo el conjunto.
Before placing the background, which, in addition to allowing my project to look neater, has a very important function, and that is, to fix the height sticks, which later would serve to fix it to the cake. So, first I fixed the height sticks to the foami with hot glue and finally I glued the cardboard on top, giving more strength to the whole thing.


Al fijar los palitos de altura a la cartulina, el trabajo estaba listo, para decorar y complementar la deliciosa torta que había preparado con mucho amor su papi @amart29. Bueno, queridos lectores, espero que les gustara este nuevo proyecto y que los animara a realizar ustedes mismos los “topper” para decorar las infaltables tortas en esos momentos especiales. No olviden cuidarse y cuidar a los suyos, se les quiere y aprecia, les envío muchas bendiciones.
Once the cake topper sticks were attached to the cardboard, the work was ready to decorate and complement the delicious cake that her daddy @amart29 had lovingly prepared. Well, dear readers, I hope you liked this new project and that it will encourage you to make your own "toppers" to decorate the inevitable cakes for those special moments. Don't forget to take care of yourselves and your loved ones, you are loved and appreciated, I send you many blessings.

Contenido y fotografías de mi propiedad intelectual
Información Técnica
| Cámara | Pentax * istDL |
|---|---|
| Lente | * Pentax 18-55 |
| Iluminación | Luz Natural |
| Locación | Barcelona, Estado Anzoátegui, Venezuela |
Content and photographs of my intellectual property
Technical information
| Camera | Pentax * istDL |
|---|---|
| Lens | * Pentax 18-55 |
| Lighting | Natural Light |
| Location | Barcelona, Anzoátegui State, Venezuela |


The rewards earned on this comment will go directly to the people( @francyrios75 ) sharing the post on Twitter as long as they are registered with @poshtoken. Sign up at https://hiveposh.com.
Hola querida @francyrios75 !!
Que lindo que te quedó la decoración que has preparado!
Seguramente tu hija ha quedado muy feliz por tu bello regalo!
Que lindo es ver todo el amor que pones en cada proyecto que emprendes y mucho más cuando es para complacer a tus princesas!
Gran abrazo y bendiciones para la familia!
Hola querido Pablo, que bueno que te gustó.
Si, realmente mi princesa quedó super contenta con el topper y con toda la decoración en general de su pequeña reunión, es la primera después de la cuarenta, realmente, solo fueron cuatro niñas y nosotros en casa, pero después del encierro, solo con eso, ella estaba super feliz.
Abrazos y bendiciones para ti y tus princesas. Gracias por la visita.
Que lindo Topper amiga @francyrios75
Su hija al verlo de seguro le gusto mucho, las imágenes y las letras están hermosas.
Lindo trabajo.
Saludos.
Con el apoyo de la familia.
Trail de TopFiveFamily
Hola querida @francyrios75! Es un gusto saludarte y desearte mis deseos por que te encuentres muy bien, así como toda tu familia!
Que bella quedó la torta de cumpleaños y el topper que prepararon para tu princesa mayor a quien espero y deseo que siga disfrutando su cumpleaños y que cada día reciba muchas las bendiciones y alegrías. Le mando un gran beso y un cariñoso abrazo ❤.
Saludos y abrazos también para ti!
Querida @francyrios75, me encanta el lindo topper que creaste. Un bello producto artesanal, te felicito y también a @amart29, la torta se ve muy sabrosa.
FELIZ CUMPLEAÑOS para la niña y un excelente día familiar para todos ustedes.
Cariños desde Cataluña.
Dear @francyrios75, we need your help!
The Hivebuzz proposal already got important support from the community. However, it lost its funding a few days ago when the HBD stabilizer proposal rose above it.
May we ask you to support it so our team can continue its work?
You can do it on Peakd, Ecency,
https://peakd.com/me/proposals/199
All votes are helpful and yours will be much appreciated.
Thank you!