Bienvenidos Queridos Amantes de la Artes Manuales
Welcome Dear Manual Arts Lovers
Feliz año nuevo para todos los maravillosos creadores de esta hermosa comunidad, mis mayores deseos de salud, amor y prosperidad para ustedes.
Happy New Year to all the wonderful creators of this beautiful community, my best wishes of health, love and prosperity for you.
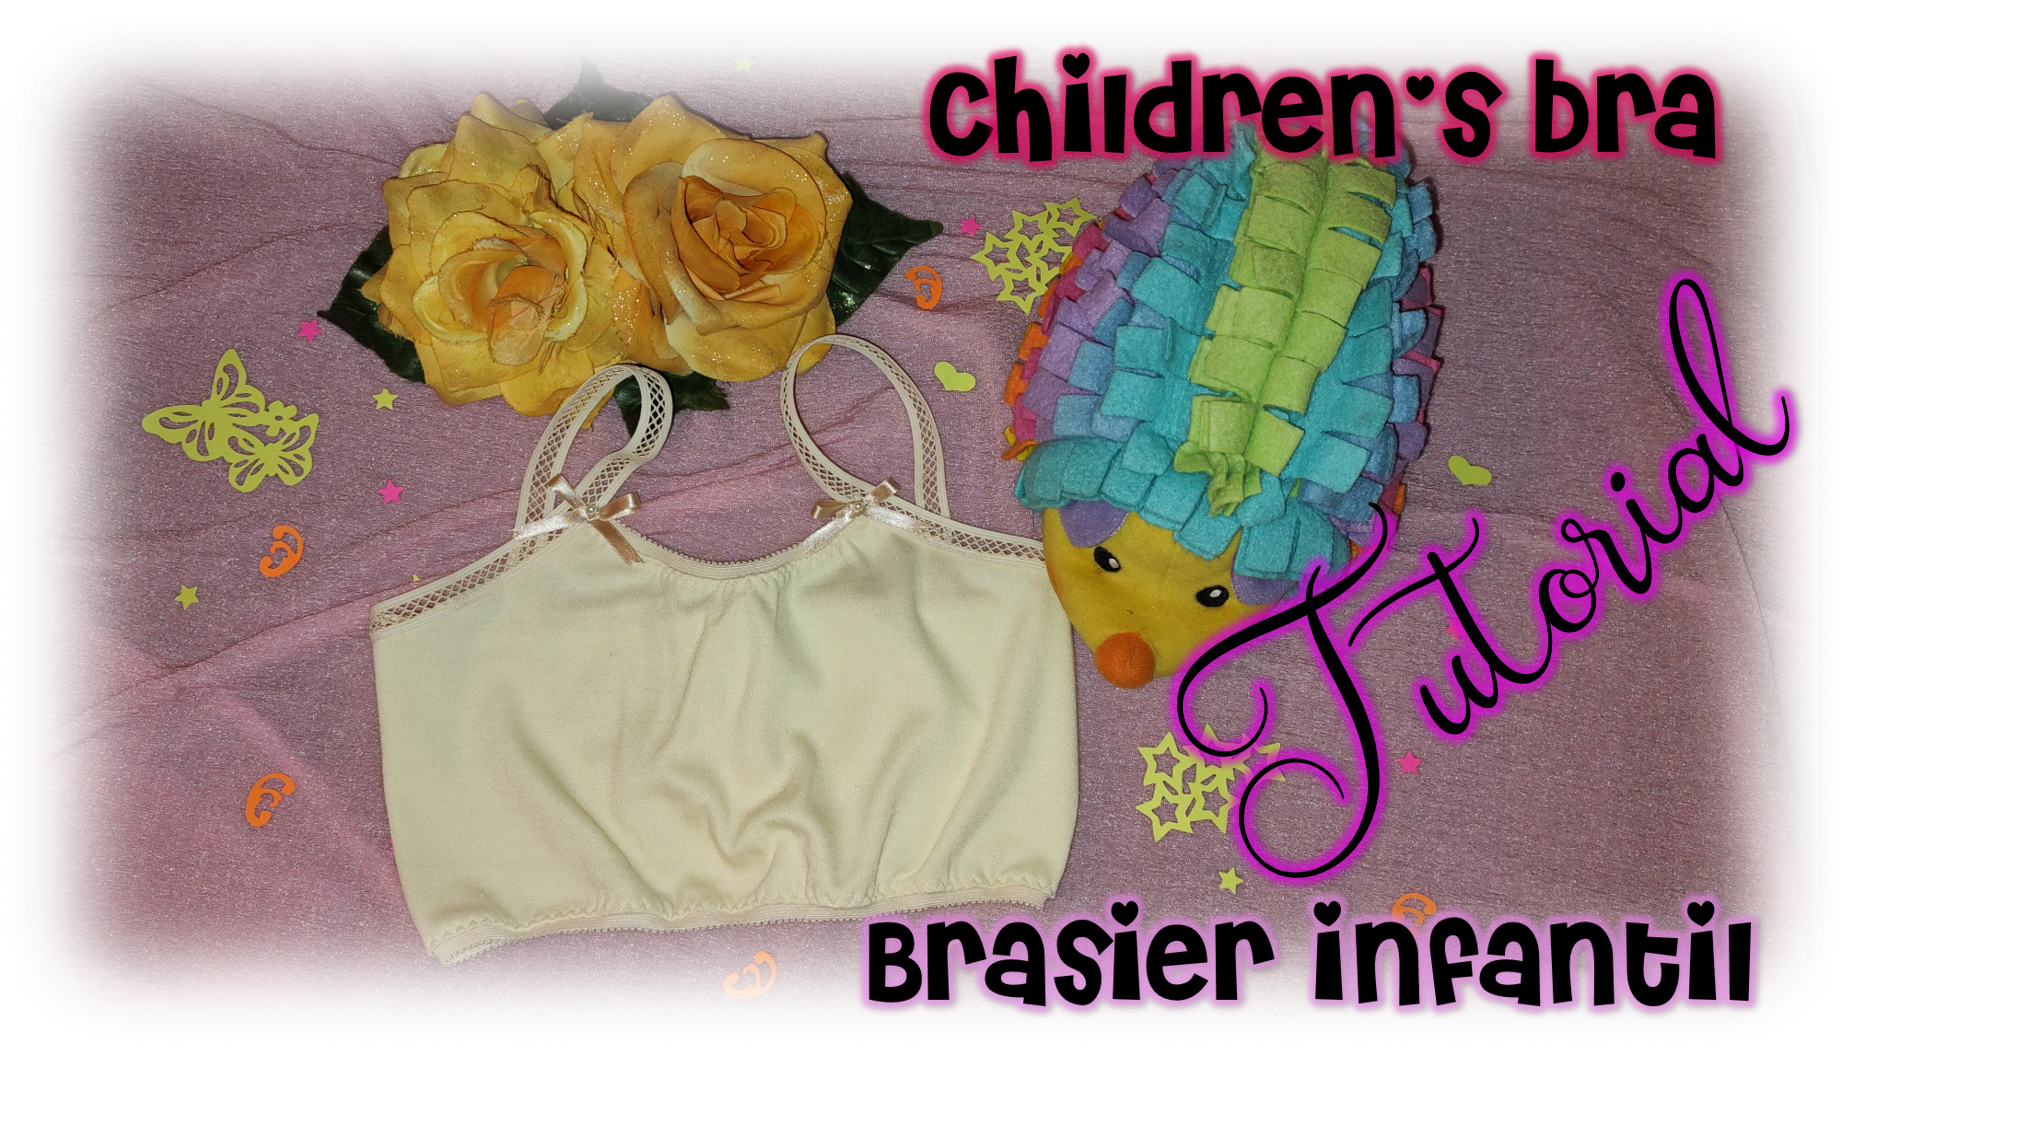

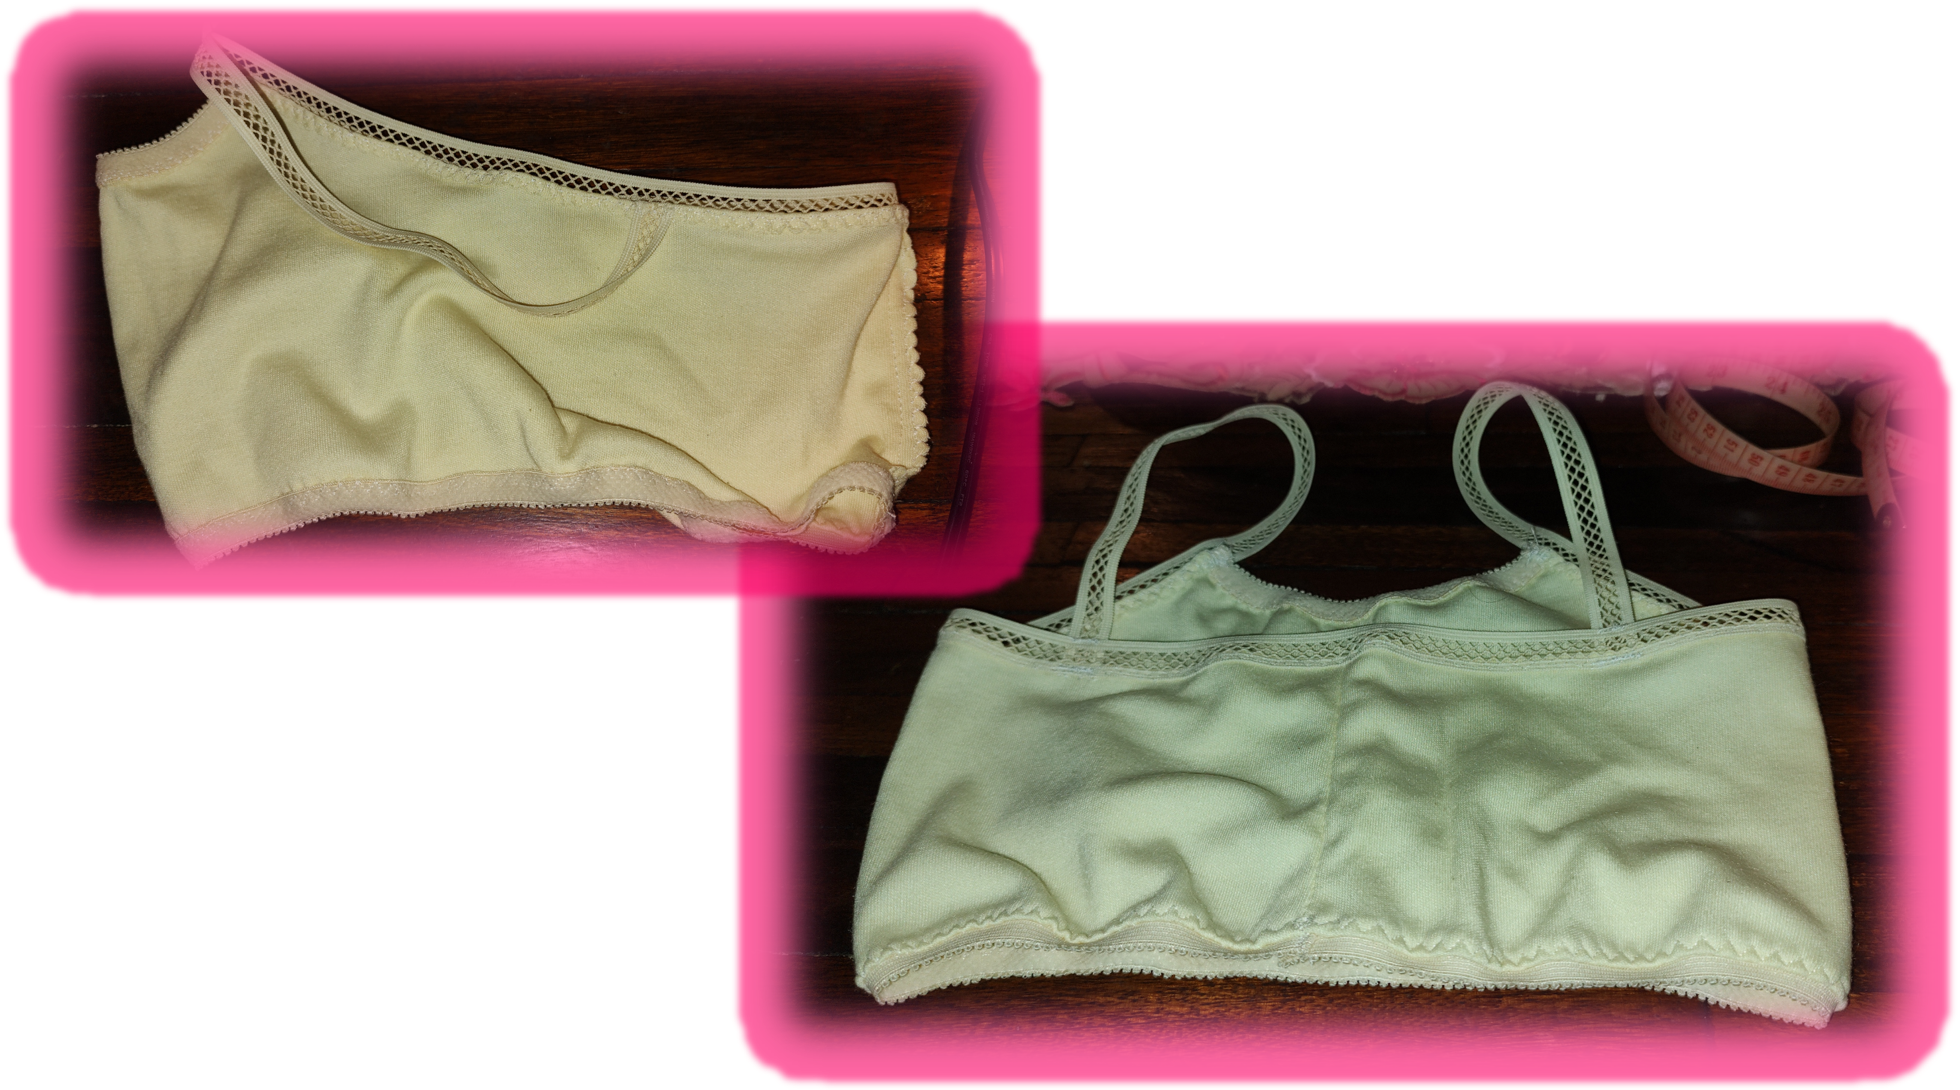
Para iniciar este nuevo año, les traigo un sencillo, pero muy lindo proyecto. Si tienen hijas, sobrinitas, nietas aseguro que les será de mucha utilidad, porque es muy versátil. Se trata de un acostumbrador, el cual, es una especie de brasier para niñas y se acostumbra usa debajo de la ropa.
To start this new year, I bring you a simple, but very nice project. If you have daughters, nieces, granddaughters, I assure you that it will be very useful, because it is very versatile. This is a habituator, which is a kind of bra for girls and is used to wear under the clothes.
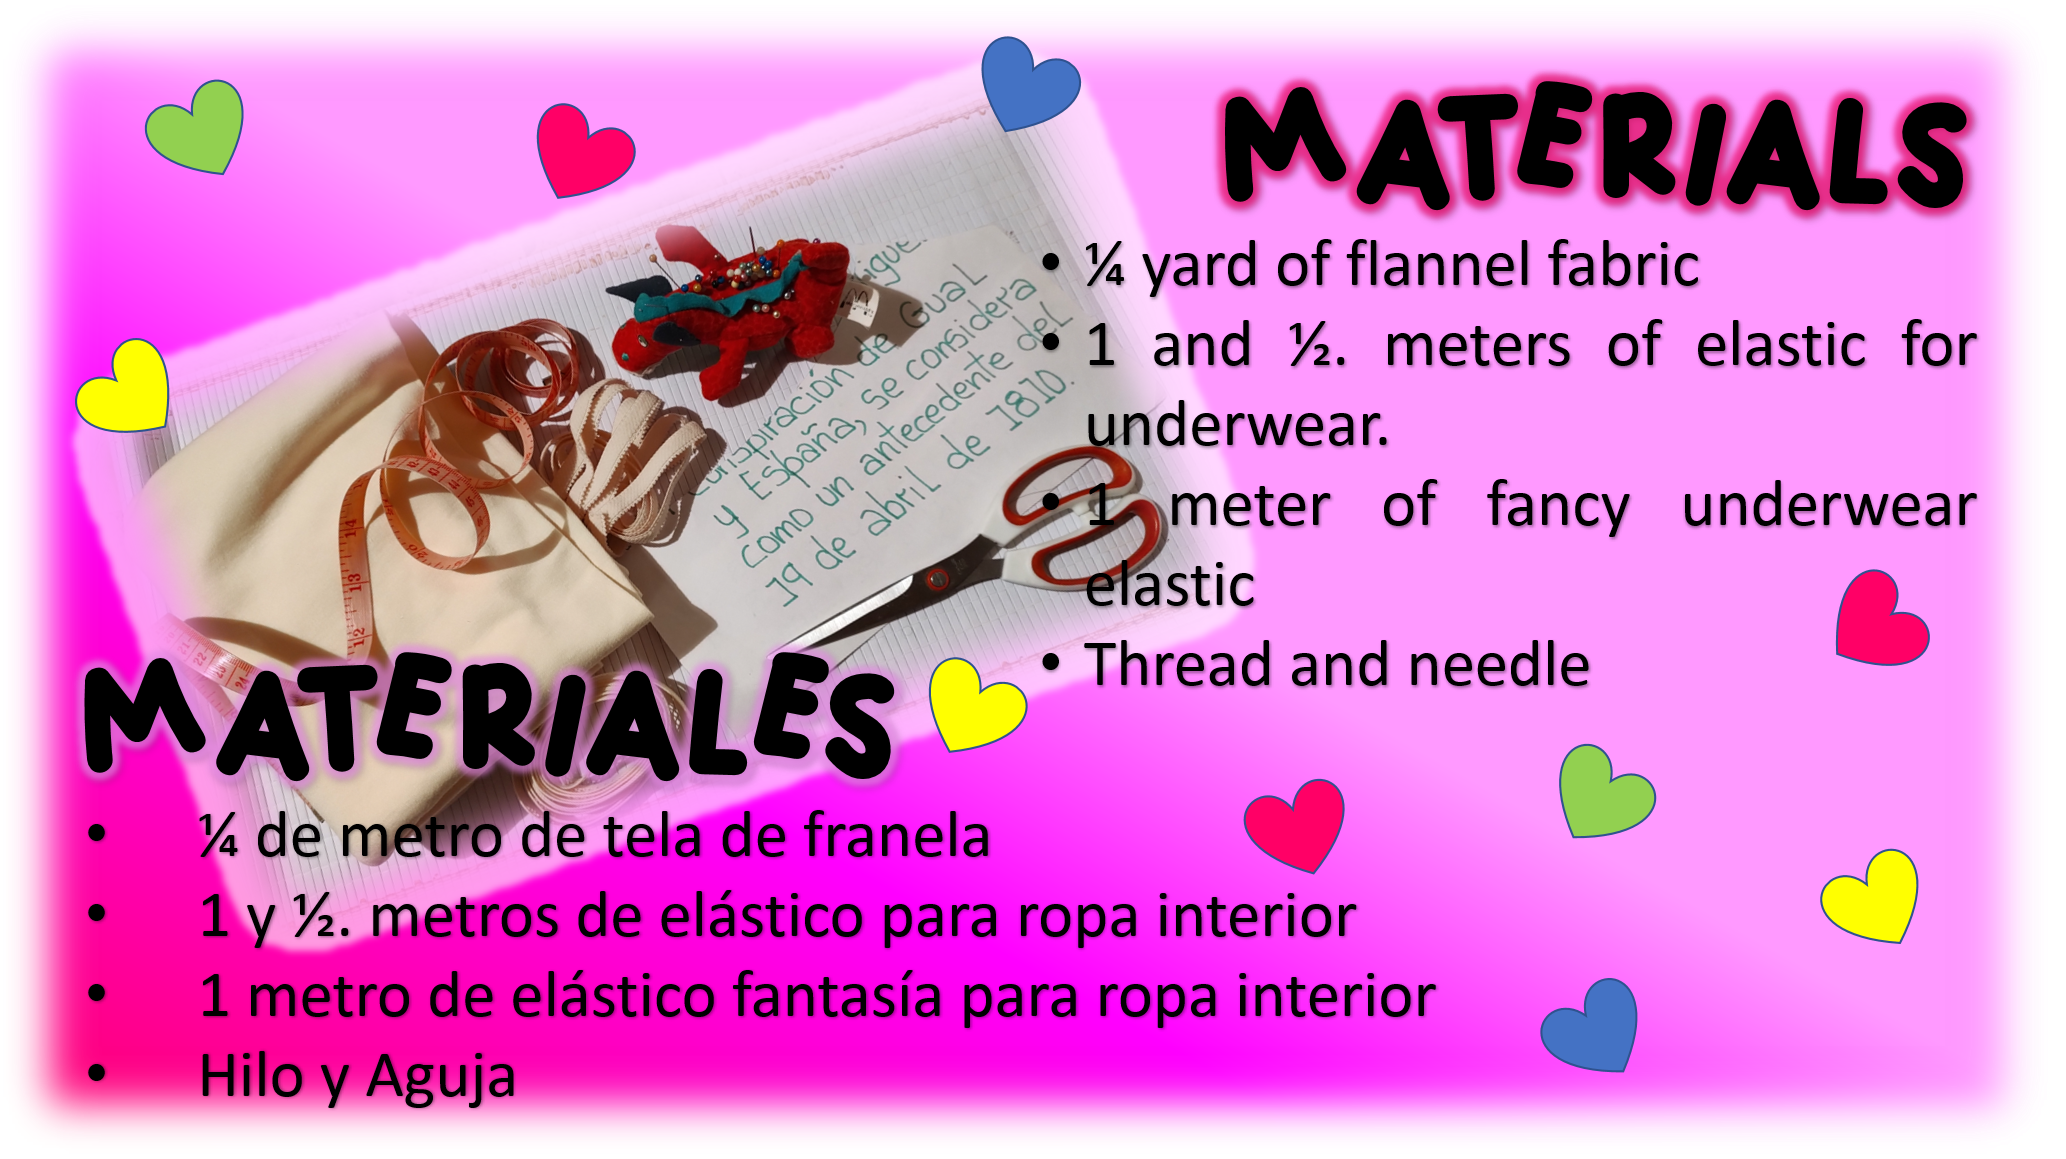
Este brasier infantil lo realice para que mi pequeña de 6 años, lo lleve debajo de su camisa del colegio. Sin embargo, utilizando el tipo de tela licra, puede servir para traje de baño o utilizando otro tipo de tela y ajustando el largo, como una blusita. Los materiales, son pocos y los pueden ver en la imagen, claro, que las cantidades varían dependiendo por supuesto de la talla, en este caso son para realizar uno talla 6.
I made this children's bra for my 6 year old daughter to wear under her school shirt. However, using the type of lycra fabric, it can be used for a bathing suit or using another type of fabric and adjusting the length, like a blouse. The materials are few and you can see them in the image, of course, the quantities vary depending of course on the size, in this case they are to make a size 6.
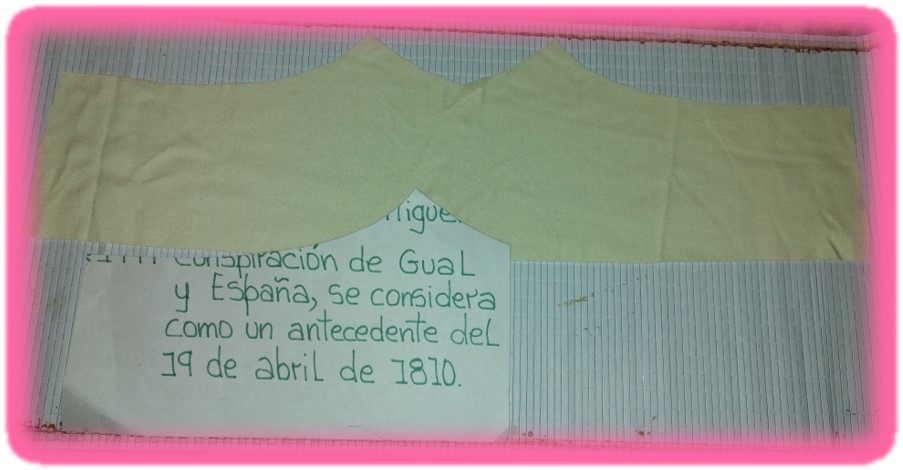
Debo resaltar que algo esencial es el patrón con el que lo haremos, en internet pueden conseguirlo fácilmente, pero, en realidad yo realice uno utilizando las medidas de mi hija. Partí de un rectángulo donde el alto era el largo total del sostén en la parte delantera y el ancho el contorno del torso de mi pequeña. Luego a ese rectángulo le desconté un poco al frente en forma de curva eso me indicaban donde irían los tiros y luego a los lados también le eliminé unos centímetros para que fuera más angosto en los lados y en la parte trasera. En la imagen pueden ver en la parte de abajo el patrón en cartulina y como ven es solo la mitad y arriba ven como queda la pieza completa ya cortada en la tela.
I must emphasize that something essential is the pattern with which we will do it, on the internet you can get it easily, but actually I made one using the measurements of my daughter. I started from a rectangle where the height was the total length of the bra in the front and the width was the contour of my little girl's torso. Then I subtracted a little from that rectangle at the front in the form of a curve that indicated where the straps would go and then at the sides, I also eliminated a few centimeters to make it narrower at the sides and at the back. In the image below you can see the pattern in cardboard and as you can see it is only half and above you can see how the complete piece is already cut in the fabric.
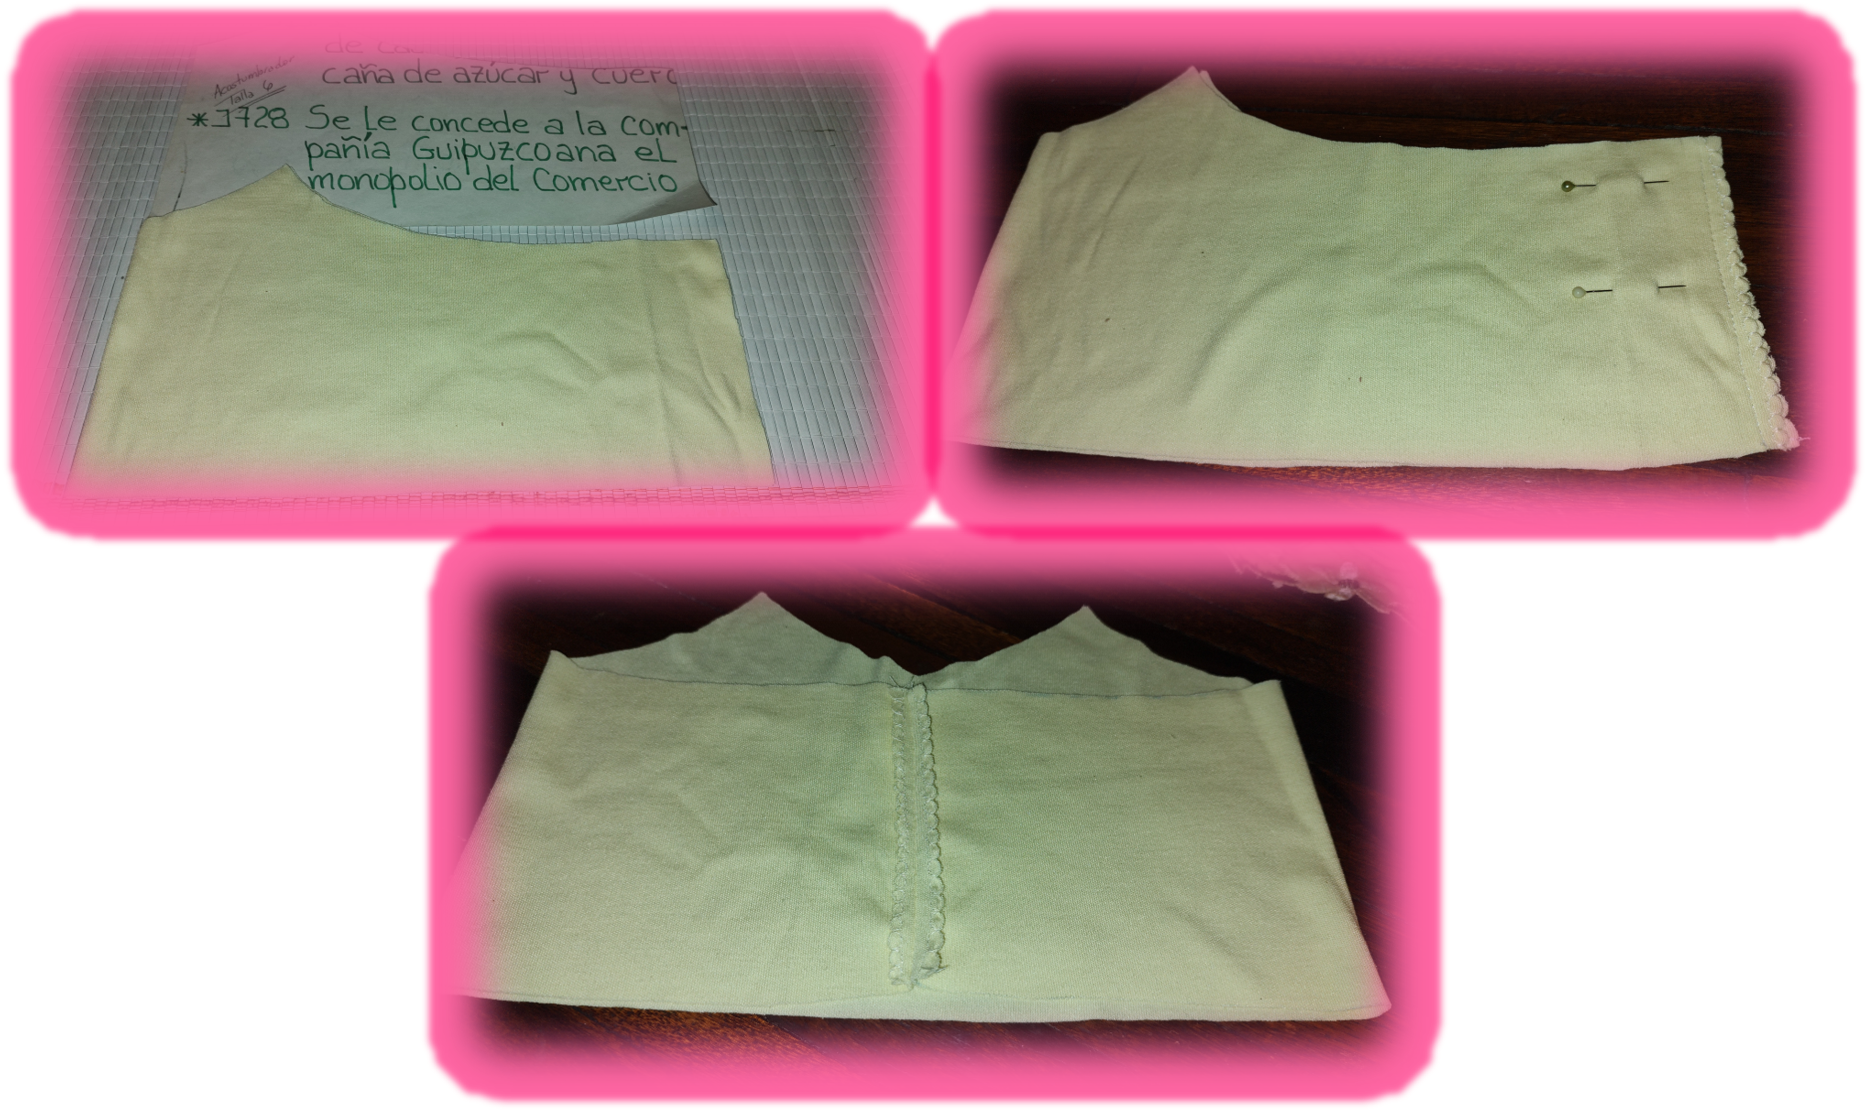
Lo siguiente que hice fue doblar la pieza de tela exactamente por la mitad haciendo que coincidiera de forma correcta. A los dos extremos de tela que debía unir le pasé una costura tipo overlock para rematar y no se deshilache la tela, posterior a eso, pase una costura recta para unir los extremos.
The next thing I did was to fold the piece of fabric exactly in half making it match correctly. To the two ends of the fabric that I had to join, I sewed an overlock seam to finish it off so that the fabric would not fray, after that, I sewed a straight seam to join the ends.
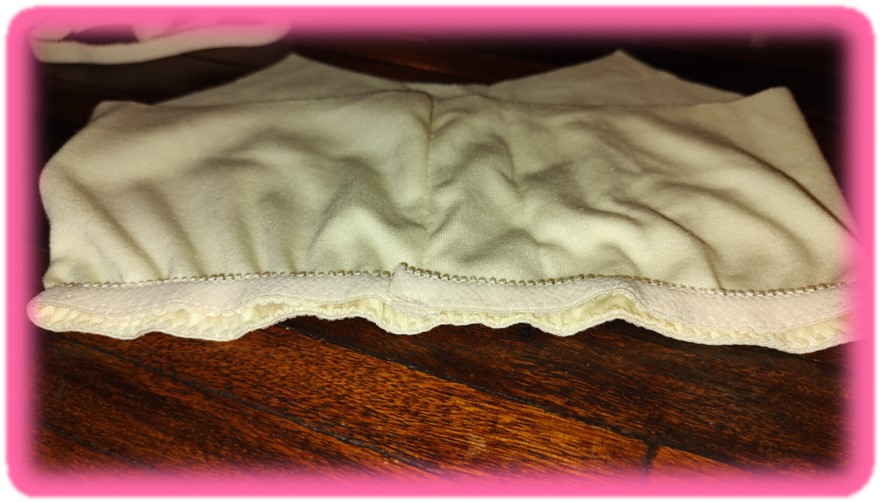
El siguiente paso fue pegar la elástica en la parte de debajo de la prenda, use un tipo de elástico especial para ropa interior, el cual es decorativo y puede colocarse de forma que se vea, aunque el que use es muy simple hay unos más decorativos y muy lindos. Es esencial identificar si el elástico tiene un lado derecho y otro de revés, si lo tiene, hacemos coincidir el lado derecho con el lado derecho de nuestra prenda, porque es lo que quedará expuesto. Colocamos correctamente sobre la máquina de coser y realizamos unas 2 o 3 puntadas para fijar y procedemos a estirar un poco el elástico y vamos pasando el zic zac. Yo ajusté mi máquina a un tamaño de zic zac no muy alto y una puntada bastante pequeña de 1,5, con ello la costura abarcaba menos de la mitad del ancho, del elástico, quedando como les muestro en la imagen.
The next step was to glue the elastic on the underside of the garment, I used a special type of elastic for underwear, which is decorative and can be placed so that it is visible, although the one I used is very simple there are some more decorative and very nice. It is essential to identify if the elastic has a right side and a wrong side, if so, we match the right side with the right side of our garment, because it is what will be exposed. We place it correctly on the sewing machine and make 2 or 3 stitches to fix it and proceed to stretch the elastic a little and go through the zic zac. I adjusted my machine to a size of zic zac not very high and a fairly small stitch of 1.5, thus the seam covered less than half the width of the elastic, leaving it as I show in the image.
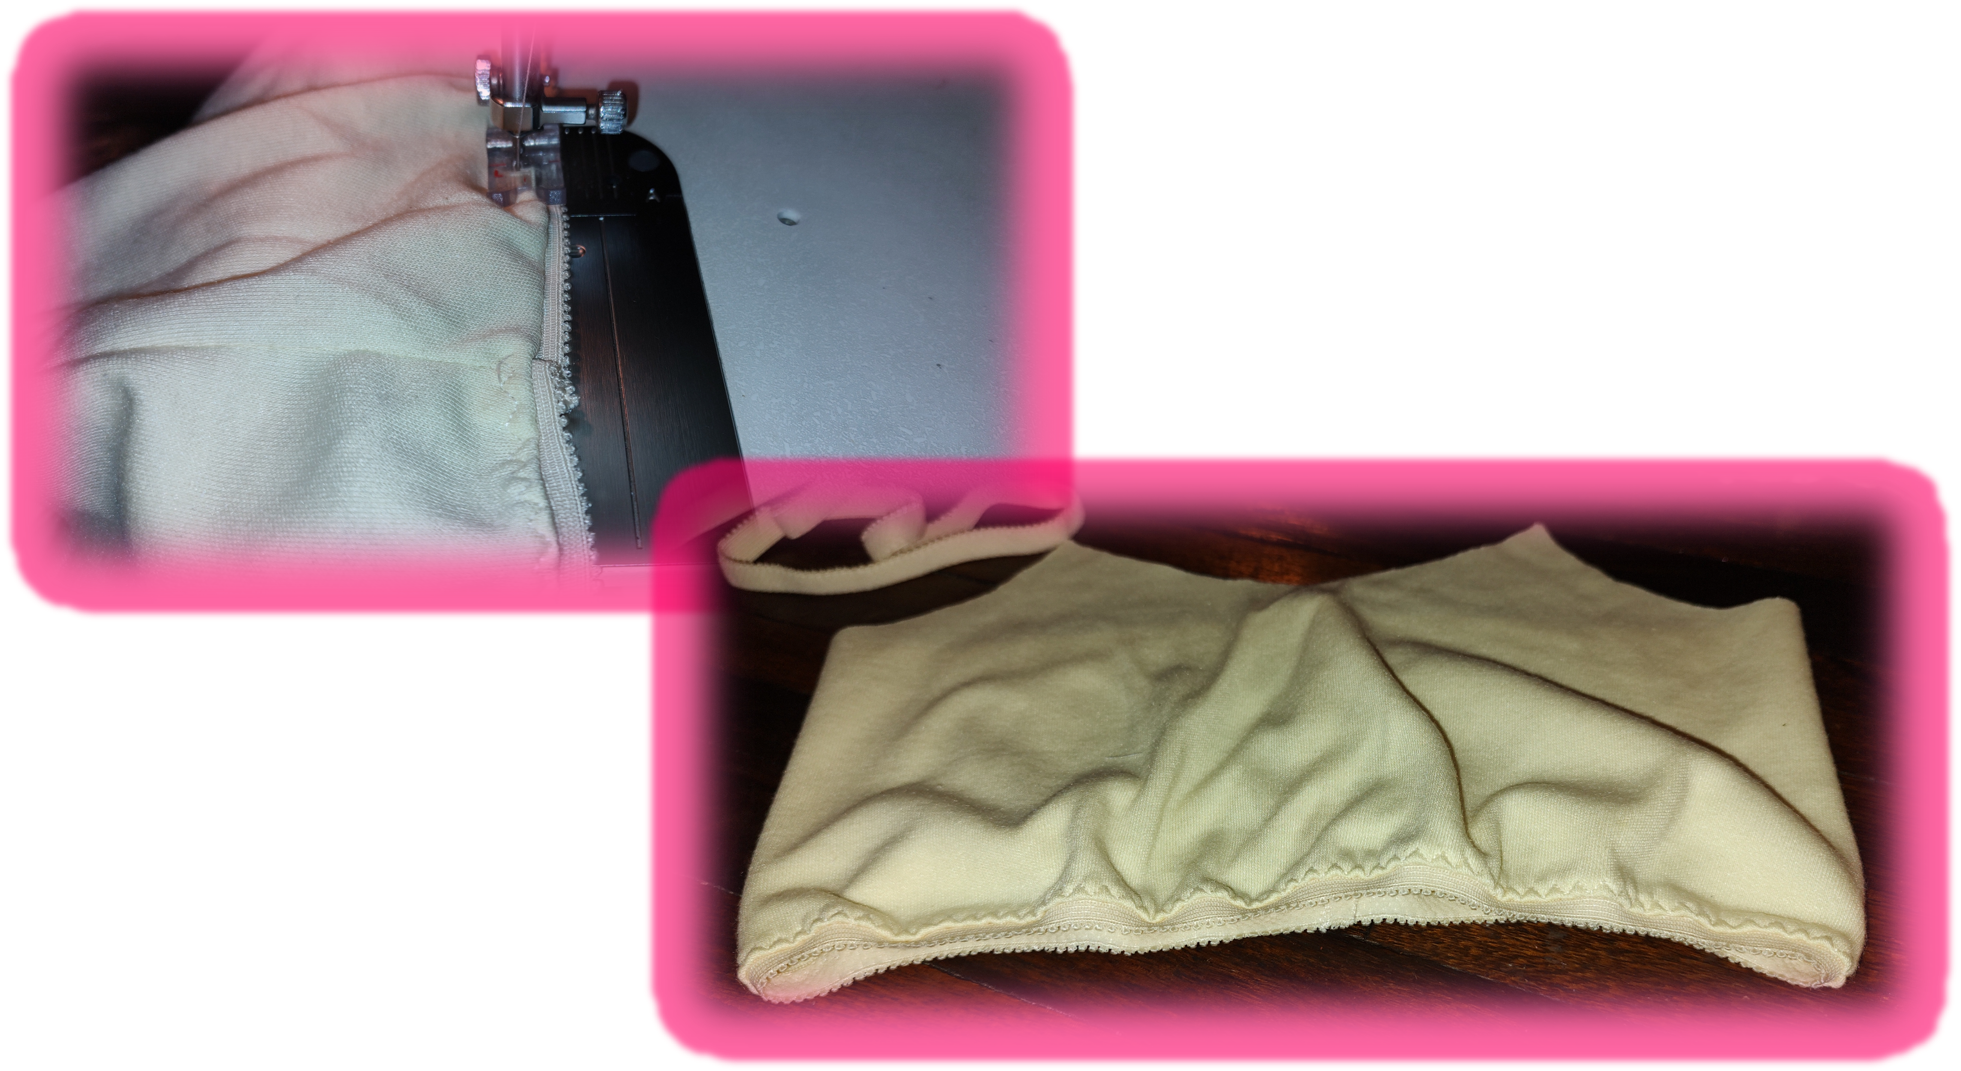
Después le di la vuelta al elástico, ahora como pueden ver en la imagen ambas caras derechas quedan hacia arriba y procedía a pasar una costura por encima. En las imágenes pueden ver el cómo debería quedar después de terminado de colocar el elástico.
Then I turned the elastic over, now as you can see in the picture both right sides are facing up and proceeded to pass a seam over it. In the pictures you can see how it should look like after the elastic is finished.
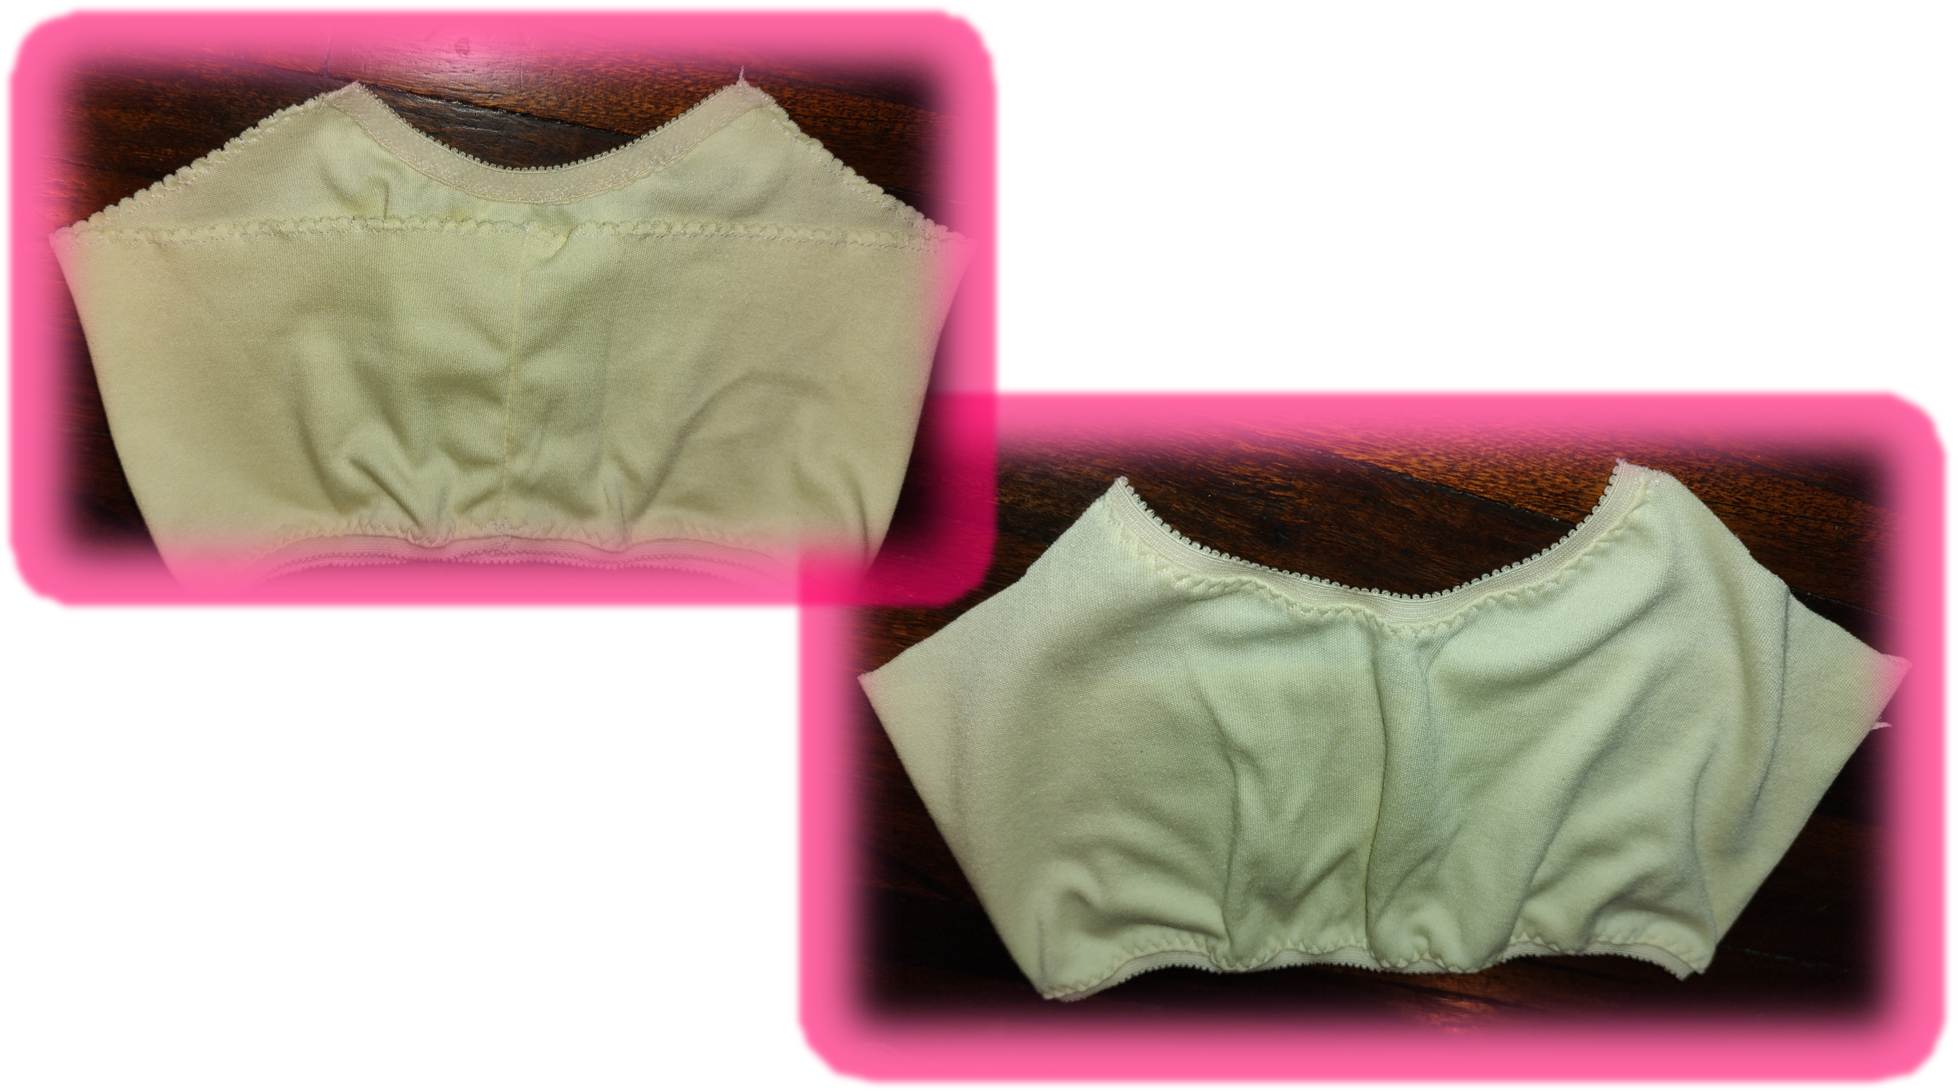
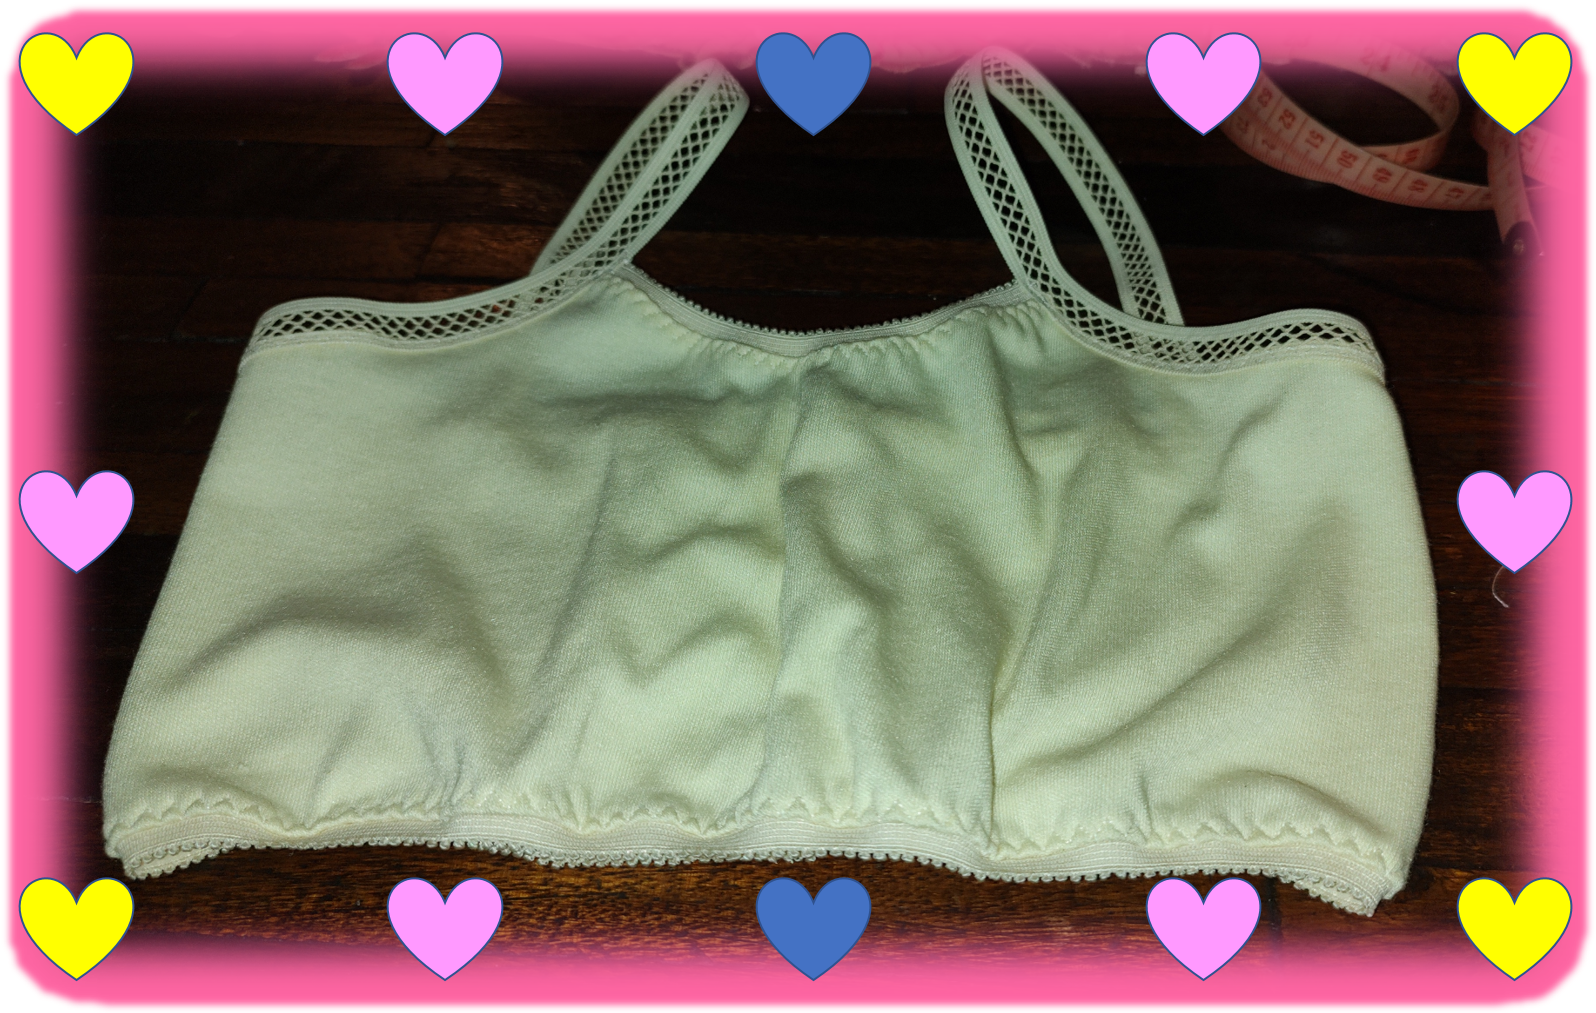
Ahora, toca colocar el elástico en la parte de arriba de nuestro brasier, iniciamos con la parte central donde realizamos una pequeña curva. El procedimiento es exactamente el mismo que les acabo de describir para colocar el elástico en la parte de abajo o ruedo de la prenda que estamos elaborando. En las imágenes que les comparto, pueden apreciar el cómo queda, por la parte derecha e interna, además, pueden detallar que usé el mismo tipo de elástico.
Now, it is time to place the elastic on the top of our bra, we start with the central part where we make a small curve. The procedure is exactly the same as the one I just described to place the elastic on the bottom or hem of the garment we are making. In the images I share with you, you can see how it looks, on the right and inside, and you can also see that I used the same type of elastic.
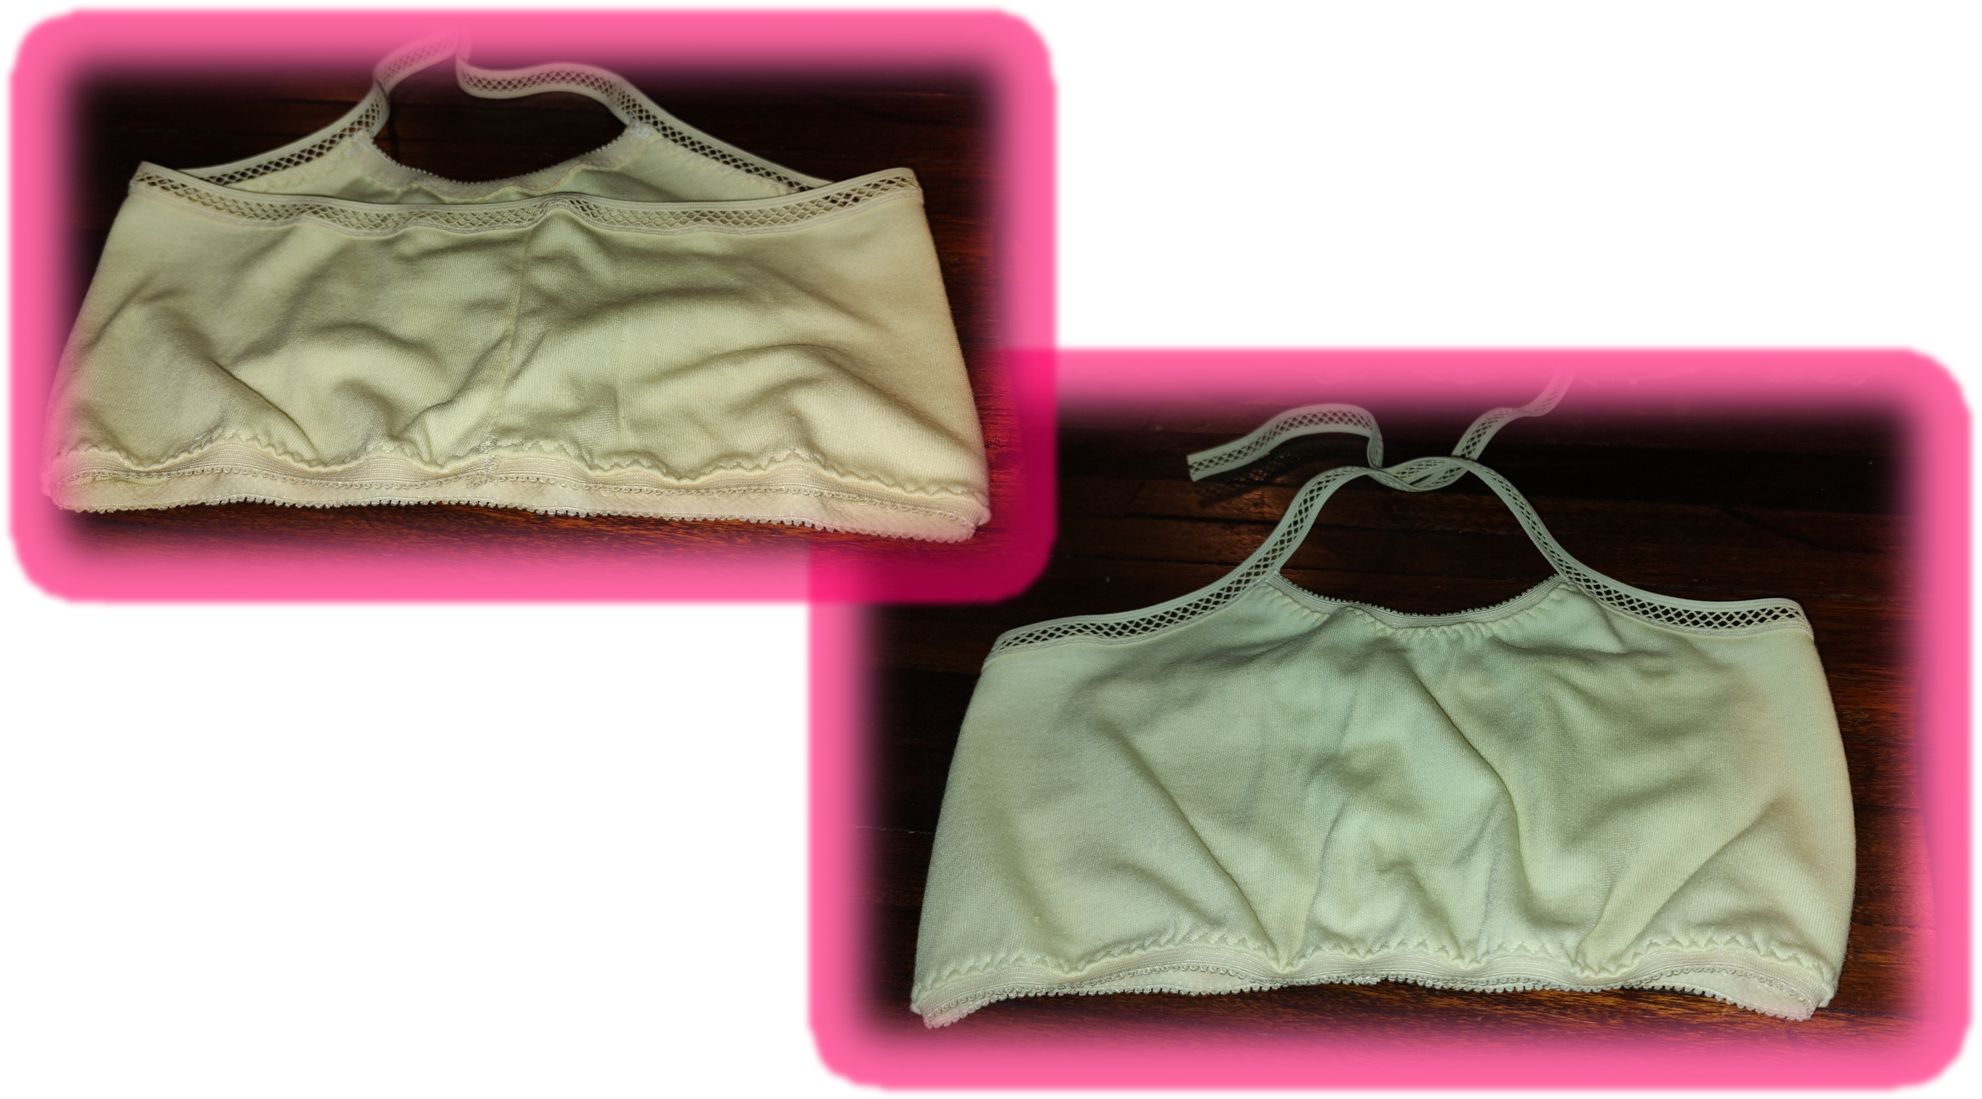
Ahora, usaremos un modelo distinto de elástico, también es especial para usarlo para elaborar ropa interior, pero como pueden observar en la imagen, en este caso es más decorativo. Y lo usaremos para colocarlo en la parte restante que nos queda de la prenda y también para los tiros. Iniciaremos colocándolo a partir del lugar frontal donde sale uno de los tiros, por supuesto, debemos tener la precaución de dejar un extremo de aproximadamente 25 cm. que corresponderá a los tiros. Una vez medido los 25 cm. que debemos dejar sin coser, colocamos el elástico sobre la tela tal cual como son quedará finalmente, en la parte de arriba del corpiño y lo iremos cosiendo, estirando solo un poco el elástico, en la medida que cosemos. Antes de seguir, debo acotar que, en este caso, previamente debimos pasar por todo el borde una costura tipo overlock para rematar la orilla y nos se nos deshilache la tela. Una vez, que llegamos al otro extremo remataremos bien la costura y antes de cortar el elástico, mediremos nuevamente 25 cm. los cuales corresponderán al otro tiro.
Now, we will use a different model of elastic, it is also special to use it to make underwear, but as you can see in the image, in this case it is more decorative. And we will use it to place it in the remaining part of the garment and also for the straps. We will start by placing it from the front place where one of the straps comes out, of course, we must be careful to leave an end of approximately 25 cm. that will correspond to the straps. Once we have measured the 25 cm. that we must leave without sewing, we place the elastic on the fabric as it will finally be, on the top of the bra and we will see it, stretching just a little the elastic, as we sew. Before continuing, I must point out that, in this case, we previously had to sew an overlock seam along the entire edge to finish off the edge and to keep the fabric from fraying. Once we reach the other end, we will finish off the seam and before cutting the elastic, we will measure again 25 cm. which will correspond to the other throw.
El último paso es colocar los tiros en su lugar, aquí, simplemente ubicamos el centro de la parte trasera y los colocamos a unos 10 cm más o menos del centro. Rematamos bien las costuras para que no se suelten, revisamos todas las costuras para cortar los hilos que se nos pudieron olvidar y con esto nuestro brasier infantil está listo, para que lo disfrute la princesa de la casa.
The last step is to place the straps in place, here, we simply locate the center of the back and place them about 10 cm more or less from the center. We finish off the seams well so that they do not come loose, we check all the seams to cut the threads that we may have forgotten and with this our children's bra is ready for the princess of the house to enjoy.
No me queda más que despedirme, esperando que les gustara este sencillo proyecto, que entendieran el paso a paso y que se animen a realizarlo para esa princesita que tengan en casa o forme parte de sus vidas. Les deseo feliz inicio de semana y que todos los proyectos que emprendan en sus vidas se hagan realidad. Dios los bendiga y hasta la próxima.
I just have to say goodbye, hoping that you liked this simple project, that you understood the step by step and that you are encouraged to make it for that little princess you have at home or that is part of your life. I wish you a happy beginning of the week and may all the projects you undertake in your life come true. God bless you and see you next time.
Contenido y fotografías de mi propiedad intelectual
Información Técnica
| Cámara | Pentax * istDL |
|---|---|
| Lente | * Pentax 18-55 |
| Iluminación | Luz Natural |
| Locación | Barcelona, Estado Anzoátegui, Venezuela |
Content and photographs of my intellectual property
Technical information
| Camera | Pentax * istDL |
|---|---|
| Lens | * Pentax 18-55 |
| Lighting | Natural Light |
| Location | Barcelona, Anzoátegui State, Venezuela |


The rewards earned on this comment will go directly to the people( @francyrios75 ) sharing the post on Twitter as long as they are registered with @poshtoken. Sign up at https://hiveposh.com.
Feliz año!!! Llegó el Carnaval y yo todavía dando feliz año 😂. Amiga ese brasier te quedó muy lindo, tu hija debe estar muy contenta.
Hola amiga, estamos igual 😂🤣😂🤣😂🤣😂🤣😅🤣😂🤣😂🤣😂🤣😂🤣😂🤣😂🤣😂🤣😂🤣
Gracias, me alegra que te gustará 😽😽😽😽😽
Si vale, mi niña hoy salió súper contenta para su colegio estrenando su conjunto nuevo de brasier y bluma. Y yo satisfecha al verla feliz.
Un abrazo desde la distancia amiga.