Bienvenidos Queridos Amantes de la Artes Manuales
Welcome Dear Manual Arts Lovers
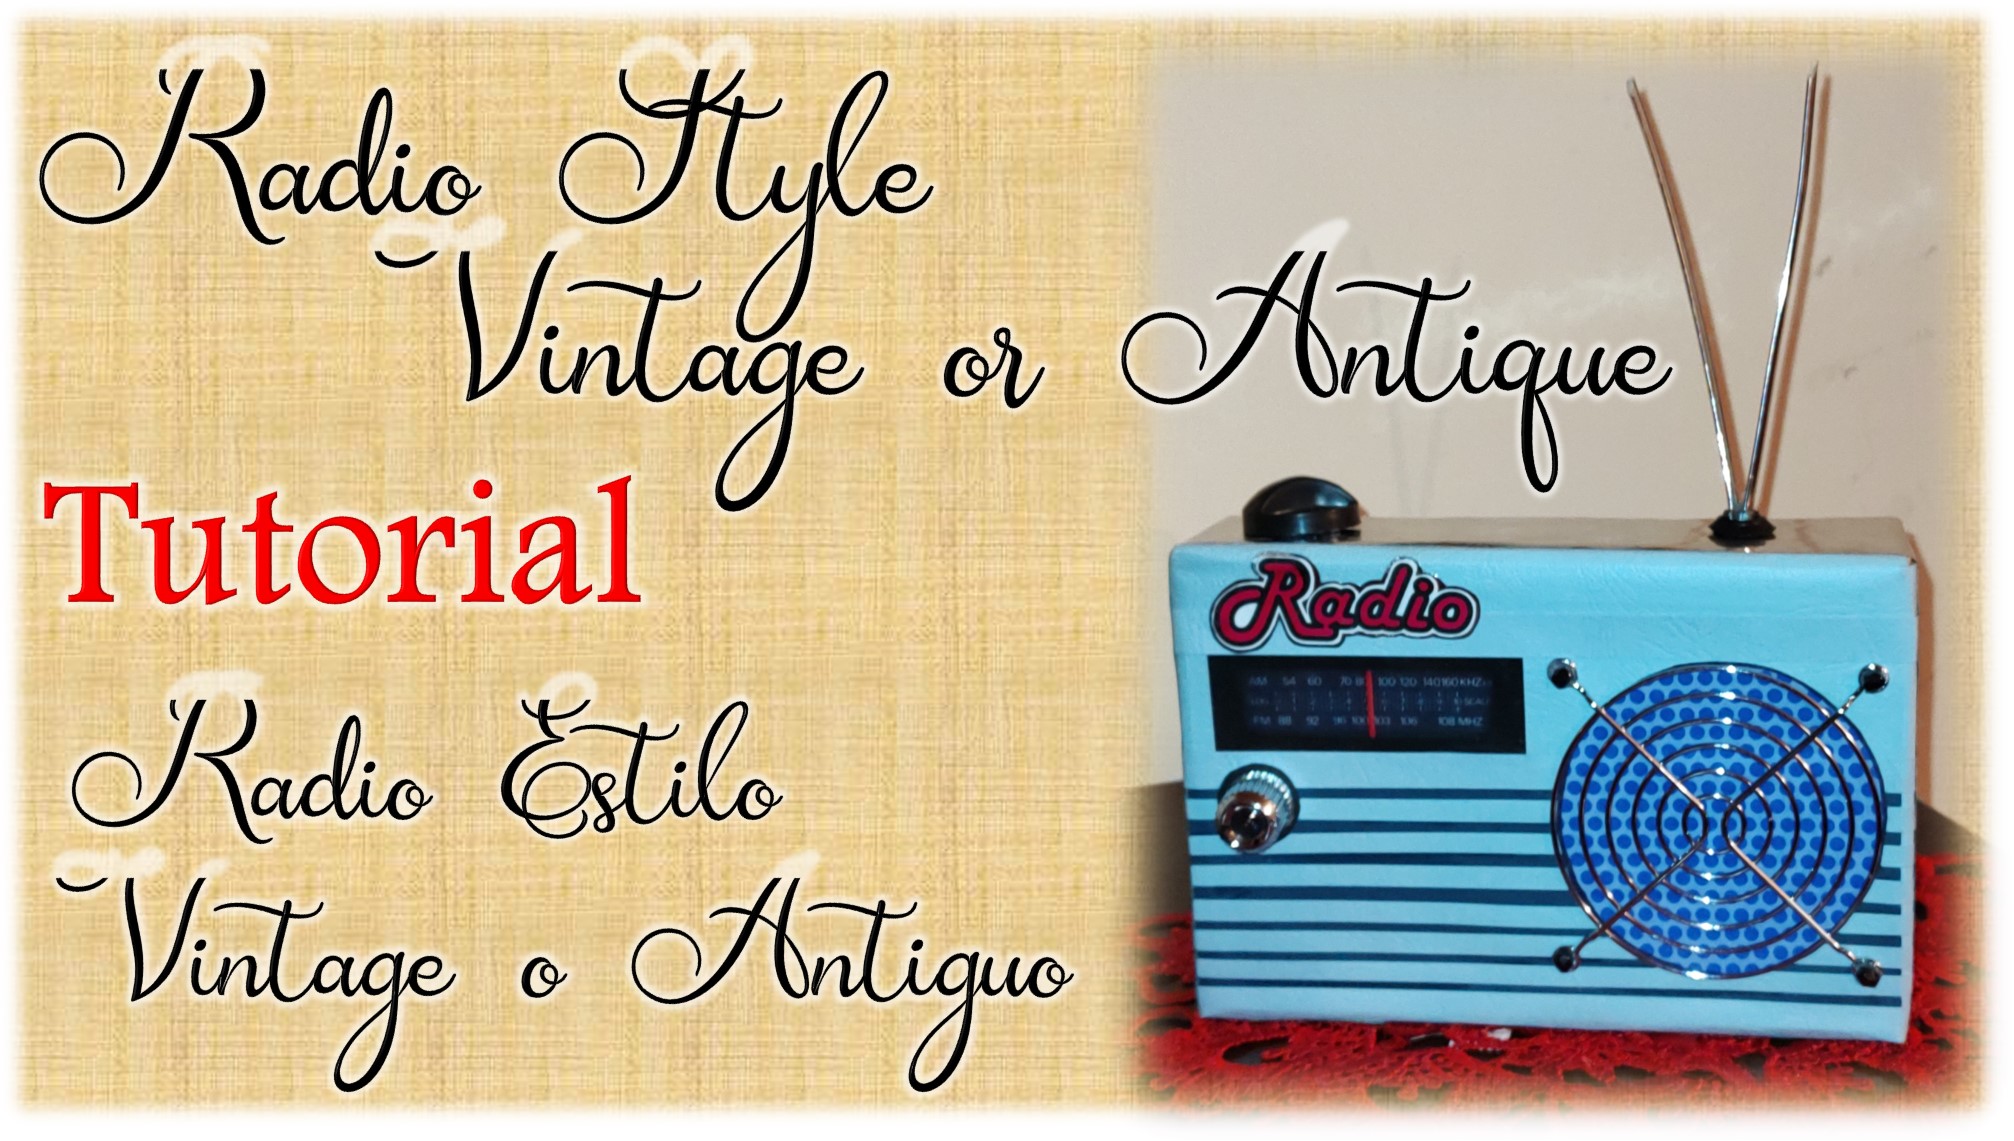
Saludos queridos amigos, integrantes de esta maravillosa comunidad de manualistas, el proyecto que hoy les vengo a compartir quizás les parezca un poco peculiar. Sin embargo, me encantó como quedo el resultado y quise compartir con ustedes todo el proceso de elaboración. Tal vez y alguno de ustedes necesita elaborar una radio estilo antigua y bueno ya aquí tendrán un ejemplo de cómo elaborarla.
Greetings dear friends, members of this wonderful community of craftsmen, the project that I am sharing with you today may seem a bit peculiar. However, I loved how the result turned out and I wanted to share with you the whole process of elaboration. Maybe some of you need to make an antique style radio and well here you will have an example of how to make it.

Les contextualizo un poco como llegue a este proyecto, ya les he hablado infinidad de veces sobre mis hijas y que están en edad escolar, la mayor ya esta en bachillerato, sin embargo, la pequeña apenas empieza la etapa de educación básica, está en 1er grado. Como ya sabrán los que han pasado por esa etapa, a veces a las maestras se les ocurre pedir cada cosa, jajaja. El caso es que el proyecto de este 2do lapso académico, trata de comparar como eran las cosas antes y como son es en la actualidad.
I have already told you many times about my daughters and that they are of school age, the older one is already in high school, however, the younger one is just starting the basic education stage, she is in 1st grade. As those of you who have gone through that stage already know, sometimes teachers ask for everything, hahaha. The thing is that the project of this 2nd academic year, tries to compare how things were before and how they are nowadays.
Resulta que, en la cátedra de inglés, además, estaban tratando el tema de los medios de comunicación. A las profesoras se les ocurrió que una buena forma de aprender vocabulario, era que los niños realizaran con materiales de provecho algún aparato que estuviera relacionado con un medio de comunicación. Entonces se podía elaborar, por ejemplo, un televisor, un teléfono o como en nuestro caso una radio. Por supuesto, luego los niños deberían presentarlo en clases, indicando algunas de sus partes en inglés.
It turns out that, in the English class, they were also dealing with the topic of the media. The teachers came up with the idea that a good way to learn vocabulary was for the children to make a device related to a means of communication with useful materials. So they could make, for example, a television, a telephone or, as in our case, a radio. Of course, the children would then have to present it in class, indicating some of its parts in English.
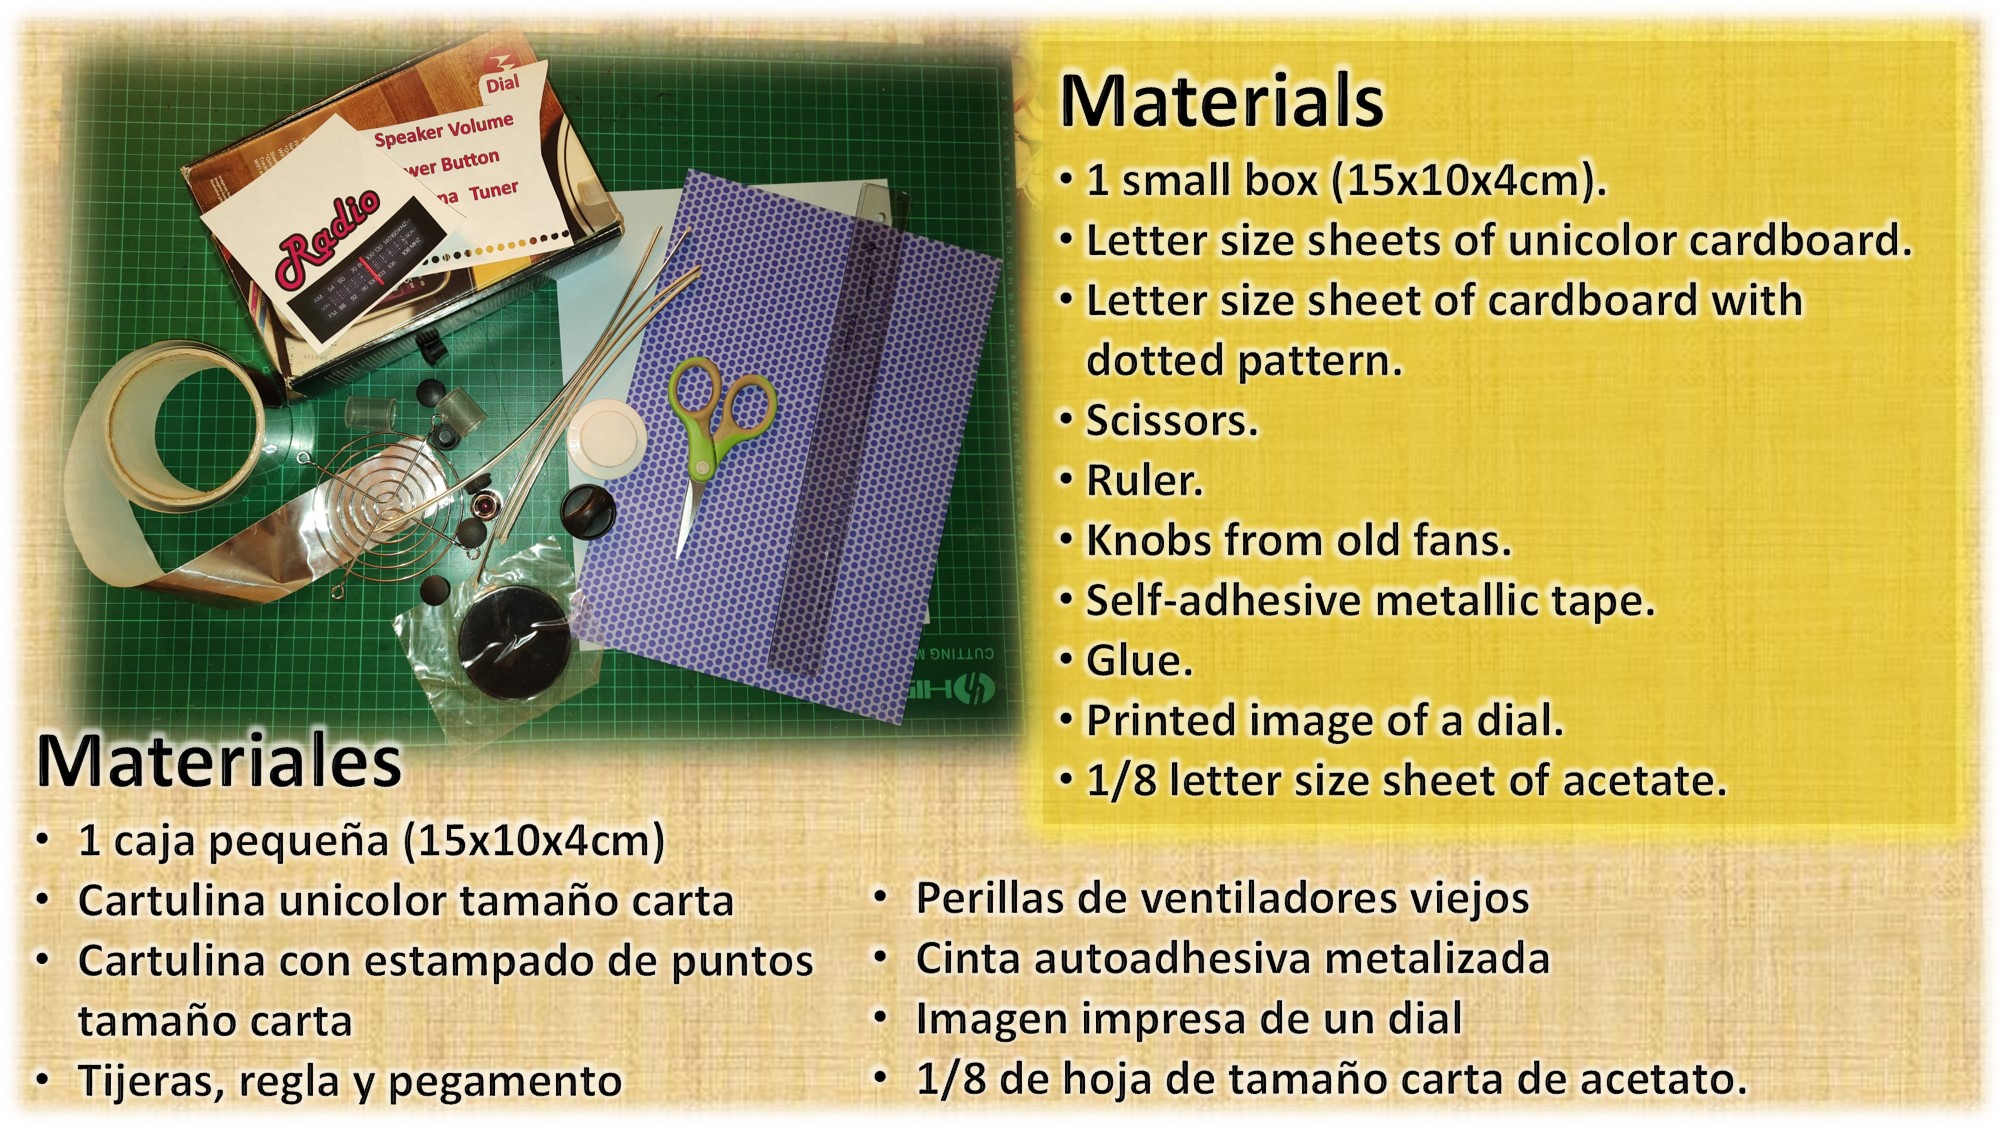
Como se debían utilizar materiales de provecho, empezó mi búsqueda en el depósito, para ver de qué me podía valer para realizar este proyecto. Encontré varias cosas como perillas de ventiladores descompuestos, la rejilla de una fuente de poder de una computadora, y una cantidad de cositas que pensé en su momento que podrían serme de utilidad. Algunas las usé otras no, en la imagen de arriba pueden observar cuales fueron las que a la final usé, el único material que olvidé incluir en la lista, y disculpen, fue la rejilla de la fuente de poder, que ya les mencioné.
Since I had to use useful materials, I began my search in the warehouse to see what I could use to make this project. I found several things like knobs of broken fans, the grill of a computer power supply, and a number of little things that I thought at the time that could be useful. Some I used, others I didn't, in the image above you can see which ones I used in the end, the only material I forgot to include in the list, and excuse me, was the power supply grill, which I already mentioned.
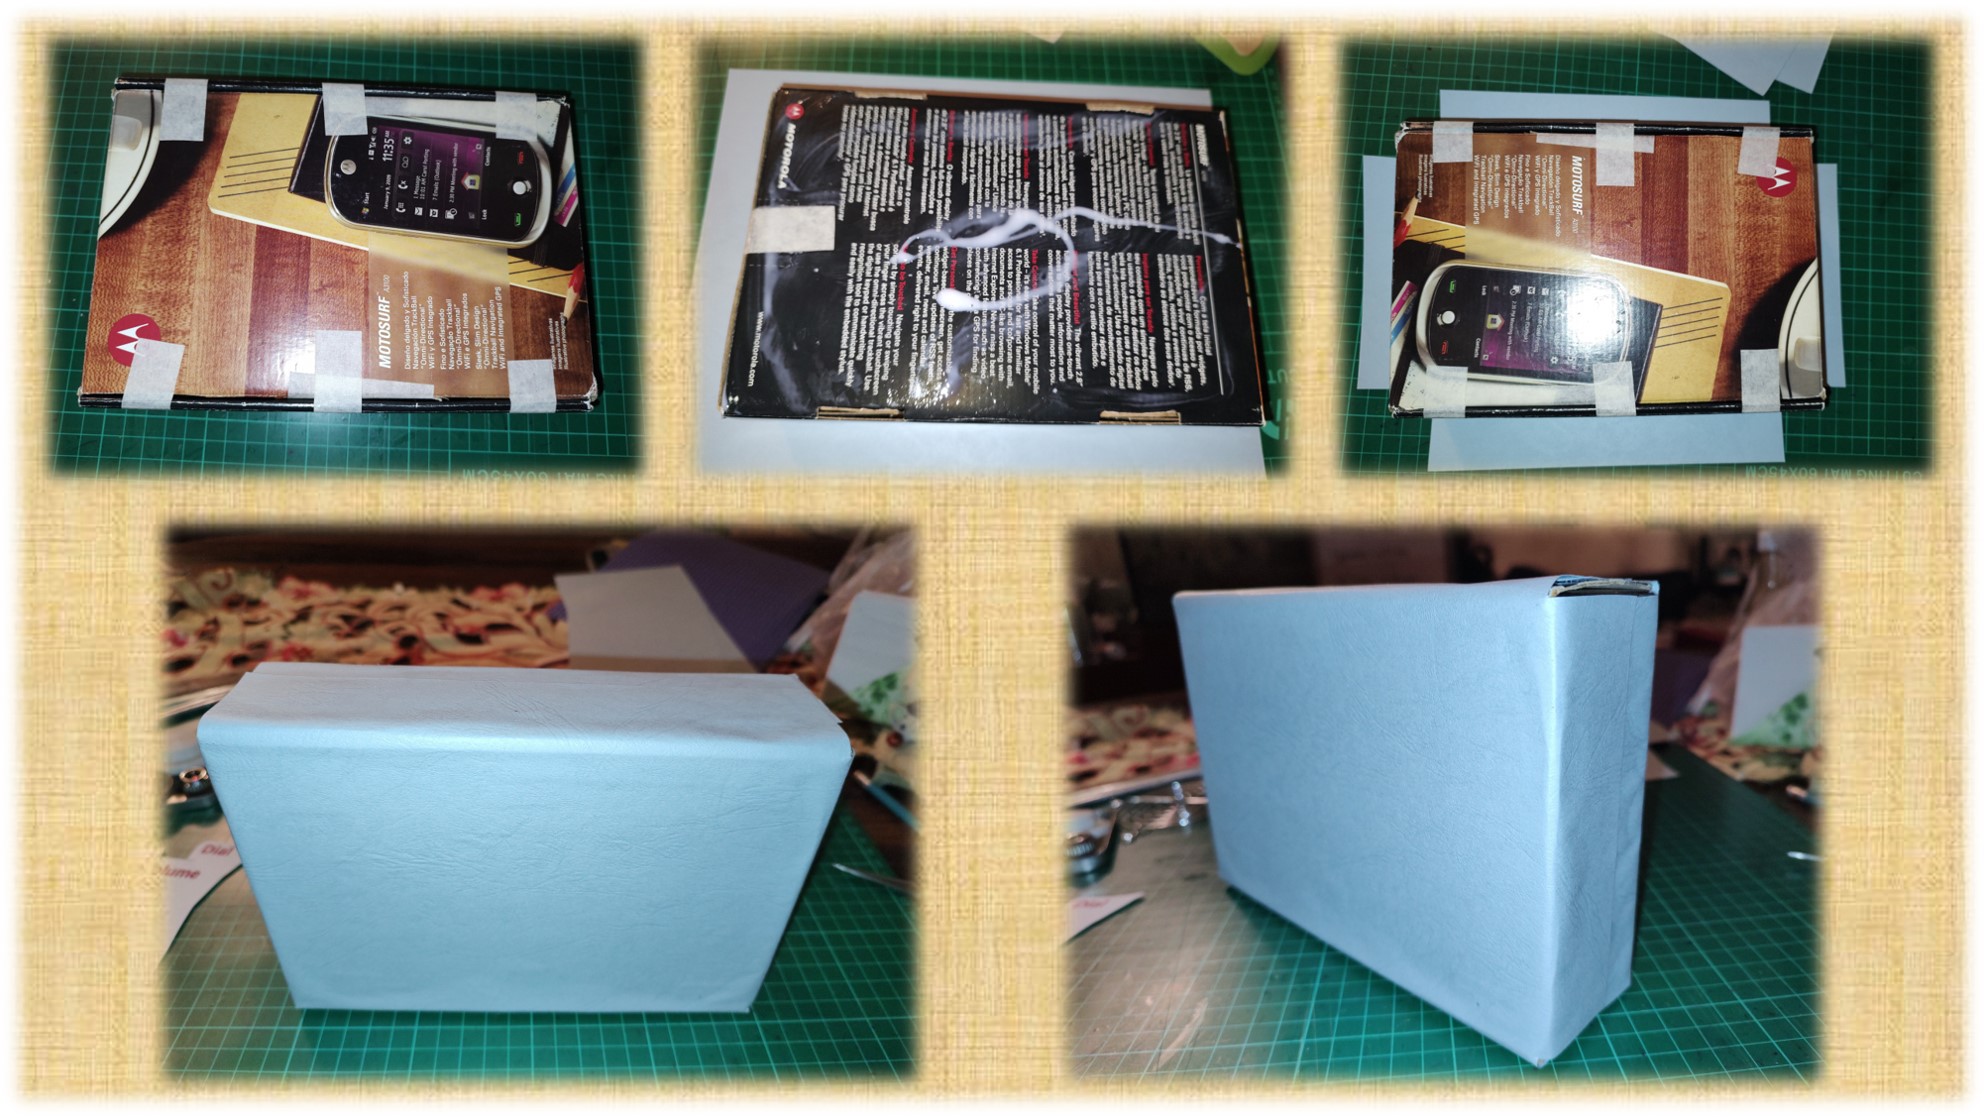
Todo partió de una simple caja de cartón que tenia guardada de un muy viejo celular, la cual selle muy bien con tirro para que no se deformara. Luego tome unas hojas de cartulina tamaño carta y empezamos a forrar toda la caja, para ello mi hija se encargó de ir esparciendo pegamento escolar por la superficie de la caja. Seguidamente, con mucho cuidado, me encargue de ir pegando la cartulina, teniendo precaución de que no me quedaran arrugas, ni burbujas, es decir, que quedara bien pareja toda la superficie.
Everything started with a simple cardboard box that I had saved from a very old cell phone, which I sealed very well with tape so that it would not deform. Then I took a few sheets of cardboard letter size and began to line the entire box, for this my daughter was in charge of spreading school glue on the surface of the box. Then, very carefully, I was in charge of gluing the cardboard, taking care that there were no wrinkles or bubbles, that is, that the whole surface was well even.
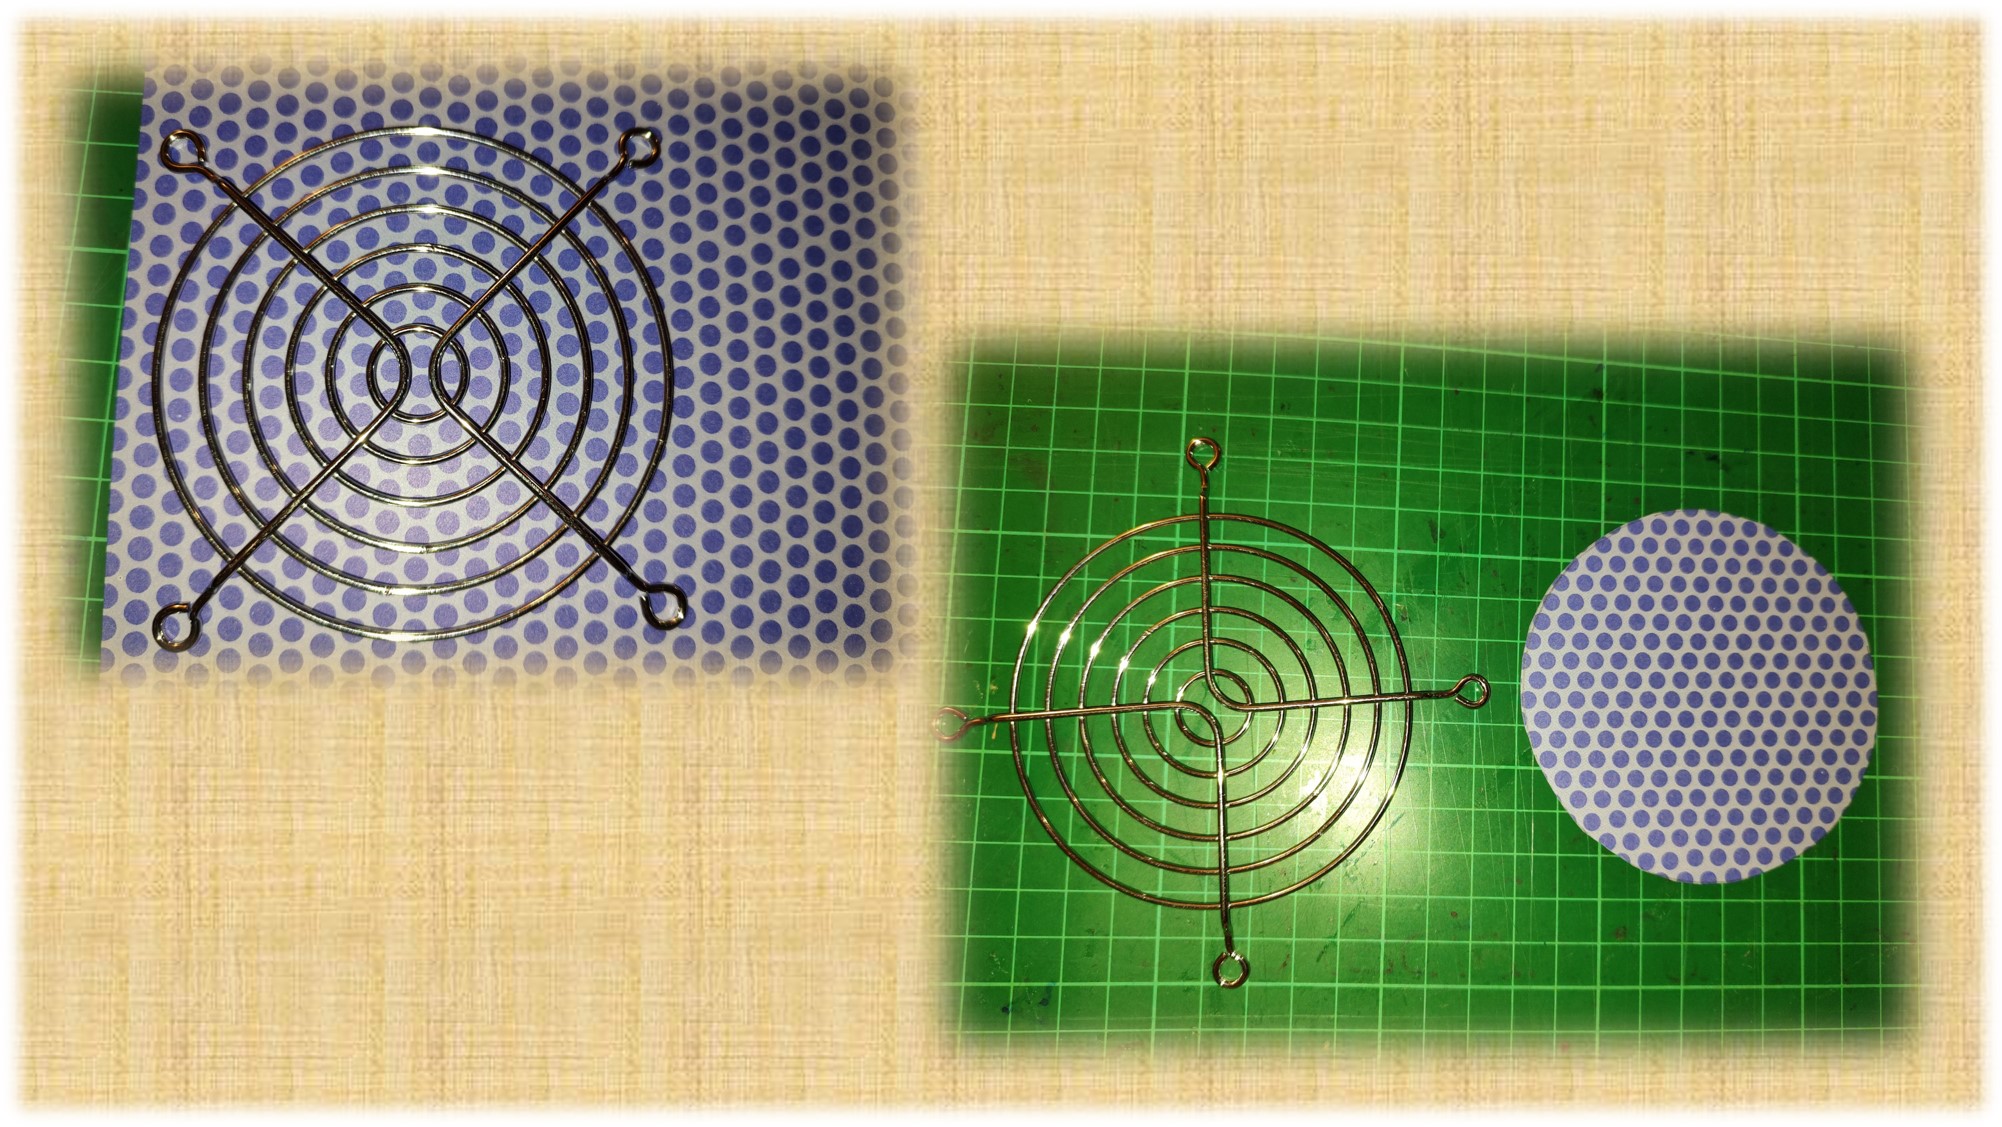
Con la caja ya forrada, la reservé para que se secara bien el pegamento y nos dispusimos a elaborar los distintos accesorios que me ayudarían a darle a la caja el aspecto de una radio. Como ya les comenté, el tema del proyecto de este lapso es referente a cosas antiguas, así que la radio debería tener el aspecto de una radio de épocas pasadas. Para darle el aspecto me guie por imágenes que encontré en el internet. Lo primero que intente imitar fue la corneta o parlantes por donde se produce el sonido. Para ello, utilice una cartulina con un estampado de puntos en azul claro y uno más oscuro, como pueden ver en la imagen. Con ayuda de la rejilla que extraje de la fuente de poder de una computadora vieja, marque un circulo en la cartulina y luego los corté.
With the box already lined, I set it aside for the glue to dry well and we set about making the various accessories that would help me give the box the look of a radio. As I already mentioned, the theme of this project is about old things, so the radio should have the look of a radio from a bygone era. To give it the look I was guided by images I found on the internet. The first thing I tried to imitate was the horn or speakers where the sound is produced. To do this, I used a cardboard with a pattern of light blue dots and a darker one, as you can see in the image. With the help of the grid that I extracted from the power supply of an old computer, I marked a circle on the cardboard and then cut them out.
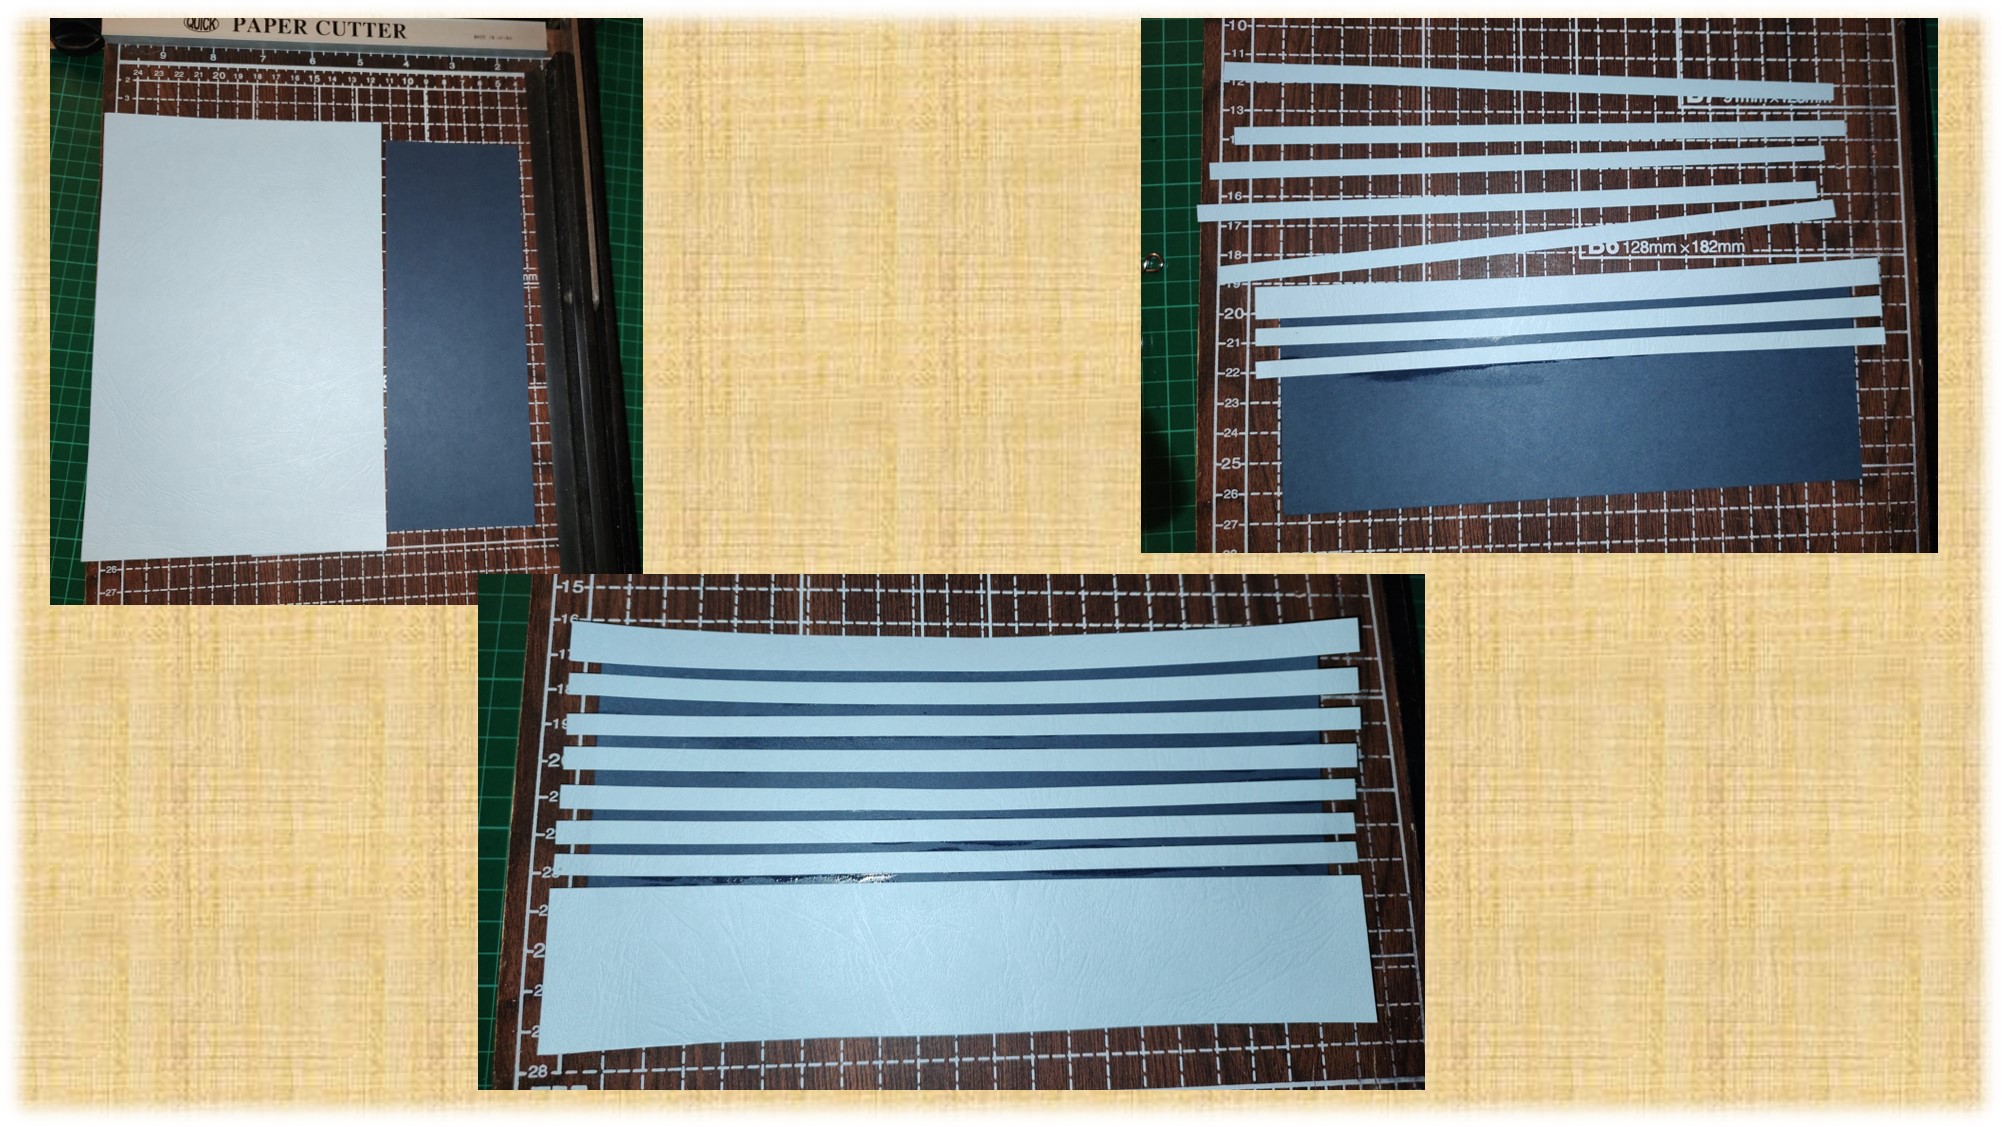
A continuación, nos tocaba simular una especie de acanalado que era característico en las radios de esa época, para ello corté varios listoncitos de cartulina azul claro y lo sobrepuse sobre una cartulina de color azul oscuro. Al final, las franjas en dos tonalidades de azul distintos, más, el sobreponer las tiras de cartulina, me permitió generar el aspecto de tener una superficie acanalada.
Next, we had to simulate a kind of ribbing that was characteristic of the radios of that era, so I cut several small strips of light blue cardboard and superimposed them on a dark blue cardboard. In the end, the stripes in two different shades of blue, plus the overlapping of the cardboard strips, allowed me to generate the appearance of having a ribbed surface.
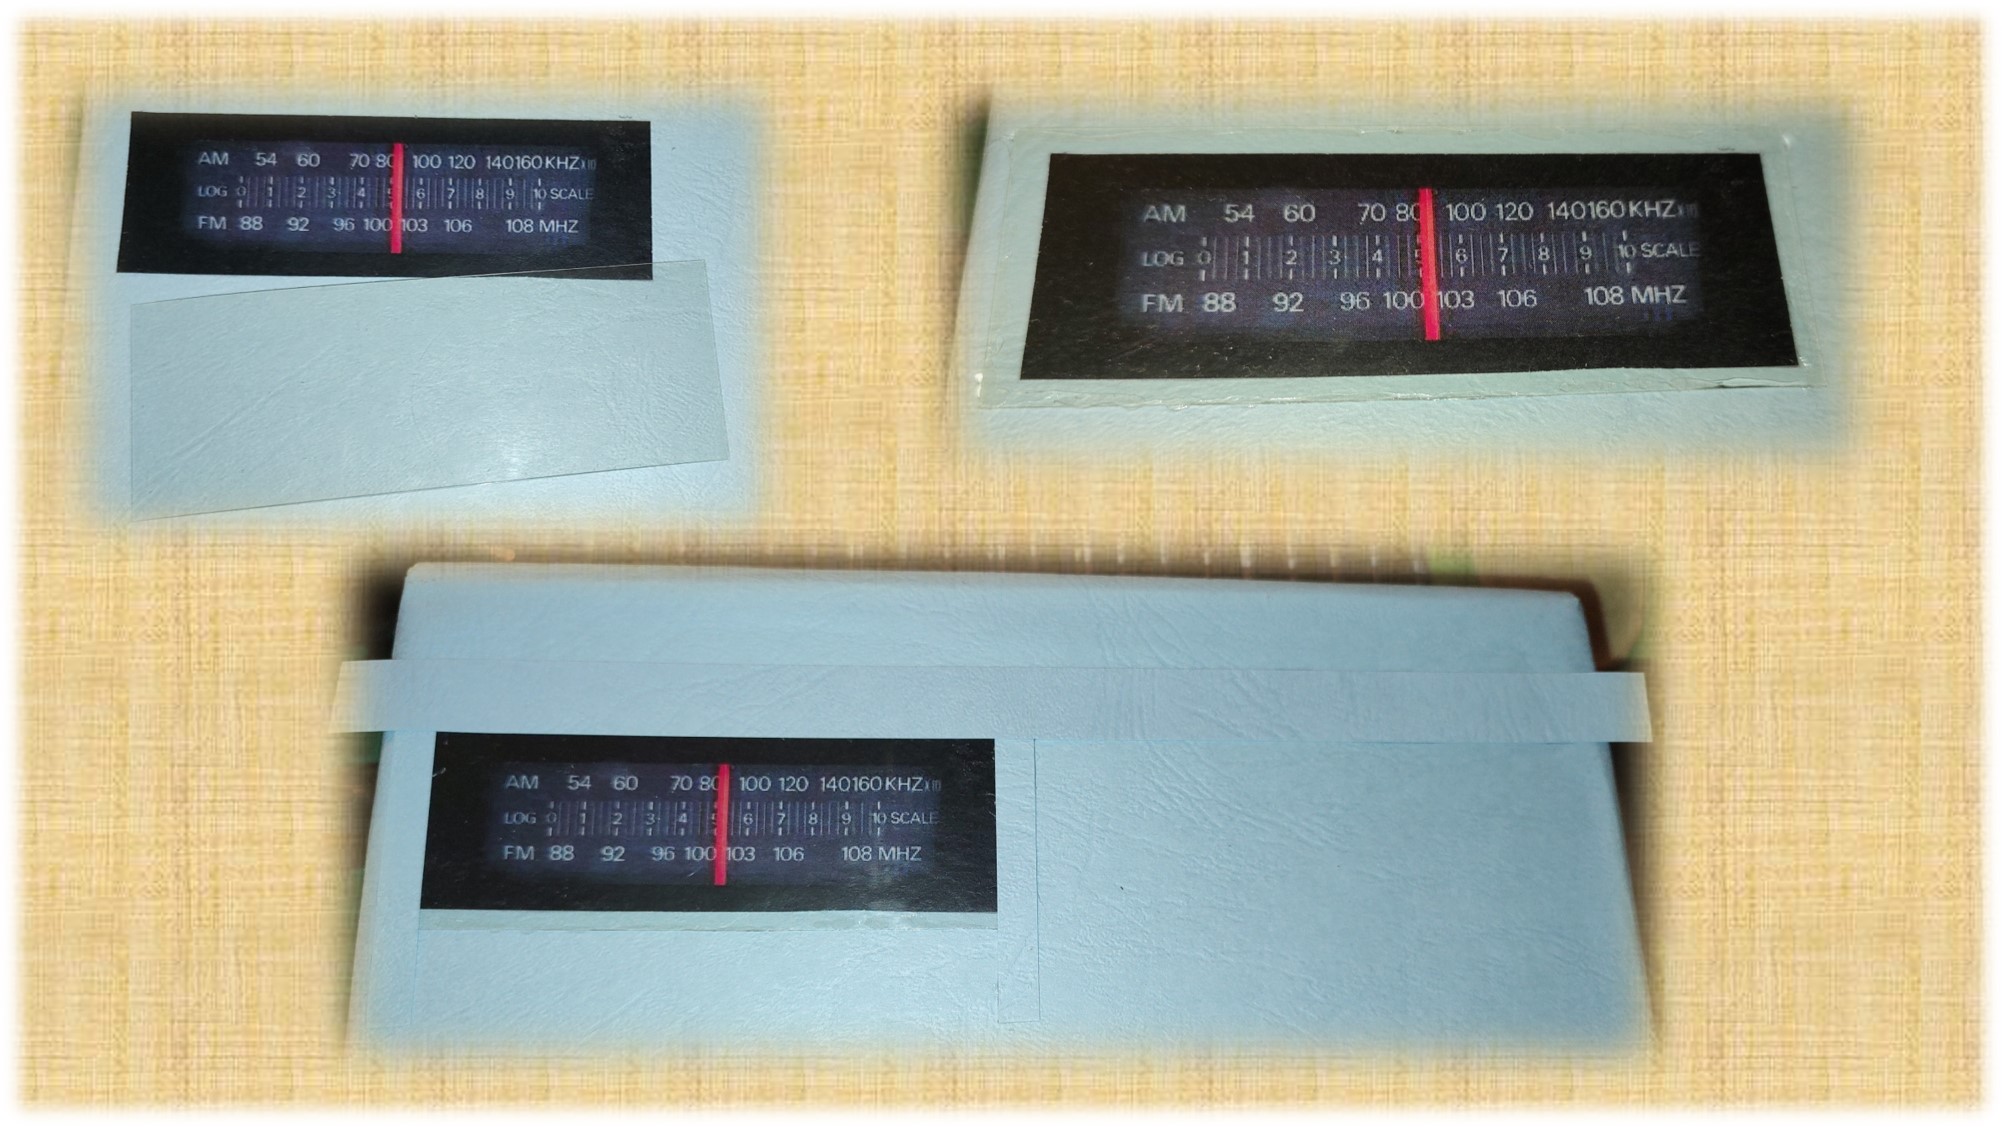
Ahora, debíamos representar el dial, el cual, es una especie de pantallita que permite seleccionar la emisora que queríamos escuchar. Para ello, busqué en internet una imagen que se viera lo más real posible, la imprimí y luego la pegue en el lugar correspondiente. Para, simular la ventanita plástica que protege el dial, use un trocito de acetato, el cual pegue encima de la imagen con pegamento de silicón frio. Para tapar el pegamento y que pareciera que estaba encapsulado en la armazón de la radio, corte tiras de cartulina y las coloque alrededor, como pueden observar en la imagen.
Now, we had to represent the dial, which is a kind of little screen that allows us to select the station we wanted to listen to. To do this, I searched the internet for an image that looked as real as possible, printed it and then pasted it in the corresponding place. To simulate the plastic window that protects the dial, I used a small piece of acetate, which I glued over the image with cold silicone glue. To cover the glue and make it look like it was encapsulated in the radio frame, I cut strips of cardboard and placed them around it, as you can see in the image.
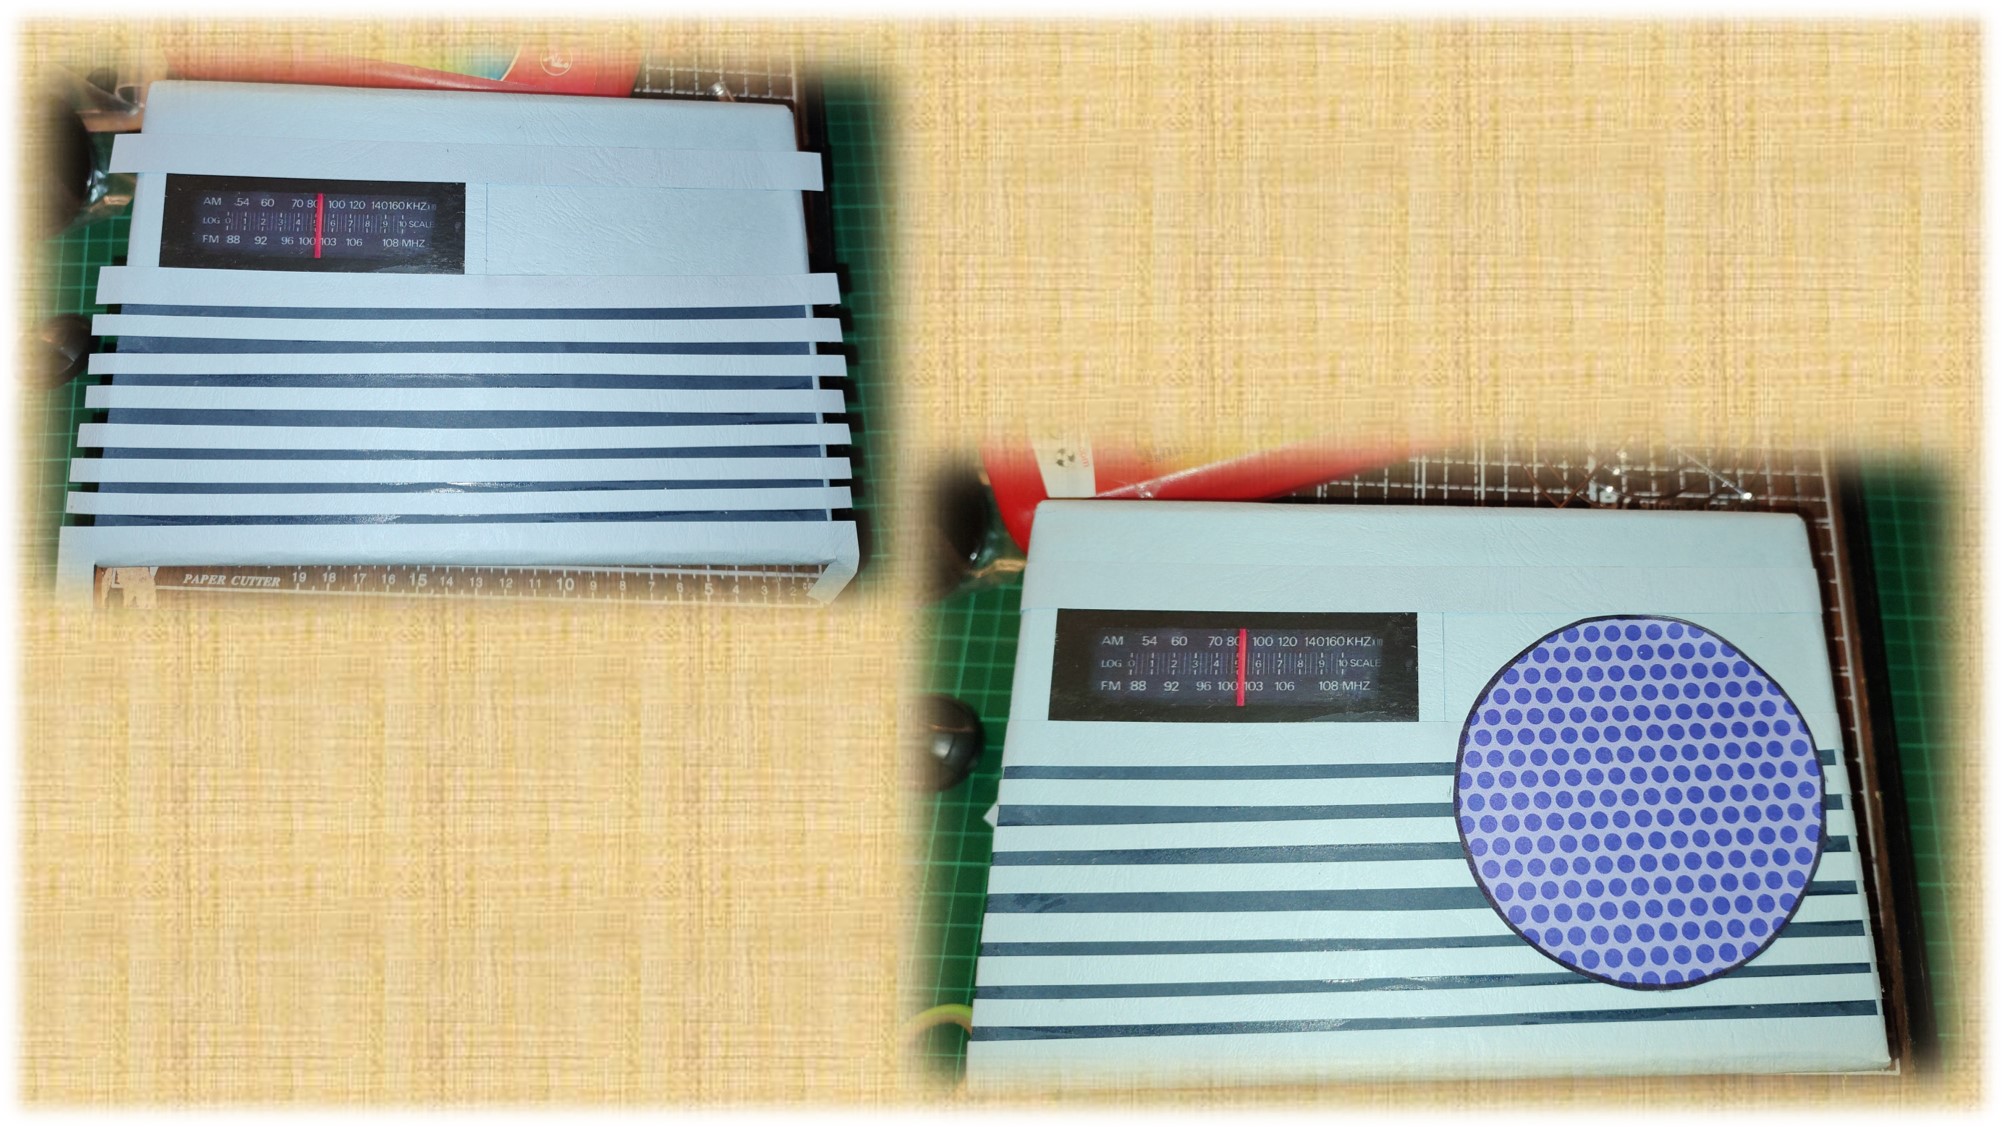
Seguidamente, buscamos las piezas que habíamos reservado y las ubicamos en su sitio como les muestro en la imagen.
Next, we look for the pieces that we had reserved and we place them in their place as shown in the image.
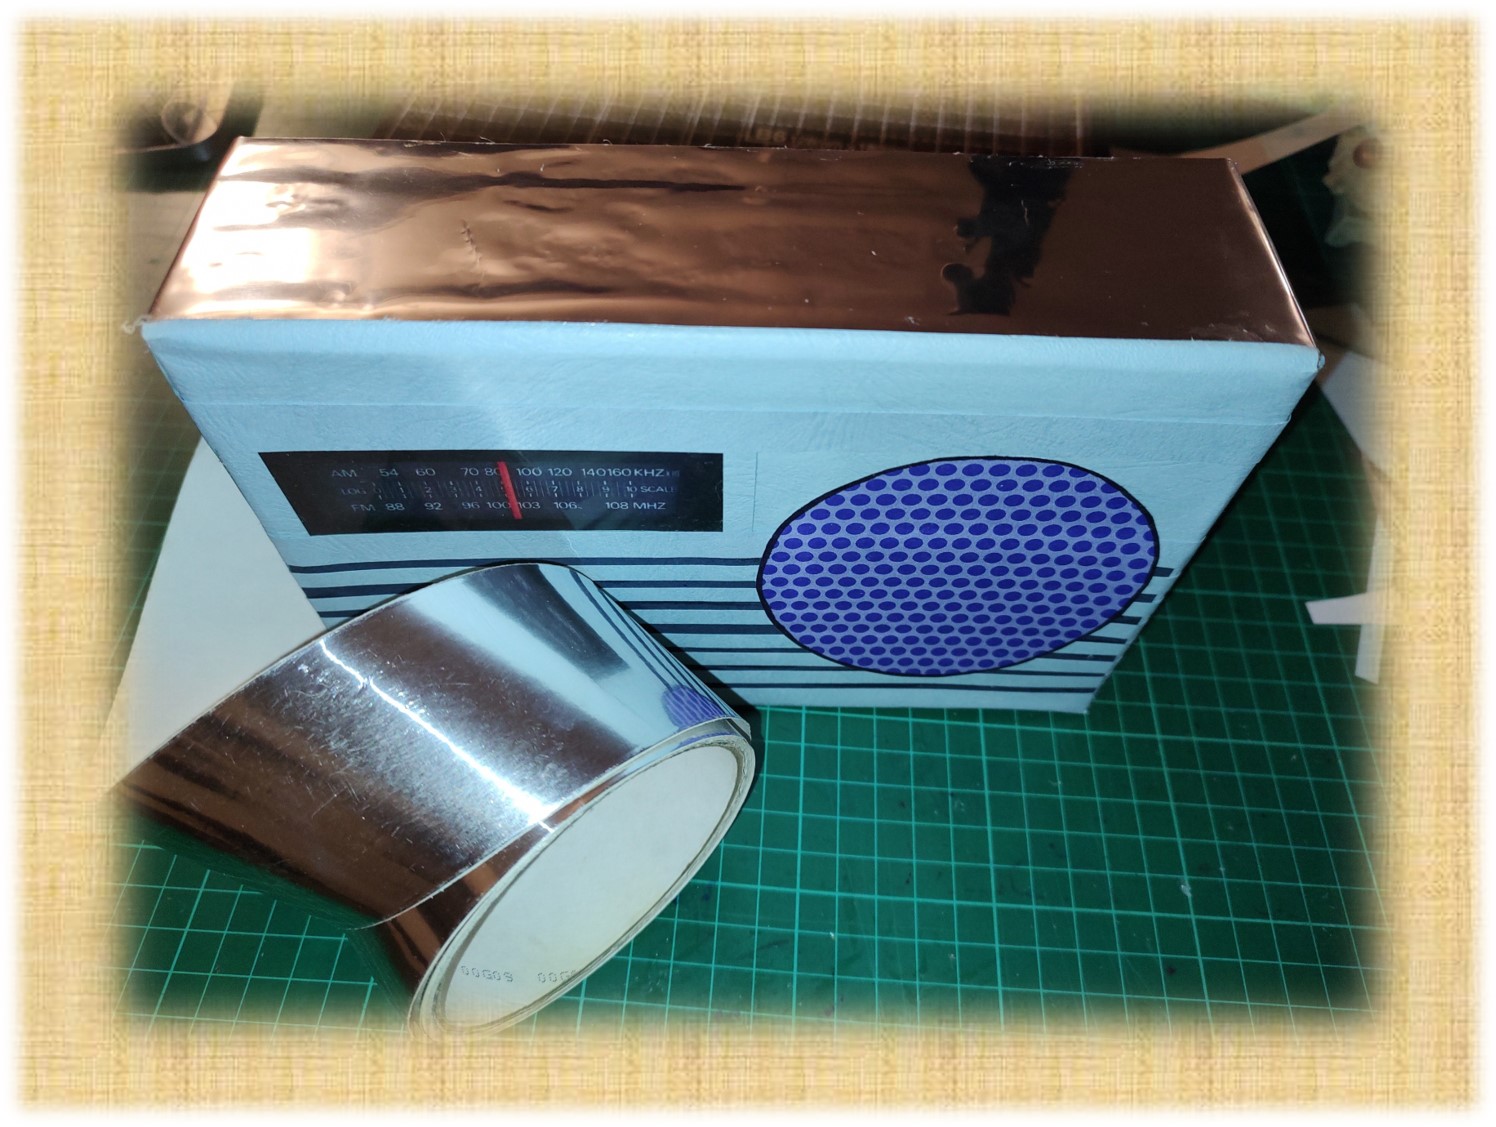
Ya el radio está tomando forma, ahora buscamos la cinta adhesiva metalizada y se la colocaremos por todo el borde de la caja. En esta oportunidad corrí con suerte, porque el ancho de la cinta coincidió perfectamente con la profundidad de la caja, así que, no tuve necesidad de recortar los excesos.
The radius is already taking shape, now we look for the metallic adhesive tape and place it all around the edge of the box. This time I was lucky, because the width of the tape coincided perfectly with the depth of the box, so I didn't need to trim the excess.
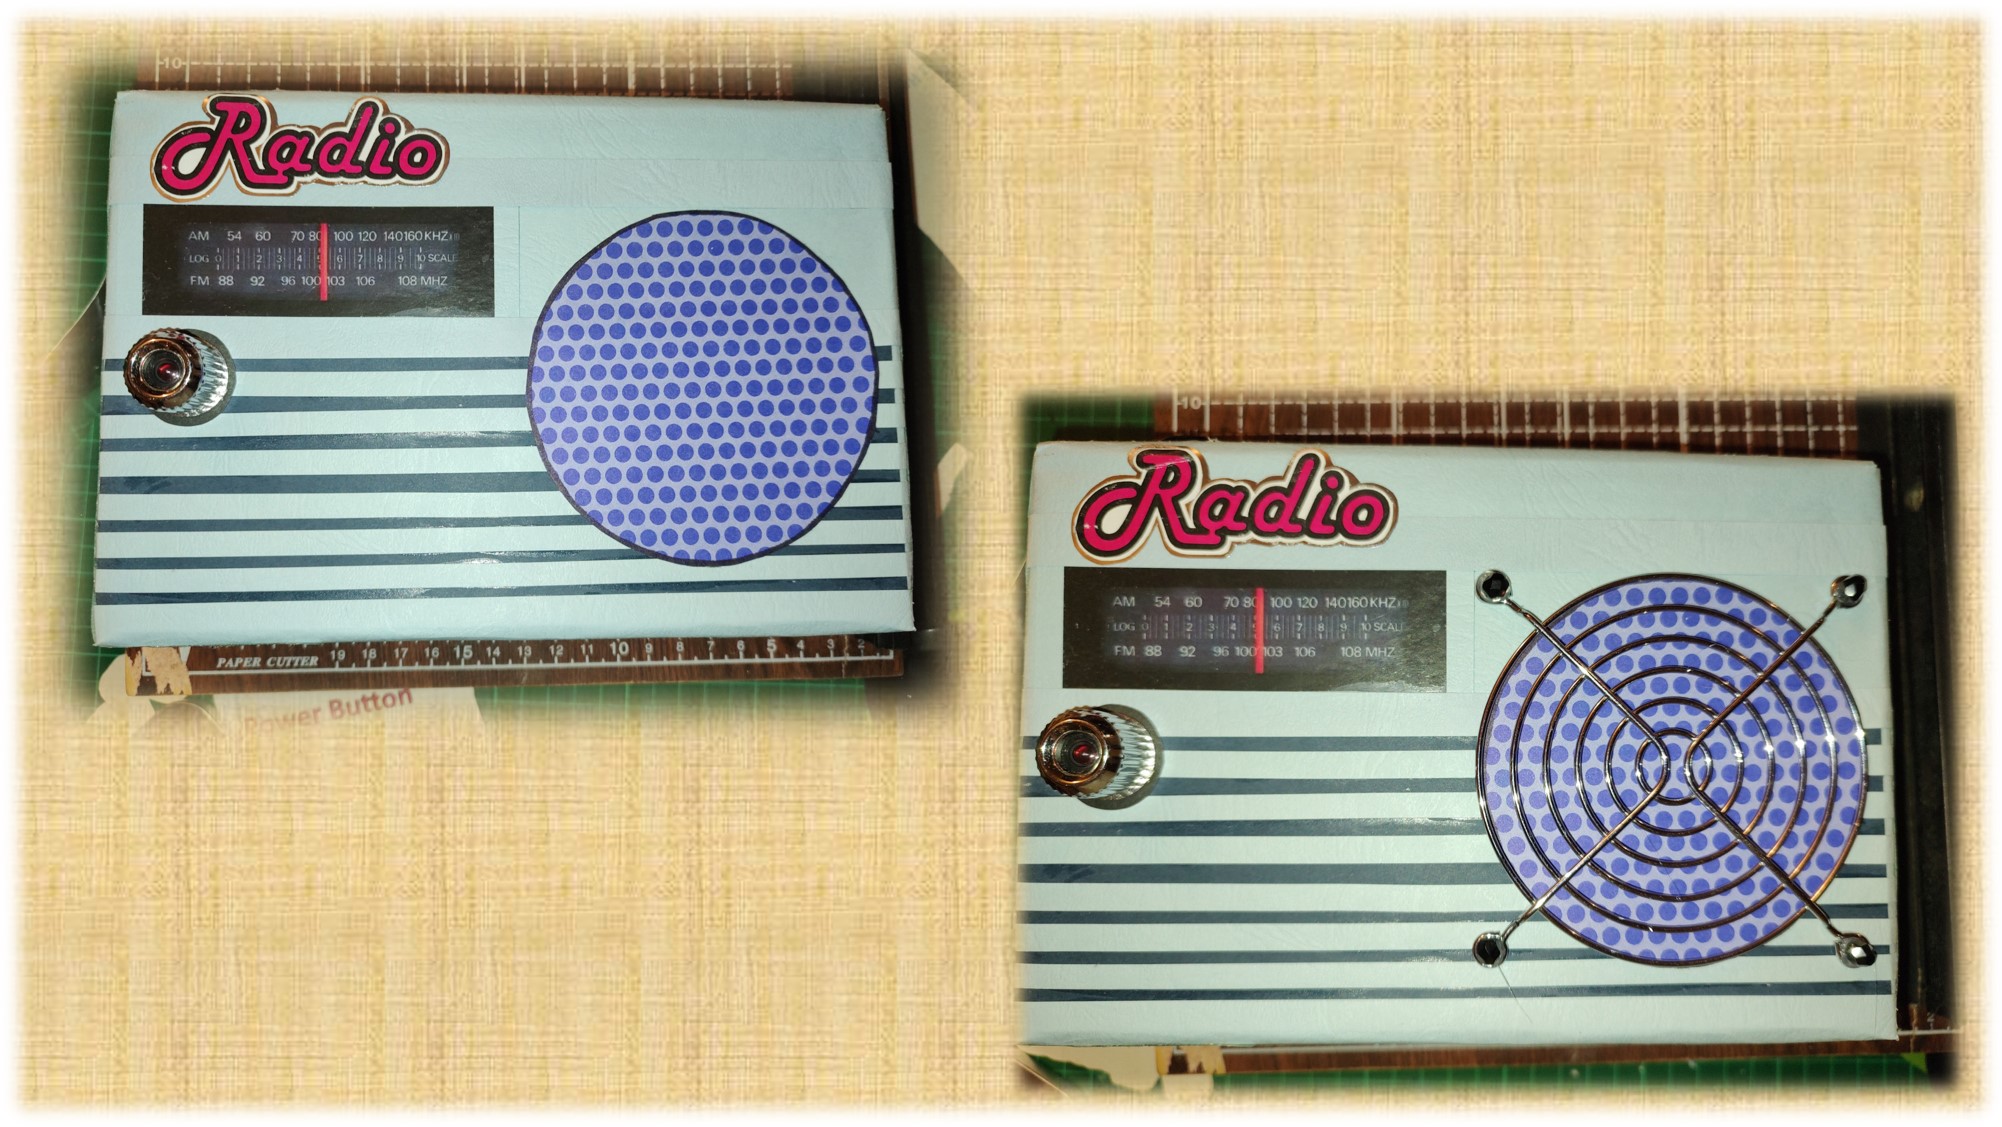
Para culminar con la parte frontal de la radio estilo antigua, colocamos una perilla, que recicle de un juguete roto de mis hijas. Con esta perilla tratamos de simular el seleccionador de emisoras de radio. También le pegamos con silicón caliente la rejilla, para terminar la corneta falsa de nuestra radio.
To finish off the front of the old-style radio, we placed a knob, which I recycled from a broken toy of my daughters. With this knob we tried to simulate the radio station selector. We also glued with hot silicone the grill, to finish the fake horn of our radio.

Los últimos detalles que coloque a la radio, fue una perilla para simular el encendido y apagado del equipo y por supuesto, no podía faltar la antena de la radio. Para la antena, conseguí unas platinas de un porta retrato que se rompió, y como eran plateadas quedaron como anillo al dedo, jajaja.
The last details I put on the radio, was a knob to simulate the on and off of the equipment and of course, could not miss the radio antenna. For the antenna, I got some plates from a picture frame that broke, and as they were silver, they were like a ring to the finger, hahaha.
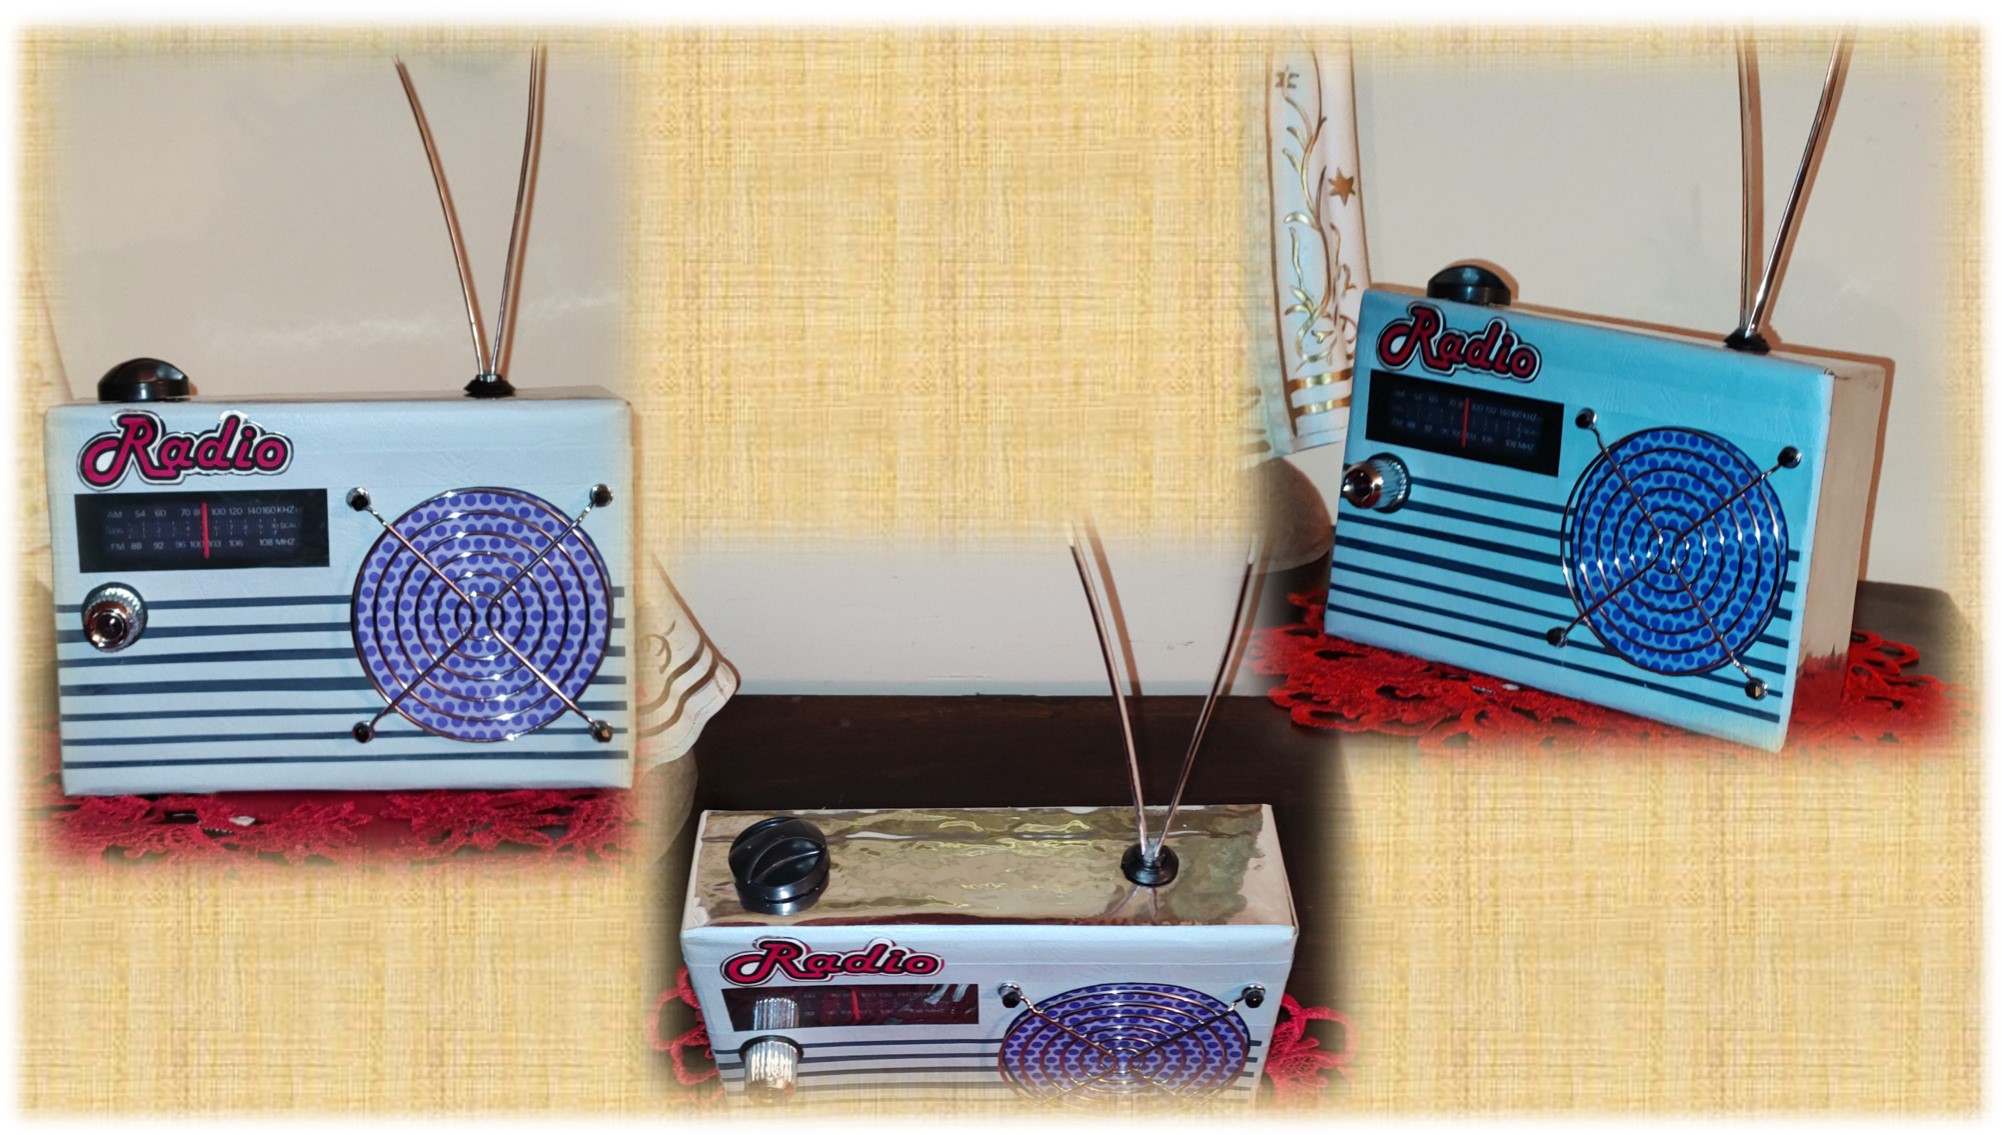
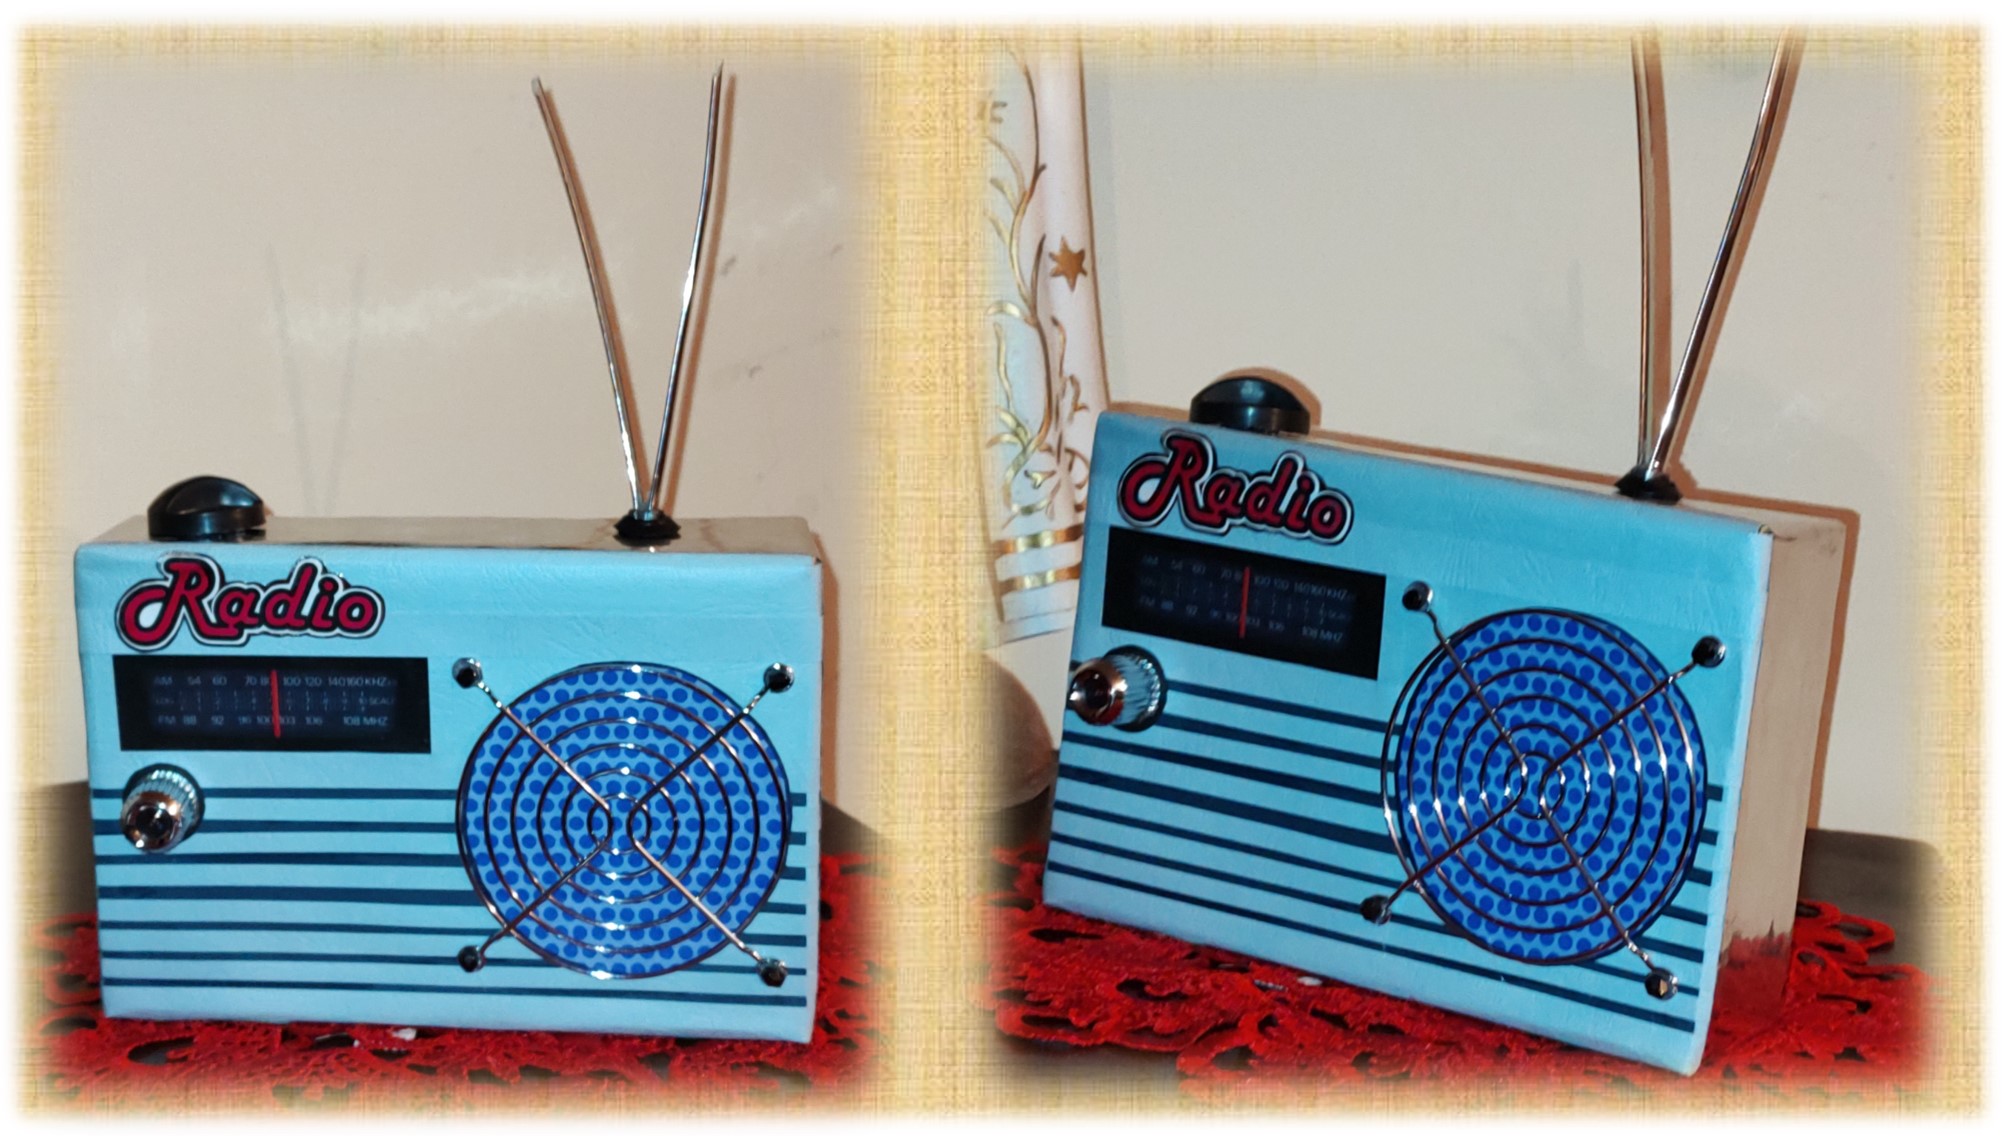
Como pueden ver ya la radio está terminada espero le gustara como finalmente quedo este proyecto, a mi particularmente me encanto. Ya solo me queda despedirme y desearles muchas bendiciones para ustedes y los suyos.
As you can see the radio is finished, I hope you like how this project turned out, I particularly loved it. It only remains for me to say goodbye and wish you many blessings for you and yours.
Contenido y fotografías de mi propiedad intelectual
Información Técnica
| Cámara | Pentax * istDL |
|---|---|
| Lente | * Pentax 18-55 |
| Iluminación | Luz Natural |
| Locación | Barcelona, Estado Anzoátegui, Venezuela |
Content and photographs of my intellectual property
Technical information
| Camera | Pentax * istDL |
|---|---|
| Lens | * Pentax 18-55 |
| Lighting | Natural Light |
| Location | Barcelona, Anzoátegui State, Venezuela |


Wow, qué linda esta manualidad, amo las cosas vintage. El proceso de realización se ve muy entretenido. Me encantó esta idea que nos has compartido. Excelente trabajo.
The rewards earned on this comment will go directly to the people( @samuell12 ) sharing the post on Twitter as long as they are registered with @poshtoken. Sign up at https://hiveposh.com.
Has hecho un gran trabado @francyrios75, te quedó muy original la radio, gracias por compartir.
Con el apoyo de la familia.
También nos puedes apoyar en nuestro Trail de TopFiveFamily
Si desea delegar HP al proyecto de la Familia del Top Family puedes hacerlo desde aquí: Delegue 5 HP - Delegue 10 HP - Delegue 20 HP - Delegue 30 HP - Delegue 50 HP - Delegue 100 HP.
Te confieso que esperaba ver la construcción real de una radio ja ja ja, ya que mi abuelo fue radiotécnico y se especializaba en realizar este tipo de aparatos, pero me encanta tu creación y la manera que resolviste y adaptaste los recursos que tenías para culminar tu proyecto.
Gracias por compartirnos esta manualidad, muy creativa.😄
Congratulations @francyrios75! You have completed the following achievement on the Hive blockchain And have been rewarded with New badge(s)
Your next target is to reach 45000 upvotes.
You can view your badges on your board and compare yourself to others in the Ranking
If you no longer want to receive notifications, reply to this comment with the word
STOPCheck out our last posts:
Support the HiveBuzz project. Vote for our proposal!