Bienvenidos Queridos Amantes de la Artes Manuales
Welcome Dear Manual Arts Lovers
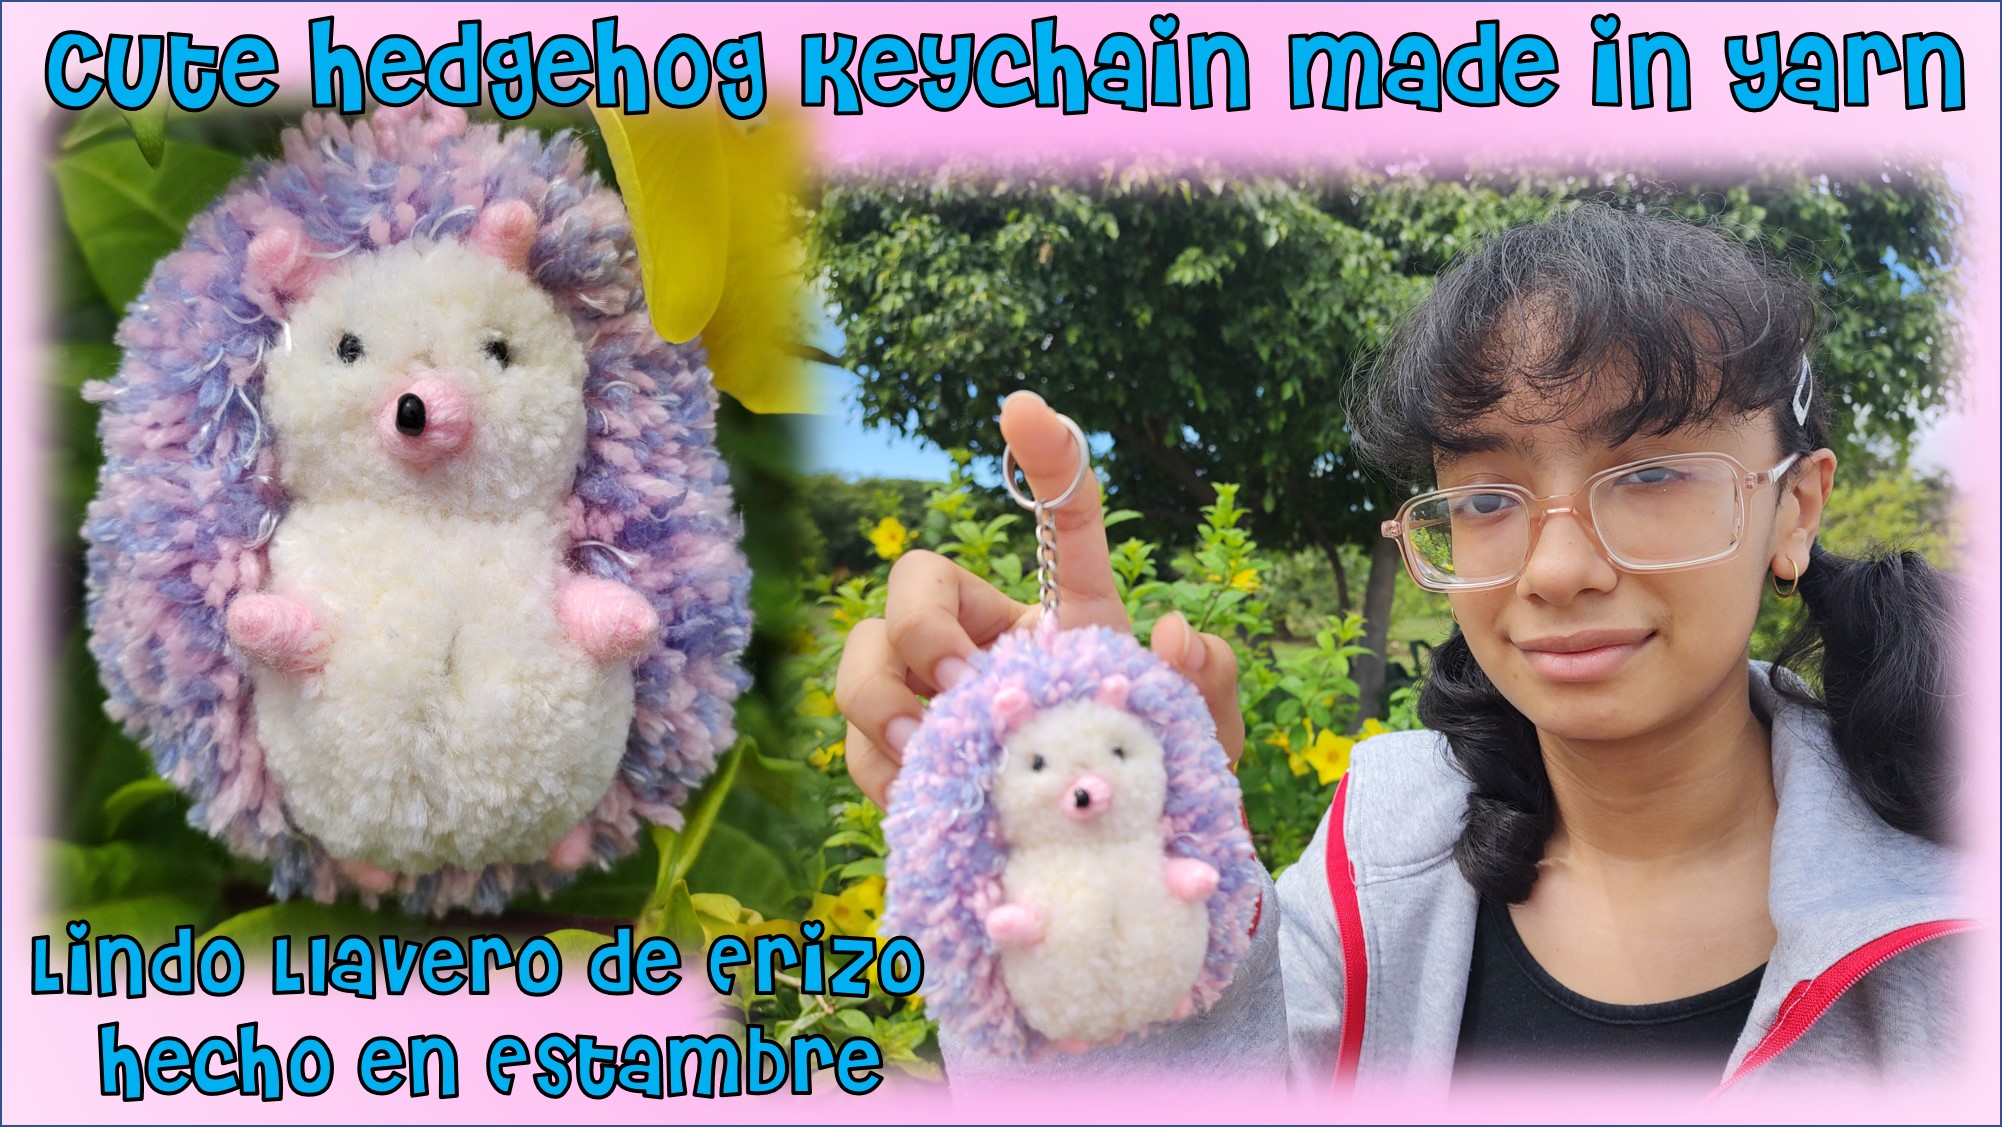

Hola a todos, estoy de regreso con ustedes con otro proyecto elaborado con estambre, esta vez es un Erizo, súper hermoso. Aniuska, mi hija mayor, me pidió que se lo hiciera para colgarlo de decoración en su bolso del colegio. Por supuesto, inmediatamente que me pidió que se lo hiciera, busqué en internet como realizarlo, para poder complacer a mi princesa mayor. Espero, que les guste el resultado final, por supuesto, entiendan todo el proceso de elaboración, que les compartiré a continuación, para que así, se animen a realizarlo para un ser especial en sus vidas.
Hello everyone, I'm back with you with another yarn project, this time it's a super beautiful Hedgehog. Aniuska, my oldest daughter, asked me to make it for her to hang it as a decoration on her school bag. Of course, as soon as she asked me to make it for her, I searched the internet to find out how to do it, so I could please my eldest princess. I hope you like the final result, of course, understand the whole process of elaboration, which I will share with you below, so that you will be encouraged to make it for a special person in your life.

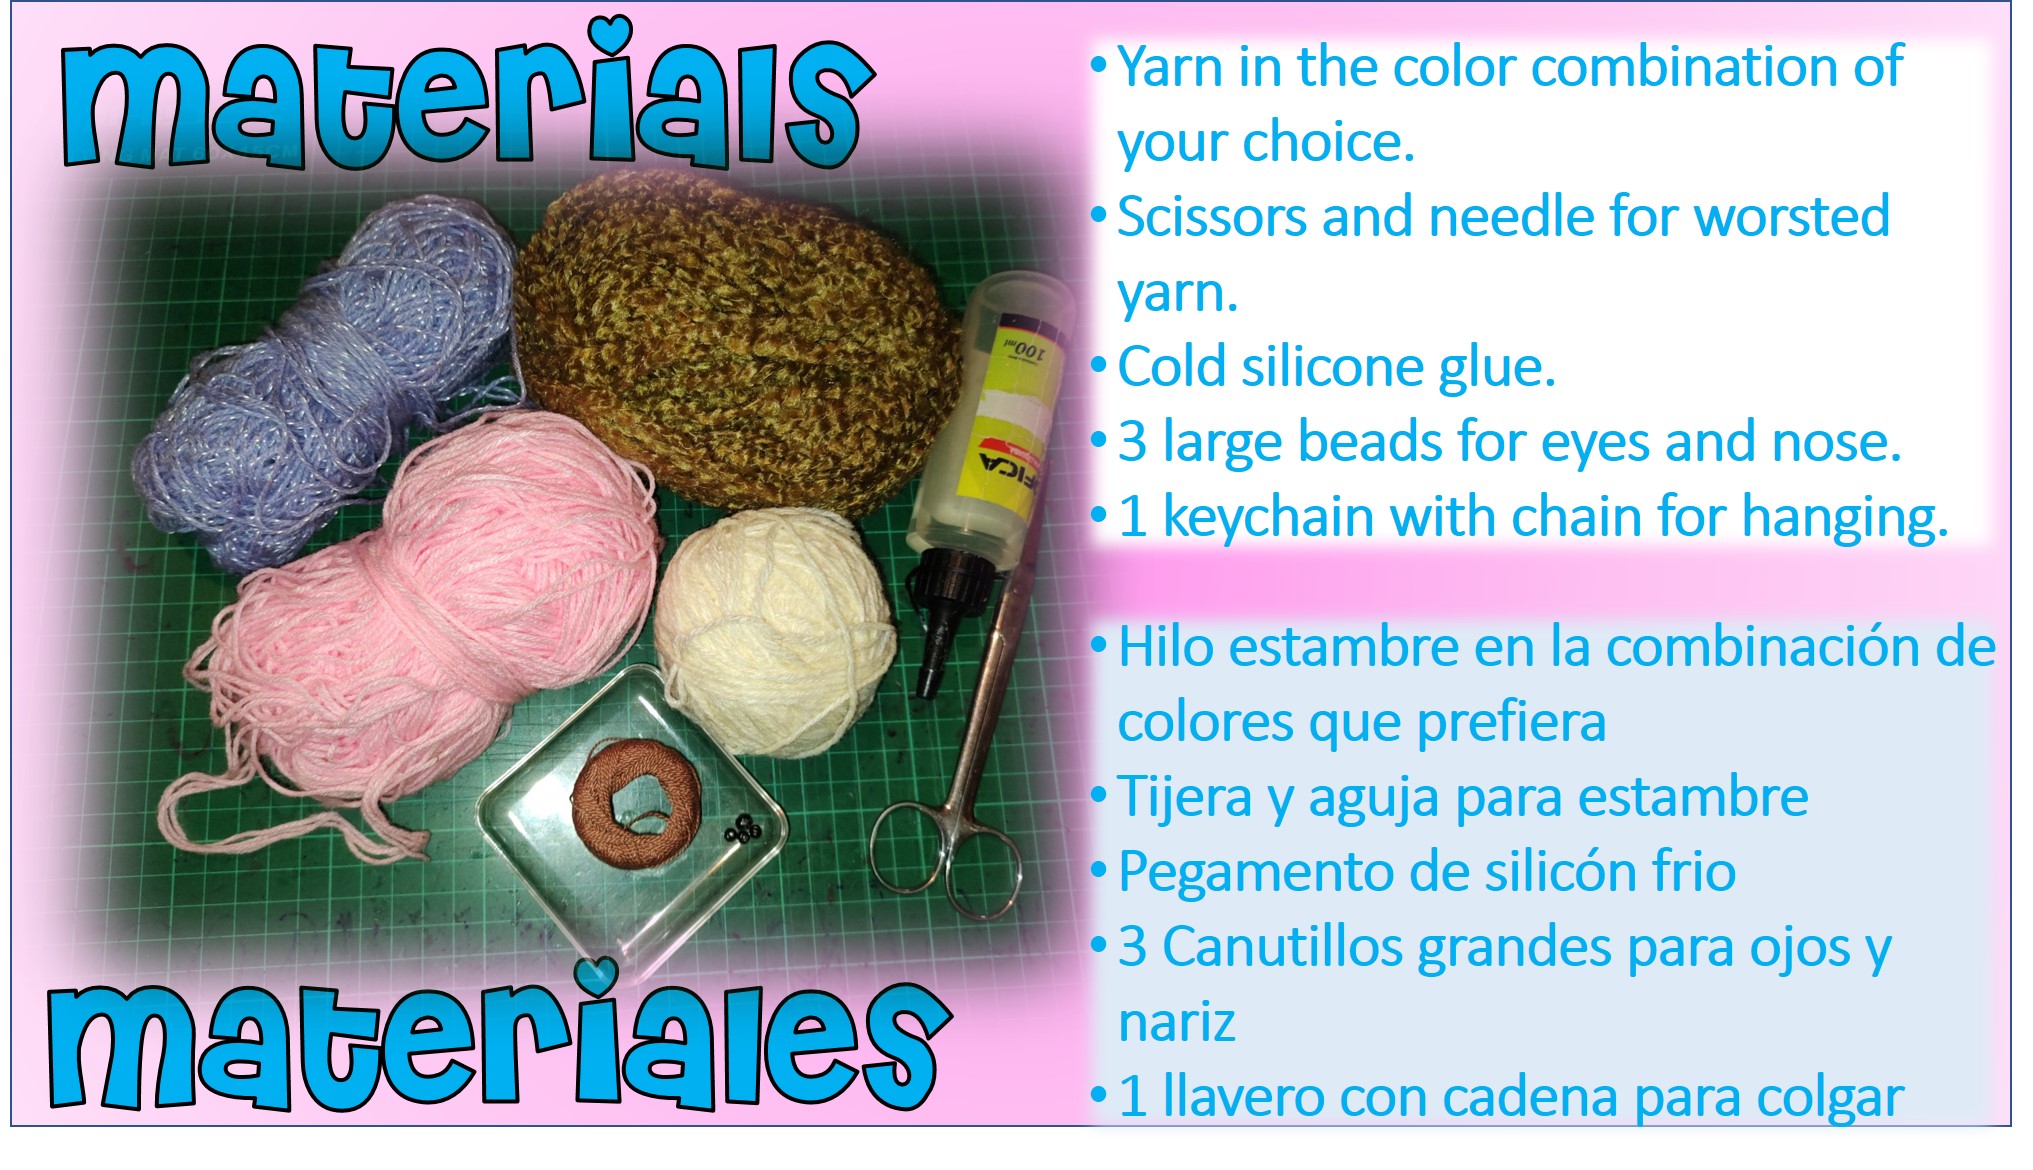

En cuanto a los materiales, son muy pocos y fáciles de encontrar, como pueden ver en la imagen solo necesitaran, estambres en los colores que ustedes prefieran, tijeras, agujas, pegamento y unos canutillos de los grandecitos para los ojitos y la nariz. Por supuesto, casi se me olvida, también necesitaran un llavero.
As for the materials, they are very few and easy to find, as you can see in the image you will only need, stamens in the colors of your choice, scissors, needles, glue and a few large beads for the eyes and nose. Of course, I almost forgot, you will also need a keychain.

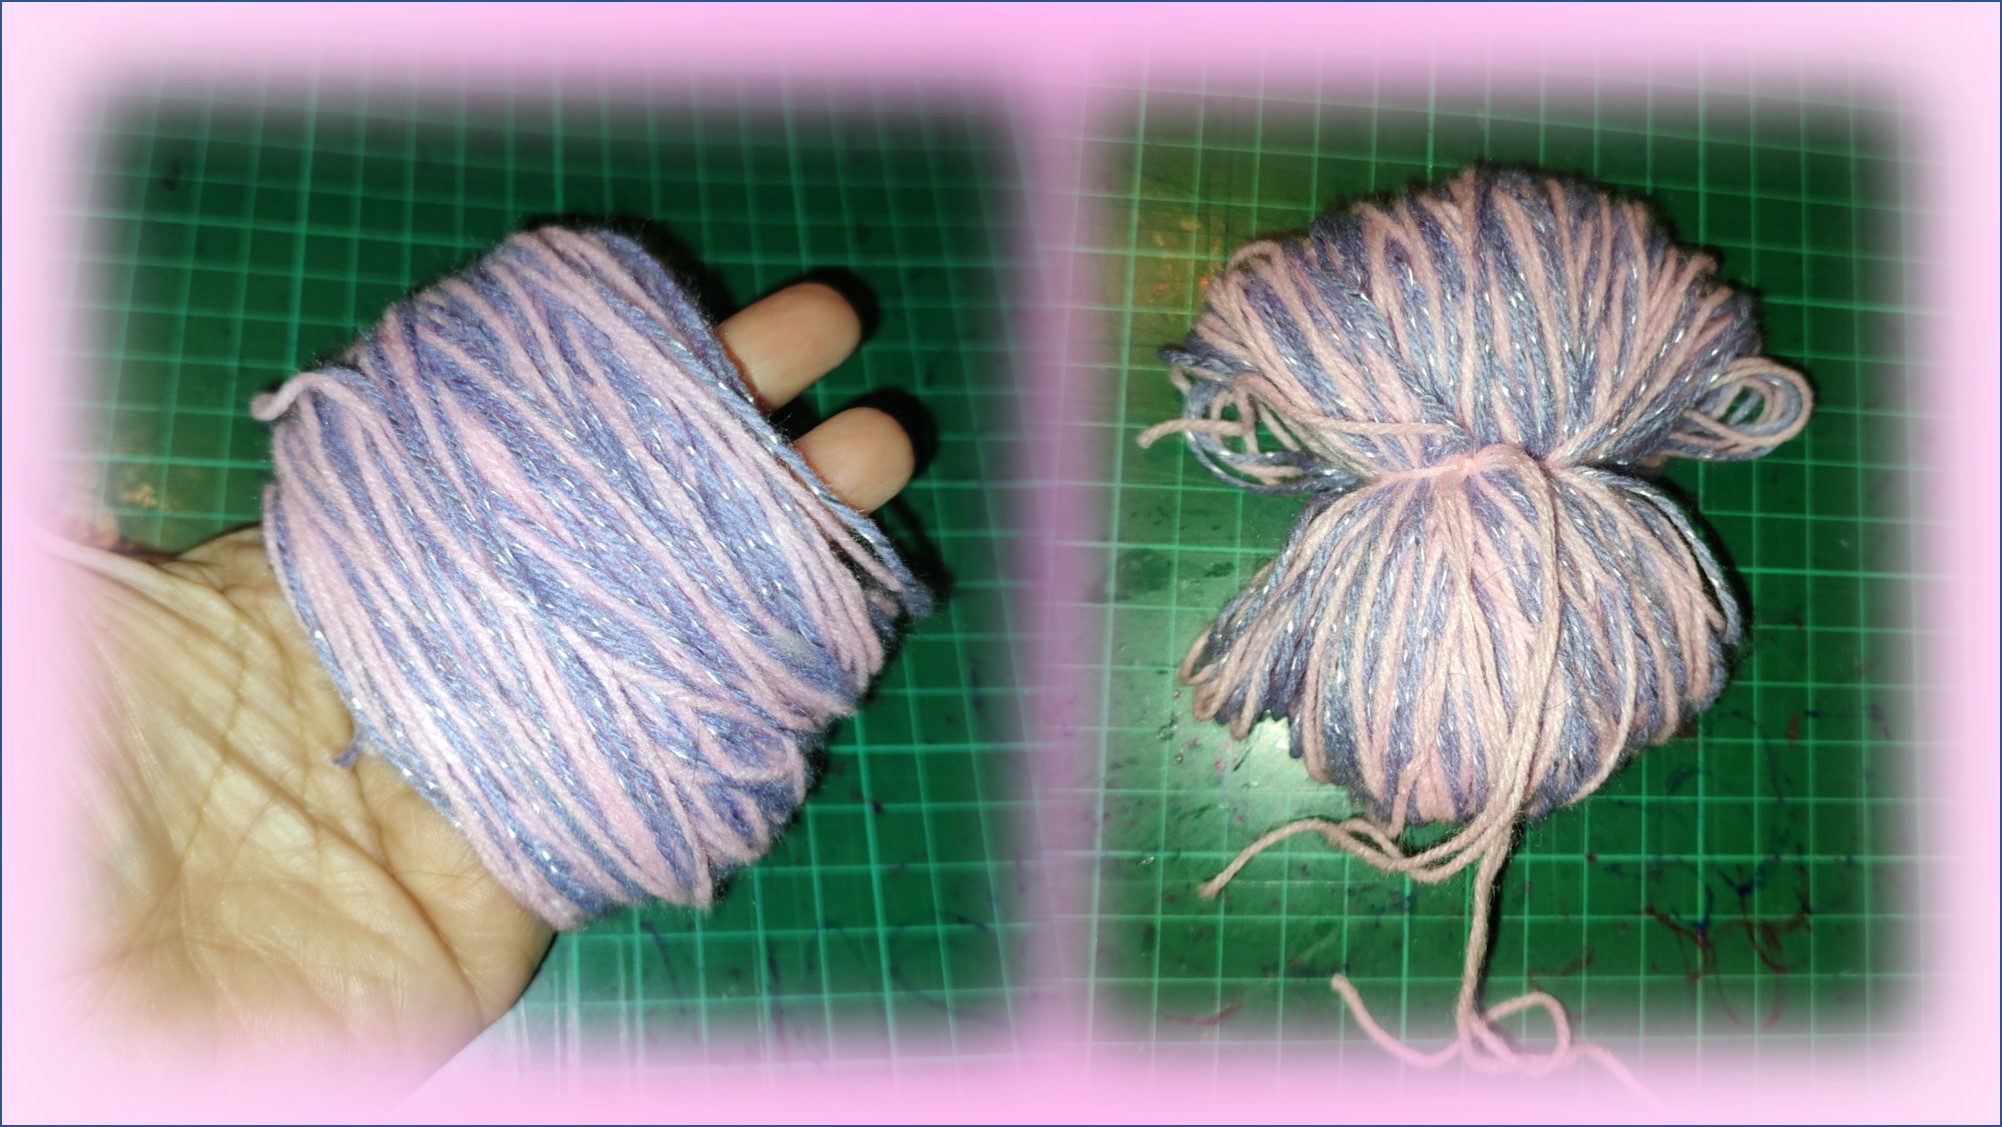

Bueno iniciaremos trabajando con lo que necesitamos para armar el cuerpecito del erizo, para ello lo primero que hice, fue tomar estambre de color lila y rosado y con ambas hebras le di 180 vueltas alrededor de los cuatro dedos de mi mano, como les muestro en la figura. Seguidamente, con otra hebra de estambre amarre muy bien, por la mitad, la madeja que había realizado, para luego dejarla de un lado para usarla después.
Well, let's start working with what we need to assemble the little body of the hedgehog, so the first thing I did was to take lilac and pink yarn and with both strands I gave it 180 turns around the four fingers of my hand, as I show in the figure. Then, with another strand of yarn, I tied the skein that I had made very well in the middle, and then I left it on one side to use it later.

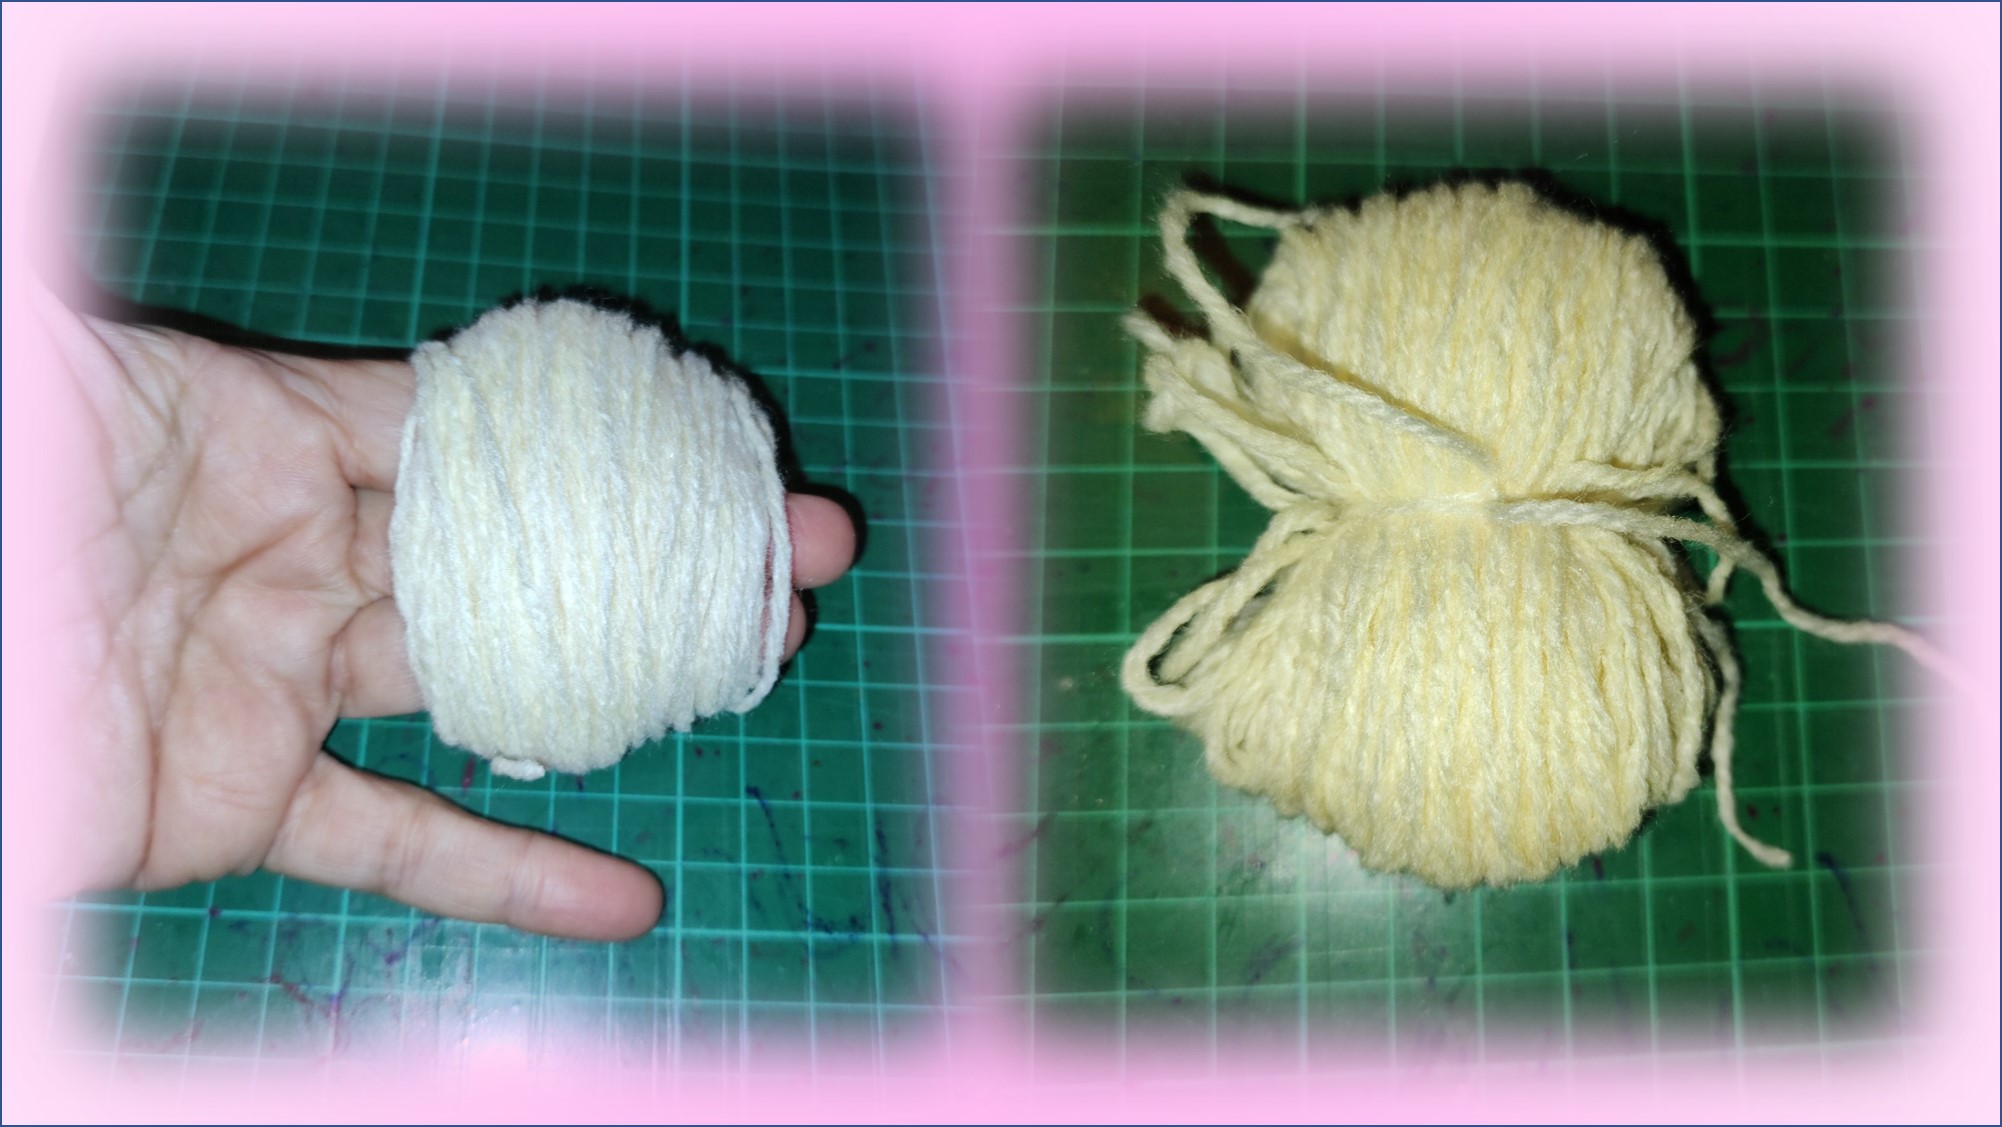

Ahora, necesitamos realizar una segunda madeja, esencialmente, el procedimiento es el mismo que les acabo de explicar. La única variación, es que ahora, usare solo una hebra de estambre blanco y la envolveré alrededor de solo 3 de mis dedos, porque necesito que sea más pequeña.
Now, we need to make a second skein, essentially, the procedure is the same as I just explained. The only variation is that now, I will use only one strand of white yarn and wrap it around only 3 of my fingers, because I need it to be smaller.

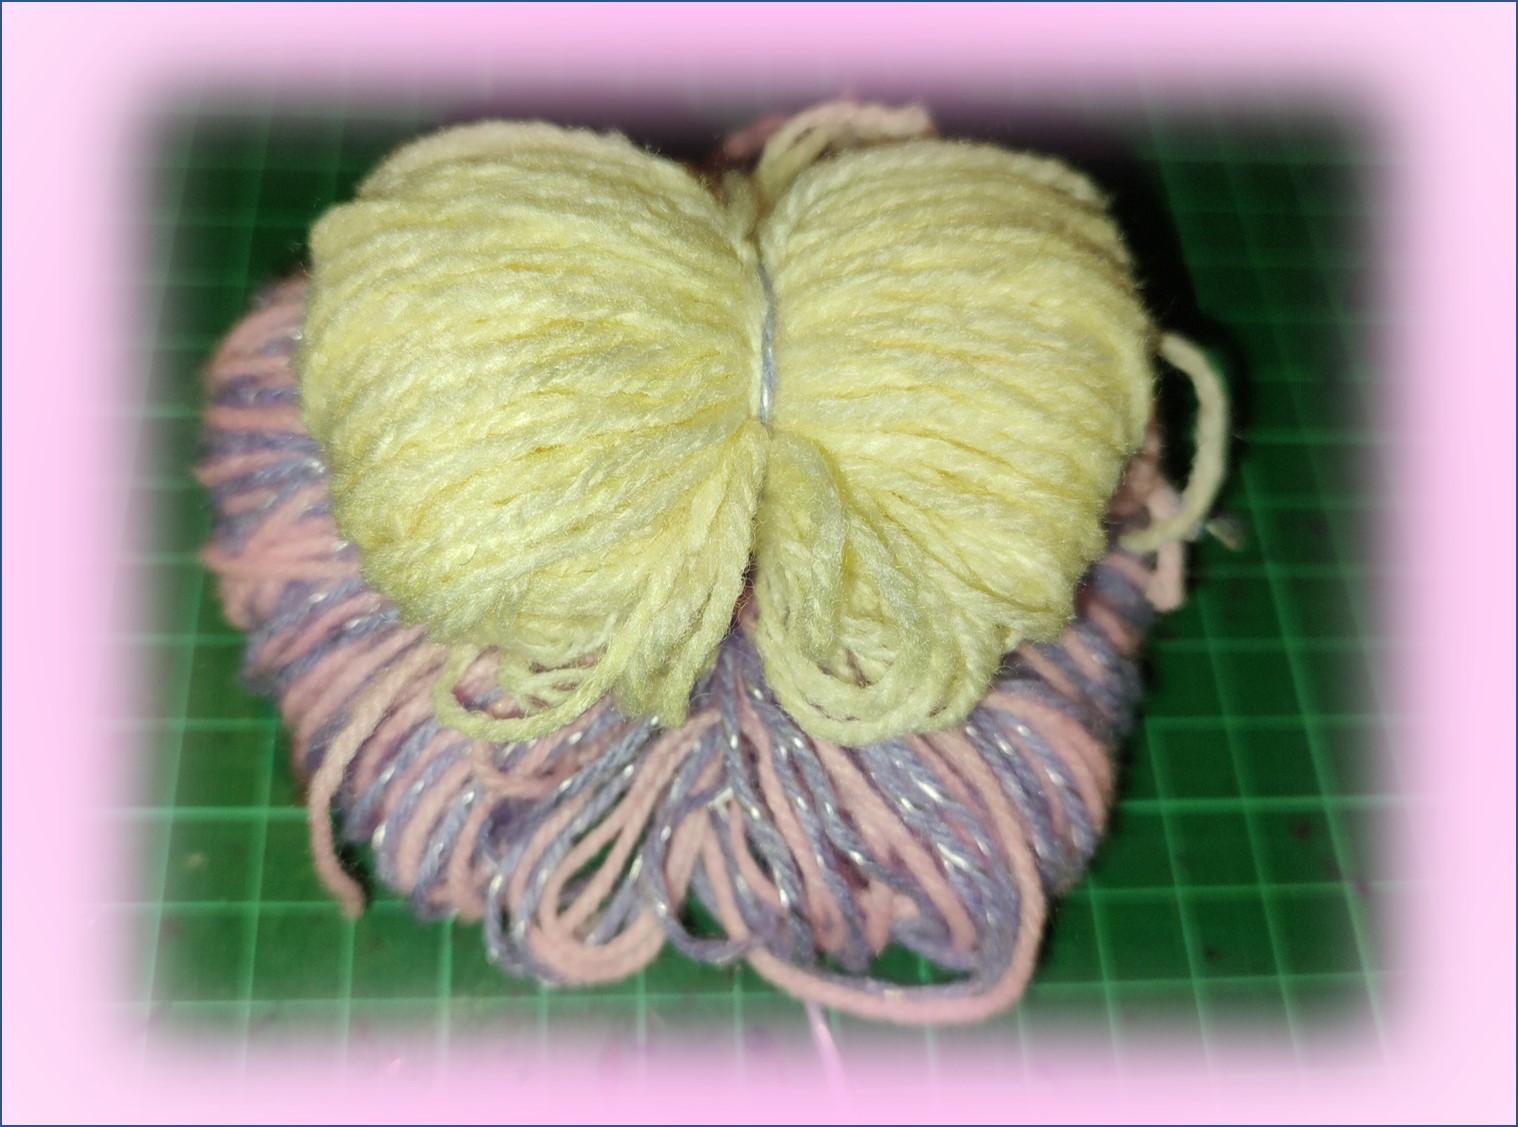

Es el momento de unir las 2 madejas de estambre que hemos armado, como pueden observar en las imágenes, es súper sencillo de hacer. Simplemente, colocamos una sobre la otra y utilizaremos el mismo hilo sobrante que nos quedó, al amarrar cada, para unirlas muy bien, para que no se suelten.
It is time to join the 2 skeins of yarn that we have assembled, as you can see in the pictures, it is very easy to do. We simply place one on top of the other and we will use the same leftover yarn that was left when we tied each one, to join them very well, so that they do not come loose.

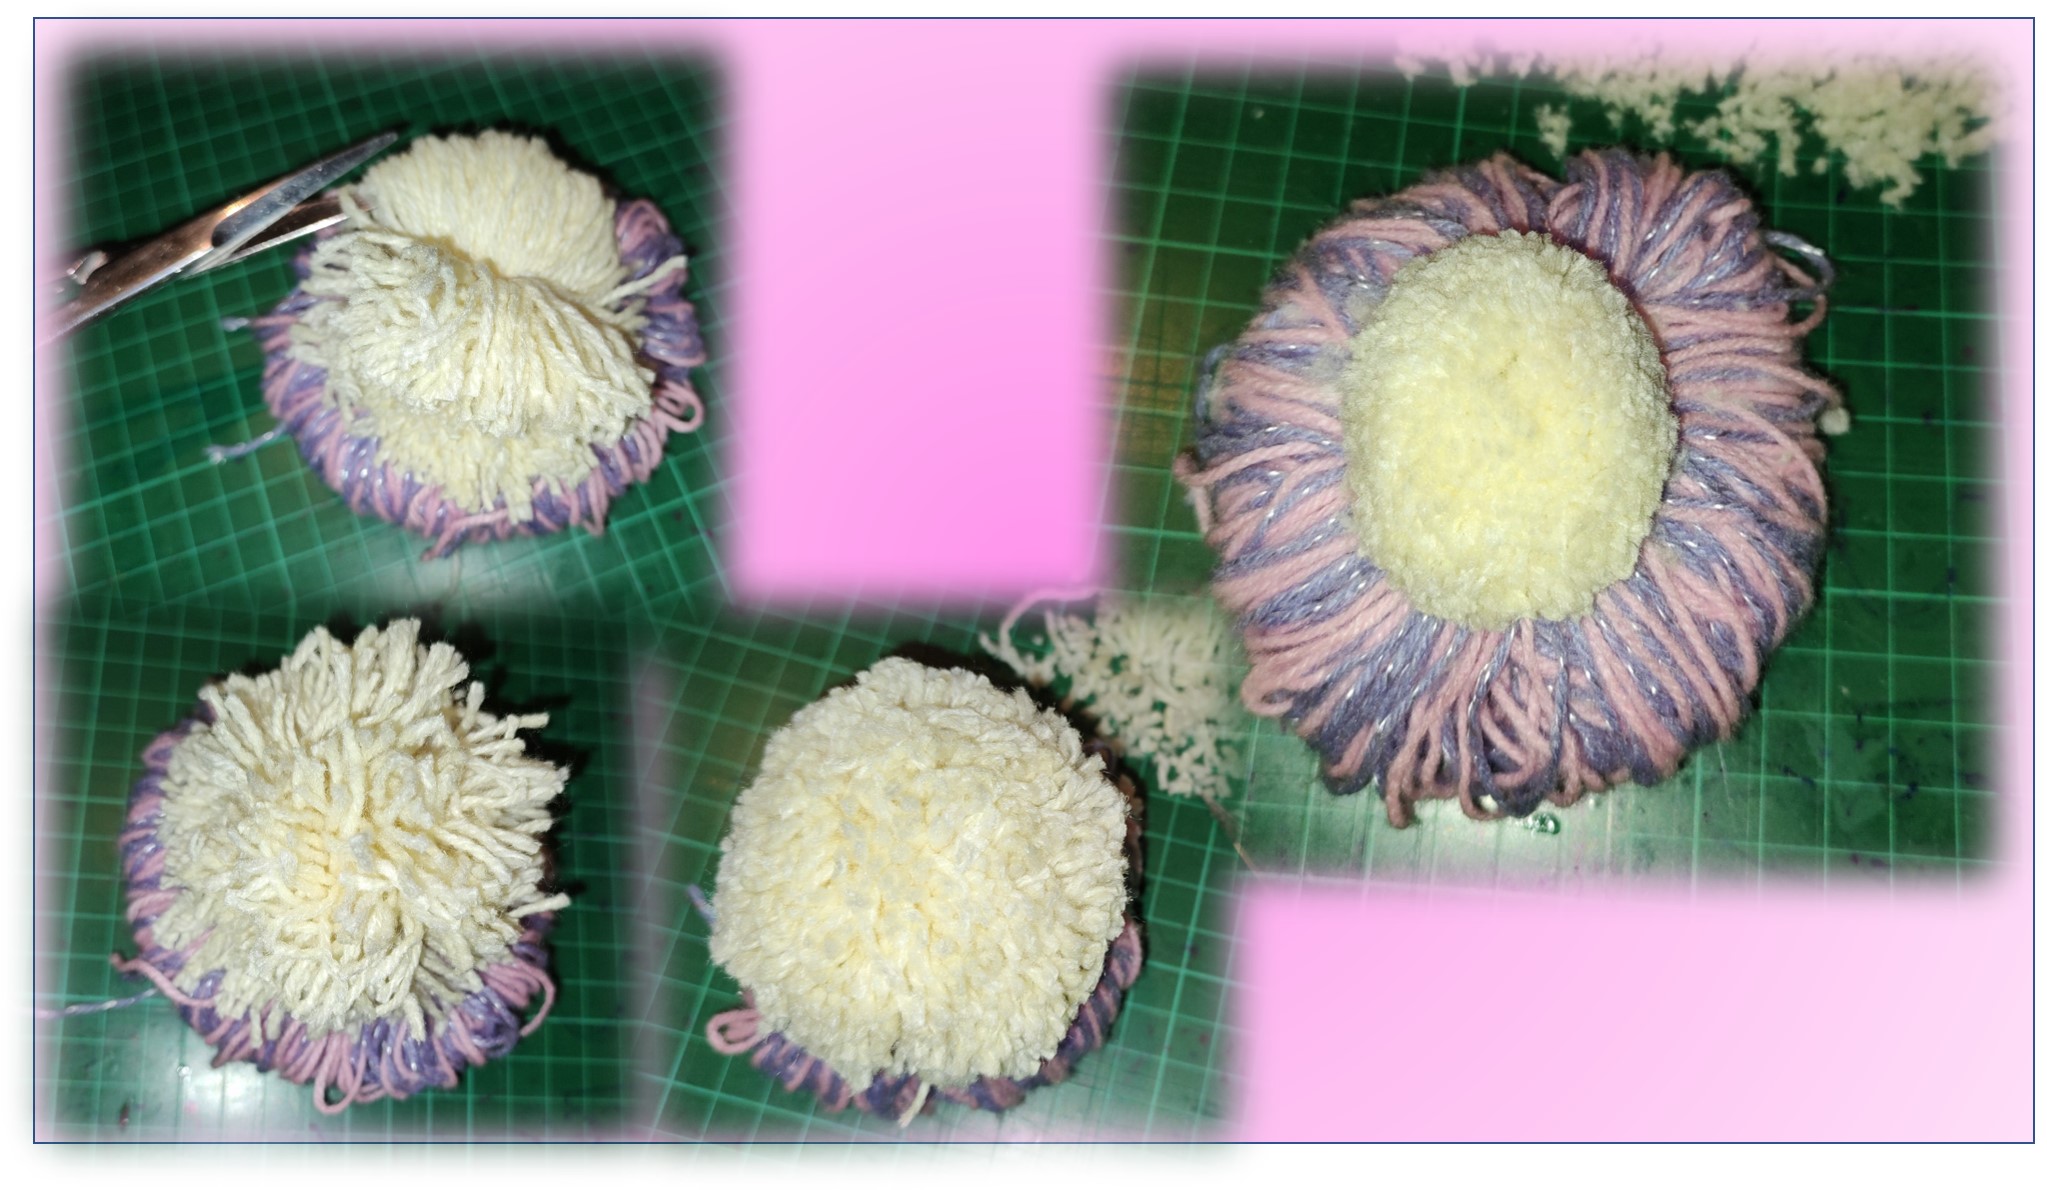

Como paso siguiente, le daremos forma, solo a la madeja de color blanco, para ello primero con la tijera cortamos las hebras de estambre para separarlas. Luego con cuidado poco a poco, vamos a ir dándole forma hasta que les quede más o menos como ven en la imagen que les comparto.
As a next step, we will give shape only to the skein of white color, for this first with the scissors we cut the strands of yarn to separate them. Then carefully little by little, we will shape the skein until it looks more or less as you can see in the image I share with you.

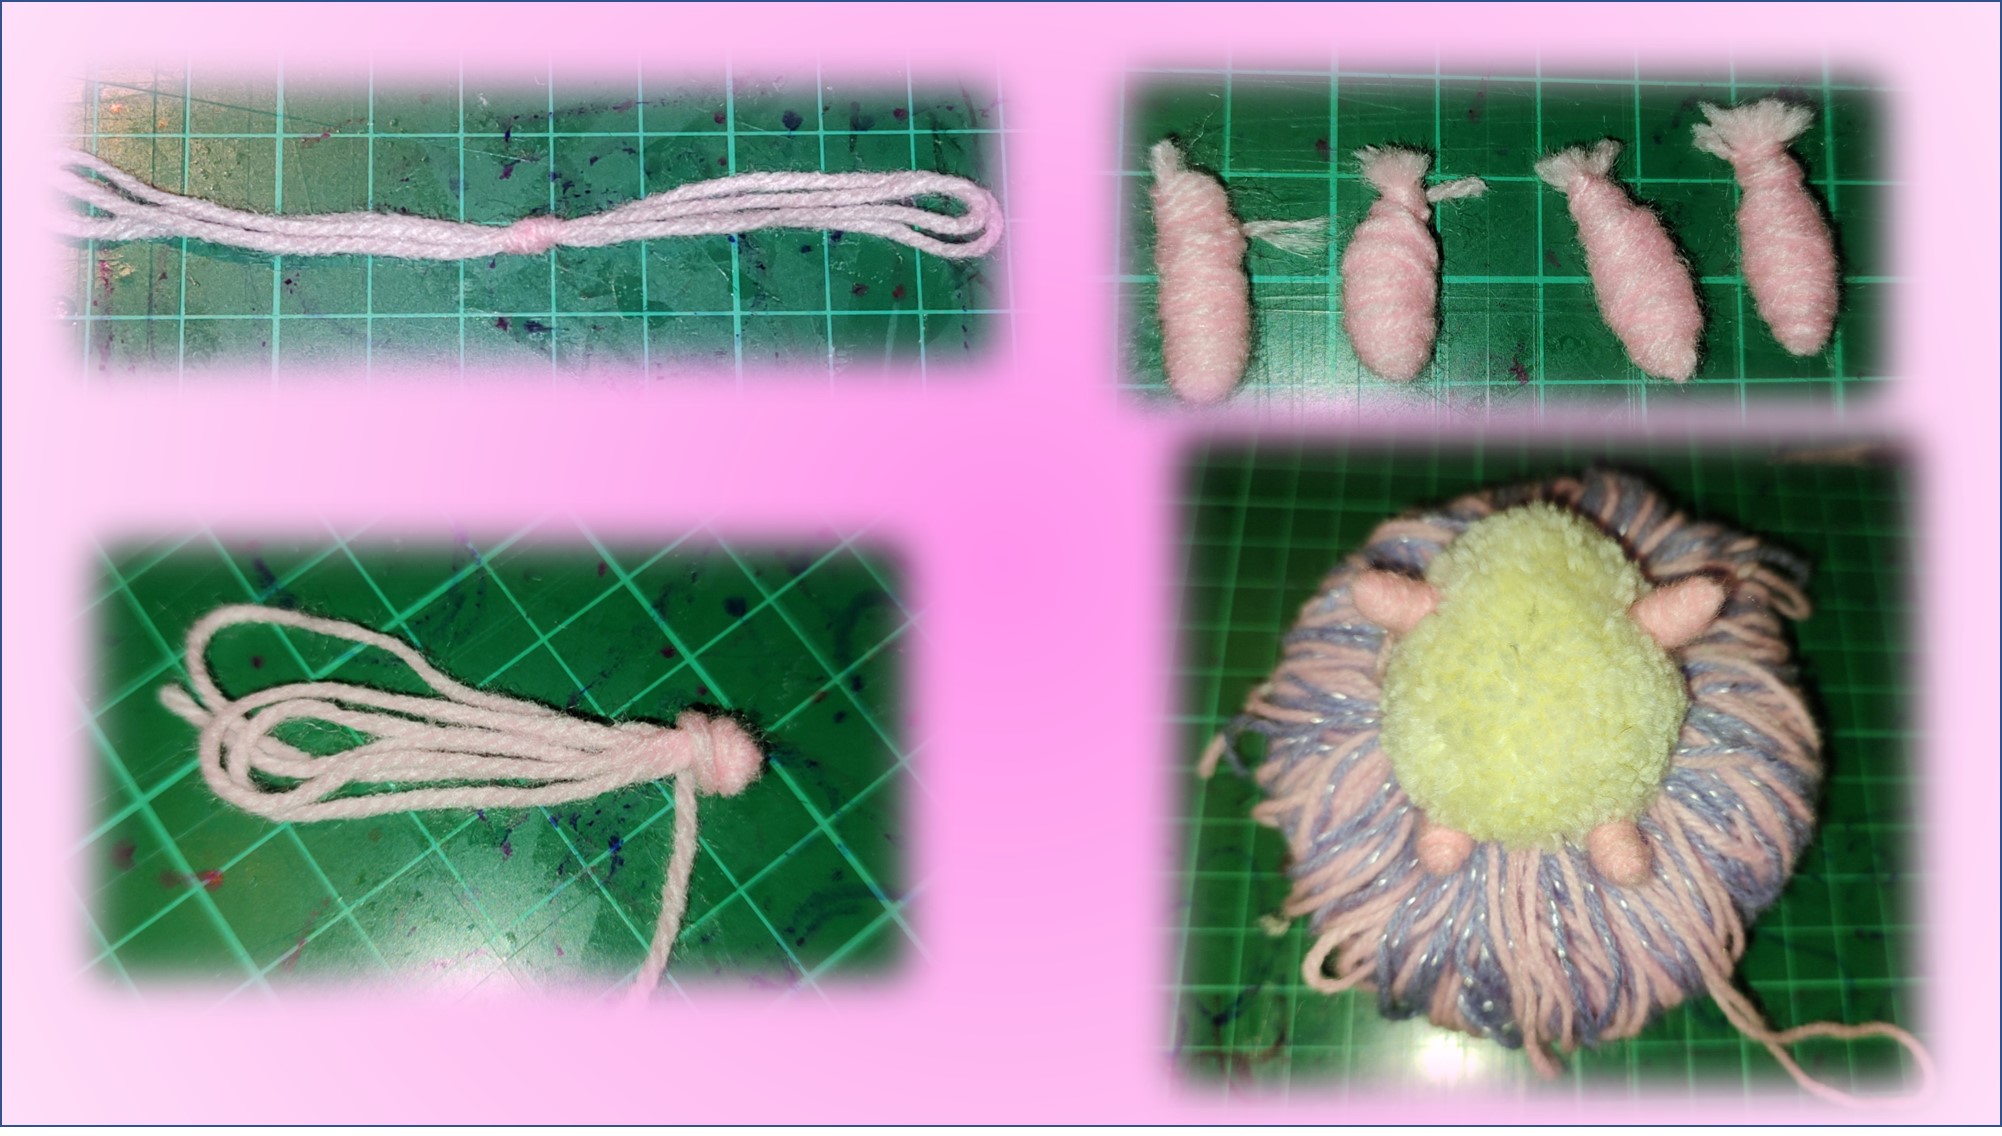

Tenemos que hacer las patitas, decidí hacerlas de color rosado, tome una hebra larga de color rosado y la doble en 4. Luego realicé un nudo, justo en la mitad y lo doble dejando el nudo en uno de los extremos. Seguidamente, tomé el extremo de la hebra que aún estaba unido a la madeja de hijo y comencé a enrollarla alrededor de las hebras que había anudado. Y como pueden ver en la imagen, después de repetir el mismo proceso 3 veces más, así quedaron las 4 patitas del erizo. Lo siguiente, consistió simplemente en pegarlas al cuerpo del erizo con pegamento.
We have to make the little legs, I decided to make them pink, I took a long pink strand and folded it in 4. Then I made a knot, right in the middle and folded it leaving the knot in one of the ends. Next, I took the end of the strand that was still attached to the skein of son and started wrapping it around the strands that I had knotted. And as you can see in the picture, after repeating the same process 3 more times, this is how the 4 little legs of the hedgehog looked like. Next, I simply glued them to the hedgehog's body with glue.

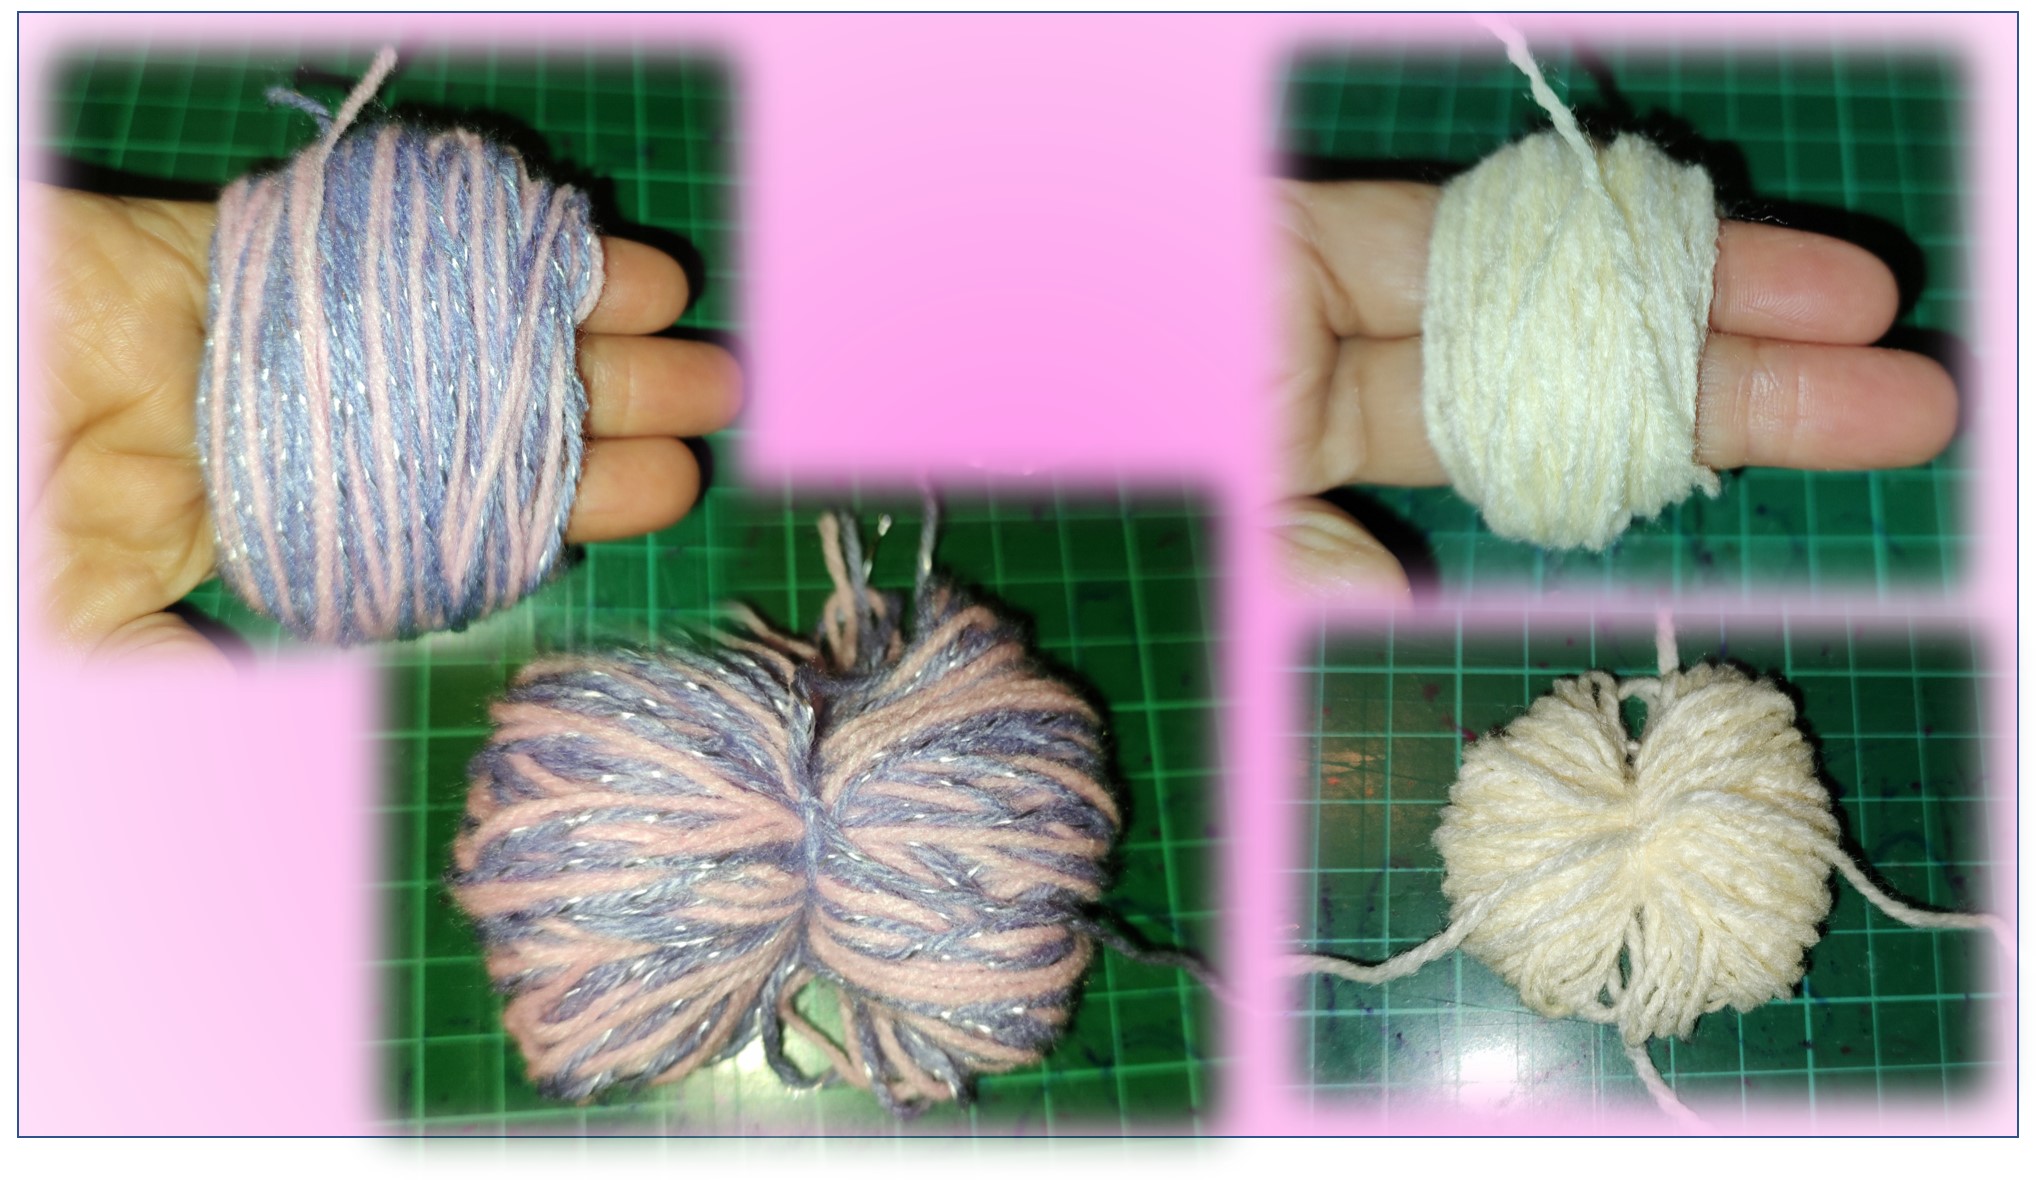

Llego el momento de elaborar la cabeza del erizo, el proceso es el mismo que realicé para el cuerpo, solo, que en este caso la madeja que armaré con los estambres color lila y rosado, la realizaré enrollando 180 veces el estambre solo por 3 de mis dedos. Esto hará que la madeja quede más pequeña. Repetiré lo mismo con el estambre de color blanco, pero en este caso usaré solo dos de mis dedos.
Now it is time to make the head of the hedgehog, the process is the same that I did for the body, only, in this case the skein that I will make with the lilac and pink stamens, I will make it by winding the yarn 180 times only by 3 of my fingers. This will make the skein smaller. I will repeat the same with the white yarn, but in this case, I will use only two of my fingers.

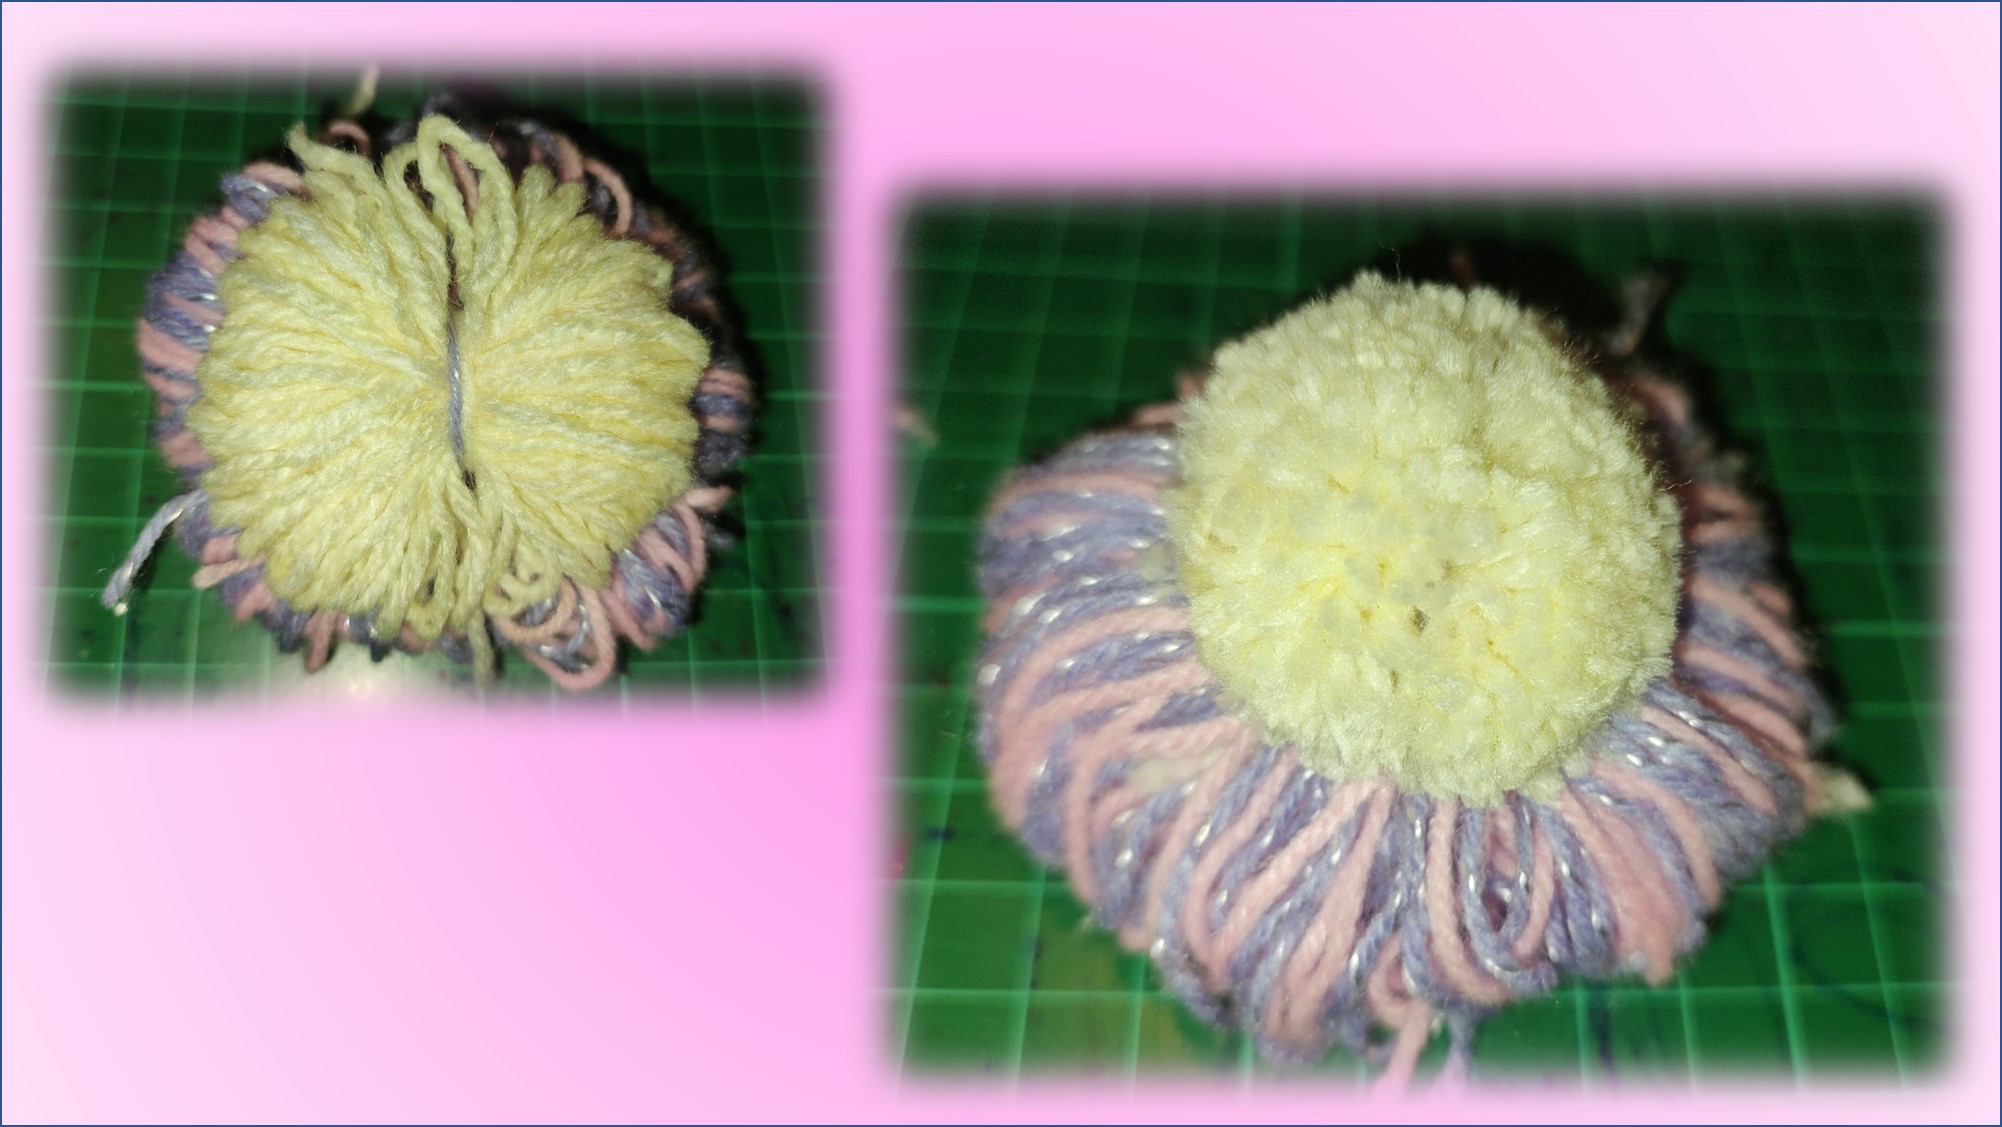

Después, igual que en el caso del cuerpo del erizo, simplemente, uní las dos madejas y me quedó de la misma forma que el cuerpo, pero, más pequeño. Seguidamente, con la tijera le di forma solo a la madeja de color blanco, dejándola, como les muestro en la imagen.
Then, as in the case of the body of the hedgehog, I simply joined the two skeins and it was the same shape as the body, but smaller. Then, with the scissors I shaped only the white skein, leaving it as shown in the image.

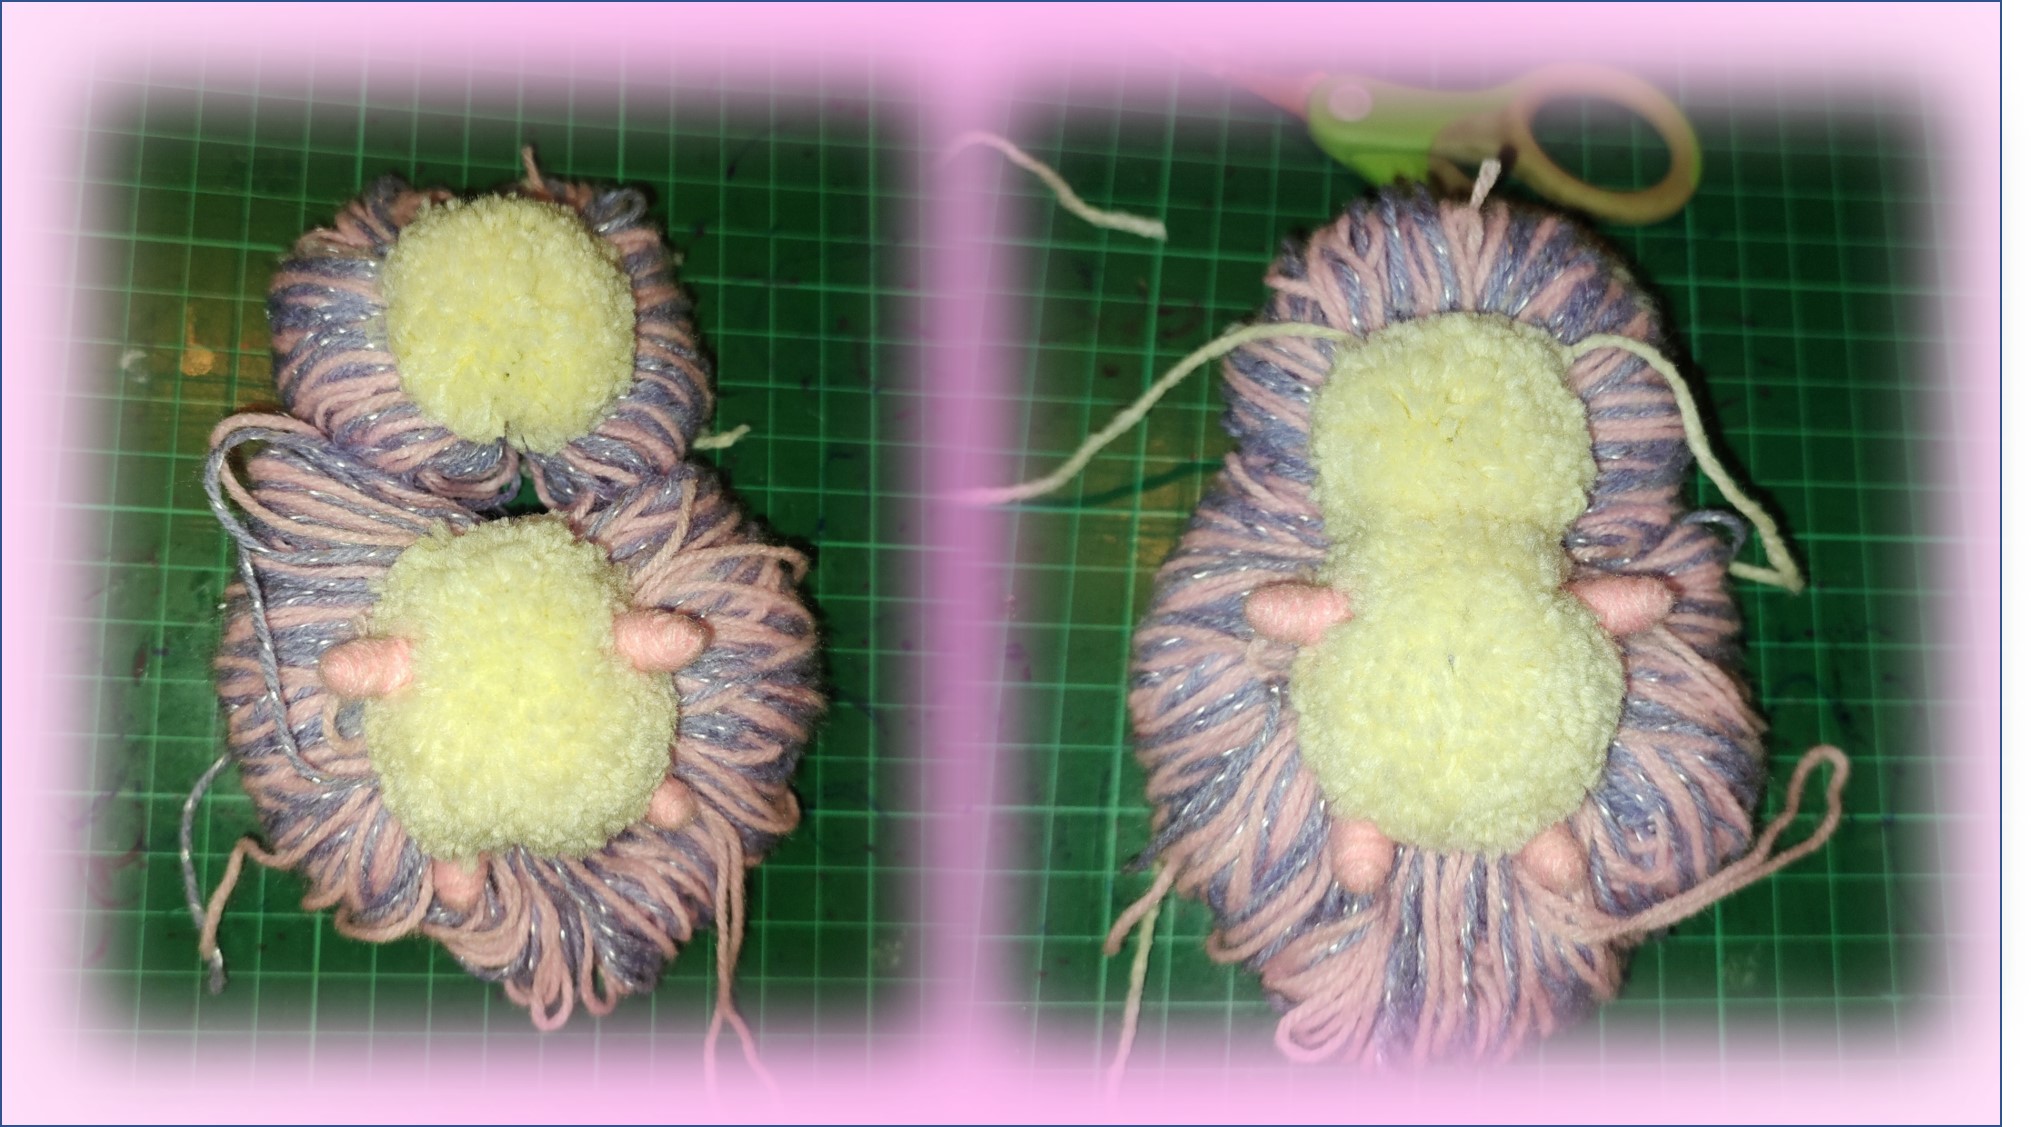

Con la parte superior e inferior del erizo listas, ahora corresponde unirlas, esto lo hice pasando una hebra de estambre alrededor de las dos uniones de las madejas del cuerpo y de la cabeza y las aseguré muy bien. Con eso ya tenia armado completo el erizo, ahora faltaba colocarle los últimos detalles restantes al pequeño animalito.
With the top and bottom of the hedgehog ready, now it is time to join them together, I did this by passing a strand of yarn around the two joints of the skeins of the body and head and secured them very well. With that, I had the hedgehog complete, now I had to put the last remaining details to the little animal.

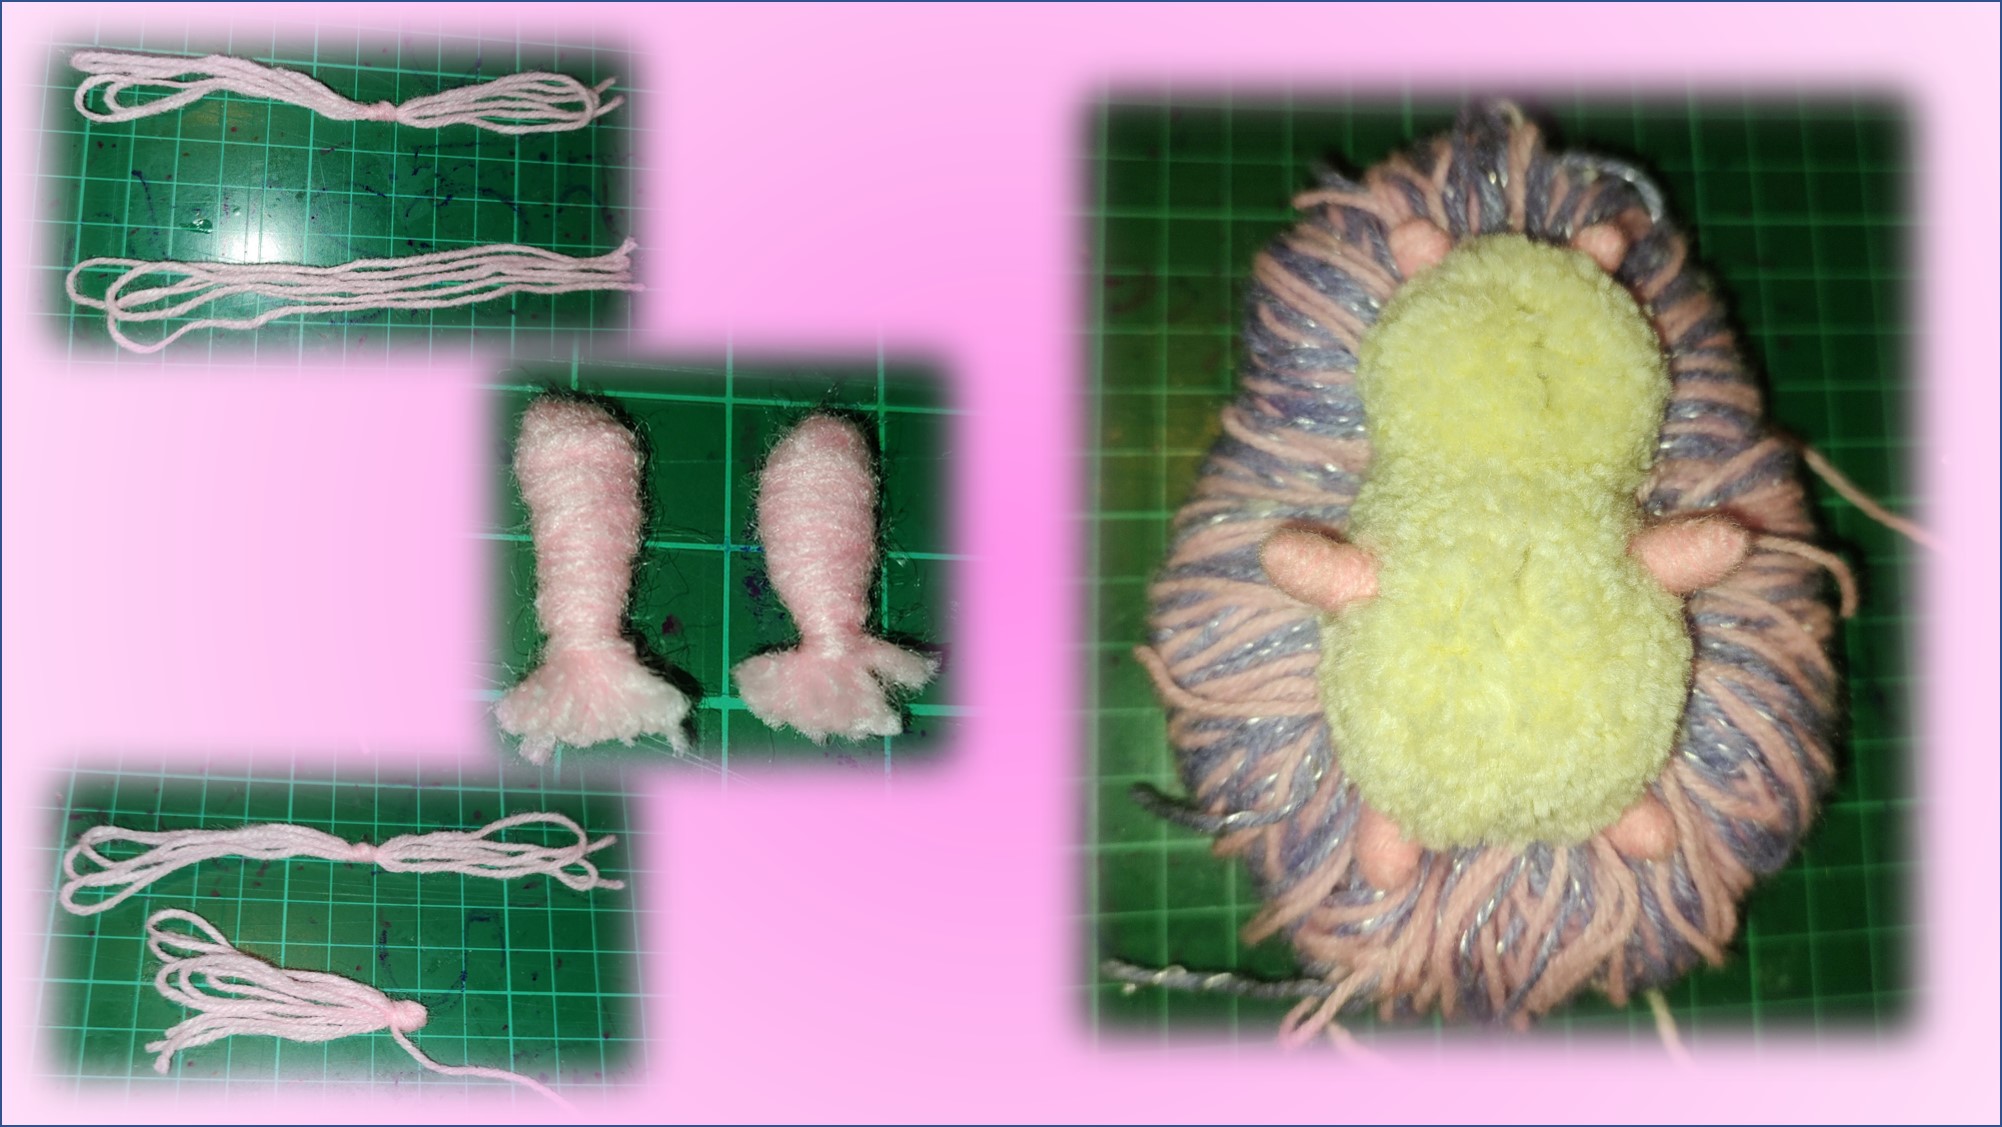

Para elaborar las orejitas del erizo, seguí el mismo procedimiento que utilicé para realizar las patitas.
To make the hedgehog's ears, I followed the same procedure I used to make the paws.

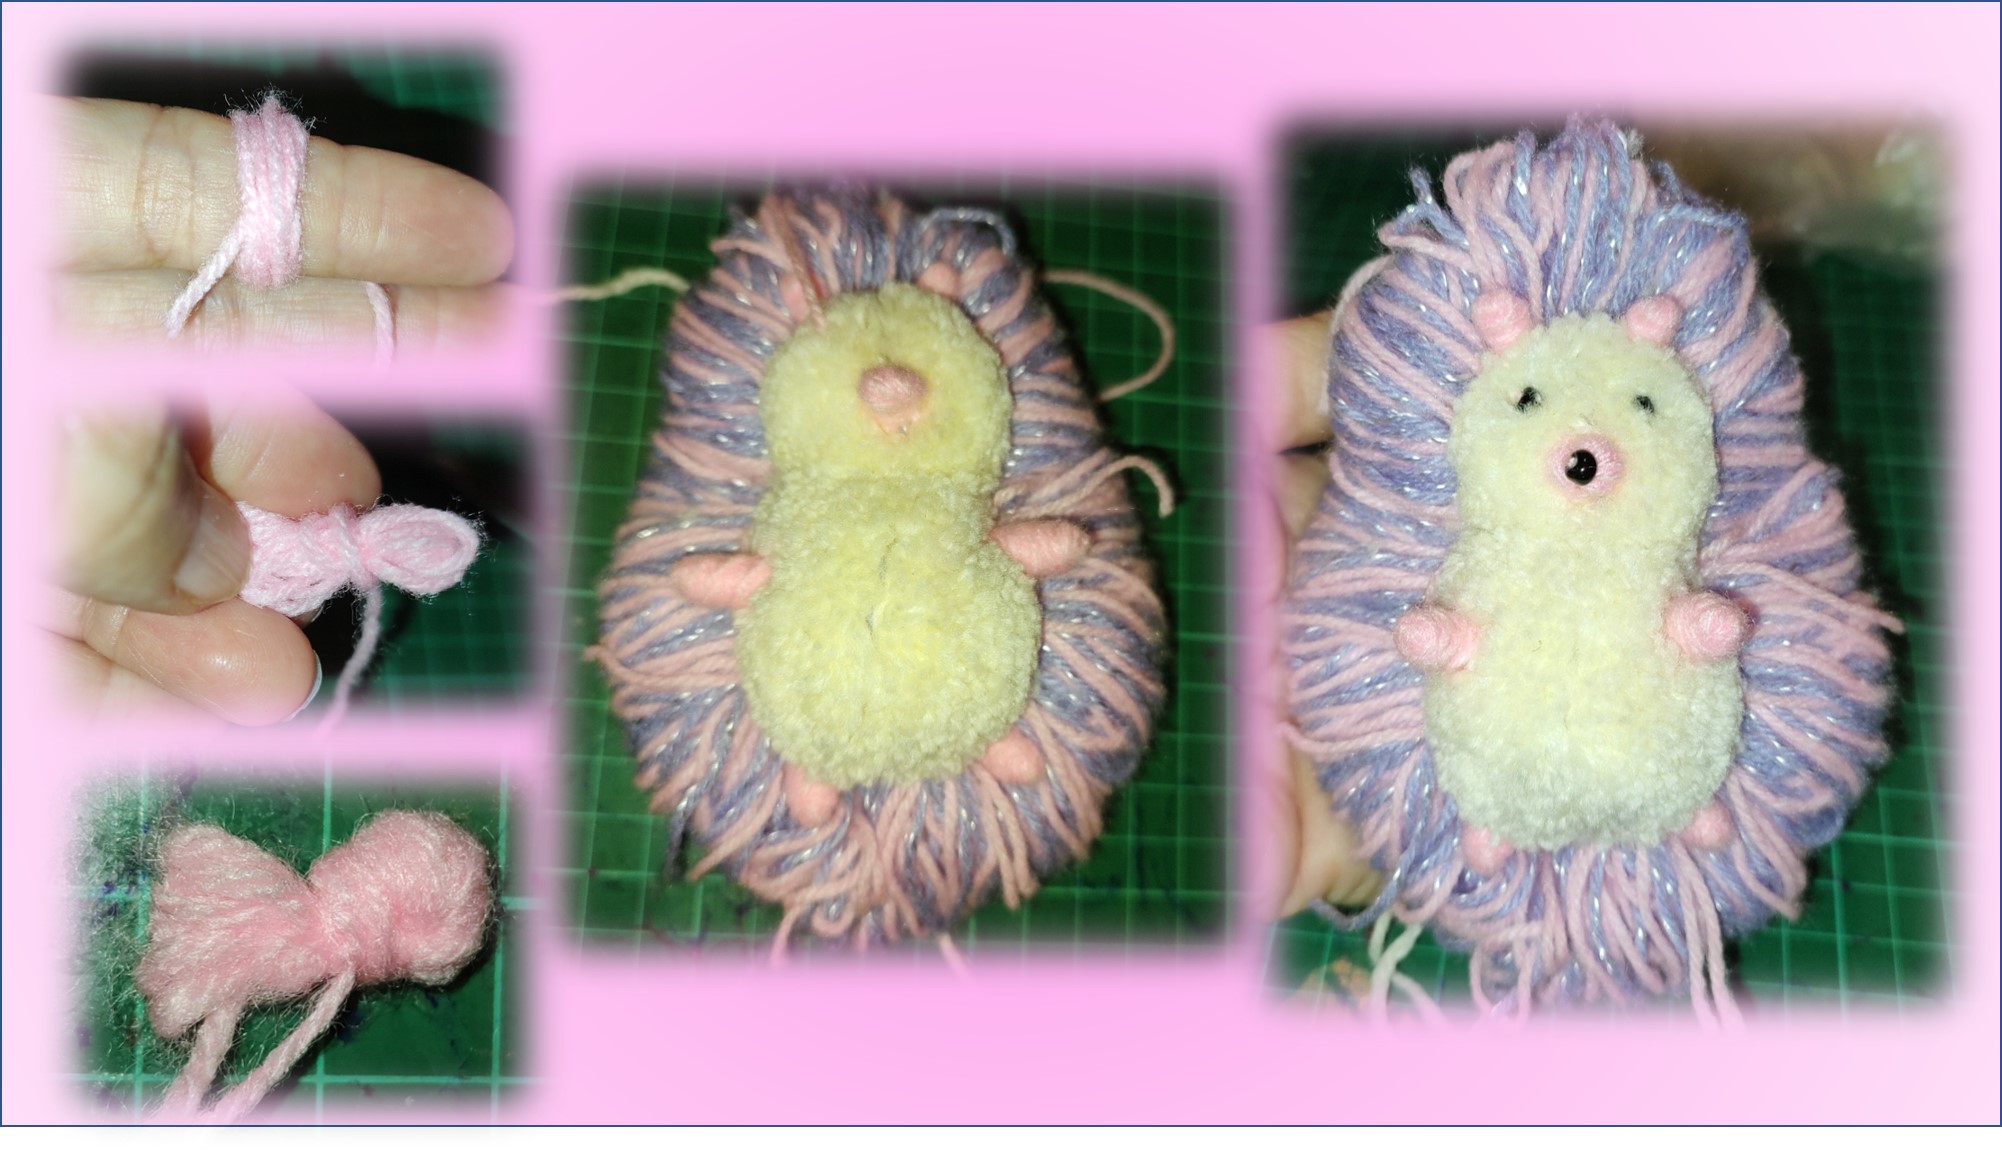

En el caso del hocico realicé una pequeña madejita, de la misma forma que realicé todas las anteriores, solo que, en este caso, una vez terminada la doble a la mitad y luego la envolví con una hebra del mismo color rosado. Después, recorté el exceso de hilo y finalmente la fijé a la cara del erizo cosiéndola. Para completar la cara, coloqué los canutillos en el lugar correspondiente a los ojitos y por supuesto, coloqué una en el centro del hocico para simular la nariz.
In the case of the snout I made a small skein, in the same way I did all the previous ones, only in this case, once finished, I folded it in half and then wrapped it with a thread of the same pink color. Then, I trimmed the excess yarn and finally attached it to the face of the hedgehog by sewing it on. To complete the face, I placed the beads in the place corresponding to the eyes and of course, I placed one in the center of the snout to simulate the nose.

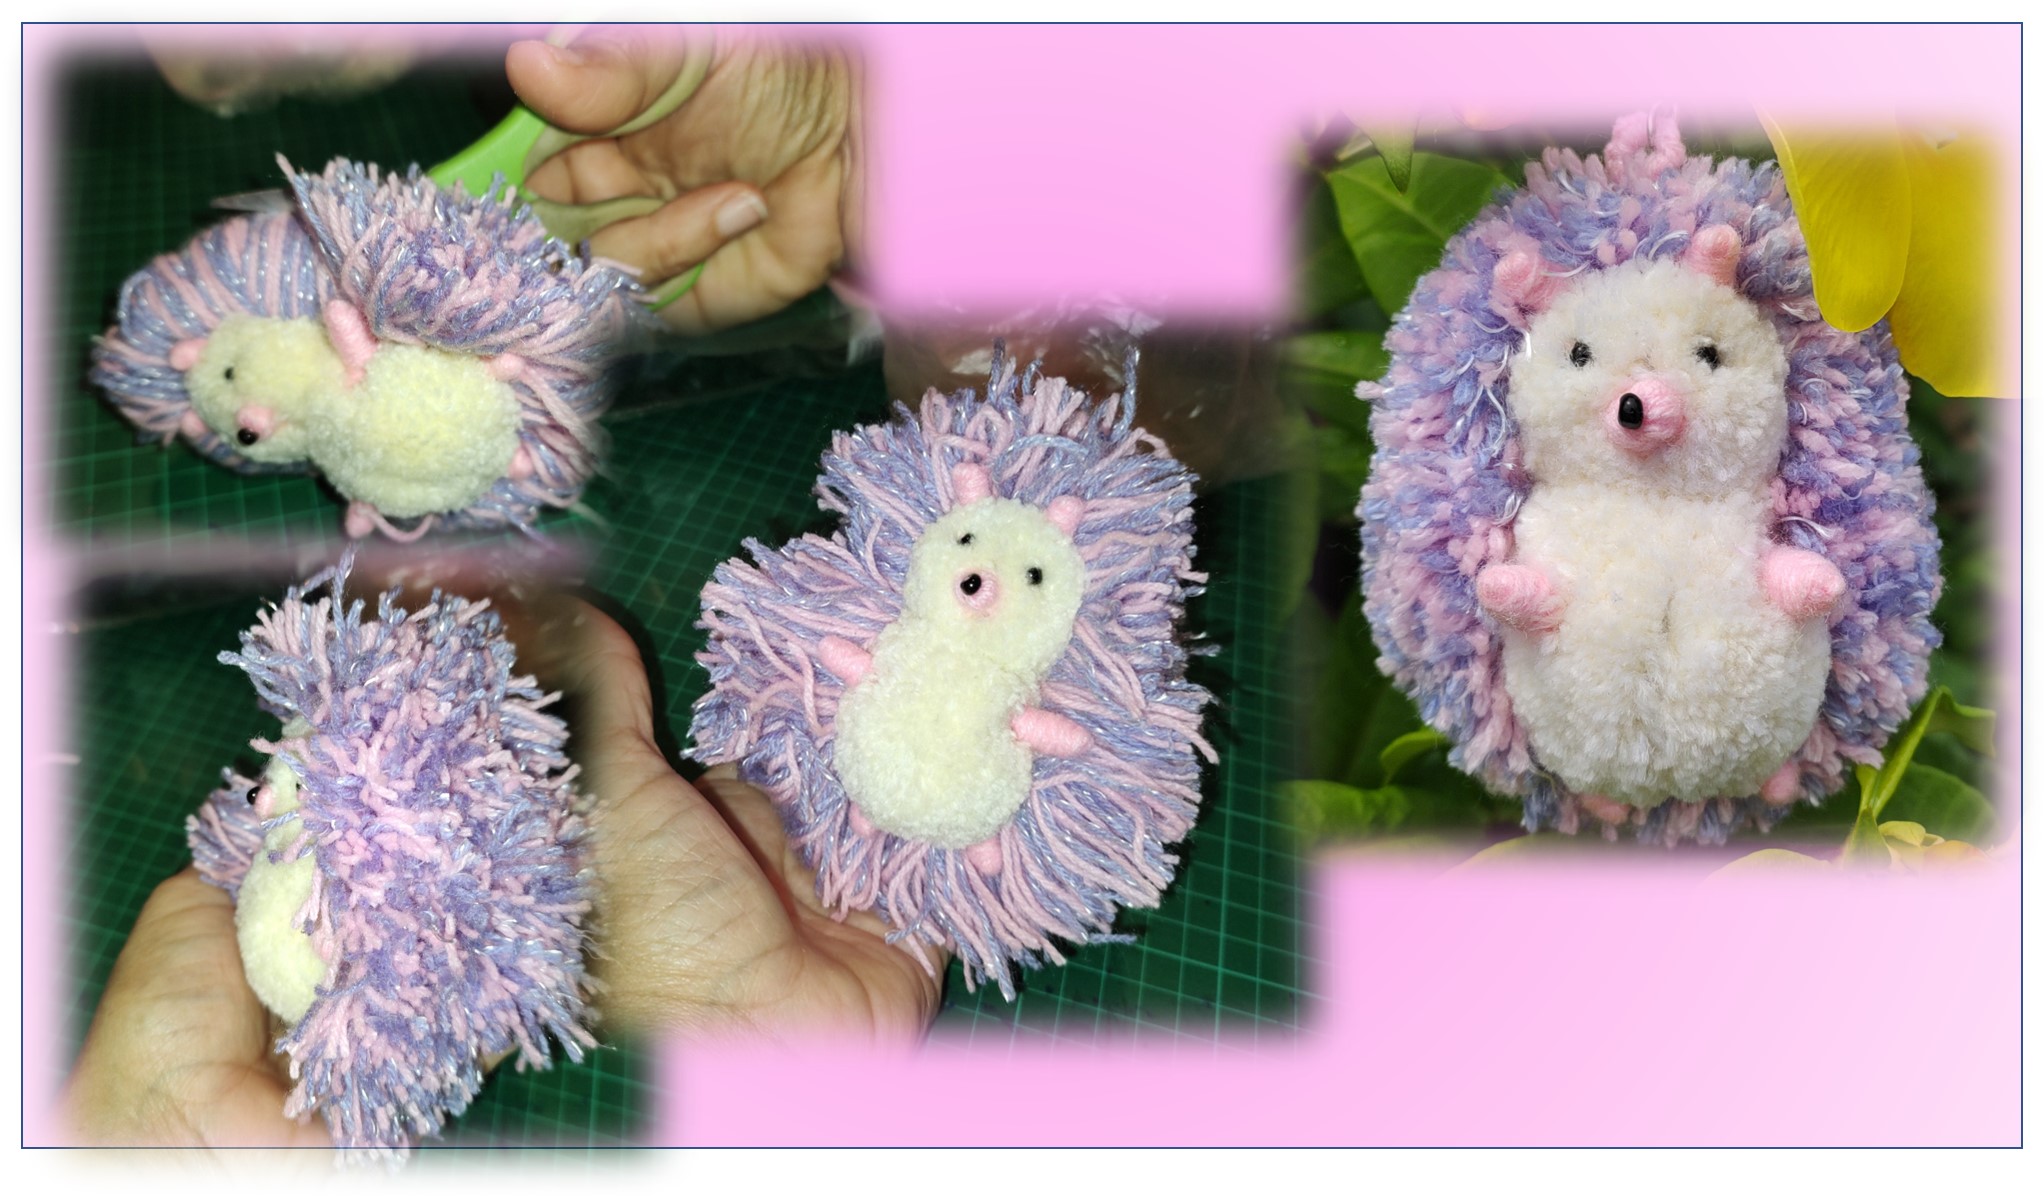

Ok. ya tenemos casi listo el erizo, solo falta cortar y dar forma a las espinas que lo caracterizan, para ello como pueden ver en la imagen, corté las hebras de las madejas que armamos en color lila y rosado. Lo último en hacer fue fijar el llavero, para ello, simplemente cosí el extremo de la cadenita a la cabeza del erizo.
Ok. the hedgehog is almost ready, we just need to cut and shape the spines that characterize it, as you can see in the picture, I cut the strands of the skeins that we made in lilac and pink. The last thing to do was to fix the keychain, for this, I simply sewed the end of the chain to the head of the hedgehog.

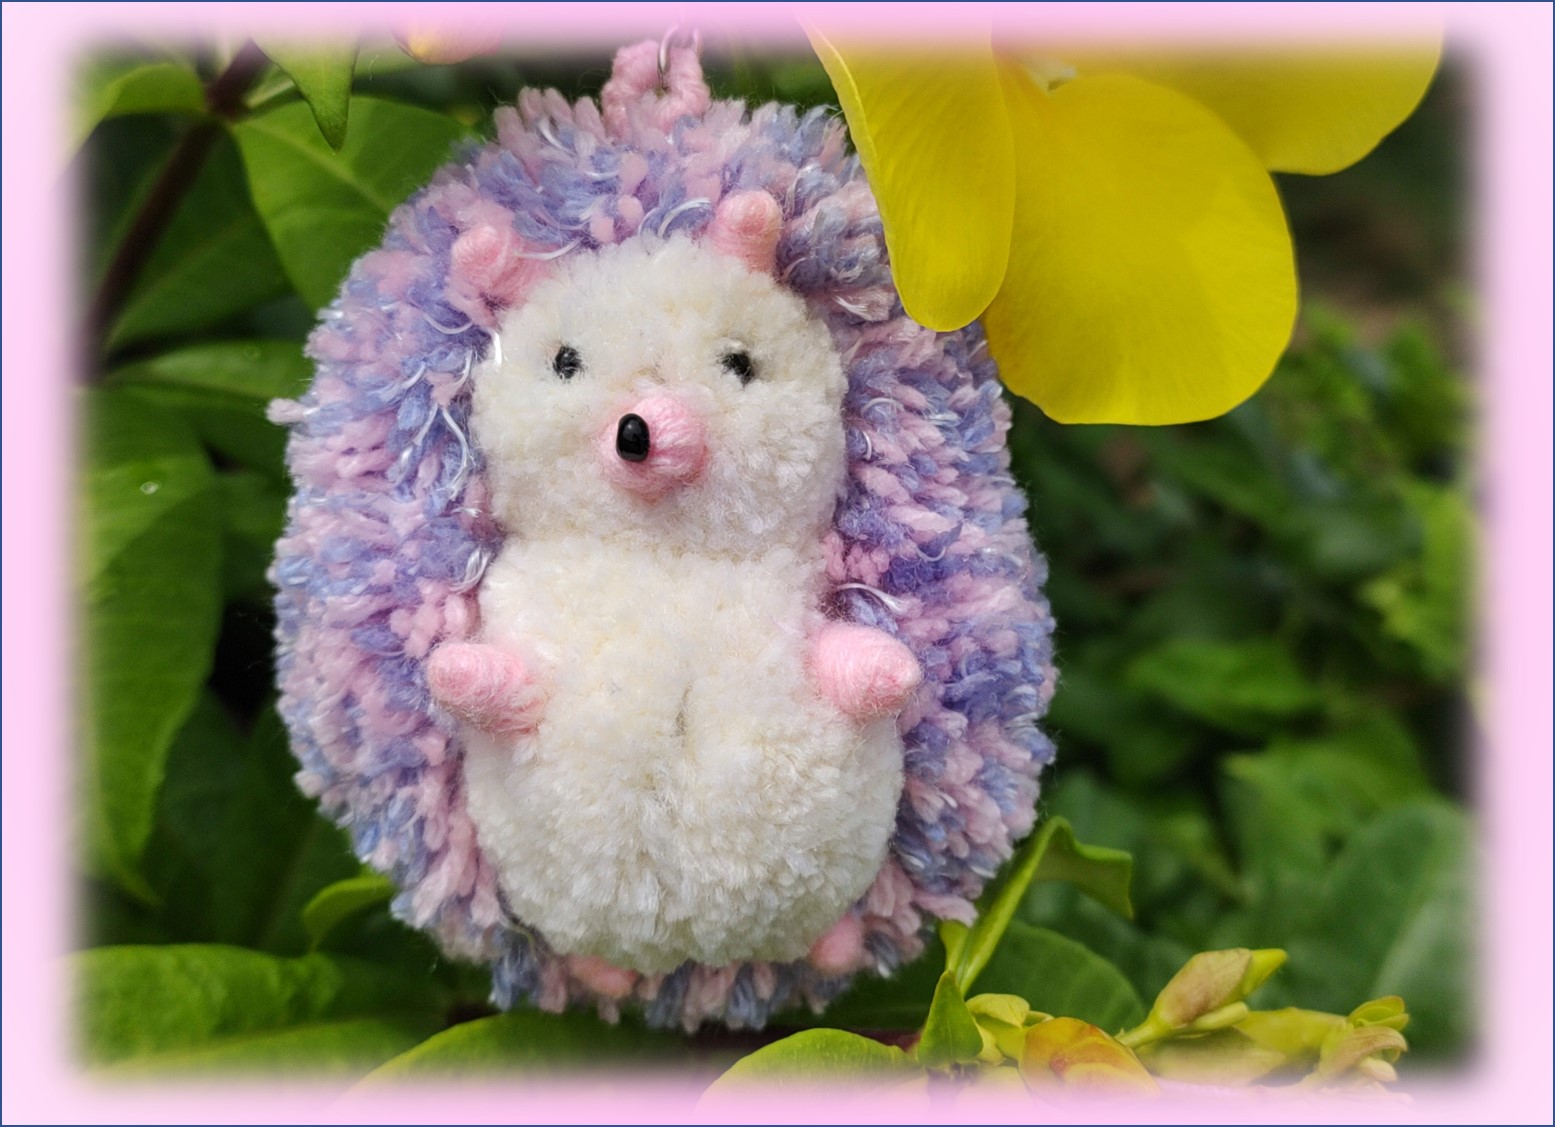

Bueno queridos lectores, hemos llegado al final de este proyecto, mi hija mayor está súper contenta, con su nuevo llavero para colocar en su morral del colegio. Así que, espero que a ustedes también les gustara, esta linda y sencilla manualidad, por ahora los dejo, hasta la próxima, bendiciones para todos.
Well dear readers, we have reached the end of this project, my oldest daughter is super happy with her new keychain to put in her school bag. So, I hope you will also like this cute and simple craft, for now I leave you, until next time, blessings to all.

Contenido y fotografías de mi propiedad intelectual
Información Técnica
| Cámara | Pentax * istDL |
|---|---|
| Lente | * Pentax 18-55 |
| Iluminación | Luz Natural |
| Locación | Barcelona, Estado Anzoátegui, Venezuela |
Content and photographs of my intellectual property
Technical information
| Camera | Pentax * istDL |
|---|---|
| Lens | * Pentax 18-55 |
| Lighting | Natural Light |
| Location | Barcelona, Anzoátegui State, Venezuela |


Esta muy lindo y tierno el llavero, sin duda, es muy usado para decorar los morrales,que bien que pudiste complacer a su hija, debe estar contenta de tenerlo. Bendiciones
Hola bienvenida y agradecida por tu visita. Si, mi princesa está súper contenta con su llavero, están muy de moda, colocarlos en los bolsos y Morrales. Salud y bendiciones para ti y los tuyos 🙏
~~~ embed:1693274795255665091?t=MfTBRPk5rBWnmEXoefiZjQ&s=19 twitter metadata:bWFyaWFybzU3MTU3Mzc1fHxodHRwczovL3R3aXR0ZXIuY29tL21hcmlhcm81NzE1NzM3NS9zdGF0dXMvMTY5MzI3NDc5NTI1NTY2NTA5MXw= ~~~#posh
Muy lindo llavero, me encanto..
Hola, bienvenida 😊 gracias, me alegra mucho que te guste. Salud y bendiciones para ti y los tuyos, feliz inicio de semana 🙏
De lo más cuchi
Gracias 😀 es muy grato saber que te gustó. Salud y bendiciones para ti y los tuyos 🙏. Agradecida por tu visita 😊
Te quedo precioso ese llavero, demasiado cuchi! 🥰!
Muchísimas gracias, que bueno que te gustó. Agradezco tus palabras y visita. Salud y bendiciones para ti y los tuyos 🙏 Feliz inicio de semana 😊
Te quedó hermoso amiga el paso a paso excelente me encantó te felicito feliz noche.
Gracias, gracias ☺️ me alegra muchísimo el saber que te gustó, espero lo intentes realizar, verás que es muy fácil. Salud y bendiciones para ti y los tuyos en esta nueva semana 🙏
Hola amiga porsupuesto me encantó y gracias por traer este paso a paso siii voy a realizarlo se ve muy fácil y Amén por esas bendiciones y buenos deseos son recíprocos un abrazo feliz noche.
Wow
Fantastic....
You have an amazing creative skills dear friend.
Thanks for sharing
Thanks, I'm glad to know you liked it. I appreciate your visit and I wish you health and blessings for you and yours. Happy start of the week 😊
Thanks my dear friend
Nice meeting you
Owww este erizo me ha robado el corazón, le diré a mi hijo para que hagamos uno. Abrazo 🤗
Siiii, es realmente hermoso, que bueno que también te gustó. Espero se diviertan realizándolo. Gracias por la visita y bendiciones para ti y tú hijo.
Saludos...que bello puedo ese llavero para colocar lo en los bolsos escolares
Gracias por tu visita, me alegra mucho que te guste.
Con el apoyo de la familia.
También nos puedes apoyar en nuestro Trail de TopFiveFamily
Si desea delegar HP al proyecto de la Familia del Top Family puedes hacerlo desde aquí: Delegue 5 HP - Delegue 10 HP - Delegue 20 HP - Delegue 30 HP - Delegue 50 HP - Delegue 100 HP.
Gracias por el apoyo, familia 😊
Que esperas para unirte a nuestro trail de curación y formar parte del "proyecto CAPYBARA TRAIL", se despide Capybaraexchange tu casa de cambio, rápida, confiable y segura
Siempre agradecida por el apoyo.