BIENVENIDOS A MI BLOG
ESPAÑOL
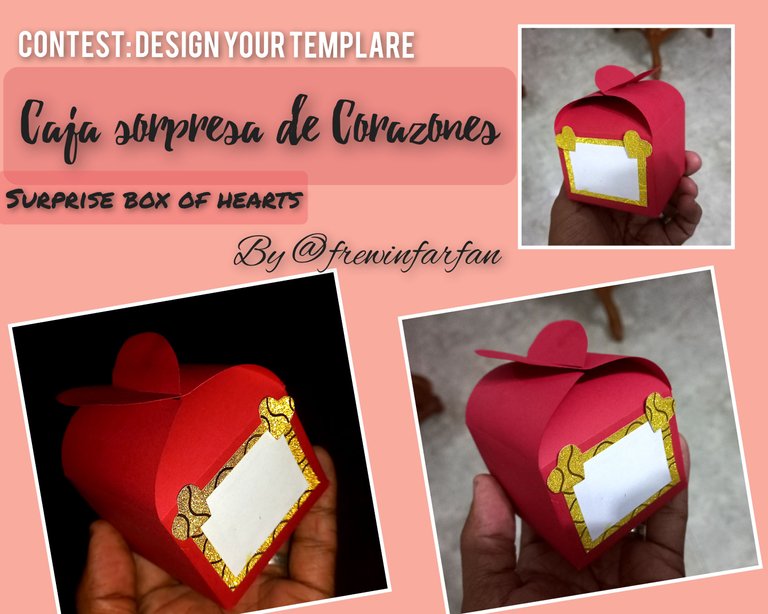
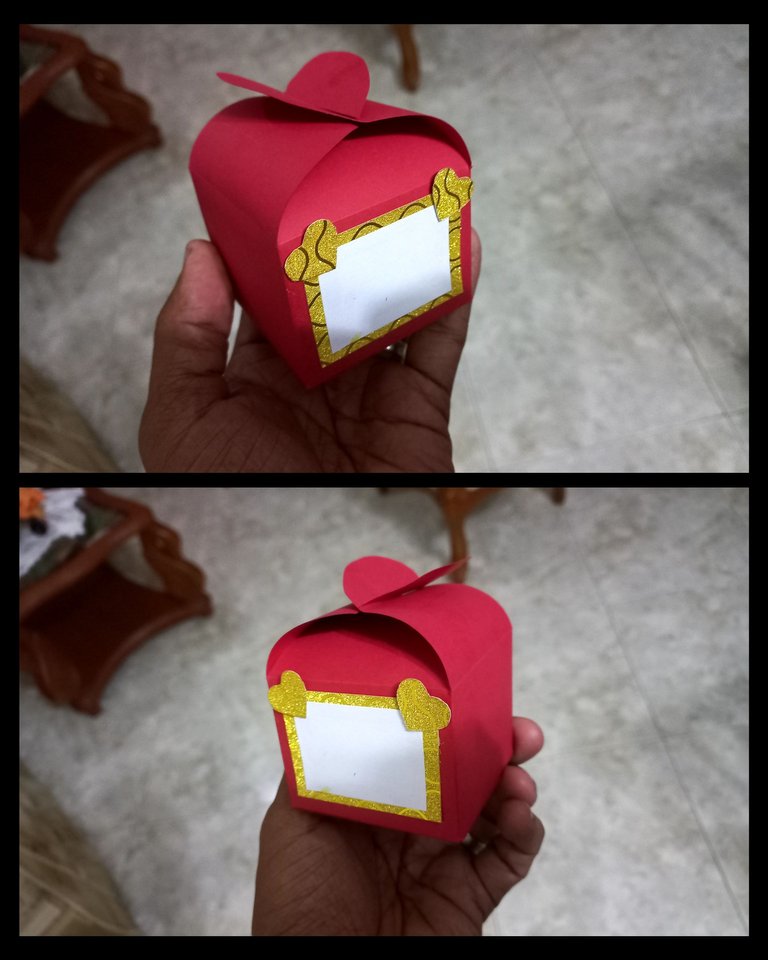
Buenas de nuevo a esta hermosa comunidad de @hivediy, estoy encantado de volver a participar en un concurso de nuestra apreciada comunidad, moderado por nuestro amigo @gaboamc2393, el cual nos invitan a realizar un molde o platilla de una caja de obsequio, en mi caso quize aprovechar la oportunidad y crear una bella caja ideal para obsequiar en estos próximos días como lo es en una fecha tan especial como lo es el día de las madres. Y así demostrarle a esos hermosos seres lo mucho que las queremos y amamos. Me gustaría invitar a la amiga @rosalbaced a unirse a esta maravillosa iniciativa. Espero que sea de su agrado , y me acompañen hasta el final en este pequeño pero productivo tutorial...
ENGLISH
Hello again to this beautiful community of @hivediy, I am delighted to return to participate in a contest of our appreciated community, moderated by our friend @gaboamc2393, which invite us to make a mold or template of a gift box, in my case I wanted to take the opportunity and create a beautiful box ideal for gift in these coming days as it is in such a special date as it is on Mother's Day. And thus show those beautiful beings how much we love and love them. I would like to invite my friend @rosalbaced to join this wonderful initiative. I hope you like it, and join me until the end in this small but productive tutorial...
MATERIALES
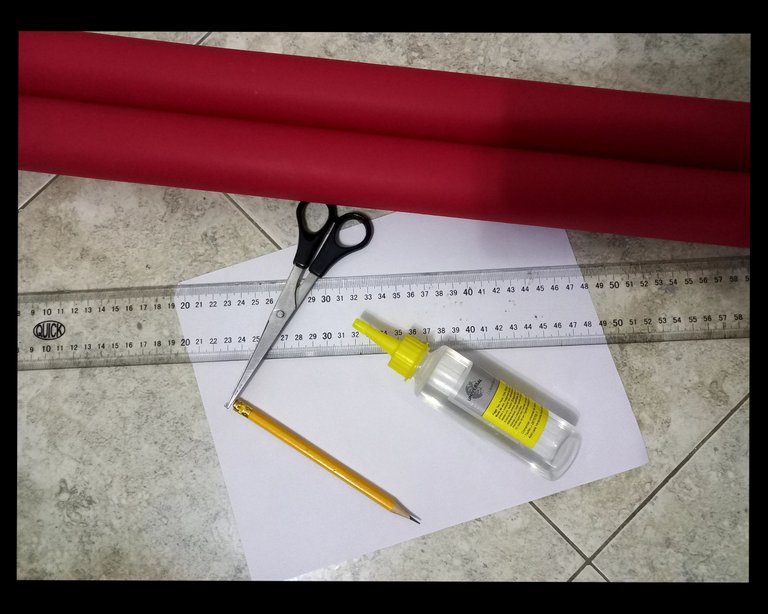
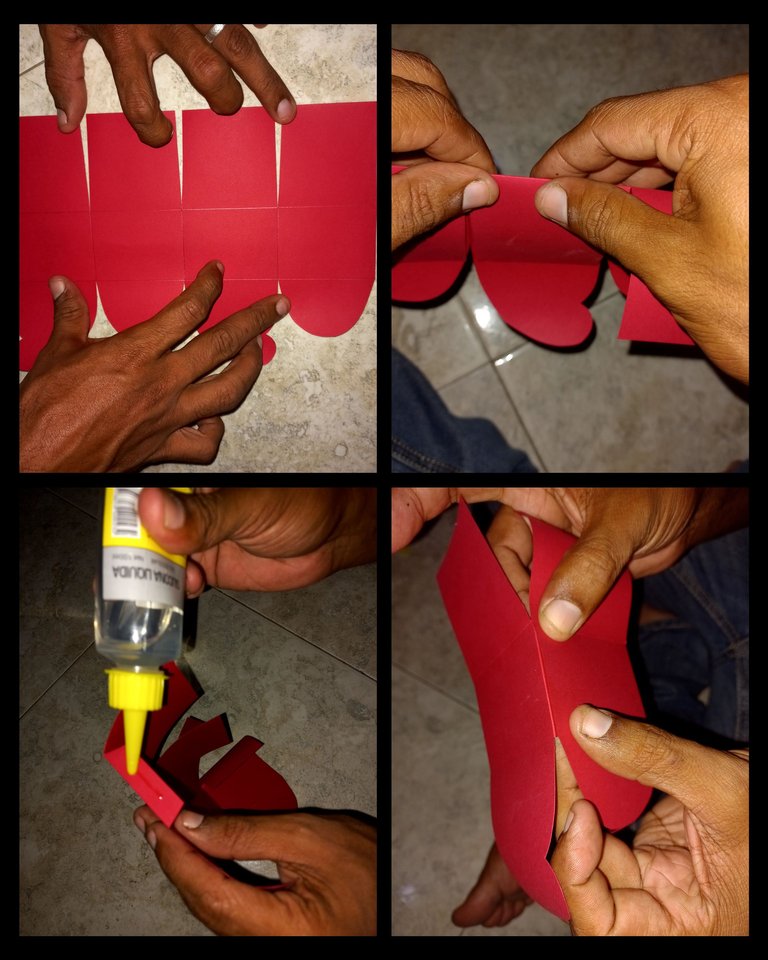
- Cartulina roja
- Tijera
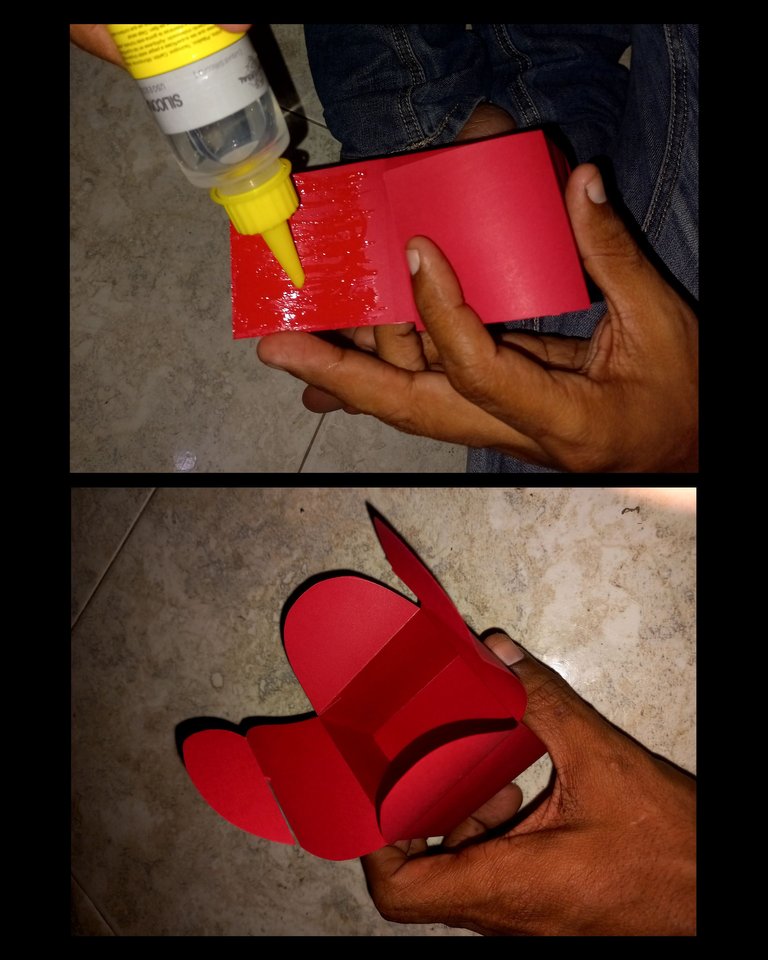
- Silicon liquido
- Regla
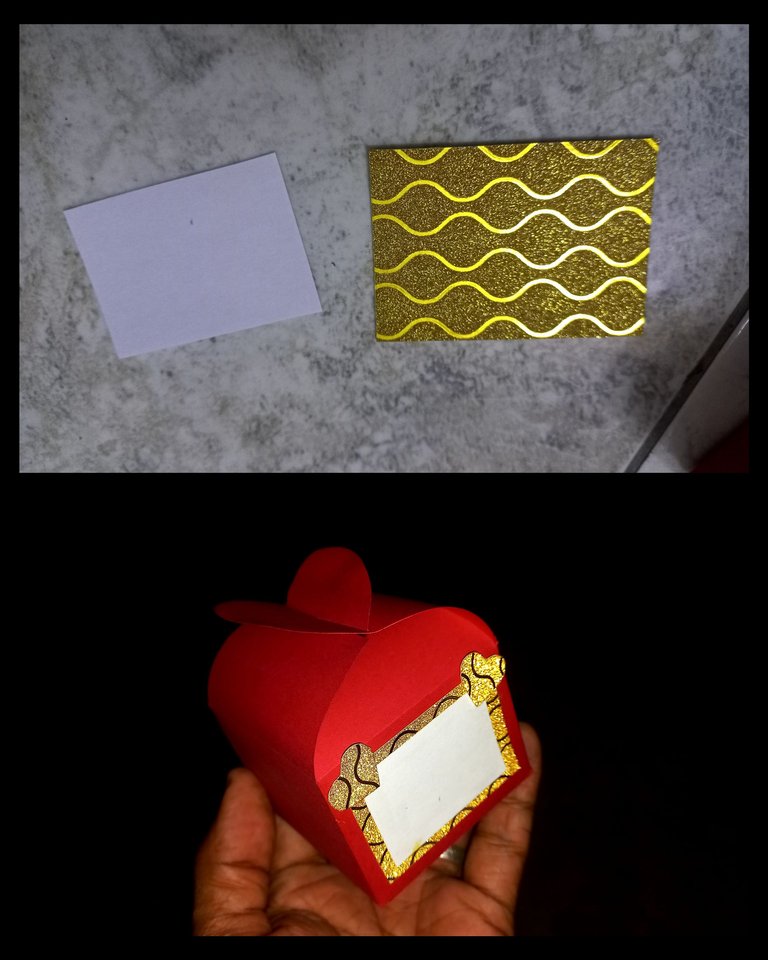
- Hoja blanca
- Lápiz
- Carulina Dorada
MATERIALS
- Red cardboard
- Scissors
- Liquid silicon
- Ruler
- White sheet
- Pencil
- Golden Carulina
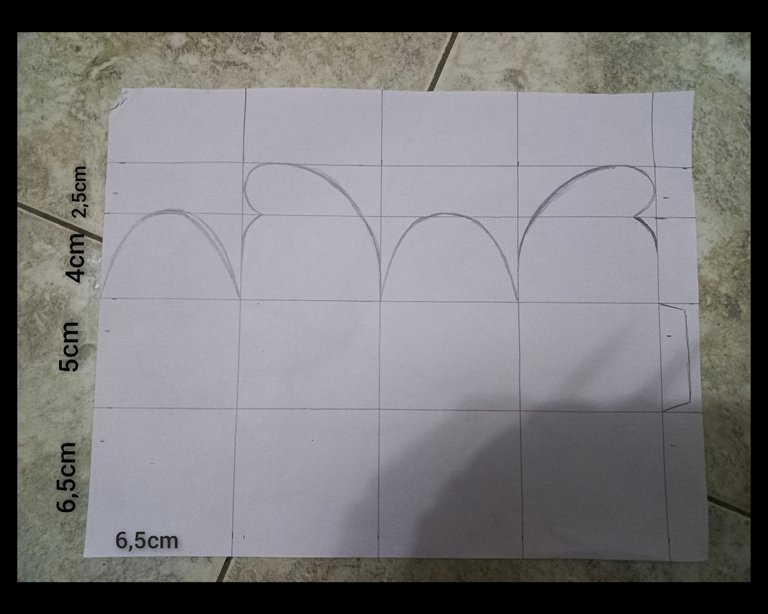
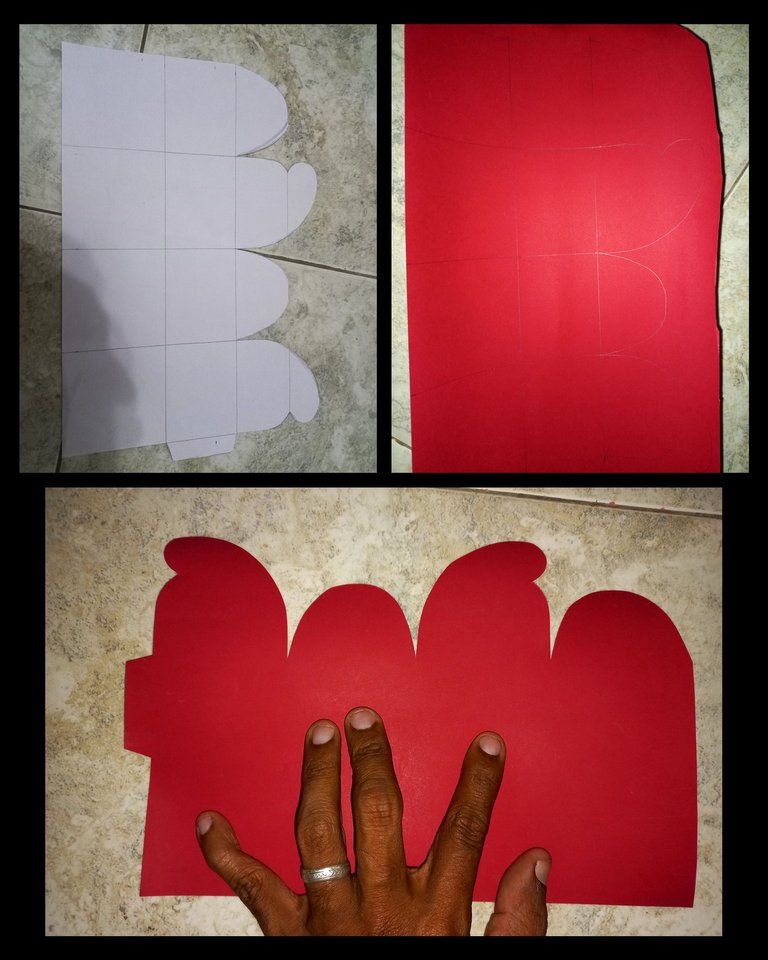
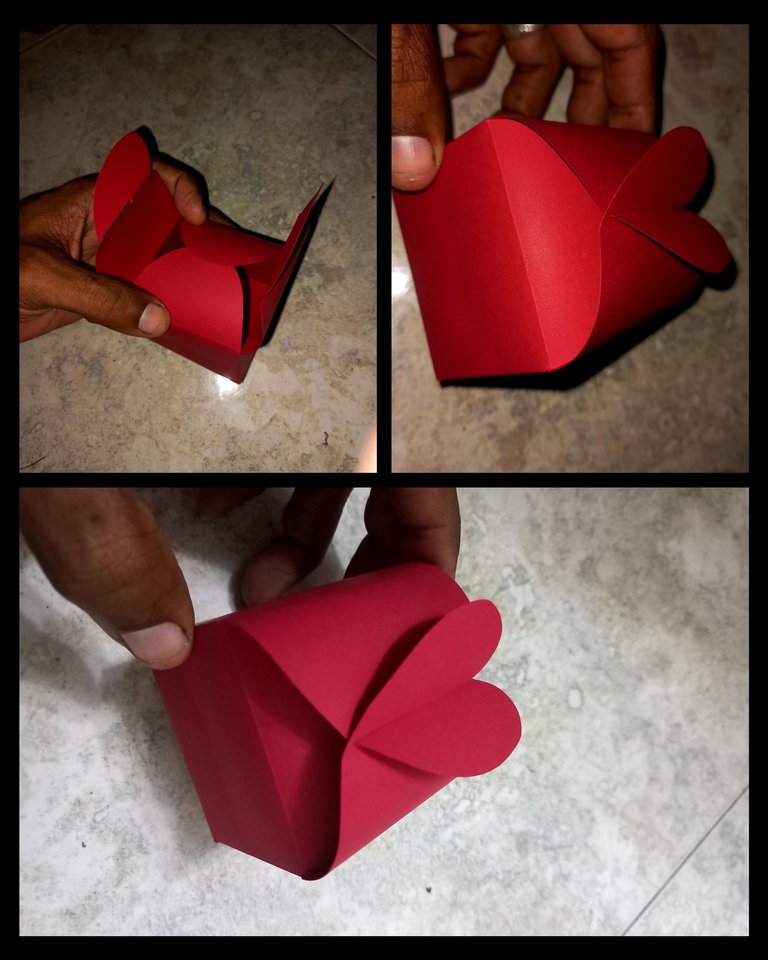
PROCEDIMIENTOS // PROCEDURES
Gracias por visitar mi blog y espero vernos en mi próxima publicación.
Thanks for visiting my blog and I hope to see you in my next post.
REFERENCIAS/ REFERENCE
Todo el texto de mi autoria / All the text of my authorship
Fotos tomadas desde mi Samsung A32 / Photos taken from my Samsung A32
Collage realializados con GridArt / Collage made with GridArt


Qué detalle tan bonito! se ve muy delicado, me encantó el color que usaste. Muchas gracias por participar y dejarnos tu aporte con la plantilla.
Un gusto, me encanta su forma de alentarnos a seguir trabajando.
Por mucho mi moderadora preferida @equipodelta...<3<3
Congratulations @frewinfarfan! You have completed the following achievement on the Hive blockchain and have been rewarded with new badge(s):
Your next target is to reach 8000 upvotes.
You can view your badges on your board and compare yourself to others in the Ranking
If you no longer want to receive notifications, reply to this comment with the word
STOPCheck out the last post from @hivebuzz:
Support the HiveBuzz project. Vote for our proposal!
Congratulations @frewinfarfan! You received a personal badge!
You can view your badges on your board and compare yourself to others in the Ranking
Check out the last post from @hivebuzz:
Support the HiveBuzz project. Vote for our proposal!