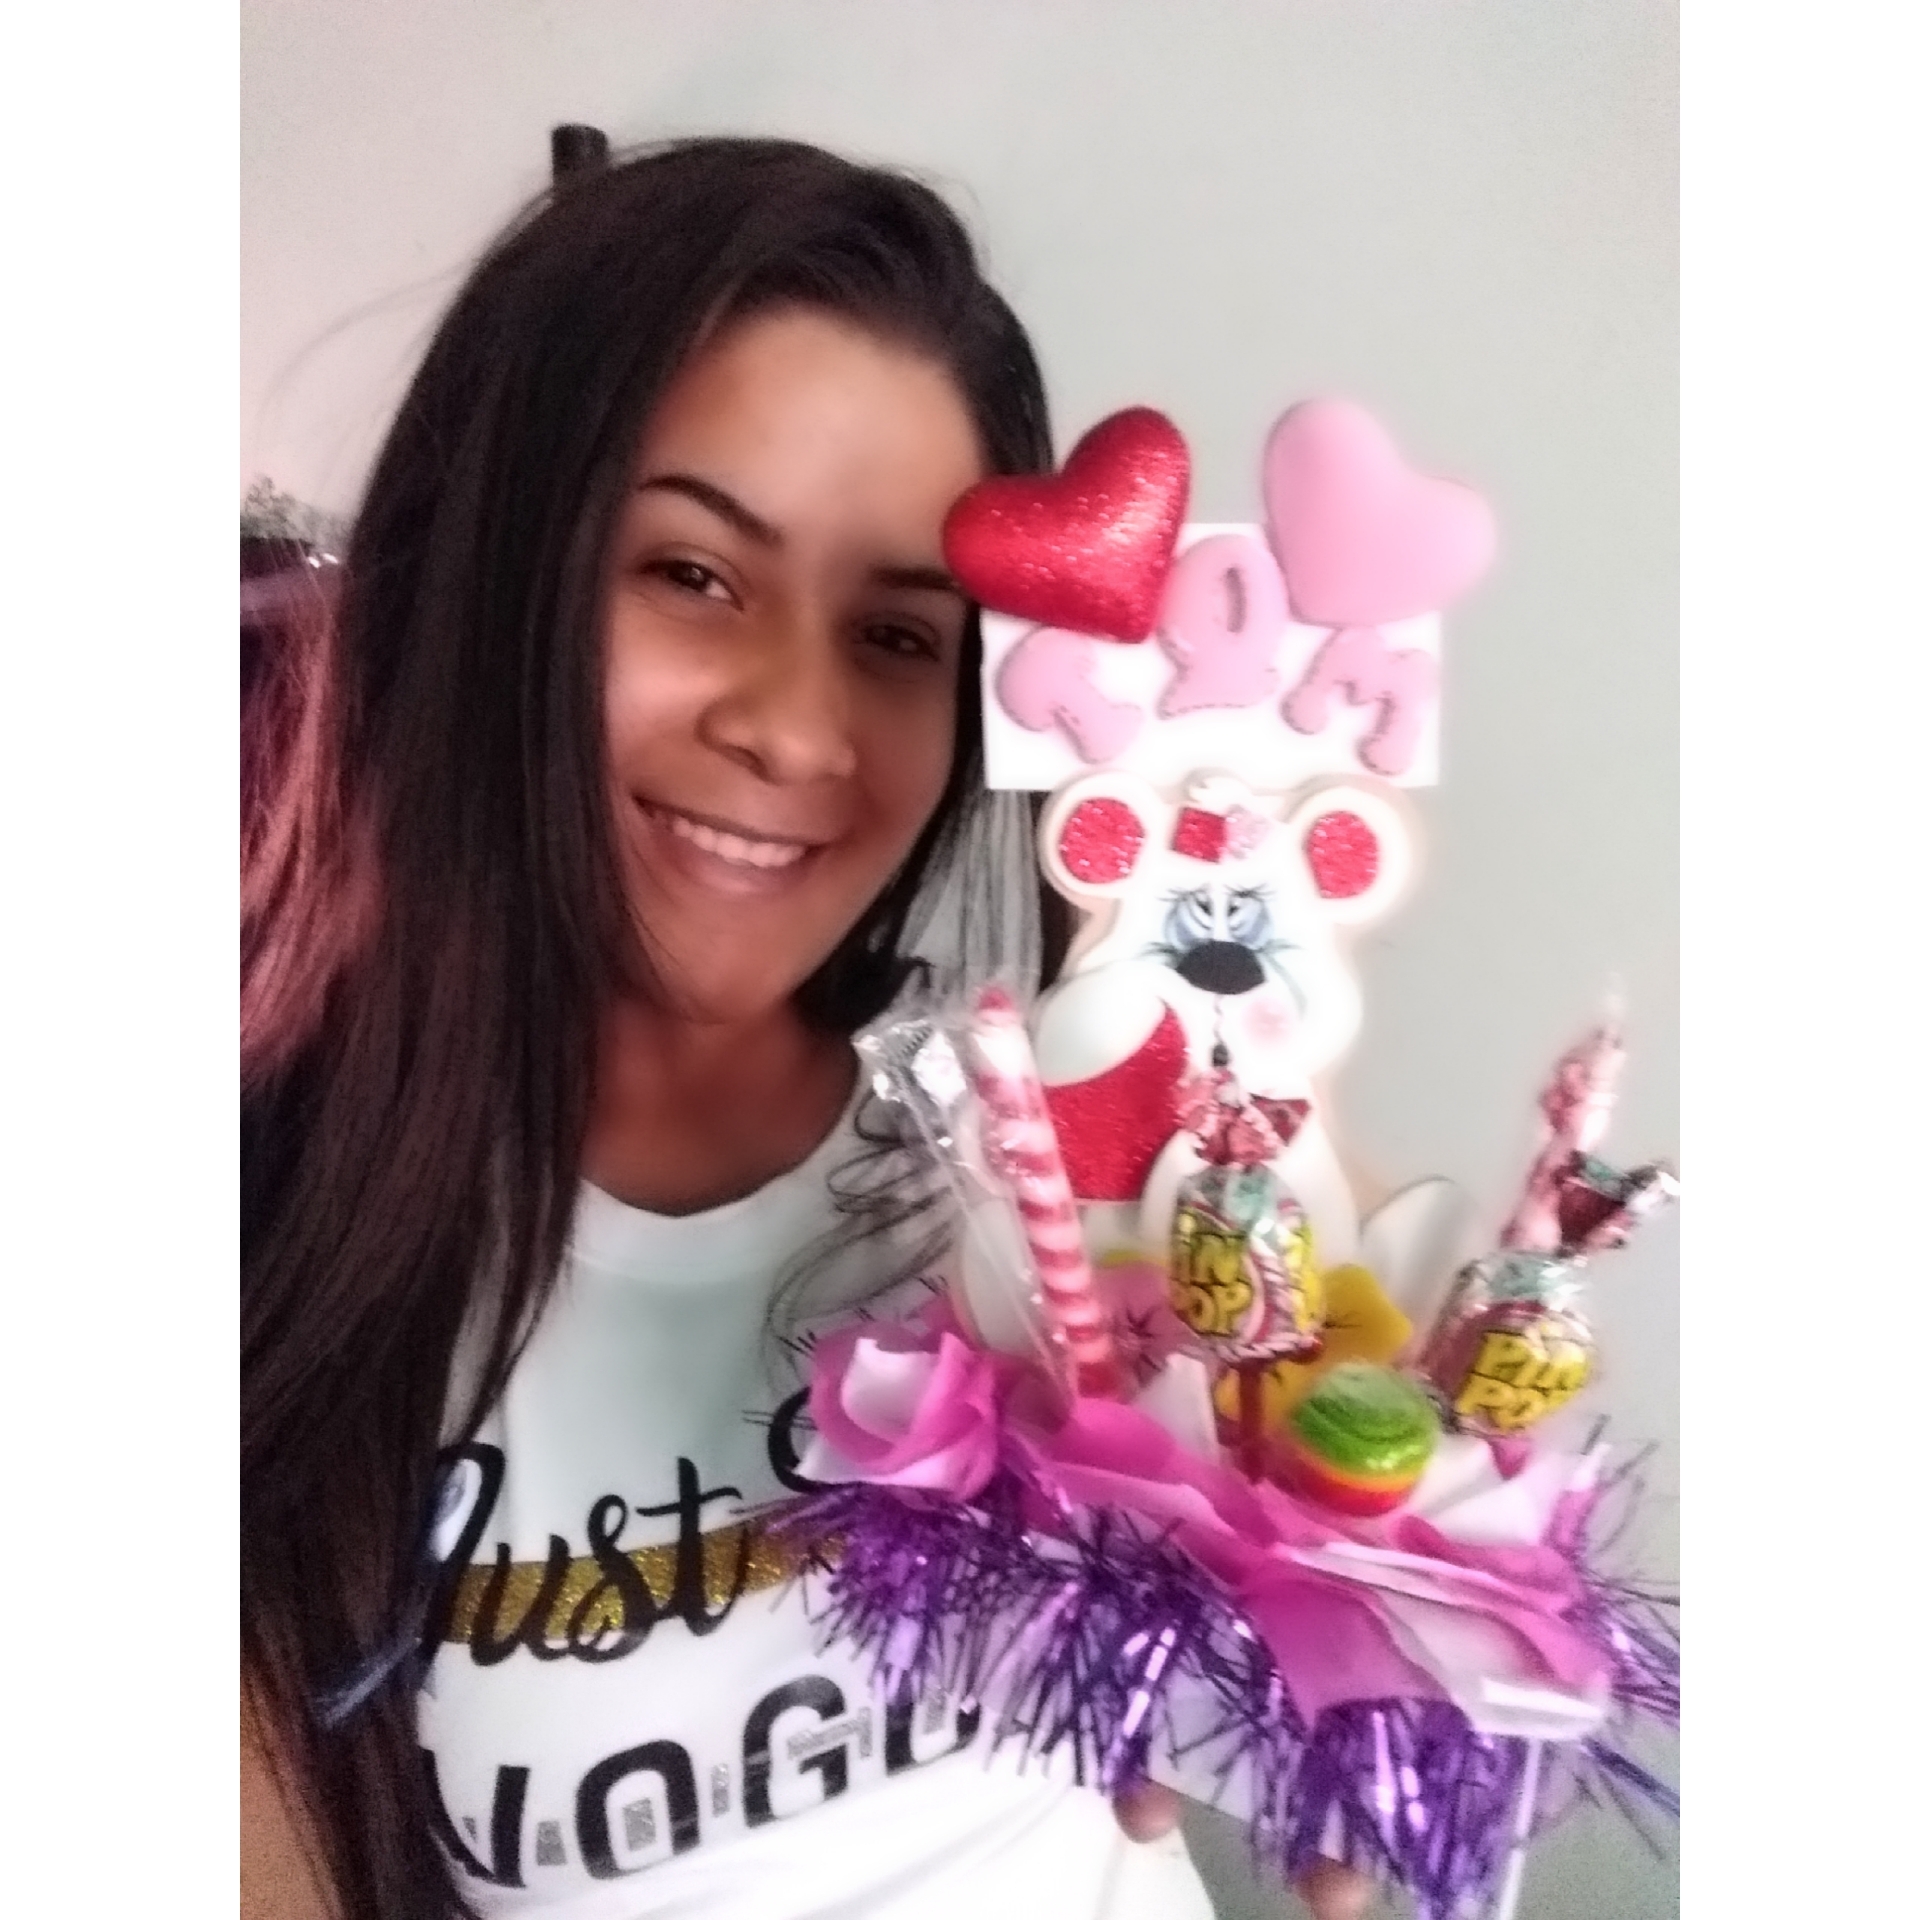
¡Buenos días amigos! Llegó el mes del amor, y para este 14 de febrero pensamos mucho en que regalar a nuestra pareja o amigos, y para ello un hermoso arreglo de dulces.
Good morning friends! The month of love has arrived, and for this February 14 we think a lot about what to give our partner or friends, and for that a beautiful arrangement of sweets.
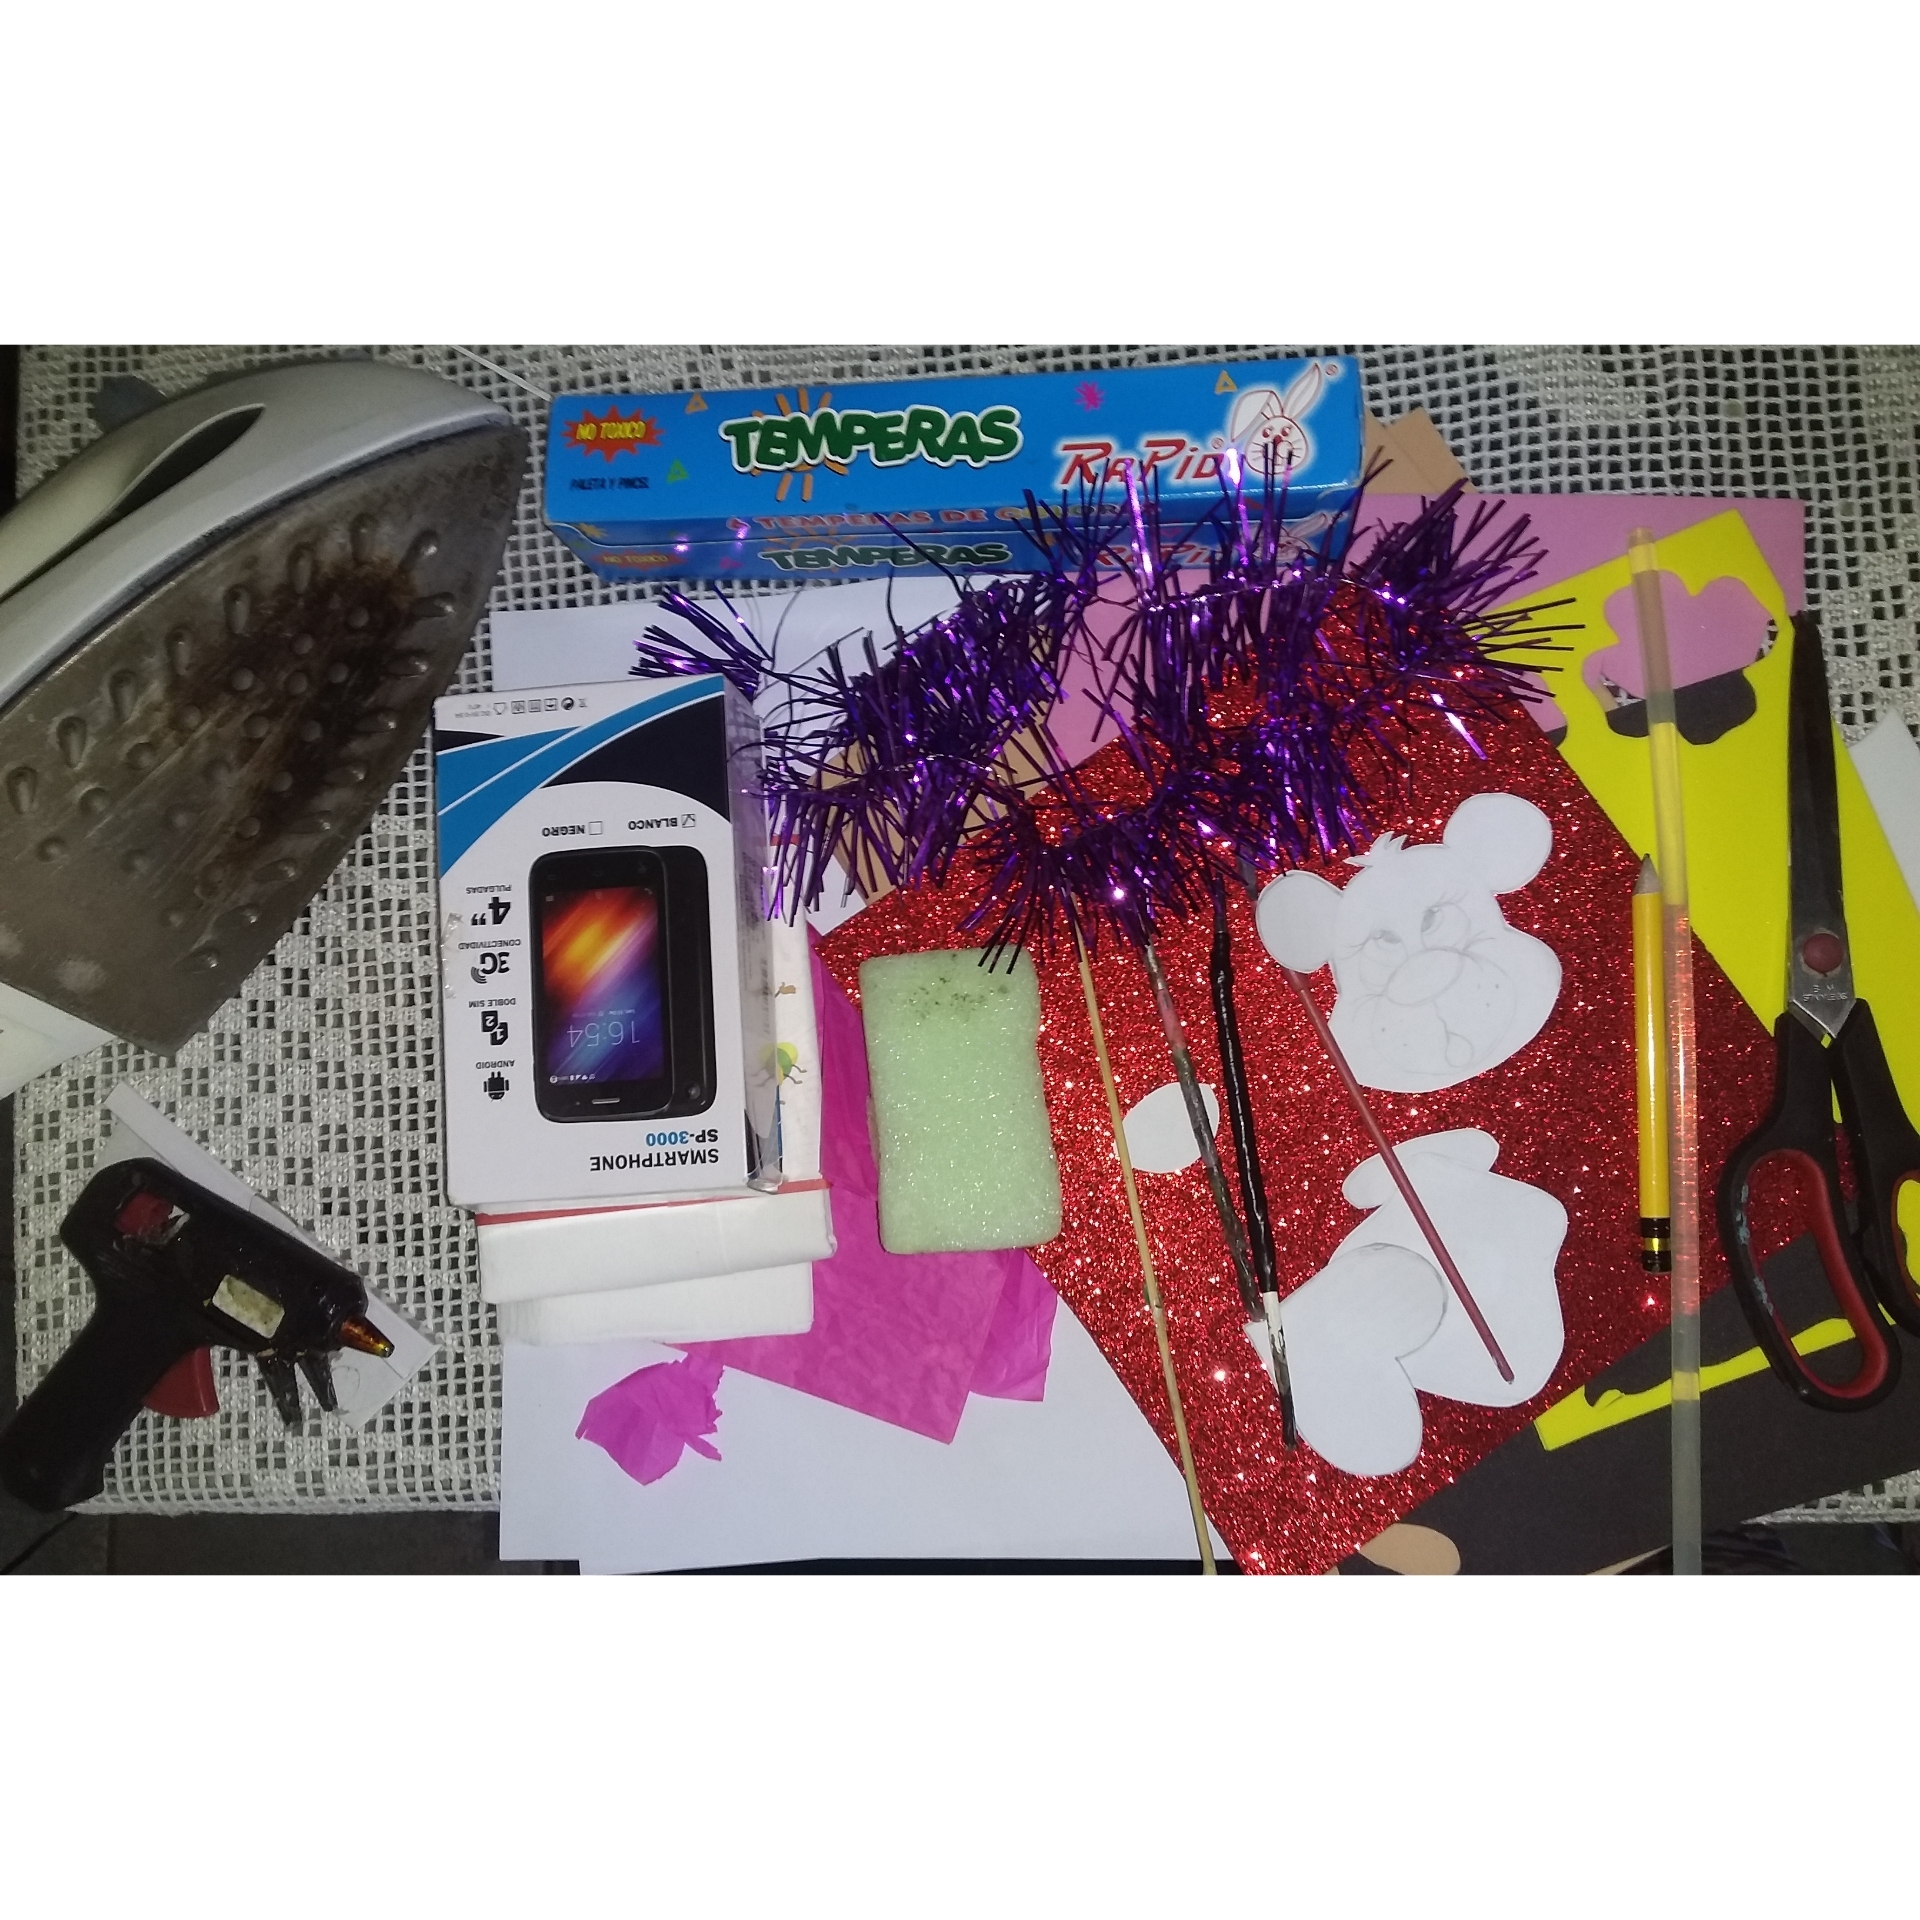
Materiales:
- Una vieja caja de teléfono celular.
- Bastón de altura.
- Una pieza de anime.
- Pinturas y pincel.
- Papel creepe blanco y fucsia.
- Hojas de papel blancas.
- Lápiz.
- Pistola y barra de silicona.
- Foami escarchado rojo.
- Foami blanco, amarillo, rosa, negro y color piel.
- Tijera.
- Patrones.
- Plancha de ropa.
- Una tira de flecos morados.
Materials:
- An old cell phone box.
- Height stick.
- A piece of anime.
- Paints and brush.
- White and fuchsia creepe paper.
- White sheets of paper.
- Pencil.
- Gun and silicone bar.
- Red frosted foami.
- Foami white, yellow, pink, black and skin color.
- Scissor.
- Patterns.
- Clothes iron.
- A strip of purple fringes.
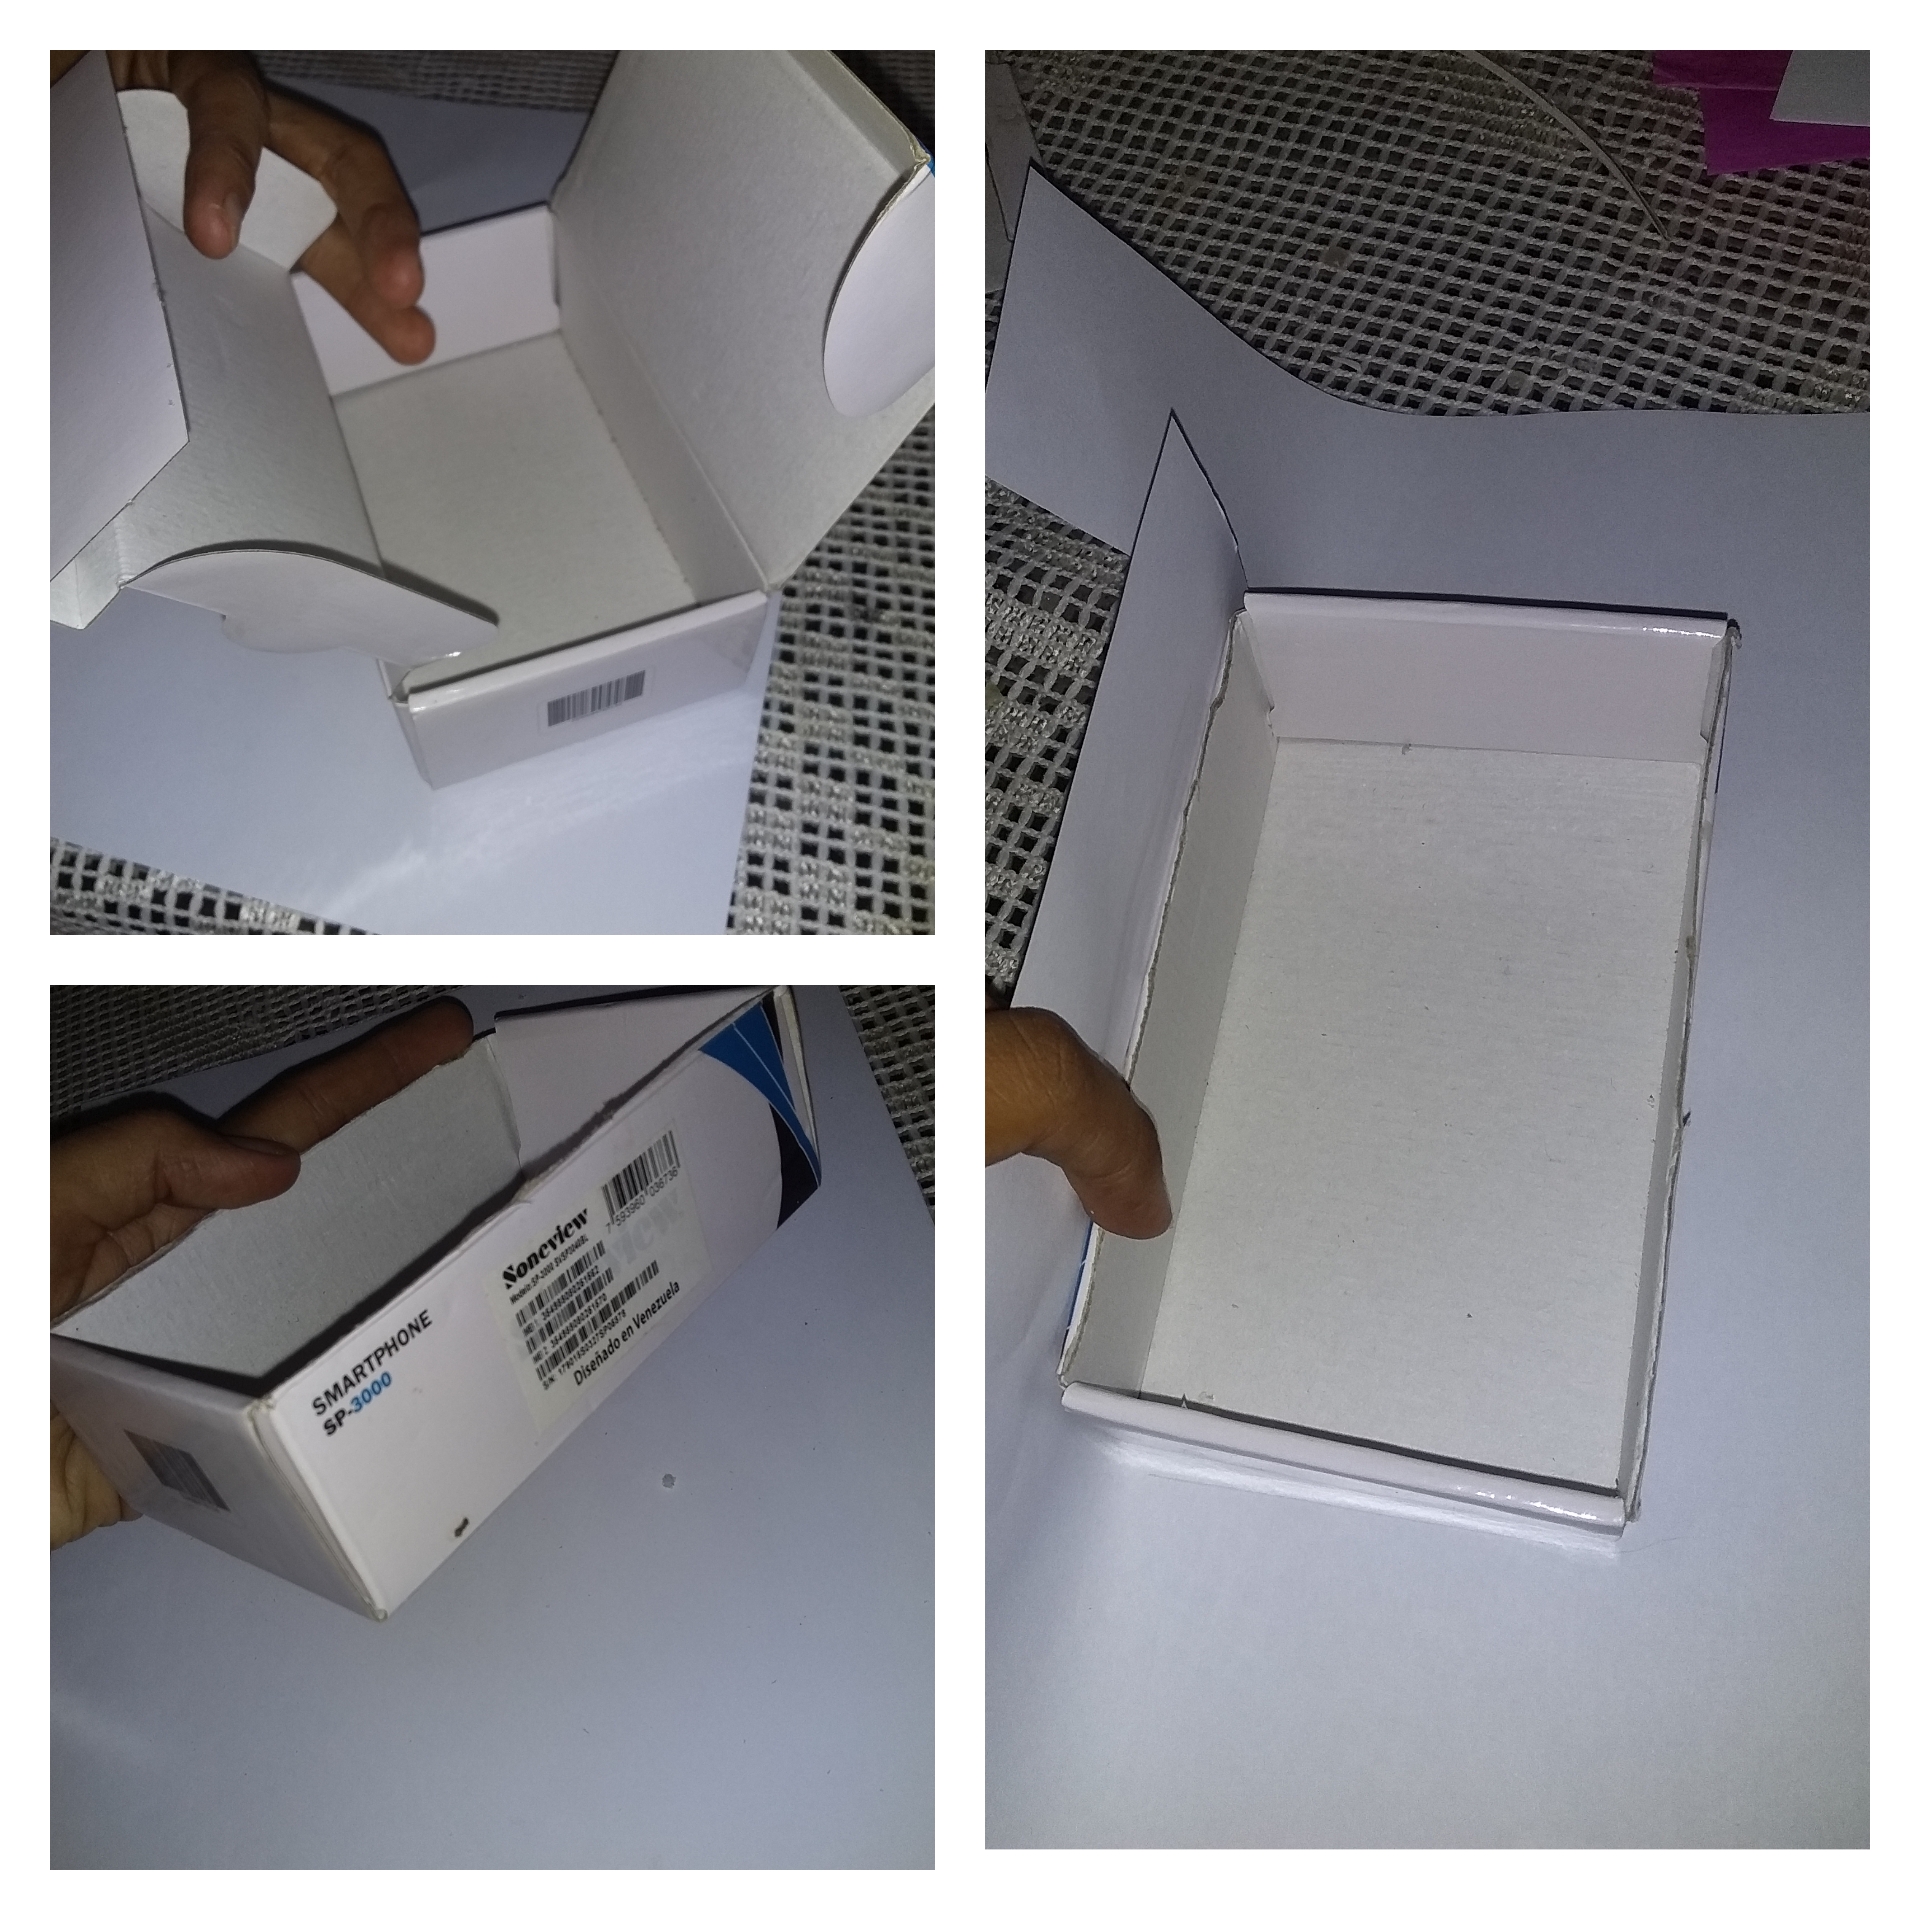
Paso 1
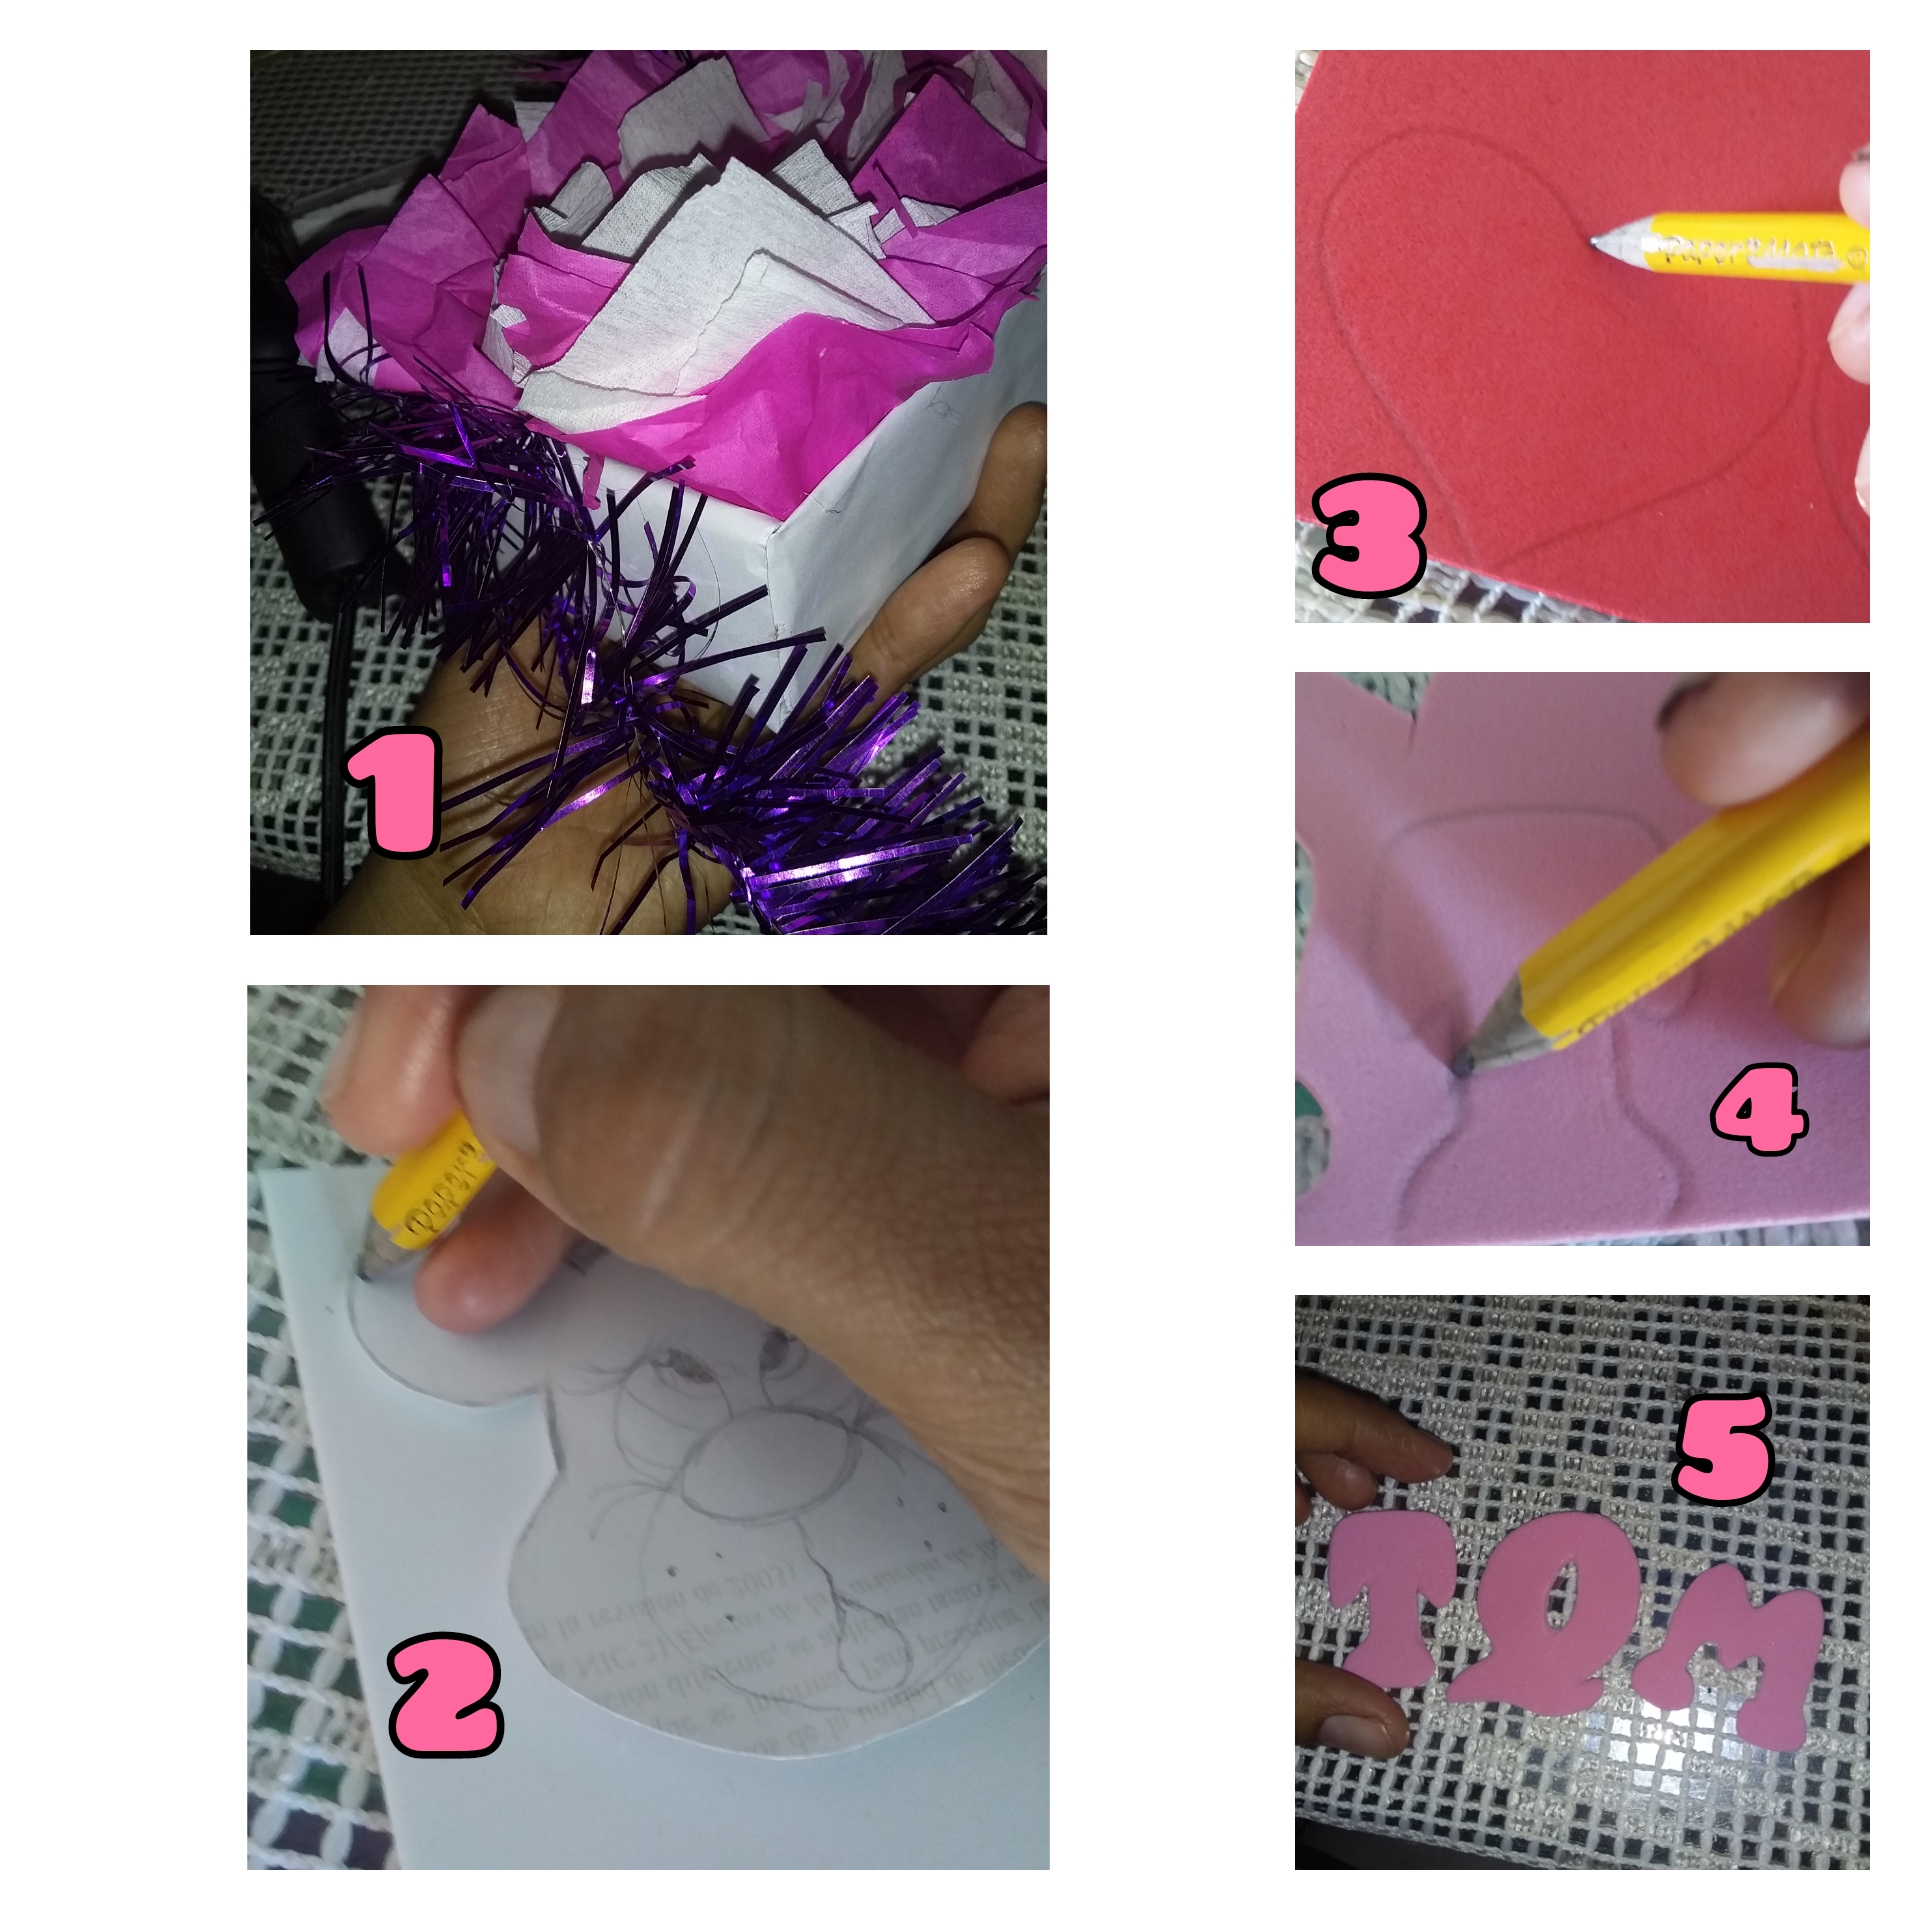
Empezamos abriendo la caja y cortando la tapa como podéis ver en las imágenes, luego la vamos a envolver con una hoja de papel en blanco.
Step 1
We start by opening the box and cutting the lid as you can see in the images, then we are going to wrap it with a blank sheet of paper.
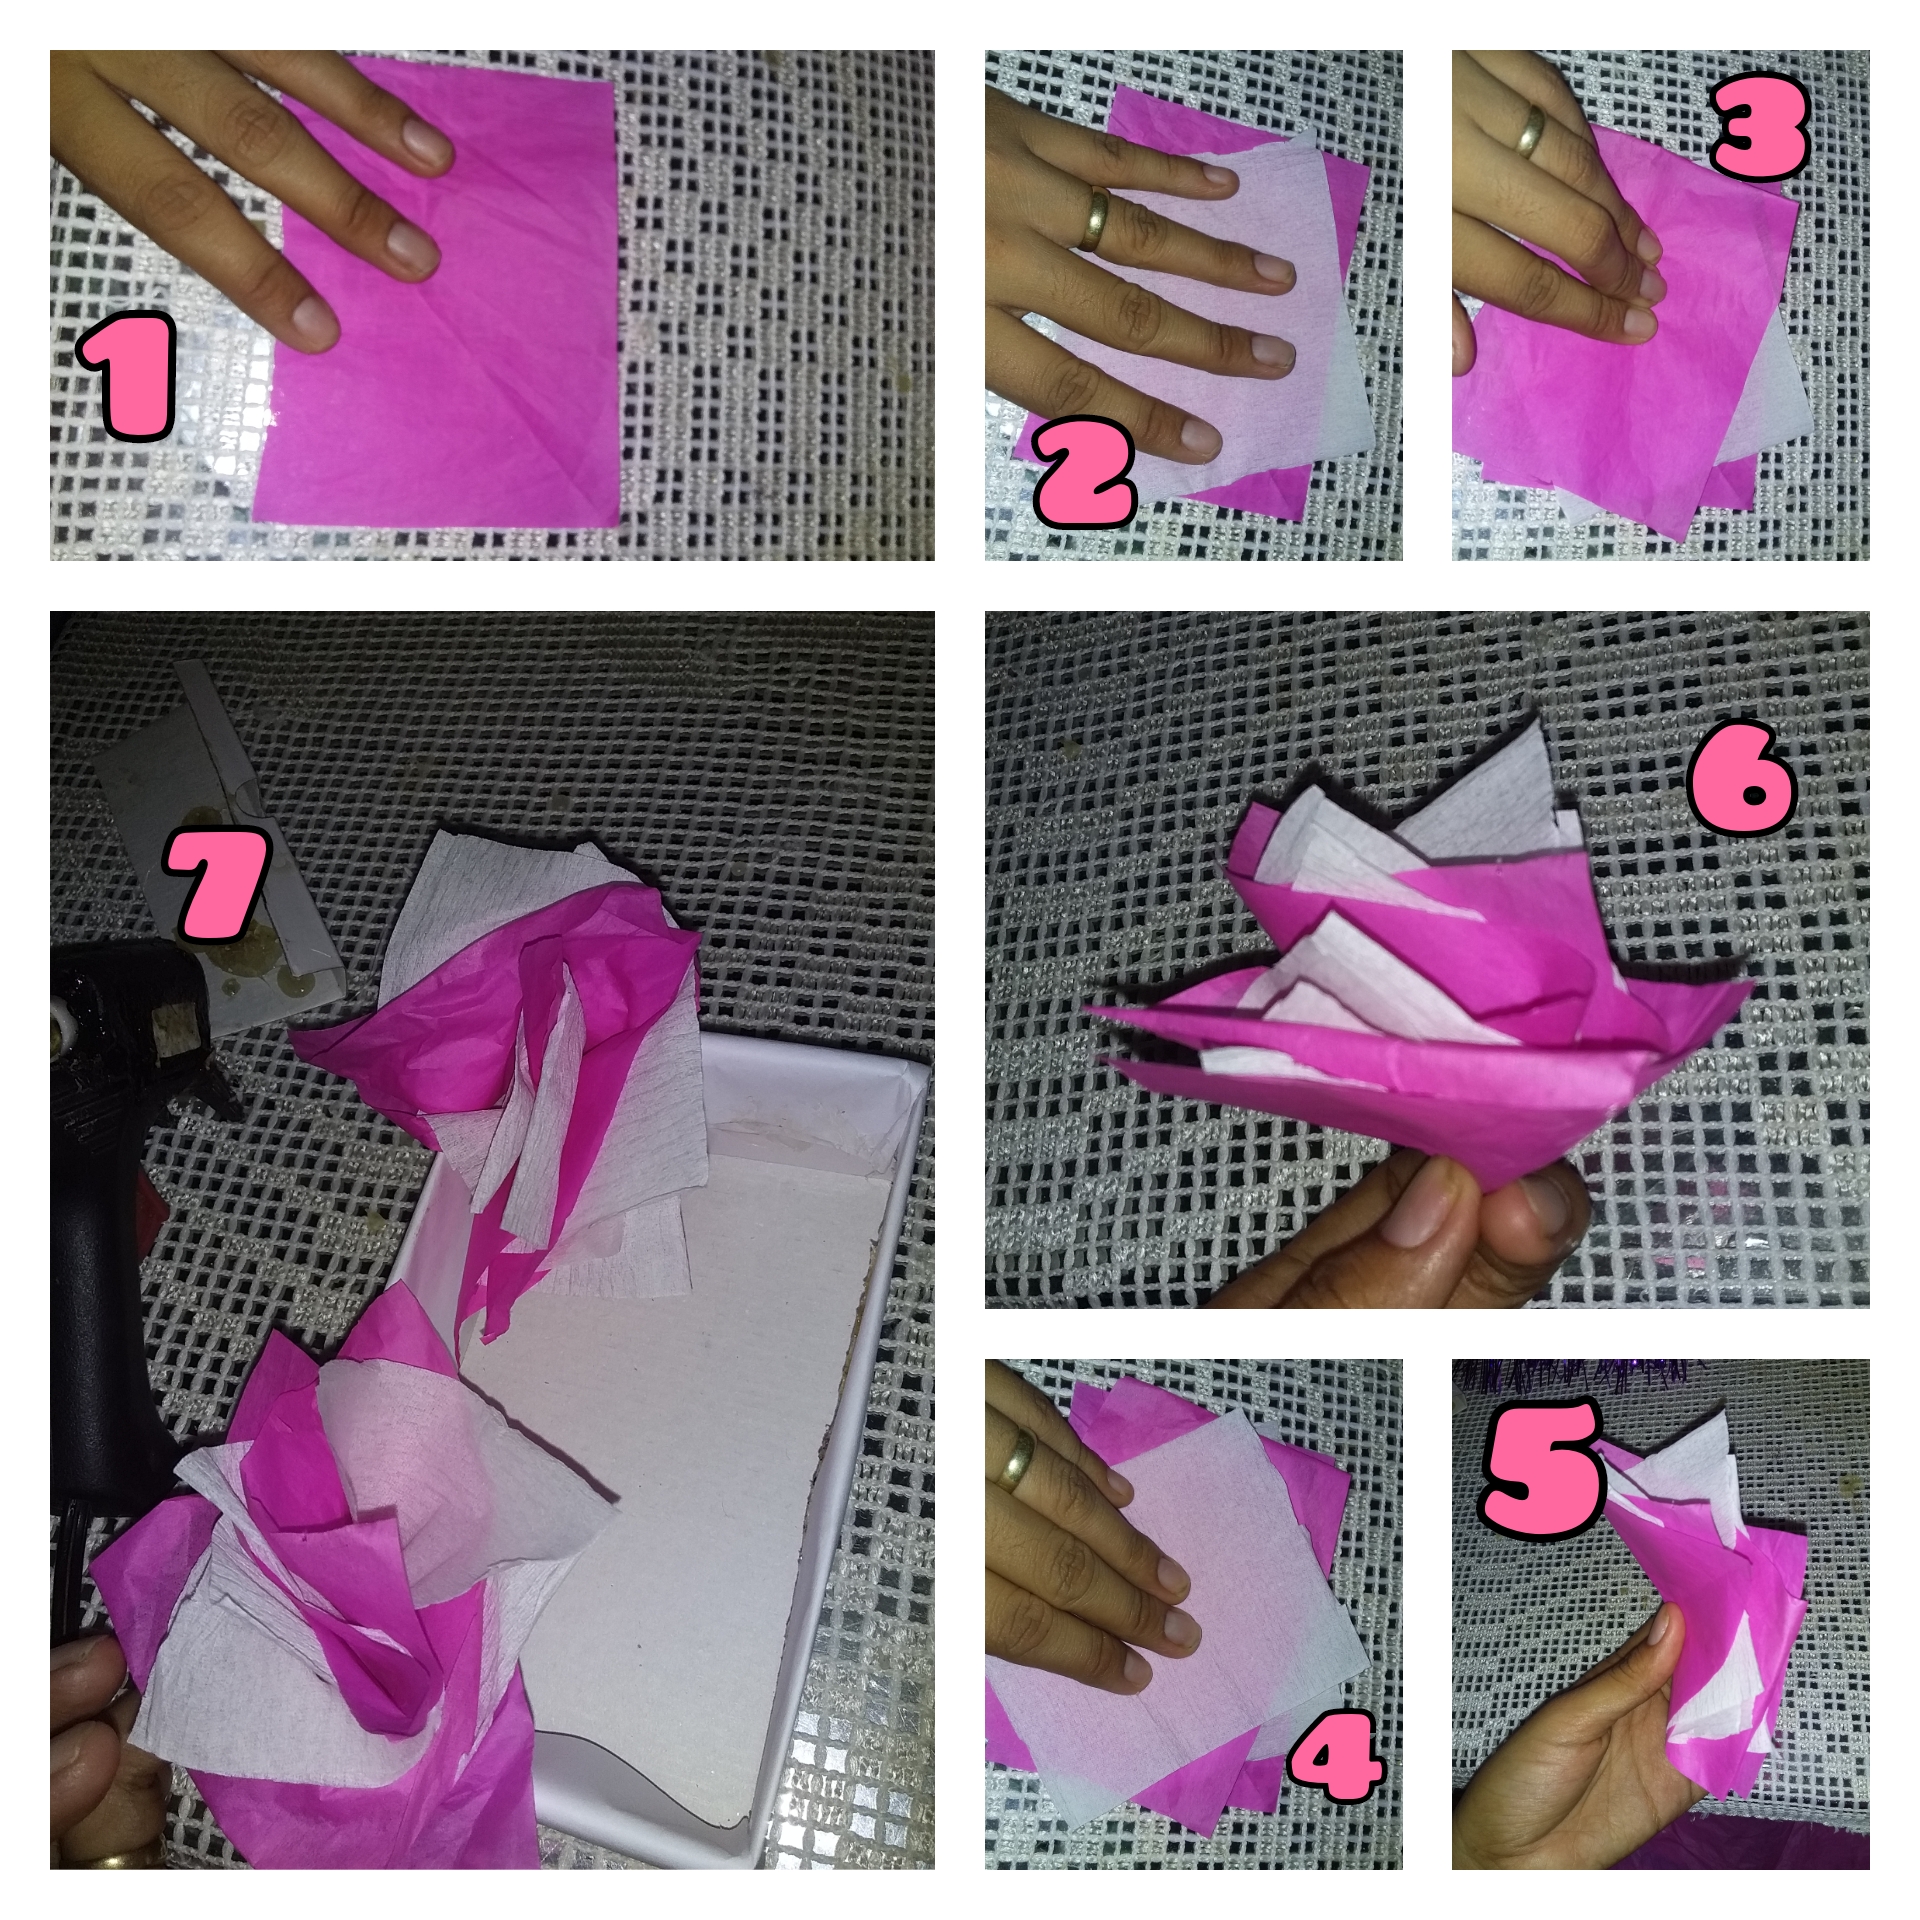
Paso 2
Cortamos 2 cuadrados de la crepe fucsia y dos de la blanca, luego ponemos una fucsia y una blanca encima en sentido contrario a la anterior, dejando los extremos sobresaliendo, seguidamente esta la tomamos del centro y doblalo por la mitad y vuelve a doblarlo por la mitad y así obtendremos nuestro cono, lo siguiente que haremos será pegarlo a la caja y pegar el anime en el centro de la caja.
Step 2
We cut 2 squares of the fuchsia crepe and two of the white one, then we put a fuchsia and a white one on top in the opposite direction to the previous one, leaving the ends protruding, followed by this we take it from the center and fold it in half and fold it again in half and so we will get our cone, the next thing we will do is stick it to the box and stick the anime in the center of the box.
Paso 3
En este paso pegaremos la tira morada de flecos alrededor de la caja para decorar, y luego comenzaremos a marcar los patrones del osito en el foami blanco (Cabeza, manos, pies y cuerpo) y también se harán unas flores con foami rosa y amarillo, haremos unos corazones con el foami rojo y con el rosa también, en el foami rosa haremos las letras TQM (que serían las iniciales de TE QUIERO MUCHO) y lo recortamos.
Step 3
In this step we will paste the purple strip of fringes around the box for decoration, and then we will begin to mark the patterns of the bear on the white foami (Head, hands, feet and body) and some flowers will also be made with pink and yellow foami , we will make some hearts with the red foami and with the pink one too, in the pink foami we will make the letters TQM (which would be the initials of I LOVE YOU SO MUCH) and cut it out.
Paso 4
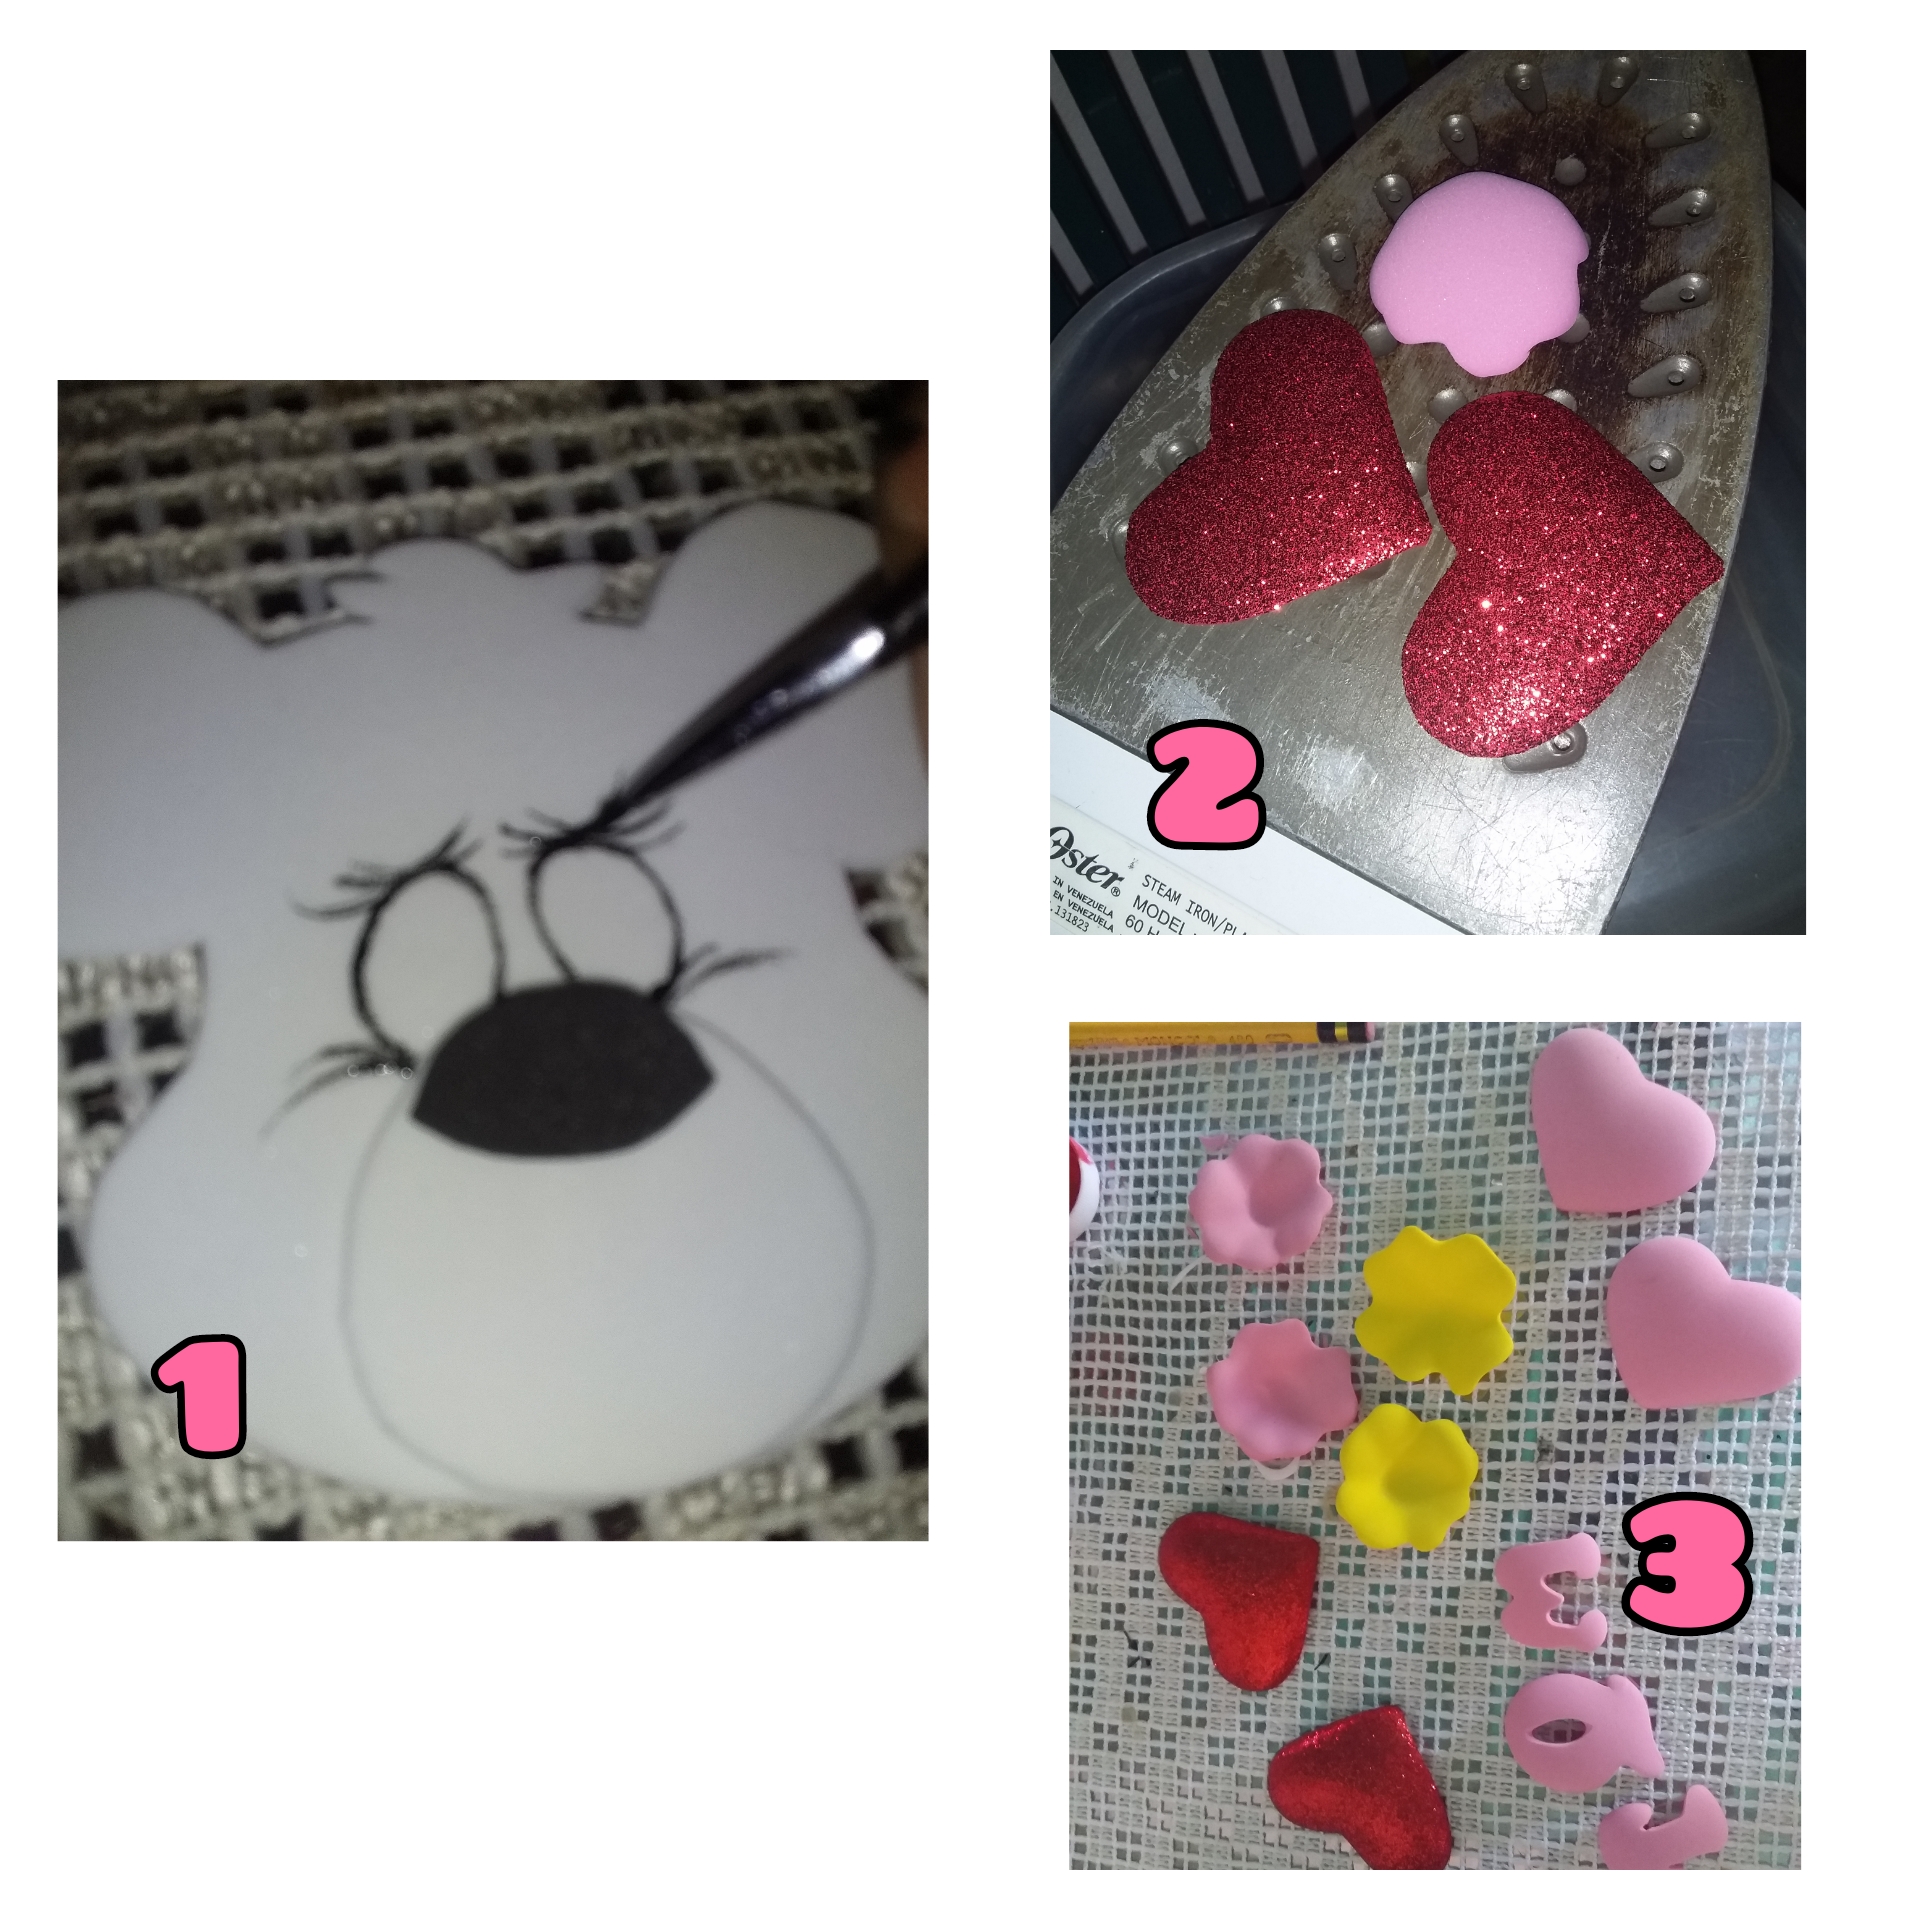
Después del paso anterior, cortamos una pequeña nariz con el foami negro para el oso, y con el foami rojo brillante haremos unas orejas. Ok ahora pintamos la cara del osito y mientras se seca pasamos por la plancha de ropa hasta que abulte todas las demás piezas menos las del osito, una vez que tengamos las piezas de las flores abombadas le damos forma apretando el centro y procedemos para pintarlas, también pintamos las letras haciendo pequeñas líneas alrededor para darle un toque más llamativo y no parecer tan simple.
Step 4
After the previous step, we cut a small nose with the black foami for the bear, and with the bright red foami we will make some ears. Ok now we paint the face of the bear and while it dries we go through the clothes iron until it bulges all the other pieces except those of the bear, once we have the pieces of the bulging flowers we shape it by pressing the center and proceed to paint them, we also paint the letters making small lines around to give it a more striking touch and not look so simple.
Paso 5
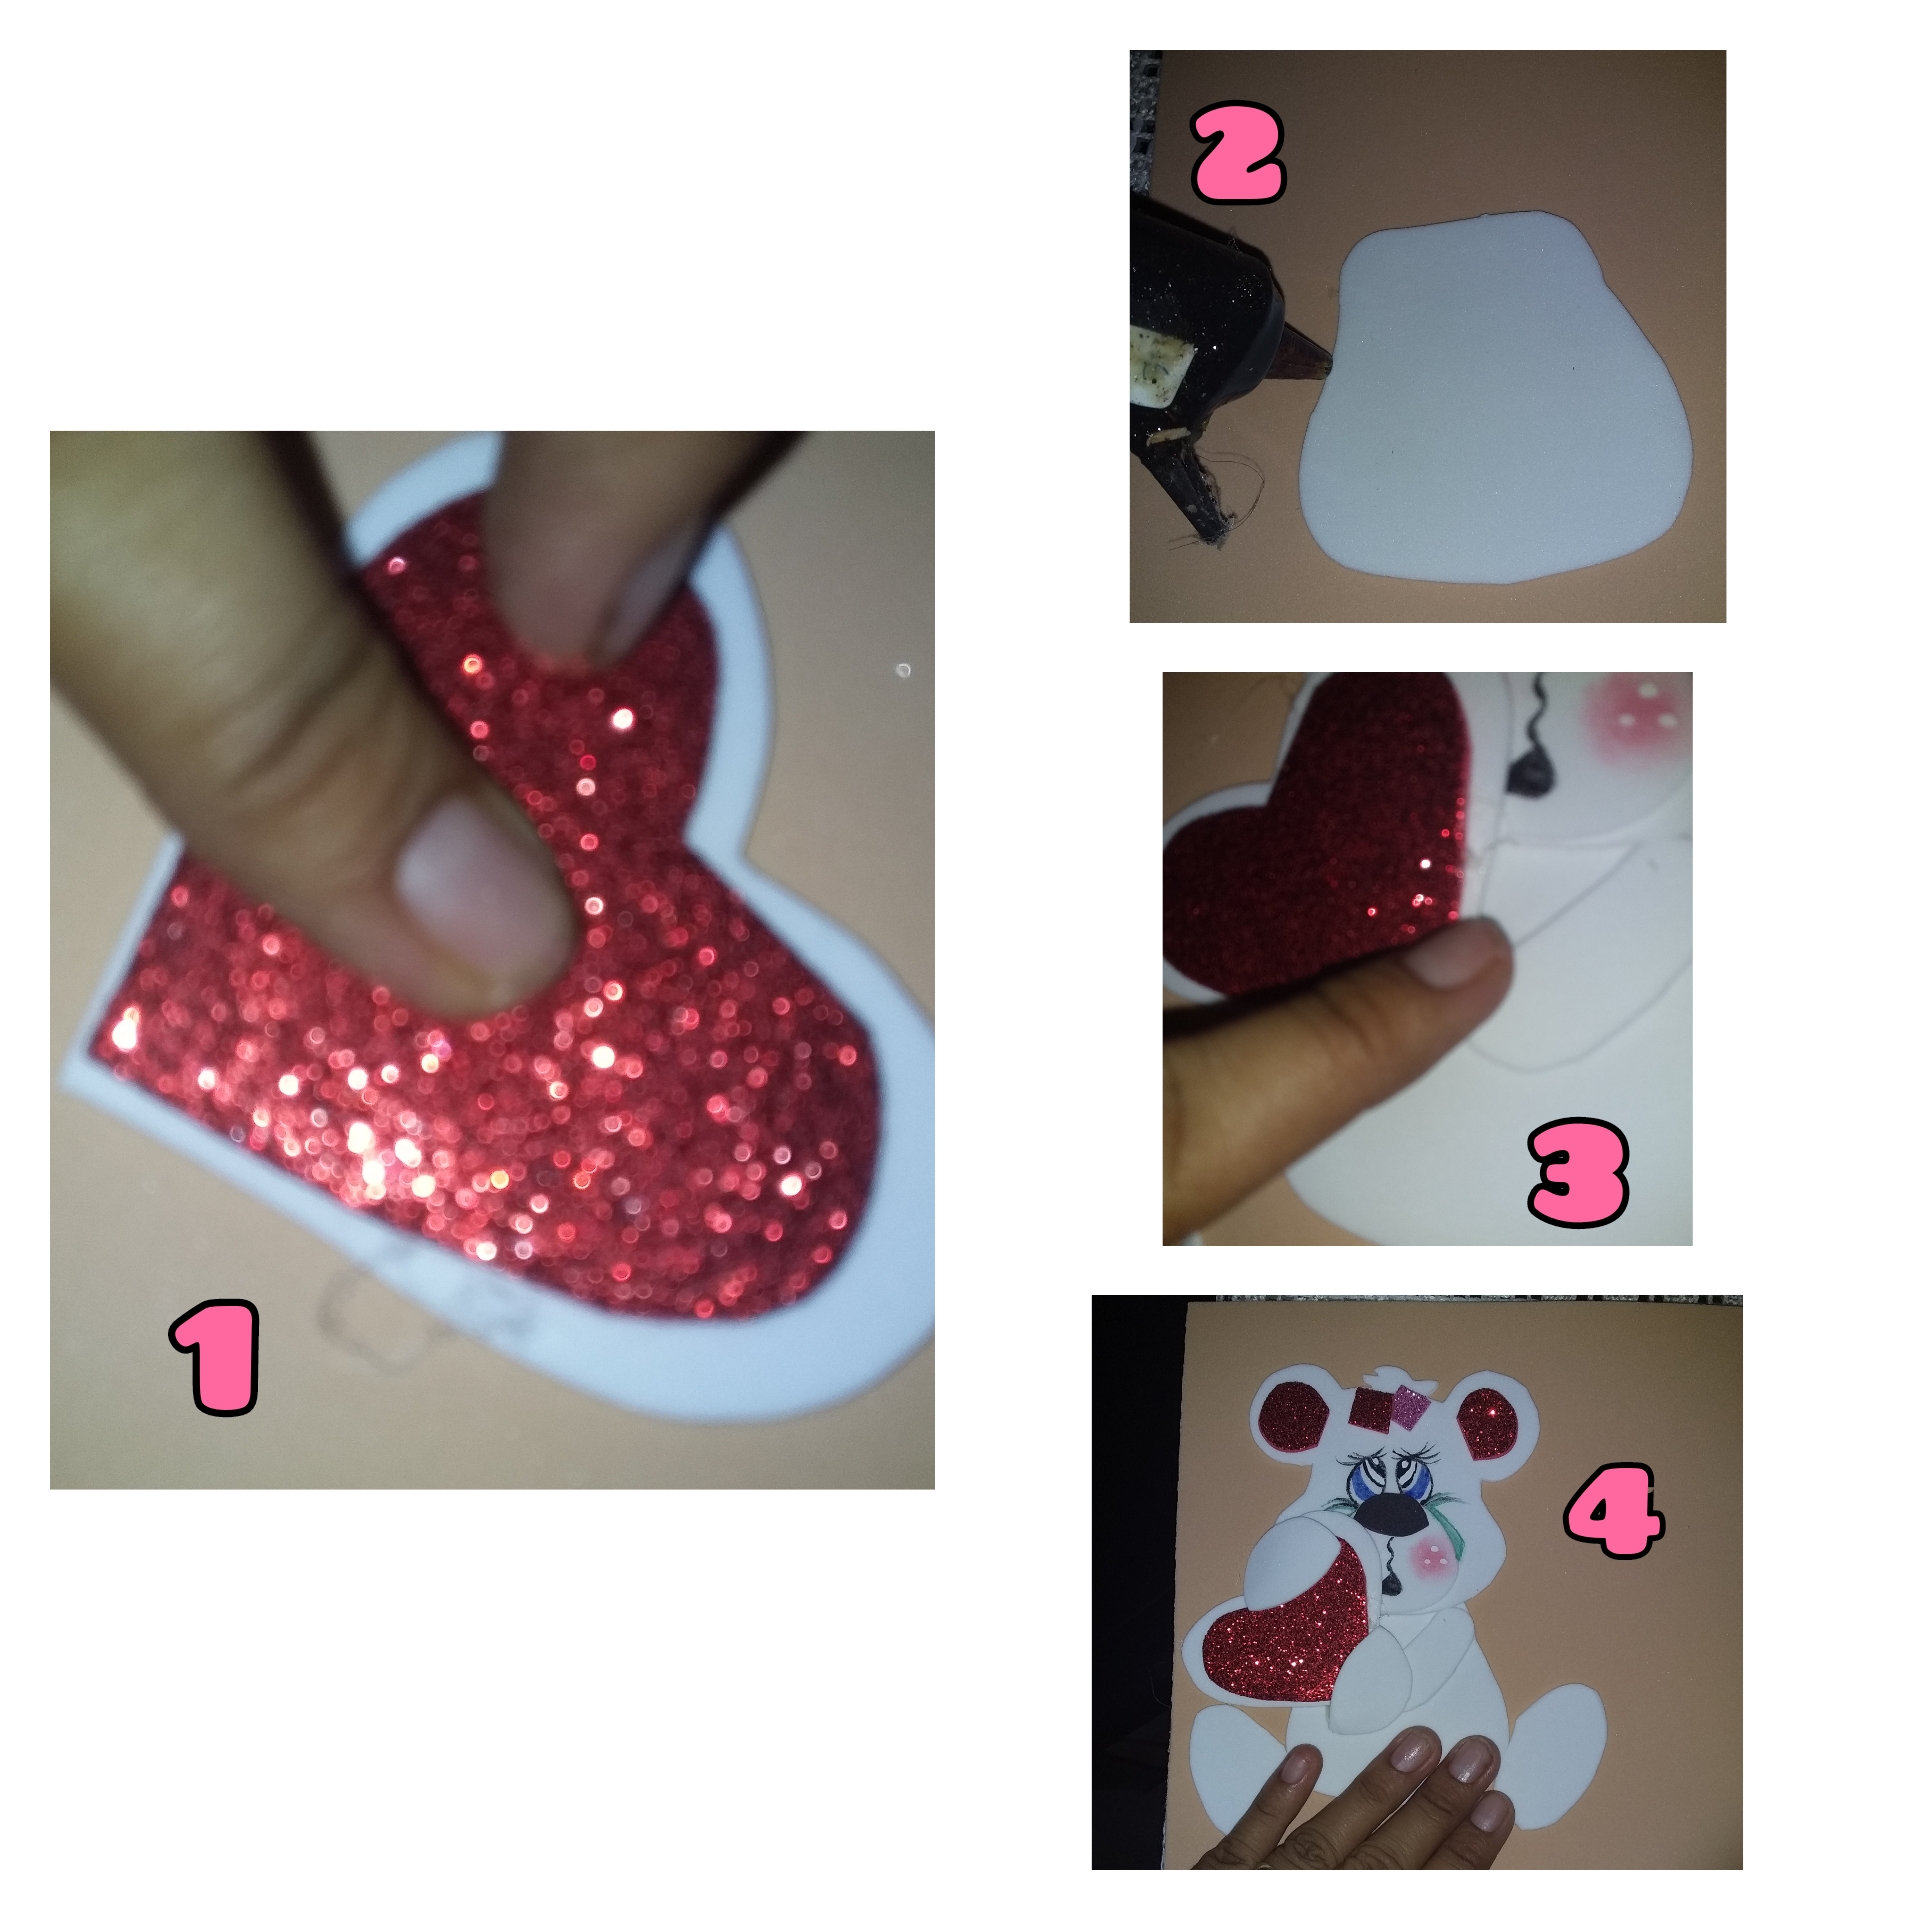
Hacemos dos corazones, uno blanco y otro rojo brillante un poco más pequeños y lo pegamos, después de esto sobre el foami color piel pegamos todas las piezas del osito y luego lo recortamos.
Step 5
We make two hearts, one white and one bright red a little smaller and glue it, after this on the skin-colored foami we glue all the pieces of the bear and then cut it out.
Paso 6
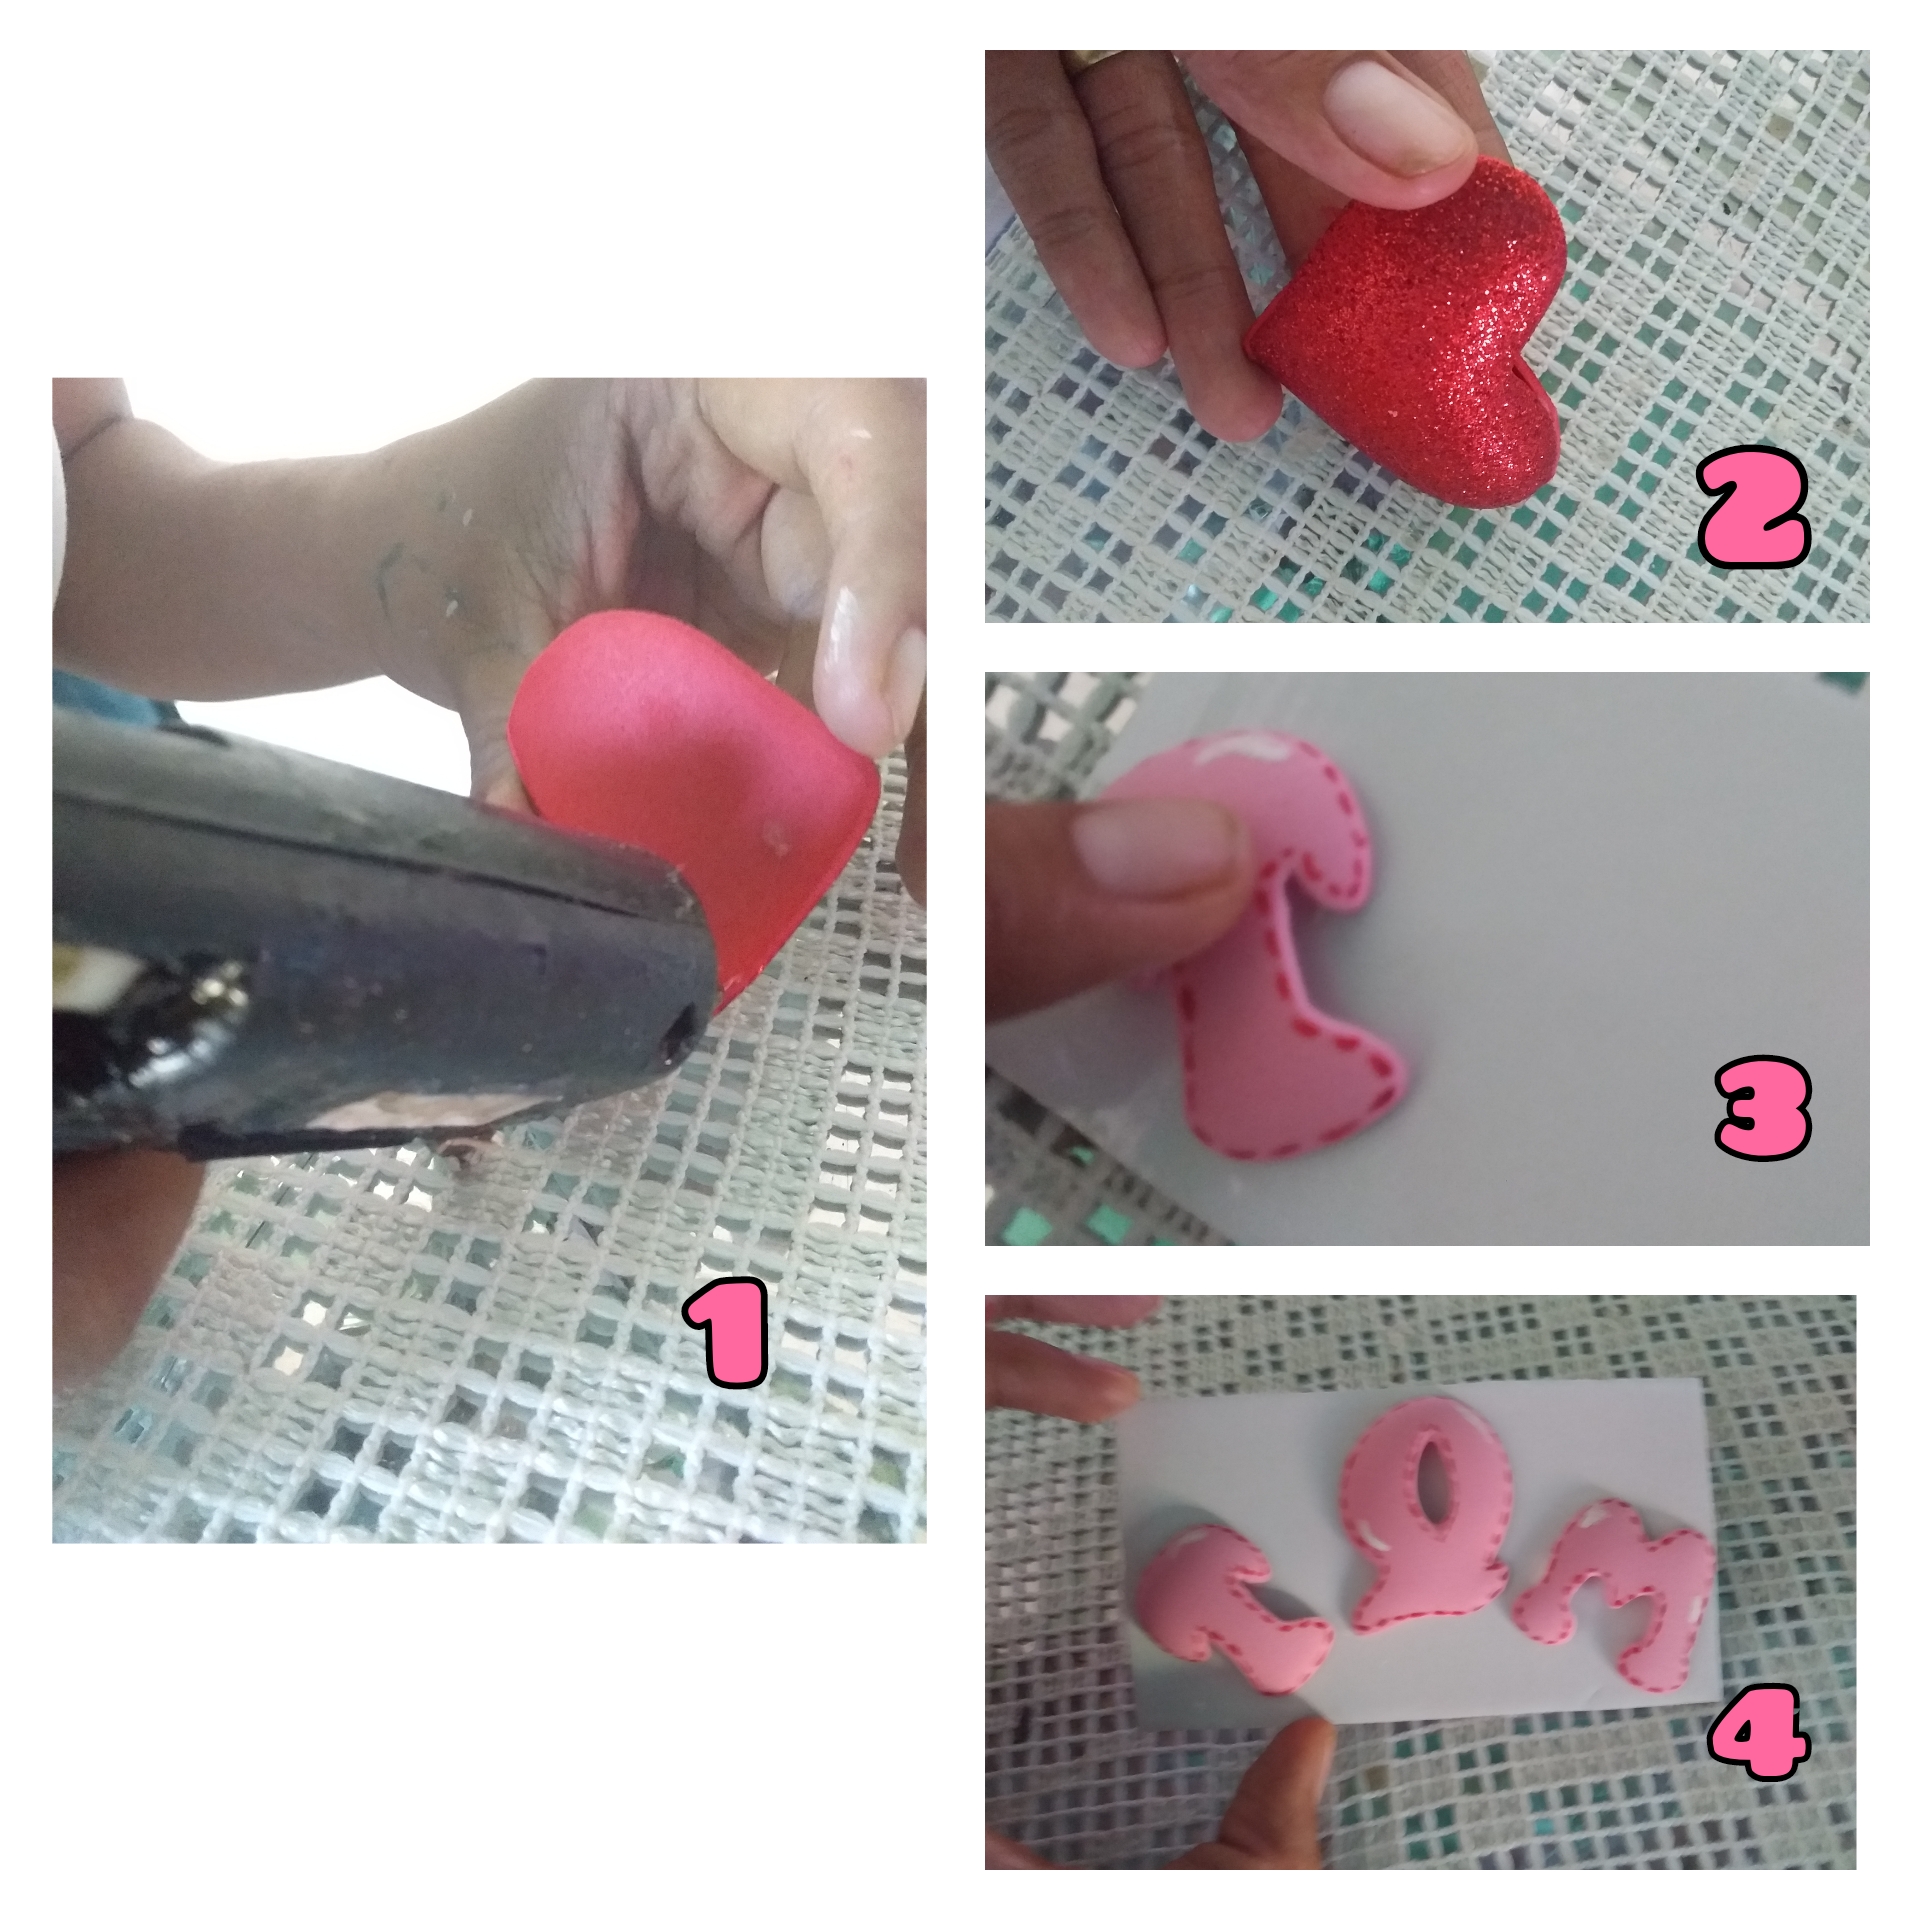
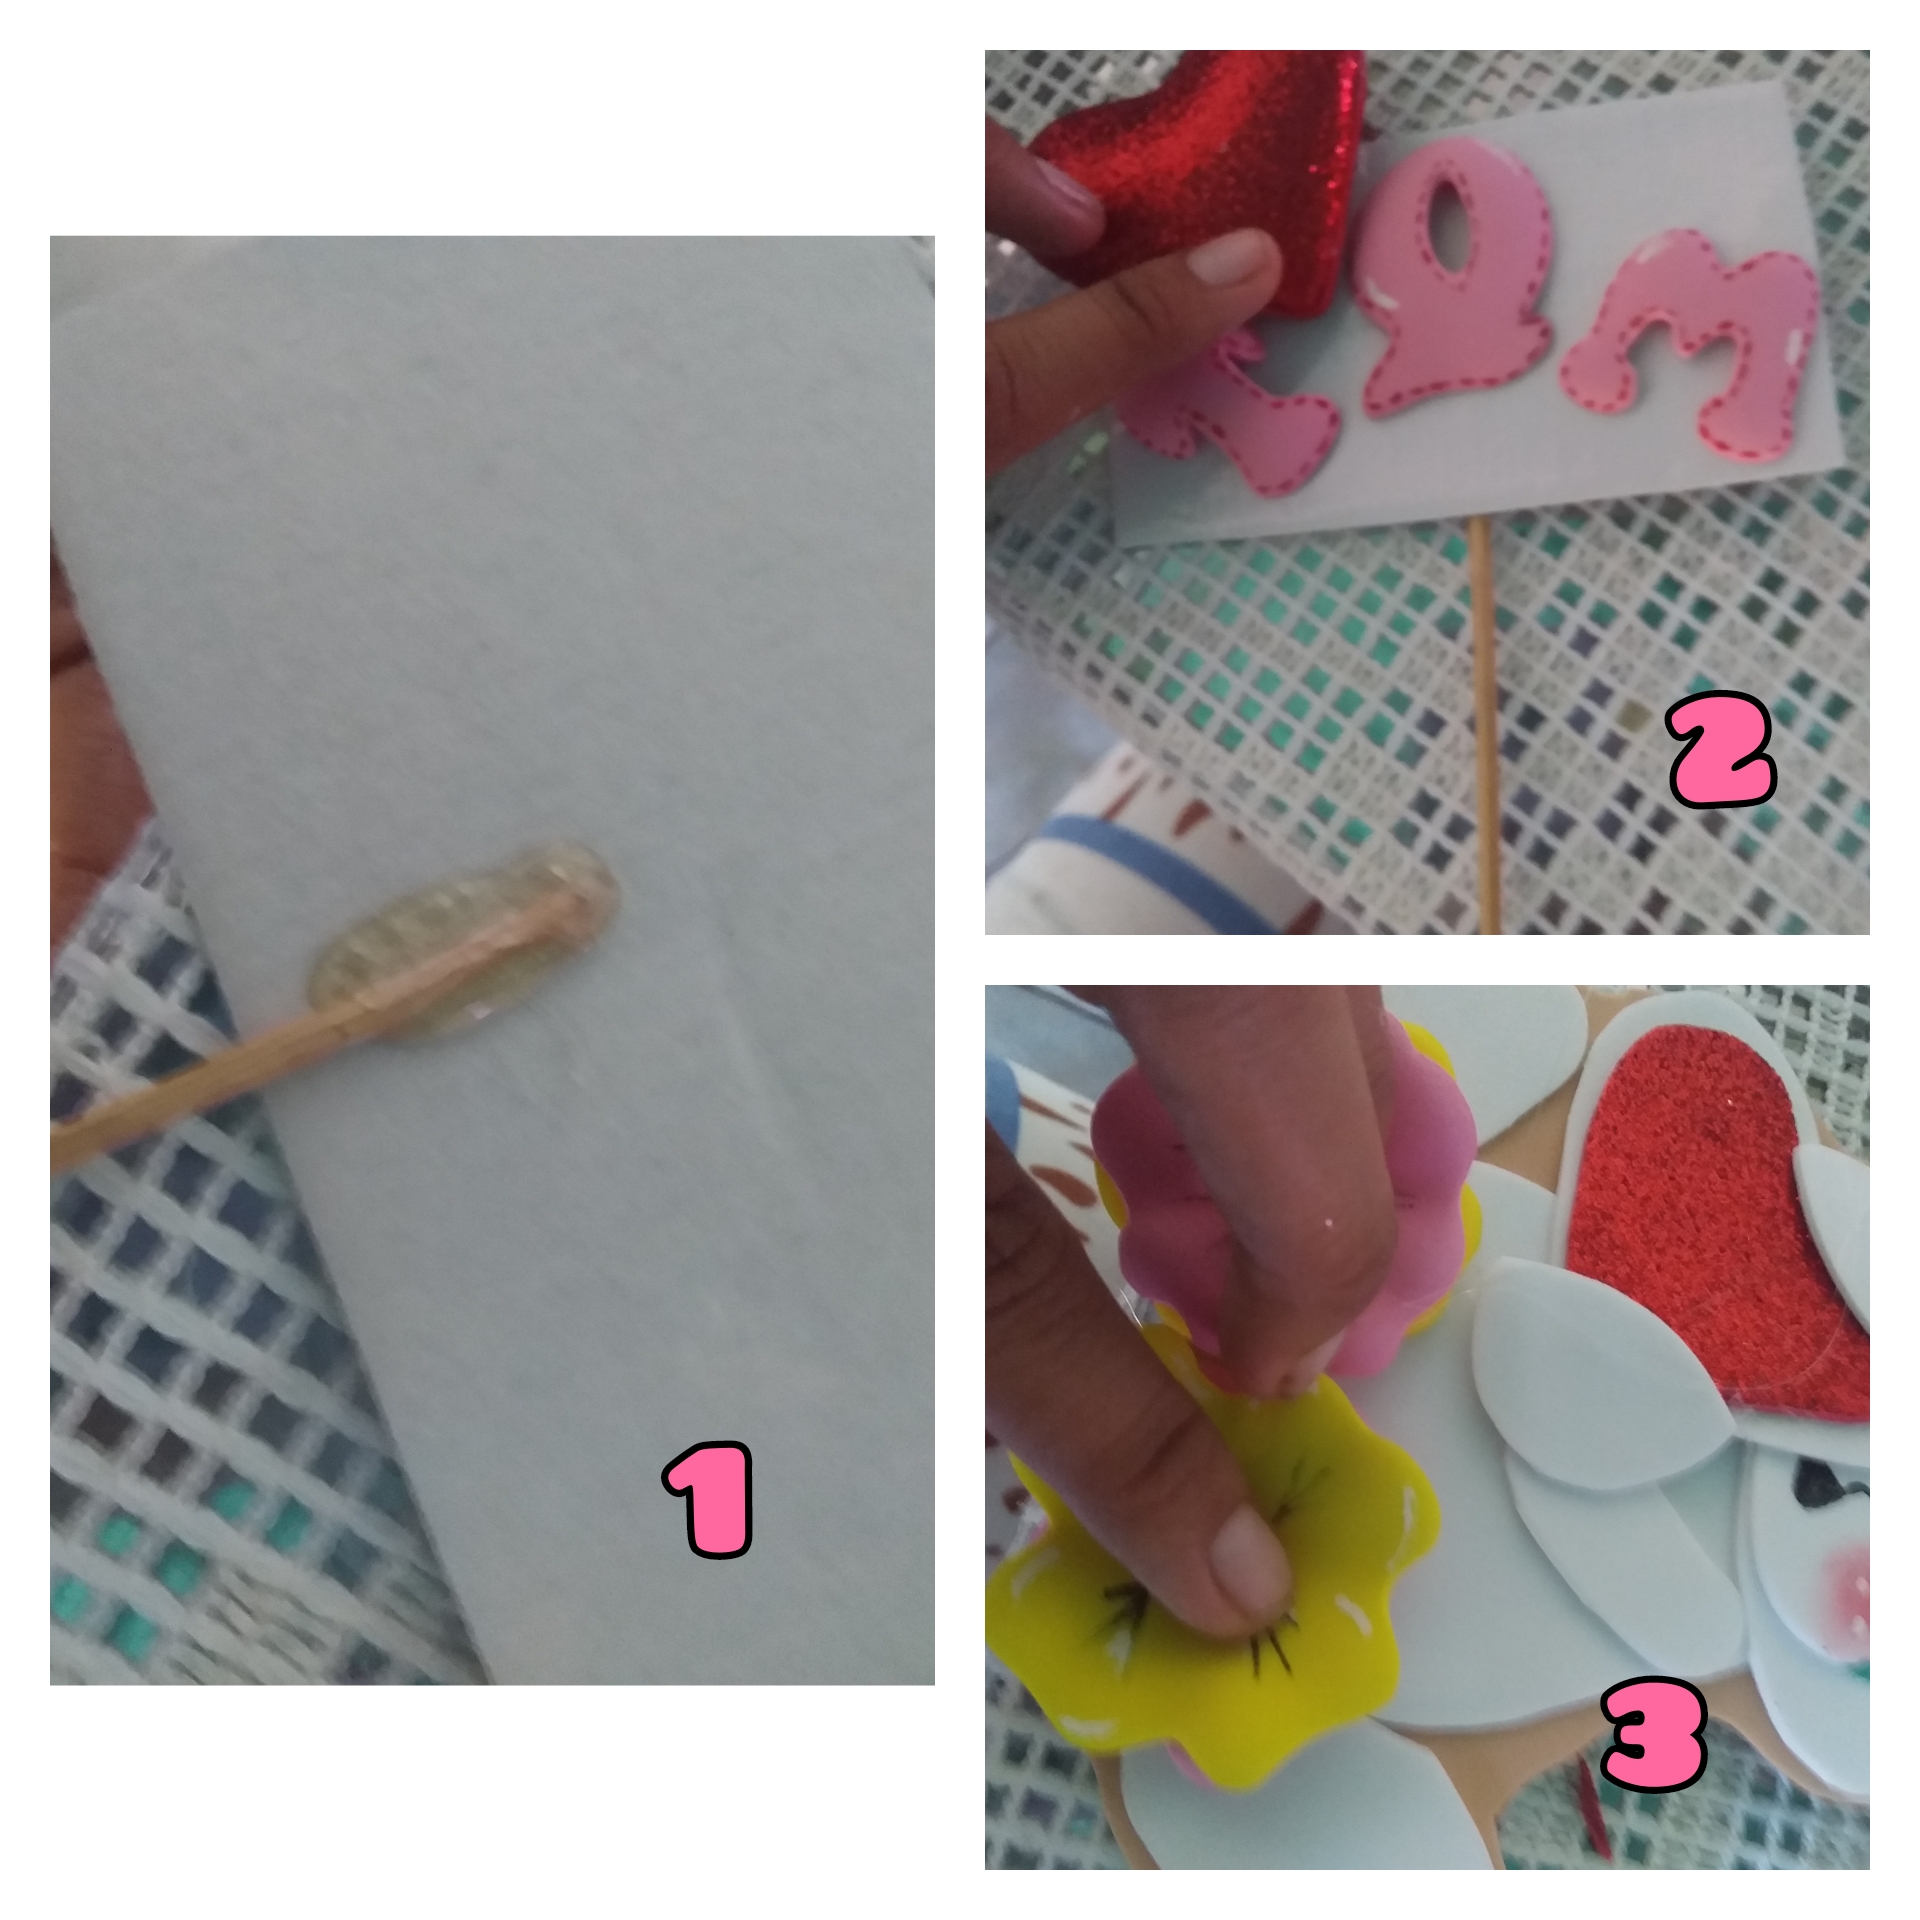
Ahora pegaremos las dos piezas del corazón rojo que pasamos por la plancha para que quede como un globo, hacemos lo mismo con el corazón rosa. Luego cortamos un pequeño cuadrado de cartón que nos ha quedado de la caja y sobre este pegamos las letras.
Step 6
Now we will glue the two pieces of the red heart that we passed through the iron so that it looks like a balloon, we do the same with the pink heart. Then we cut a small square of cardboard that we have left from the box and on this we paste the letters.
Paso 7
Pegamos el palito de altura a la cartulina, pegamos los corazones, pegamos el osito al palito un poco más abajo sobre la cartulina con las letras, y para terminar pegamos las flores a la parte de abajo del osito, y luego lo incrustamos en el anime.
Step 7
We glue the height stick to the cardboard, we glue the hearts, we glue the bear to the stick a little lower on the cardboard with the letters, and to finish we glue the flowers to the bottom of the bear, and then we embed it in the anime.
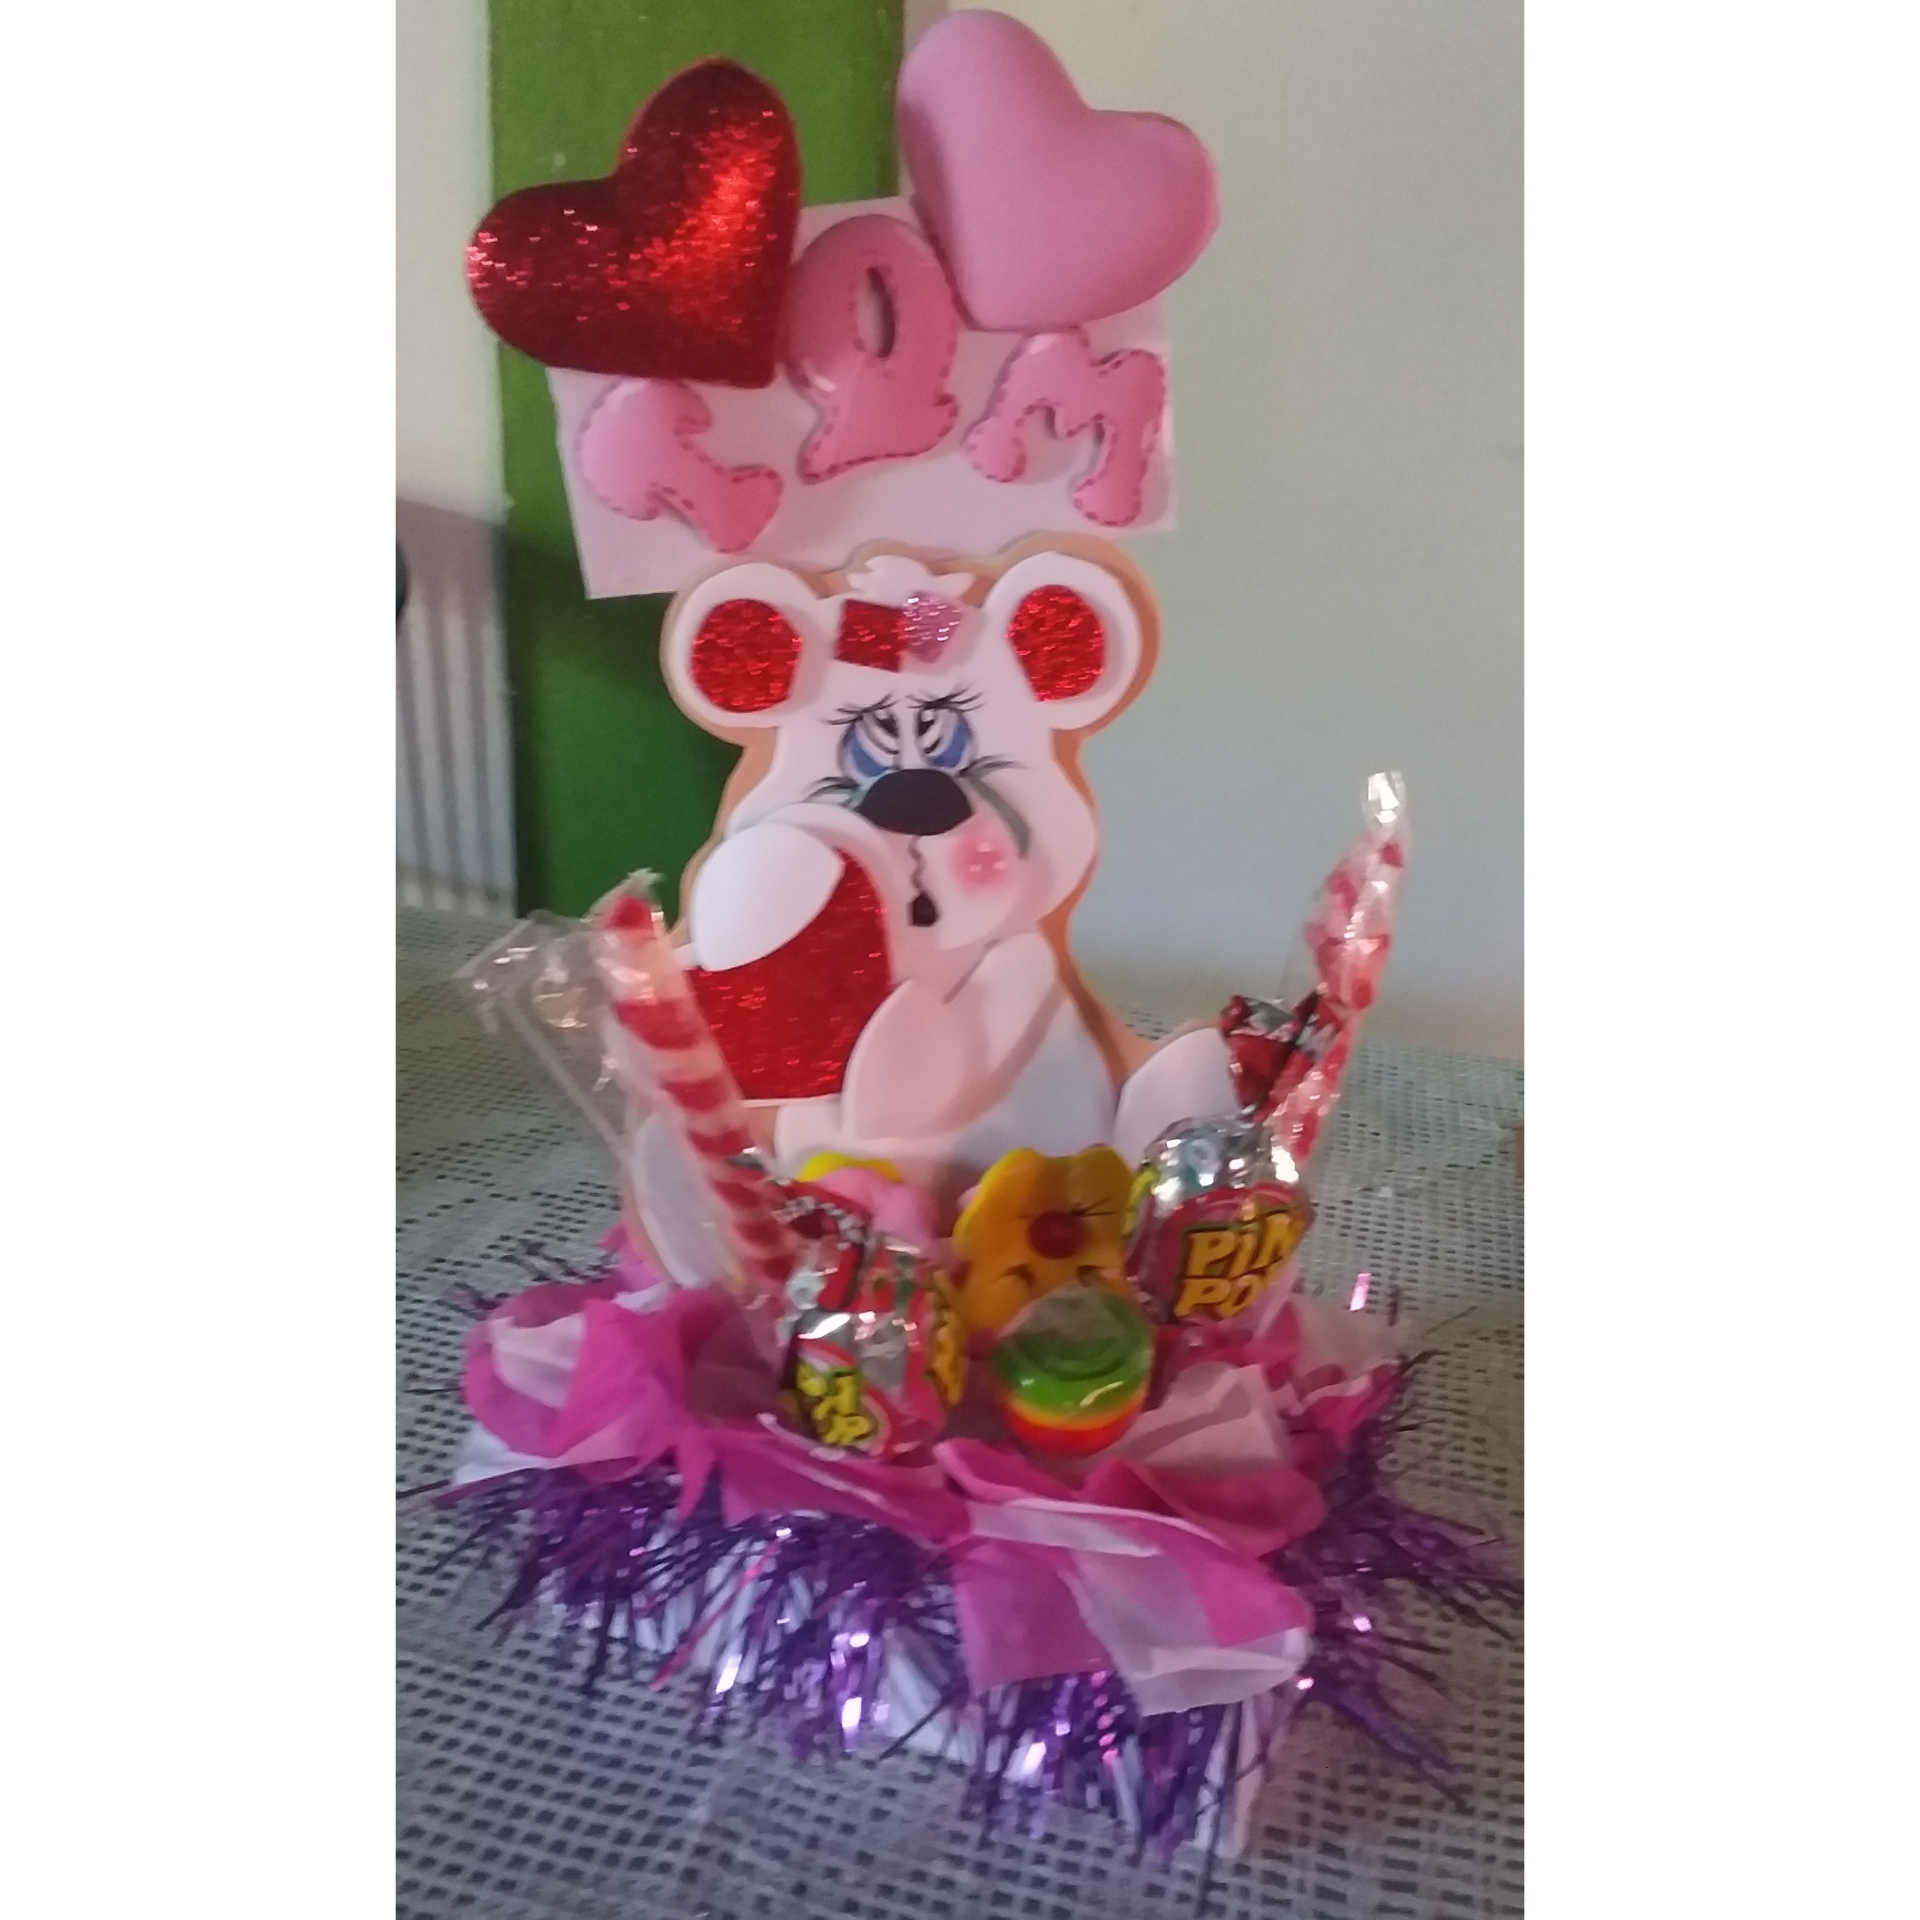
Y este es el resultado, un hermoso arreglo para regalar este 14 de febrero reciclando una vieja caja de celular, espero que les haya gustado amigos. Nos vemos en una próxima publicación.
And this is the result, a beautiful arrangement to give away on this February 14 by recycling an old cell phone box, I hope you liked it friends. See you in a next post.
Simplemente hermoso,gracias por enseñarnos como lo haces,un abrazo
Congratulations @gness! You have completed the following achievement on the Hive blockchain and have been rewarded with new badge(s):
Your next payout target is 500 HP.
The unit is Hive Power equivalent because post and comment rewards can be split into HP and HBD
You can view your badges on your board and compare yourself to others in the Ranking
If you no longer want to receive notifications, reply to this comment with the word
STOPCheck out the last post from @hivebuzz:
Support the HiveBuzz project. Vote for our proposal!