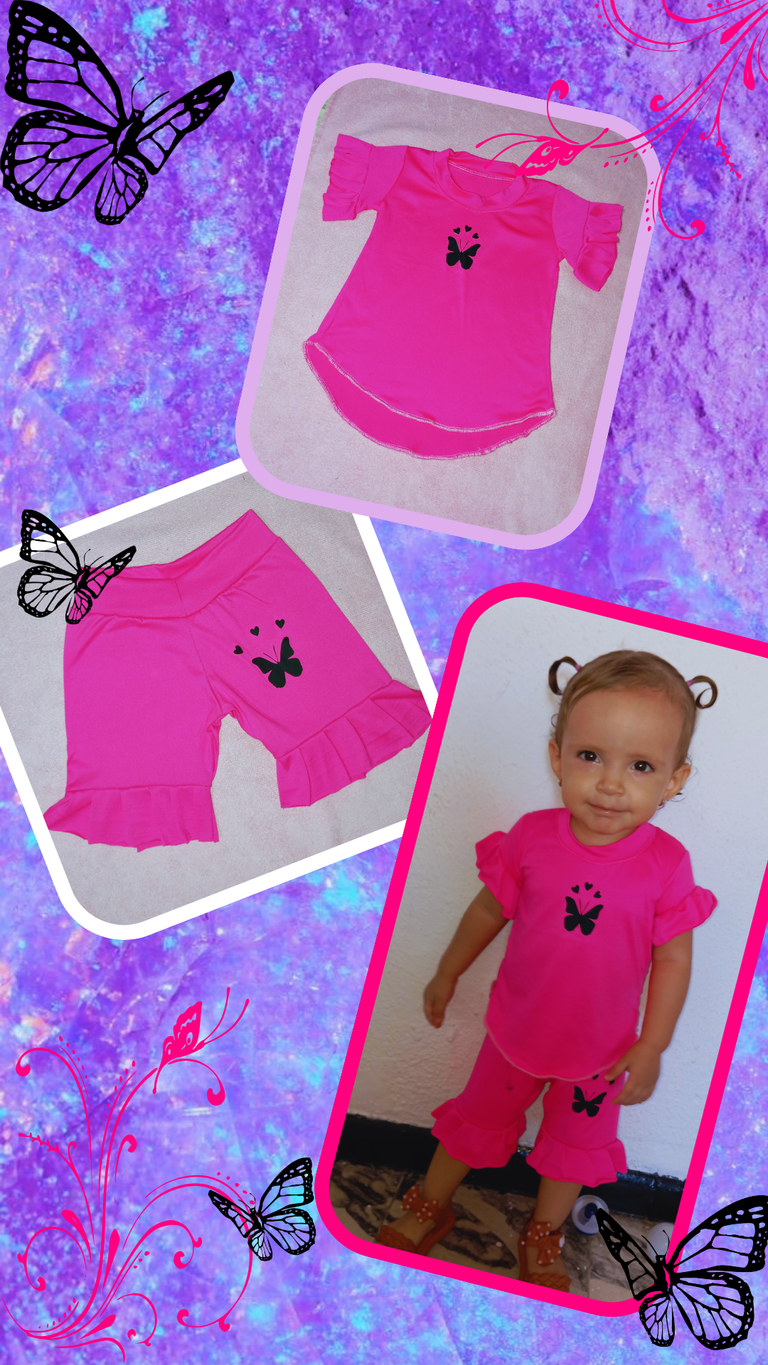
Hello, dear hivers it is a pleasure to share with you one more of my creations. Today has been quite a hectic day. We had to take our baby girl in the morning to get her shots and run errands. The previous times of Emma's vaccinations the side effects, such as fever, did not progress until a slight fever, but this time it has been different, since noon she has been running a fever and has been quite down. I know that this is completely normal, but it is still worrying for us because we know that this will lead her to have a bad night. Anyway, tomorrow will be a better day for my little girl.
Hola, queridos hivers es un gusto compartir con ustedes una más de mis creaciones. Hoy ha sido un día bastante agitado. Ya que, nos ha tocado llevar en la hora de la mañana a nuestra bebé a colocarle sus vacunas y hacer diligencias. Las veces anteriores de las vacunas de Emma los efectos secundarios como lo es la fiebre, no avanzaron sino hasta un leve fogaje, pero está vez ha sido diferente, a partir del mediodía le ha estado dando fiebre y anda bastante decaída. Se que esto es completamente normal, aunque sea así sigue siendo preocupante para nosotros porque sabemos que esto la llevará a tener una mala noche. En fin, mañana será un mejor día para mí pequeña.
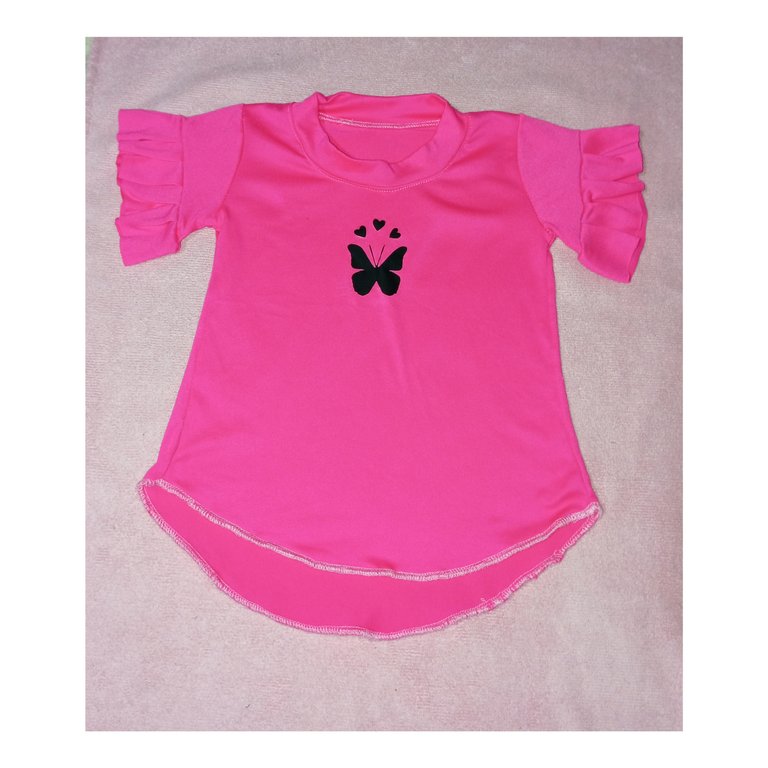
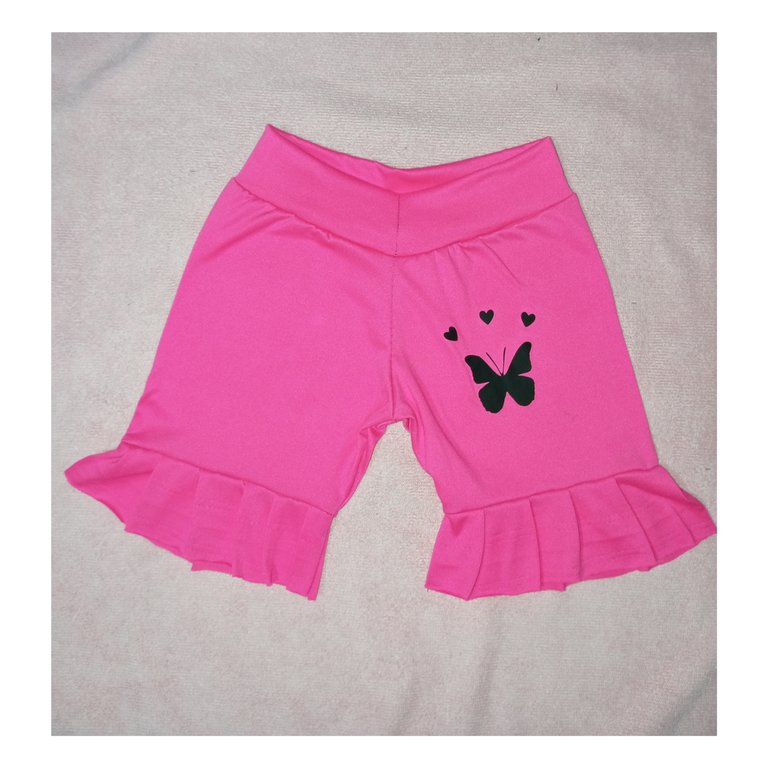
The outfit I show you, I made it last night with some shirts I had made before coming to Colombia, I made them to wear them together when going out, mine was too tight in the sleeves and as I didn't like it, I preferred to make her her complete outfit taking advantage that they had the same sticker and so she could wear it for her vaccination day. For the time being, she will rest from these punctures until she is 5 years old, I feel a little relieved. Without further ado, let's get started with the tutorial.
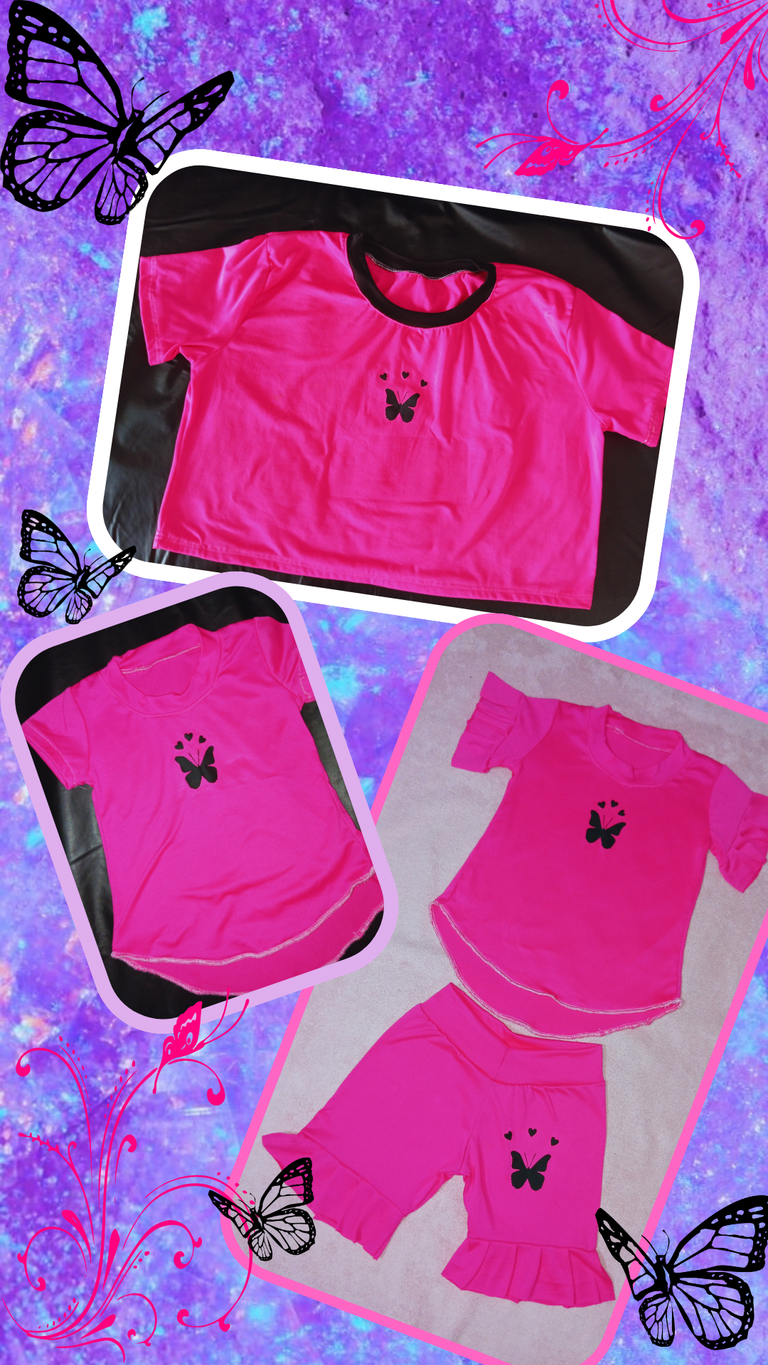
El conjunto que les muestro, lo hice ayer en la noche con unas camisas que había hecho antes de venir a Colombia, las hice para usarlas juntas al salir, la mía me quedaba muy ajustada en las mangas y como no me gustaba, preferí hacerle a ella su conjunto completo aprovechando que tenían el mismo sticker y así ponérselo para su día de vacunación. Por el momento descansará de estos pinchazos hasta los 5 años, me siento un poco aliviada . Sin más preámbulo, comencemos con el tutorial.
Materials:
- Sewing machine.
- Thread.
- Scissors.
- Pins.
- Shorts for size.
Materiales:
- Máquina de coser.
- Hilo.
- Tijera.
- Alfileres.
- Pantalón corto para la medida.
Step 1:
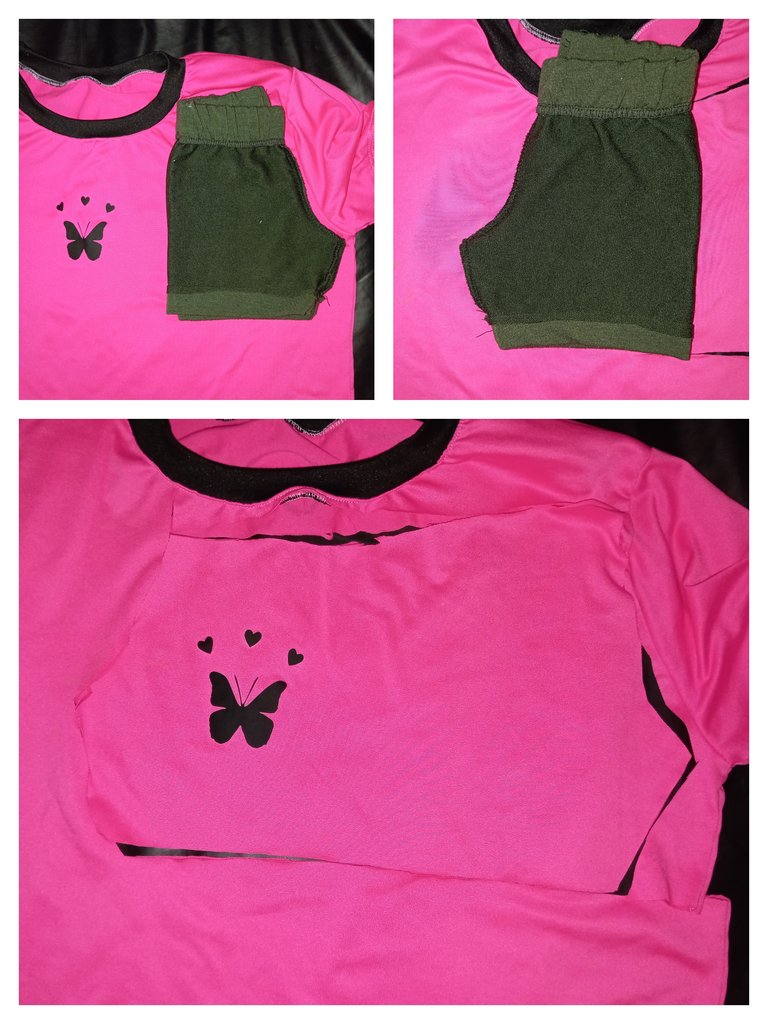
Stretch the lady's shirt and with the sample pants take the measure, first the back and then the front placing it on top of the side where the sticker is, so it will be on the front.
Paso 1:
Estirar la camisa de dama y con el pantalón de muestra sacar la medida, primero la parte trasera y luego la delantera colocando esta encima del lado donde está el sticker, así quedará en el frente.
Step 2:
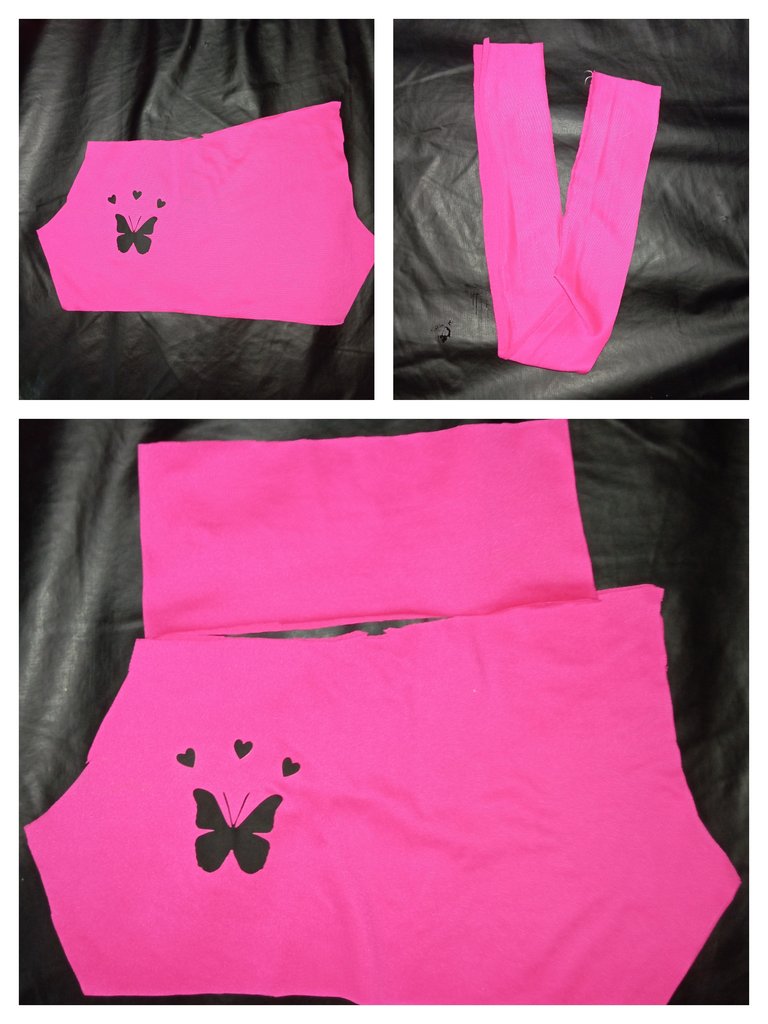
With the leftover part of the shirt cut the waistband a little smaller than the width of the pieces of the shorts, also cut some thick strips to make the fly of the shorts.
Paso 2:
Con la parte que nos sobró de la camisa cortar la pretina un poco más pequeña del ancho que tiene las piezas del pantalón corto, también cortar unas tiras gruesas para hacer los vuelos del mismo.
Step 3:
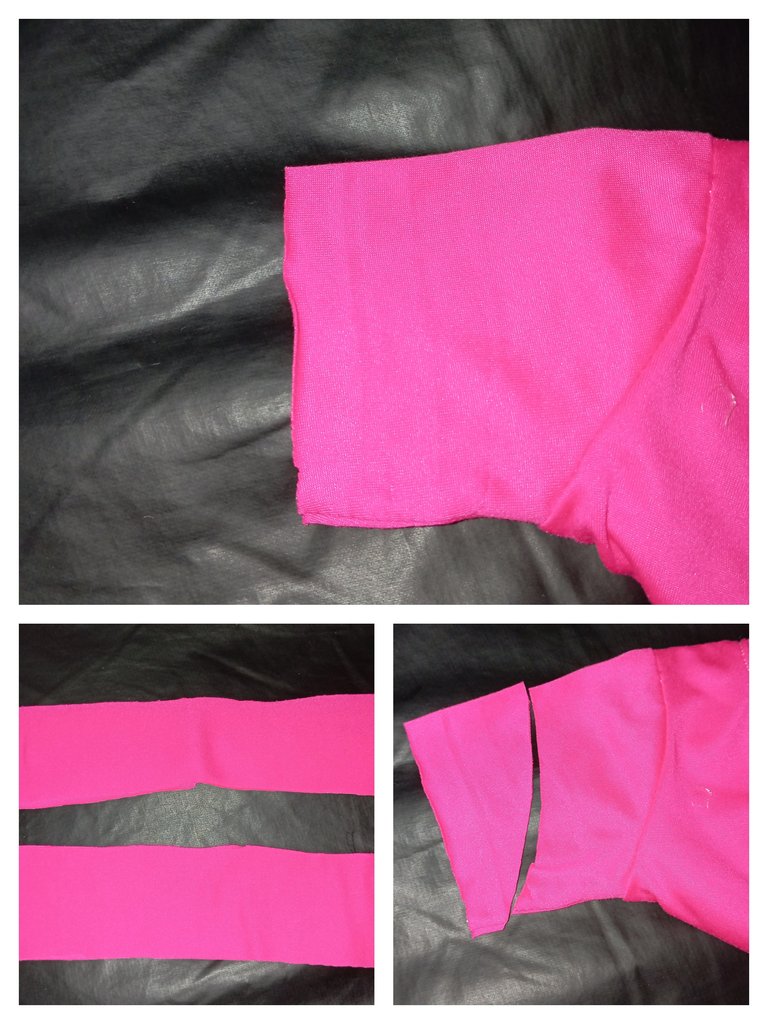
Unpick the edges of the sleeves of the girl's shirt and make a cut as shown in the photo, cut two strips to make the frills of the shirt.
Paso 3:
Descoser las orillas de las mangas de la camisa de niña y hacer un corte tal cual como se aprecia en la foto, cortar dos tiras para los vuelos de esta.
Step 4:
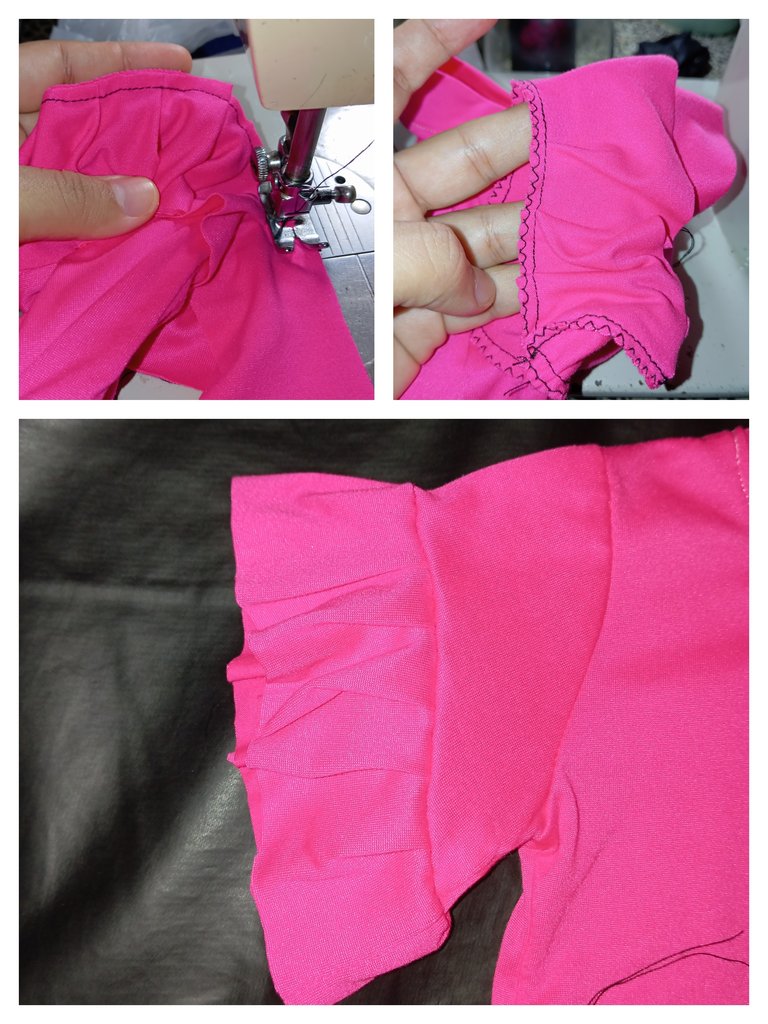
Sew the sleeve sleeves' pleats by making small pleats, first sew them with a straight stitch and finish with a zigzag stitch.
Paso 4:
Coser los vuelos de las mangas de la camisa haciendo pequeños pliegues, primero hacer estos con la puntada recta y finalizar pasando zigzag.
Step 5:
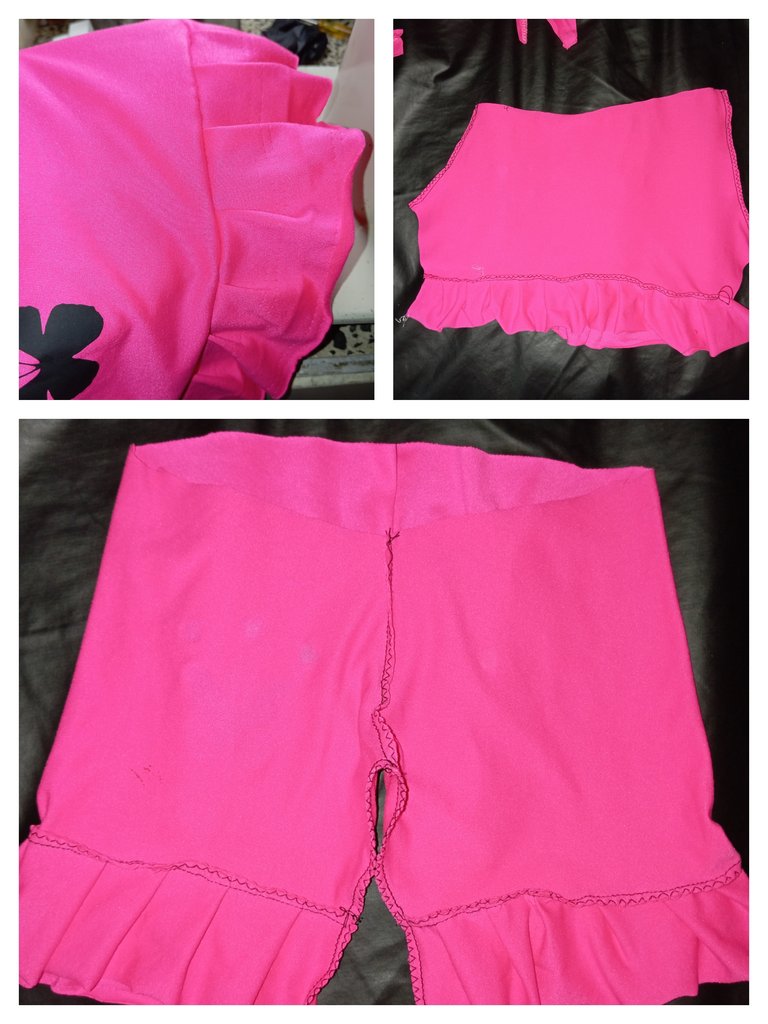
Glue the pleats of the shorts pieces together before starting to assemble, once this is done, join the front, the back and then join the crotch.
Paso 5:
Pegar los vuelos de las piezas del pantalón corto antes de empezar a armar, una vez hecho esto, unir la parte delantera, la trasera y luego unir la entrepierna.
Step 6:
Make a diagonal cut to the waistband and sew, with the pins center the line to the front, half to the back and glue the waistband stretching a little. This will finish the whole thing.
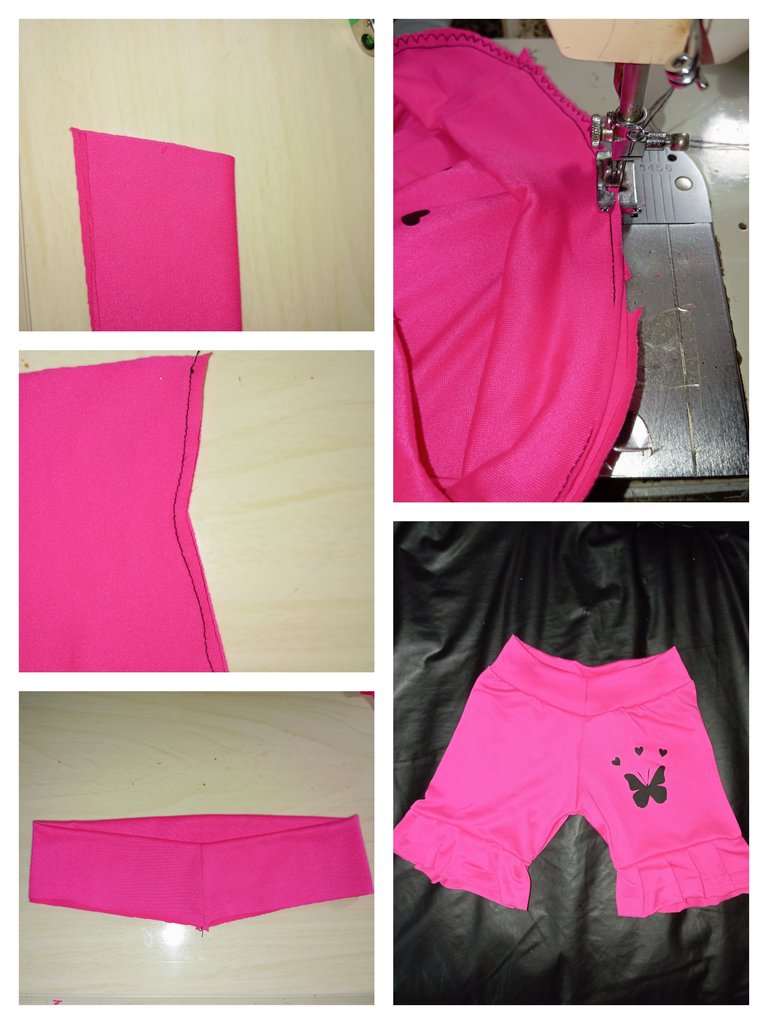
Paso 6:
Hacer un corte diagonal a la pretina y coser, con los alfileres centrar la línea a la parte delantera, la mitad a la parte trasera y pegar la pretina estirando un poco. Con esto quedará terminado el conjunto.
I always like to give another chance to the garments that I have not used and are in perfect condition and this was one of those occasions in which I could take advantage, being my little girl even more. I could say that what I enjoy the most is making Emma clothes that I know she will use a lot.
Siempre me gusta darle otra oportunidad a las prendas que no he usado y están en perfecto estado y pues esta fue una de esas ocasiones en las cuales pude sacar provecho, tratándose de mi pequeña aún más. Podría decir que lo que más disfruto es hacerle a Emma ropa que sé que usará bastante.
I hope you liked it. A hug from afar and take care of yourselves guys. See you soon with another tutorial!
Espero haya sido de su agrado. Un abrazo desde la distancia y cuídense mucho chicos. Hasta pronto con otro tutorial!!!
Translation with DeepL
Photos taken with Redmi 12
Editing done in Canva
Traducción con DeepL
Fotos tomadas con Redmi 12
Edición realizada en Canva
Que bonito quedó amiga, se ve muy lindo 😉
!DIY
Muchas gracias, fue hecho con mucho amor. Saludos 😊🥰
You can query your personal balance by
!DIYSTATSI would love to have the same talent as you) looks great👍