#☀️☀️☀️☀️☀️☀️☀️☀️☀️☀️☀️☀️
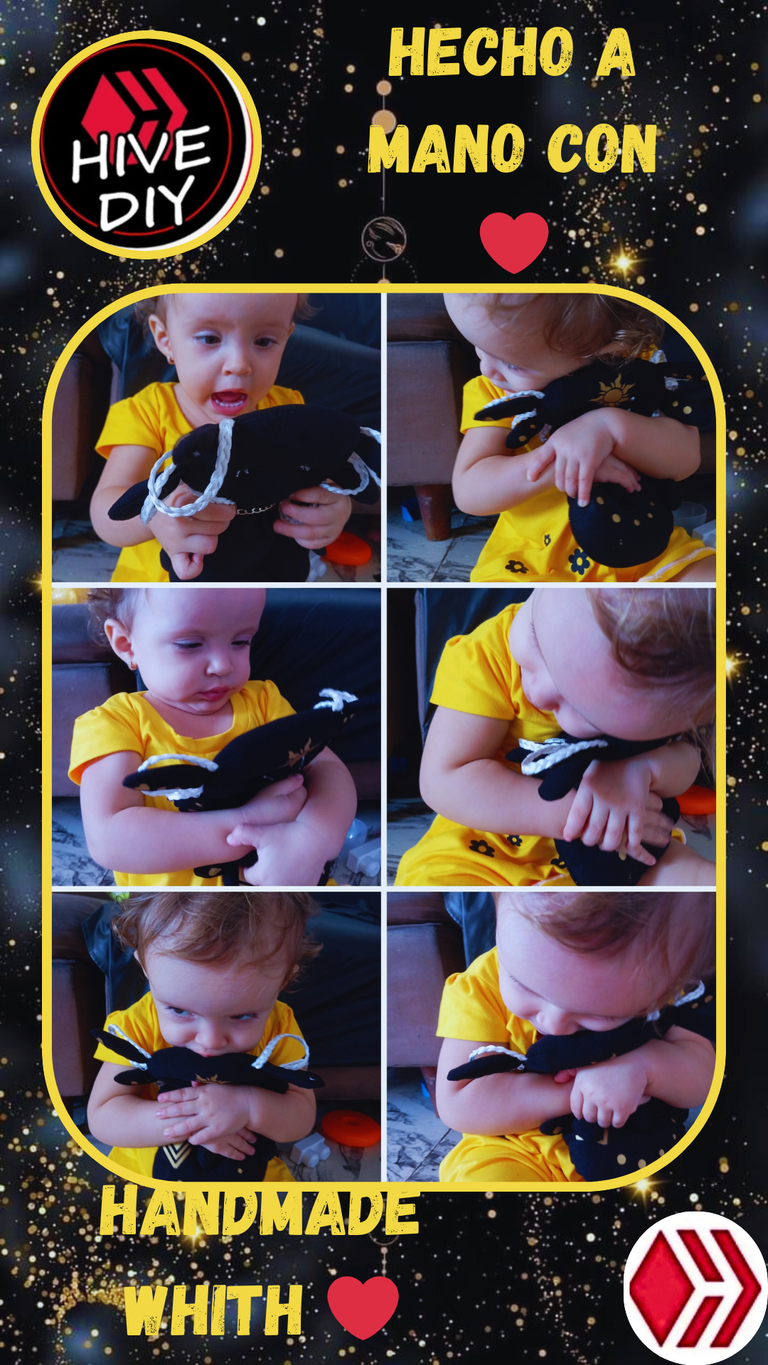
Hi Hivers. It is a special day for me and to celebrate it I have decided to make a cute ajolote stuffed animal. Today is my birthday and although I know that what I will make will not be for me, there is no better gift than to see my little girl happy. When she was just months old I made her an attachment stuffed animal, this was a very cute pink ajolote but it's been more than a year since I made it and even though it's a little worn out she still loves it.
Hola Hivers. Es un día especial para mí y para celebrarlo he decidido hacer un lindo peluche de ajolote. Hoy se celebra mi cumpleaños y aunque sé que lo que haré no será para mí, no existe mejor regalo que ver a mi pequeña feliz. Cuando tenía apenas meses de nacida le hice un peluche de apego, este fué un ajolote rosa muy bonito pero ya pasó más de un año desde que lo hice y aunque está un poco desgastado ella lo sigue amando.
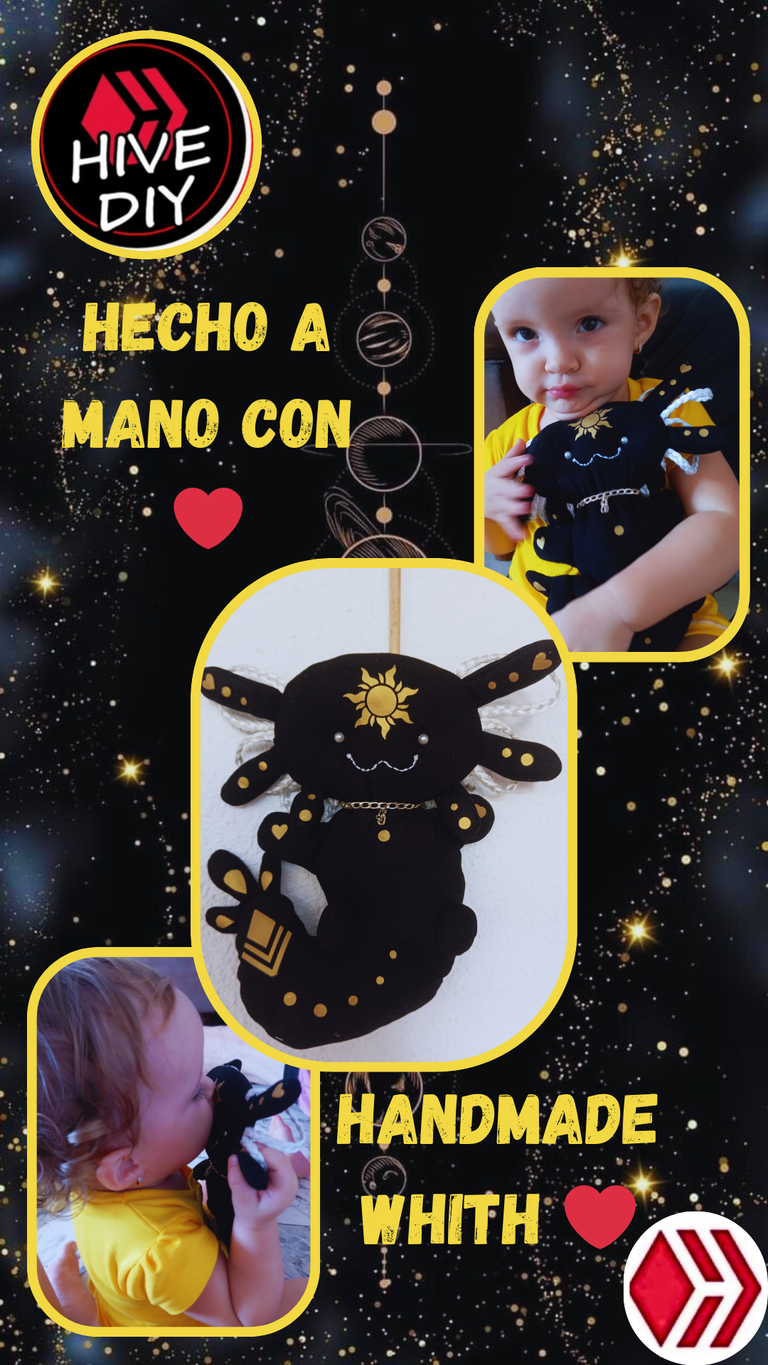
I think this is a very beautiful creature so I made this one but different from the previous one and with more details. I loved the reaction of my princess when she had it in her little hands, it was the nicest gift I could receive this day. Before on my birthdays I used to feel sad but now that I have her everything changed for the better. I hope you like it as much as she did.
A mí me parece que está es una criatura muy hermosa por eso realicé este pero diferente al anterior y con más detalles. Me encantó la reacción de mi princesa al tenerlo en sus pequeñas manitos fue el regalo más lindo que pude recibir este día. Antes en mis cumpleaños solía sentirme triste pero ahora que la tengo a ella todo cambió para bien. Espero a ustedes les guste tanto como a ella le gustó.
Materials:
☀️ Fabric.
☀️ Threads.
☀️ Needle.
☀️ Sewing machine.
☀️ Pins.
☀️ Scissors.
☀️ Clothes iron.
☀️ 2 plastic beads.
☀️ Gold textile vinyl figures.
☀️ Stuffing (I used scraps of plush fabric cut very small).
☀️ Decorative braid.
☀️Cadena of costume jewelry.
Materiales:
☀️ Tela.
☀️ Hilos.
☀️ Aguja.
☀️ Máquina de coser.
☀️ Alfileres.
☀️ Tijera.
☀️ Plancha de ropa.
☀️ 2 perlas de plástico.
☀️ Figuras de vinil textil dorado.
☀️ Relleno (Usé retazos de tela de peluche cortados muy pequeños).
☀️ Trenza decorativa.
☀️Cadena de bisutería.
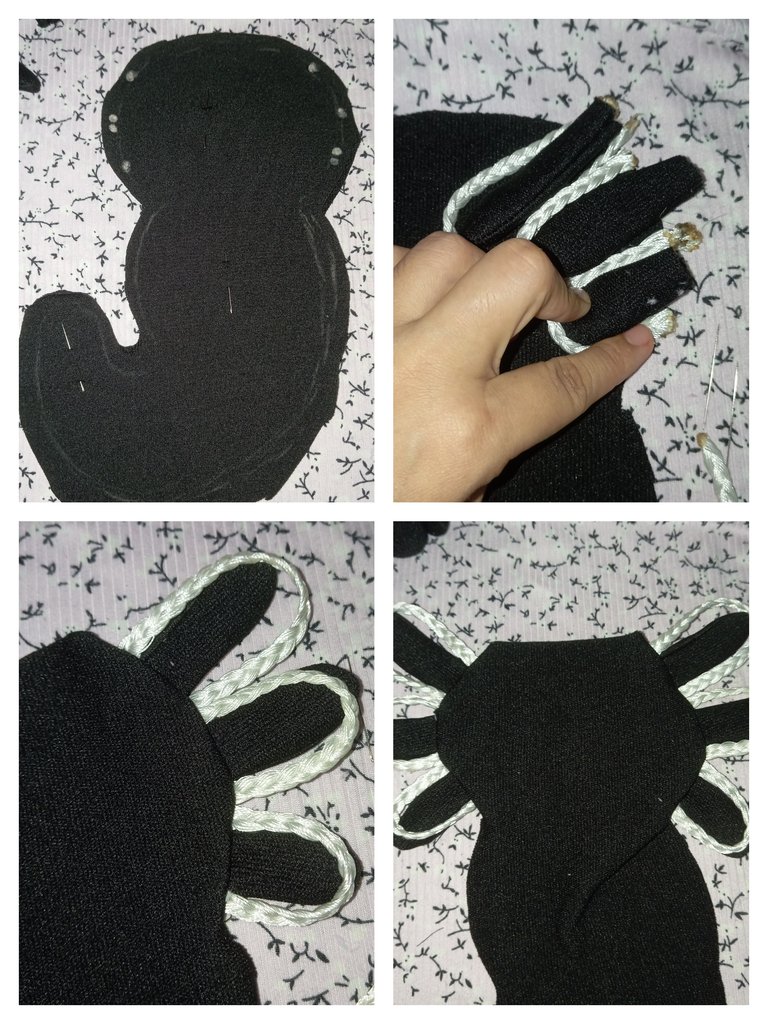
Step 1:
Place the two layers of fabric on the side where we are going to sew, we will mark all the pieces and a 3 tail that is not seen in the photo🫢😁.
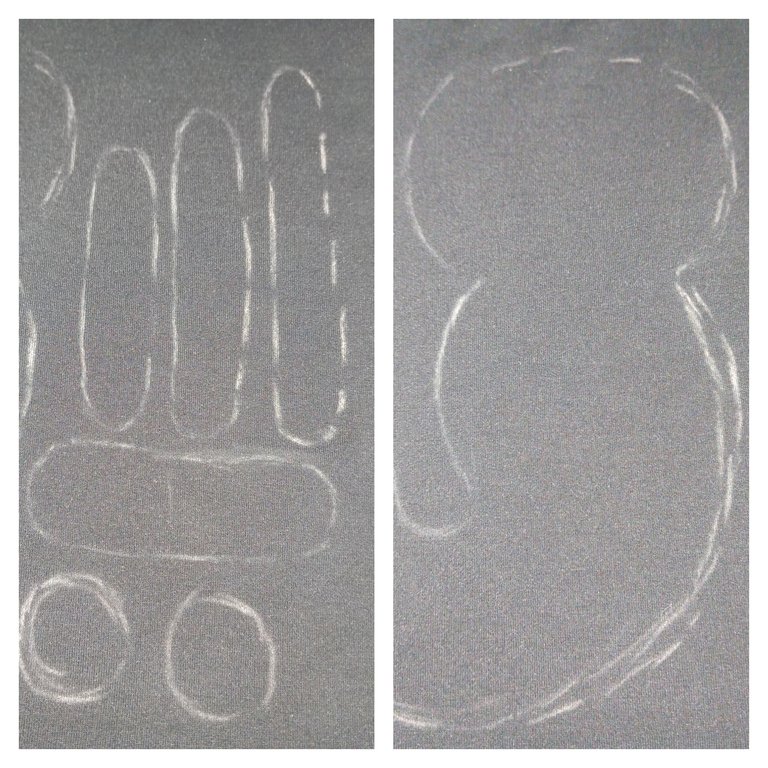
Paso 1:
Colocar las dos capas de tela por el lado donde vamos a coser, marcaremos todas las piezas y una colita de 3 que no se ve en la foto🫢😁
Step 2:
Sew all the small pieces, the ones that are aligned from largest to smallest we will cut them in half and the one that is left over thicker will be the front legs, the round pieces will be the back legs to these we must leave a space without a seam to be able to fill, in the same way we will do with the tail. Once this is done, we proceed to fill in.
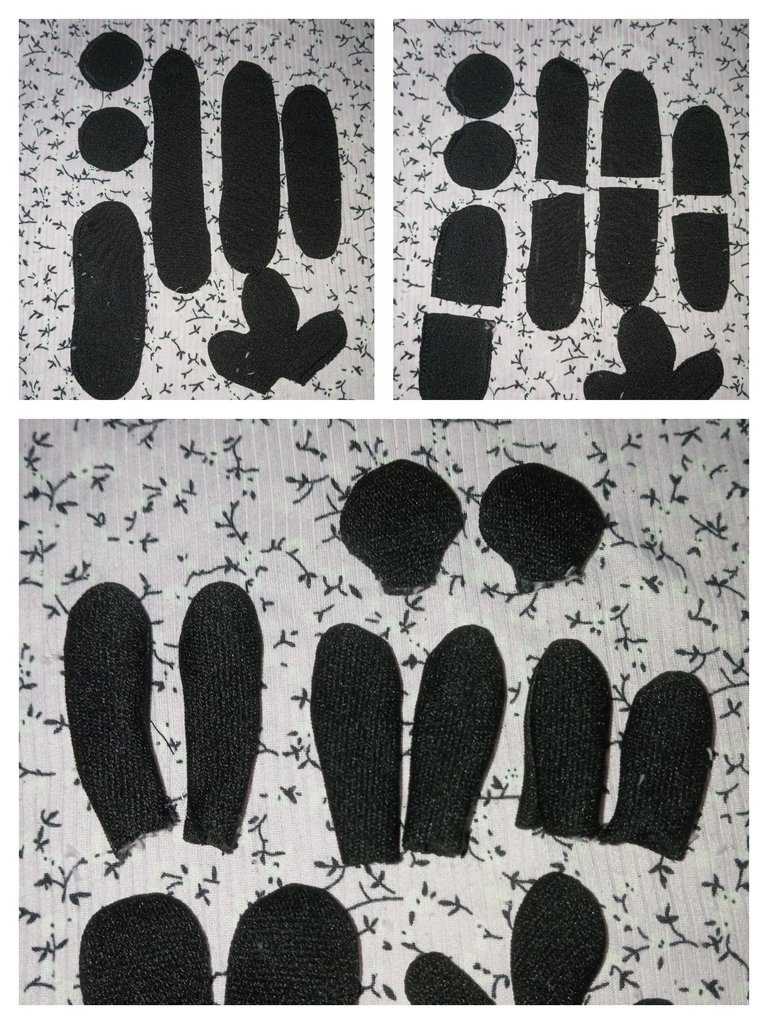
Paso 2:
Coser todas las piezas pequeñas, las que van alineadas de mayor a menor las cortaremos a la mitad y la que sobra más gruesa serán las patas delanteras, las piezas redondas serán las patas traseras a estás debemos dejar un espacio sin costura para poder rellenar, de igual manera haremos con la cola. Hecho lo anterior procedemos a rellenar.
Step 3:
Cut 6 braids from largest to smallest, placing them in pairs (3 pairs).

Paso 3:
Cortar 6 trenzas de mayor a menor colocando por par (3 pares).
Step 4:
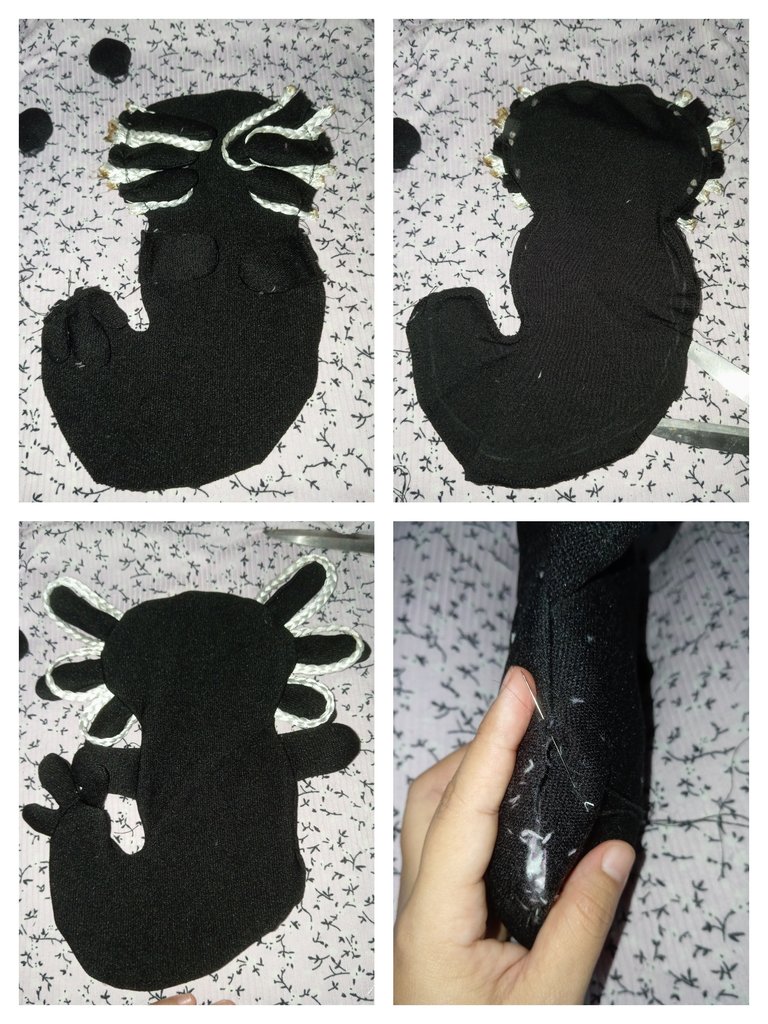
The 2 pieces of fabric that will be for the body must be unsewn, in one we will place the external gills placing from largest to smallest and around it a braid of the same shape, sew going over them to secure them well.
Paso 4:
Las 2 piezas de tela que serán para el cuerpo deben estar sin coser, en una ubicaremos las branquias externas colocando de mayor a menor y a su alrededor una trenza de la misma forma, coser repasando para asegurarlas bien.
Step 5:
Place the front legs, the tail and sew, place the cape on top and seal leaving a space to fill. Turn over, fill and seal.
Paso 5:
Ubicar las patas delanteras, la cola y coser, colocar la capa encima y sellar dejando un espacio para rellenar. Volteamos, rellenamos y sellamos.
Step 6:
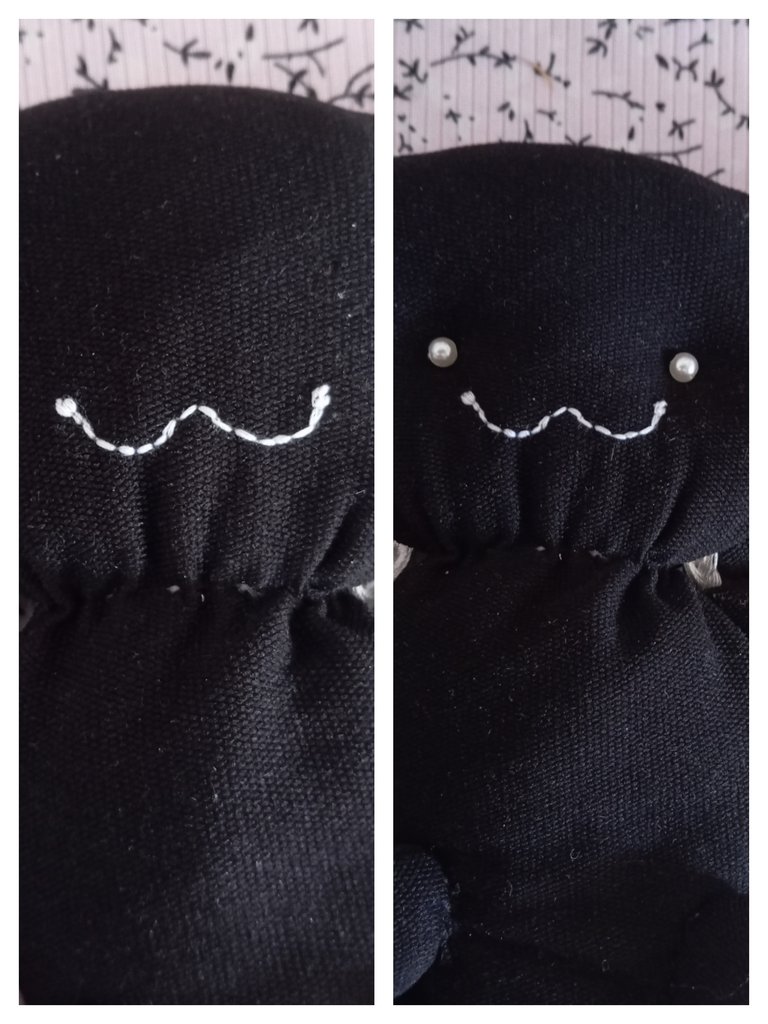
Glue the back legs, with white thread and the manual needle make the mouth and glue the beads that will be the eyes, we will also adjust the neck.
Paso 6:
Pegar las patas traseras, con hilo blanco y la aguja manual hacer la boca y pegar las perlas que serán los ojos, también ajustaremos el cuello.
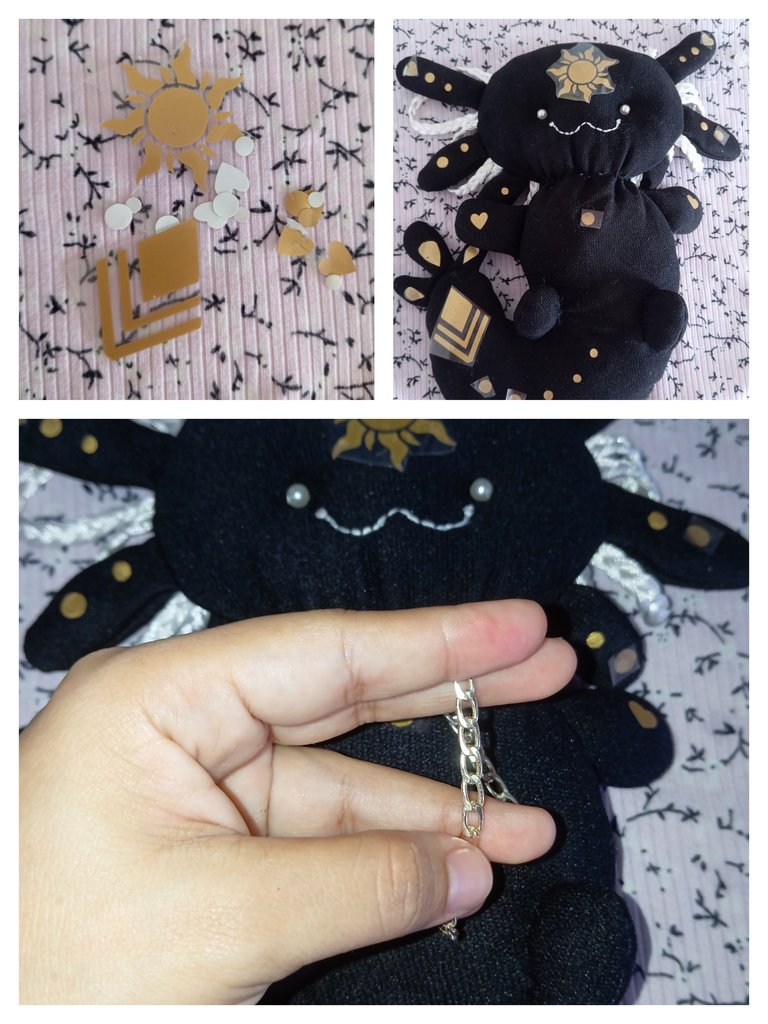
Step 7:
With the iron glue the golden textile vinyl and put the costume jewelry chain on the neck to cover the seam.
Paso 7:
Con la plancha pegar el vinil textil dorado y poner la cadena de bisutería en su cuello para tapar la costura.
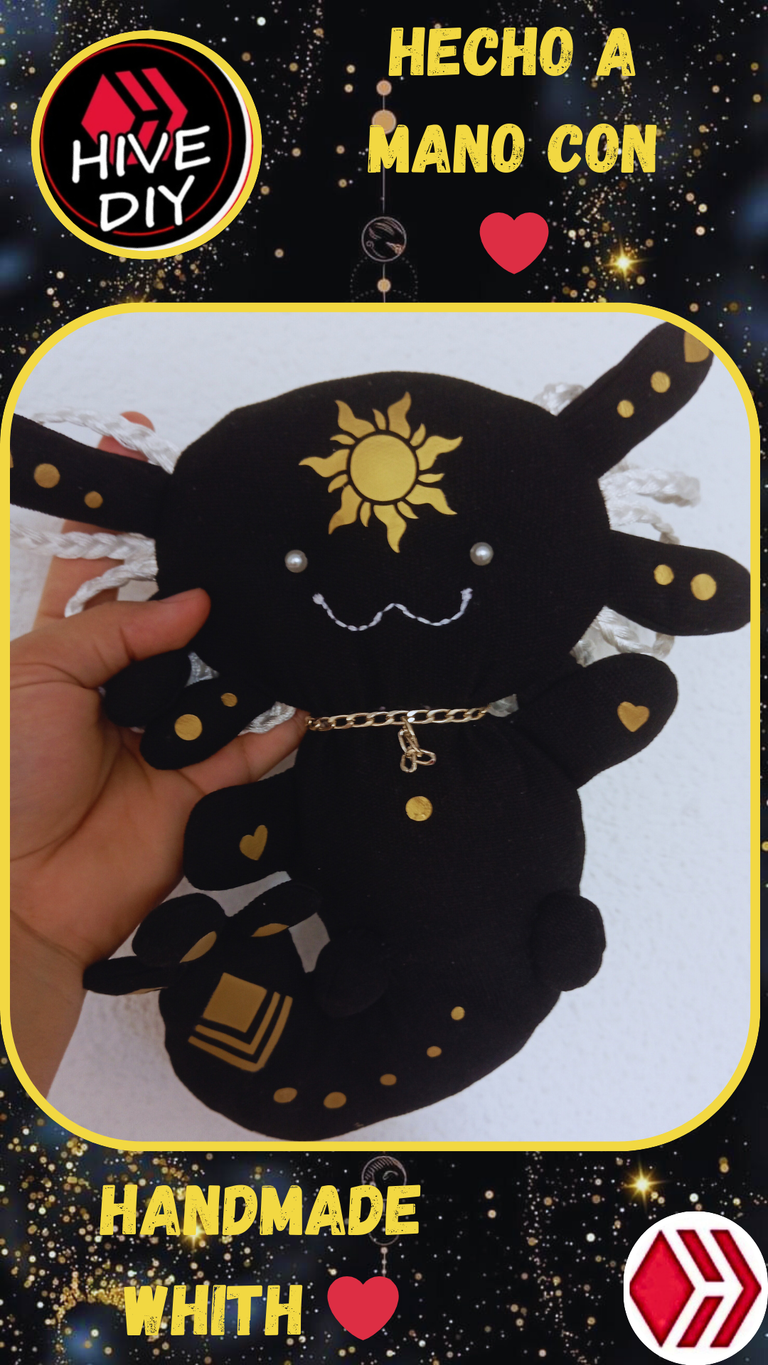
With this we have finished the stuffed animal. Let me know in the comments what you thought of it and if you would change anything. To my taste I think it looked great, it lacked more stuffing but since I didn't have any more I left it like that. Greetings to you all.
Con esto ya terminamos el peluche. Cuéntenme en los comentarios que tal les pareció y si le cambiarían algo. A mi gusto creo que quedó genial, le faltó más relleno pero como no tenía más lo dejé así. Saludos.

Translation with DeepL
Photos taken with Redmi 12
Editing done in Canva
Traducción con DeepL
Fotos tomadas con Redmi 12
Edición realizada en Canva
Congratulations @hayleysv! You have completed the following achievement on the Hive blockchain And have been rewarded with New badge(s)
Your next target is to reach 150 posts.
You can view your badges on your board and compare yourself to others in the Ranking
If you no longer want to receive notifications, reply to this comment with the word
STOPCheck out our last posts:
Es un regalo encantador
!discovery 45
Gracias amigo. Mi hija quedó encantada y muy feliz. Saludos ☺️
This post was shared and voted inside the discord by the curators team of discovery-it
Join our Community and follow our Curation Trail
Discovery-it is also a Witness, vote for us here
Delegate to us for passive income. Check our 80% fee-back Program
Nice
The post is so creative
Thank you my friend. It is a pleasure that you liked it. Regards 😊
Wow.. Amazing...
Handmade present with lots of love and dedication...
Thank you, when it comes to my little one the love given in these projects is double.
Yea, it seems ...🤗