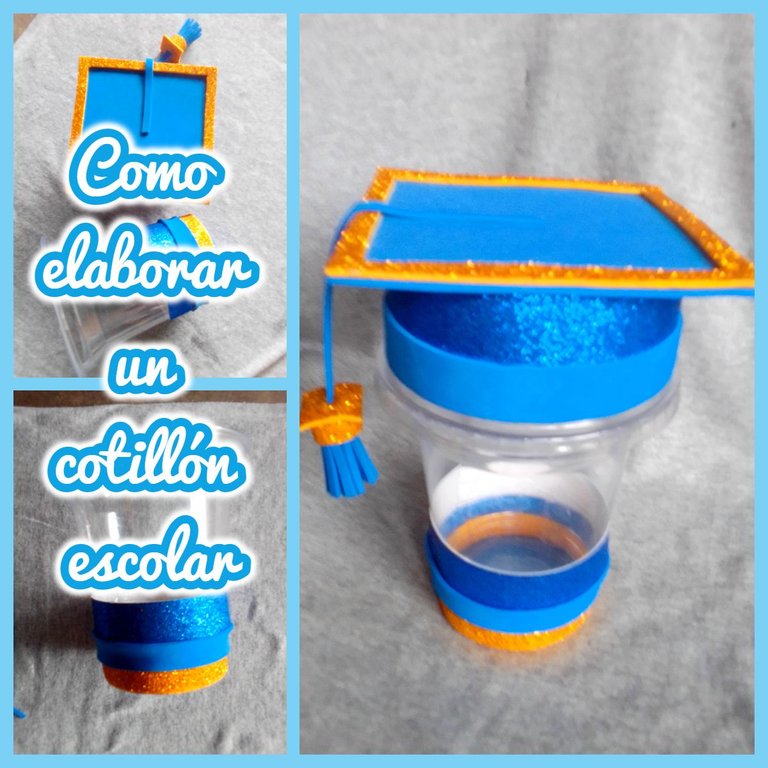
Very good morning, my appreciated friends who make up this beautiful community. Also, blessed beginning of the month for everyone, may this month be very prosperous and with new projects to carry out.
To start this day, I would like you to join me in making a school party favor, taking into account a new initiative, we are going to make it using a plastic container with its lid, for those children who are graduating, and it is also a great idea to be able to use this type of packaging, it is very comfortable when opening.
Muy buenos días, mis apreciados amigos que conforman esta bella comunidad. Además, bendecido comienzo de mes para todos, que este mes sea de mucha prosperidad y con nuevos proyectos a realizar.
Para comenzar este día, deseo que me acompañen a elaborar un cotillón escolar, tomando en cuenta una nueva iniciativa, vamos a elaborarlo utilizando un envase plástico justo con su tapa, para esos niños que se gradúan, además es una gran idea en poder utilizar este tipo de envase, es muy cómodo al momento de abrir.
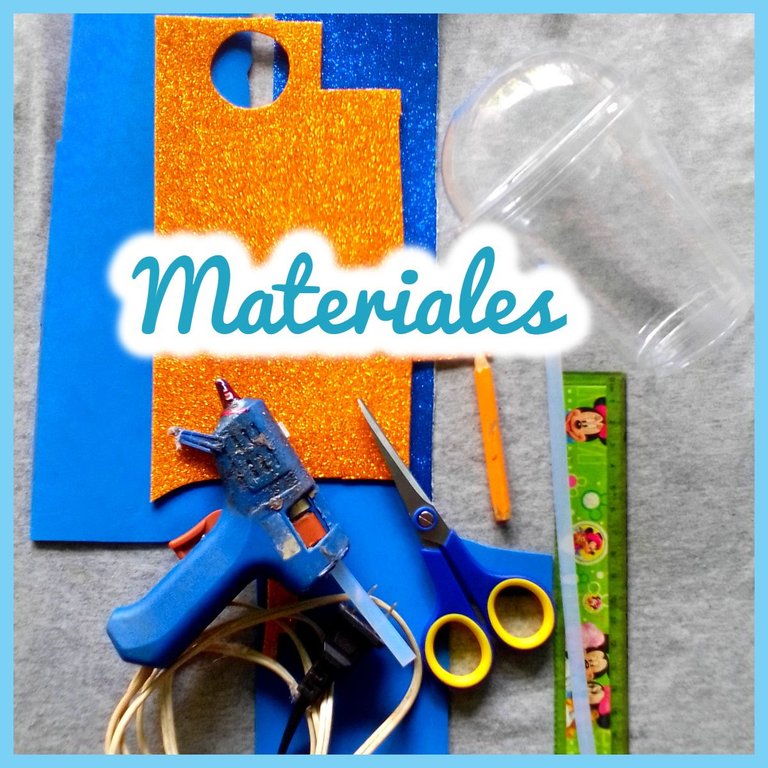
Used materials:
√ Plastic container.
√ Blue foam.
√ Golden frosted foam.
√ Blue frosted cardstock.
√ Pencil.
√ Scissors.
√ Rule.
√ Silicone gun plus bar.
Materiales utilizados:
√ Envase plástico.
√ Foam azul.
√ Foami escarchado dorado.
√ Cartulina escarchada azul.
√ Lápiz.
√ Tijera.
√ Regla.
√ Pistola de silicona más barra.
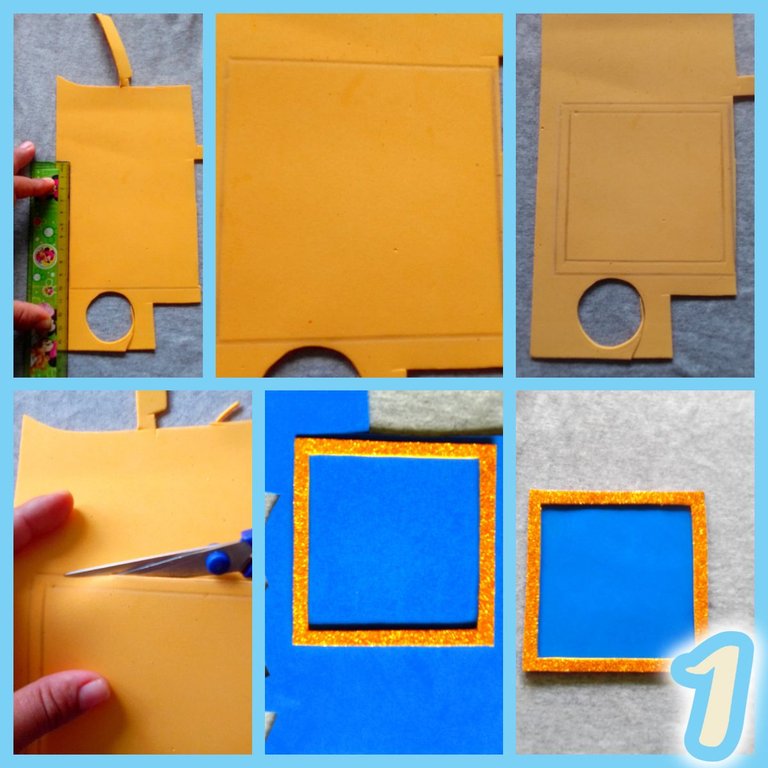
Step 1:
Place the foam on the opposite side. I measured a square 12cm wide x 12cm long, then to that square, I measured 0.5cm wide x 0.5cm long and cut out. When cutting out I glued it to the blue foam, looking like this.
Paso 1:
Coloque el foami del lado contrario. Medí un cuadrado de 12 cm de ancho x 12 cm de largo, luego a ese cuadrado, medí 0.5 cm de ancho x 0.5 de largo y recorte. Al recortar lo pegué al foami azul, quedando de esta manera.
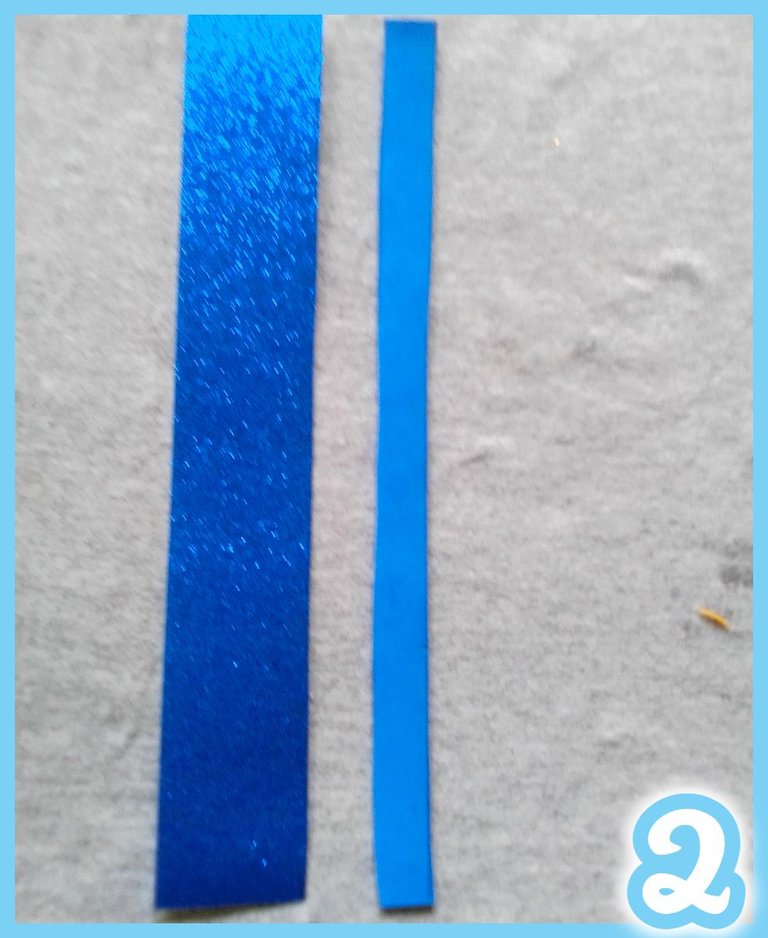
Step 2:
Cut a strip of cardboard 28 cm long x 4.5 cm wide, then cut a strip of blue foam 28 cm long x 1.5 cm wide.
Paso 2:
Corte una tira, de cartulina de 28 cm de largo x 4.5 de ancho, luego corte una tira de foami azul de 28 cm de largo x 1.5 de ancho.
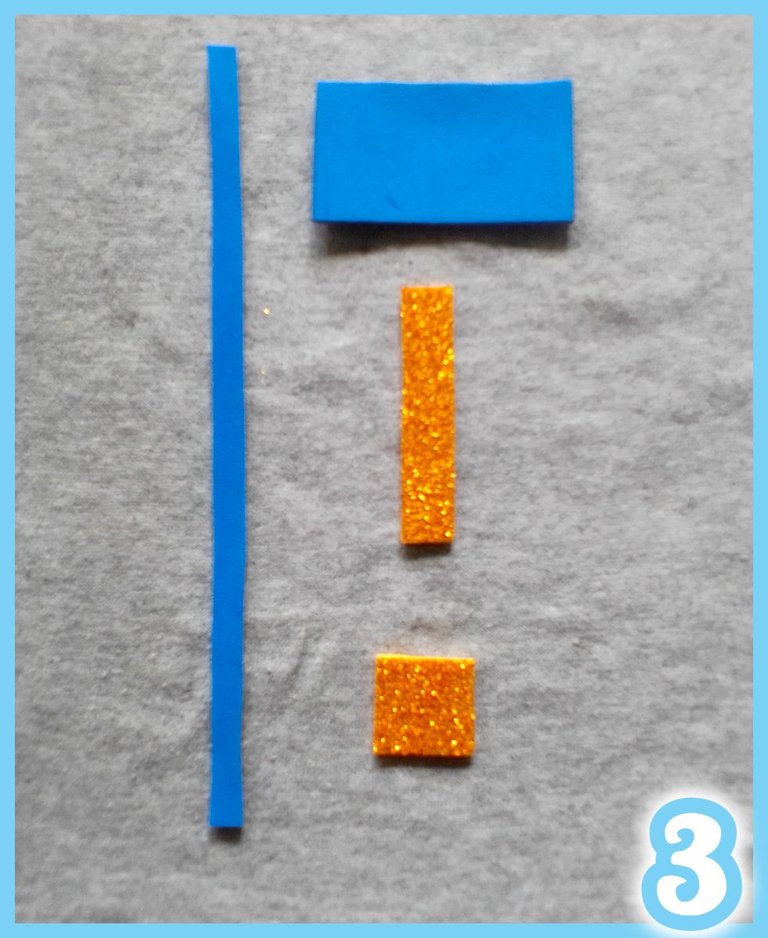
Step 3:
To make the tassel I cut a strip 15 cm long x 0.5 cm wide, plus a rectangle 6.3 cm long x 3 cm wide, then I used the gold frosted foam to cut a strip 5 cm long x 1 cm wide. wide and finally a 2 x 2 square.
Paso 3:
Para elaborar la borla corté una tira de 15 cm de largo x 0.5 cm de ancho, más un rectángulo de 6.3 cm de largo x 3 cm de ancho, luego use el foami escarchado dorado para cortar una tira 5 cm de largo x 1 cm de ancho y por último un cuadrado de 2 x 2.
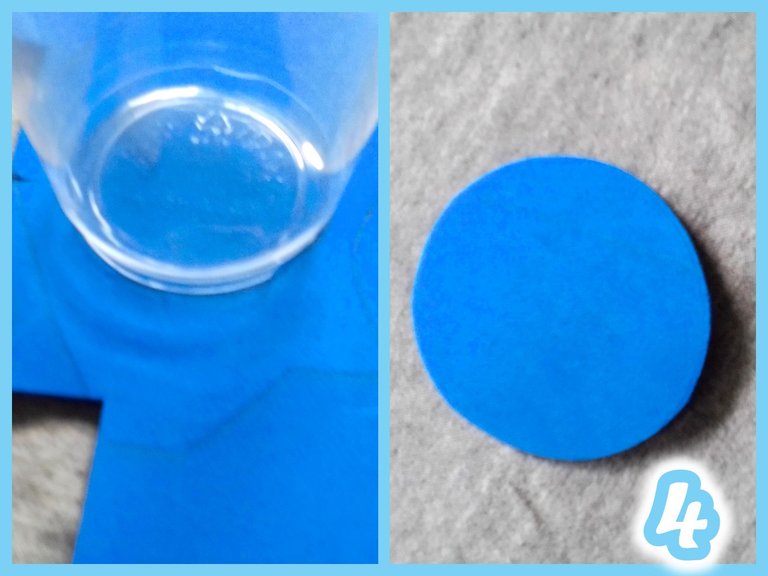
Step 4:
Take the plastic container, on top of the blue foam, to proceed to make a circle.
Paso 4:
Lleve el envase plástico, sobre del foami azul, para así proceder a elaborar un círculo.
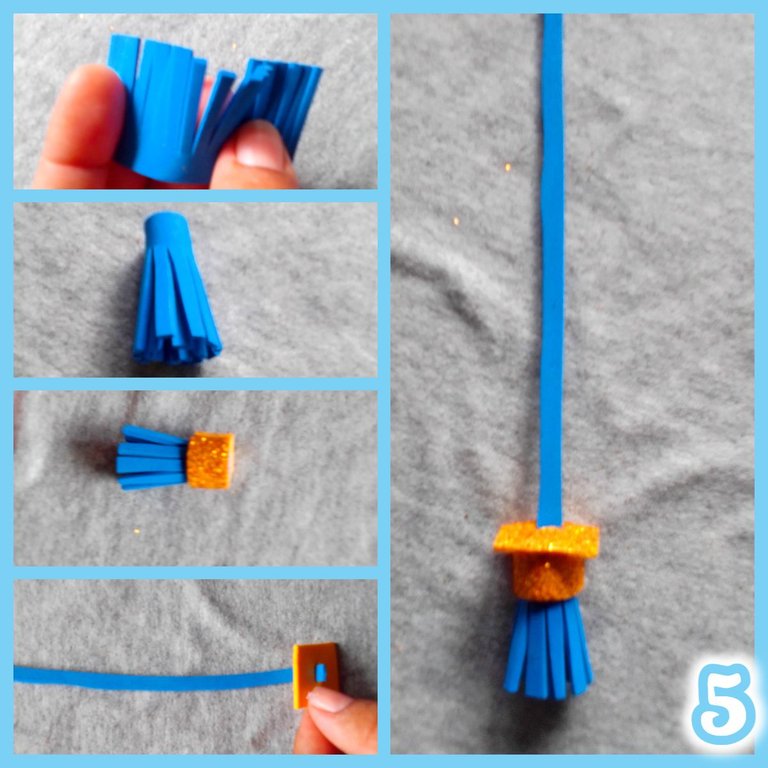
Step 5:
To the rectangle that I had already cut in step #3, I made some thin strips, in order to glue it, then I placed the gold strip around the entire contour. I made a small opening in the gold square to insert the blue strip and attach it to the tassel.
Paso 5:
Al rectángulo que ya había cortado en el paso #3, le hice unas tiras finas, para así pegarlo, luego le coloque la tira dorada por todo el contorno. Al cuadrado dorado, le hice una pequeña abertura para así introducir la tira azul y llevarlo a pegar a la borla.
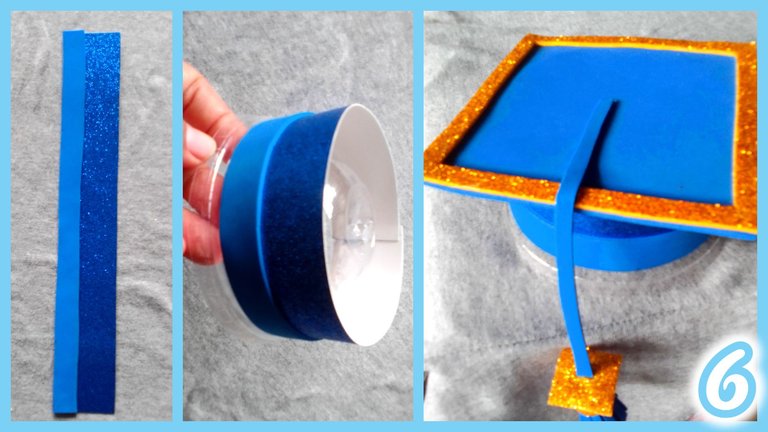
Step 6:
Assemble the foam strip on the thickest cardboard, as I know that the container to be used is not resistant to heat, I first added the hot silicone and when it was already warm, I proceeded to glue it to the lid of the container, in this way form the first part which is the cap.
Paso 6:
Monte la tira de foami, sobre la cartulina más gruesa, como sé que el envase a utilizar no es resistente a lo caliente, agregue primero la silicona caliente y cuando ya estaba tibio, procedí a pegar a la tapa, del envase, de esta manera forme la primera parte que viene siendo el birrete.
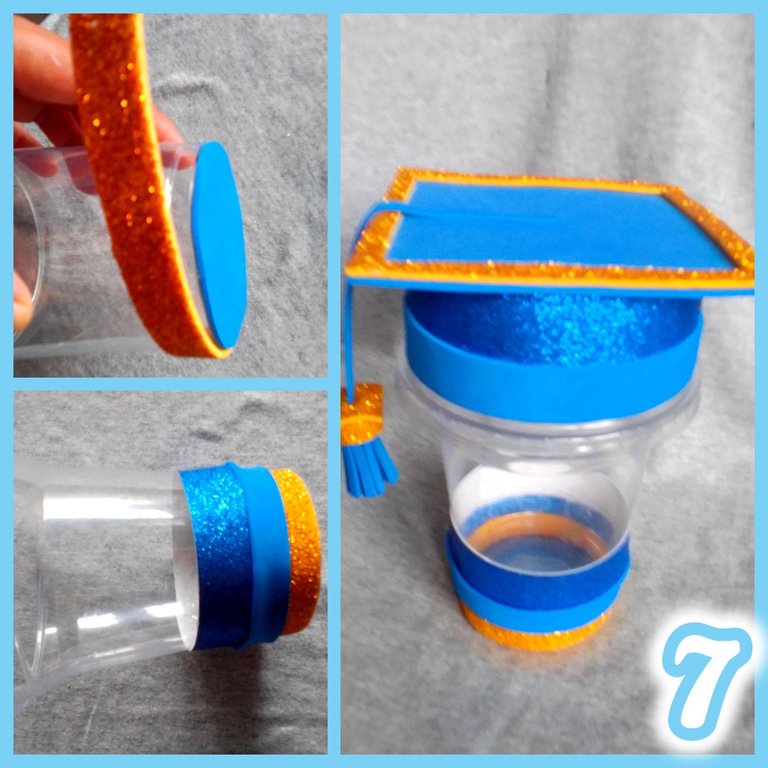
Step 7:
In this last step, I proceeded to glue the circle to the bottom of the container, then to cover the container a little, I placed a strip of frosty gold foam, a strip of blue foam and to finish lining a blue cardboard, the which I did the same procedure in the previous part. This is how I finish this beautiful school party favor, to give to the children, and filled with sweets it would look much better, I am very happy and delighted to be able to continue sharing this great idea with you. Happy and blessed day. Greetings.
Paso 7:
En esta último paso, procedí a pegar el círculo en la parte de abajo del envase, luego para cubrir un poco el envase, le coloque una tira de foami dorada escarchada, una tira de foami azul y para culminar de forrar una cartulina azul, la cual hice el mismo procedimiento en la parte anterior. Así culmino este bello cotillón escolar, para obsequiar a los niños, y relleno de golosinas se vería mucho mejor, yo muy feliz y encantada de poder seguir compartiendo con ustedes esta gran idea. Feliz y bendecido día. Saludos.
The photos were taken from a Canaima tablet.
Collage making program: Fotojet Link
Translated from google translator Link
Photo editing program: PhotoFiltre 7
Las fotos fueron tomadas desde una tablet Canaima.
Programa para hacer el collage: Fotojet Enlace
Traducido del traductor de Google Enlace
Programa para editar fotos: PhotoFiltre 7
I say goodbye until another opportunity.
Thanks for your support.
Me despido hasta otra oportunidad.
Gracias por su apoyo.
Copyright @imargasa. All rights reserved.
Quedó muy lindo amiga, gracias por compartir 😉
Yo siempre he tenido curiosidad de hacer un cotillón. Me gusta también para fiestas infantiles con alguna temática. Este te ha quedado súper lindo 💟
Nice work keep it up
Congratulations @imargasa! You have completed the following achievement on the Hive blockchain And have been rewarded with New badge(s)
Your next target is to reach 1750 upvotes.
You can view your badges on your board and compare yourself to others in the Ranking
If you no longer want to receive notifications, reply to this comment with the word
STOPCheck out our last posts: