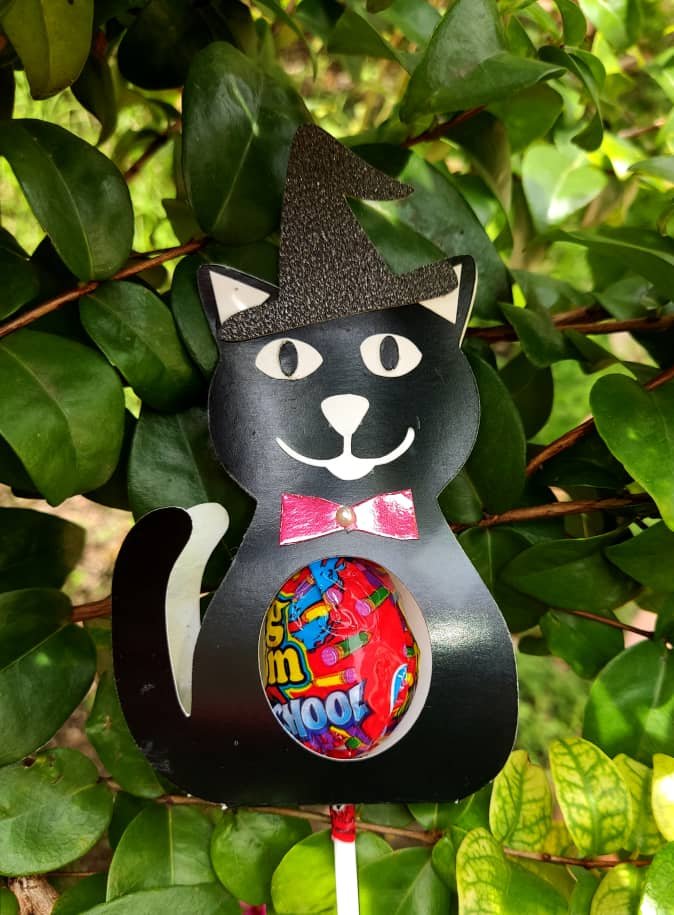
Les cuento que desde hace tiempo quería compartir algo en esta comunidad, aunque no soy muy buena en las manualidades, bueno cada día con practica vamos mejorando, pero si me encanta todo lo que se publica en este comunidad así que aproveche esta oportunidad, que mejor para celebrar el Halloween que un dulce, y mejor si viene acompañado de un hermoso empaque, es por eso que decidí hacer este hermoso porta dulces de gato con sombrero de bruja para colocar una chupeta, por mi casa mía hojas con sus amigas, se disfrazan y salen por nuestra comunidad a pedir dulce o truco, y luego se reúnen en una de las casa a comer algo y compartir, así que necesitaba algo significativo para este día que no fuera muy complicado de hacer por qué aún no estoy muy práctica con mi máquina de corte y por supuesto que se vieran original y fantástico a mi hija le encantó realmente y está muy emocionada, para ella es un gato-chupeta que le encantará a todos sus amigas.
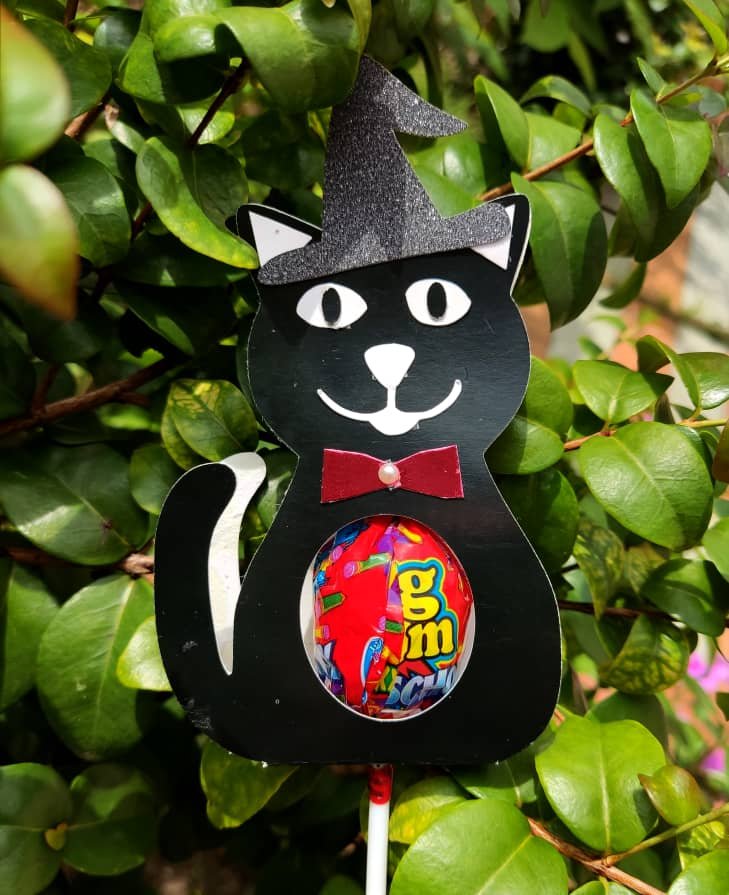
El Halloween en mi país casi no se celebra , solo algunas personas tomamos esa iniciativa y para mí es algo encantador ver sus sonrisas y verlas caminar por las calles con su disfraces llevando alegría por dónde pasan, de niña nunca tuve la oportunidad de celebrarlo es por ello, que comparto con ella su emoción y trato de que cada año sea diferente, además este tipo de manualidades nos permite compartir tiempo con ellos y que ellos también pongan en práctica su creatividad, con materiales tan simples como cartulina o foami, un poco de pega y mucha imaginación les aseguro podemos lograr cosas maravillosas, y aunque las manualidades no son mi fuerte, la verdad me gustó mucho el resultado obtenido y les aseguro que ustedes también les encantará.
Para esto necesitaremos:
- Cartulina o foami negro
- Cartulina o foami blanco
- Cartulina o foami escarchado para el sombrero
- Pega
- Tijeras o exacto
- Lápiz
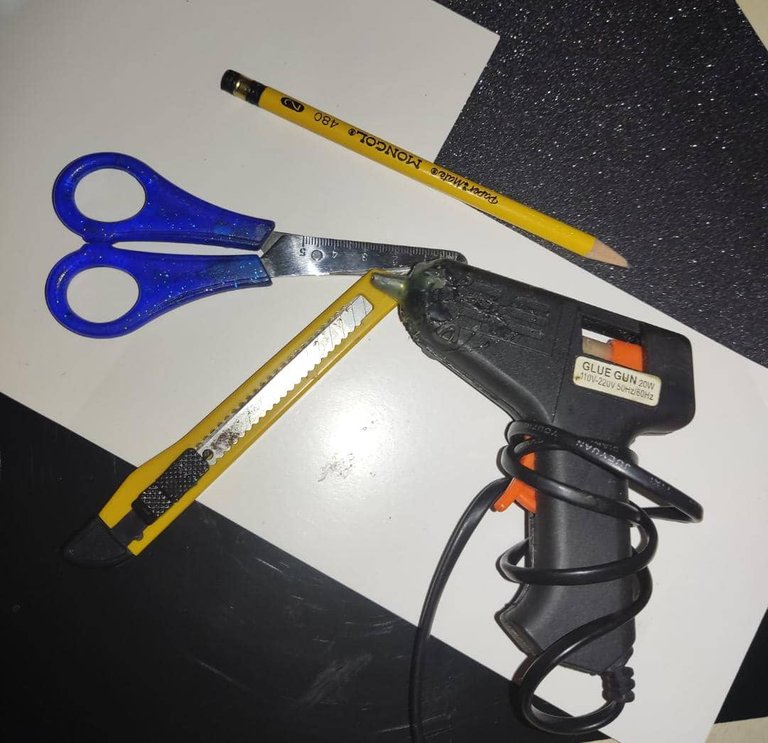
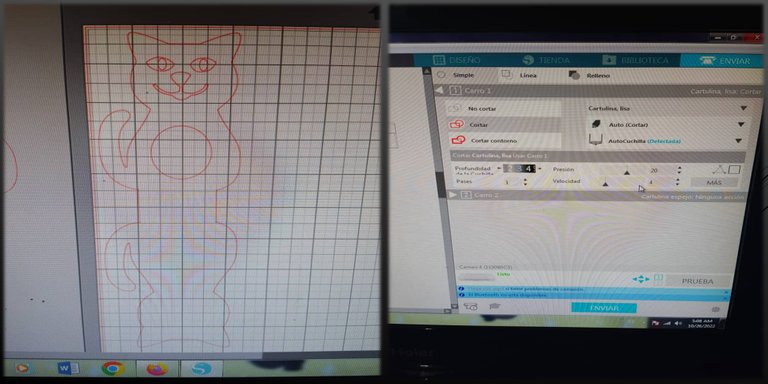
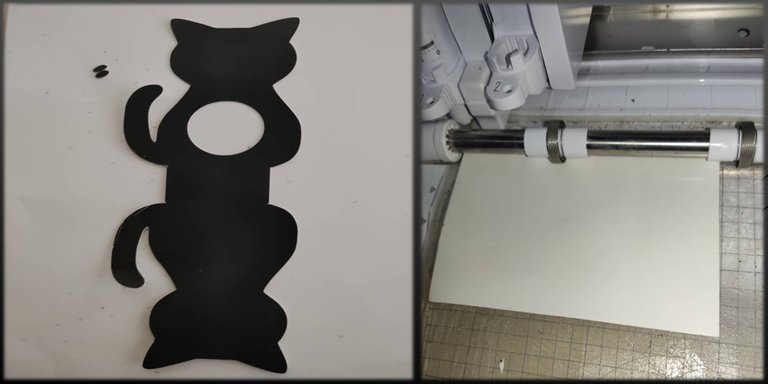
Primero que nada, diseñamos la imagen de nuestra preferencia o realizamos el dibujo que nos gustaría, puede ser gatos, perros, conejo lo que más nos guste, yo tengo un pequeño plotter de corte, pero igual podemos cortar con tijera o exacto, marcamos con un lápiz. Recordemos marcar un circulo en la barriga o cuadrado del tamaño de la golosina que colocaremos. Recordemos que debemos hacer dos caras para adelante y una por detrás, además dejaremos un espacio entre una y la otra para poder doblar.
A continuación, recortamos todas las partes que compongan nuestra figura que sean del mismo color, en este caso empecé con el negro.
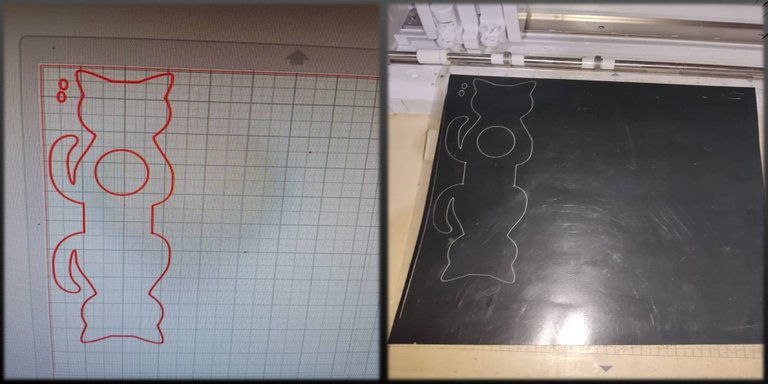
Y ahora, cortamos el resto de nuestras partes, es mejor cortar todo, armar y luego empezar a pegar para que nos quede todo mejor presentado.
Con todo ya cortado y presentado, pegamos y agregamos los detalles de nuestra preferencia, doblamos el medio para que nos queden 2 caras y el espacio para colocar nuestra golosina, en el caso de una paleta o chupeta, haremos un pequeño huequito para que entre el palito.
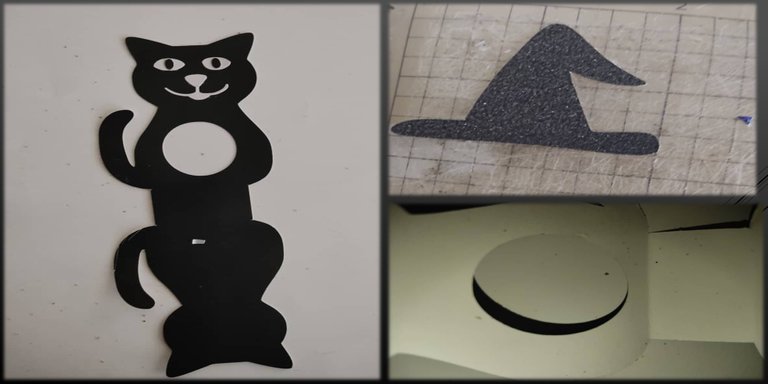
Y listo yo para complementar le coloque un sombrero negro escarchado y un lazo rojo de corbata.
Todas las imágenes son de mi propiedad, tomadas con la cámara de mi teléfono Poco X3 Pro Traducido con https://www.deepl.com/es/translator

El Halloween en mi país casi no se celebra , solo algunas personas tomamos esa iniciativa y para mí es algo encantador ver sus sonrisas y verlas caminar por las calles con su disfraces llevando alegría por dónde pasan, de niña nunca tuve la oportunidad de celebrarlo es por ello, que comparto con ella su emoción y trato de que cada año sea diferente, además este tipo de manualidades nos permite compartir tiempo con ellos y que ellos también pongan en práctica su creatividad, con materiales tan simples como cartulina o foami, un poco de pega y mucha imaginación les aseguro podemos lograr cosas maravillosas, y aunque las manualidades no son mi fuerte, la verdad me gustó mucho el resultado obtenido y les aseguro que ustedes también les encantará.
Para esto necesitaremos:
- Cartulina o foami negro
- Cartulina o foami blanco
- Cartulina o foami escarchado para el sombrero
- Pega
- Tijeras o exacto
- Lápiz

Primero que nada, diseñamos la imagen de nuestra preferencia o realizamos el dibujo que nos gustaría, puede ser gatos, perros, conejo lo que más nos guste, yo tengo un pequeño plotter de corte, pero igual podemos cortar con tijera o exacto, marcamos con un lápiz. Recordemos marcar un circulo en la barriga o cuadrado del tamaño de la golosina que colocaremos. Recordemos que debemos hacer dos caras para adelante y una por detrás, además dejaremos un espacio entre una y la otra para poder doblar.

A continuación, recortamos todas las partes que compongan nuestra figura que sean del mismo color, en este caso empecé con el negro.

Y ahora, cortamos el resto de nuestras partes, es mejor cortar todo, armar y luego empezar a pegar para que nos quede todo mejor presentado.

Con todo ya cortado y presentado, pegamos y agregamos los detalles de nuestra preferencia, doblamos el medio para que nos queden 2 caras y el espacio para colocar nuestra golosina, en el caso de una paleta o chupeta, haremos un pequeño huequito para que entre el palito.

Y listo yo para complementar le coloque un sombrero negro escarchado y un lazo rojo de corbata.

English
I tell you that for some time I wanted to share something in this community, although I am not very good at crafts, well every day with practice we are improving, but if I love everything that is published in this community so take this opportunity, what better to celebrate Halloween than a candy, and better if it comes with a beautiful packaging, that's why I decided to make this beautiful cat candy holder with witch hat to place a lollipop, my daughter really loved it and is very excited, for her it's a cat lollipop that all her friends will love, she is a cat lollipop that all her friends will love.

Halloween in my country is almost not celebrated, only some people take that initiative and for me it is something charming to see their smiles and see them walking through the streets with their costumes bringing joy wherever they go, as a child I never had the opportunity to celebrate it is why I share with her her excitement and I try to make it different every year, Besides this kind of crafts allow us to share time with them and they also put into practice their creativity, with materials as simple as cardboard or foami, a little glue and a lot of imagination I assure you we can achieve wonderful things, and although the crafts are not my forte, I really liked the result and I assure you that you will also love it.
For this we will need:
- Cardboard or black foami
- White cardboard or foami
- Cardboard or frosted foami for the hat
- Paste
- Scissors or exacto
- Pencil

First of all, we design the image of our preference or make the drawing that we would like, it can be cats, dogs, rabbits, whatever we like, I have a small cutting plotter, but we can cut with scissors or exactly, we mark with a pencil. Remember to mark a circle on the belly or square the size of the treat that we will place. Remember to make two sides for the front and one for the back, and leave a space between one and the other to be able to fold.

Next, we cut out all the parts that make up our figure that are the same color, in this case I started with black.

And now, we cut the rest of our parts, it is better to cut everything, assemble and then start gluing so that everything is better presented.

With everything already cut and presented, we glue and add the details of our preference, we fold the middle so that we have 2 sides and the space to place our candy, in the case of a lollipop or lollipop, we will make a small hole for the stick to enter.

And ready, to complement it I put a black frosted hat and a red bow tie.

All images are my own, taken with the camera of my Poco X3 Pro phone Translated by https://www.deepl.com/es/translator

Halloween in my country is almost not celebrated, only some people take that initiative and for me it is something charming to see their smiles and see them walking through the streets with their costumes bringing joy wherever they go, as a child I never had the opportunity to celebrate it is why I share with her her excitement and I try to make it different every year, Besides this kind of crafts allow us to share time with them and they also put into practice their creativity, with materials as simple as cardboard or foami, a little glue and a lot of imagination I assure you we can achieve wonderful things, and although the crafts are not my forte, I really liked the result and I assure you that you will also love it.
For this we will need:
- Cardboard or black foami
- White cardboard or foami
- Cardboard or frosted foami for the hat
- Paste
- Scissors or exacto
- Pencil

First of all, we design the image of our preference or make the drawing that we would like, it can be cats, dogs, rabbits, whatever we like, I have a small cutting plotter, but we can cut with scissors or exactly, we mark with a pencil. Remember to mark a circle on the belly or square the size of the treat that we will place. Remember to make two sides for the front and one for the back, and leave a space between one and the other to be able to fold.

Next, we cut out all the parts that make up our figure that are the same color, in this case I started with black.

And now, we cut the rest of our parts, it is better to cut everything, assemble and then start gluing so that everything is better presented.

With everything already cut and presented, we glue and add the details of our preference, we fold the middle so that we have 2 sides and the space to place our candy, in the case of a lollipop or lollipop, we will make a small hole for the stick to enter.

And ready, to complement it I put a black frosted hat and a red bow tie.


Me enamoré de estos gatitos, me imagino que esta idea se puede llevar a diversos personajes que fácilmente pueden ser ofrecidos a los más pequeños en fiestas de cumpleaños, por ejemplo.
Hola!! Si son súper lindos y tienen múltiples usos,sobretodo para dar la golosina a los niños de una forma diferente y divertida! ☺️
Que lindo gatito, una forma muy bonita para personalizar estos ricos dulces para las fechas..
Saludos Bonita✨
Si algo diferente y muy lindo para los niños . gracias por leer mi post y comentar. Saludos! ☺️
Congratulations @irenebarreto! You have completed the following achievement on the Hive blockchain and have been rewarded with new badge(s):
Your next payout target is 3000 HP.
The unit is Hive Power equivalent because post and comment rewards can be split into HP and HBD
You can view your badges on your board and compare yourself to others in the Ranking
If you no longer want to receive notifications, reply to this comment with the word
STOPTo support your work, I also upvoted your post!
Check out the last post from @hivebuzz:
Support the HiveBuzz project. Vote for our proposal!
Gracias por el apoyo!!
De nada @irenebarreto, es merecido 😊👍 ¡Felicitaciones por su participación constante en en Hive!