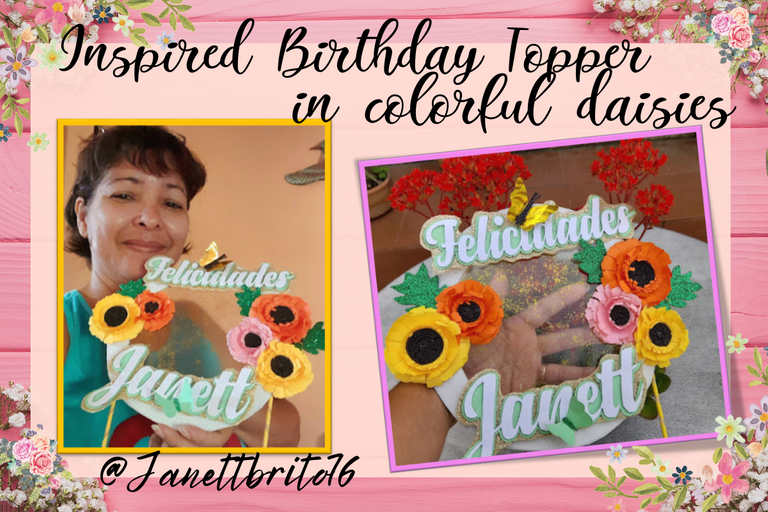

Greetings to all my creative friends who make life in this great community of #HiveDiy, I hope you are full of health. Tonight I have the pleasure of being with you again presenting my project today and I hope you like it. My friends I tell you that this post was to participate in the new contest proposed by our friend @equipodelta but we have had a lot of problems with electricity here where I live ..., but well my creative friends here I am sharing tonight with you this beautiful and spectacular birthday topper inspired by a colorful daisies, which I did with much love and affection for the decoration of my birthday cake which I will celebrate this Sunday 29. As I have always said the birthday toppers are the perfect crowning to decorate our cakes, best of all is that you can design them to your liking, with the theme that you like and the colors you like. You just have to have a little creativity to make a spectacular birthday topper. Well, don't miss the step by step to make this beautiful and spectacular birthday topper, let's get to work!!!

Saludos para todos mis creativas amigas que hacen vida en esta gran comunidad de #HiveDiy, espero que estén llenos de mucha salud. Esta noche tengo el placer de estar con ustedes nuevamente presentando mi proyecto del día de hoy y espero que les sea de su agrado.
Mis amigas les cuento que este post era para participar en el nuevo concurso que propuesto nuestra amiga @equipodelta pero hemos tenido mucho problemas con la electricidad por aquí donde vivo..., pero bueno mis creativas amigas aquí estoy compartiendo en esta noche con ustedes este hermoso y espectacular topper de cumpleaños inspirados en una coloridas margaritas, el cual lo hice con mucho cariño y amor para la decoracion de mi torta de cumpleaños el cual lo celebrare este domingo 29. Como siempre he dicho los topper de cumpleaños son la coronación perfecta para decorar nuestras tortas, lo mejor de todo es que los puedes diseñar a tu gusto, con la temática que mas te agrade y los colores que te gusten. Solo tienes que tener un poco de creatividad para realizar un espectacular topper de cumpleaños. Bueno, no te pierdas el paso a paso para hacer este lindo y espectacular topper de cumpleaños. ¡¡Vamos manos a la obra!!


- EVA glue (gold frosted, black, white frosted, green)
- Cardboard (yellow, pink and orange)
- Acetate sheet
- Height stick
- Scissors
- Silicone
- Mold circles (7 and 5 centimeters)
- Chopsticks

- Goma eva (dorado escarchado, negro, blanco escarchado, verde)
- Cartulinas (amarilla, rosada y naranja)
- lámina de acetato
- Palito de altura
- Tijera
- Silicon
- Molde círculos (7 y 5 centímetros)
- Palillos
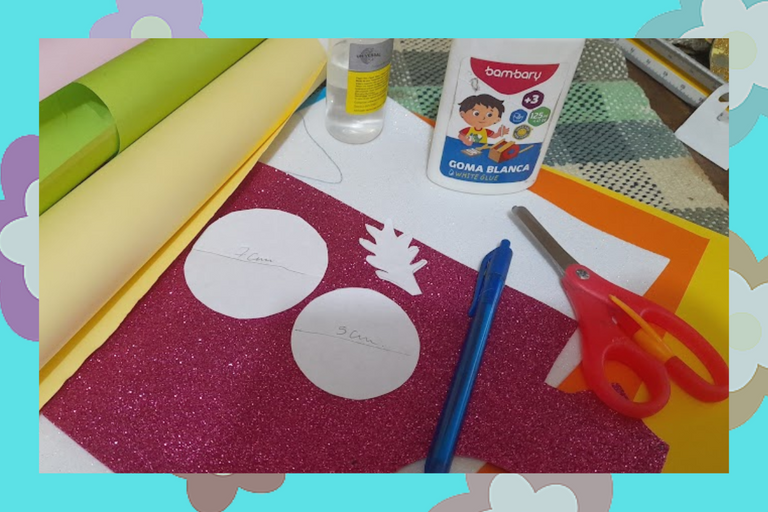


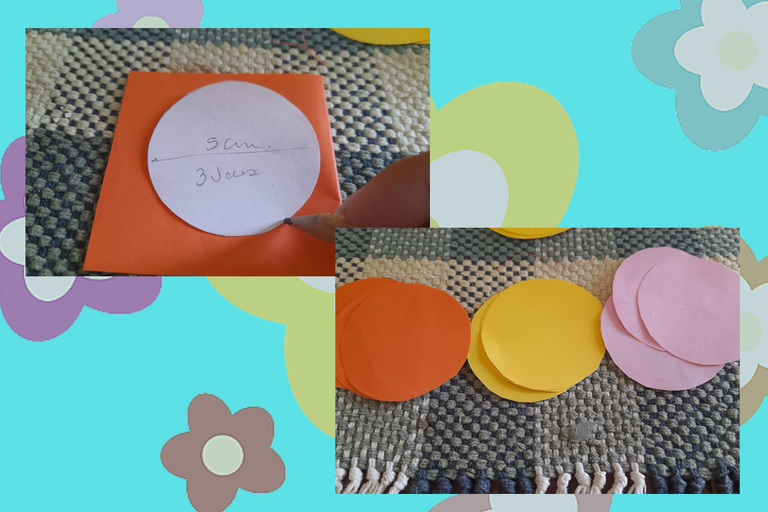
1:To make our flowers, we start by marking 3 circles of 7 centimeters in diameter on the yellow cardboard, then we cut out and repeat the same procedure with the pink and orange cardboard. Then we make other smaller circles of 5 centimeters in diameter, to form three smaller flowers.

1: Para la realización de nuestras flores, comenzamos marcando en la cartulina amarilla 3 círculos de 7 centímetro de diámetro, luego recortamos y repetimos el mismo procedimiento con la cartulina rosada y la naranja. Después realizamos otros círculos mas pequeños de 5 centímetros de diámetro, para formar tres flores mas pequeñas.
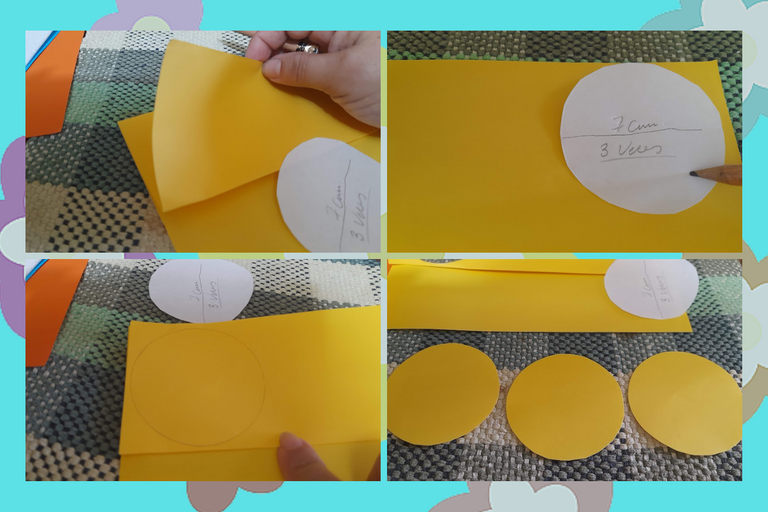
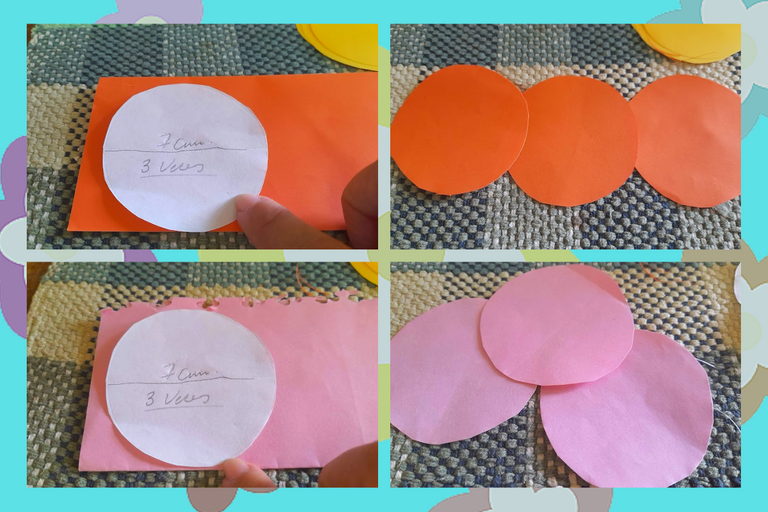


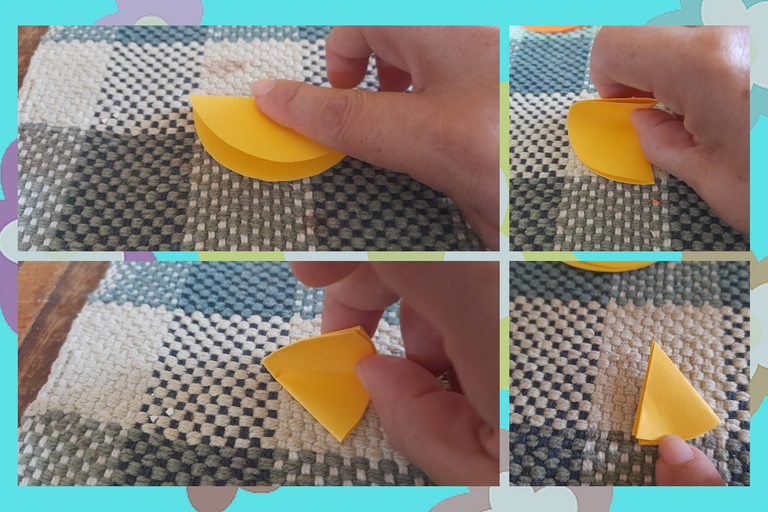
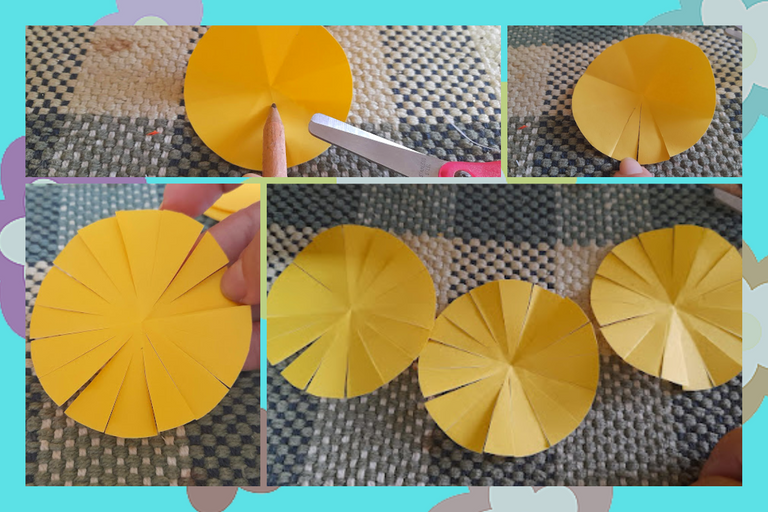
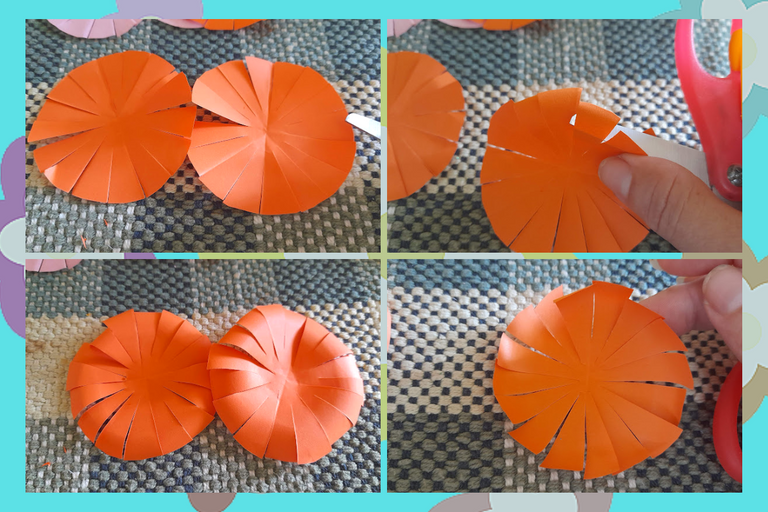
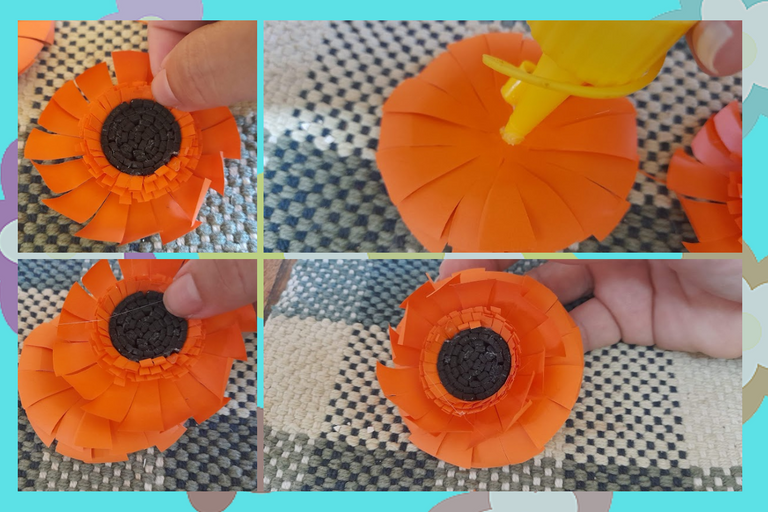
2:Now to form each petal of each layer of our flowers, we proceed to fold each circle in half, then again in half and finally again in half (3 times). Then we open our circle and with the scissors we make cuts for each of the marked doubles without reaching the center as you can see in the images, thus obtaining 18 petals in each circle.

2: Ahora para formar cada pétalo de cada capa de nuestras flores, procedemos a doblar cada circulo a la mitad, luego nuevamente a la mitad y finalmente otra vez a la mitad (3 veces). seguidamente abrimos nuestro circulo y con la tijera realizamos cortes por cada uno de los dobles marcados sin llegar al centro como pueden ver en las imágenes, obteniéndose así 18 pétalos en cada circulo.
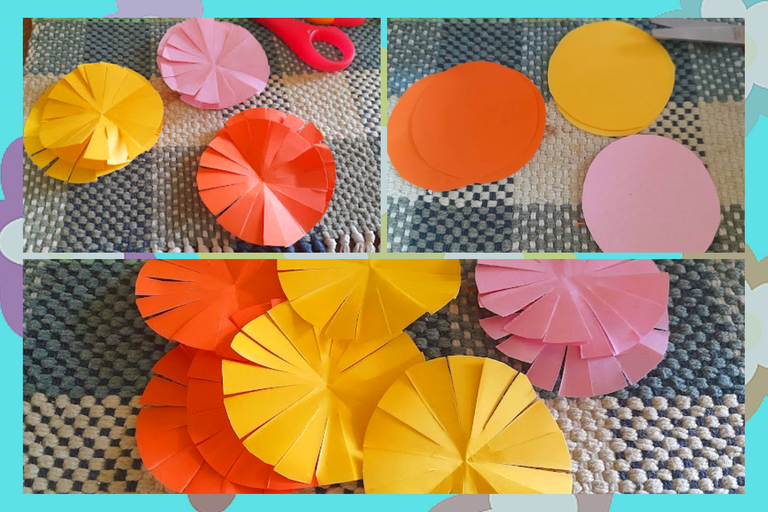


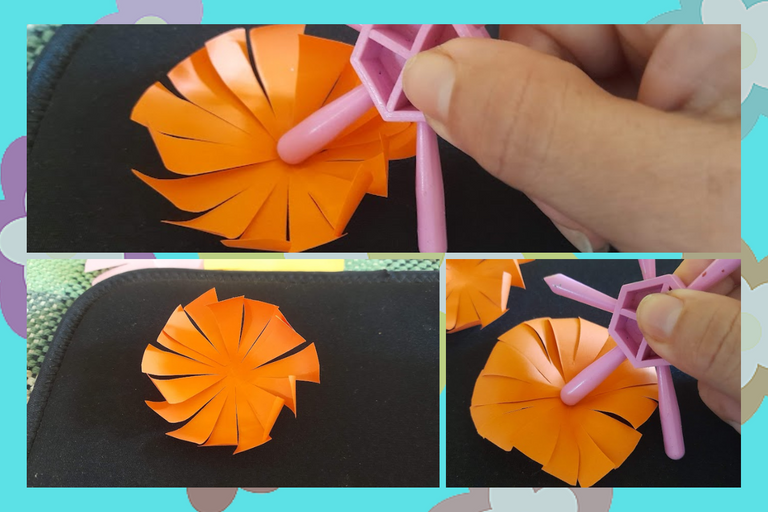
3: Then we proceed to give a little movement to each petal with the tip of the scissors, then with a sponge base and with the help of a pen or any object with a round tip we give a little depth to each layer of each of our flowers, as you can see in the images.

3: Luego procedemos a darle un poco de movimiento a cada pétalo con la punta de la tijera, después con una base esponjas y con la ayuda de un bolígrafo o cualquier objeto punta redonda le damos un poco de profundidad, a cada capa de cada una de nuestras flores, como pueden observar en las imágenes.
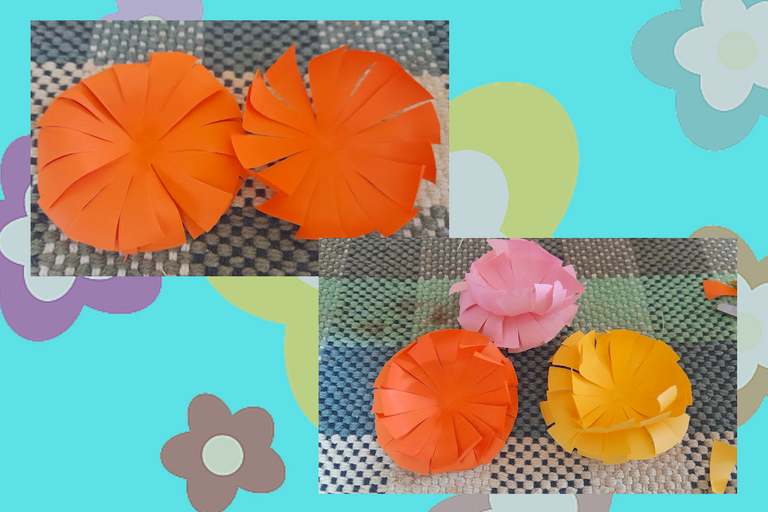


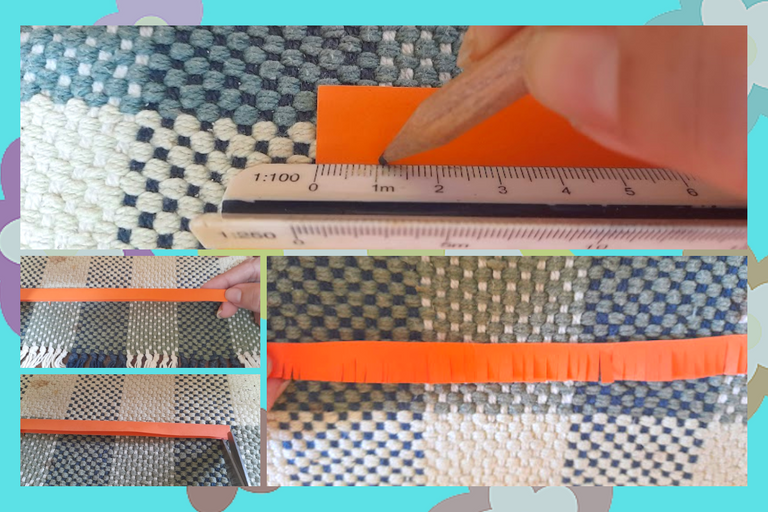
4: Now we cut two strips of cardboard (orange, yellow, and pink) 1 centimeter wide by 15 centimeters long and three strips of black eva rubber 1 centimeter wide by 20 centimeters long. Then with the scissors we make fine cuts on each of the strips to form the pistils of the flowers. Then we proceed to assemble each of our flowers, placing the pistil on the base that has the petals facing up, then we glue it to the other two remaining layers. Repeat the same procedure for the small flowers.

4: Ahora recortamos dos tiras de cartulina (naranja, amarillo, y rosado) de 1 centímetros de ancho por 15 centímetro de largo y tres tiras de goma eva negro de 1 centímetro de ancho por 20 centímetros de largo. Seguidamente con la tijera le realizamos a cada una de las tiras unos finos cortes para forma los pistilos de la flores. Después procedemos armar cada una de nuestras flores, colocando el pistilo en la base que tiene los pétalos hacia arriba, luego la pegamos a las otras dos capas restantes. Repetimos el mismo procedimiento para las flores pequeñas.
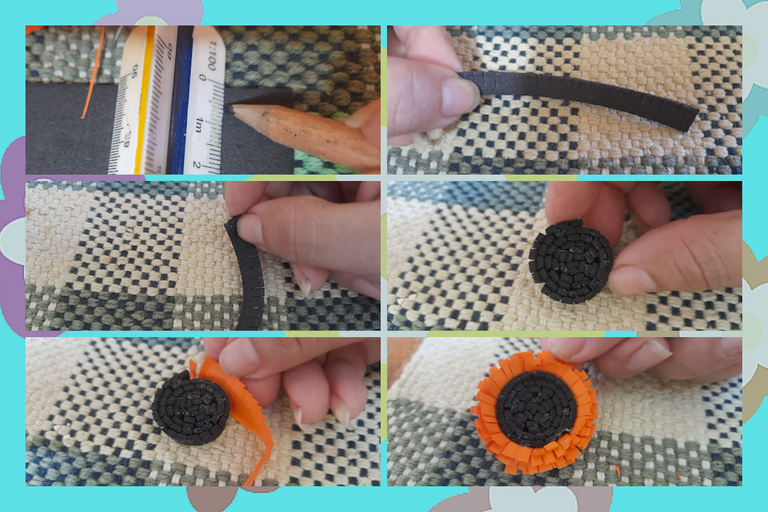
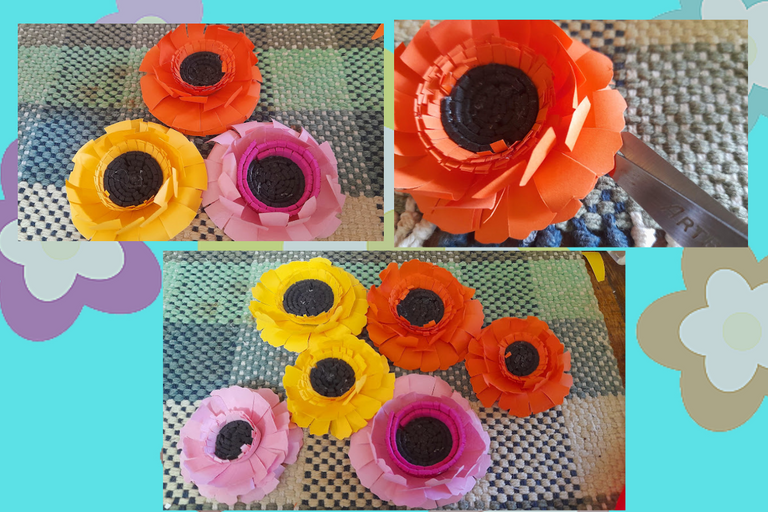


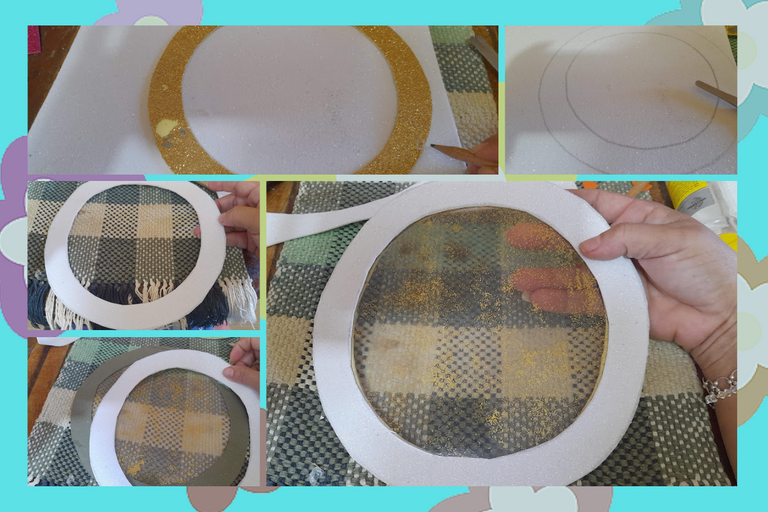
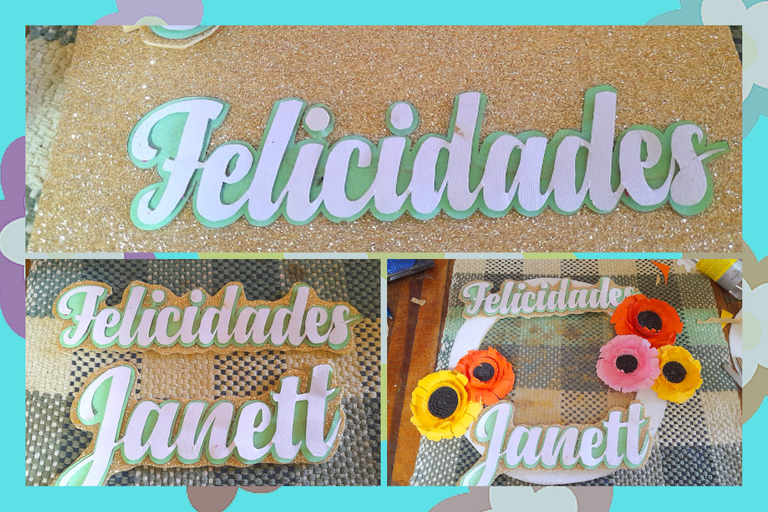
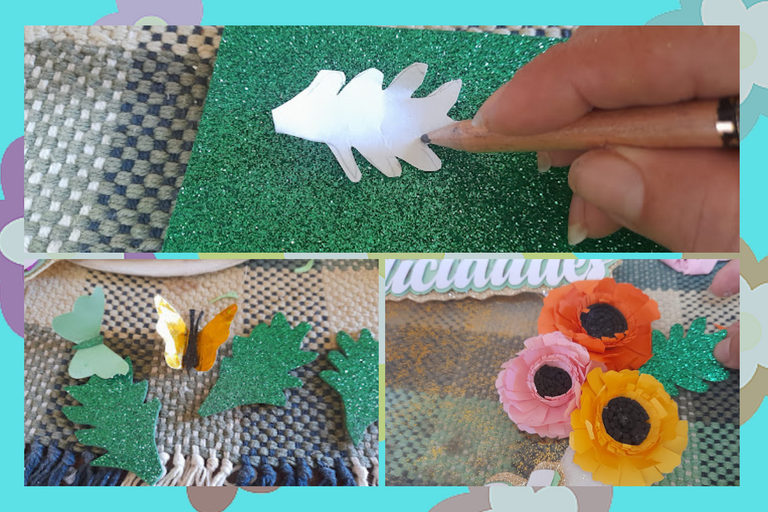
5: For the base of our topper we proceed to mark a circle of 9 cm in diameter in the white eva rubber, leaving 2 centimeters wide around the contour, then we proceed to paste it on another circle of cardboard and acetate with the same measures. Then we take our letters and glue them to the golden eva rubber and cut leaving a little edge on them, then we proceed to glue our letters and flowers to our base decorating it with a small green leaves made in frosted green eva rubber and to finish our topper we place on the back of the two sticks of height at each end.

5: Para la base de nuestro topper procedemos a marcar un círculo de 9 cm de diámetro en la goma eva blanca, dejando 2 centímetros de ancho alrededor del contorno, Luego procedemos a pegarlo en otro circulo de cartón y de acetato con la misma medidas. Seguidamente tomamos nuestras letras y las pegamos a la goma eva dorada y recortamos dejando un poco de borde en ellas, luego procedemos a pegar nuestras letras y las flores a nuestra base decorándola con una pequeñas hojas verdes elaboradas en goma eva verde escarchada y para finalizar nuestro topper le colocamos por la parte de atrás los dos palitos de altura en cada extremo.
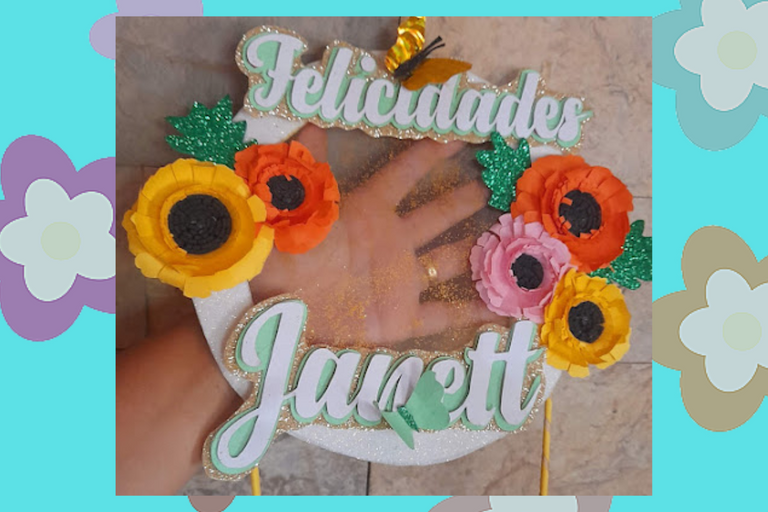


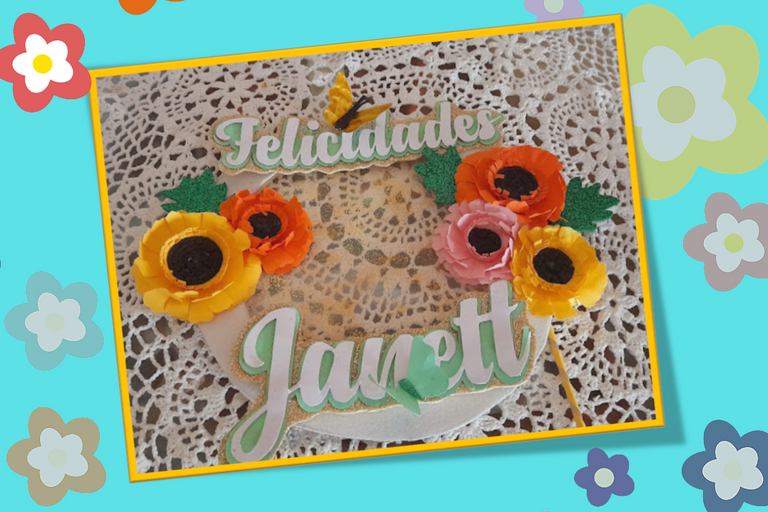
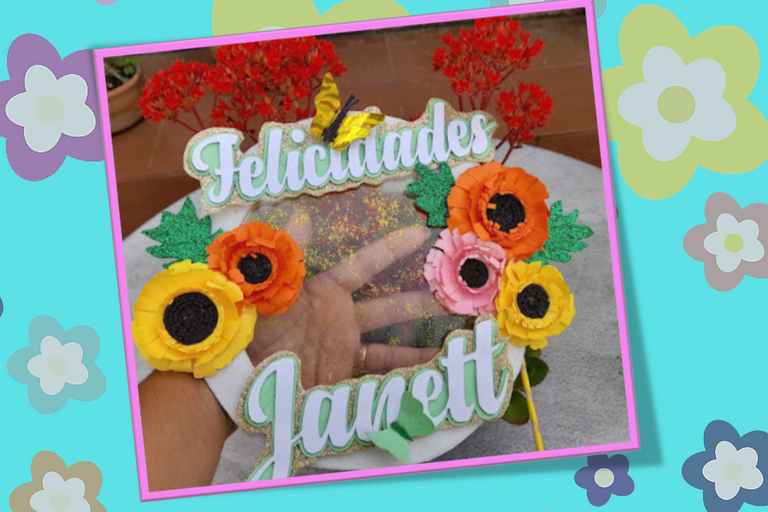
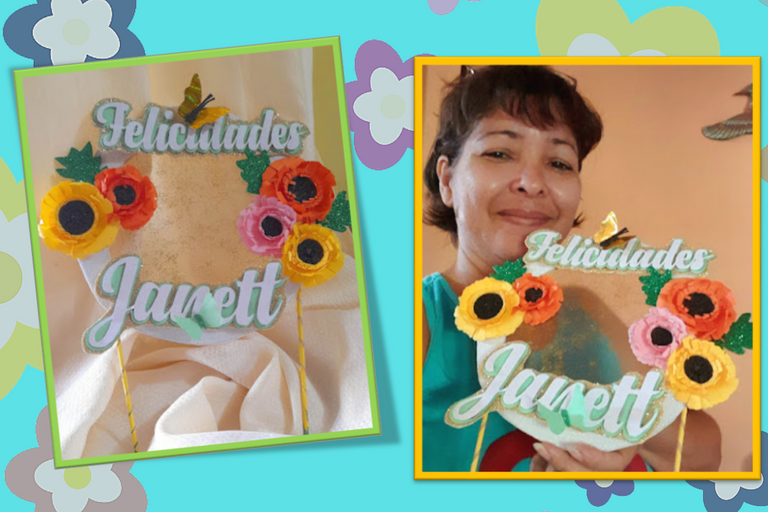
My dear creative friends, this is the spectacular final result of my beautiful colorful daisy topper which will be on my birthday cake this Sunday 29th. I hope you liked my project today and I hope you like it!
Friends, see you in the next post!

Mis queridas amigas creativas, este es el espectacular resultado final de mi hermoso topper colorido de margaritas el cual lo lucirá mi torta de cumpleaños este domingo 29. ¡Espero les haya gustado mi proyecto de hoy y les sea de su agrado!
Amigas, ¡nos vemos en la próxima publicación!
Portada y plantillas elaboradas en canva
Fuente Separador

The photographs were taken with a Samsung A12 smartphone, the text was translated into English with the Deepl translator.link
The banner was designed on canvas link

Las fotografías fueron tomadas con un teléfono inteligente Samsung A12, el texto fue traducido al ingles con el traductor Deepl.link
El banner fue diseñado en canvas link


~~~ embed:1618103798207229953 twitter metadata:MTI2ODQxNjE2ODUwMDUyNzEwNHx8aHR0cHM6Ly90d2l0dGVyLmNvbS8xMjY4NDE2MTY4NTAwNTI3MTA0L3N0YXR1cy8xNjE4MTAzNzk4MjA3MjI5OTUzfA== ~~~
The rewards earned on this comment will go directly to the people( @mariajcastro28, @chacald.dcymt ) sharing the post on Twitter as long as they are registered with @poshtoken. Sign up at https://hiveposh.com.
Que bello te quedó amiga, justo estoy por hacer un topper para mi cumpleaños que es el 28, un dia antes del tuyo, y también quiero ponerle flores, tu idea me gustó, está hermoso el resultado 💮💮
Hola amiga gracias 😊 por tu apoyo y estoy segura que también vas a crear un hermoso topper para decorar tu torta de cumpleaños. Espero que la pases chevere. Feliz día 🤗
Igualmente amiga, ya falta poco 😍
Me gusa mucho este topper porque amo las flores!!🌸🌺🌼 se ve todo tan alegre y colorido 😍. Además está muy bien explicado el tutorial.
Te deseo que lo pases muy bien en tu cumpleaños!! Bendiciones🌸🌸
Muchas gracias 😘 por tu comentario y apoyar mi proyecto. Feliz día 🤗
Thank you for sharing this post on HIVE!
Your content got selected by our fellow curator semarekha & you just received a little thank you upvote from us for your great work! Your post will be featured in one of our recurring compilations which are aiming to offer you a stage to widen your audience within the DIY scene of Hive. Stay creative & HIVE ON!
Please vote for our hive witness <3
Un lindo Topper....me encantó el resultado final ☺️.
🎆🎇🎉🎊🌧️💐✨🌾🌱🌹🌙🌿🍃🥀⚡🌺☘️🍀🌈🌷⭐🪴🌵🌸🌟💮🌴🌳💫☀️💮☔🌲🌳🌍🌌🌠☄️🏵️🐝🌻🌼🍄🐞🦋💙☕💜🍍🎆🎇🎉🎊🎆🎇🎉🎊🌧️💐✨🌾🌱🌹🌙🌿🍃🥀⚡🌺☘️🍀🌈🌷⭐🪴🌵🌸🌟💮🌴🌳💫☀️💮☔🌲🌳🌍🌌🌠☄️🏵️🐝🌻🌼🍄🐞🦋💙☕💜🍍🎆🎇🎉🎊
!LADY
View or trade
LOHtokens.@chacald.dcymt, you successfully shared 0.1000 LOH with @janettbrito76 and you earned 0.1000 LOH as tips. (2/4 calls)
Use !LADY command to share LOH! More details available in this post.
Hola amiga, gracias 🙂 por tu apoyo. Feliz día 🤗
Congratulations @janettbrito76! You have completed the following achievement on the Hive blockchain And have been rewarded with New badge(s)
Your next target is to reach 95000 upvotes.
You can view your badges on your board and compare yourself to others in the Ranking
If you no longer want to receive notifications, reply to this comment with the word
STOPTo support your work, I also upvoted your post!
Check out our last posts:
Support the HiveBuzz project. Vote for our proposal!
How nice to create such decoration out of paper. Those colors you chose are lovely. I can see it as a nice gift for someone. Well done.
Thanks for visiting and commenting
Muy hermoso querida @janettbrito76, suerte con su publicación. Abrazos
Gracias amiga. Feliz día
Que arreglo tan bonito, las letras se ven geniales estimada. Que hermoso trabajo.
Gracias amigo 😘
Muy bonito , me encanto cómo t quedó.
Gracias amiga 🤗 💕
Quedó muy lindo el diseño, las cosas siempre toman un valor especial cuando lo haces tú mismo, espero la hayas pasado muy bien 🌟✨
Gracias amiga 🤗