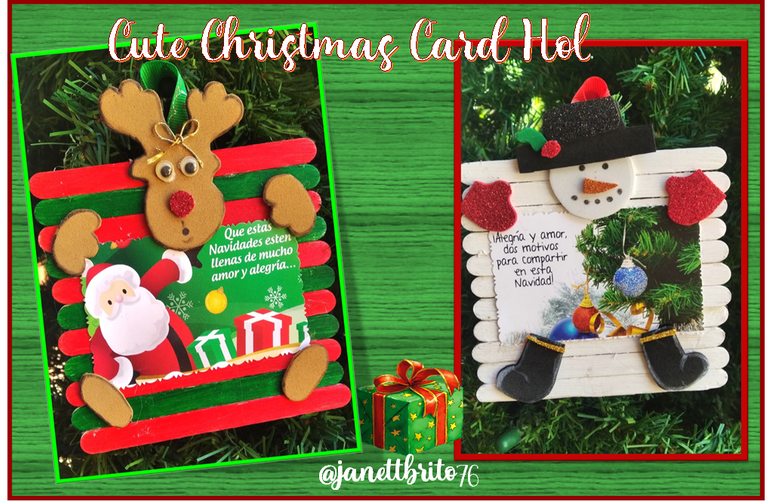

Feliz noches para todos los que hacen vida en esta creativa y hermosa comunidad de #HiveDiy, espero estén pasan una excelente noche, hoy les mostrare como elaborar unos lindos porta tarjetas de navidad para colgarlo en el árbol o simplemente lo puedes obsequiar a un amigo/a en especial con un bonito mensaje o a un familiar esa noche de navidad como regalo. Es un proyecto bonito, sencillo de elaborar y económico. Espero que les guste y no te pierdas el paso a paso!


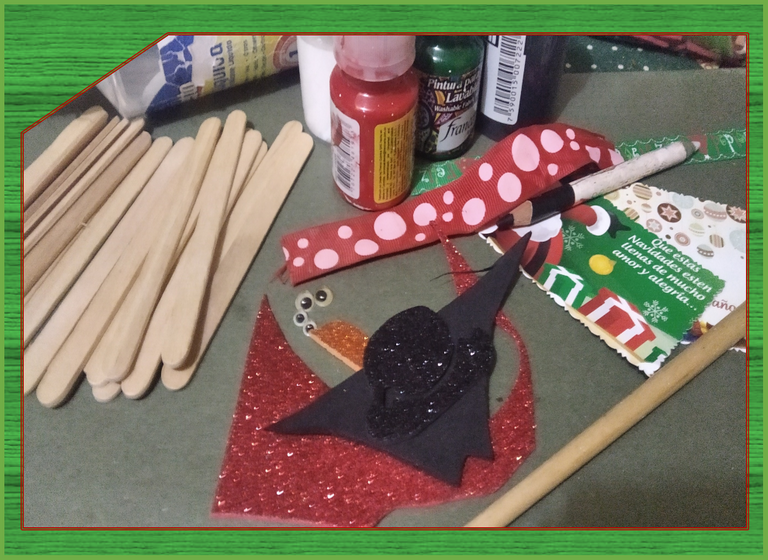
Paletas de madera
Tijera
Silicon
Pinturas(verde, roja y blanca)
Pinceles
Cintas de navidad
Foami (rojo, negro, blanco y marrón)
Ojos moviles
Tarjetas de navidad
Wooden pallets
Scissor
Silicon
Paints (green, red and white)
Brushes
Christmas ribbons
Foami (red, black, white and brown)
Mobile eyes
Christmas cards

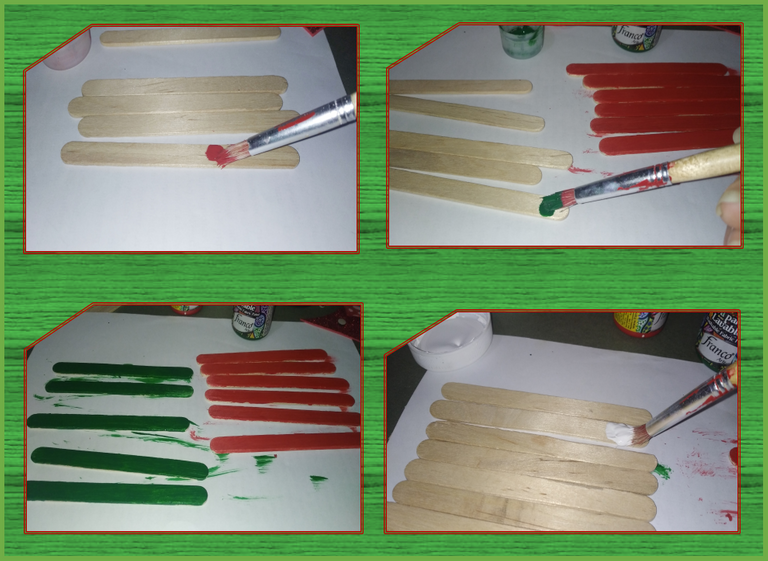
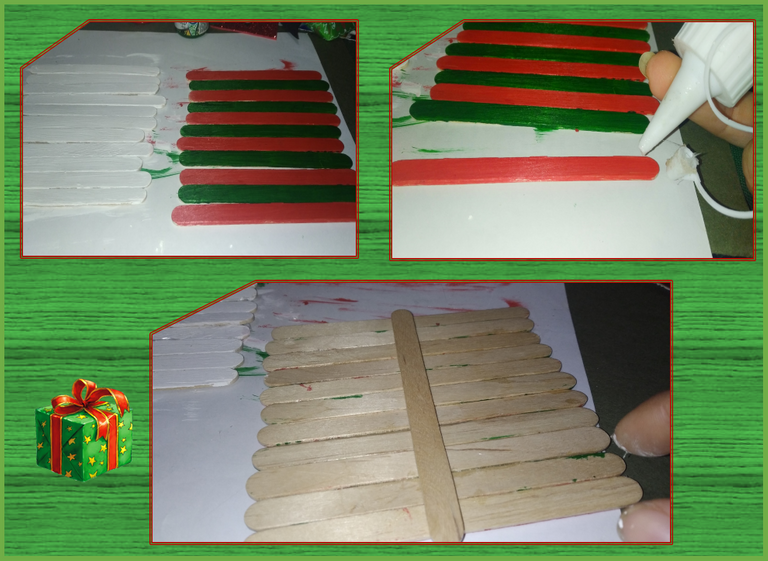
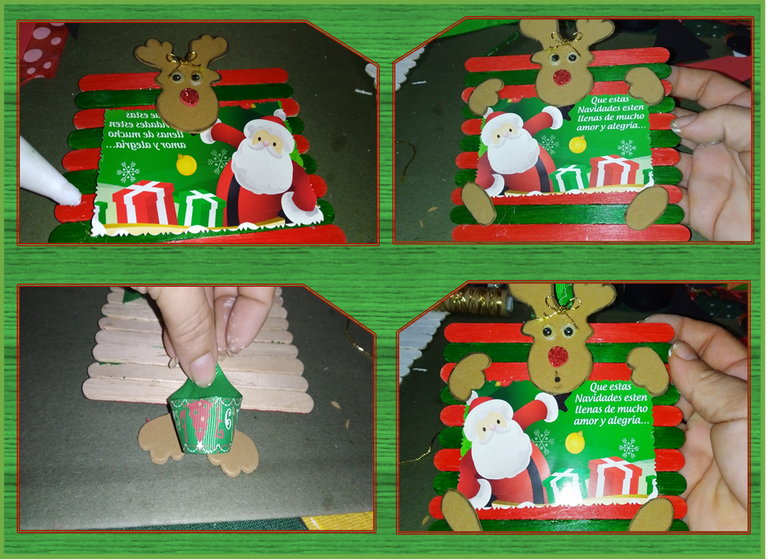
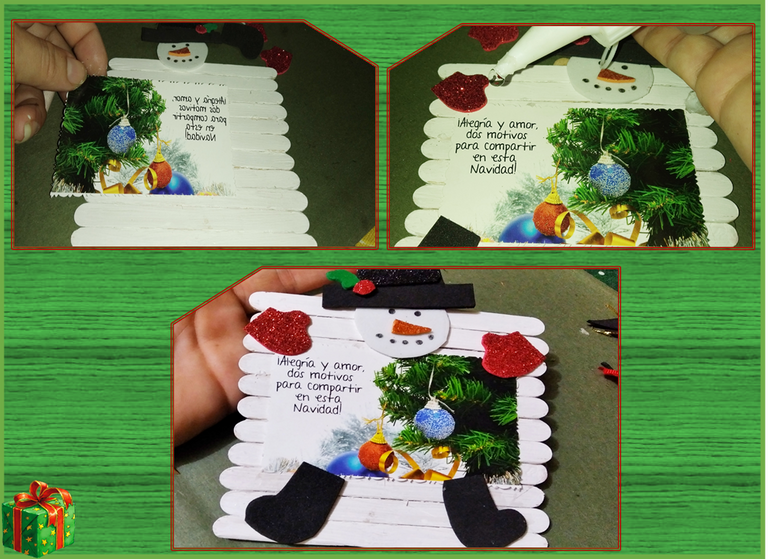
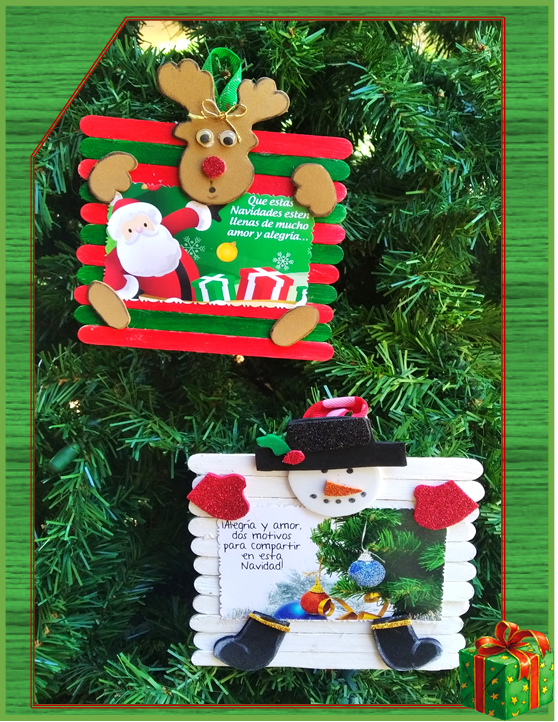
Paso1 : Para cada porta tarjetas utilice 11 paletas. Para el primer porta tarjeta que es de un reno comenzamos pintando de rojo y verde las paletas de madera y para el segundo porta tarjeta es un muñeco de nieve entonces pintamos las paletas de blanco, dejamos secar, luego procedemos a pegarlas y por la parte de atrás le pegamos una paleta para darle un poco de estabilidad, así como se muestra en la imagen.
Step1: For each card holder use 11 paddles. For the first card holder, which is from a reindeer, we start by painting the wooden pallets red and green and for the second card holder it is a snowman, so we paint the palettes white, let them dry, then we proceed to glue them and on the Back we glue a paddle to give it a bit of stability, as shown in the image.
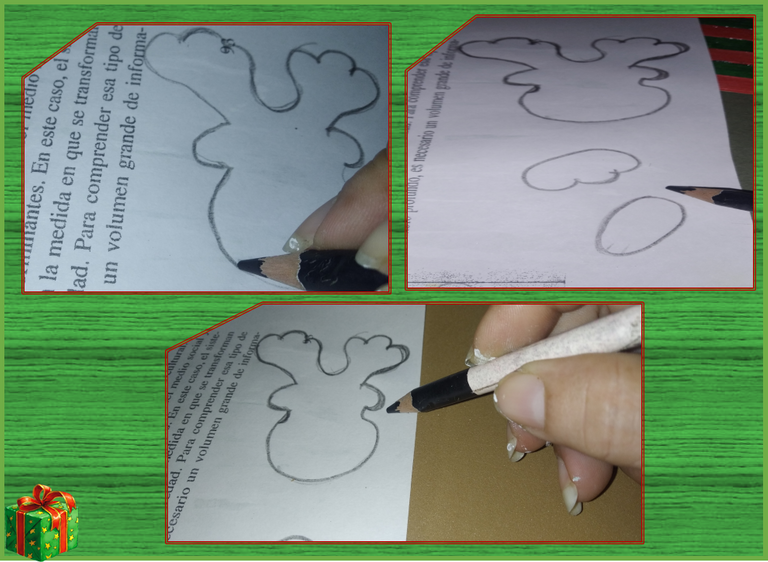
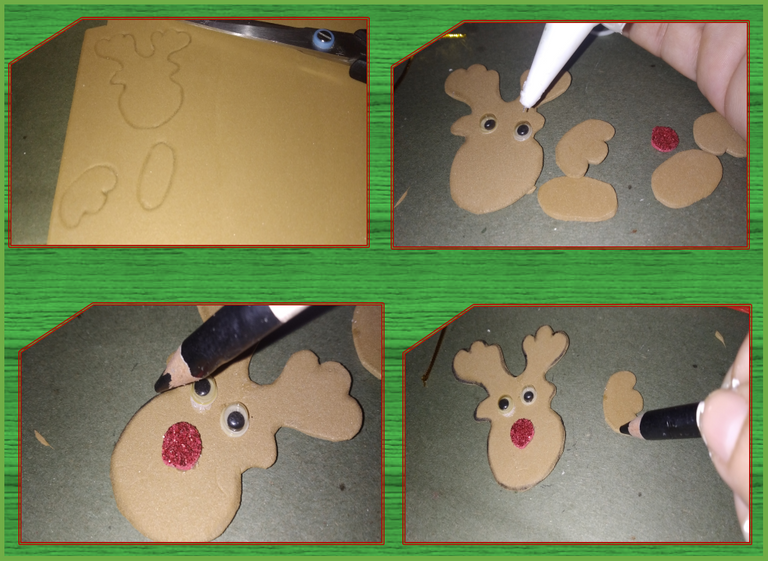
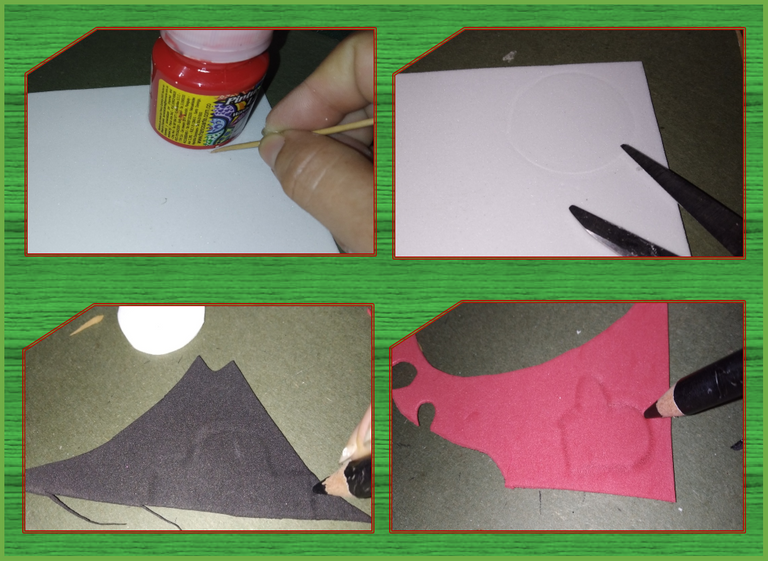
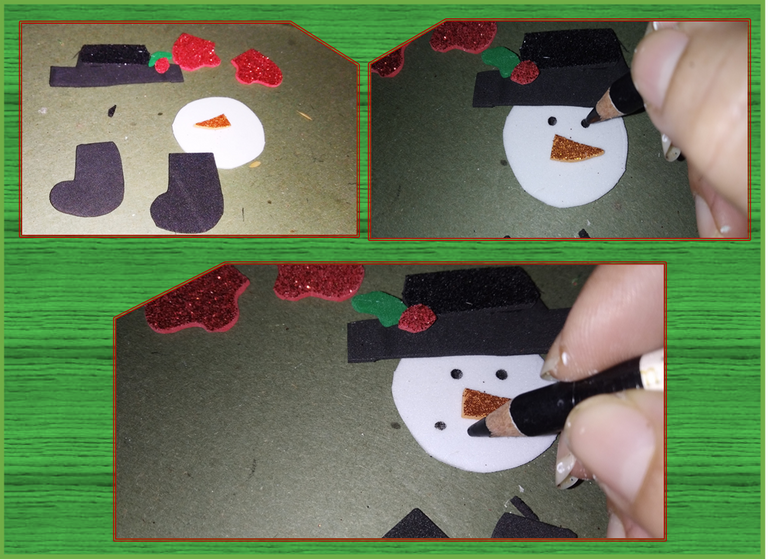
Paso 2: Seguidamente procedemos a realizar nuestro reno y muñeco de nieve. En un papel dibuje las piezas del reno y luego las transferí al foami marrón, les pegue los ojitos y luego con un creyon negro le di un poco de sombra por el alrededor de cada pieza. Después procedí a realizar las piezas del muñeco de nieve,marcando en el foami blanco un circulo, en el negro marque el sombrero y las botas y en el rojo los guantes, recorte y arme la cabeza del muñeco de nieve.
Step 2:Then we proceed to make our reindeer and snowman. On a paper I drew the pieces of the reindeer and then I transferred them to the brown foam, I glued the little eyes to them and then with a black creyon I gave a little shadow around each piece. Then I proceeded to make the pieces of the snowman, marking a circle in the white foami, in the black mark the hat and boots and in the red the gloves, cut out and assemble the snowman's head.
Paso3 : Para finalizar procedemos a pegar en cada base las piezas de cada figura y las tarjeta, como se muestra en las imágenes y por último por la parte de atrás le pegamos la cinta de navidad para poder colgarla al árbol.
Step3: Finally, we proceed to glue the pieces of each figure and the cards on each base, as shown in the images and finally, on the back, we glue the Christmas ribbon to be able to hang it on the tree.
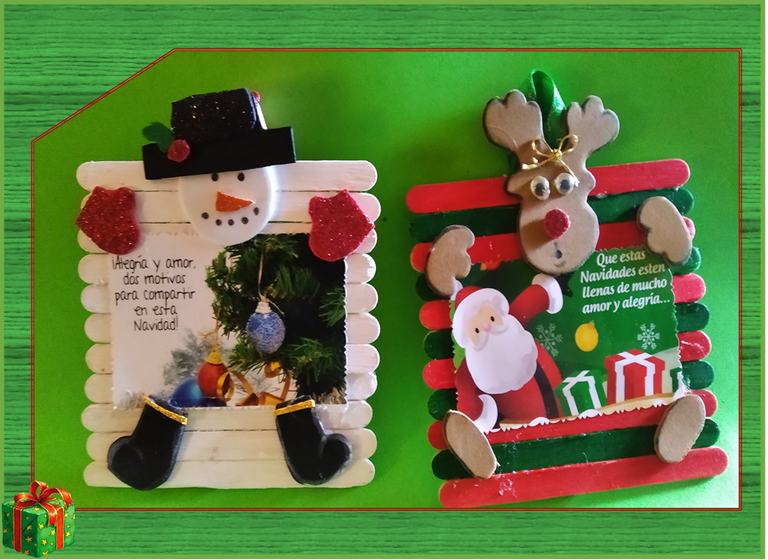
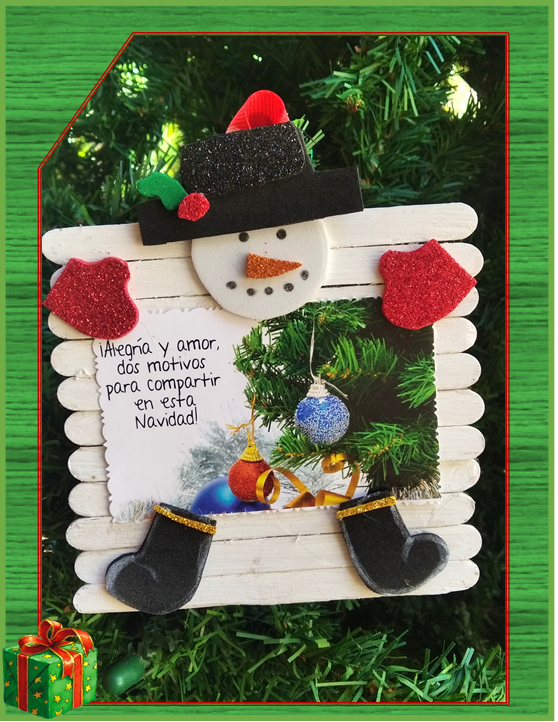
Listo, así de lindo me quedaron mis porta tarjetas de navidad. Espero les haya gustado!
Hasta la próxima
Ready, that's how cute my Christmas card holders were. I hope you liked it!
Until next time


Las fotografías fueron tomadas con un teléfono inteligente Xiaomi Redmi 7A, el texto fue traducido al ingles con el traductor de Google.
The photographs were taken with a Xiaomi Redmi 7A smartphone, the text was translated into English with the Google translator.
Your content has been voted as a part of Encouragement program. Keep up the good work!
Use Ecency daily to boost your growth on platform!
Support Ecency
Vote for Proposal
Delegate HP and earn more