Siempre necesito un llavero, pero por alguna razón, lo iba postergando. No quería comprar uno porque me gusta hacerlos yo misma a crochet. Hace un tiempo me hice un llavero con forma de limón, porque en esa época me dio por hacer frutas. Me gustaba mucho, pero con el tiempo se fue desgastando hasta que el color se envejeció. Entonces me hice una frutilla (o fresa, según dónde vivas). Me quedó bonita y todo, pero un día perdí las llaves.
Después de buscarlas como loca, resultó que un familiar mío las tenía, y al final, se las dejé con llavero y todo. Me saqué unas nuevas llaves, pero ahora tenía otro problema: no tenía llavero.
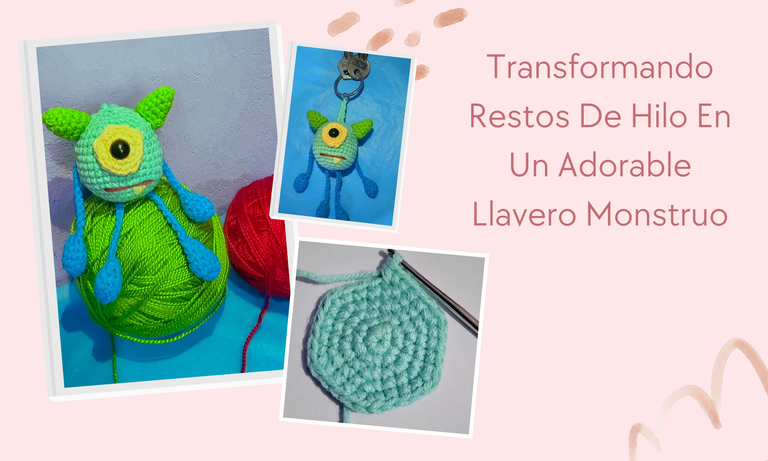
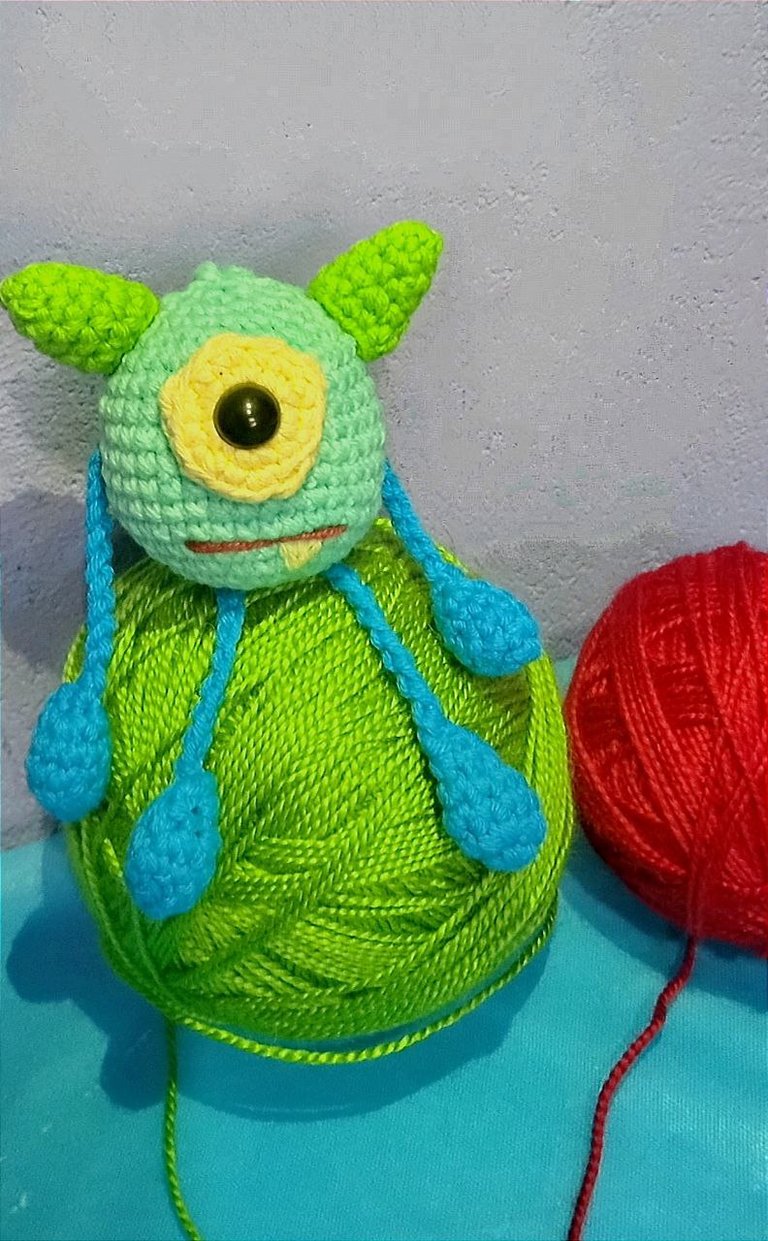
Esta vez no quise hacer una fruta, se me ocurrió hacer un pequeño monstruito. Siempre me quedan restos de hilo de algodón después de hacer otros proyectos, y me pareció una buena idea aprovecharlos para algo pequeño. Vi que una joven compartió el patrón de un monstruito y me encantó. Era simple, fácil de hacer y muy tierno.
Así que me puse manos a la obra y en poco tiempo tenía mi nuevo llavero. Me gusta hacer cosas con lana porque siempre se pueden aprovechar los restos y convertirlos en algo útil y bonito. Ahora mis llaves tienen su monstruito y yo estoy feliz con mi pequeño proyecto improvisado. Aquí les comparto como lo hice 🤗
I always need a keychain, but for some reason, I kept putting it off. I didn’t want to buy one because I like making them myself with crochet. Some time ago, I made a lemon-shaped keychain because at that time, I was into making fruits. I really liked it, but over time, it started to wear out, and the color faded. So, I made myself a frutilla (or a strawberry, depending on where you live). It turned out nice and all, but one day, I lost my keys.
After searching like crazy, I found out that a family member had them, and in the end, I just let them keep them—keychain included. I got new keys, but now I had another problem: I didn’t have a keychain.
This time, I didn’t want to make a fruit; I decided to make a little monster instead. I always have leftover cotton yarn from other projects, and I thought it would be a great idea to use them for something small. I saw that a young woman shared a pattern for a tiny monster, and I loved it. It was simple, easy to make, and super cute.
So, I got to work, and in no time, I had my new keychain. I love making things with yarn because you can always use up scraps and turn them into something useful and beautiful. Now my keys have their own little monster, and I’m happy with my small, improvised project. Here’s how I made it! 🤗
Materiales / Materials
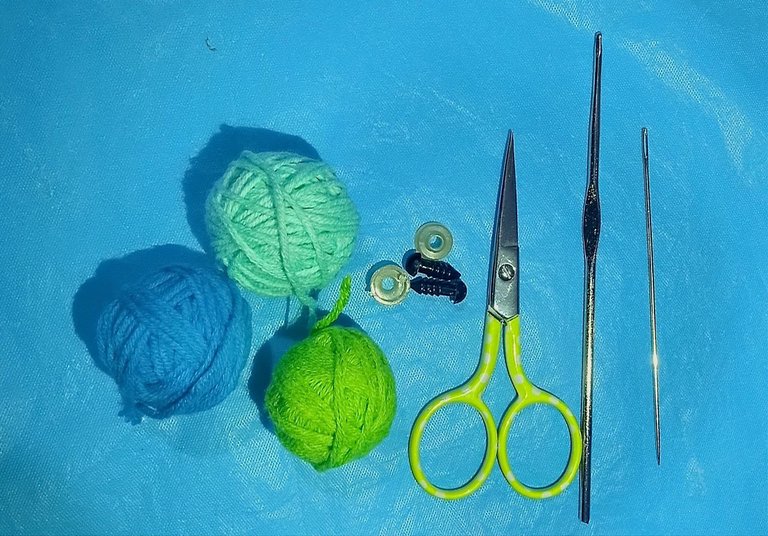
- Restos de hilos de algodón (pueden ser de cualquier color).
- Un crochet o ganchillo (en mi caso, usé de 1.6 mm).
- Tijeras.
- Aguja para Soft (larga y con punta, ideal para detalles).
- Algodón sintético para el relleno.
- Ojos de seguridad o hilo negro para bordar los ojos.
- Alicate de bisutería
- Argolla de llavero
- Leftover cotton yarn (can be any color).
- A crochet hook (I used a 1.6 mm hook).
- Scissors.
- Soft needle (long and pointed, ideal for details).
- Synthetic cotton for stuffing.
- Safety eyes or black thread for embroidering the eyes.
- Jewelry pliers.
- Keyring.
Elaboración / Elaboration
Cuerpo del Monstruito / Monster Body
|
|

|
|
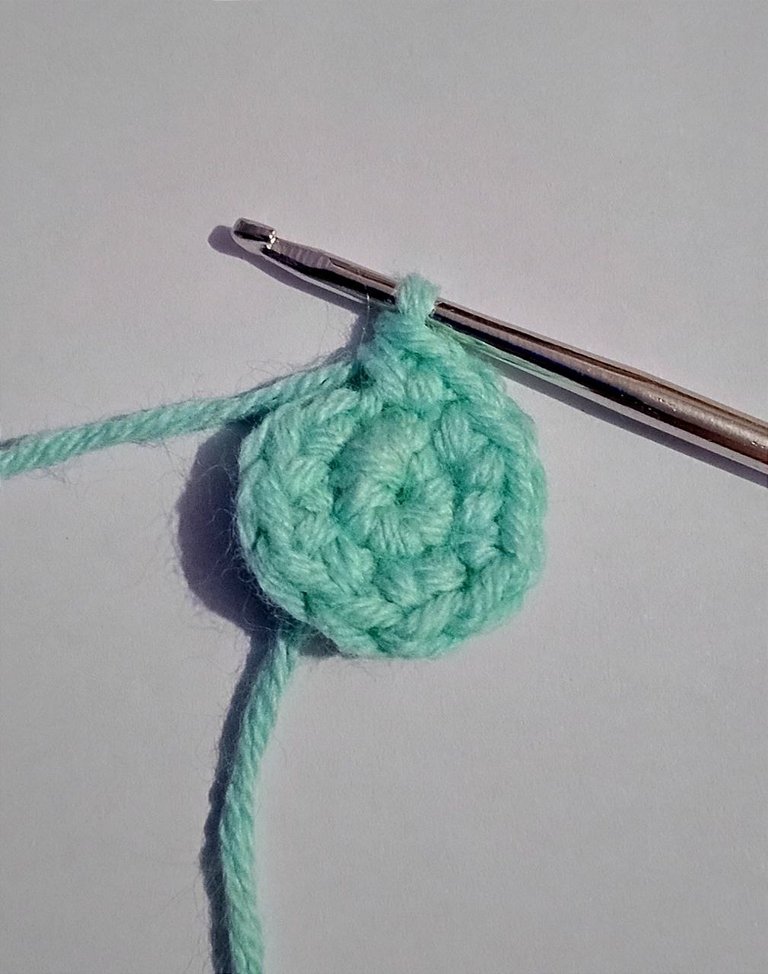
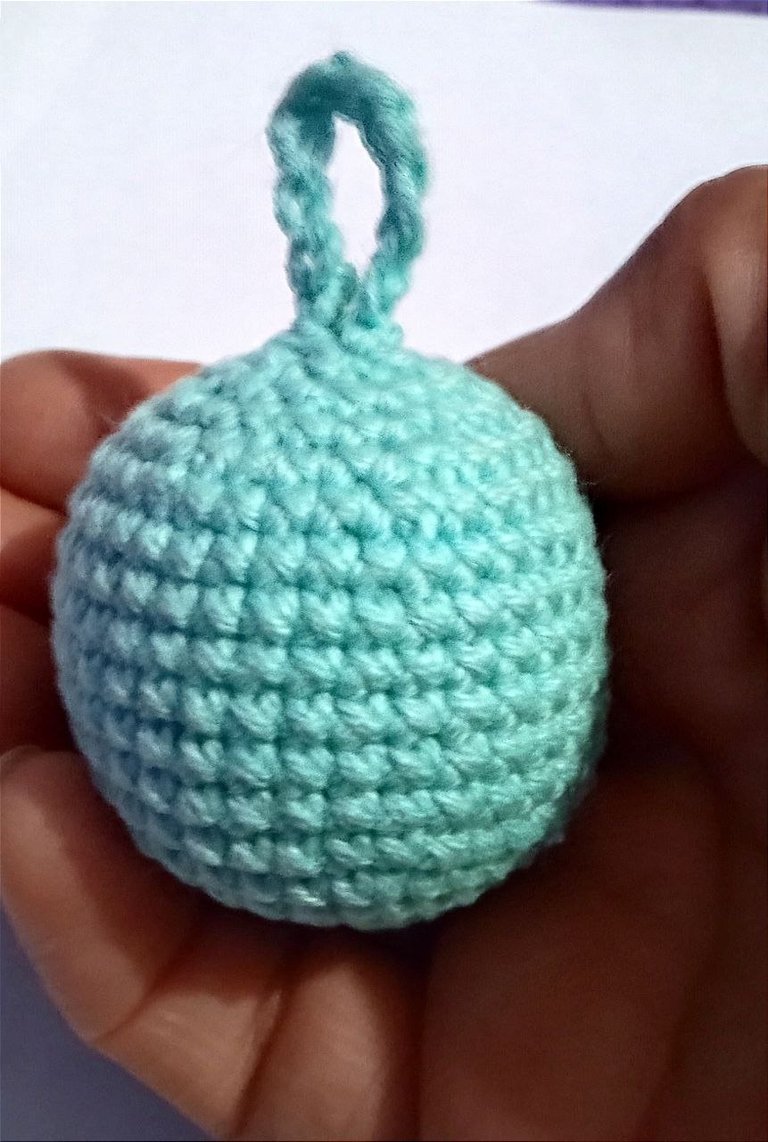
Vuelta 1: Anillo mágico Tejer 6 puntos bajos dentro del anillo mágico.
Vuelta 2: Hacer aumentos en cada punto (quedan 12 puntos en total).
Vuelta 3: Tejer una secuencia de, 1 punto bajo y 1 aumento hasta el final (18 puntos).
Vuelta 4: Tejer una secuencia de 2 puntos bajos 1 aumento hasta el final (24 puntos).
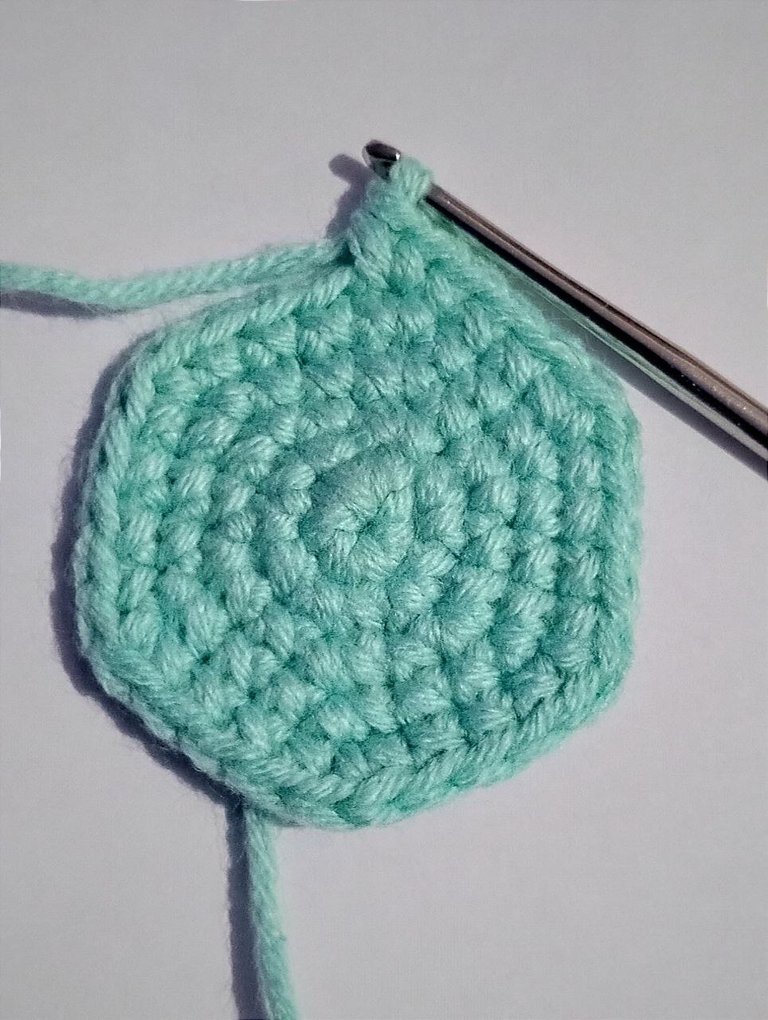
Vuelta 5: Tejer una secuencia de 3 puntos bajos 1 aumento hasta el final (30 puntos).
Vuelta 6: Tejer una secuencia de 4 puntos bajos 1 aumento hasta el final (36 puntos).
Vuelta 7: Tejer una secuencia de 4 puntos bajos 1 disminución hasta el final (30 puntos).
Vuelta 8: Tejer una secuencia de 3 puntos bajos 1 disminución hasta el final (24 puntos).
Vuelta 9: Tejer una secuencia de 2 puntos bajos 1 disminución hasta el final (18 puntos).
Aquí es importante rellenar la esfera con el algodón sintético antes de cerrarla
Vuelta 10: Tejer una secuencia de 1 punto bajo 1 disminución hasta el final (12 puntos).
Vuelta 11: Hacer sólo disminuciones en toda la vuelta hasta cerrar completamente.
Round 1: Magic ring – Crochet 6 single crochet (sc) inside the magic ring.
Round 2: Increase in each stitch (total of 12 stitches).
Round 3: Crochet a sequence of 1 sc, 1 increase until the end (18 stitches).
Round 4: Crochet a sequence of 2 sc, 1 increase until the end (24 stitches).
Round 5: Crochet a sequence of 3 sc, 1 increase until the end (30 stitches).
Round 6: Crochet a sequence of 4 sc, 1 increase until the end (36 stitches).
Round 7: Crochet a sequence of 4 sc, 1 decrease until the end (30 stitches).
Round 8: Crochet a sequence of 3 sc, 1 decrease
until the end (24 stitches).
Round 9: Crochet a sequence of 2 sc, 1 decrease until the end (18 stitches).
At this point, it’s important to stuff the sphere with synthetic cotton before closing it.
Round 10: Crochet a sequence of 1 sc, 1 decrease until the end (12 stitches).
Round 11: Work only decreases throughout the round until fully closed.
Tejer las patas y los brazos / Crocheting the Legs and Arms

|
|
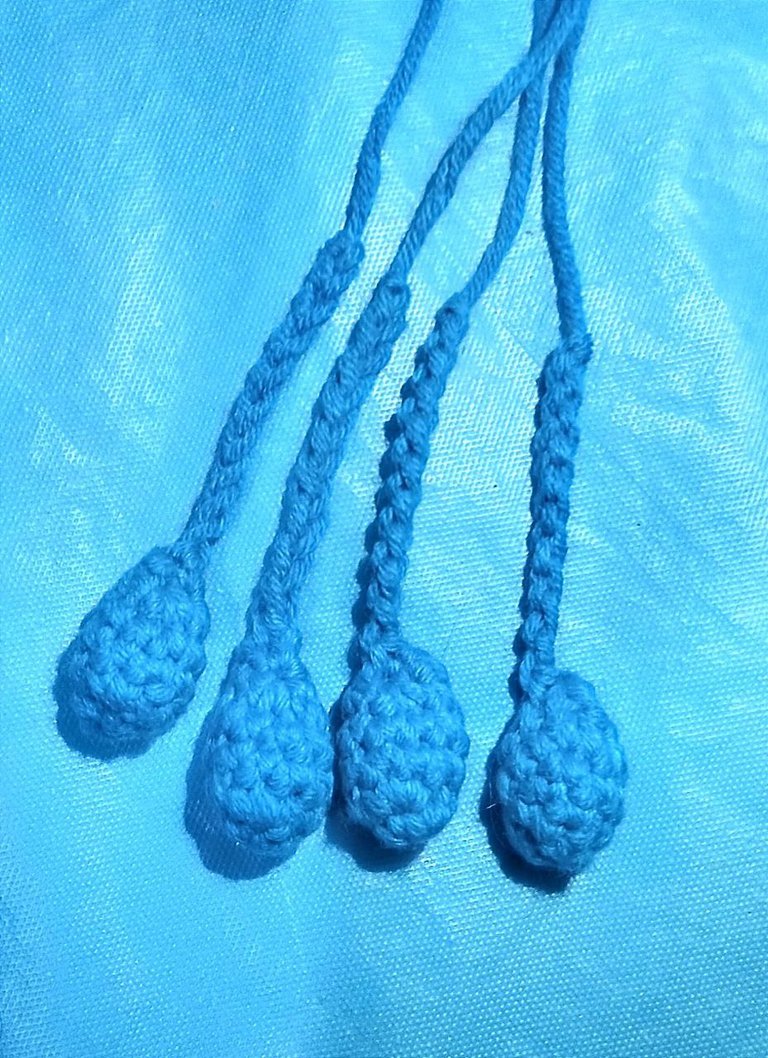
Comencé con un color diferente de hilo para las patas y los brazos.
Hice un anillo mágico con 5 puntos bajos dentro. En la segunda vuelta, tejí aumentos en cada punto. Para después tejer dos vueltas con solo puntos bajos (10 puntos en cada vuelta).
En la siguiente vuelta, hice solo disminuciones. Las patas-brazos deben quedar cerradas completamente después de las disminuciones
Levanté 10 cadenas al aire y listo.
Repetí este proceso hasta tener cuatro de estas patitas-brazos.
I started with a different yarn color for the legs and arms.
I made a magic ring with 5 single crochet (sc) inside. In the second round, I crocheted increases in each stitch. Then, I worked two rounds with only single crochet (10 stitches per round).
In the next round, I made only decreases. The legs/arms should be completely closed after the decreases.
I chained 10 and finished.
I repeated this process until I had four of these leg-arm pieces.
Tejer los cuernos / Crocheting the Horns

Con otro color de hilo para los cuernos hice un anillo mágico con 6 puntos bajos dentro.
En la segunda vuelta, hice solo puntos bajos
En la tercera vuelta, tejí una secuencia de 1 punto bajo 1 aumento.
En la cuarta vuelta, tejí solo puntos bajos.
En la quinta vuelta, tejí una secuencia de 2 puntos bajos 1 aumento.
En la última vuelta hice solo puntos bajos.
Using a different yarn color for the horns, I made a magic ring with 6 single crochet (sc) inside.
In the second round, I crocheted only single crochet.
In the third round, I worked a sequence of 1 sc, 1 increase.
In the fourth round, I crocheted only single crochet.
In the fifth round, I worked a sequence of 2 sc, 1 increase.
In the last round, I crocheted only single crochet.
Hacer el círculo para el ojito de seguridad / Making the Circle for the Safety Eye
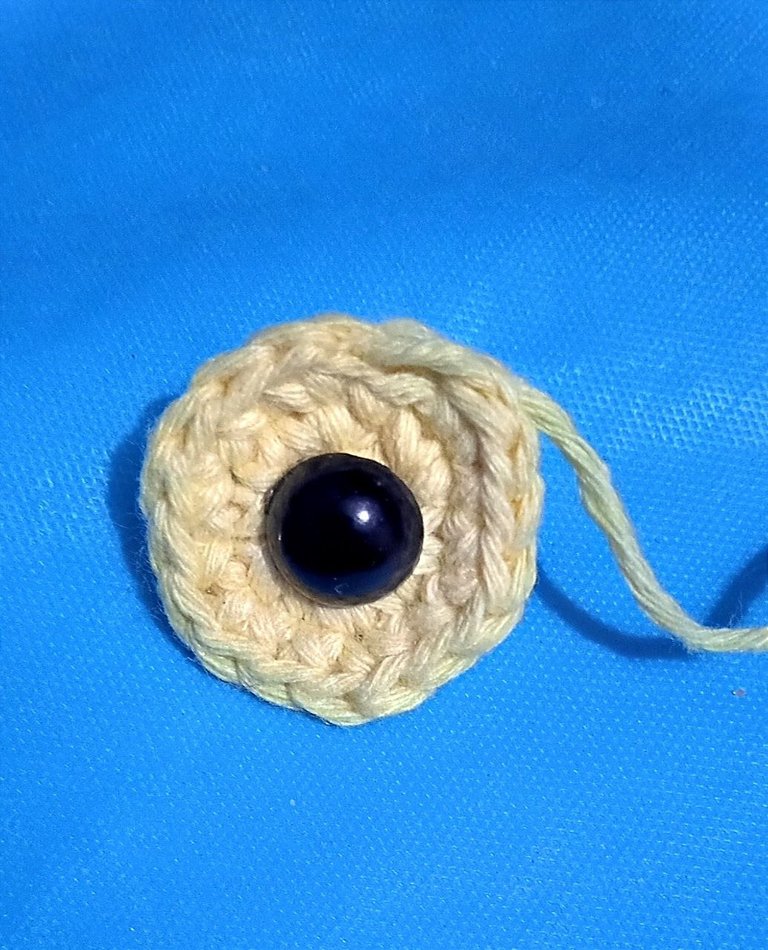
Comencé con un anillo mágico y tejí 6 puntos bajos dentro.
En la segunda vuelta, hice aumentos en cada punto.
En la tercera vuelta, tejí una secuencia de 1 punto bajo 1 aumento y listo.
I started with a magic ring and crocheted 6 single crochet (sc) inside.
In the second round, I made increases in each stitch.
In the third round, I worked a sequence of 1 sc, 1 increase*, and that’s it.
Resultado / Result

|
|
|
|
|
|
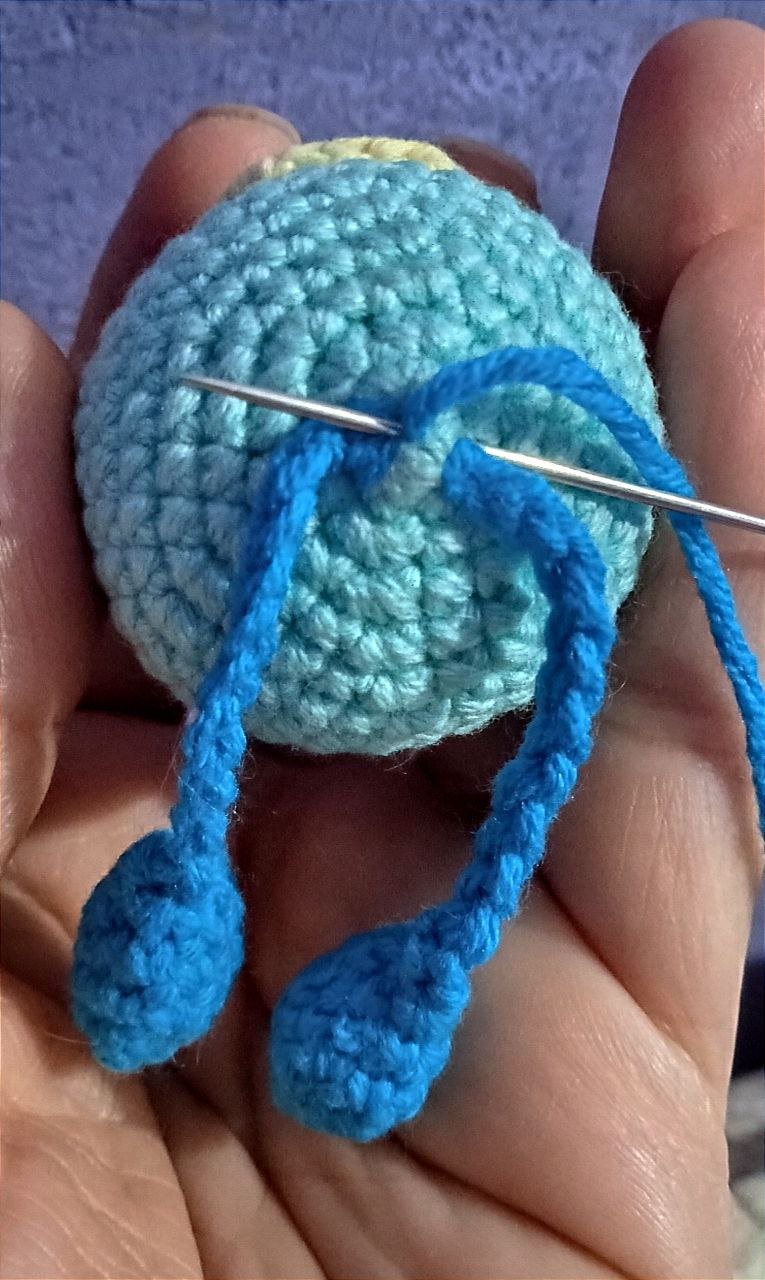
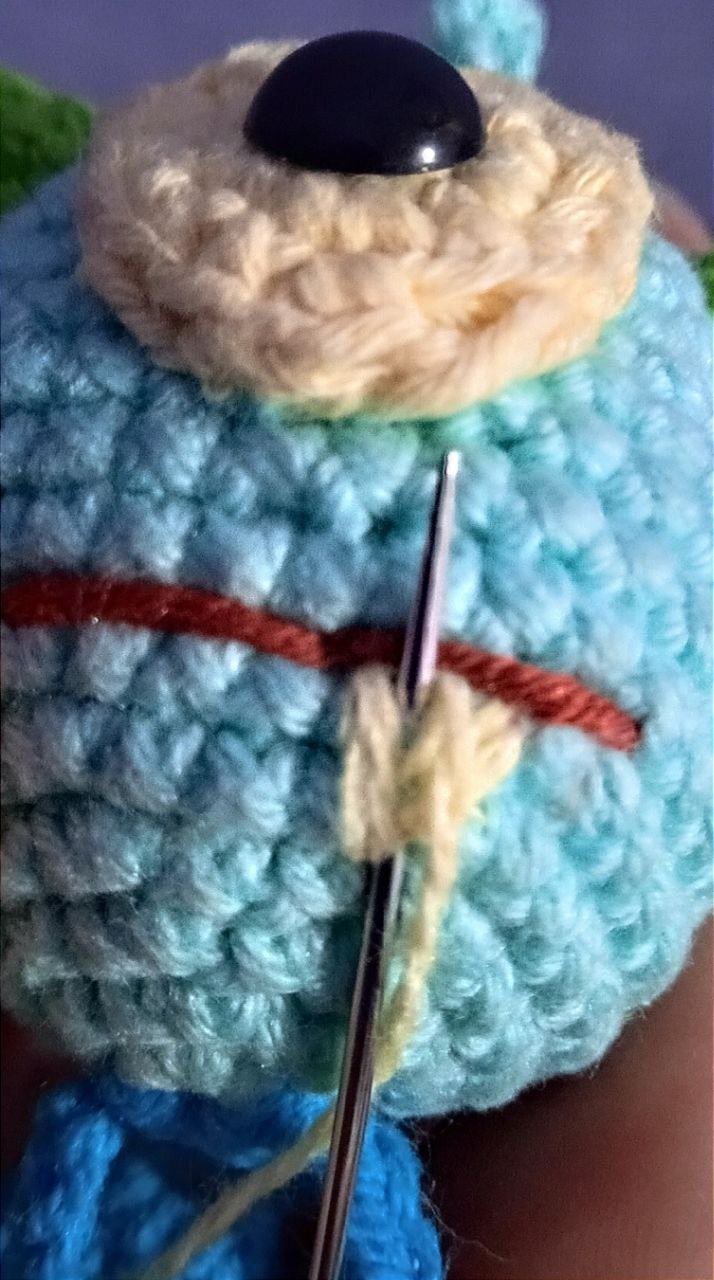
Cosi todas las partes (cuerpo, brazos, patas, cuernos y círculo del ojo) utilizando la aguja soft e hilo de algodón.
Una vez que todas las partes estaban unidas, bordé la boca y un pequeño diente para darle más detalle.
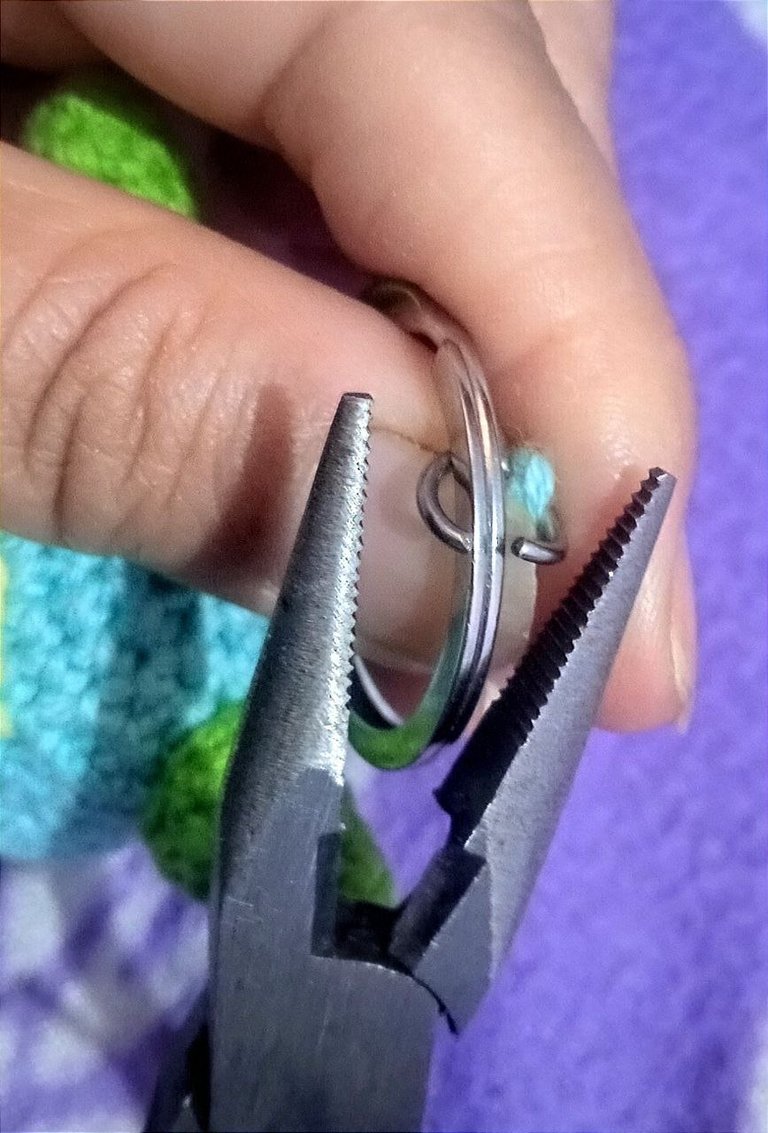
Al final, coloqué el monstruito en la argolla del llavero ayudándome con el alicate.
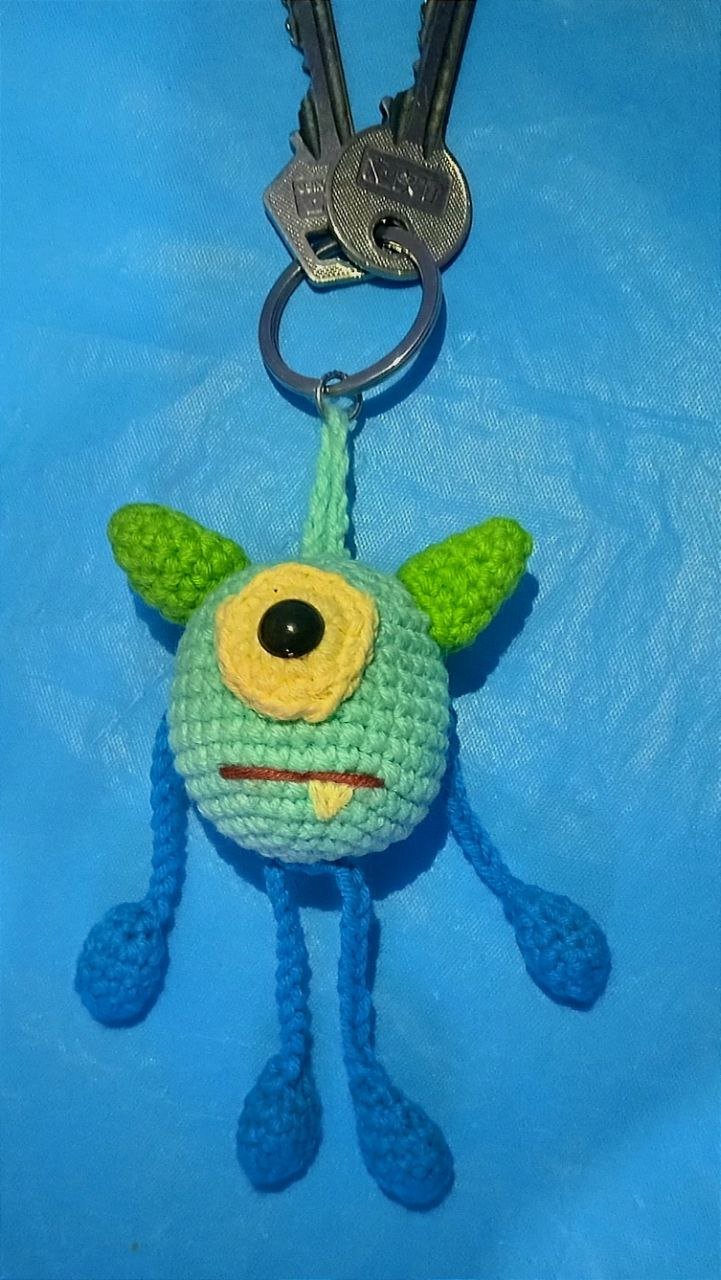
Aunque sea pequeño, igual lleva trabajo el llavero amigurumi 🤗.
I sewed all the parts (body, arms, legs, horns, and eye circle) using the soft needle and cotton thread.
Once everything was attached, I embroidered the mouth and a small tooth to add more detail.
Finally, I placed the little monster on the keyring with the help of pliers.
Even though it’s small, making an amigurumi keychain still takes some effort! 🤗

Mucha creatividad! 🥰 Me gusta mucho lo que has logrado..! Gracias por compartir!
Me alegra que le haya gustado 😊
Muchas Gracias
¡Enhorabuena!
✅ Has hecho un buen trabajo, por lo cual tu publicación ha sido valorada y ha recibido el apoyo de parte de CHESS BROTHERS ♔ 💪
♟ Te invitamos a usar nuestra etiqueta #chessbrothers y a que aprendas más sobre nosotros.
♟♟ También puedes contactarnos en nuestro servidor de Discord y promocionar allí tus publicaciones.
♟♟♟ Considera unirte a nuestro trail de curación para que trabajemos en equipo y recibas recompensas automáticamente.
♞♟ Echa un vistazo a nuestra cuenta @chessbrotherspro para que te informes sobre el proceso de curación llevado a diario por nuestro equipo.
🥇 Si quieres obtener ganancias con tu delegacion de HP y apoyar a nuestro proyecto, te invitamos a unirte al plan Master Investor. Aquí puedes aprender cómo hacerlo.
Cordialmente
El equipo de CHESS BROTHERS
Wow, it's so beautiful, your skills are amazing in making it.
This is so adorable and so creative of you, you did an awesome job and I love what you did. Well done and bravo.
Hola amiga. Te quedó bien chevere este llavero. ¡Gracias por compartir!
Es un monstruito muy tierno, tiene cara de ser un buen protector de llaves jeje me encanta el crochet, que de lindas cositas se pueden realizar con esta tecnica 😍
Sí, un buen protector de llaves 😅
Soy fans del crochet, espero poder compartir mas de mis proyectos en esta comunidad más adelante.
Saludos 👋😊