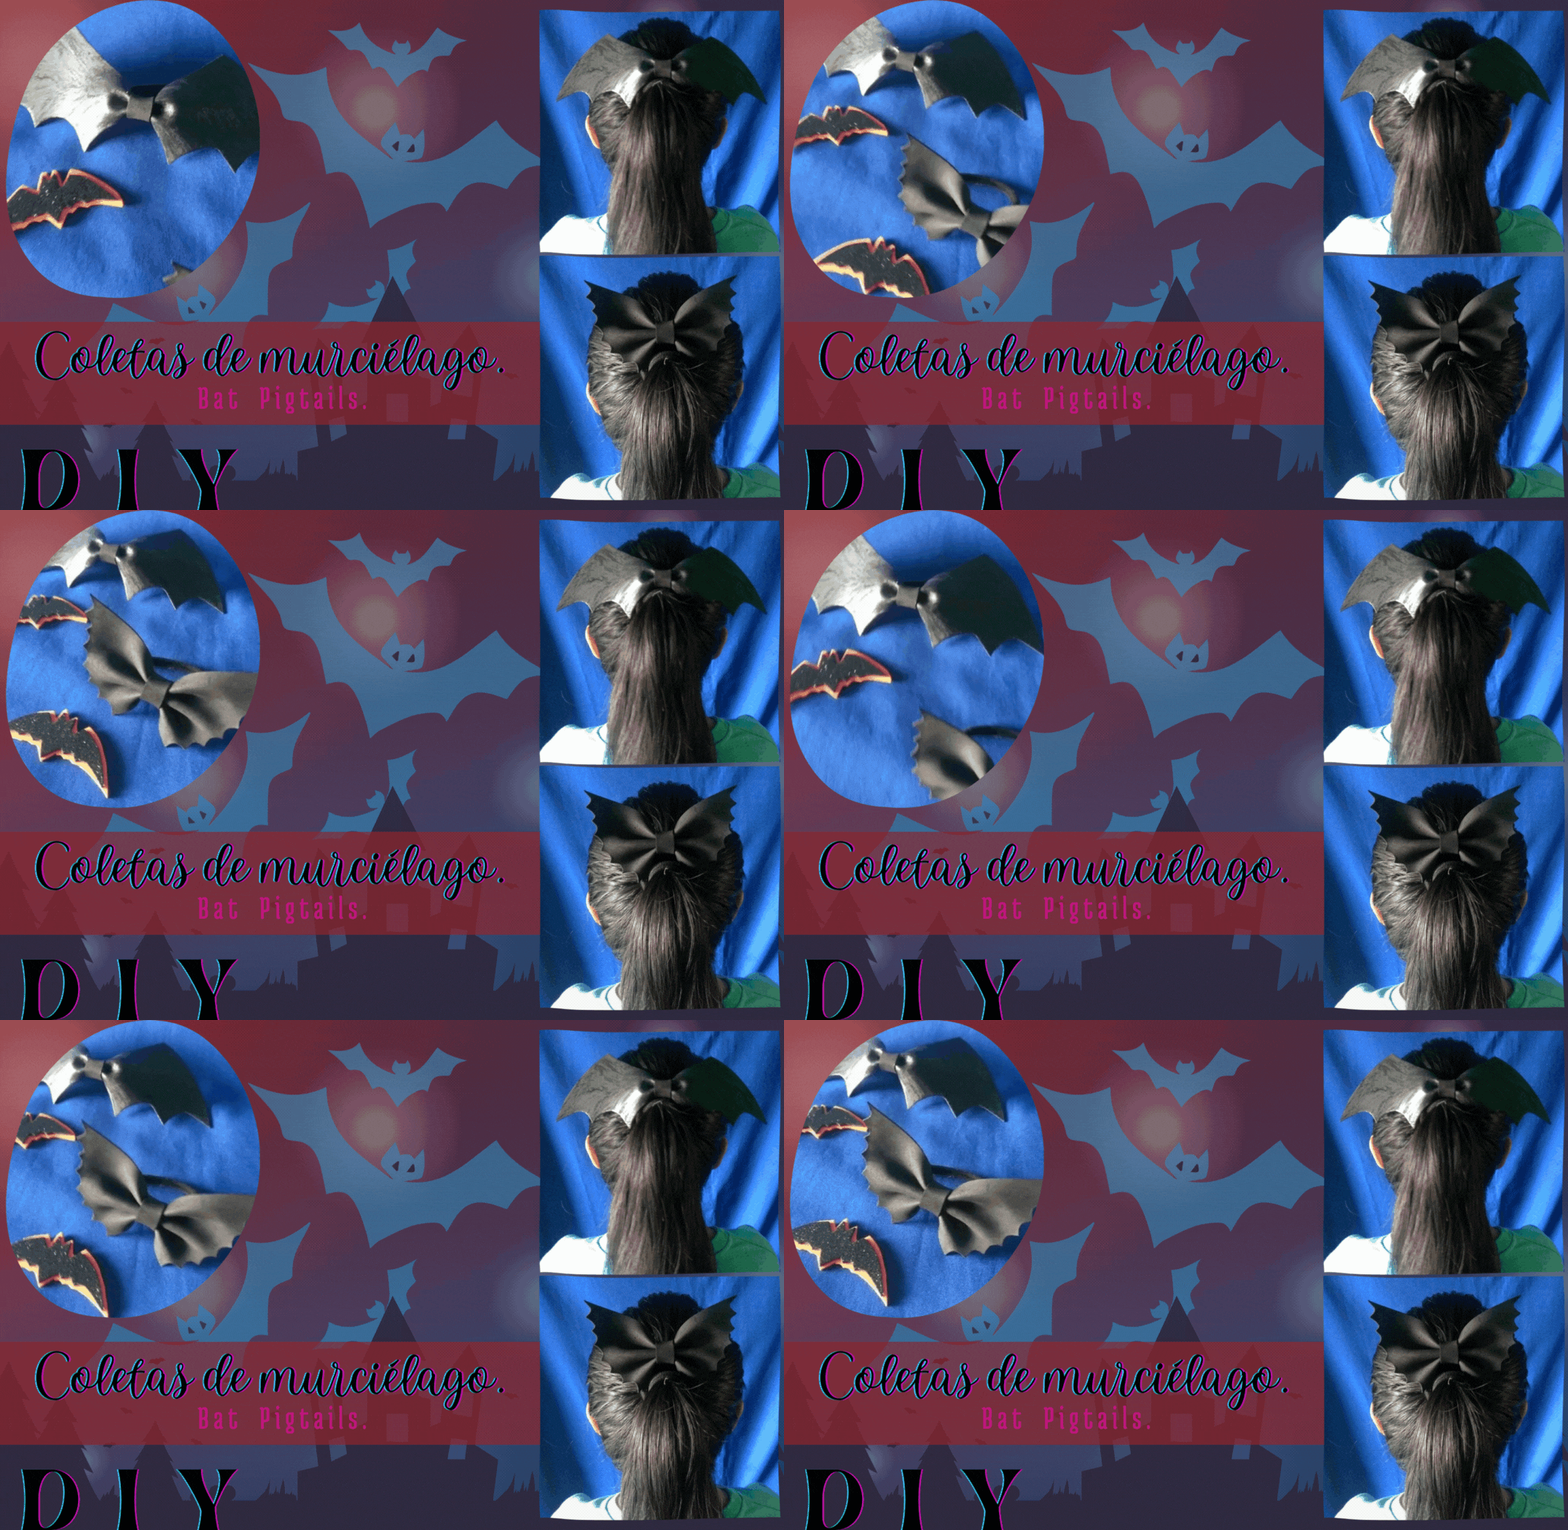
Esta es mi última publicación dedicada a halloween, finalizo este ciclo de publicación con unas coletas muy spooky, ambas son diferentes, pero comparten el mismo tema, murciélagos, los materiales son pocos y debo decir que son fáciles de hacer en un par de minutos las tendrán listas, pueden hacer pares o como yo individuales, también pueden variar en el uso de materiales, usé foami pero siente que serían más resistentes al hacerlas de tela de cuero sintético, la idea inicial era esa pero no tengo ese material así que tuve que improvisar.
This is my last publication dedicated to halloween, I end this cycle of publication with a very spooky pigtails, both are different, but share the same theme, bats, the materials are few and I must say that they are easy to make in a couple of minutes you will have them ready, you can make pairs or like me individuals, you can also vary in the use of materials, I used foami but I feel that they would be more resistant to make them of synthetic leather fabric, the initial idea was that but I do not have that material so I had to improvise.
Otra cosa que pueden cambiar es la decoración, si les gustan los brillos pueden agregar, o si usan foami como yo pueden sustituir el foami liso que usé y emplear escarchado, esto les dará un toque único a las alas de murciélago, demos inicio al tutorial.
Another thing you can change is the decoration, if you like glitter you can add it, or if you use foami like me you can substitute the plain foami I used and use frosting, this will give a unique touch to the bat wings, let's start the tutorial.


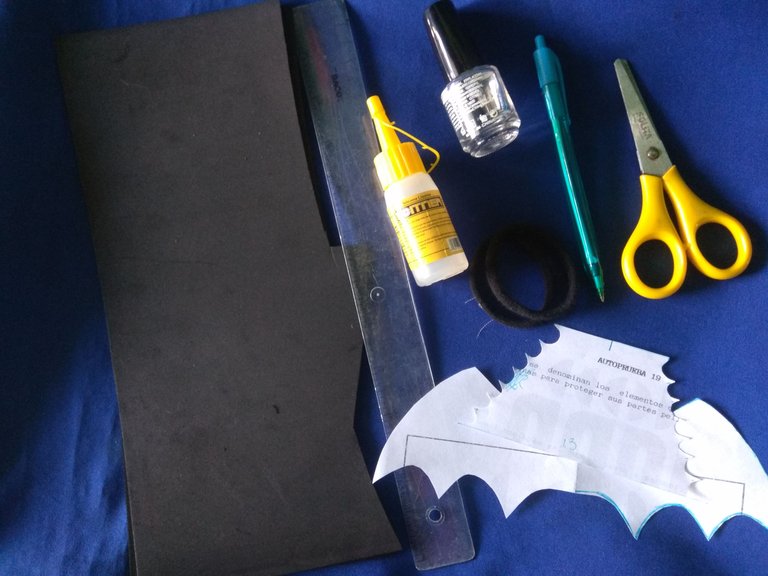
Materiales: || Materials:

▪️ Foami negro, 2 coletas, tijeras, hoja de papel, silicón líquido, lápiz, regla geométrica, esmalte o pegamento escolar (opcional).
▪️ Black Foami, 2 pigtails, scissors, sheet of paper, liquid silicone, pencil, geometric ruler, enamel or school glue (optional).

Paso a paso: || Step by step:

▪️ Primera coleta: || First ponytail:
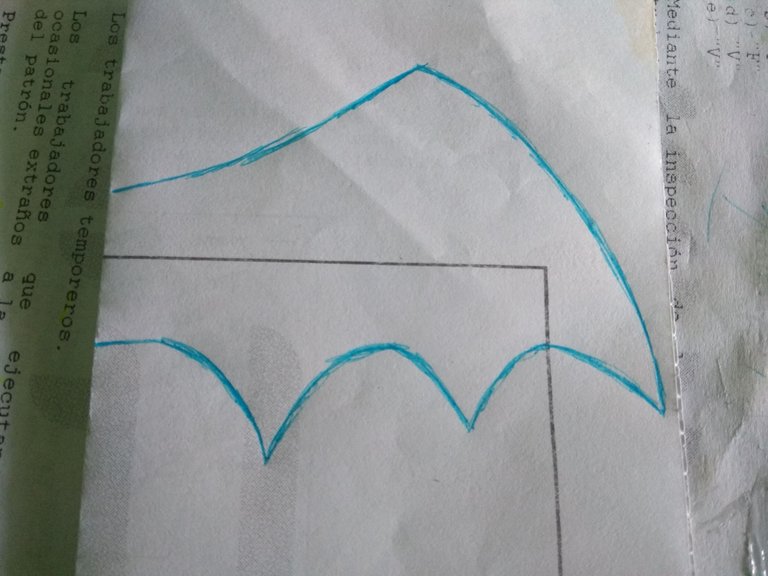
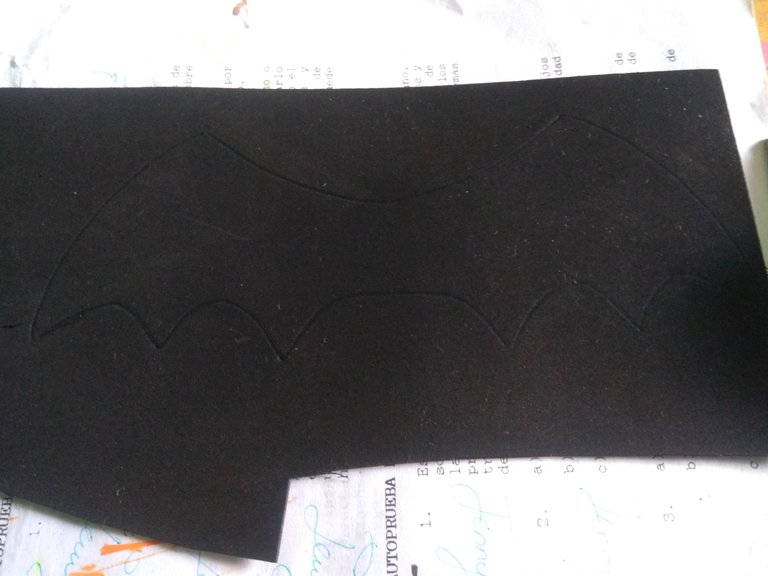
La primera coleta son unas alas clásicas de murciélago, simplemente debemos doblar una hoja y dibujar la silueta de un ala de murciélago, luego recortamos y tendremos la silueta completa.
The first ponytail is a classic bat wings, simply fold a sheet of paper and draw the silhouette of a bat wing, then cut it out and you will have the complete silhouette.
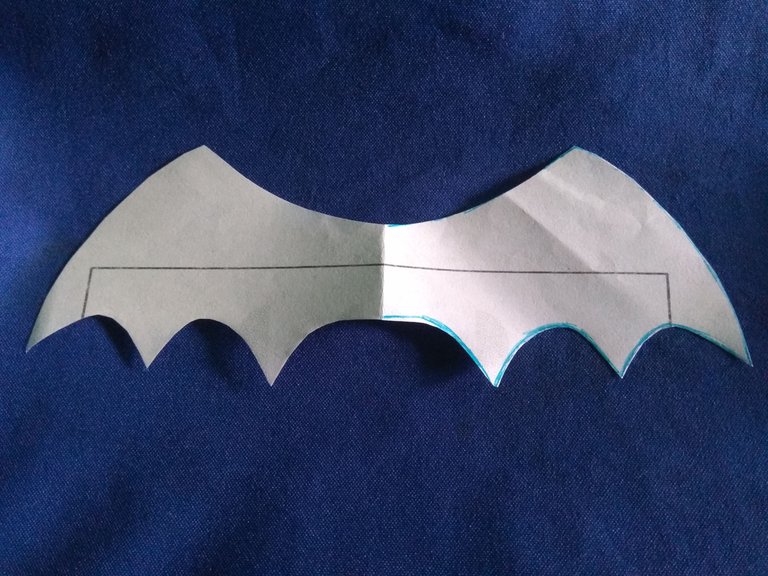
Colocar el patrón sobre el foami y trazar la silueta con un lápiz, luego debemos recortarlo.
Place the pattern on the foami and trace the silhouette with a pencil, then cut it out.
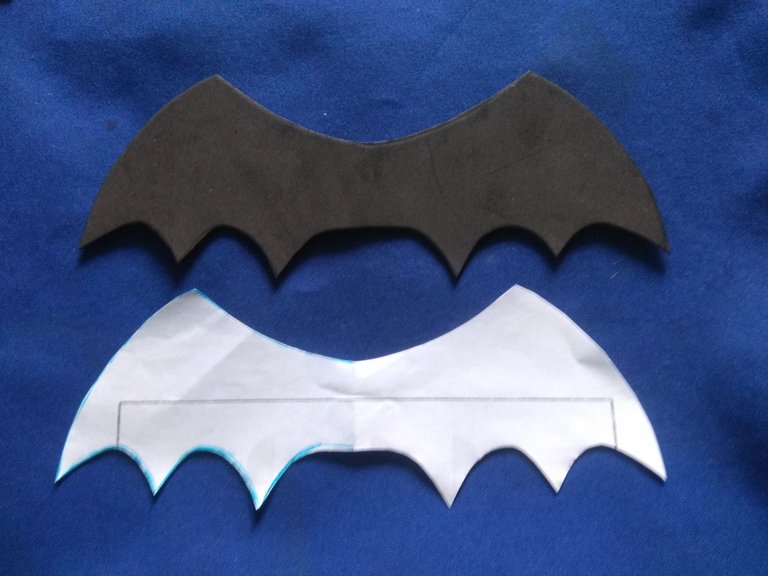
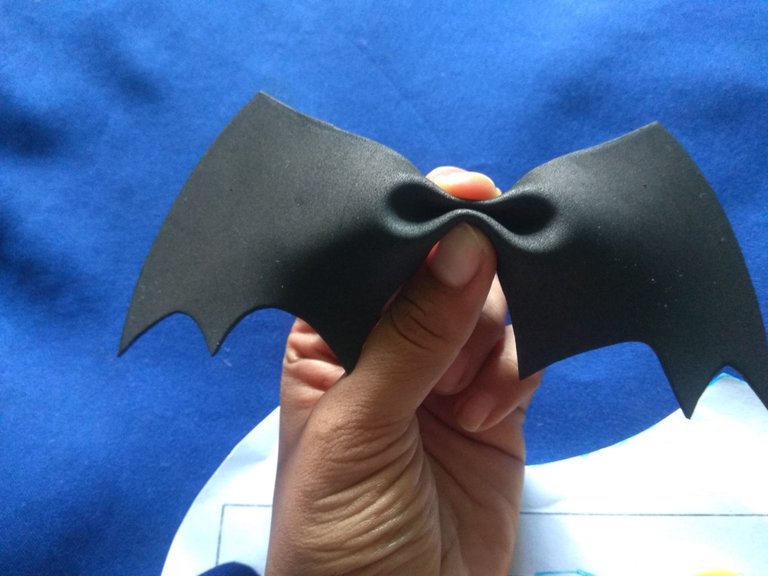
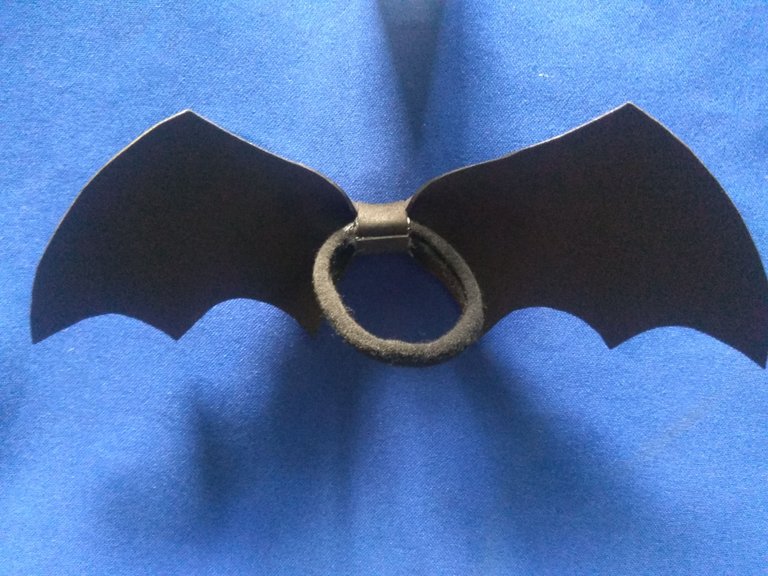
Deben recortar una pequeña tira de foami y tenerla cerca para usarla, hacer un dobles en el centro para dar forma de lazo, luego colocar la tira antes recortada, colocar la coleta o goma y pegar con silicón.
They should cut a small strip of foami and keep it close to use it, make a double in the center to form a loop, then place the strip cut out before, place the ponytail or rubber band and glue with silicone.
▪️ Segunda coleta: || Second ponytail:
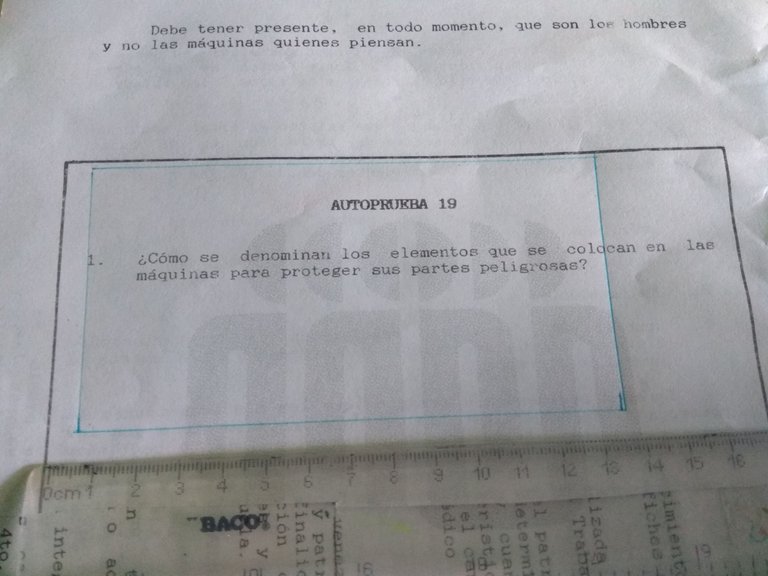
La segunda coleta es un poco más compleja, al igual que la anterior se debe realizar el patrón, primero trazamos un rectángulo de 13 cm de ancho x 7 cm de largo, nos situamos a mitad del rectángulo y medimos 3 cm de ambos lados.
The second ponytail is a little more complex, like the previous one the pattern must be made, first we draw a rectangle of 13 cm wide x 7 cm long, we stand in the middle of the rectangle and measure 3 cm on both sides.
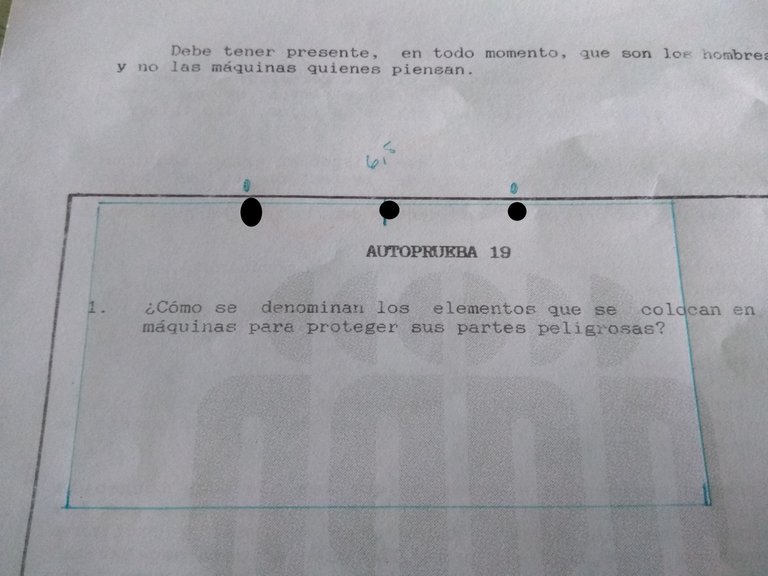
Unir los puntos trazados con los extremos del rectangulo, luego se debe recortar.
Join the points drawn with the ends of the rectangle, then cut out.
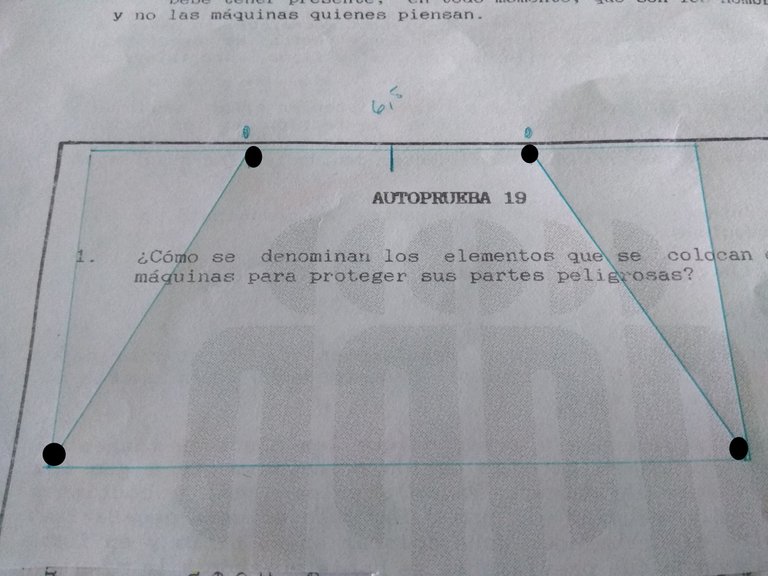
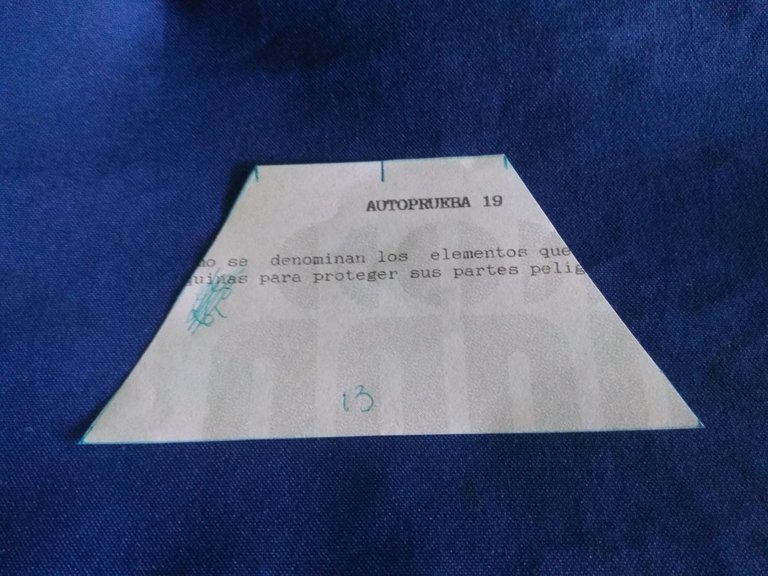
A los lados marcaremos puntos con un 1 cm de distancia, luego recortaremos de forma redondeada, no debe ser una forma perfecta, esta manera tendremos listo el patrón.
On the sides we will mark points with a 1 cm distance, then we will cut in a rounded shape, it should not be a perfect shape, this way we will have the pattern ready.
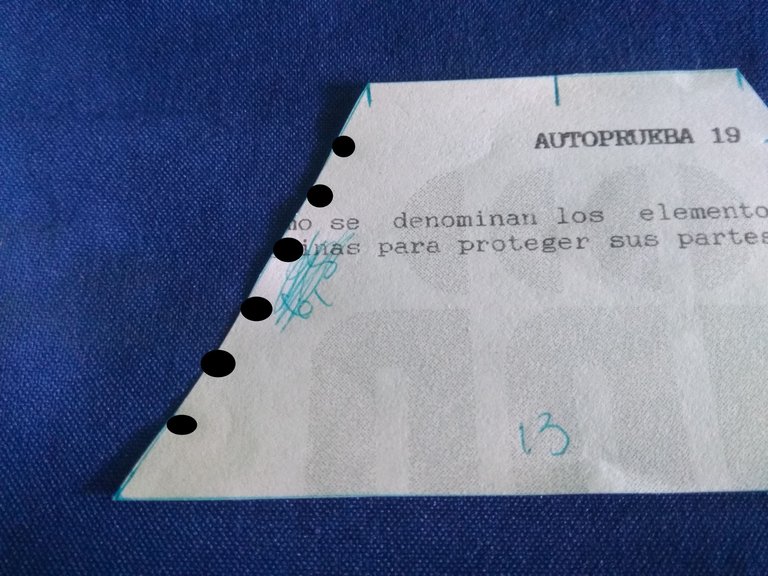
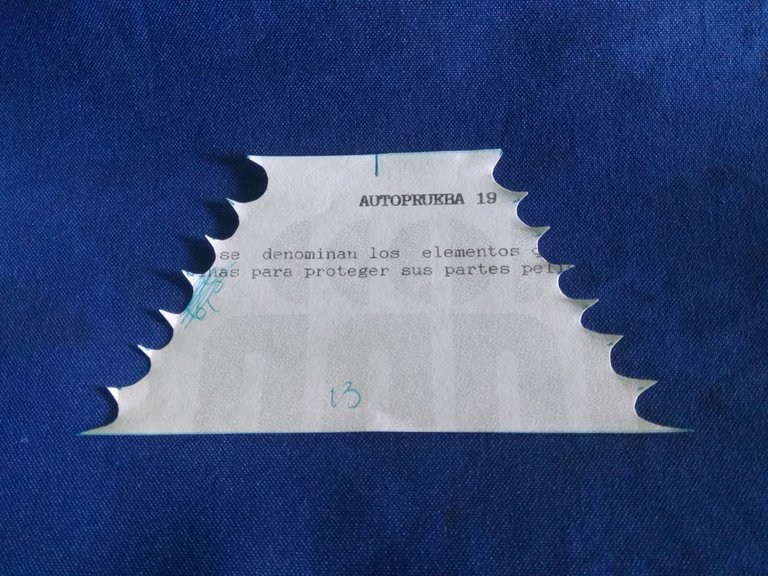
Trazar el patrón en el foami y repetir los pasos anteriores para formar la coleta, es decir; hacer varios dobleces en el centro de la pieza, colocar una tira de foami previamente recortada y pegar junto con la goma.
Trace the pattern on the foami and repeat the previous steps to form the ponytail, i.e., make several folds in the center of the piece, place a strip of foami previously cut out and glue together with the glue.
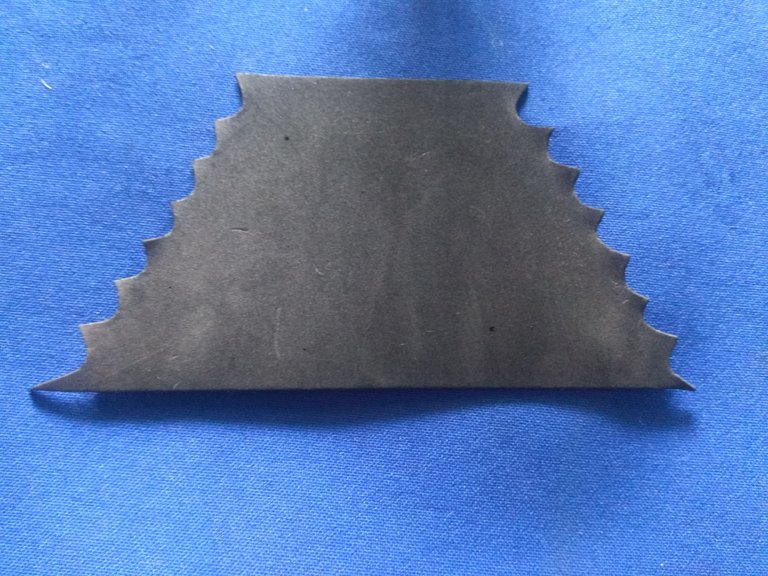
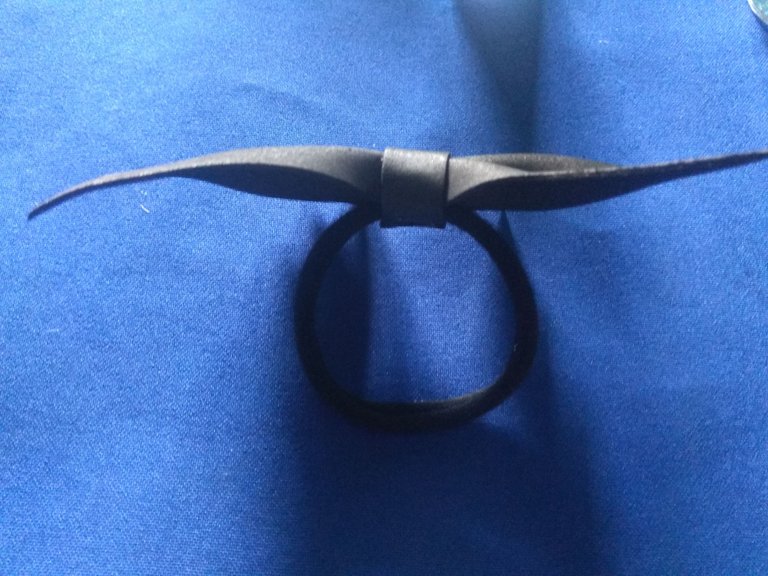


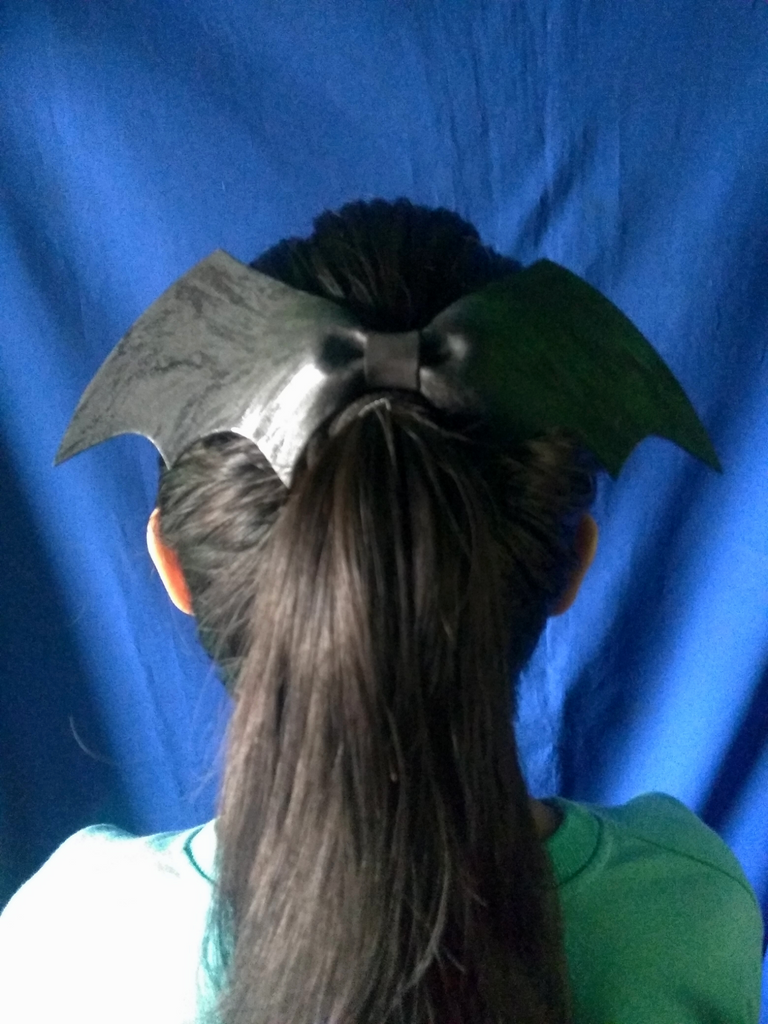
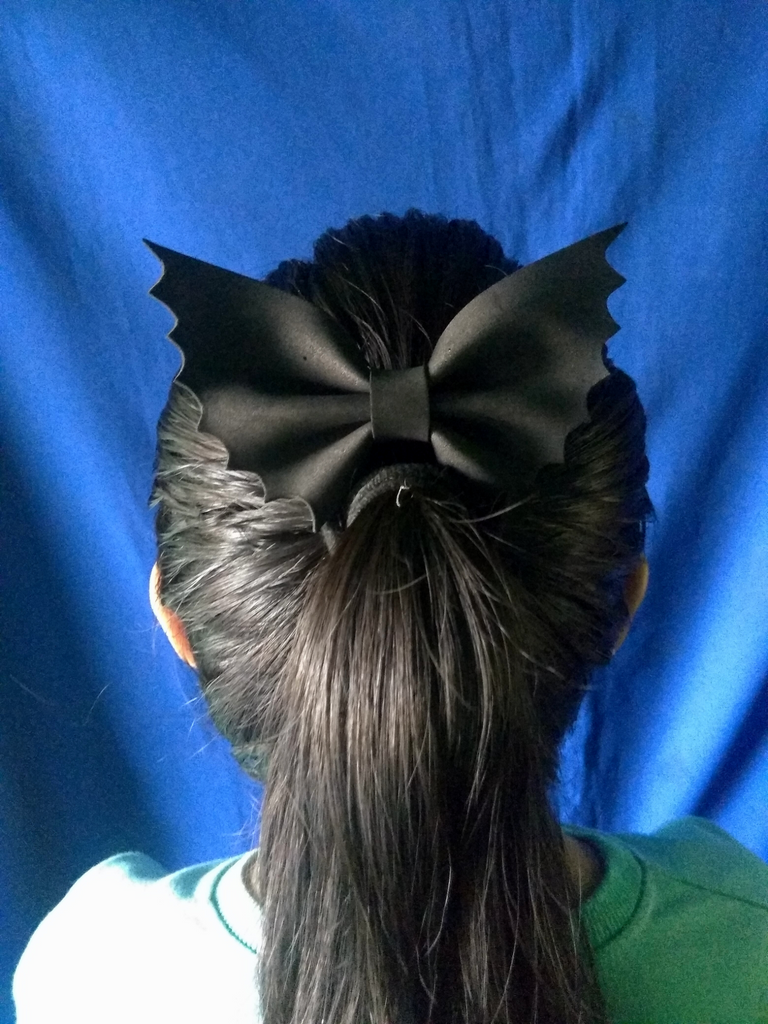
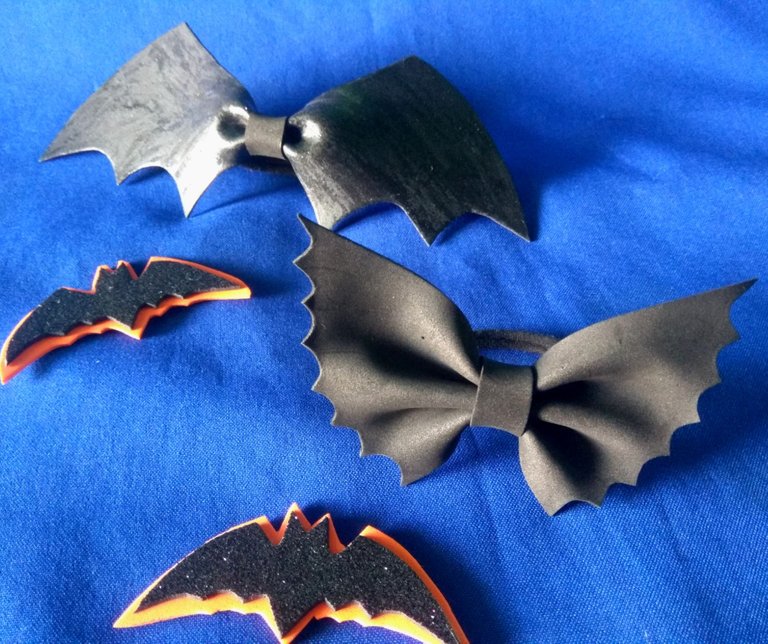


Ha llegado a su fin el mes más tenebroso del año, quiero cerrar con un tutorial creativo muy simple, pero que tiene en el todo el espíritu de halloween, estás coletas me han encantado, aunque admito que tengo una favorita, y es la segunda coleta, considero que por ser pequeña más personas que querrán usarla, aunque pueden hacer la primera de menor tamaño y será llevadera, si eres de esas personas que lleva el look dar como diario estos son tus accesorios, espero haya sido de sus agrado este post, gracias por llegar hasta aquí.
The spookiest month of the year has come to an end, I want to close with a very simple creative tutorial, but that has in it all the spirit of halloween, I loved these pigtails, although I admit that I have a favorite, and is the second pigtail, I think that being small more people will want to use it, although they can make the first smaller size and will be bearable, if you are one of those people who takes the look as a daily give these are your accessories, I hope you liked this post, thank you for coming here.


Imágenes tomadas desde mi Xiaomi Redmi Note 4. || Images taken from my Xiaomi Redmi Note 4.
Separadores hechos en Canva. || Dividers made in Canva.
Ediciones hechas en Canva. || Editions made in Canva.
Vídeos convertidos en gif || Videos converted to gif IMG2GO
Translator Deepl.
Me encanta 😍😍😍
The rewards earned on this comment will go directly to the people sharing the post on Twitter as long as they are registered with @poshtoken. Sign up at https://hiveposh.com.
Me gusta más la primera colita..las alas del murciélago se ven más grandes y tenebrosas.
Están muy lindas ambas colitas. Yo uso colas todo el día así que para el próximo año me haré unas de estas.
Muchas gracias por tu tutorial 🦇
Te gustan las más tenebrosas ajajjaaj, ambas quedaron lindas y son ideas geniales para quienes aman los looks dark, gracias por comentar amiga.
Feliz noche.
Muy lindas las coletas me gusto mucho la segunda, acompaña muy bien a un disfraz.
Saludos Jenny 😄
A mí también me gustó más la segunda, gracias por comentar.
Me encantaroooon, están geniales 🦇🦇
Gracias por comentar.
Quedaron demasiado geniales estas coletas amiga, seven geniales con el peinado 😉
Es un toque diferente que podemos dar a nuestro look ajaj, y va a tono con halloween, gracias por comentar.
@jennyzer está muy lindo y original, Gracias por compartir esta creación, saludos 😊
Gracias a ti por comentar.
Thank you for sharing this post on HIVE!
Your content got selected by our fellow curator rezoanulvibes & you received a little thank you upvote from our non-profit curation initiative. Your post will be featured in one of our recurring curation compilations which is aiming to offer you a stage to widen your audience within the DIY scene of Hive.
Next time make sure to post / cross-post your creation within the DIYHub community on HIVE and you will receive a higher upvote!
Stay creative & hive on!
Thank you for your support.
Thank you for sharing your skills with us :)
El batarang encima de la primera cola y genial jajaj!
Gracias por comentar amigo.
Que bonitas se ven en el cabello ♥️ super linda idea
Si, al atarlas al cabello quedan lindísimas, gracias por comentar.