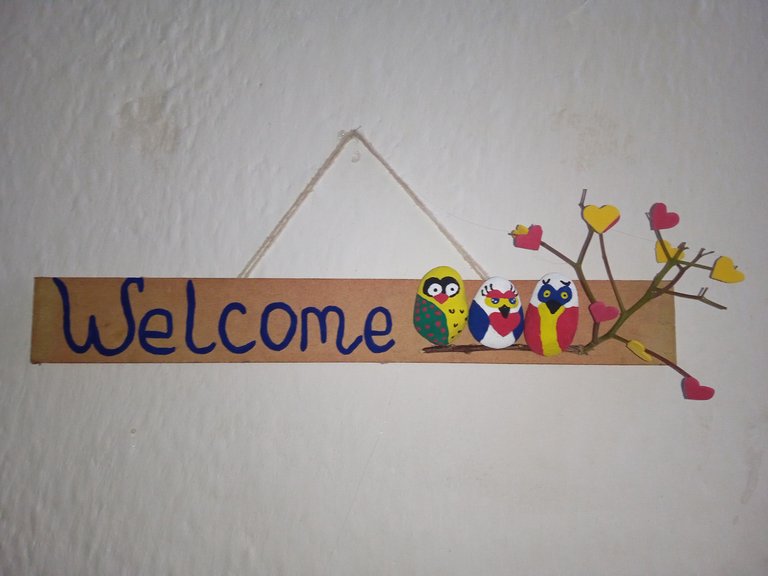
Hola feliz noche para todos mis amistades de esta linda plataforma , espero que hayan disfrutado de esta semana santa al máximo , que hayan tenido un excelente domingo , en esta bella noche les quiero compartir una manualidad que realice , se trata de un adorno de bienvenida para el hogar ,realizado con materiales reciclados , más adelante les mostraré los pasos a seguir
Hello happy evening to all my friends of this beautiful platform, I hope you have enjoyed this holy week to the fullest, you have had an excellent Sunday, in this beautiful night I want to share a craft that I made, it is a welcome home decoration, made with recycled materials, later I will show you the steps to follow.
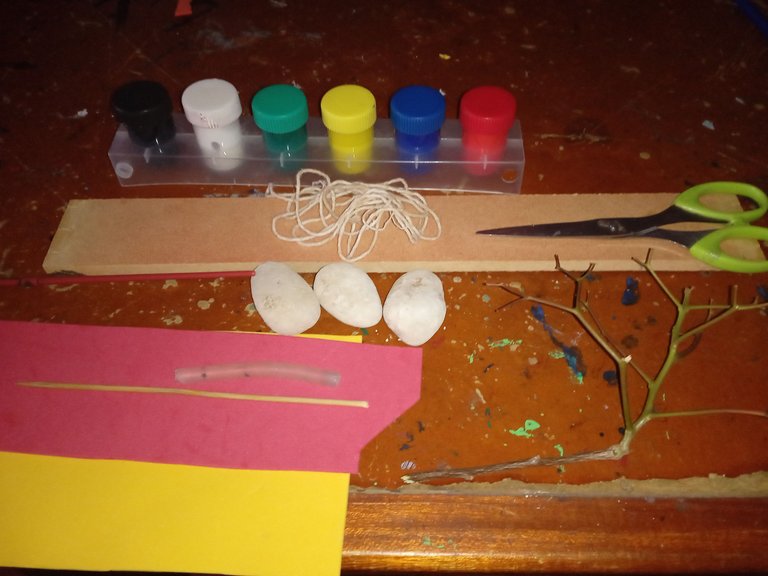
Materiales que utilice :
Tabla de MDF
Piedras
Pintura
Silicón
Pincel
Palito de altura
Cuerda
Tijera
Foamis
Materials used :
MDF board
Stones
Paint
Silicone
Brush
Height stick
String
Scissors
Foamis
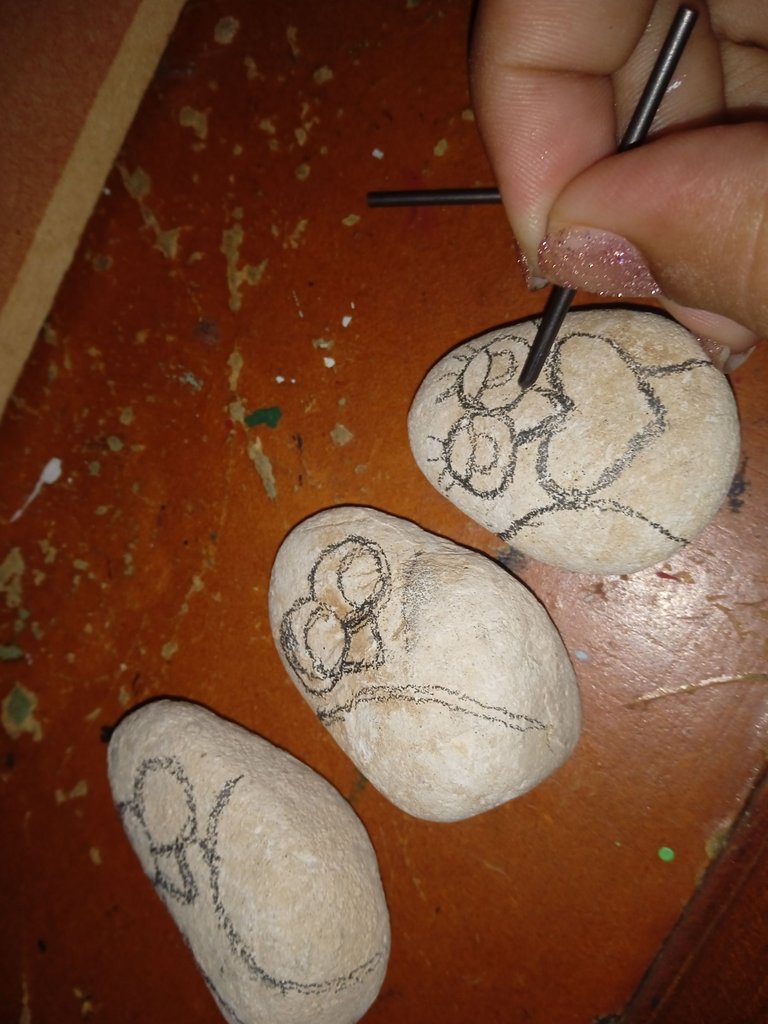
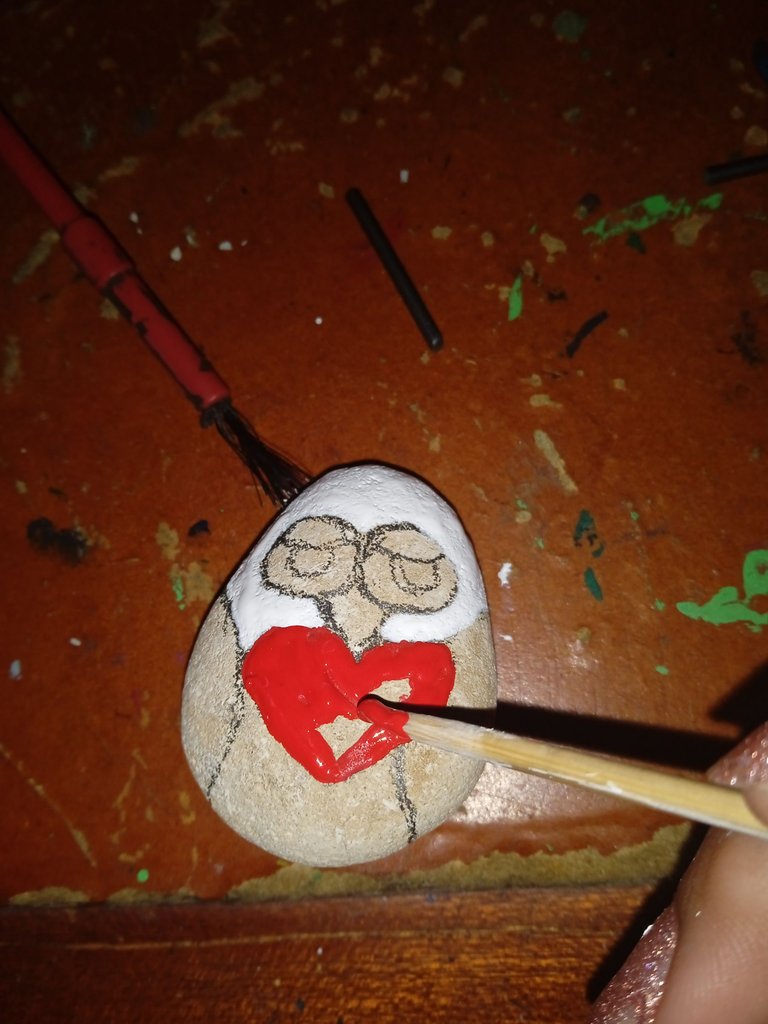
Pasos a seguir :
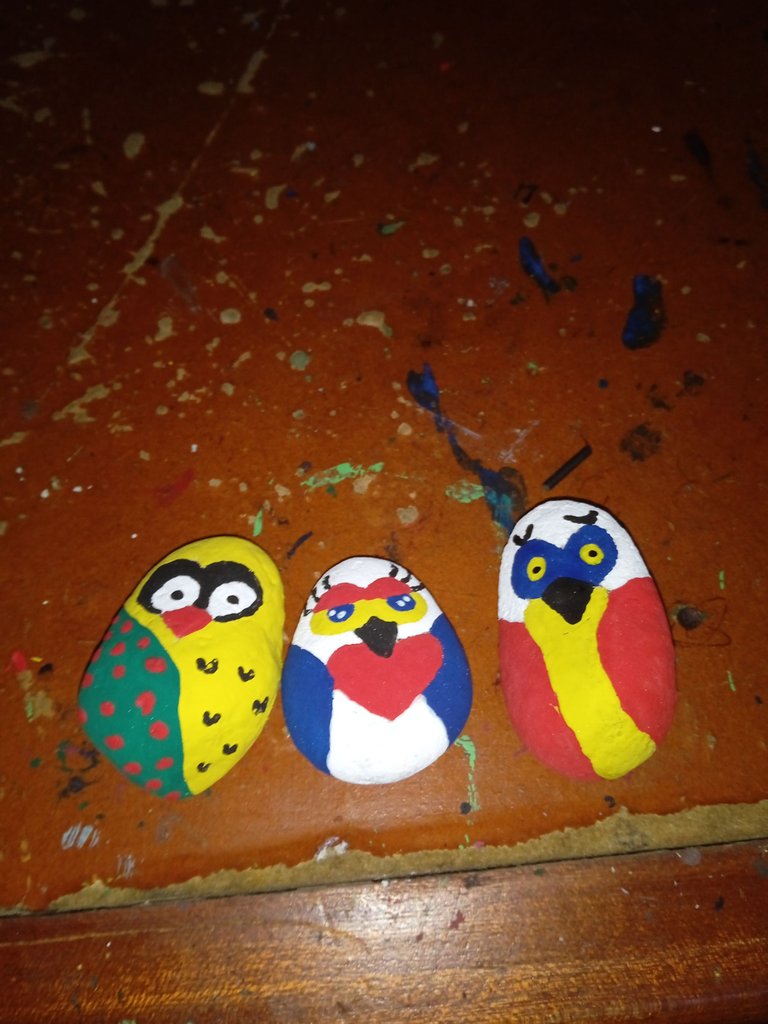
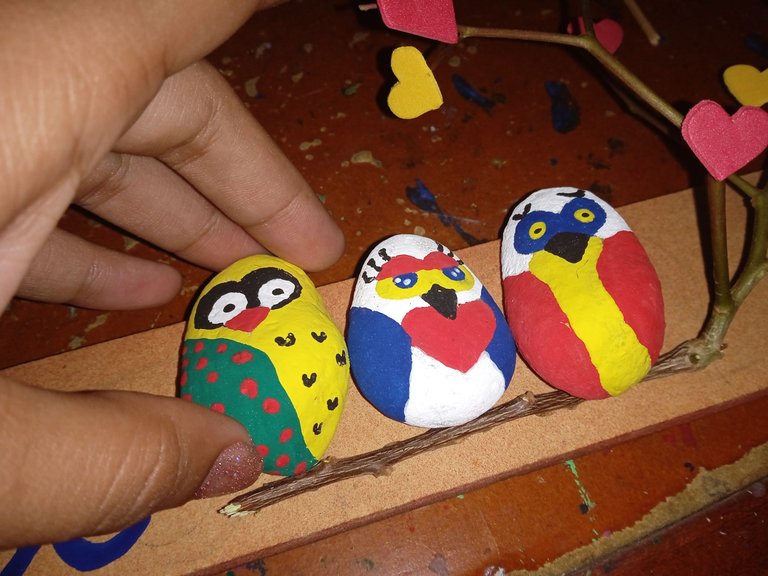
En nuestro primer paso iniciaremos dibujando el rostro de los búhos en las tres pequeña piedras , ambas lo marque con lápiz para luego pintar exacto
Steps to follow:
In our first step we will start by drawing the face of the owls on the three small stones, both marked with pencil and then paint the exact shape of the owls.
Una vez que marcamos nuestros búhos, procedimos a pintarlos, ambos de varios colores.
Once we marked our owls, we proceeded to paint them, both in various colors.
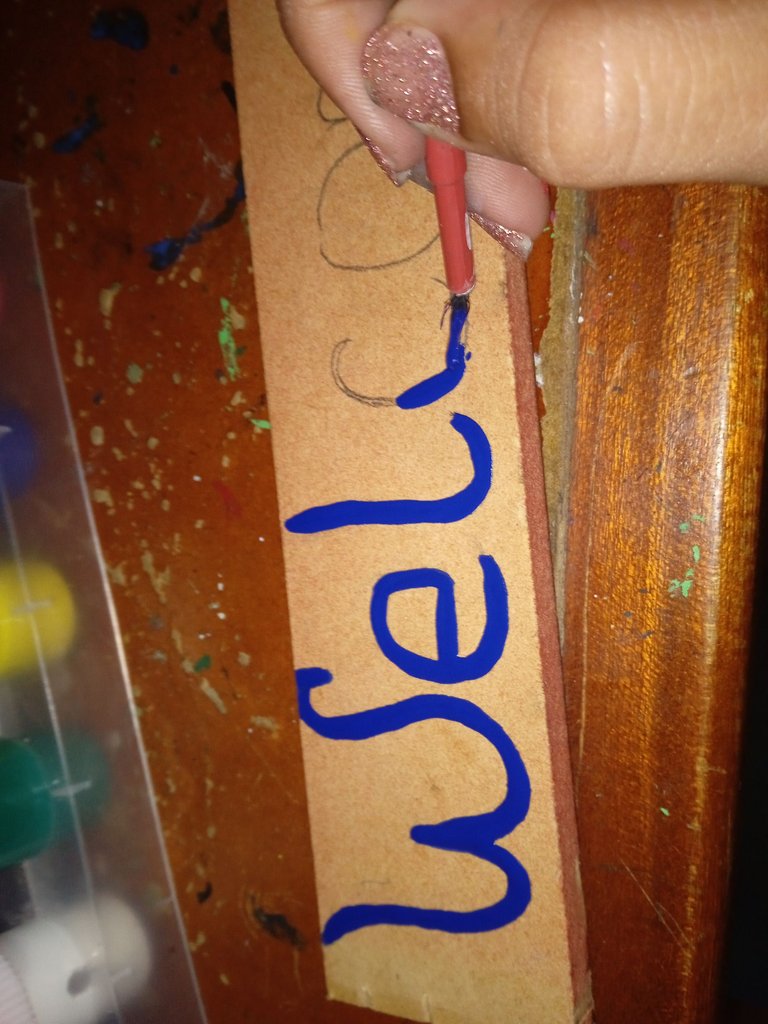
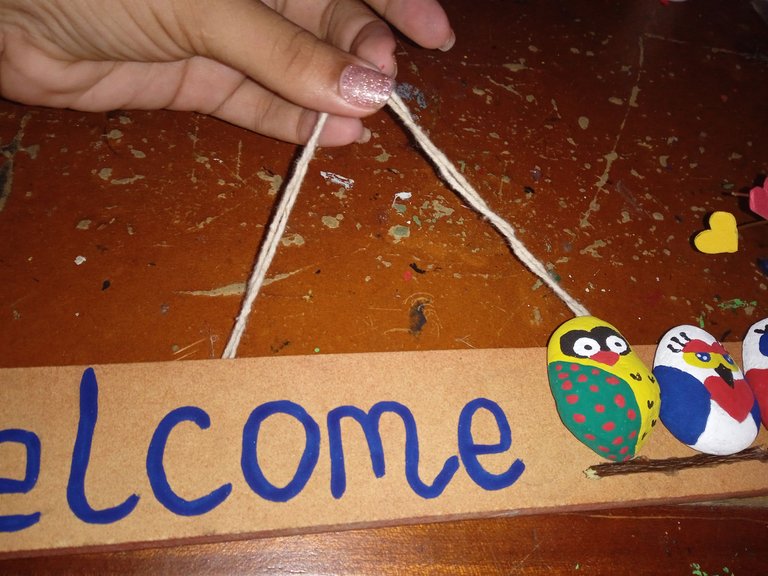
Mientras nuestros hermosos búho secan , continuaremos describiendo en la tablita la palabra welcome que en diccionario significa bienvenido
While our beautiful owls are drying, we will continue to describe on the little board the word welcome, which in the dictionary means welcome.
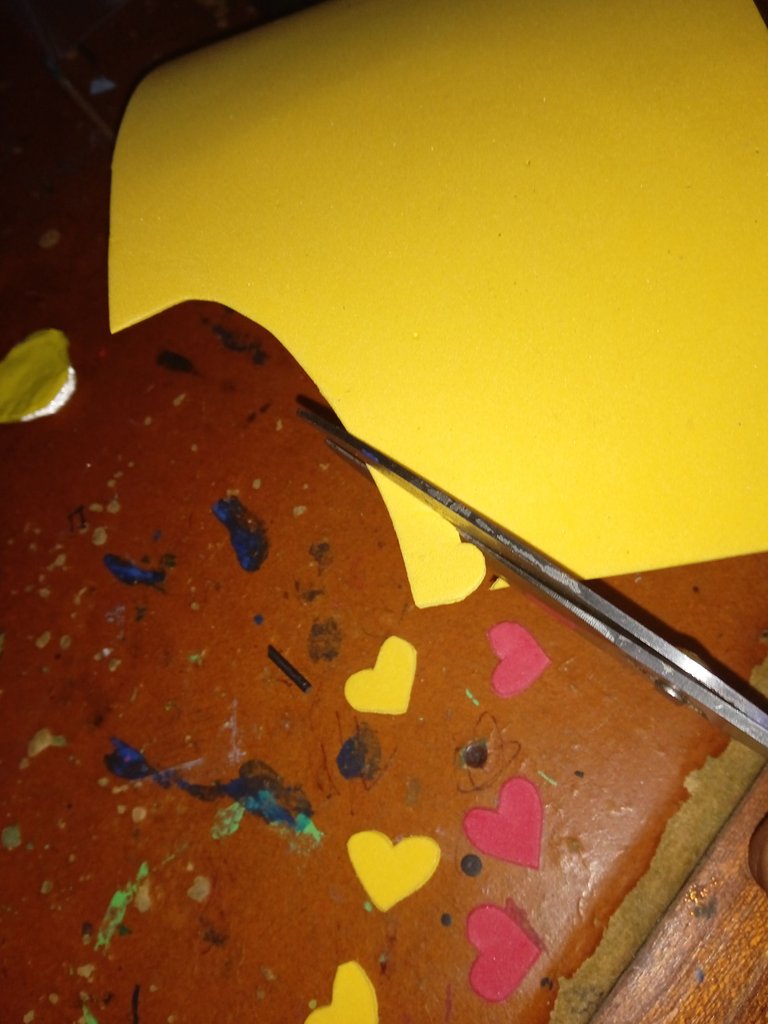
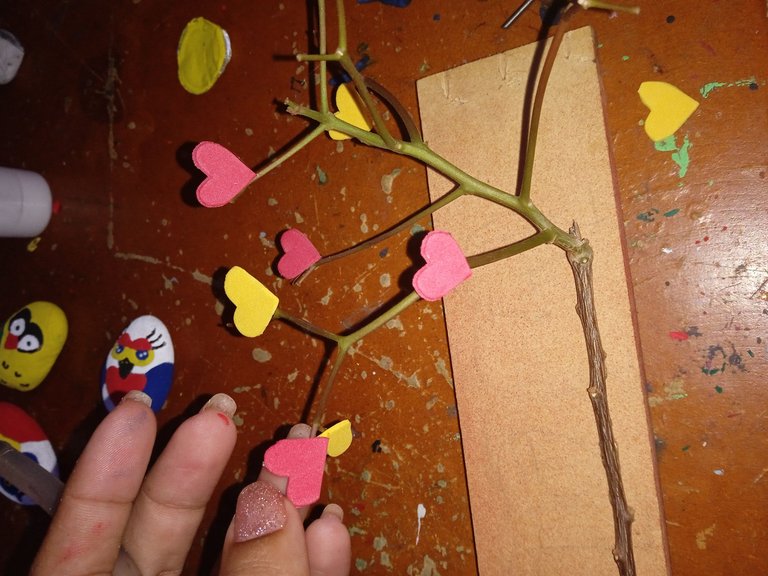
Luego continuamos recortando un poco de foamis y con el realizaremos unos corazones entre rojo y amarillo para decorar el árbol de la rama seca
Then we continue cutting out some foamis and with it we will make some hearts between red and yellow to decorate the tree of the dry branch.
Una vez que seque la pintura el bienvenida en inglés , procedimos a pegar la rama en una esquina del letrero
Once the paint dries, we proceeded to glue the branch in one corner of the sign.
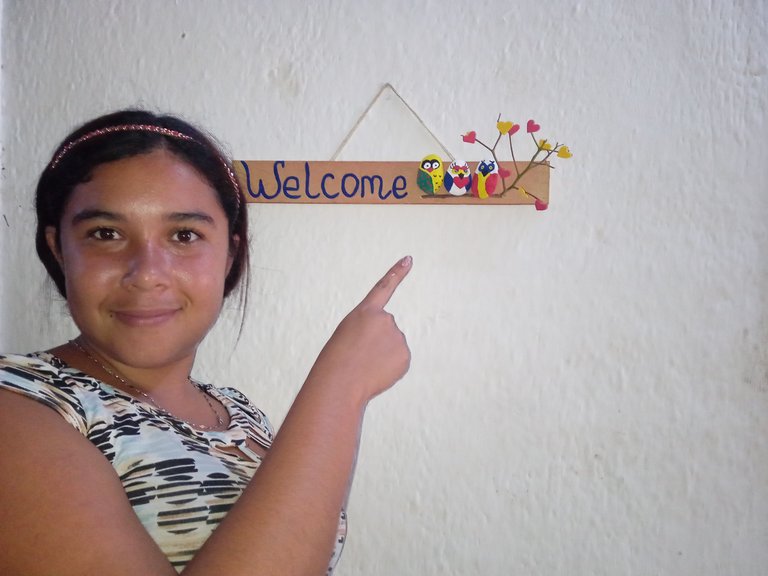
Finalmente pegaremos los búhos al mismo lado donde irá la rama seca , lo pegaremos uno al lado del otro
Finally we will glue the owls on the same side where the dry branch will go, we will glue them side by side.
Para culminar mi hermoso adorno , pegue una cuerda en el centro para que tenga por dónde guindar
To finish off my beautiful ornament, I glued a rope in the center so it would have a place to hang.
Hola amiga, que original tu diseño, me encanta.!
Los búhos coloridos le dan un lindo aspecto.
Saludos
Gracias amiga
Thank you for sharing this amazing post on HIVE!
non-profit curation initiative!Your content got selected by our fellow curator @rezoanulvibes & you just received a little thank you via an upvote from our
You will be featured in one of our recurring curation compilations and on our pinterest boards! Both are aiming to offer you a stage to widen your audience within and outside of the DIY scene of hive.
Join the official DIYHub community on HIVE and show us more of your amazing work and feel free to connect with us and other DIYers via our discord server: https://discord.gg/mY5uCfQ !
If you want to support our goal to motivate other DIY/art/music/homesteading/... creators just delegate to us and earn 100% of your curation rewards!
Stay creative & hive on!