Hola buenos días mis amigos espero que se encuentren bien , hoy les quiero compartir un ramo de rosas eternas que realicé para hacer feliz a un cliente el 14 de febrero, les cuento que esto es parte de mi emprendimiento, día y noche le pongo mucho amor y me siento orgullosa, les cuento que gracias a Dios y a esta plataforma por haberme motivado e inspirado a crear , no sabía que tan habilidosa era
Hello good morning my friends I hope you are well, today I want to share a bouquet of eternal roses that I made to make a customer happy on February 14, I tell you that this is part of my venture, day and night I put a lot of love and I am proud, I tell you that thanks to God and this platform for having motivated and inspired me to create, I did not know how skillful I was.
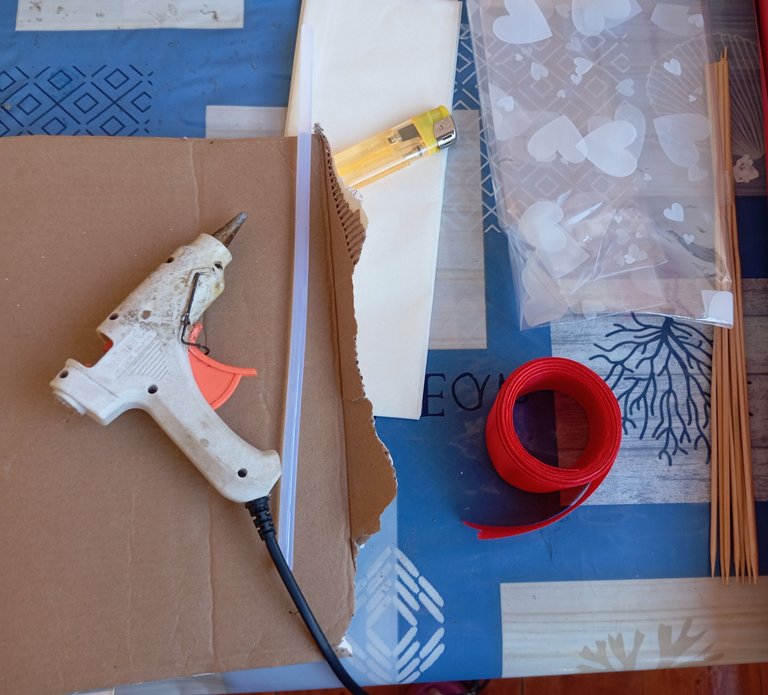
Materiales qué utilice :
-Cinta gruesa color rojo
-Encendedor de cocina
-Palitos de altura
-Silicon
-Papel cebolla
-Papel De corazones transparentes
Materials I used:
-Thick red ribbon
-Kitchen lighter
-Height sticks
-Silicon
-Onion paper
-Paper with transparent hearts
A continuación los pasos a seguir :
Iniciaremos tomando nuestra cinta con el apoyo de una tarjeta vamos a continuar realizando varios dobles o enrollando la cinta en ella de forma horizontal, las vueltas dependerán de la cantidad de pétalos y flores
Here are the steps to follow:
We will begin by taking our ribbon with the support of a card we will continue making several doubles or rolling the ribbon on it horizontally, the turns will depend on the amount of petals and flowers.
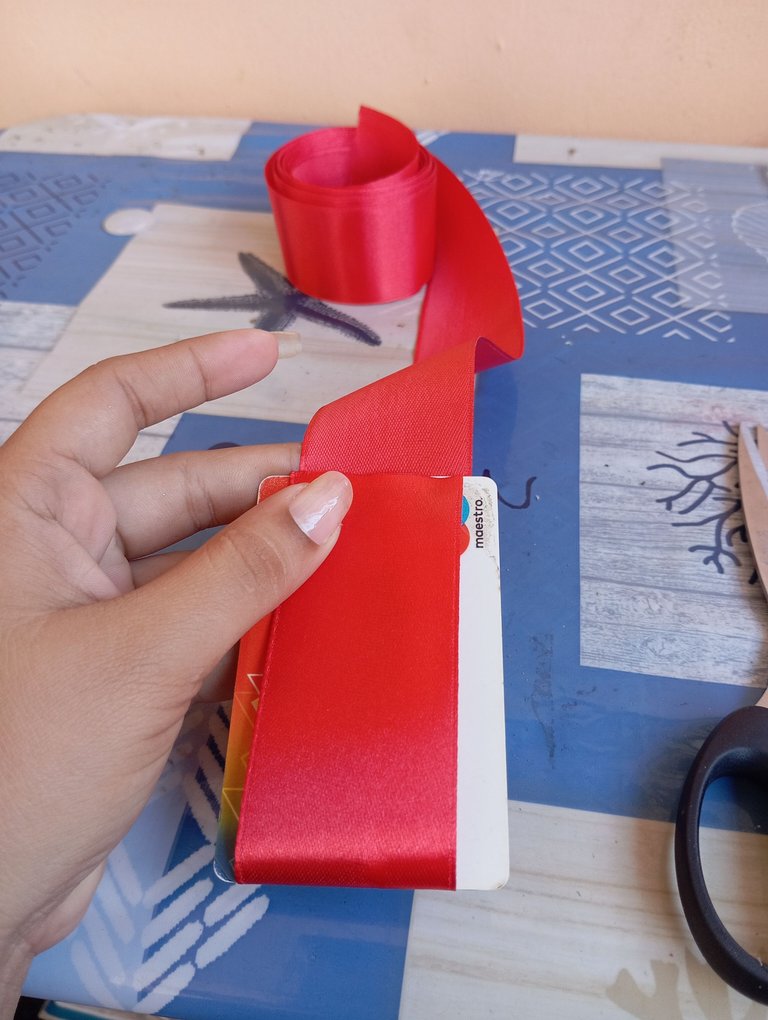
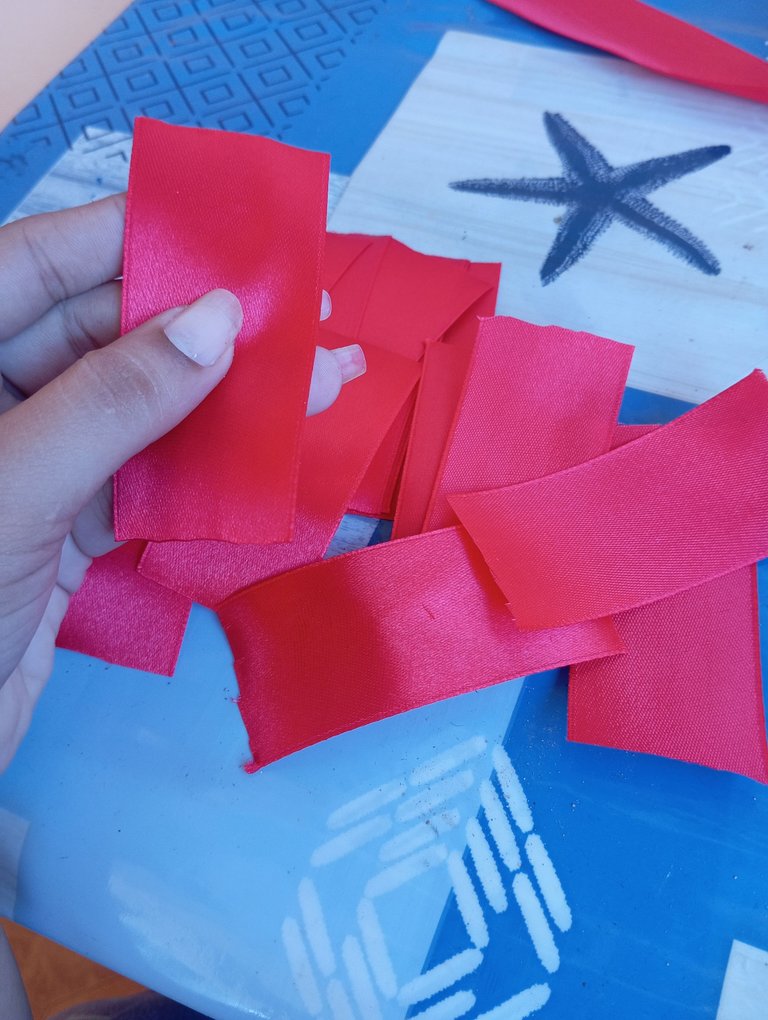
Luego vamos a continuar retirando la cinta de la tarjeta con cuidado , al mismo tiempo recortando obteniendo las piezas para formar nuestros pétalos
Then we will continue removing the ribbon from the card carefully, at the same time cutting out the pieces to form our petals.
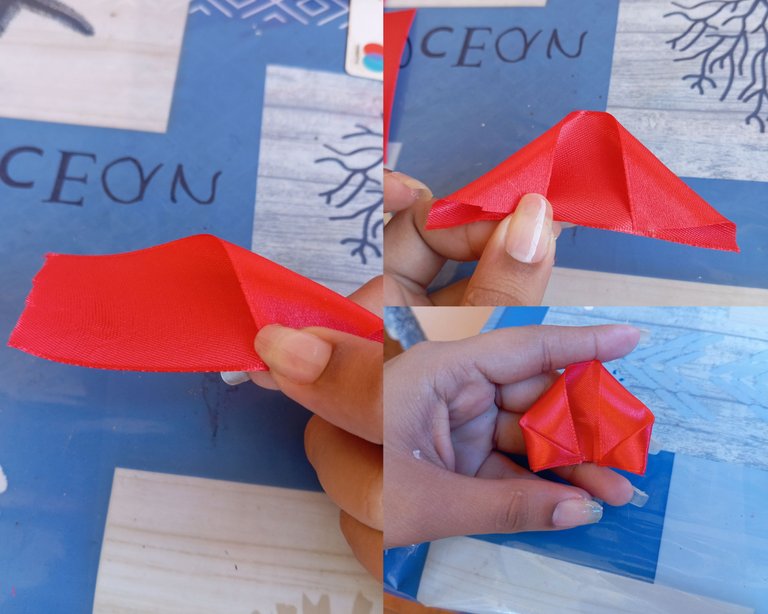
A continuación vamos a proceder realizando nuestros pétalos , Iniciaremos tomando nuestro encendedor de cocina y con el calor le retiramos las hilachas de la cinta , luego continuamos agregando silicón a la punta de arriba , bajamos ambas puntas hacia el centro de la cinta agregando silicón, luego continuaremos repitiendo el mismo paso , las puntas de ambos lados agregamos silicón y pegamos hacia el centro formando nuestro pétalo
Next we will proceed to make our petals, we will start by taking our kitchen lighter and with the heat we will remove the threads of the ribbon, then we will continue adding silicone to the top tip, we will lower both tips towards the center of the ribbon adding silicone, then we will continue repeating the same step, the tips of both sides we will add silicone and glue towards the center forming our petal.
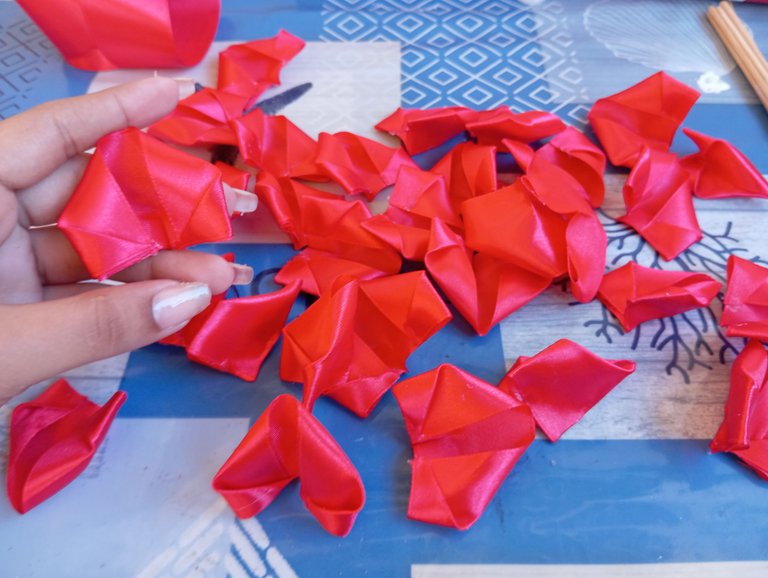
De esta manera van a quedar nuestros pétalos como pueden apreciar, la cantidad de pétalos va a depender de la cantidad de flores que vayamos a realizar
This way we will have our petals as you can see, the amount of petals will depend on the amount of flowers we are going to make.
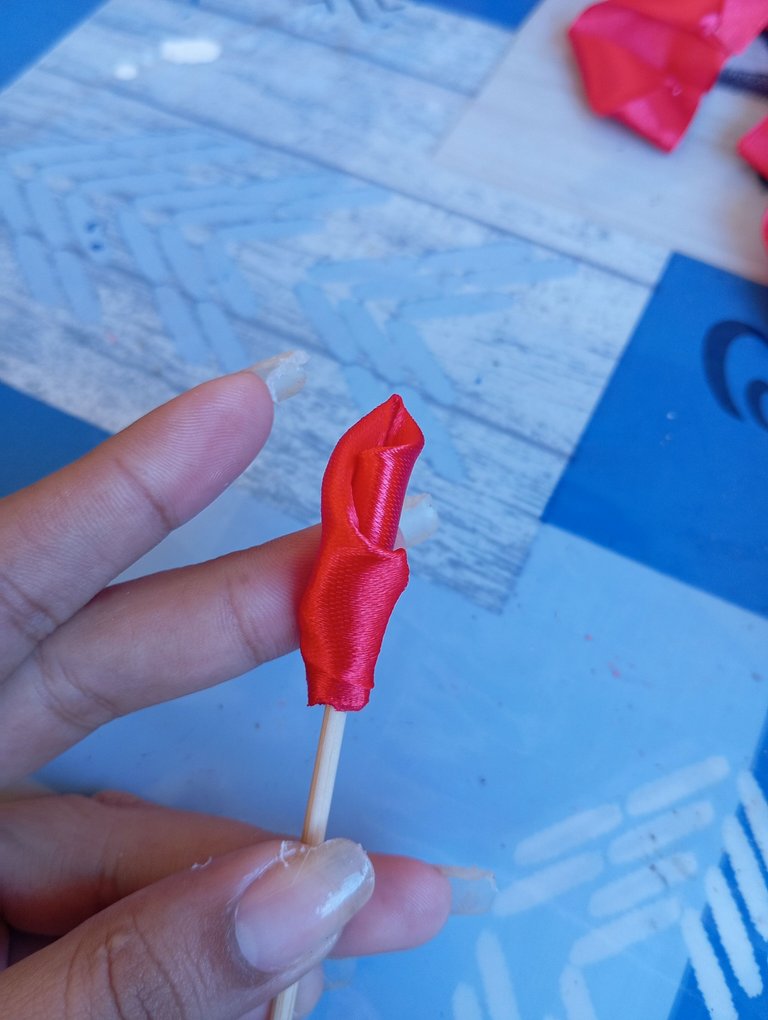
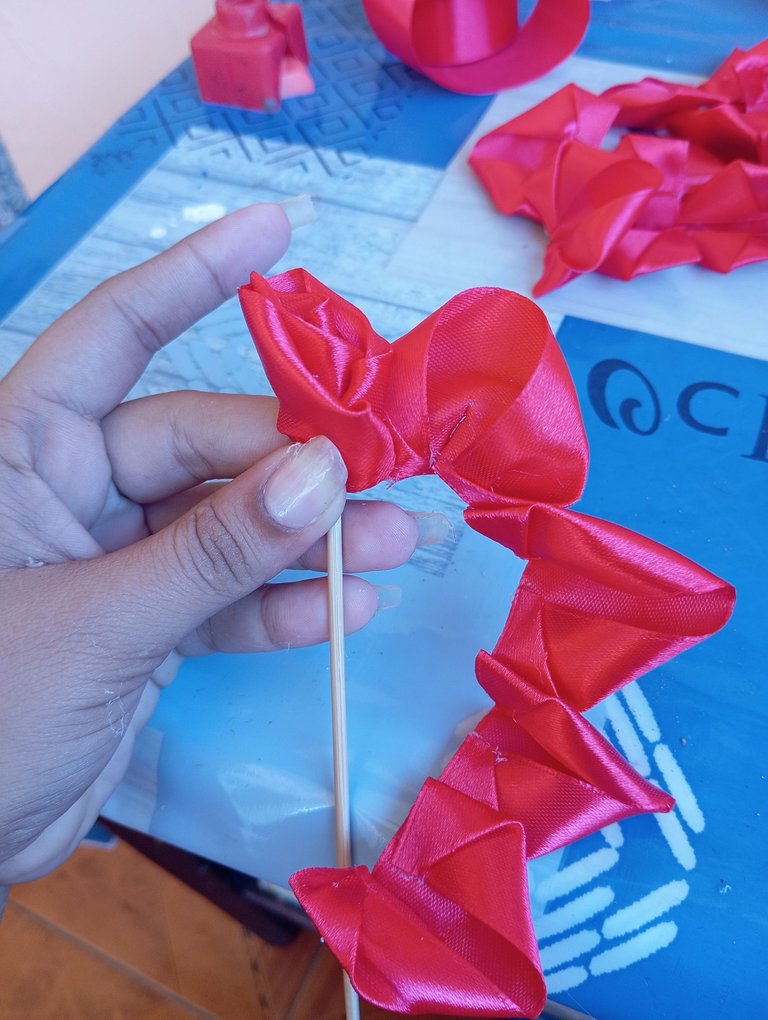
Seguidamente vamos a tomar un pétalo y un palito de altura, vamos a enrollar este pétalo en toda la punta del palito como lo pueden observar
Next we are going to take a petal and a stick of height, we are going to roll this petal in all the tip of the stick as you can see.
Luego vamos a continuar pegando un pétalo al lado del otro formando una cadena de pétalos ,la cantidad que utilicé por cada flor fueron 12 pétalos , si gustan pueden hacerlas más pequeñas o más grandes
Then we will continue gluing one petal next to the other forming a chain of petals, the amount I used for each flower was 12 petals, if you like you can make them smaller or bigger.
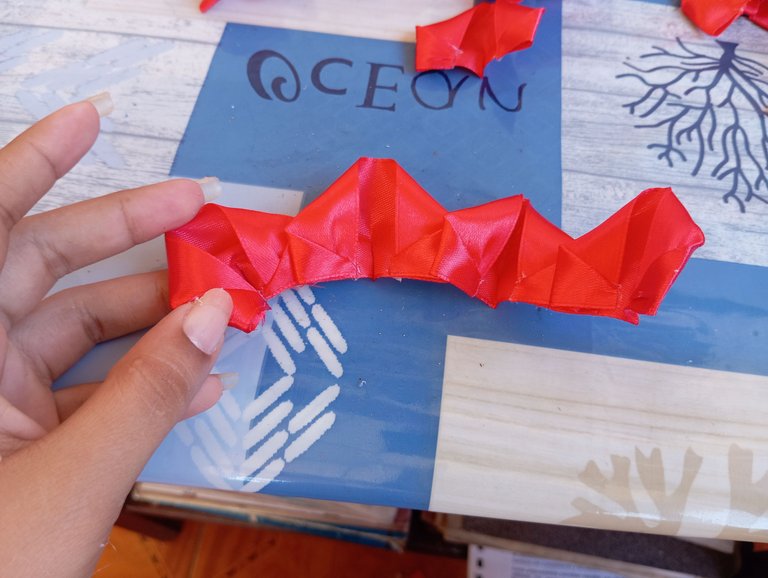
A continuación vamos a proceder pegando nuestros pétalos en forma de cadeneta y formando nuestra hermosa rosa eterna
Next we are going to proceed gluing our petals in the form of a chain and forming our beautiful eternal rose.
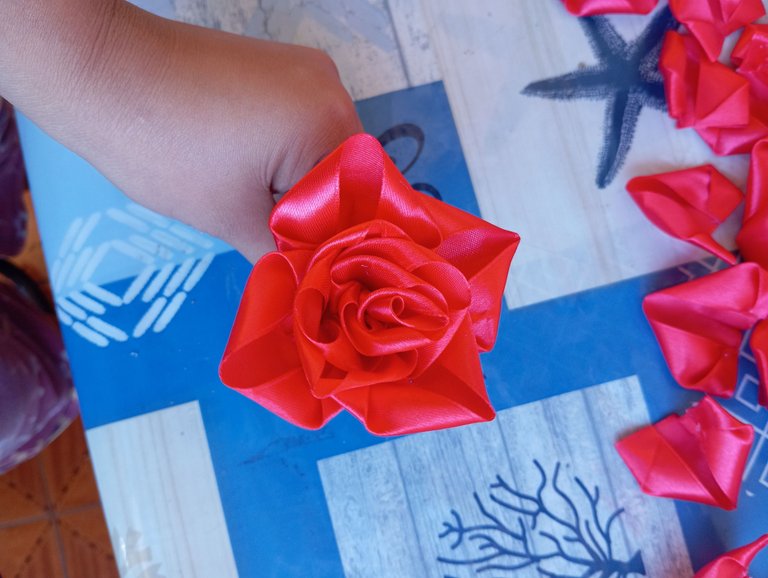
De esta manera quedará nuestra preciosa rosa como lo pueden apreciar
In this way our beautiful rose will be as you can see.
Seguidamente una vez que tengamos nuestras rosas listas , vamos a proceder realizando nuestro ramo de rosas envuelto en papel , colocaremos de primero el papel simple
Next, once we have our roses ready, we will proceed to make our bouquet of roses wrapped in paper, we will place the simple paper first.
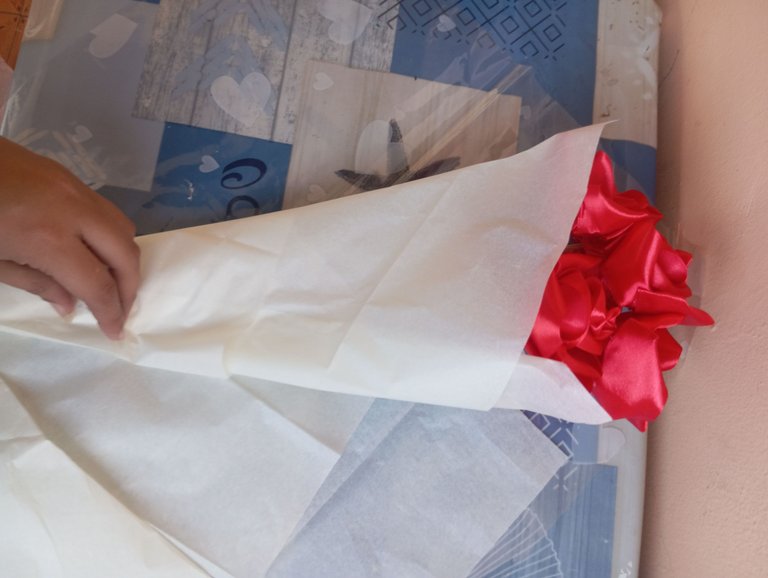
Luego continuaremos envolviendo nuestro ramo de rosas en el papel de corazones para que le dé un toque mejor , por último le pegaremos en el centro del ramo un pequeño lazo color rojo
Then we will continue wrapping our bouquet of roses in the paper of hearts to give it a better touch, finally we will paste in the center of the bouquet a small red ribbon.

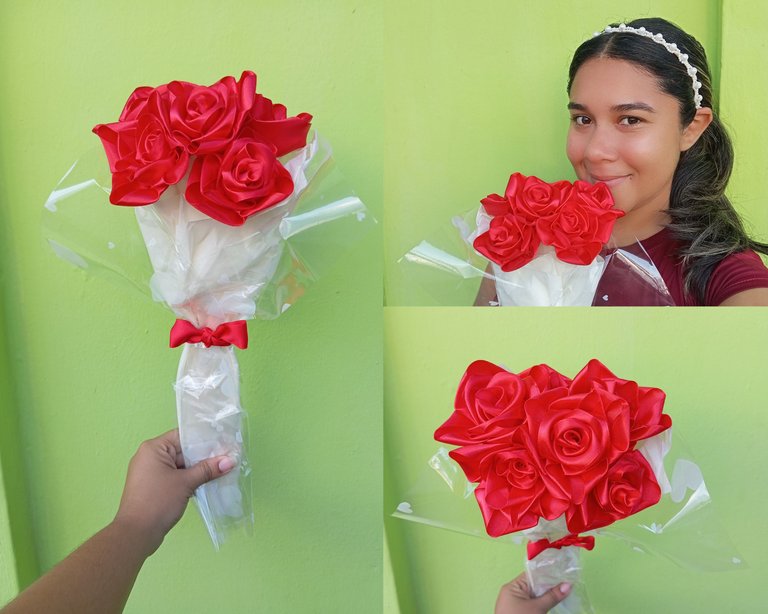
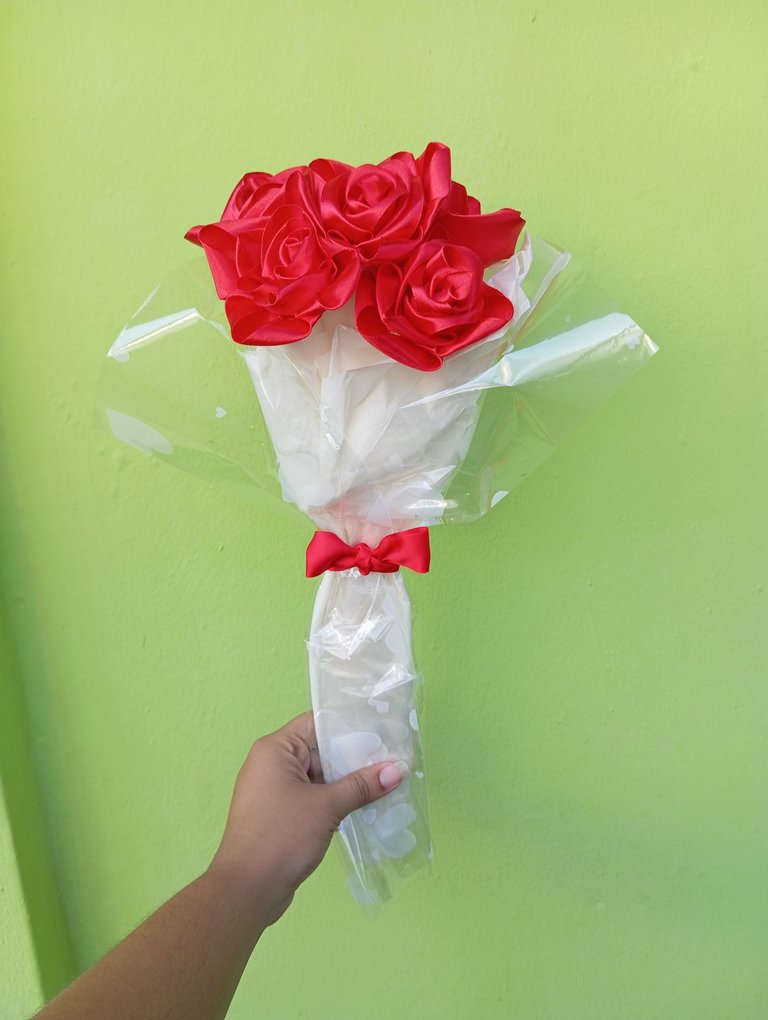
Este es el resultado final de mi hermoso ramo de rosas , ideal para obsequiar en cualquier ocasión, espero les guste amigos
Créditos: las fotos las tomé con mi redmi 12 y traduje los textos con el traductor deepl.
This is the final result of my beautiful bouquet of roses, ideal for any occasion, I hope you like it friends.
Credits: the photos were taken with my redmi 12 and I translated the texts with the deepl translator.
Se ven realmente preciosas 🥰 Gracias por compartirnos el tutorial 🙏
Gracias amiga ,me alegra que te haya gustado
It is so attractive, lovely, and beautiful. Love its color. What you did, that's great. Keep up the good work! Thanks!
Es realmente ideal para muchas ocasiones y muy fácil de realiza, solo algo de inspiración y delicadeza.
Así es querida amiga