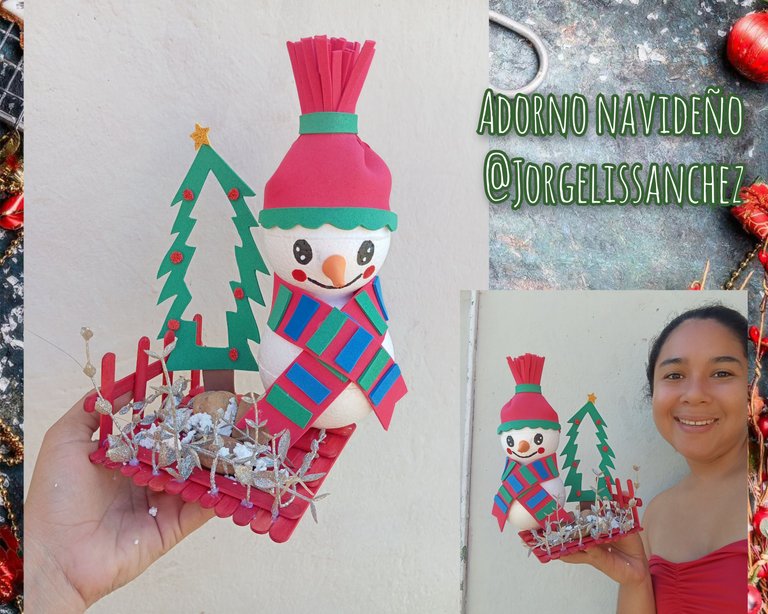
Hola mis queridos amigos feliz día para todos espero que hayan amanecido bien , se encuentren llenos de mucha salud, les quiero compartir un lindo adorno navideño ideal para decorar repisas , oficinas ,mesas y cualquier espacio que queramos , es un proceso muy sencillo pero amarán el resultado
Hello my dear friends happy day to all I hope you have dawned well, are full of good health, I want to share a nice Christmas ornament ideal for decorating shelves, offices, tables and any space we want, it is a very simple process but love the result
Materiales qué utilicé:
-Esferas de anime
-Pinturas
-Foamis
-Tijera
-Paletas rojas
-Silicon
Materials I used:
-Anime spheres
-Paints
-Foamis
-Scissors
-Red palettes
-Silicon

A continuación los pasos a seguir:
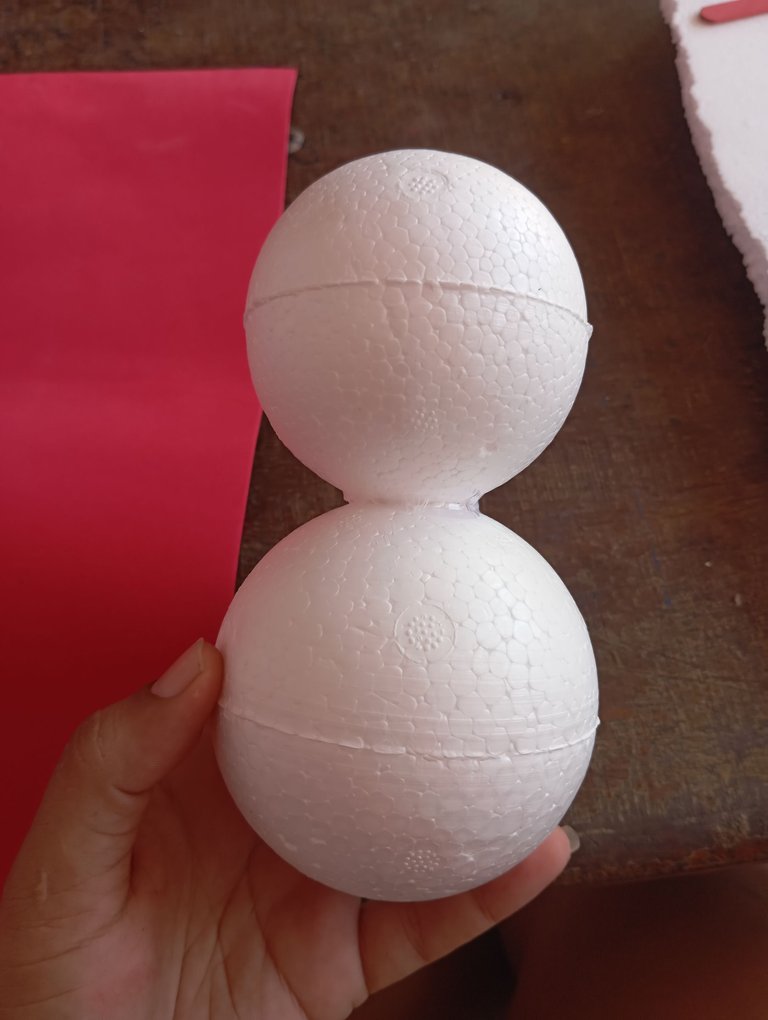
Iniciaremos tomando nuestras esferas de anime , una es más grande que la otra como pueden apreciar , la más chica será la cabeza , pegaremos ambas esferas una arriba de la otra
Here are the steps to follow:
We will start by taking our anime spheres, one is bigger than the other as you can see, the smaller one will be the head, we will glue both spheres one on top of the other.
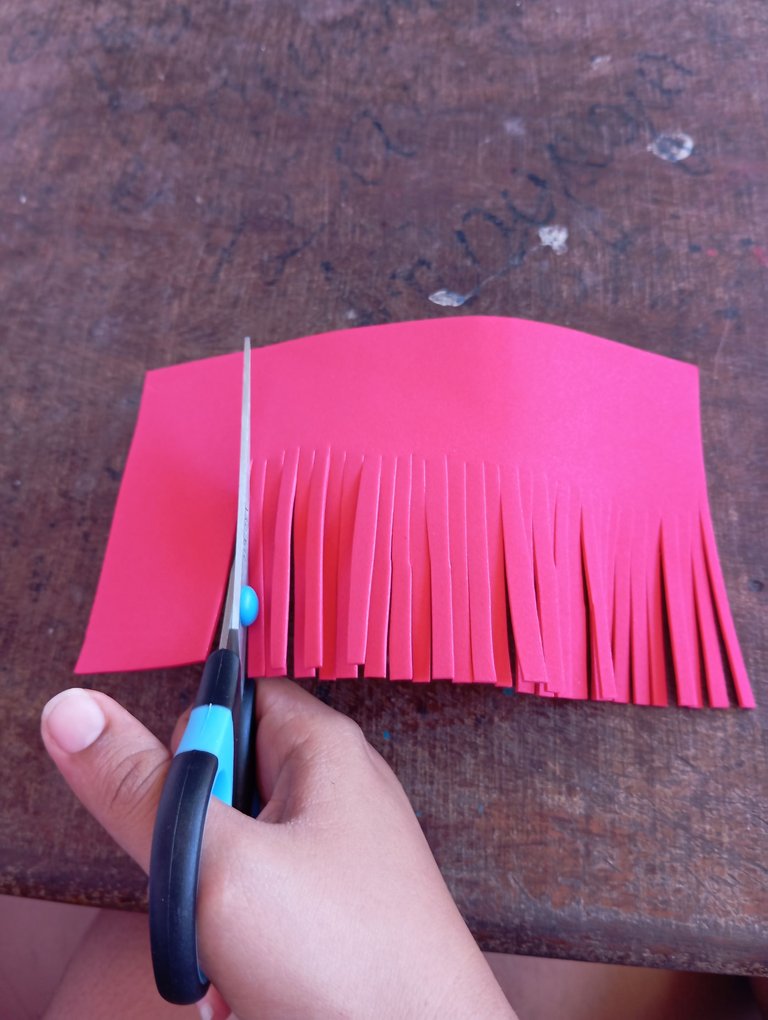
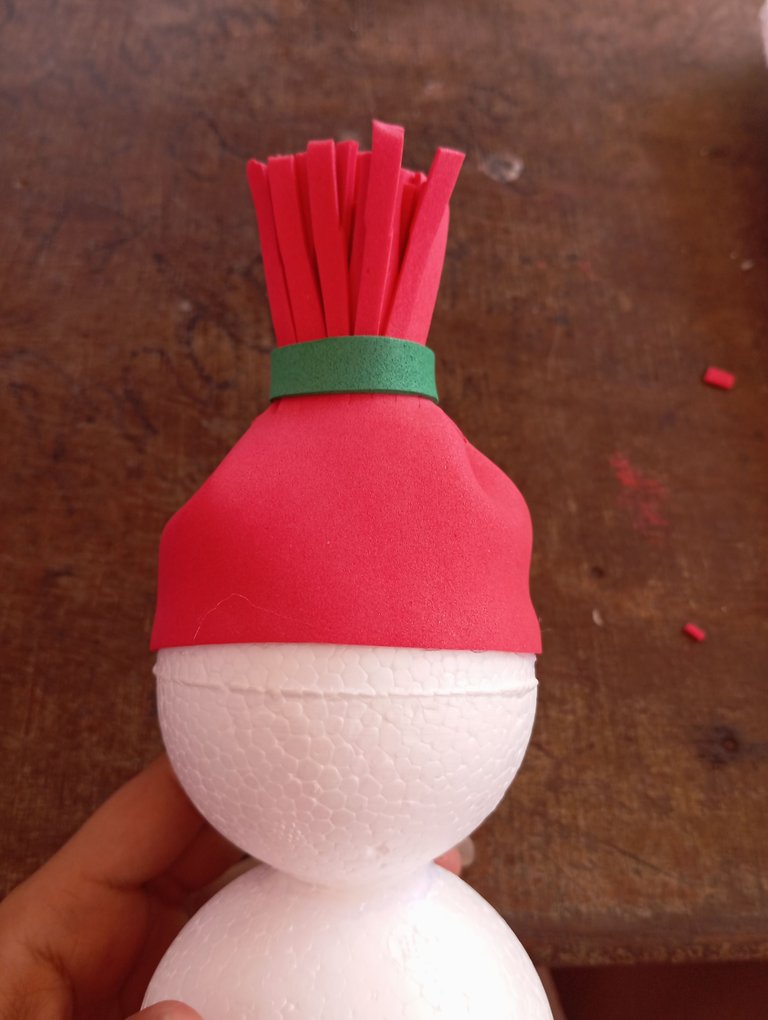
Luego vamos a continuar recortando una pieza de foamis que cubra alrededor de la esfera , está pieza la vamos a convertir en flecos , dejando 4 centímetros de distancia sin cortar los flecos
Then we will continue cutting a piece of foamis that covers around the sphere, this piece we will turn it into bangs, leaving 4 centimeters of distance without cutting the bangs
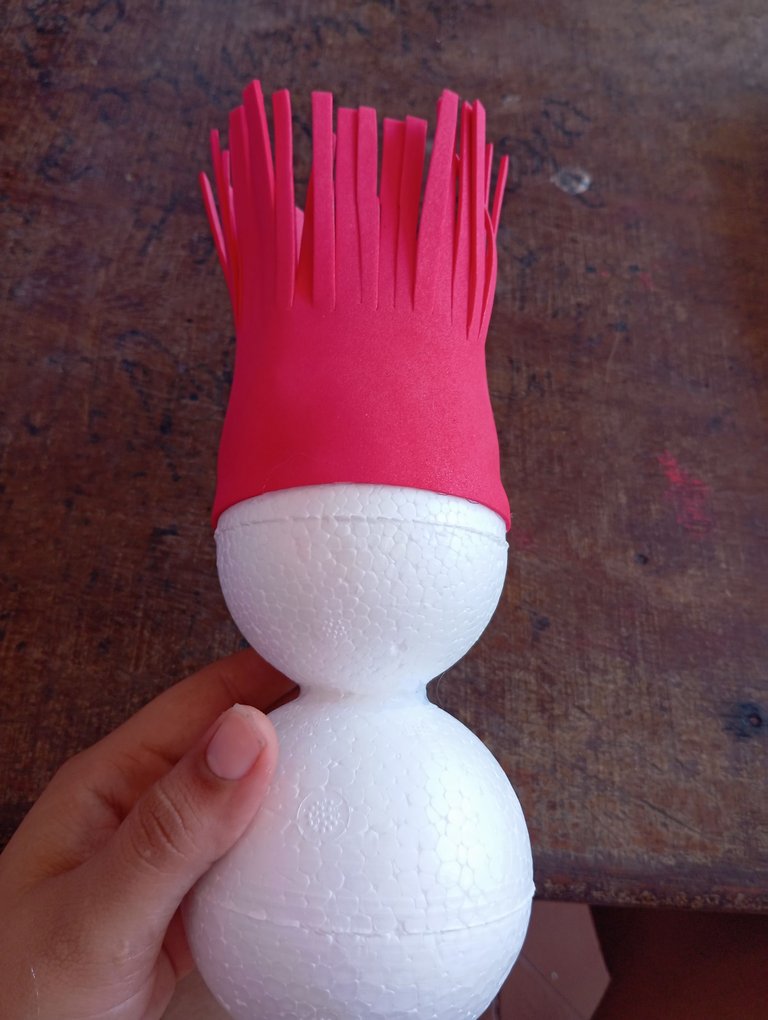
Luego vamos a continuar pegando el foamis por alrededor de la esfera este será el gorrito navideño de nuestro muñeco de nieve
Then we will continue gluing the foamis around the sphere, this will be the Christmas hat of our snowman.
Para finalizar con el gorrito navideño vamos a tomar una tira color verde o nuestra preferencia , la pegaremos en todo el centro de los flecos , finalizando nuestro gorrito
To finish with the Christmas hat we are going to take a green strip or our preference, we will glue it around the center of the bangs, finishing our hat.
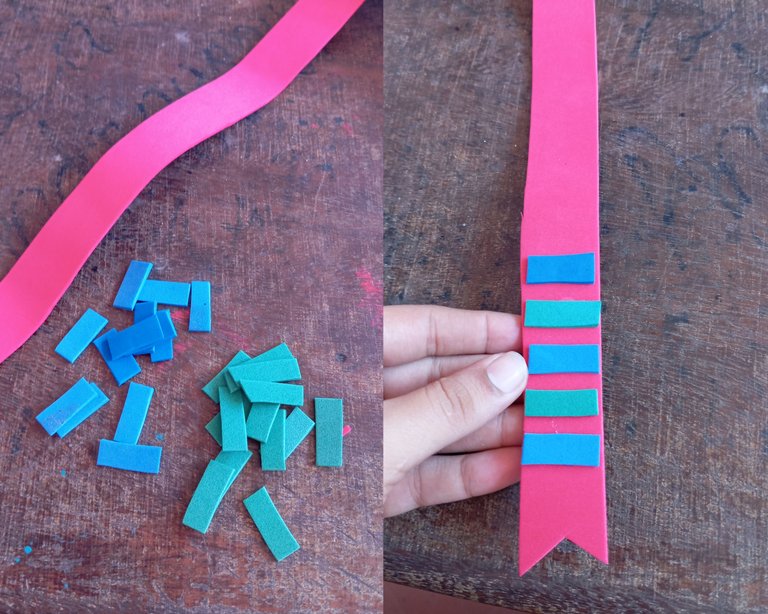
Seguidamente vamos a continuar recortando una tira de foamis roja que será la bufanda , esta debe tener dos flecos en las puntas , luego vamos a tomar unos recortes de foamis de dos tonos distintos, y lo pegaremos para que parezca una bufanda de rayas
Then we will continue cutting a strip of red foamis that will be the scarf, this should have two bangs at the ends, then we will take some foamis cuts of two different colors, and we will glue it to look like a striped scarf.
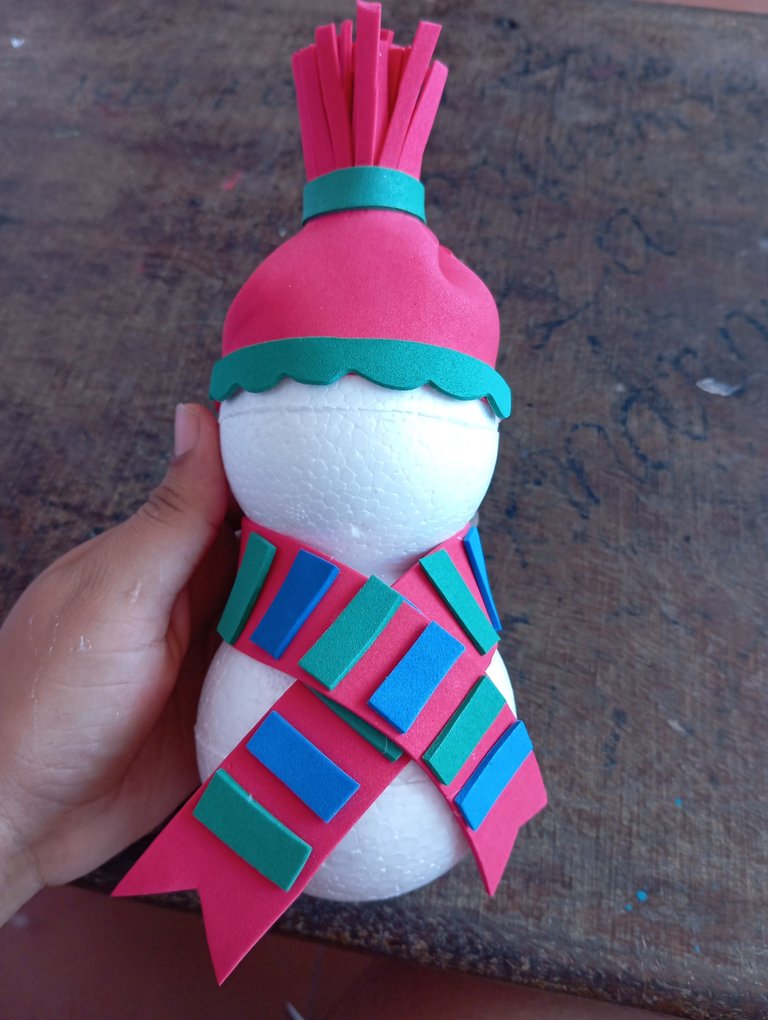
A continuación vamos a pegar la bufanda alrededor del muñeco de nieve , en la parte del frente debe quedar cruzada ambas puntas a los lados contrarios
Next we are going to glue the scarf around the snowman, in the front part it should be crossed both ends to the opposite sides.
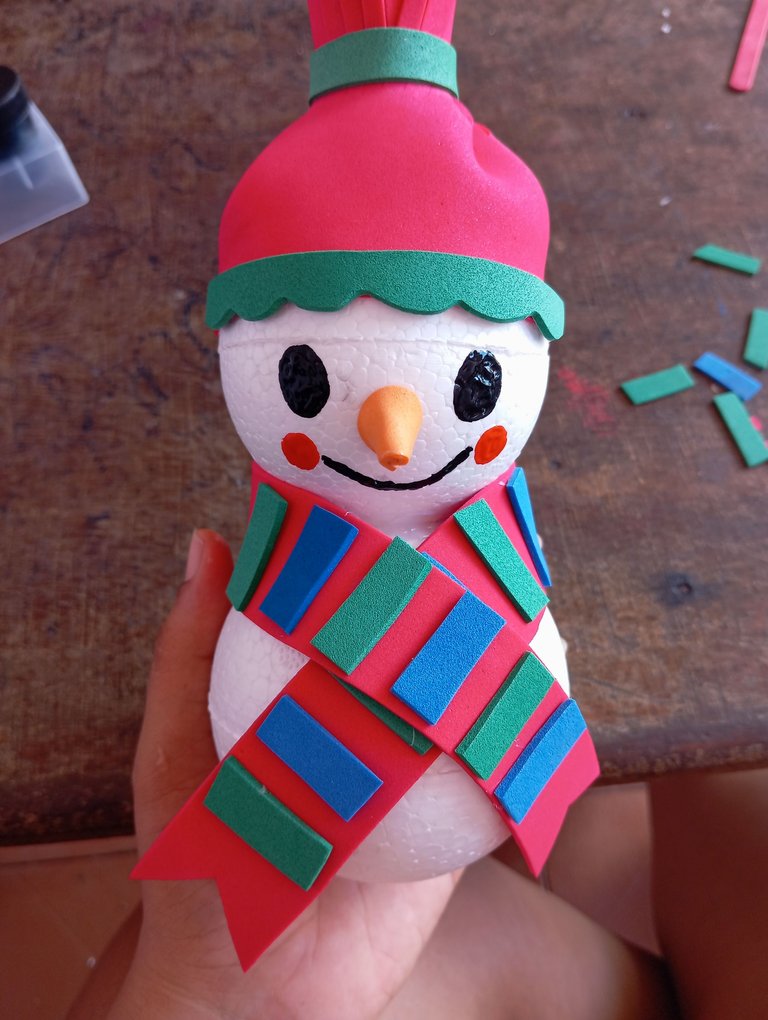
Con el recorte de foamis naranja realizaremos una zanahoria y la pegaremos en el centro del rostro , será su nariz , luego dibujaremos sus ojos y por último su sonrisa y cachetes sonrojados
With the orange foamis cut out we will make a carrot and glue it in the center of the face, it will be his nose, then we will draw his eyes and finally his smile and blushing cheeks.
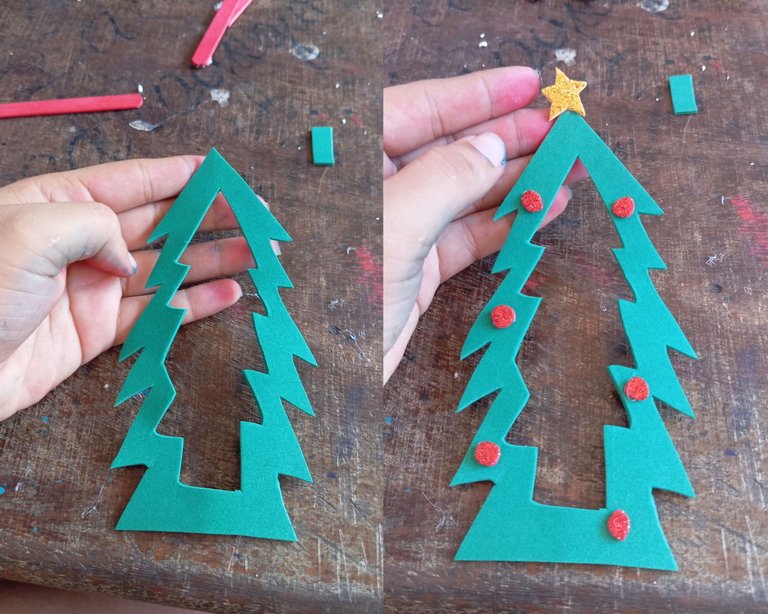
A continuación vamos a realizar un pequeño arbolito navideño,en el centro vamos a recortar lo que se note en el fondo , pegaremos alrededor unos círculos rojos que será las luces y en el copo una estrella
Next we are going to make a small Christmas tree, in the center we will cut out what is noticeable in the background, we will glue around it some red circles that will be the lights and in the flake a star.
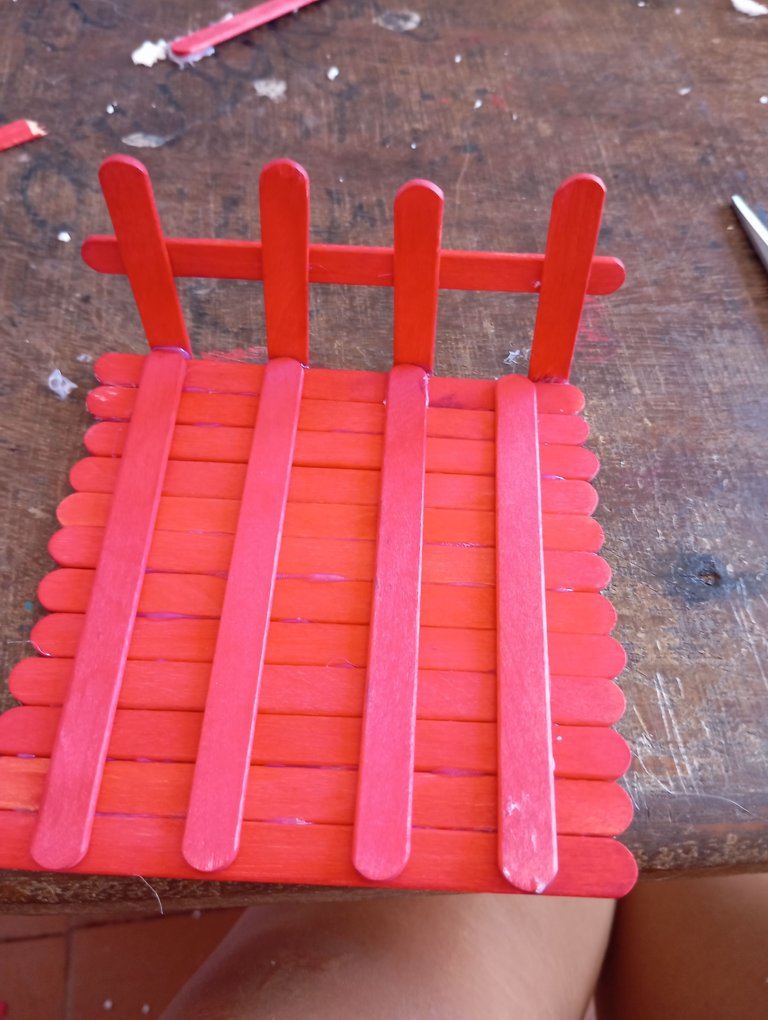
Seguidamente continúe realizando una base donde irá ubicado mi adorno , coloque las paletas una al lado de la otra de forma horizontal , en total pegué 12 paletas , luego de forma vertical pegué 4 semi separadas para fortalecer la base , por último pegué 4 pequeñas paradas y una larga de forma horizontal tipo una cerca
Then continue making a base where my ornament will be located, place the pallets next to each other horizontally, in total I glued 12 pallets, then vertically I glued 4 semi separated to strengthen the base, finally I glued 4 small stops and a long horizontal fence type.
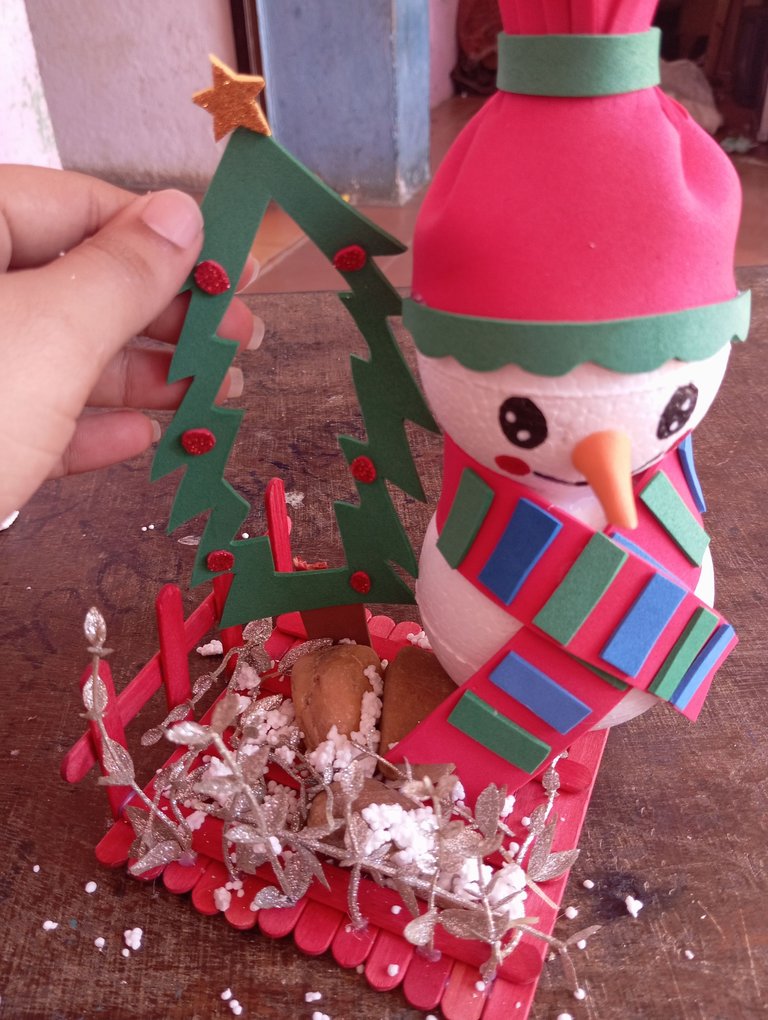
Luego continuaremos pegando unas ramas artificiales que encontré entre mis cosas , las pegué alrededor de la base , en la parte frontal .
continúe pegando el muñeco de nieve en una esquina
Then we will continue gluing some artificial branches that I found among my things, I glued them around the base, in the front part.
I continued gluing the snowman in one corner

Para finalizar con mi decoración continúe pegando en una esquina al lado del muñeco el arbolito , en la base recortes de anime y hojas artificiales junto unas piedras
To finish with my decoration I continued gluing in a corner next to the snowman the tree, in the base I glued some anime cutouts and artificial leaves along with some stones.
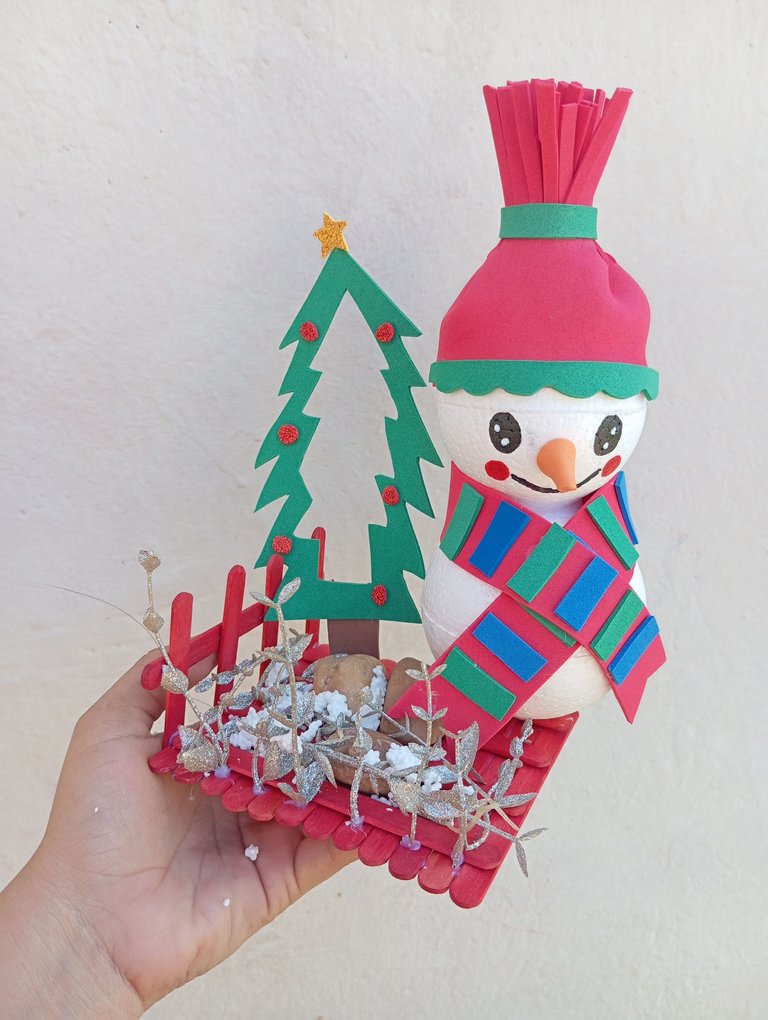
Este es el resultado final de mi hermoso adorno navideño , ideal para decorar cualquier espacio , utilizando materiales faciles de conseguir, las fotos las tomé con mi redmi 12 y traduje los textos con el traductor deepl, feliz día amigos
This is the final result of my beautiful Christmas ornament, ideal for decorating any space, using materials easy to get, the photos were taken with my redmi 12 and translated the texts with the translator deepl, happy day friends
I love it, looks very original and smart. Can I have one please? 😄
I would definitely like to give you one, thank you very much, greetings
Que linda decoración navideña amiga, me encanta, te quedó muy lindo y creativo.
Gracias amiga
Que lindo te quedo el adorno, sencillo e ideal para adornar nuestros espacios o dar un detalle en esta navidad... 🎄✨
!DIY
Gracias amiga
You can query your personal balance by
@dayadam just sent you a DIY token as a little appreciation for your post dear @jorgelissanchez! Feel free to multiply it by sending someone else !DIY in a comment :) You can do that x times a day depending on your balance so:!DIYSTATSOye amiga te quedó super lindo feliz tarde.
Muchas gracias,saludos
Feliz tarde un abrazo bendiciones.
Lo ame, esta muy bonito y se ve muy fácil de hacer
Gracias si es fácil de realizar , saludos
Super bonito el oso de nieve
Gracias amiga