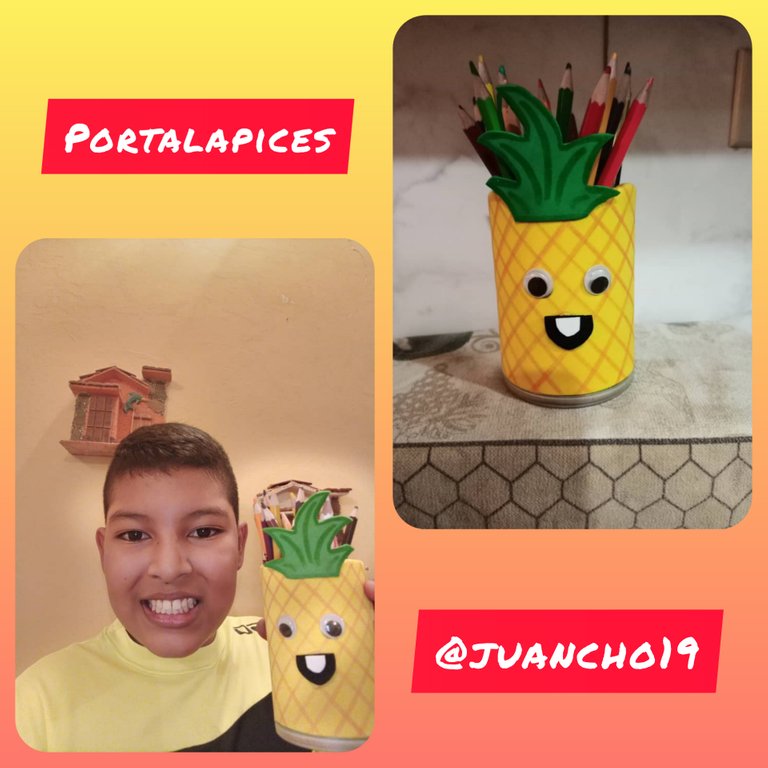
El día de hoy les haré un pequeño tutorial de cómo hacer un portalapiz en forma de piña, con elementos reciclados.
Hello everyone, I hope you are very well.Today I will make a small tutorial on how to make a pineapple-shaped pencil holder, with recycled elements.
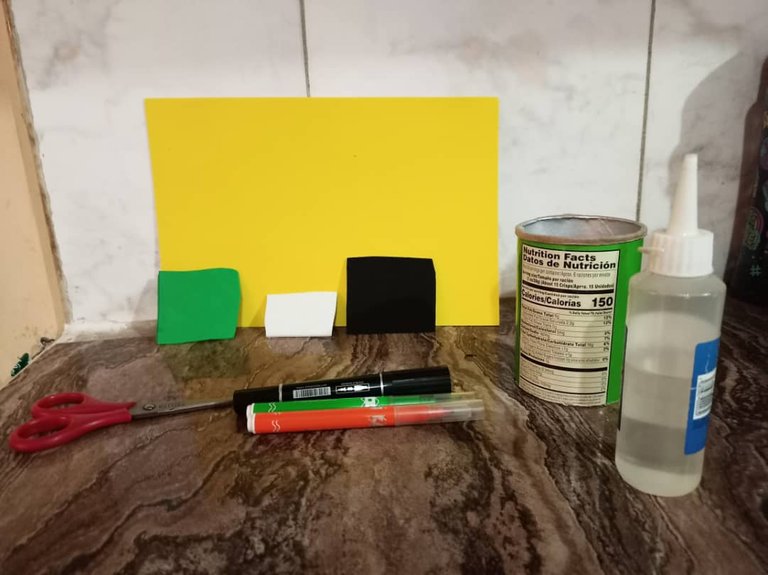
Materiales
*Cilindro de cartón.
*Foami de color amarillo, verde, negro y blanco.
*Silicón.
*Marcador naranja y verde.
*Tijeras.
Materials
*Cardboard cylinder.
*Yellow, green, black and white foam.
*Silicone.
*Orange and green marker.
*Pair of scissors.
Pasos
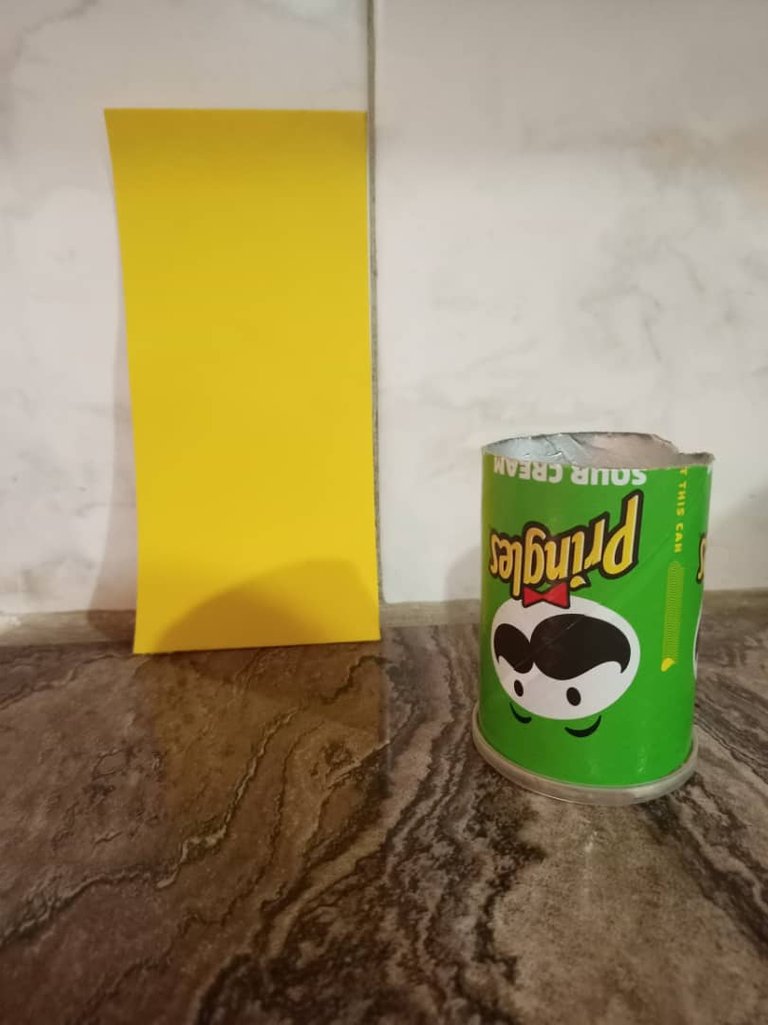
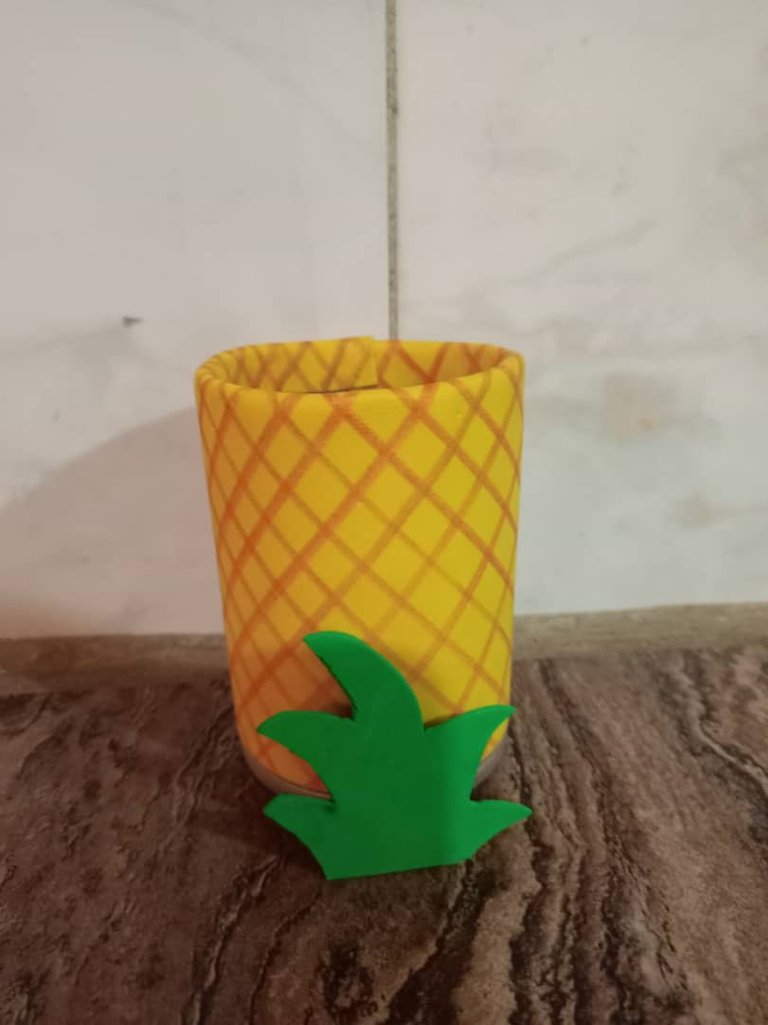
Paso 1: Cortar el foami amarillo con las tijeras, a la medida del cilindro de cartón.
Step 1: Cut the yellow foami with scissors, to the size of the cardboard cylinder.
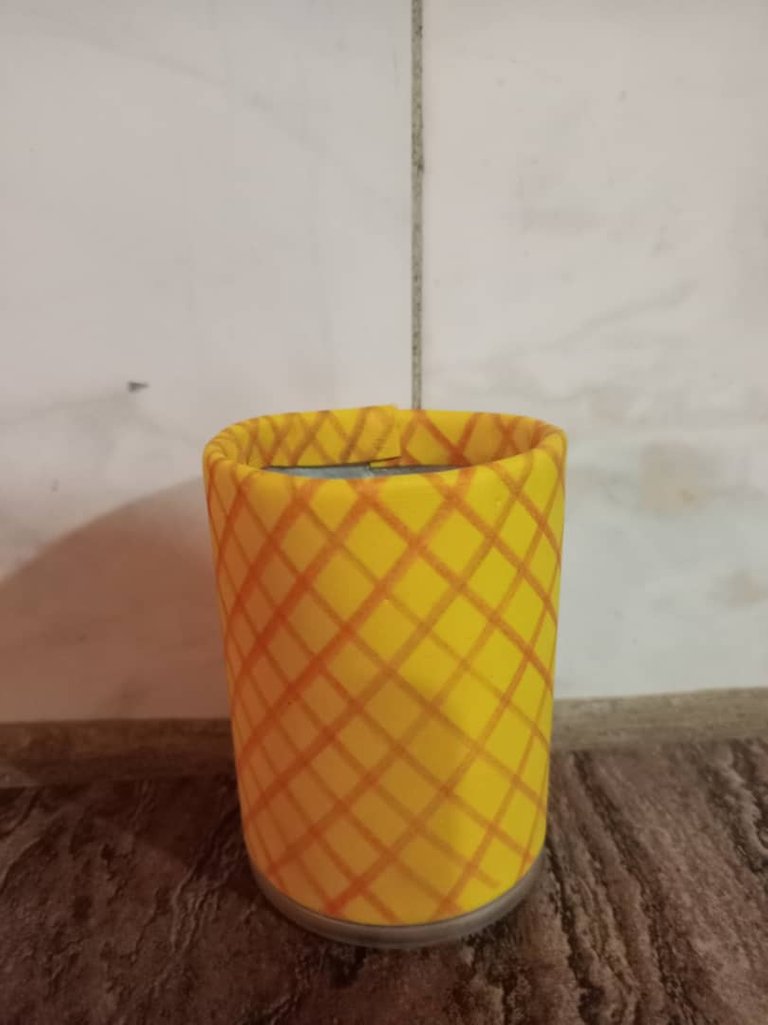
Paso 2: Marcar líneas diagonales con el marcador de color naranja, al foami de color amarillo para darle textura de piña.
Step 2: Mark diagonal lines with the orange marker, to the yellow foami to give it a pineapple texture.

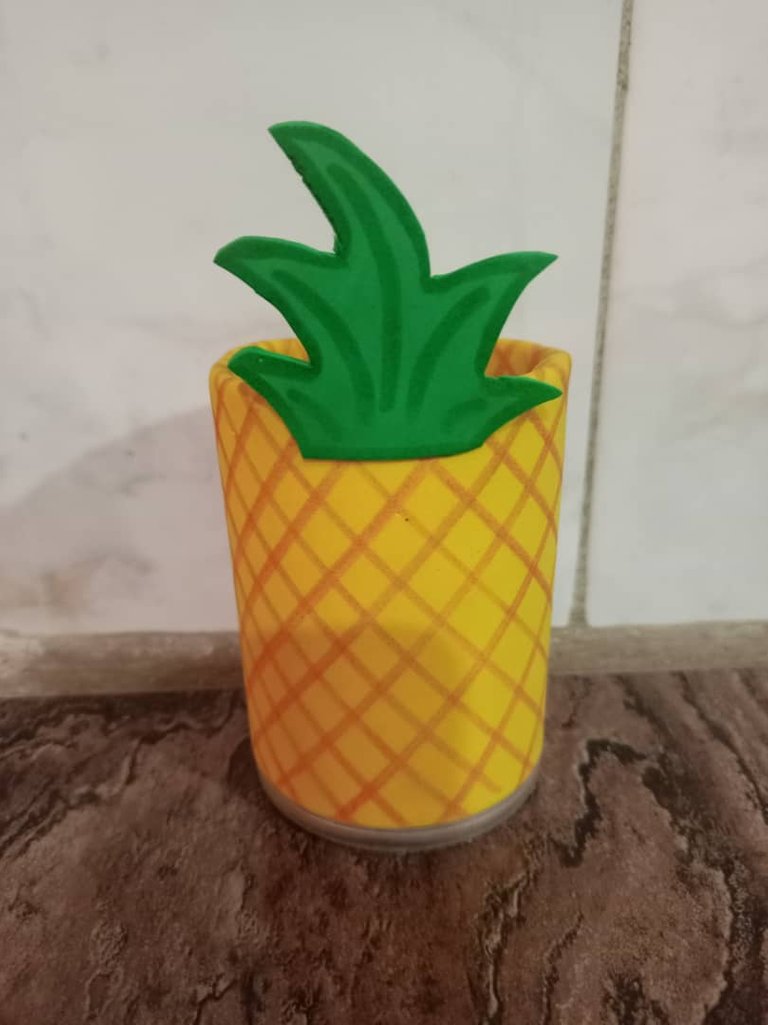
Paso 3: Pegar el foami amarillo al cilindro de cartón con silicón.
Step 3: Stick the yellow foami to the cardboard cylinder with silicone.
Paso 4: Cortar el foami verde con las tijeras, la forma de la corona de una piña.
Step 4: Cut the green foami with scissors, the shape of the crown of a pineapple.
Paso 5: Delinear las orillas del foami verde en forma de corona de piña, con un marcador de tono mas fuerte para resaltar.
Step 5: Outline the edges of the green foami in the shape of a pineapple crown, with a stronger tone marker to highlight.
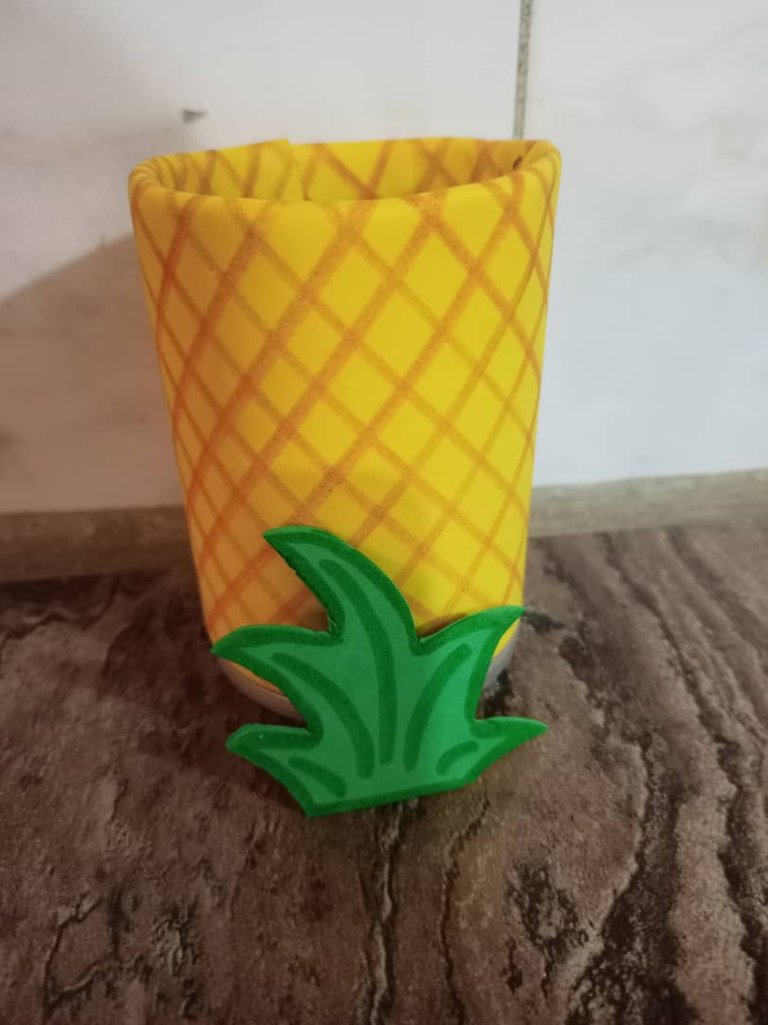
Paso 6: Pegar el foami verde en forma de corona de piña en el cilindro de cartón.
Step 6: Stick the green foami in the shape of a pineapple crown on the cardboard cylinder.
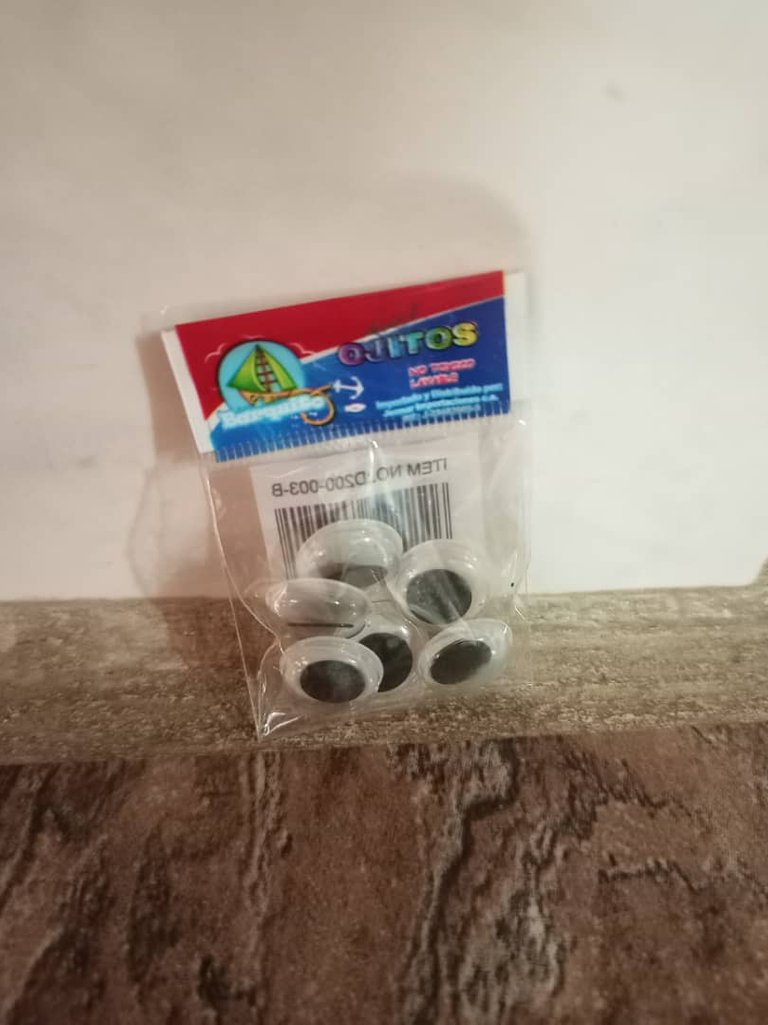
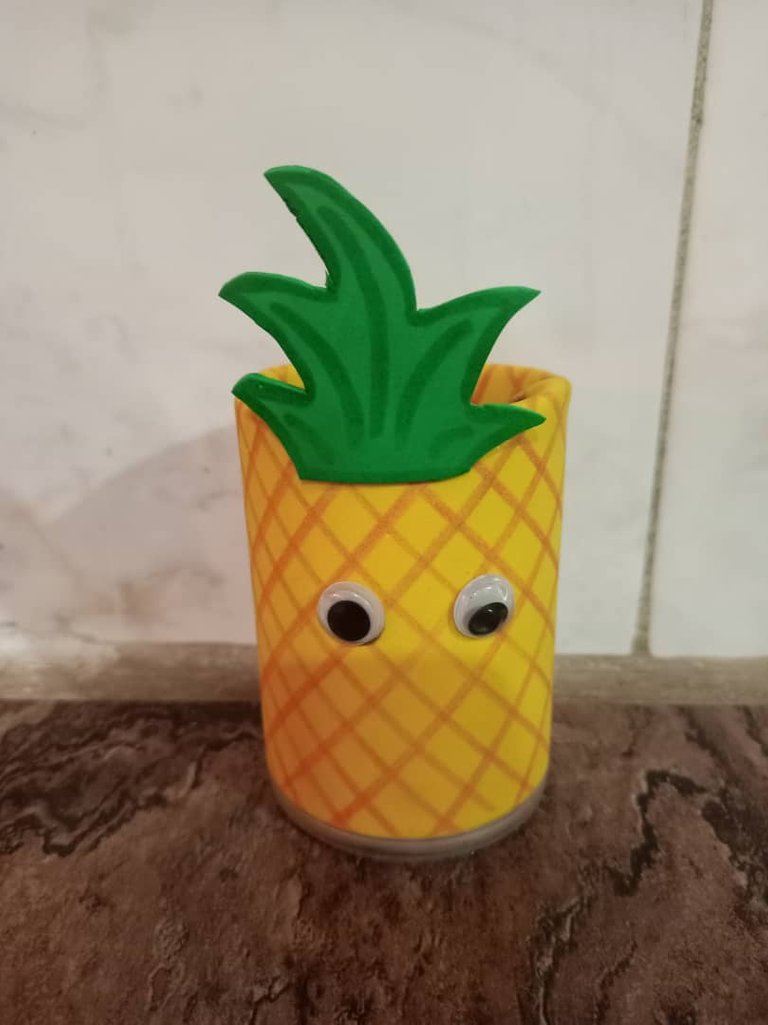
Paso 7: Para los ojos puedes usar el foami de color negro y blanco pero en este caso encontré entre mis materiales unos ojos locos y se los pegue con el silicón para darle más originalidad.
Step 7: For the eyes you can use the black and white foami but in this case I found some crazy eyes among my materials and I glued them with the silicone to give it more originality.
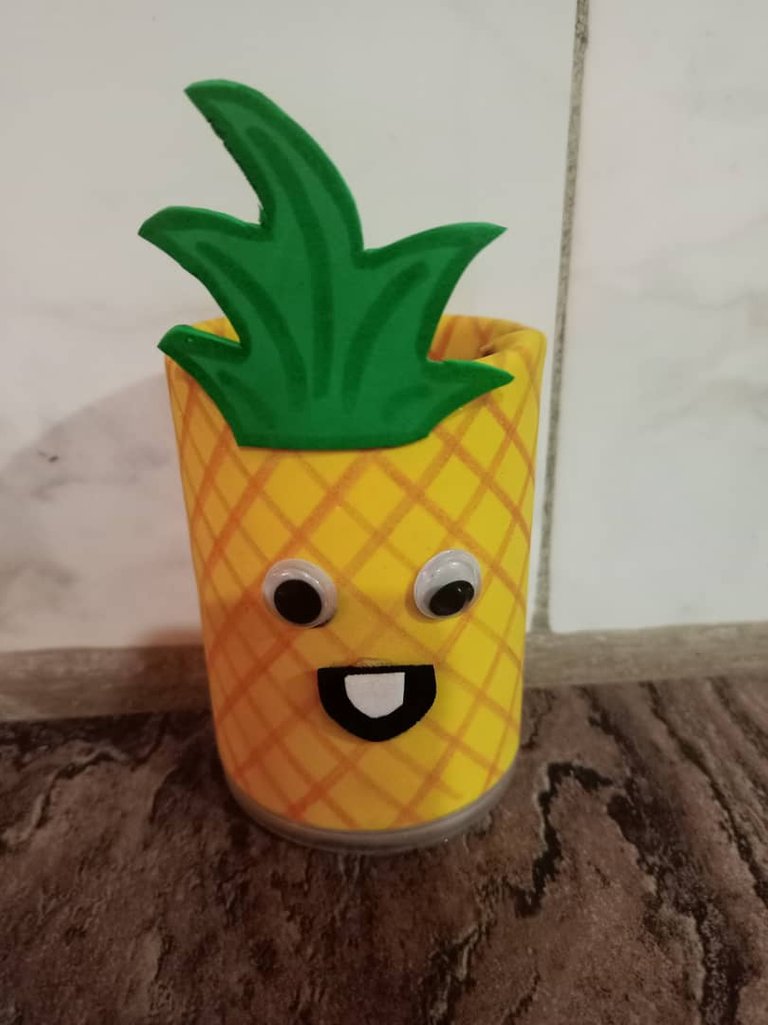
Último paso: Para la boca use el foami de color negro y blanco y lo pegue al cilindro de cartón.
Last step: For the mouth, use the black and white foami and glue it to the cardboard cylinder.

Y así quedó comenten que les pareció.
Gracias por verme, espero les guste lo que público y nos vemos en la próxima.
Todas estas fotografías fueron tomadas con mi teléfono Alcatel 1B.
And so it was, comment what you thought.Thank you for seeing me, I hope you like what I publish and see you in the next one.
All these photos were taken with my Alcatel 1B phone.
Congratulations @juancho19! You have completed the following achievement on the Hive blockchain and have been rewarded with new badge(s):
Your next target is to reach 400 upvotes.
You can view your badges on your board and compare yourself to others in the Ranking
If you no longer want to receive notifications, reply to this comment with the word
STOPCheck out the last post from @hivebuzz:
Support the HiveBuzz project. Vote for our proposal!