
Some time ago I was somewhat disenchanted and unmotivated with the textile confections, because I could not find inspiration in anything, until I got a new challenge, which gave me back the muse, so to speak. The mix of these two colors and the project for which it was dedicated, was worth creating and dazzle with a unique design, full of life and with a very student vibe.Very good evening @hivediy artisan family. I hope you are all well, full of energy and tranquility.
Hace un tiempo estube algo desencantada y desmotivada con las confecciones textiles, pues no encontraba inspiración en nada, hasta que me llego un nuevo reto, que me devolvio la musa, por asi decirlo. La mezcla de estos dos colores y el proyecto para el que iba dedicado, valia la pena crear y deslumbrar con un diseño unico, lleno de vida y con una onda muy estudiantil.Muy buenas noches familia de artesanos de @hivediy. Espero que todos se encuentren bien, llenos de mucha energía y tranquilidad.
This sewing project is always one of my favorites, because I make the most of any garment giving it a new life and a better use. In this case, I was hesitant, because the material selected was somewhat thick and without elasticity.
In spite of being a very laborious fabric, there were several designs that invaded my thoughts as I was unpicking the nurse's gown.
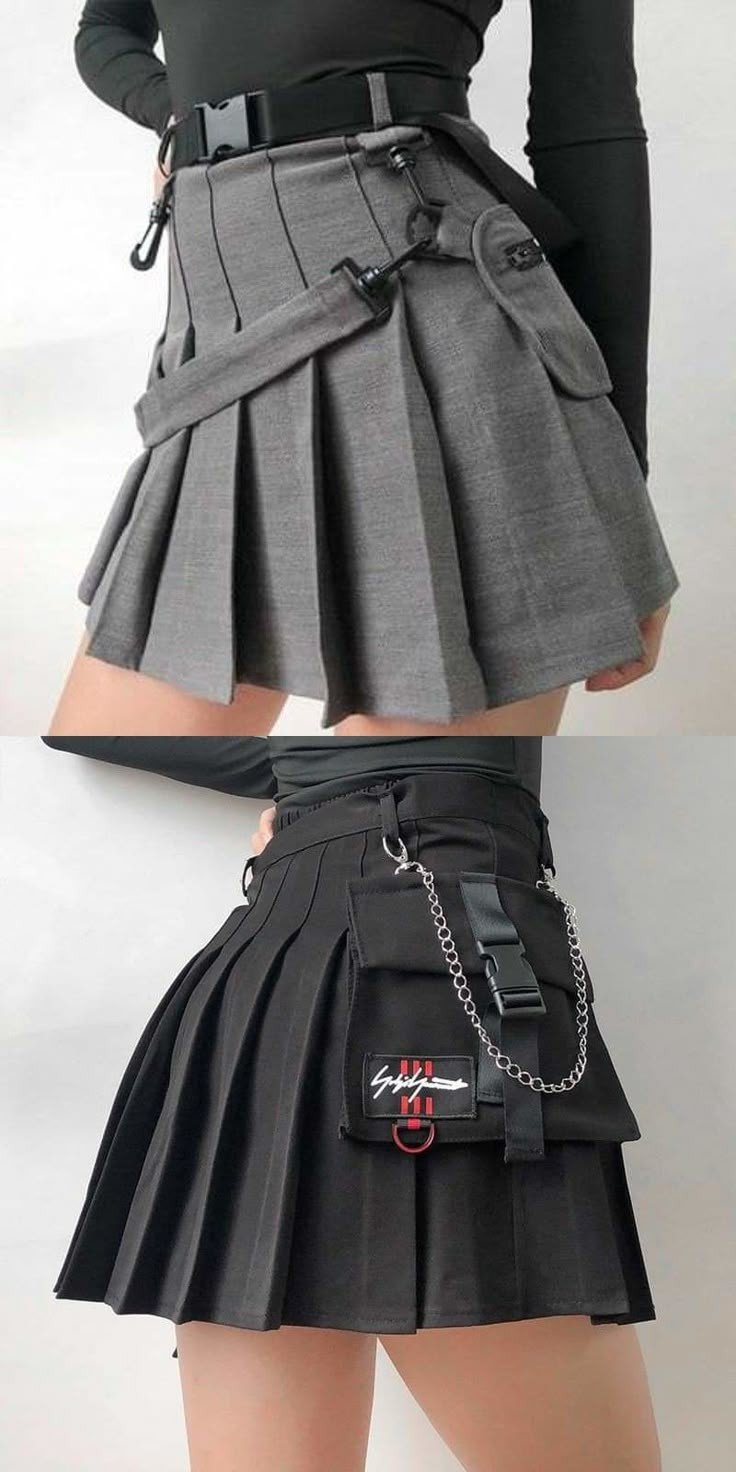
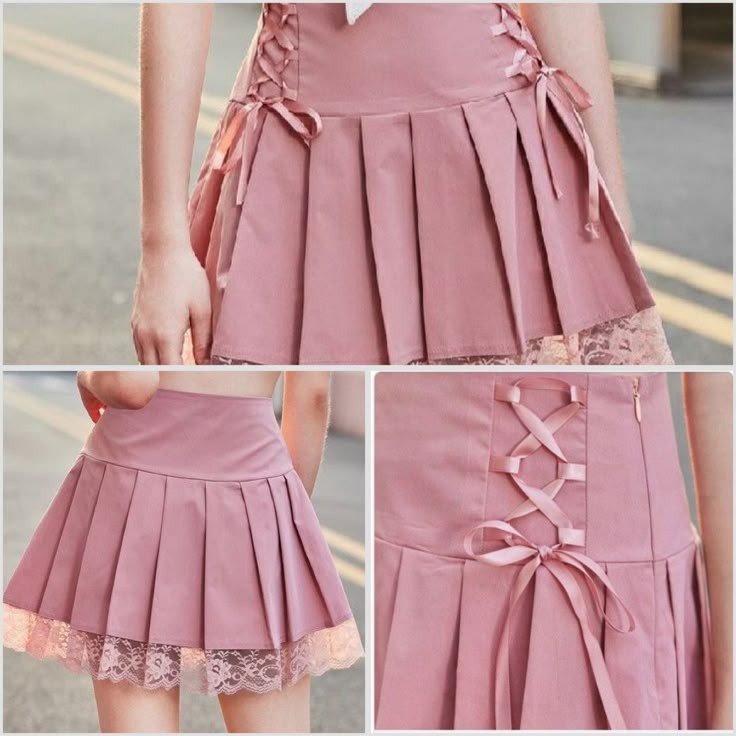
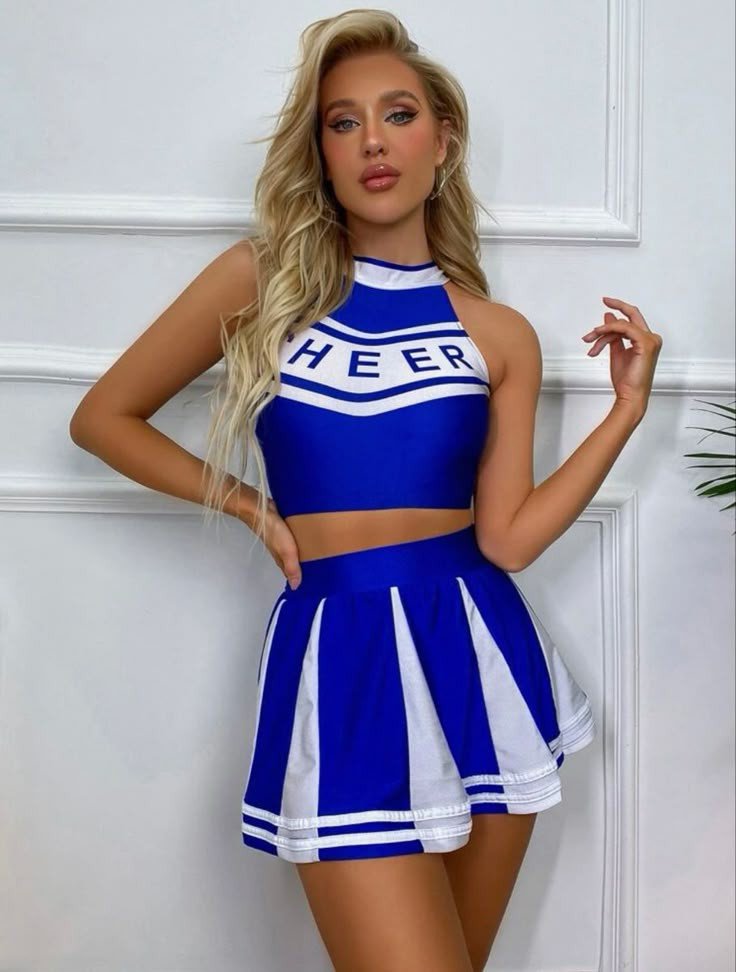
For its realization I was inspired by thousands of designs that were made with the same type of fabric or very similar, but the most beautiful to my personal taste were as follows:
Este proyecto de costura, es siempre uno de mis favoritos, pues aprovecho al máximo cualquier prenda de vestir dandole nueva vida y un mejor uso. En este caso, estaba dudosa, pues el material seleccionado era algo grueso y sin elasticidad.
A pesar de ser un tejido bien trabajoso, habian varios diseños que me invadian el pensamiento a medida que iba descosiendo la bata de enfermera.
Para su realización me inspire en miles de diseños que estaban confeccionados con el mismo tipo de tela o muy similar, pero los mas bonitos a mi gusto personal fueron los siguientes:
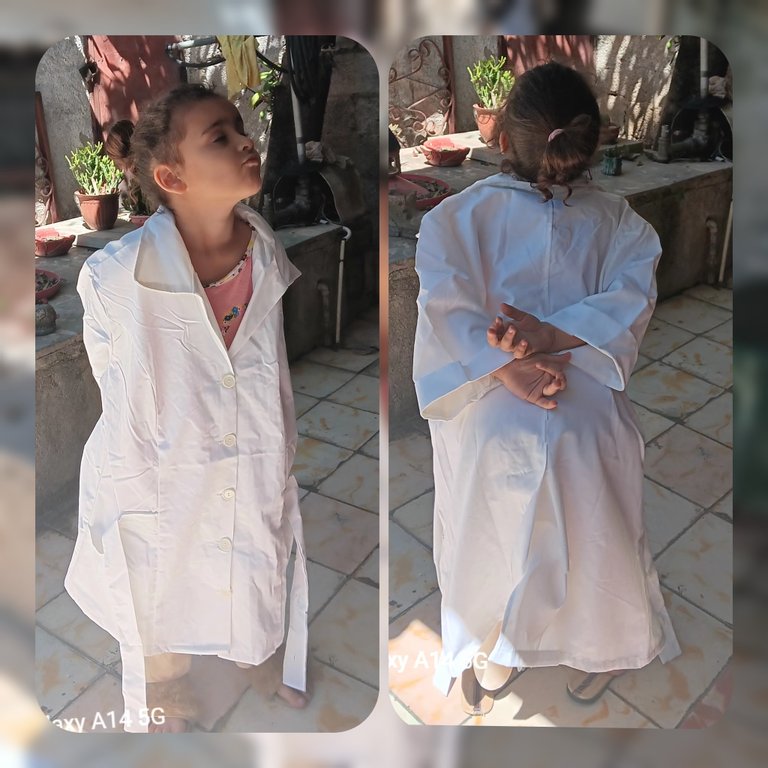
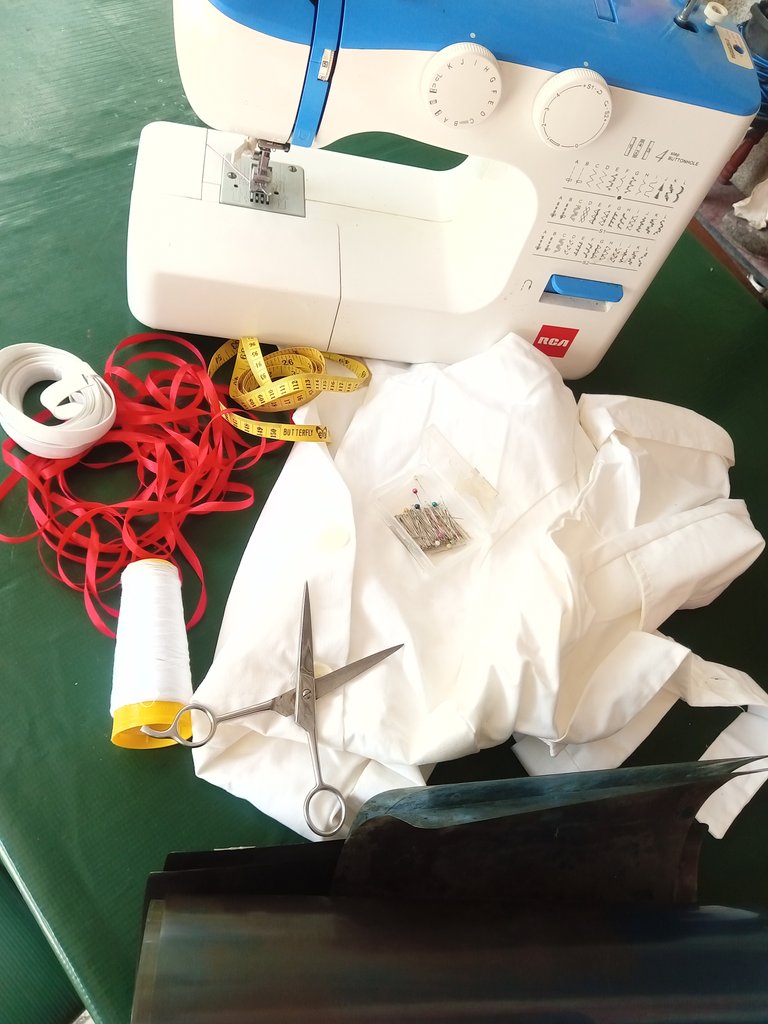
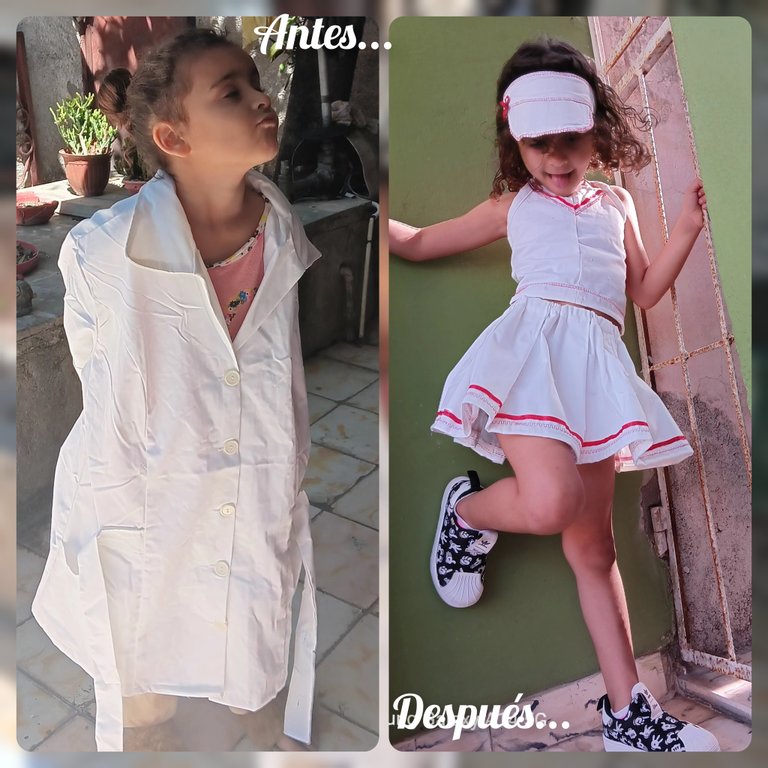
✨✨✨Material to be transformed/ Material a transformar...✨✨✨
✨✨✨Inspiration /Inspiracion✨✨✨
⬇️ https://pin.it/5bUI76TDw
✨ All the ideas were taken from the Pinterest App. It is more than recommended, you have very good ideas and options of all kinds.
I invite you to join me in this entertaining step by step on how to transform and reuse old-fashioned clothes, or some kind of uniform. Giving a new opportunity to old clothes.
Are you ready?
✨ Todos las ideas fueron tomadas desde la App Pinterest. Esta mas que recomendado, tienes muy buenas ideas y opciones de todo tipo.
Los invito a acompañarme en este entretenido paso a paso de como transformar y reutilizar ropita pasada de moda, o alguna especie de uniforme. Dándole una nueva oportunidad a prendas antiguas.
Estan listos?..
Materiales / Materials
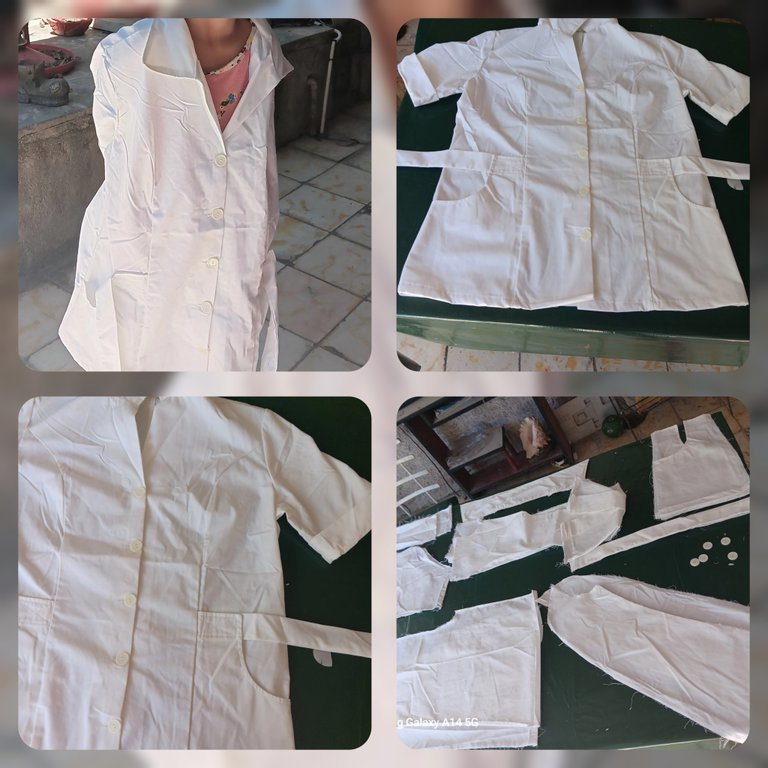
nursing gown
Scissors
Thread and needle
Elastic
Measuring tape
Pins
Sewing machine
red ribbon
cardboard or plate
unpicker
Procedure:
1st step:
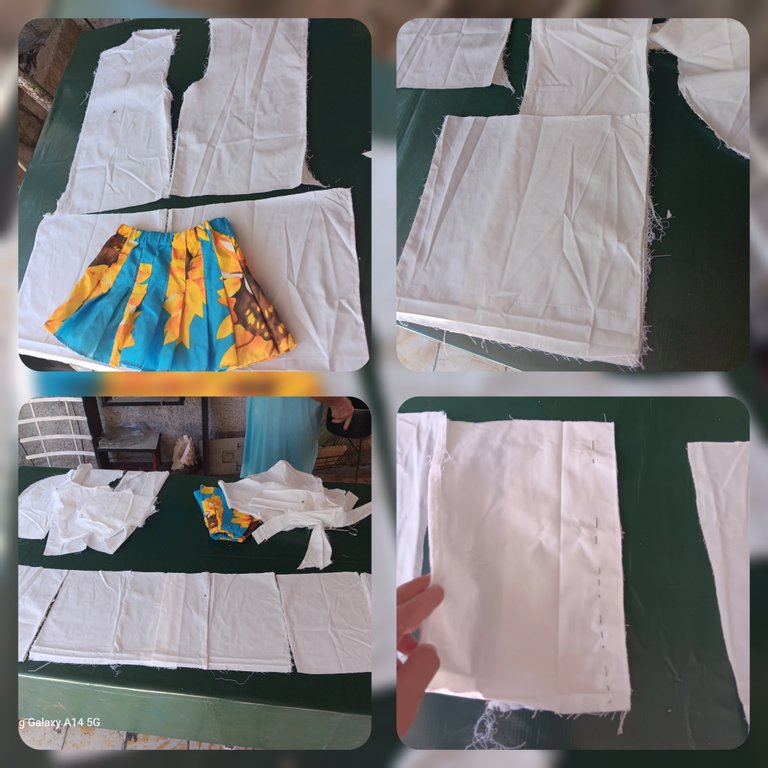
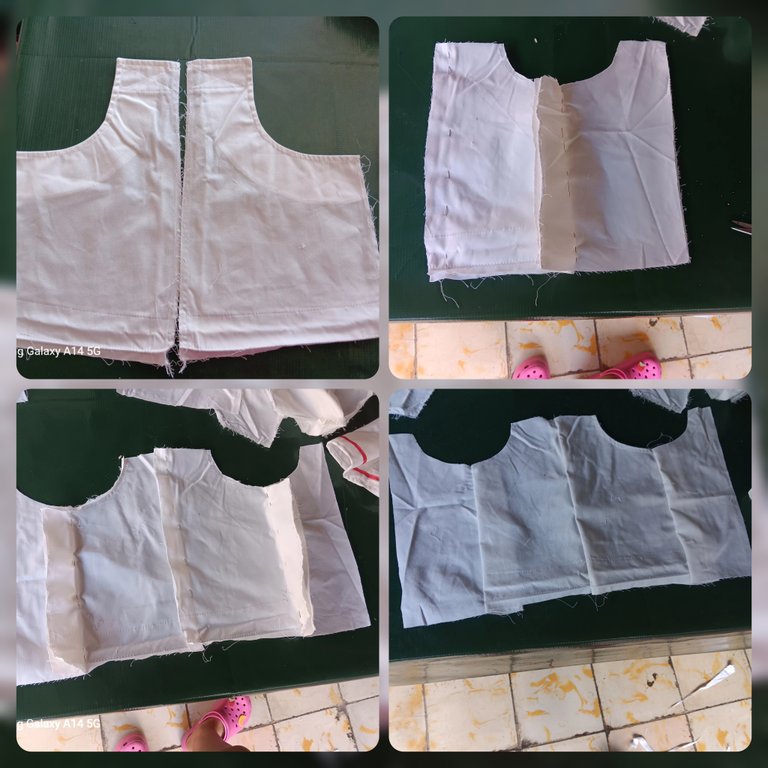
✨To begin, I carefully unpicked the entire robe, from the sides, sleeves and other parts. Once this process was finished, with the help of a sample of a studded skirt, I marked the lower part of the gown with other areas to obtain more material to achieve the selected design. I continued cutting all the marked areas and pinning them, until I obtained the body of the skirt.
Procedimiento:
1er paso:
✨Para comenzar, me dedique cuidadosamente a descoser toda la bata, desde sus costados, mangas y demas partes. Una vez terminado este proceso, con ayuda de una muestra de una falda de tachones, marqué la parte baja de la bata con otras áreas para obtener de esta forma mas material para lograr el diseño seleccionado. Continué picando todas las areas marcadas y sujetandolas con alfileres, hasta obtener el cuerpo de la falda
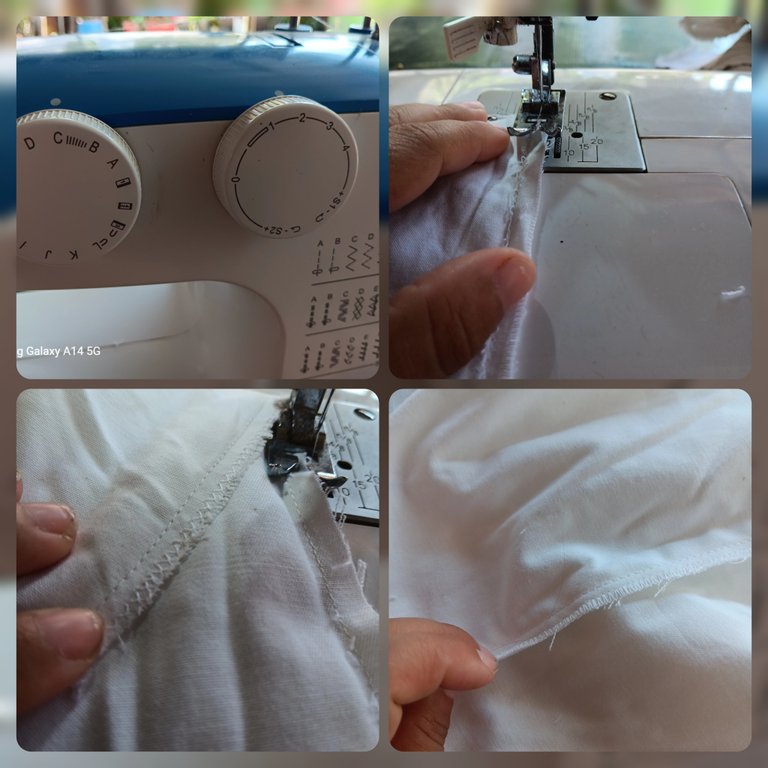
2nd step:.
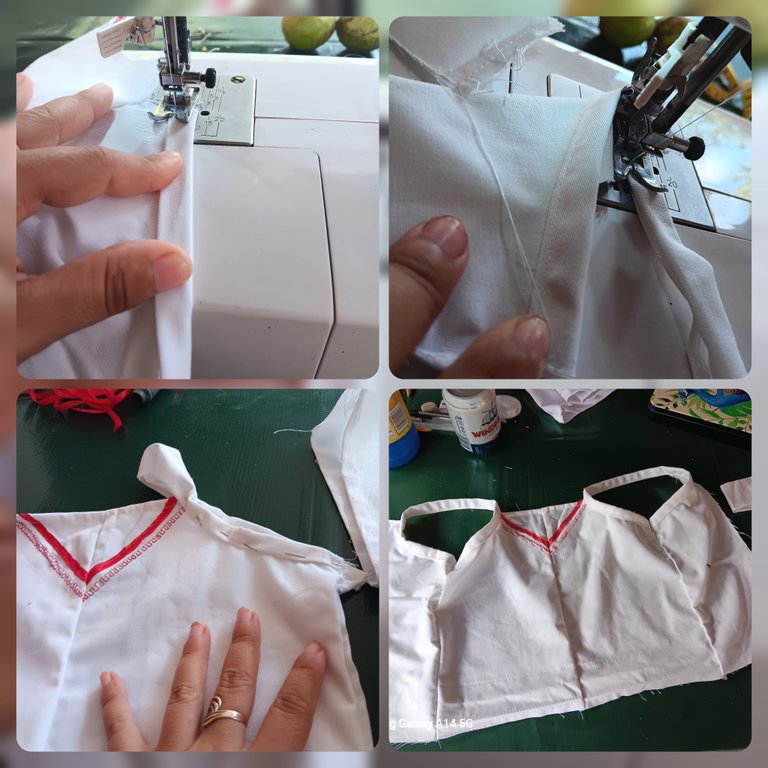
✨Once the pieces are ready and pinned together, I proceed to sew with straight stitches, joining them one by one, leaving a front and a back.
Then I finish with a tik tak stitch along all the ties, achieving a better finish and preventing the fabric from fraying.
2do paso:
✨Ya listas las piezas unidas con alfileres, procedo a realizar una costura con puntadas recta, uniendo una por una, dejando un delantero y un trasero.
Luego remato con una puntada en tik tak por todos los empates logrando un mejor acabado y que la tela no se deshile.
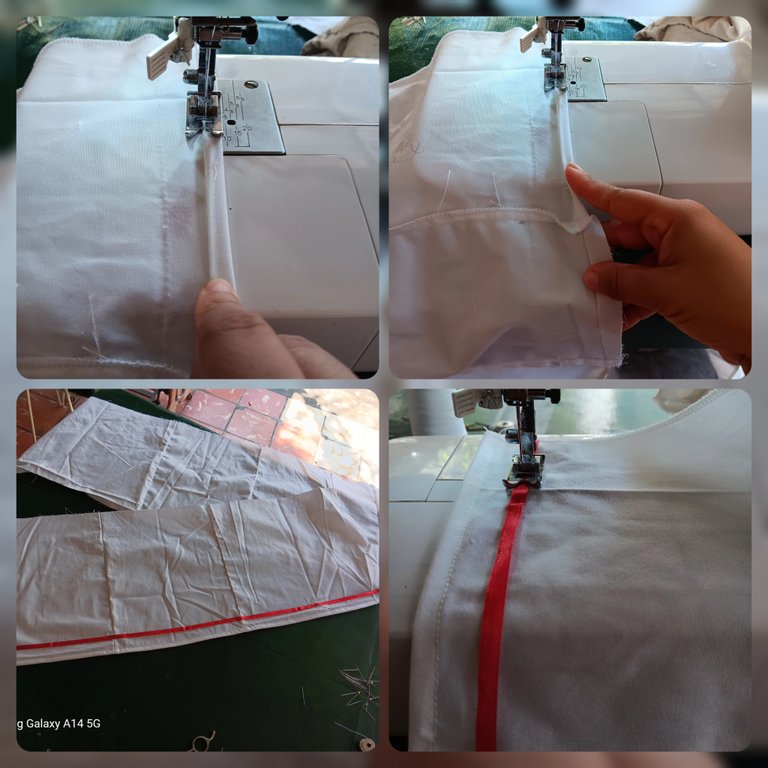
3rd step:
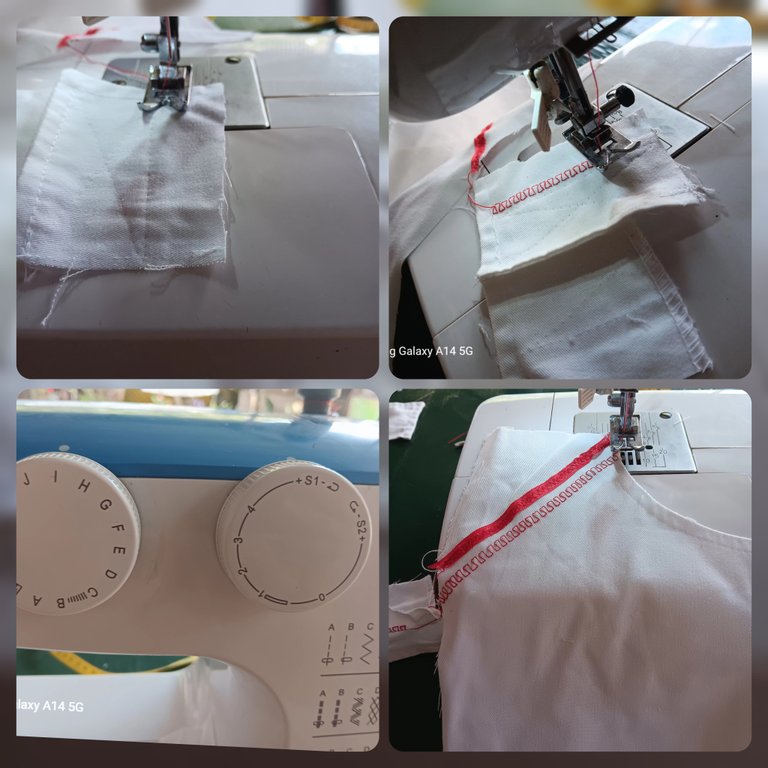
✨I hemmed both pieces of the skirt and with the help of pins, I placed the red ribbon approximately 3cm from the hem, thus ornamenting this garment. I zic zac stitched all over the ribbon, holding it delicately, as this material tends to fray easily.
3er paso:
✨Realice los dobladillos a ambas piezas de la falda y con ayuda de unos alfileres, fui colocando la cinta roja a 3cm aproximadamente del dobladillo, ornamentando asi esta prenda de vestir. Pase costura en zic zac por toda la cinta, sujetandola delicadamente, pues este material tiende a deshilarse con facilidad.
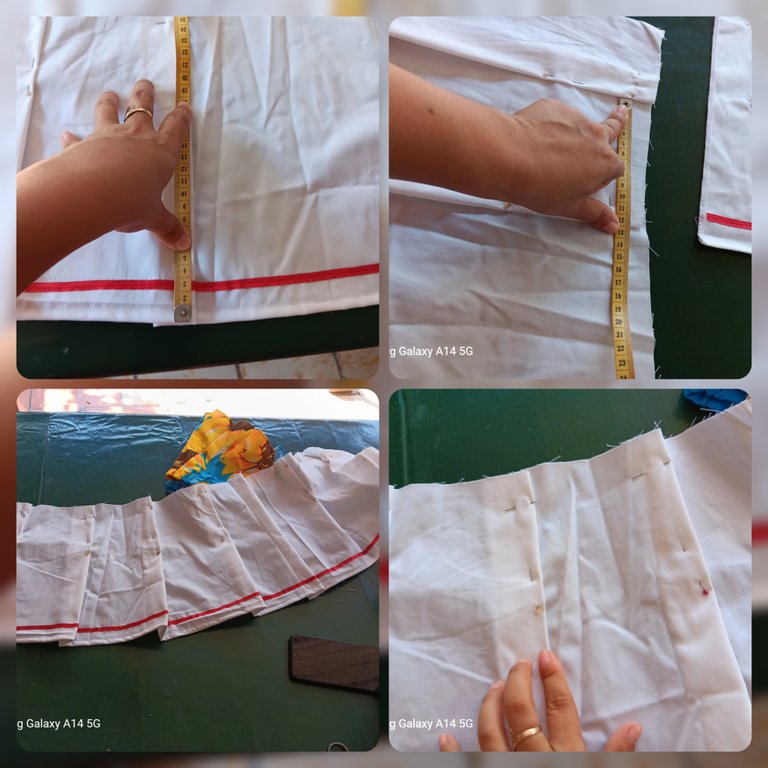
4th step:.
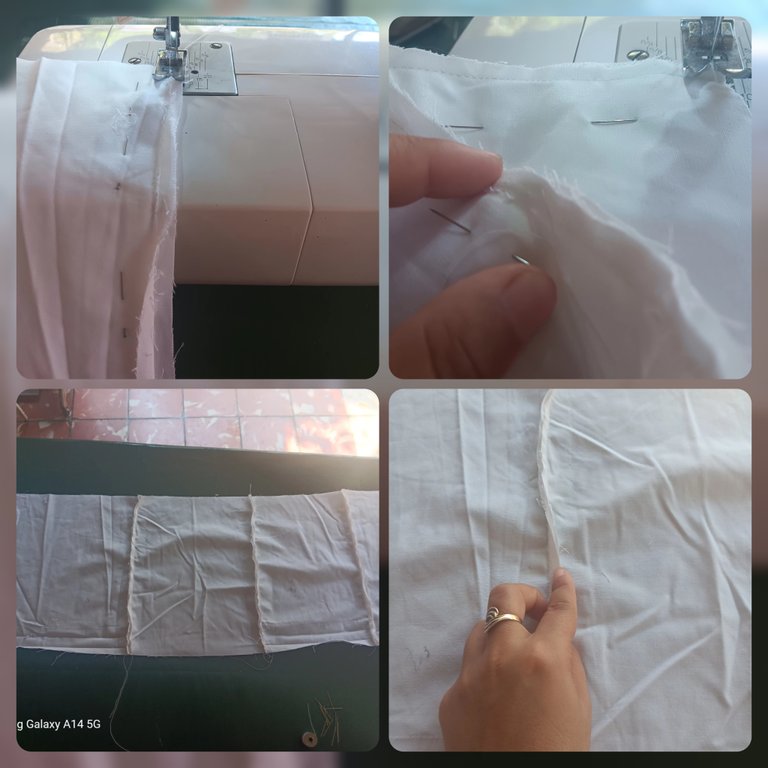
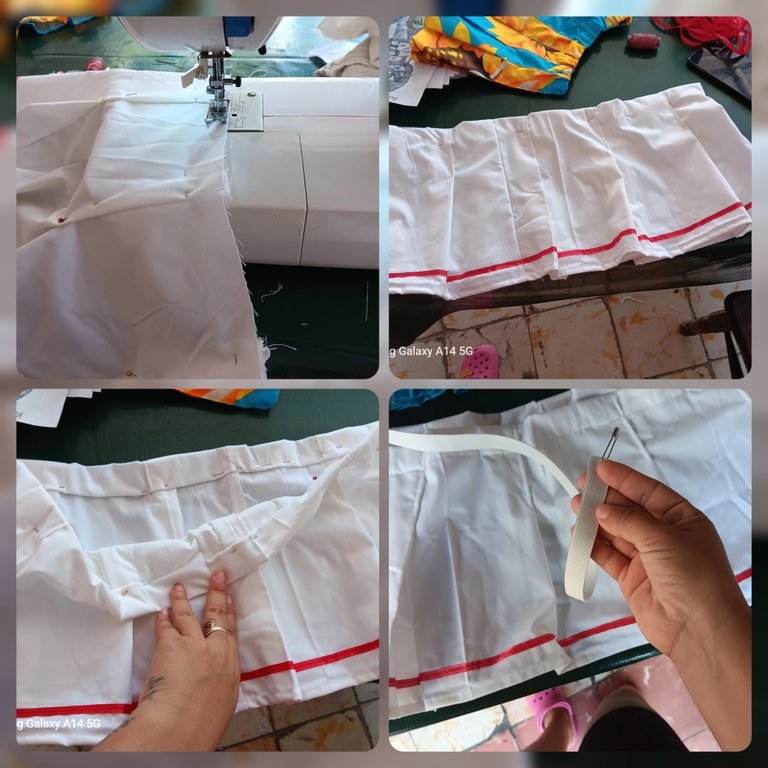
✨To make the studs or planks, with the help of a tape measure, mark the distance between each one of approximately 12cm, with 8-10cm long, that is to say that when assembling them all, a seam is passed down until it reaches 8-10cm, achieving a perfect balance and a level of order in the distribution.
Being a bit unexpected, I learn as I go along, and each process is done directly on the machine..
I did the same procedure for the sash as I did for the hems, leaving a width of approximately 4-5cm and with a safety pin I put the elastic inside.
4to paso:
✨Para hacer los tachones o tablones, con ayuda de una cinta métrica, marque la distancia entre cada uno de aproximadamente 12cm, con 8-10cm de largo, o sea que al montarlos todos, se le pasa una costura hacia abajo hasta que llegue a 8 o 10cm, logrando un perfecto equilibrio y un nivel de orden en la distribución.
Al ser un poco inesperta, aprendo en la marcha, y cada proceso lo realizo ya directamente en la maquina.
Al fajin hice el procedimiento parecido que el de los dobladillos dejando un ancho de 4-5cm aproximadamente y con un imperdible le pase el elástico por dentro.
5to step:
✨When I started to make the blouse, I took one of the pieces and placed them in front of my little girl to get the measurement, so I obtained the four pieces for the blouse.
Then I pinned each side to the front and sewed a straight line seam, always finishing with a zic zac.
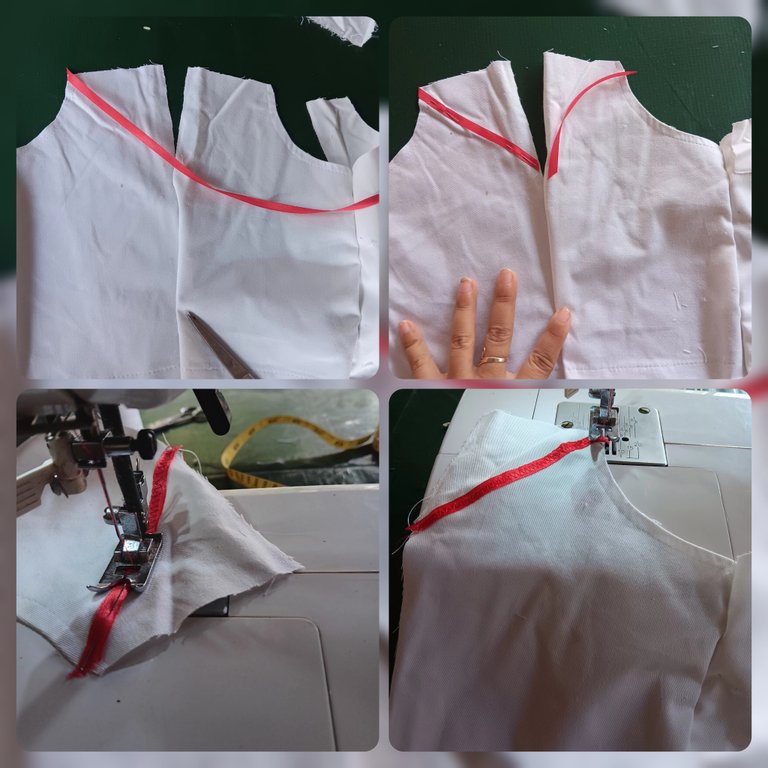
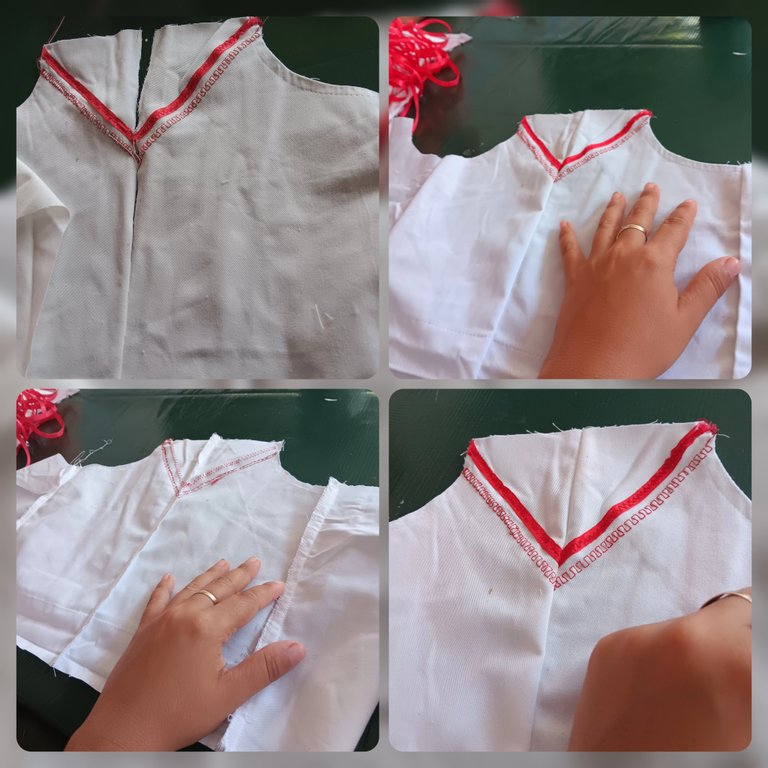
On the front of the blouse, when joining the two pieces together, leave the top part unstitched, so that I can place the red ribbon in a V shape for decoration. In order to make this work straight and well executed, I pinned them before with pins.
5to paso:
✨Al pasar a realizar la blusa tome uno de los retazos y los coloque en frente de mi niña para sacar la medida, asi fui obteniendo las cuatro piezas para la blusita.
Luego sujete con alfileres cada lateral con el frente y pase una costura en linea recta, rematando siempre con un zic zac.
En la parte delantera de la blusa al unir las dos piezas deje la parte de arriba sin coser, para poder colocar en forma de V la cinta roja a modo decorativo. Para que este trabajo quedara recto y bien ejecutado, los sujete antes con alfileres
6th step:.
✨Before I do any ornamental stitching, I proceed to test on a piece of the same fabric, to make sure it's going to look good. Then I apply it to the fabric and close the opening.
6to paso:
✨Antes de hacer algun tipo de puntada ornamental, procedo a probar en un pedazo de la misma tela, para asegurarme que vaya a quedar bien. Luego la aplique en la tela y cerre la abertura.
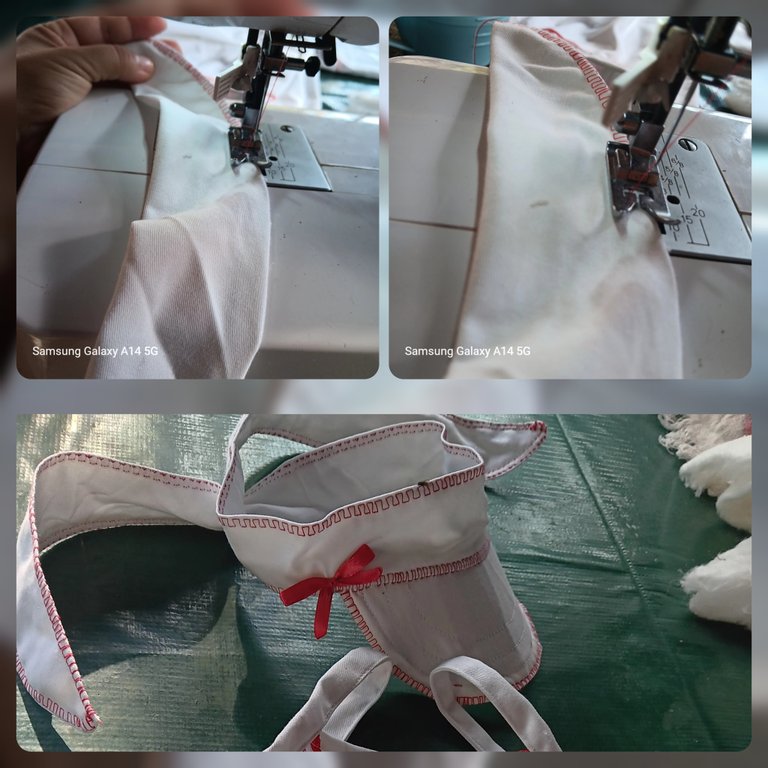
7th step:
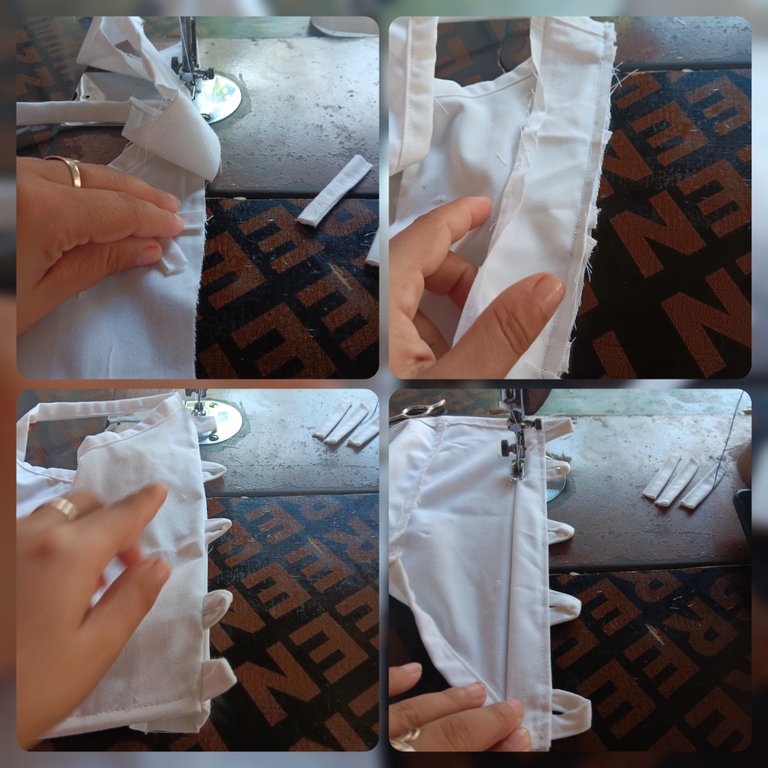
✨For the straps, I took a ribbon of fabric and started making a ten around the entire contour of the sleeve cuff, creating a strap attached to the blouse.
Then for the back, I sewed the little ears made with the fabric, for this I placed a ribbon on top and went through a straight stitch placing little by little each little ear from the inside to the outside. To turn it right side out and sew a seam again, holding it well and giving it a nice finish.
7mo paso:
✨Para los tirantes, tome un liston de tela y comence hacer un diez por todo el contorno de la bocamanga, creando un tirante sujeto a la blusa.
Luego para la parte trasera, cosi las orejitas echas con la tela, para ello coloque un liston encima y fui pasando una puntada recta colocandole poco a poco cada orejita de adentro hacia afuera. Para voltearla al derecho y volver a pasar una costura, sujetandola bien y dandole un bonito acabado.
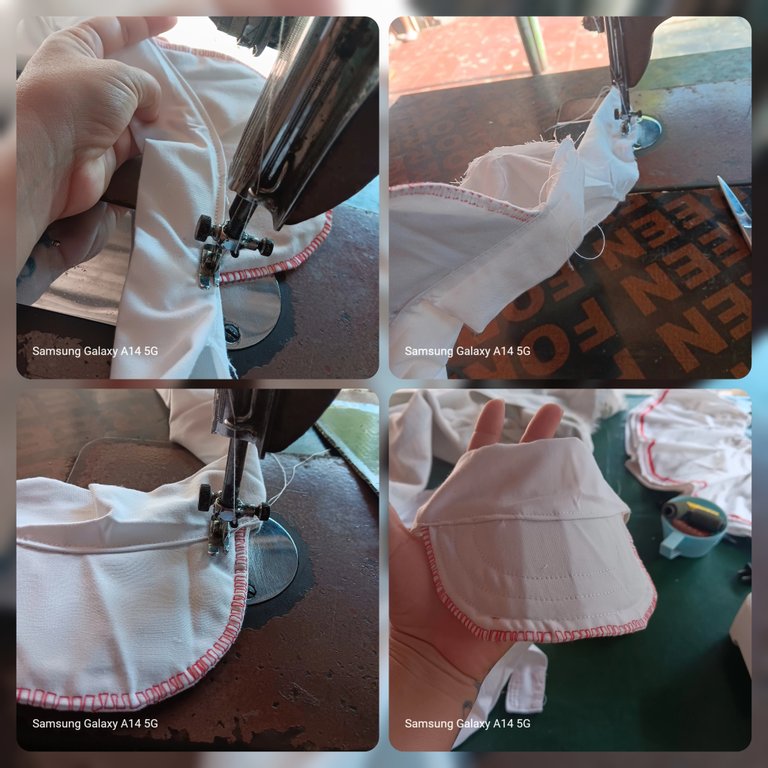
8th step:
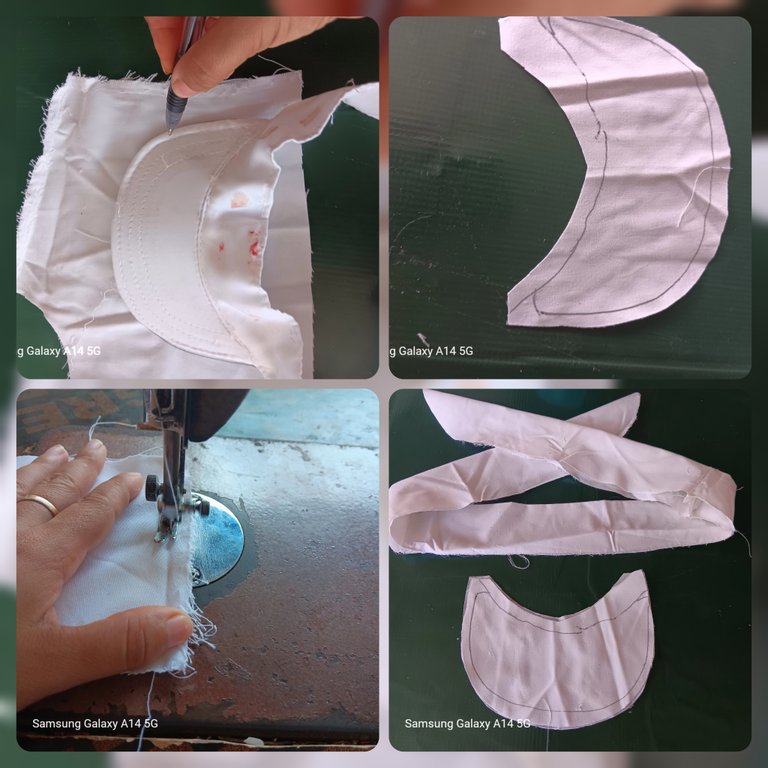
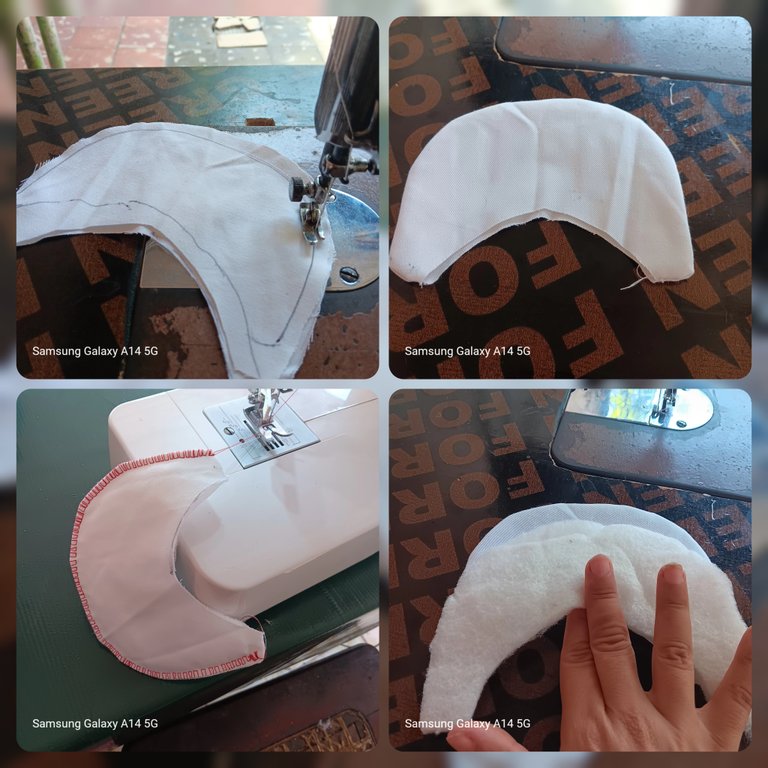
✨For the visor, I took a sample I had, and took the mold or pattern of it. Then I cut it out and joined it with a straight seam, turned it right side out and with a decorative stitch I went all the way around it, leaving an open part where the sponge, plate or cardboard would be placed.
8vo paso:
✨Para la viserita, tome una muestra que tenia, y saque el molde o patron de la misma. Luego la recorte y uni con una costura recta, la voltee al derecho y con una puntada decorativa pase por todo el contorno de la misma, dejando una parte abierta donde se colocaria la esponja, placa o cartón.
9th step:
✨Stitch all the way around and the ribbon where the visor would be tied, turn both ends right side out and stitch the decorative stitching all the way around the ribbon.
9no paso:
✨Pase costura por todo el contorno y la cinta donde se amarraria la visera, voltee al derecho las dos puntas y pase la costura decorativa por todo ese liston.
✨✨✨Resultado/result✨✨✨
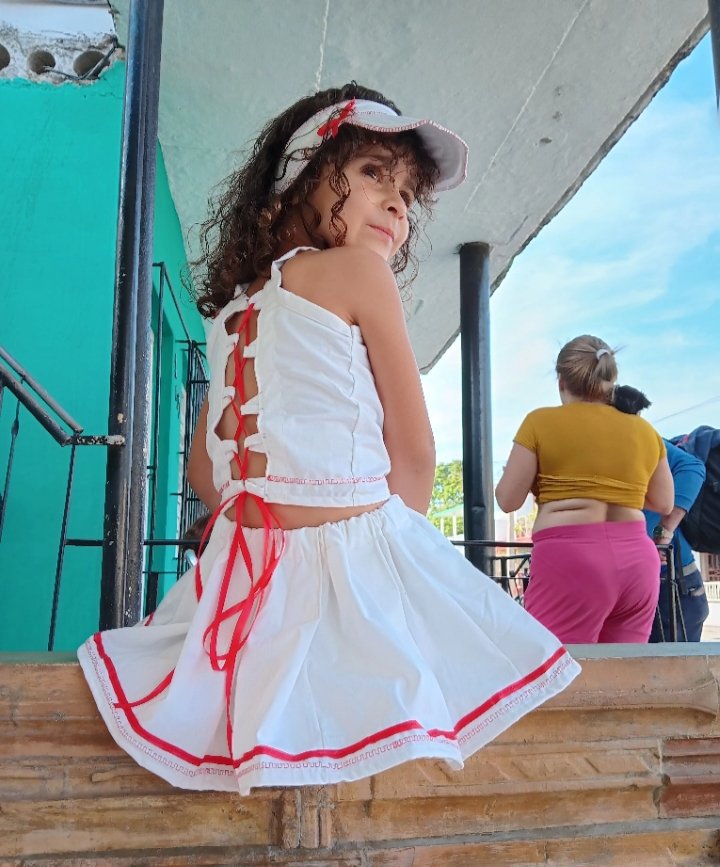
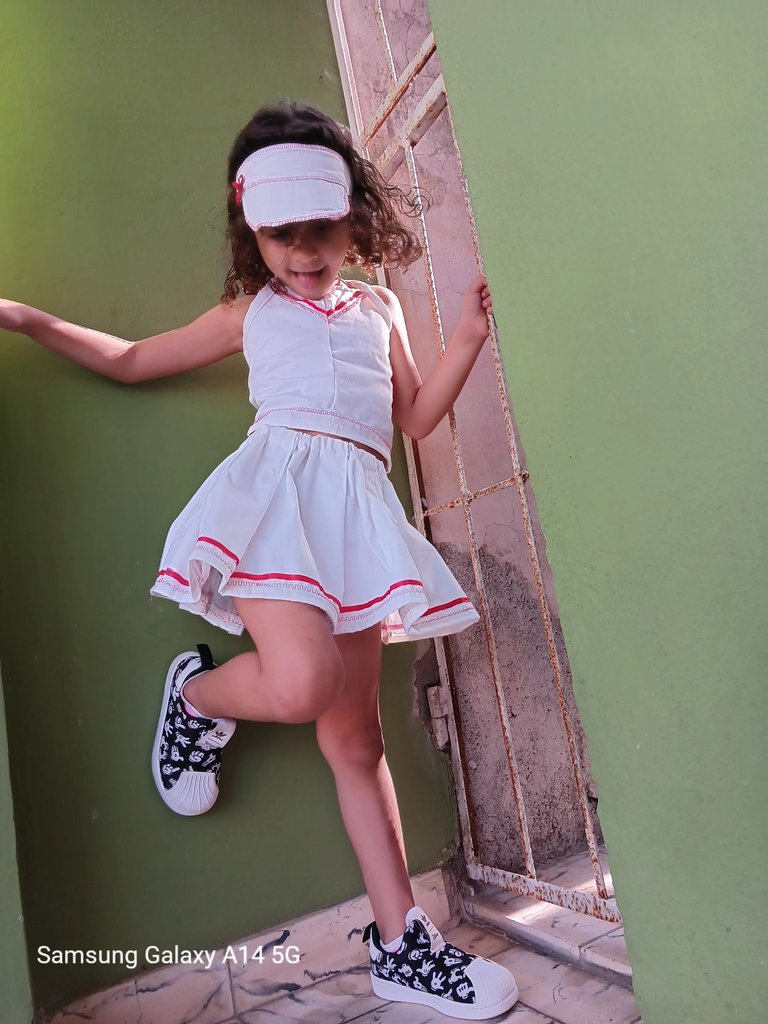
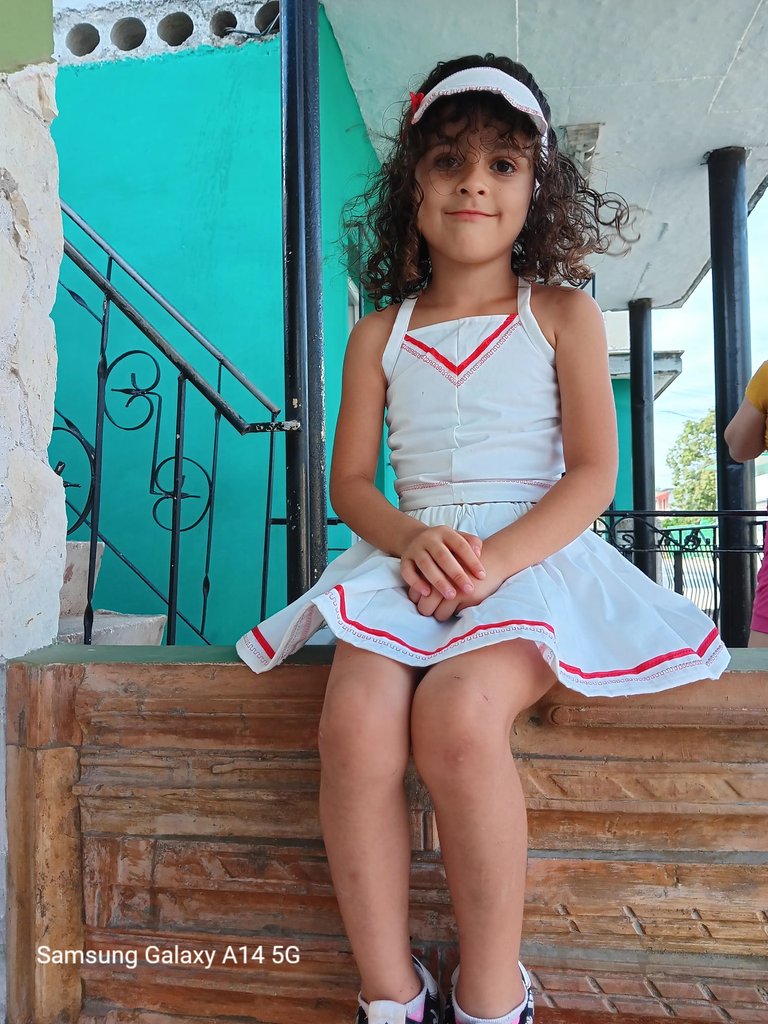
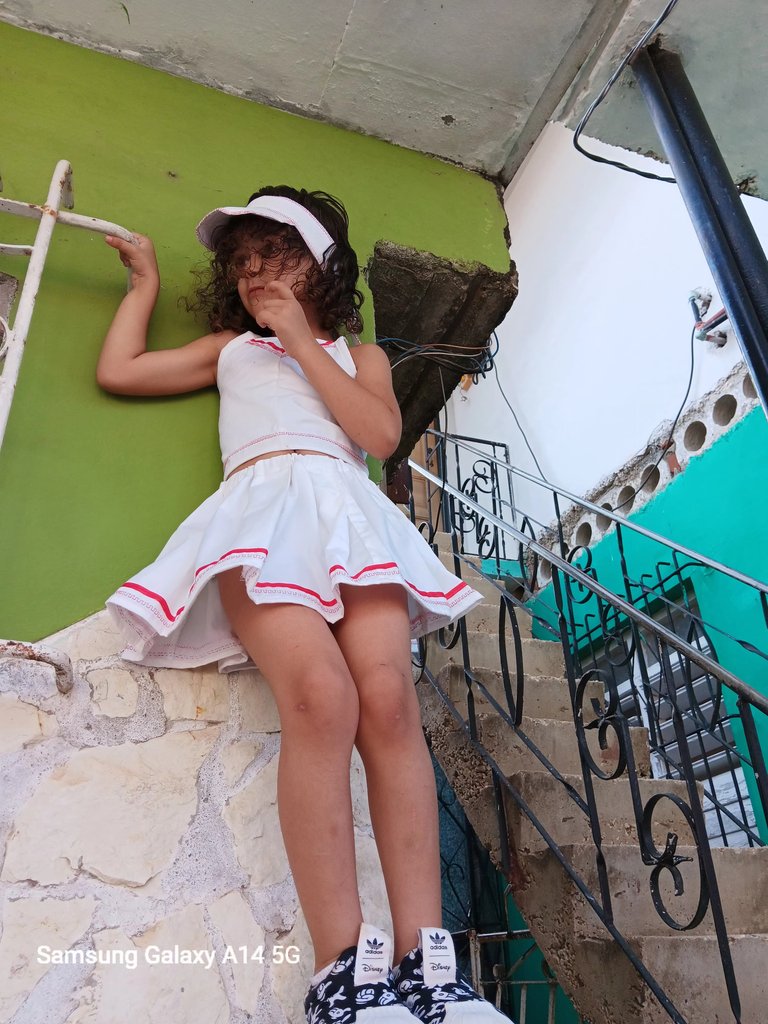
Love this transformation, because it shows that you can always give new life to clothes that you don't use or are simply out of fashion. You can also reuse it with other outfits. This one in particular would look great with any sporty style, paired with some nice scooters and a pair of high socks.
Ame esta transformacion, porque demuestra que siempre se puede dar nueva vida a ropitas que no usas o simplemente esten pasadas de moda. A parte de tambien poder reutilizarla con otros outifs. Esta en particular quedaria divina con cualquier estilo deportivo, acompañado con unas lindas motonetas y unas medias bien altas.
I hope you liked this nice transformation, I would appreciate your support and your nice comments, thank you in advance and many blessings to all. Have a nice night.
Espero y os haya gustado esta linda transformación, agradeceria que dejen su apoyo y sus lindos comentarios, gracias de antemano y muchas bendiciones para todos. Linda noche.
The text or summary is entirely my own.
El texto o resumen es totalmente de mi autoria.
Thank you so much 🙏🏻☺️
You're welcome.
Excelente transformación amor, le quedo súper bonita a tu niña.
Gracias amorcito. Me alegra que te haya gustado 🥰🙏🏻
Congratulations @karoly! You have completed the following achievement on the Hive blockchain And have been rewarded with New badge(s)
Your next target is to reach 50000 upvotes.
You can view your badges on your board and compare yourself to others in the Ranking
If you no longer want to receive notifications, reply to this comment with the word
STOPThank you so much 🙏🏻☺️
very beautiful👍
Thank you so much 🙏🏻🤩
Yes you're welcome♥️
Que linda le quedó 🤗.
Gracias amiga me alegra que te haya gustado ☺️🙏🏻
So beautiful ❤️❤️
Thank you ☺️🙏🏻
Welcome 🤗