👋🏻👋🏻👋🏻☺️☺️☺️☺️☺️👋🏻👋🏻👋🏻
Buenas, buenas por aquí, gente linda y creativa de hivediy, les deseo un maravilloso dia, cargado de buena vibra, de mucha alegria y sobre todo mucho amor. Estoy fascinada ante tanto derroche de talento que abunda en esta hermosa comunidad, agradecida siempre con todos sus integrantes por mostrar tan bellos proyectos y por siempre apoyarnos los unos a los otros.
👋🏻👋🏻👋🏻☺️☺️☺️☺️☺️👋🏻👋🏻👋🏻
Good, good here, beautiful and creative people of hivediy, I wish you a wonderful day, full of good vibes, lots of joy and above all lots of love. I am fascinated by so much talent that abounds in this beautiful community, always grateful to all its members for showing such beautiful projects and for always supporting each other.
👋🏻👋🏻👋🏻☺️☺️☺️☺️☺️👋🏻👋🏻👋🏻
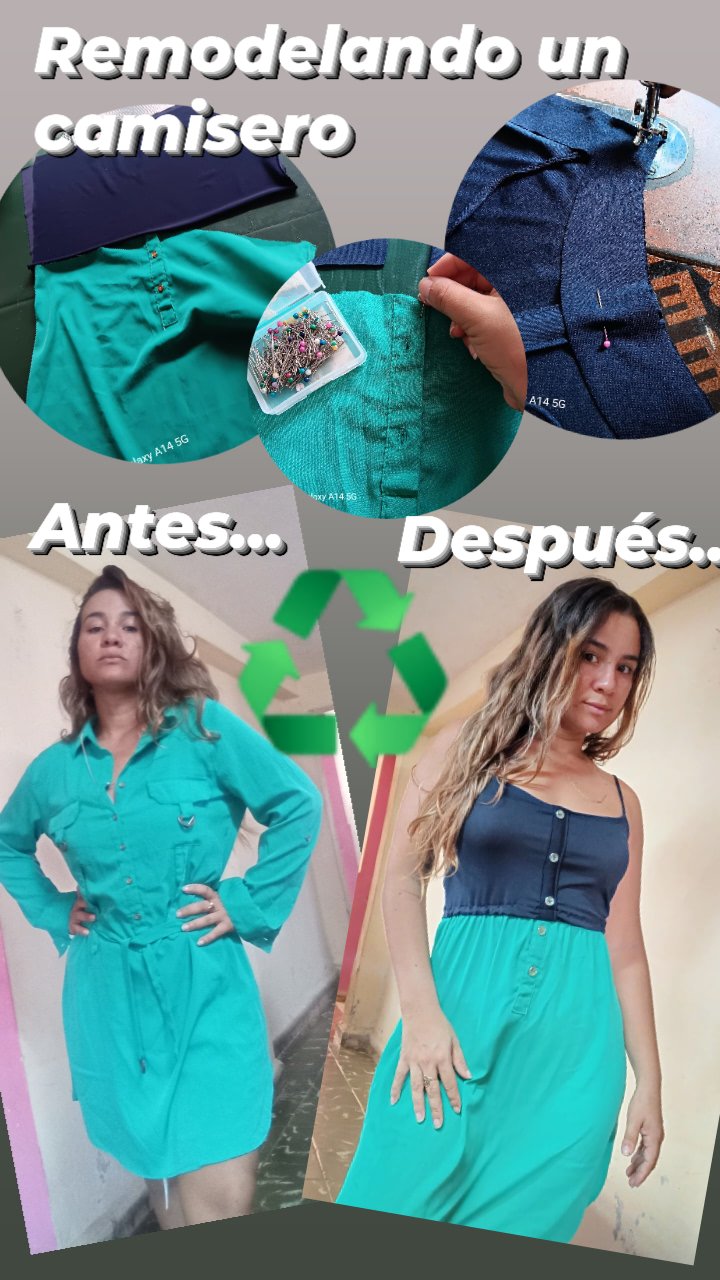
Estoy bien emocionada, pues adoro el reciclado de ropa. El dia de hoy les traigo un lindo proyecto de costura, donde modifique un lindo camisero.
Me toco innovar y jugar un poco con los materiales que tenia a disposición. Al final me quede con un tejido licrado en una tonalidad azul Prusia, este le quedaba genial a la prenda...
I'm very excited, because I love recycling clothes. Today I bring you a nice sewing project, where I modified a nice shirtdress.
I had to innovate and play a little with the materials I had at my disposal. In the end I was left with a lycra fabric in a Prussian blue tone, this one looked great on the garment...
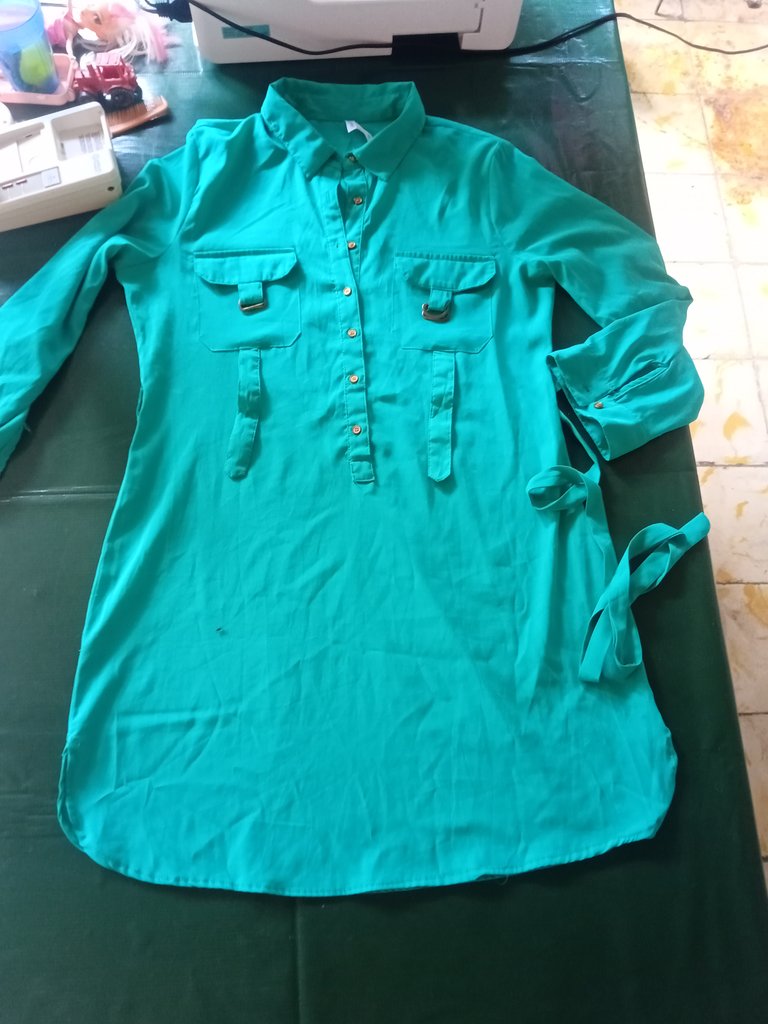
Los invito a acompañarme en este tutorial. Les dejo los materiales y herramientas que emplee para ejecutar esta linda transformación. Espero y os guste. Bendecido día...
I invite you to join me in this tutorial. Here are the materials and tools I used to make this beautiful transformation. I hope you like it. Blessed day...
💙💚💙💚💙💚💙💚💙💚💙💚💙💚
Materiales / Materials
✨✨✨✨🧷📏✂️🏮✨✨✨✨
Shirtmaker
Scissors
Thread and needle
Elastic
Measuring tape
Pins
Sewing machine
Elastic
💙💚💙💚💙💚💙💚💙💚💙💚💙💚
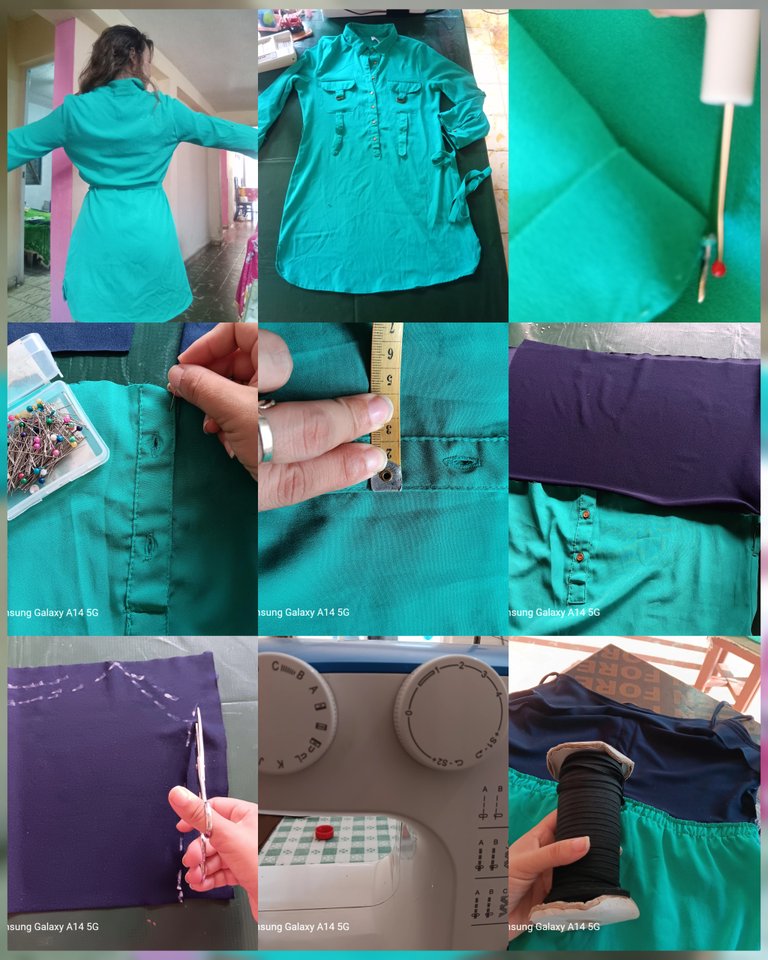
Procedimiento:
1er paso:
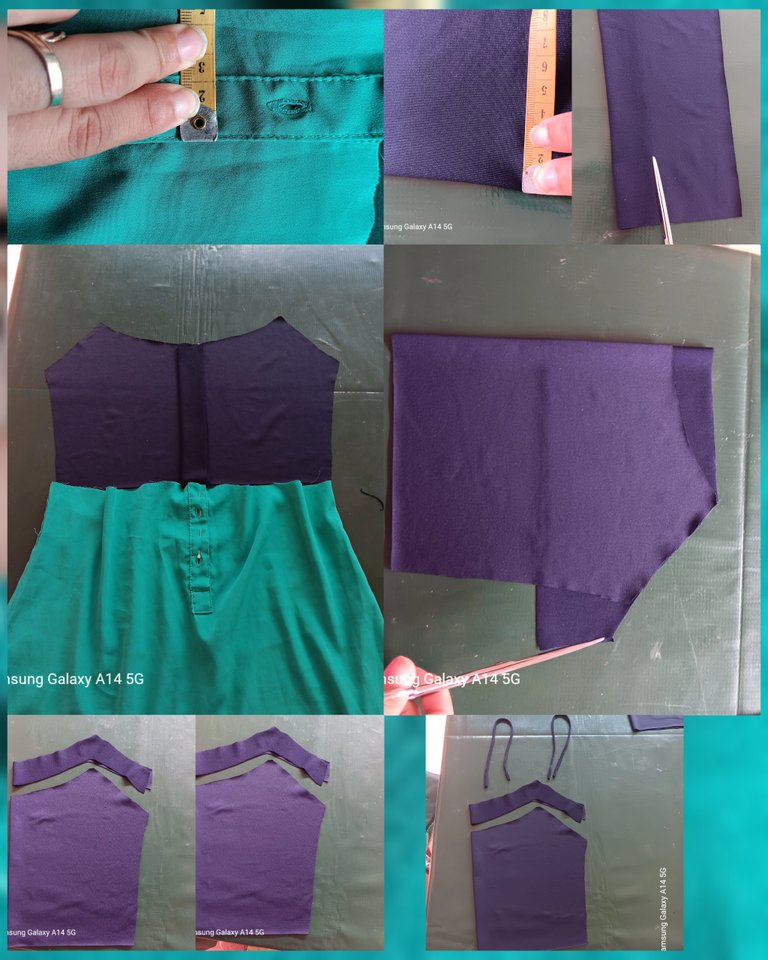
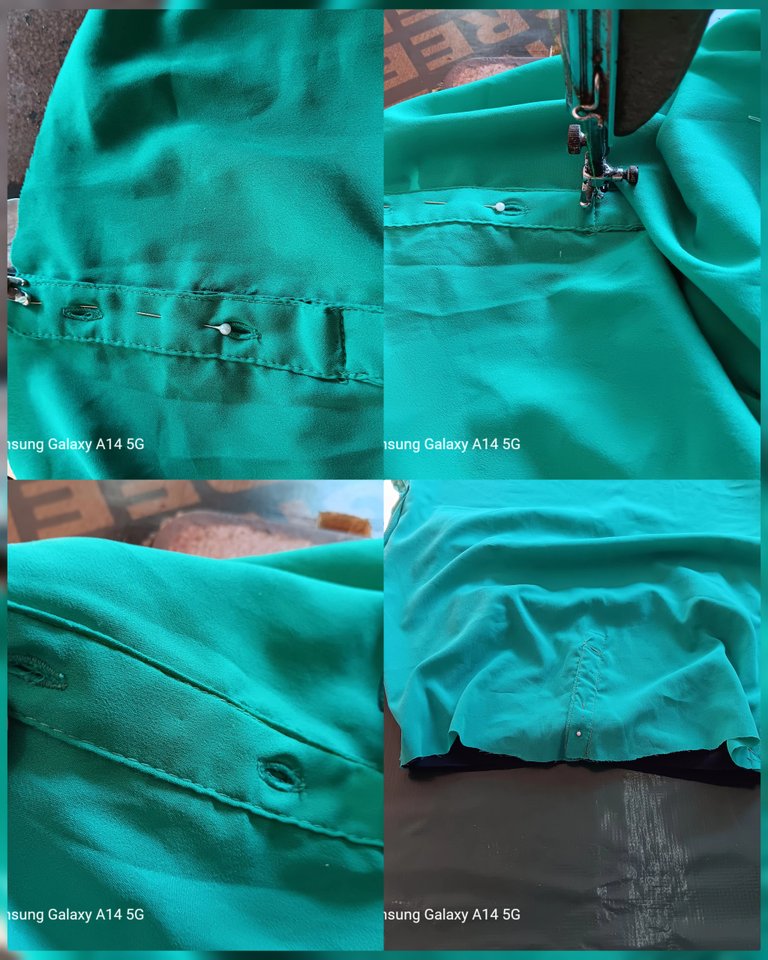
Comence descosiendo los bolsillos del camisero, y cortando por la mitadel mismo. Pues lo unico que iba a utilizar era la parte baja...
Procedure:
1st step:
I started by unpicking the pockets of the shirt, and cutting the shirt in half. The only thing I was going to use was the lower part...
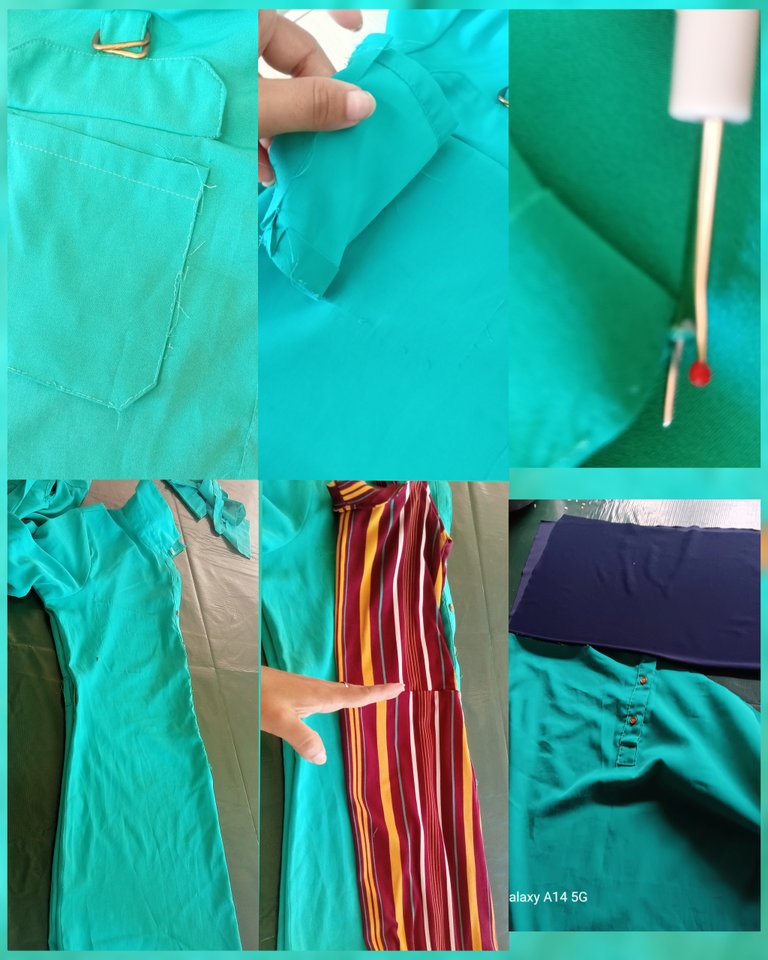
2do paso:
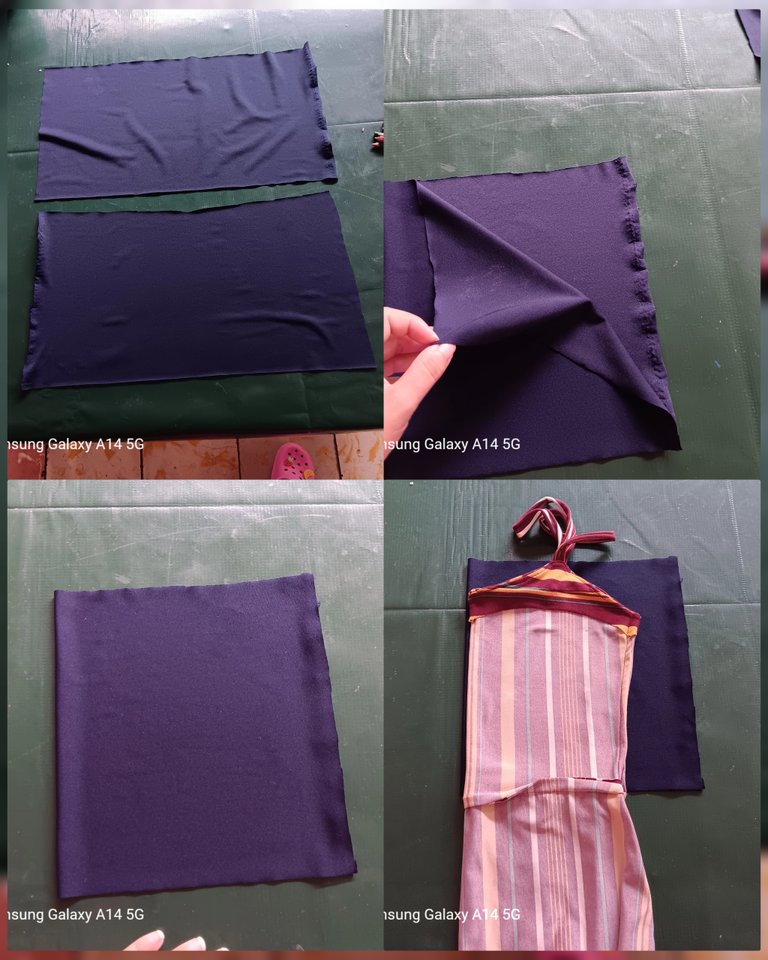
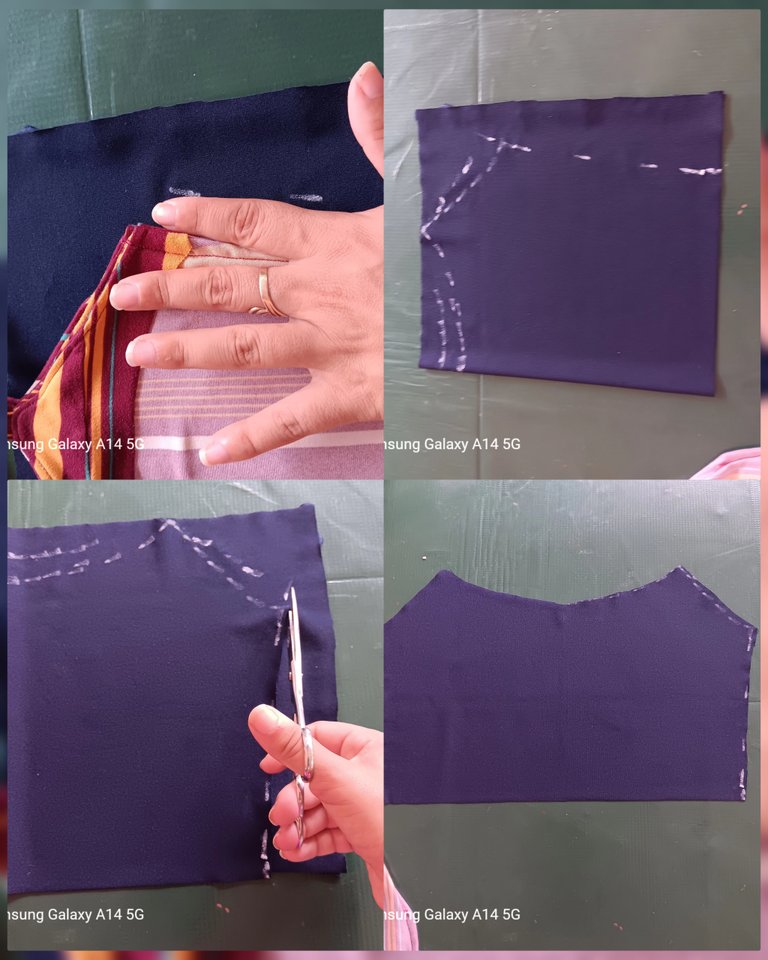
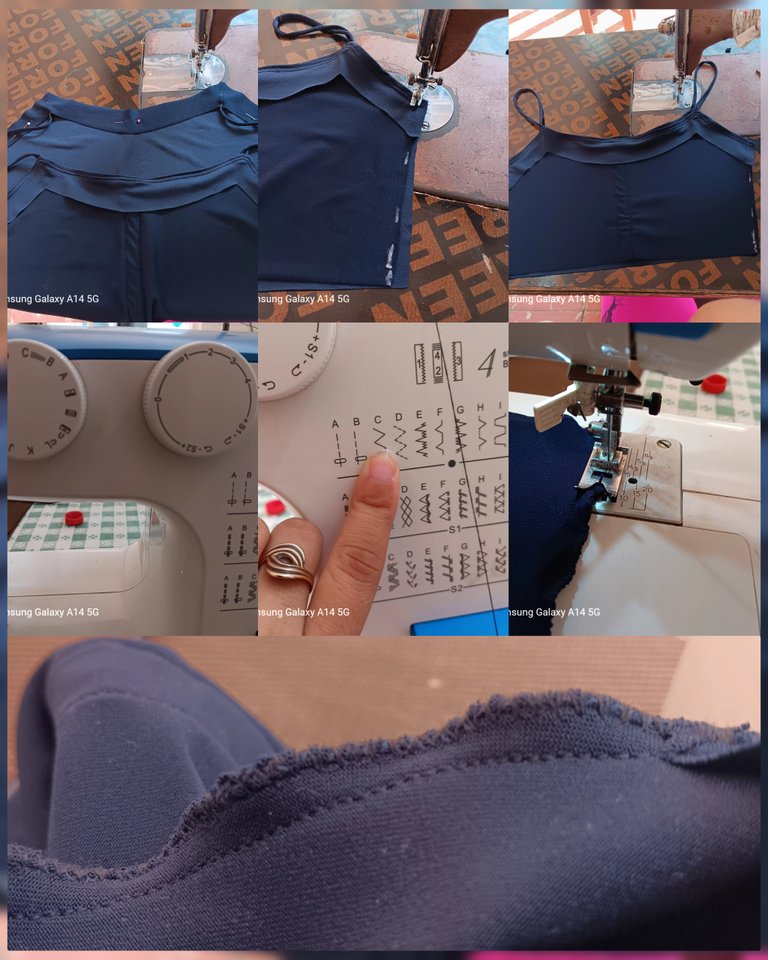
Tome una porción de tela que tenia. La doble a la mitad, y con una muestra de un vestido, saque el patron de la parte de arriba del vestido.
Luego saque unos listones para hacer el cubre tirante, parte la cual, iria por dentro del vestido y unos tirantes...
2nd step:
I took a piece of fabric I had. I folded it in half, and with a sample of a dress, I made the pattern for the top of the dress.
Then I took some ribbons to make the strap cover, part of which would go inside the dress, and some straps...
3er paso:
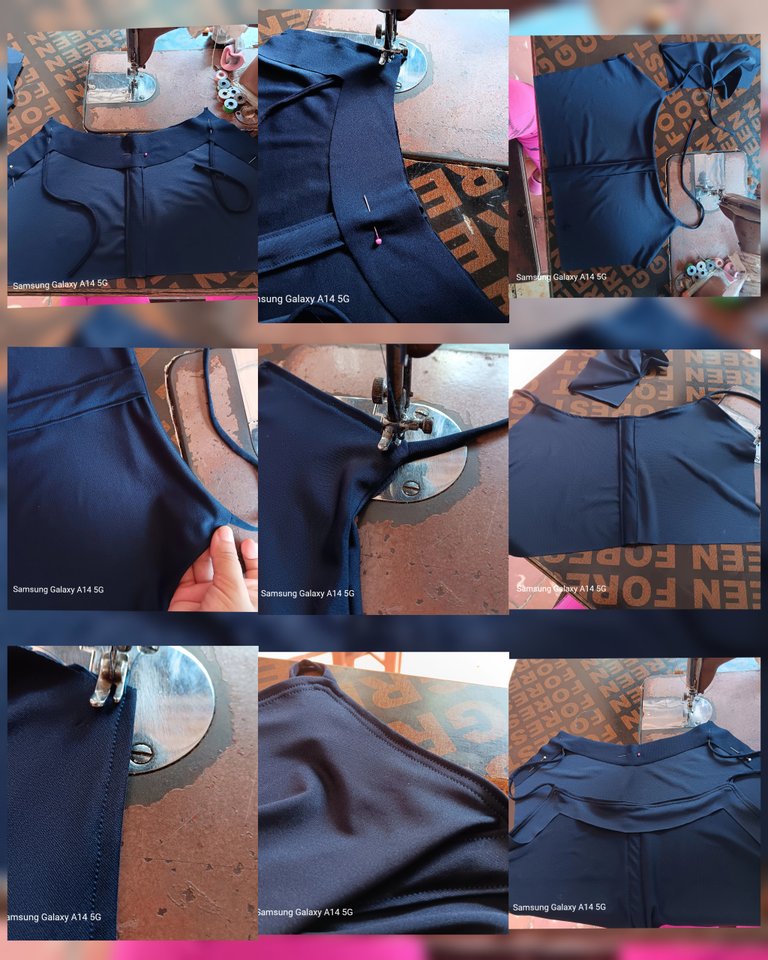
Sujete con alfileres los tirantes junto con los bordes, de los cubretirantes. Pase costura, luego lo voltee al derecho fije con una costura en puntada larga por todo el contorno. Realice el mismo procedimiento a 1cm de ancho de la costura ya pasada.
Uni delantero con trasero con una costura, para un mejor acabado pase una costura en zic zac en los laterales
Step 3:
Pin the shoulder straps together with the edges of the suspender covers. Turn it right side out, then turn it right side out and pin with a long stitch all the way around. Repeat the same procedure 1 cm wide from the seam allowance.
Join front and back with a seam, for a better finishing, pass a zic zac seam on the sides.

4to paso:
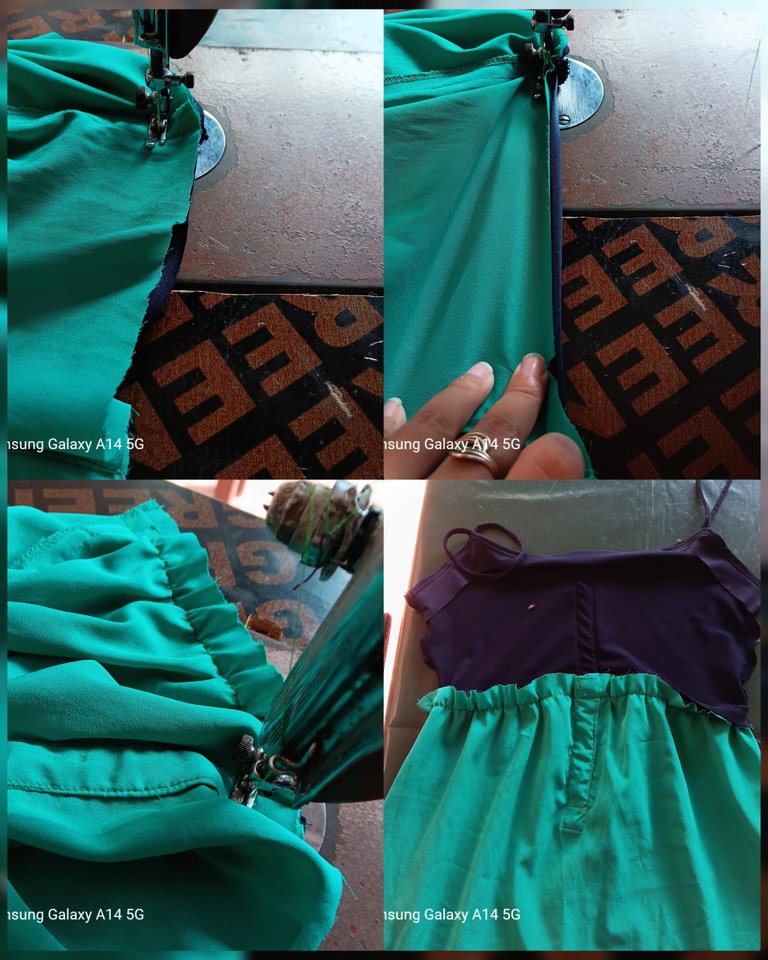
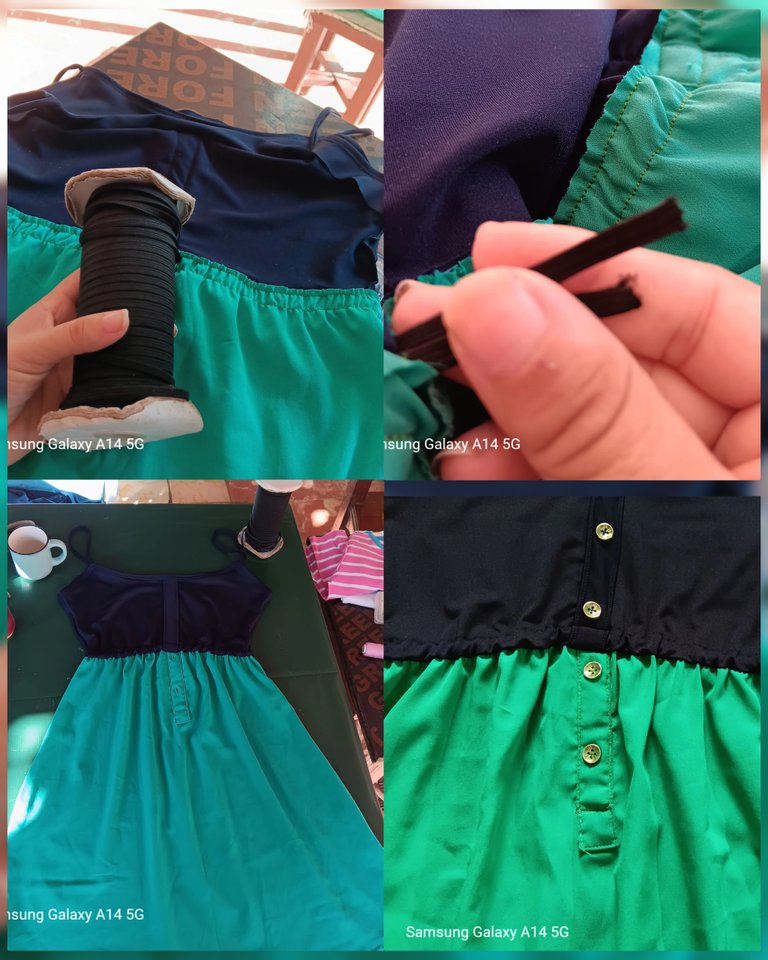
Cerre la apertura que tenia la parte baja del vestido, pues como había descosido los botones, quedaba abierta. Luego uni con alfileres la parte baja y la parte alta de vestido. Para que quedara mas firme a la hora de pasar la costura. Una vez pasada la costura, volvi a pasar otra costura dejando 2cm de ancho entre cada costura y picando con la tijera todo el sobrante....
4th step:
I closed the opening at the bottom of the dress, since I had unpicked the buttons and it was open. Then I pinned the bottom and the top of the dress together. So that it would be firmer when it was time to sew the seam. Once past the seam, I went back to pass another seam leaving 2cm wide between each seam and chopping with the scissors all the excess....
5to paso:
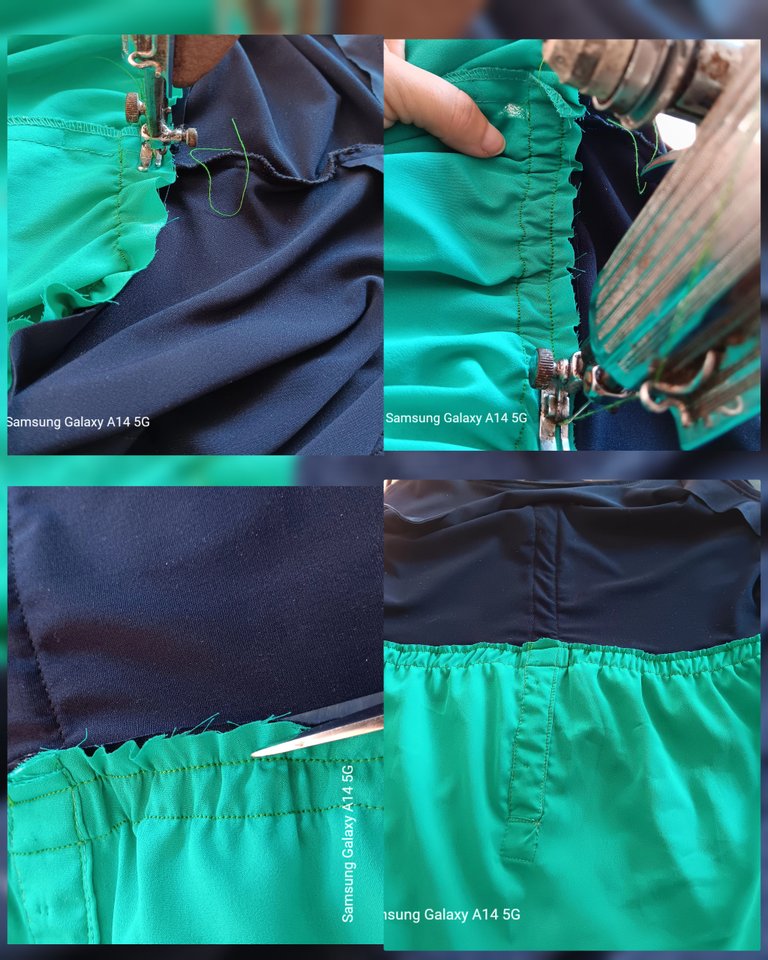
Pase el elástico por la pequeña apertura que habia dejado, y luego la selle. También cosi los botones en la parte delantera del vestido. En el falso abotonado, este solo era hornamental...
5th step:
I threaded the elastic through the small opening I had left, and then sealed it. I also sewed the buttons on the front of the dress.
✨✨✨✨✨✨👗👗👗✨✨✨✨✨✨
Resultado/Result
✨✨✨✨✨✨👗👗👗✨✨✨✨✨✨

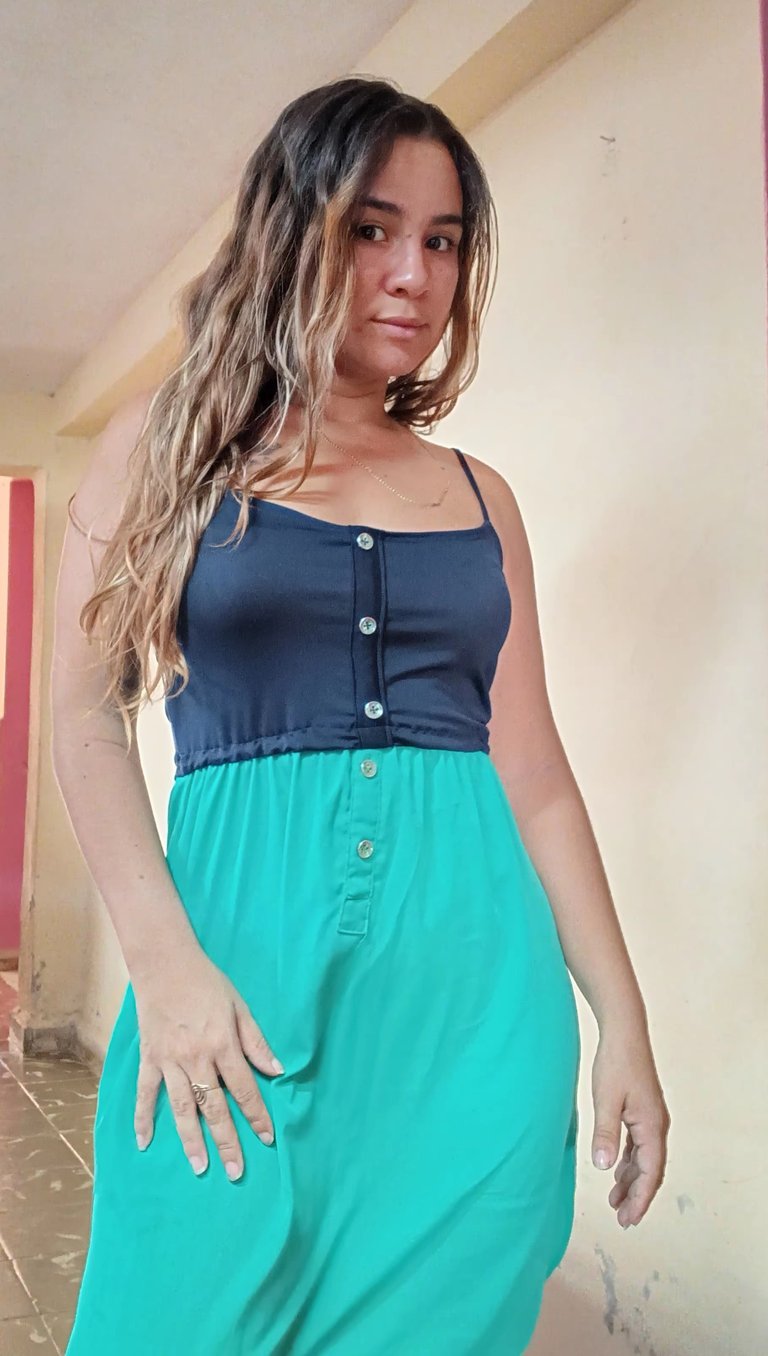
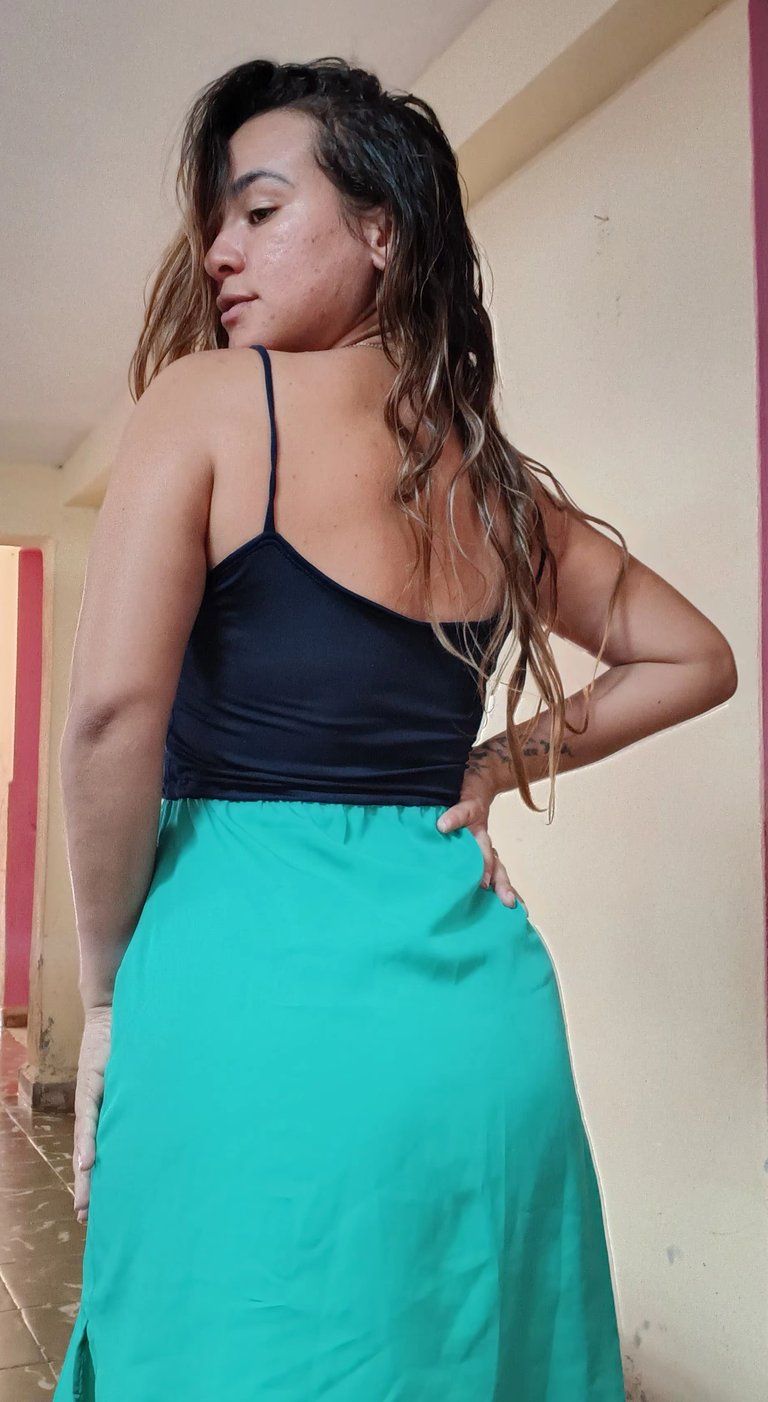
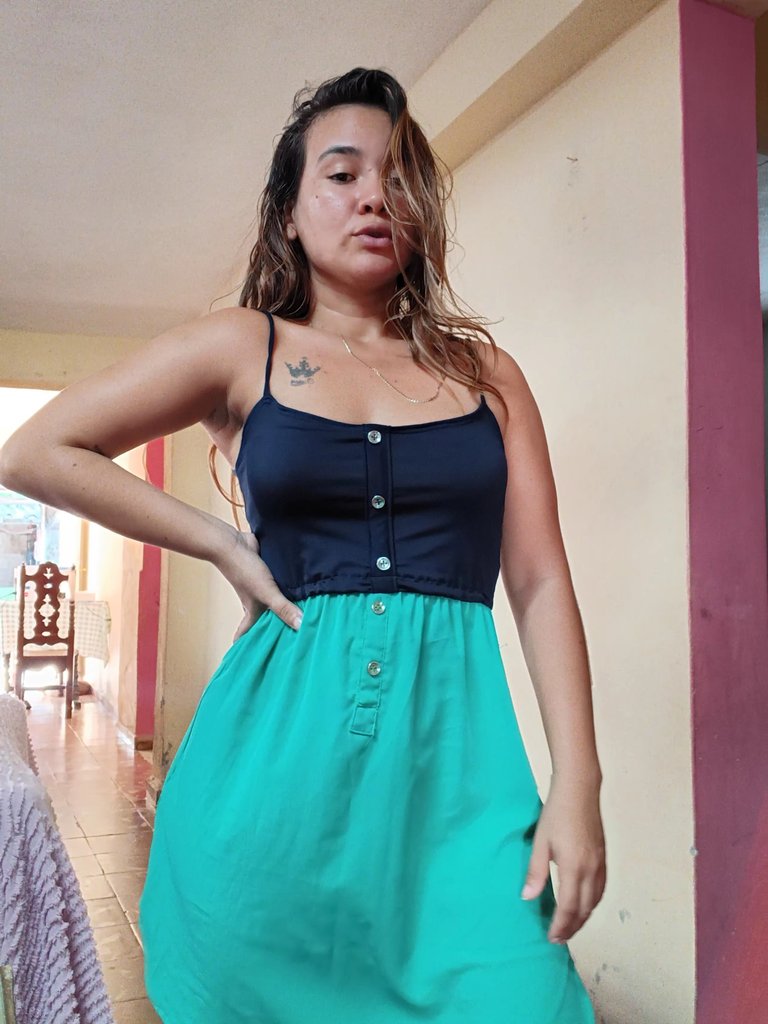
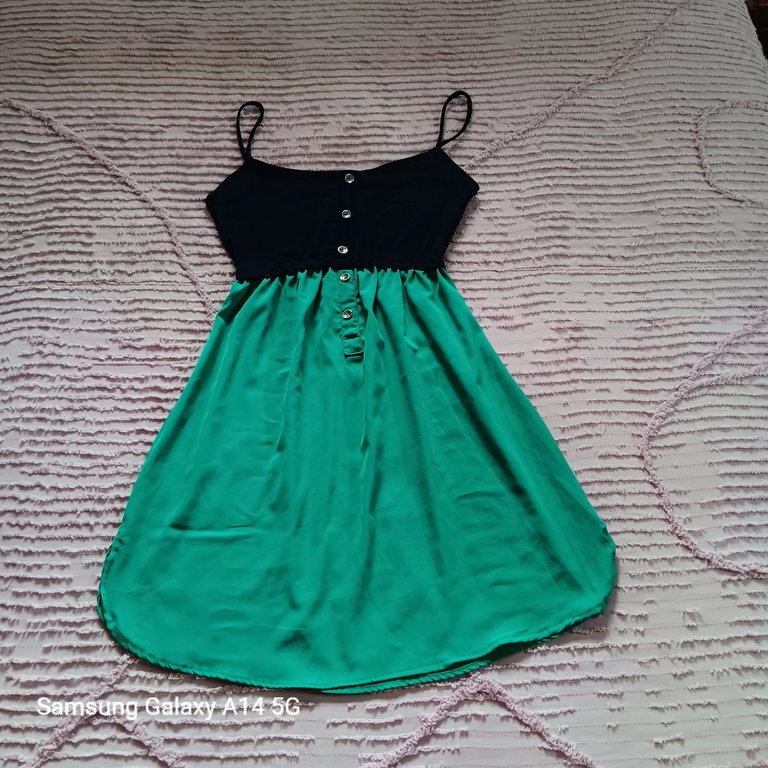
De esta manera se puede crear un lindo vestido, formal, a la moda, en tendencia y sobre todo, una prenda ideal para combinarlo con cualquier tipo de calsado, siempre a comodidad del que lo porte.
😊😊😊😊😊😊😊😊😊😊😊😊😊😊
This way you can create a nice dress, formal, fashionable, trendy and above all, an ideal garment to match it with any type of outfit, always at the comfort of the wearer.
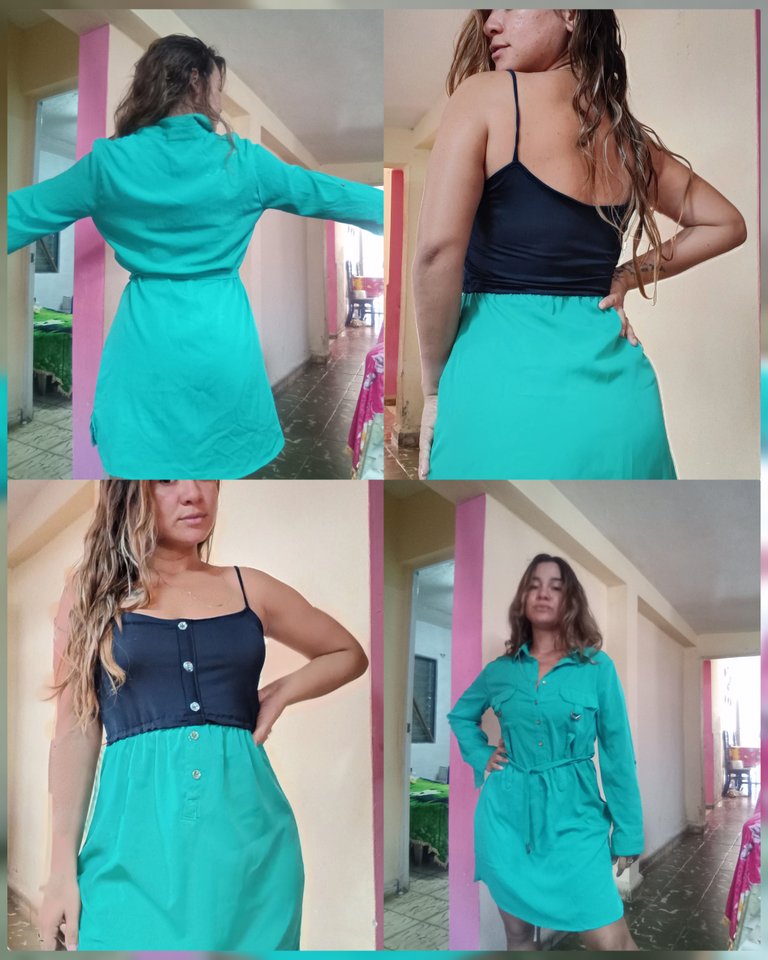
Espero que les halla gustado y les sirva de alguna ayuda este pequeño minitutorial. Pido disculpas si no se entiende bien alguna informacion, pues nos soy muy buena explicando estos procedimientos. Gracias de antemano, espero y os guste mi contenido, y agradeceria que dejaran sus lindos comentarios y se aventuraran conmigo en este proyecto.
Si les gusto este contenido, pueden seguirme, para proyectos futuros.
Bendiciones y feliz noche
🙏🏻🙏🏻🙏🏻🙏🏻🙏🏻🙏🏻🙏🏻🙏🏻🙏🏻🙏🏻🙏🏻🙏🏻🙏🏻
I hope you liked it and that this little mini tutorial will be of some help to you. I apologize if some information is not well understood, because I am not very good at explaining these procedures. Thank you in advance, I hope you like my content, and I would appreciate if you could leave your nice comments and venture with me in this project.
If you like this content, you can follow me, for future projects.
Blessings and happy night
El texto o resumen es totalmente de mi autoria.
The text or summary is entirely my own.
No podia faltar mi nena colandose en una de las fotos, jj. Ella siempre quiere ser la protagonista / Couldn't miss my baby sneaking into one of the pictures, jj. She always wants to be the protagonist...
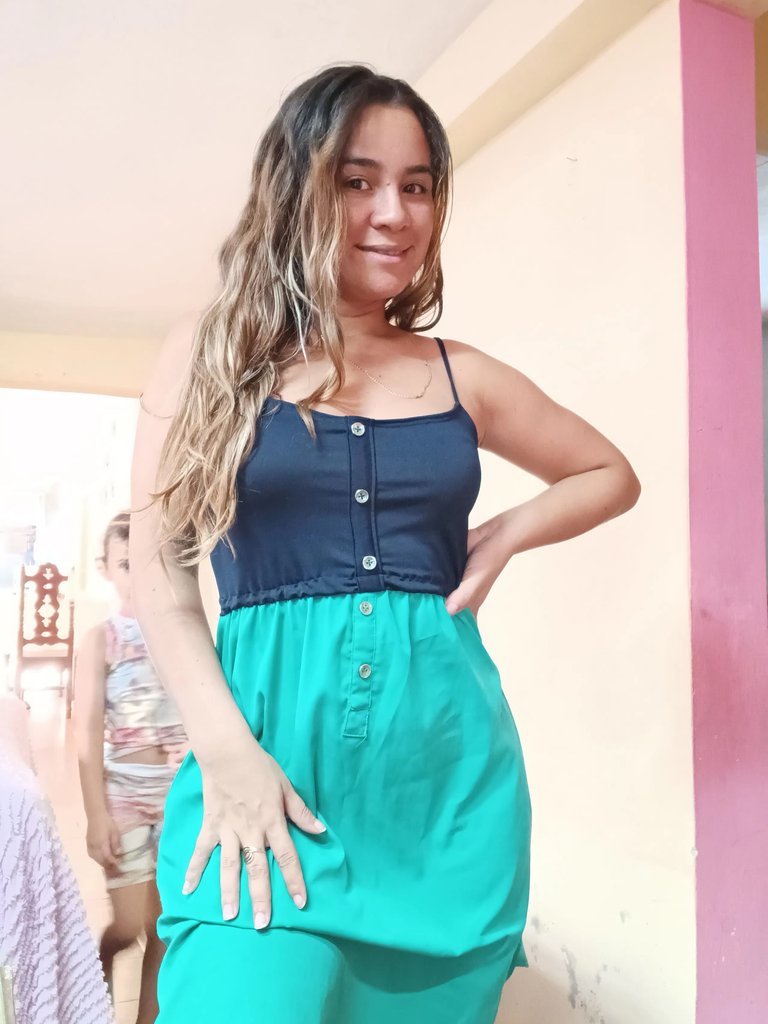
Hiciste un excelente trabajo, la combinación de colores quedó muy hermosa, es una idea excelente para aprovechar esas prendas que ya no nos gusta o que tienen algún detalle, te felicito me encantó esta transformación saludos 🥰❤️
Muchísimas gracias amiga, me alegra saber que le haya gustado. También pensé que la combinación de esas dos tonalidades les quedaría genial.
Linda transformación Amor, me gusto mucho la tonalidad de verde con negro, lindo diseño !!
Gracias amorcito. Pues si esos dos tonos quedaron geniales
Que maravilloso diseño has logrado
Estupendo!
Quedó genial
Felicidades
Muchas gracias amiga, me alegra saber que le haya gustado
It is so lovely, stylish, and beautiful. Its color and design can draw anyone's attention. It looks great. Nice work! Thanks!
Thank you so much 🙏🏻☺️
I love this transformation. It looks good on you. You are really creative. Thanks for sharing
Thank you so much 🙏🏻☺️