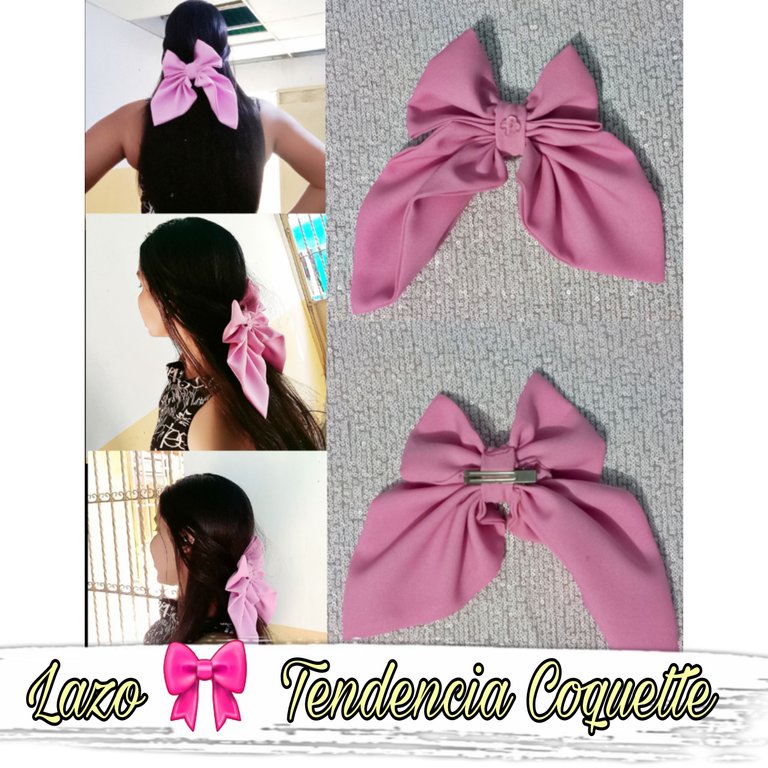
Hola, hola creativa colmena de artesanos y manualistas, que gusto saludarlos y desear que estén pasando un bendecido resto del día. El año pasado predominó mucho la moda o el estilo "Aesthetic" que su traducción al castellano vendría siendo "Estética" haciendo alusión a algo que produce una atracción o un gusto a la vista de la mamera que sea; pero ahora entró al mercado o a la industria de la moda el estilo "Coquette" Es un término francés que quiere decir coqueta, es muy femenino y romántico, aunque suele ser un poco exagerado y un tanto infaltil según opiniones, ya que la mayoría de los accesorios son lazos y moños grandes en tonos pasteles, en mi caso, yo considero este estilo tierno, delicado y muy femenino, osea, toda una damita, como cuentan los abuelos. Así que quise probar éste estilo y me hice un "Lazo coqutte en tono rosa pastel" Espero les guste.

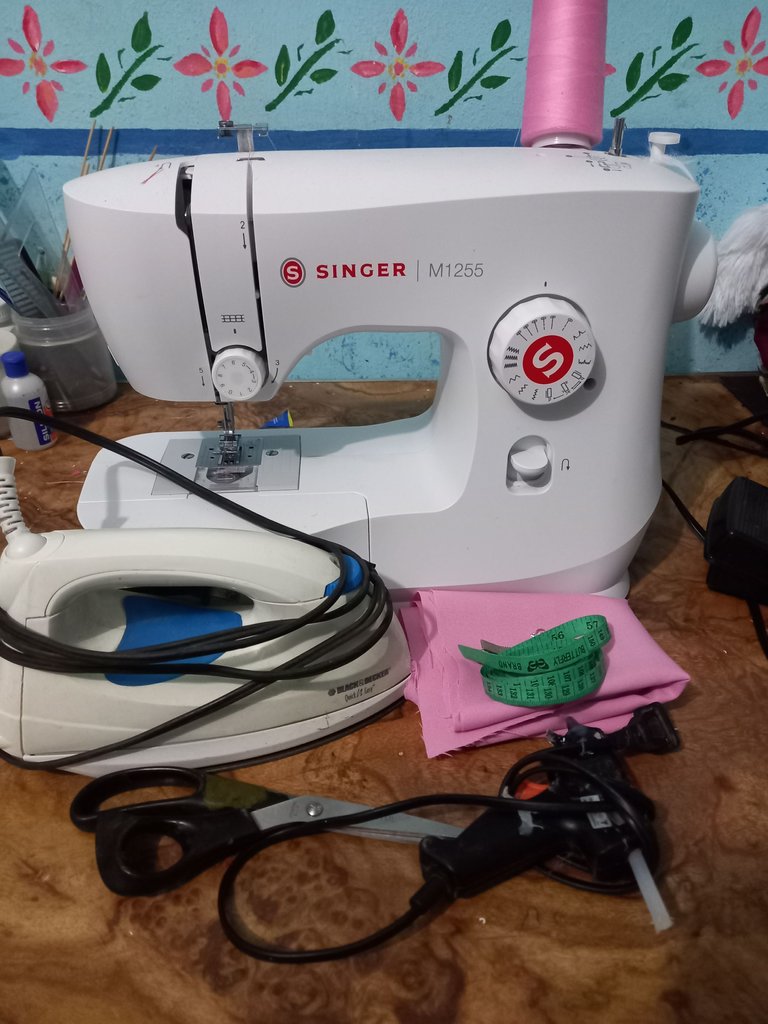
- Tela de gabardina rosa pastel.
- Cinta métrica.
- Plancha para ropa.
- Pistola de silicón.
- Botón decorativo.
- Pinza o gancho para el pelo.
- Tijeras.
- Máquina de coser(opcional)
- Pastel pink gabardine fabric.
- Tape measure.
- Clothes iron.
- Silicone gun.
- Decorative button.
- Hair clip or hook.
- Scissors.
- Sewing machine (optional).

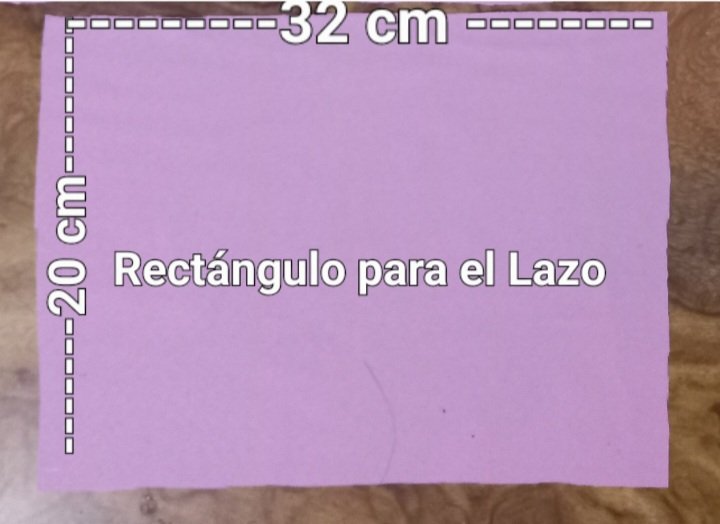
Para realizar éste lazo coquette, lo primero que hice fue sacar tres rectángulos, el primero que saqué fue de 20 cm de alto y 32 cm de largo, para el lazo.
The first thing I did was to get three rectangles, the first one was 20 cm high and 32 cm long, for the ribbon.
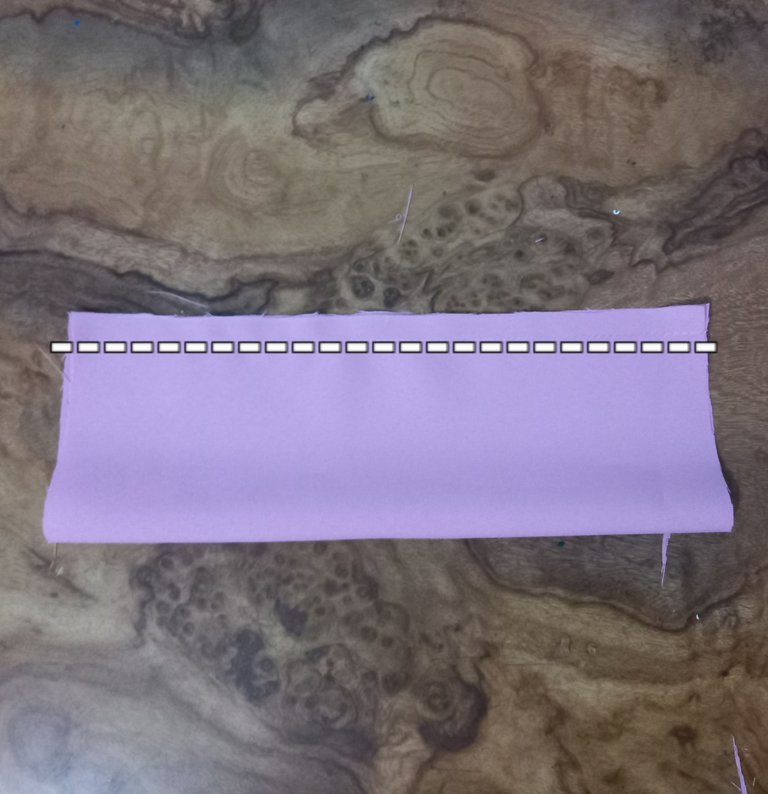
Luego uni las orillas del largo del rectángulo y los 1.5 cm de tela que quedaron sobrando, después de la costura, los abrí en dos y pasé por em medio la plancha para que quedaran acostados.
Then I joined the edges of the length of the rectangle and the 1.5 cm of fabric that was left over after sewing, I opened them in two and passed the iron through the middle so that they would lie flat.
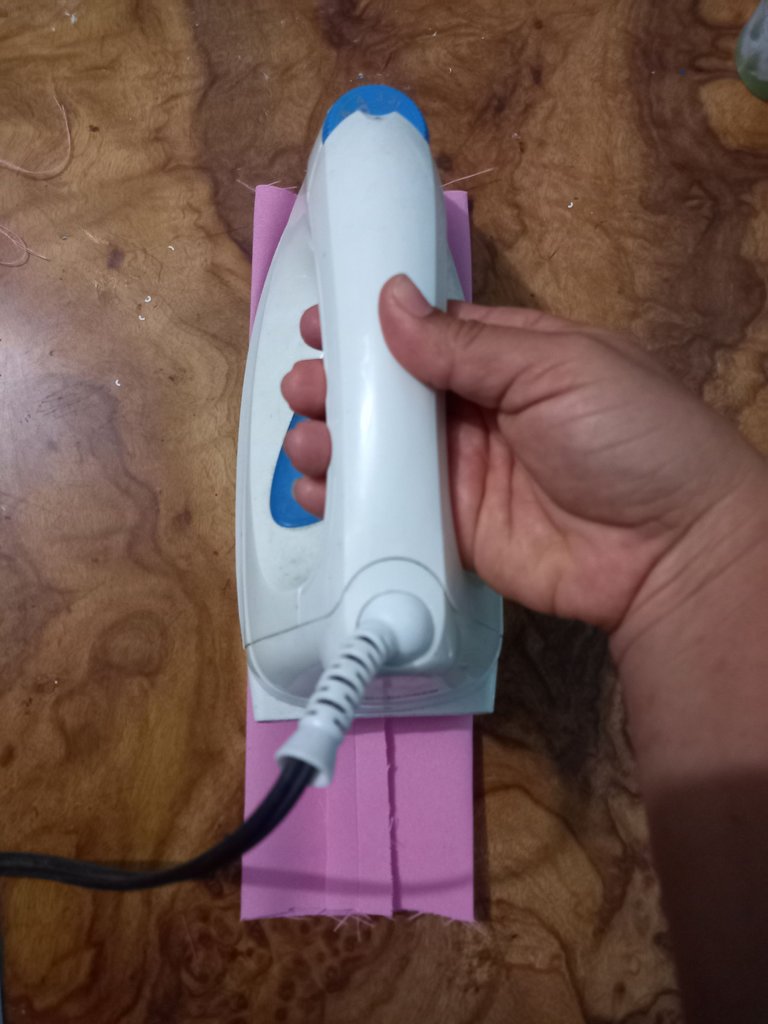
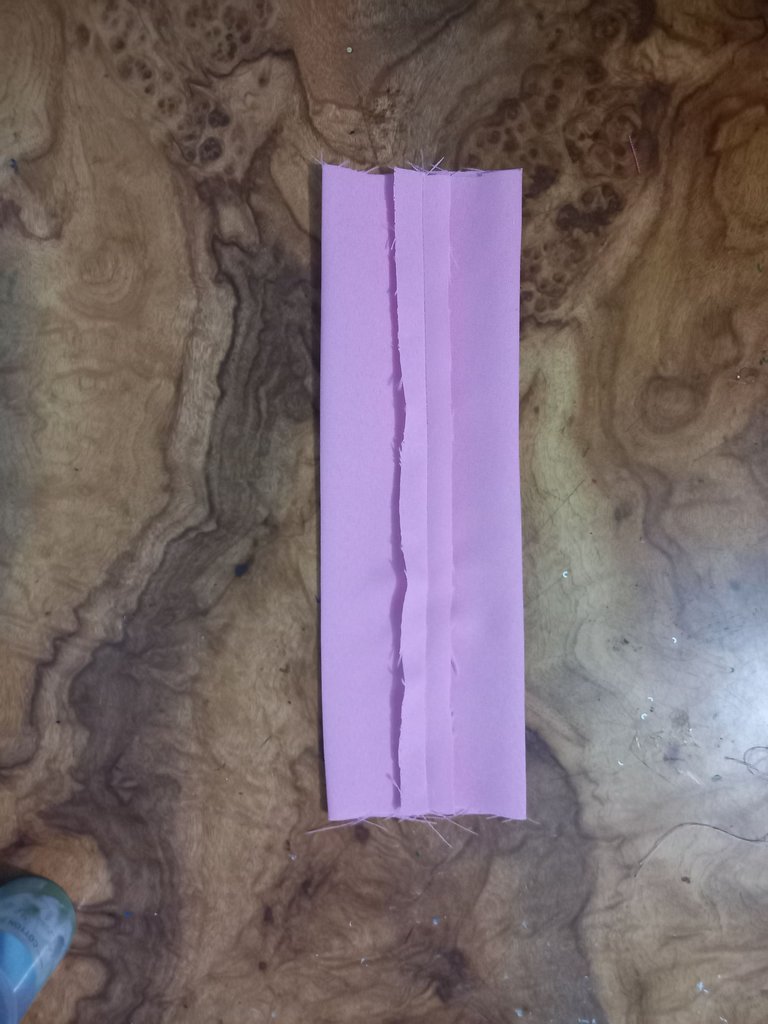
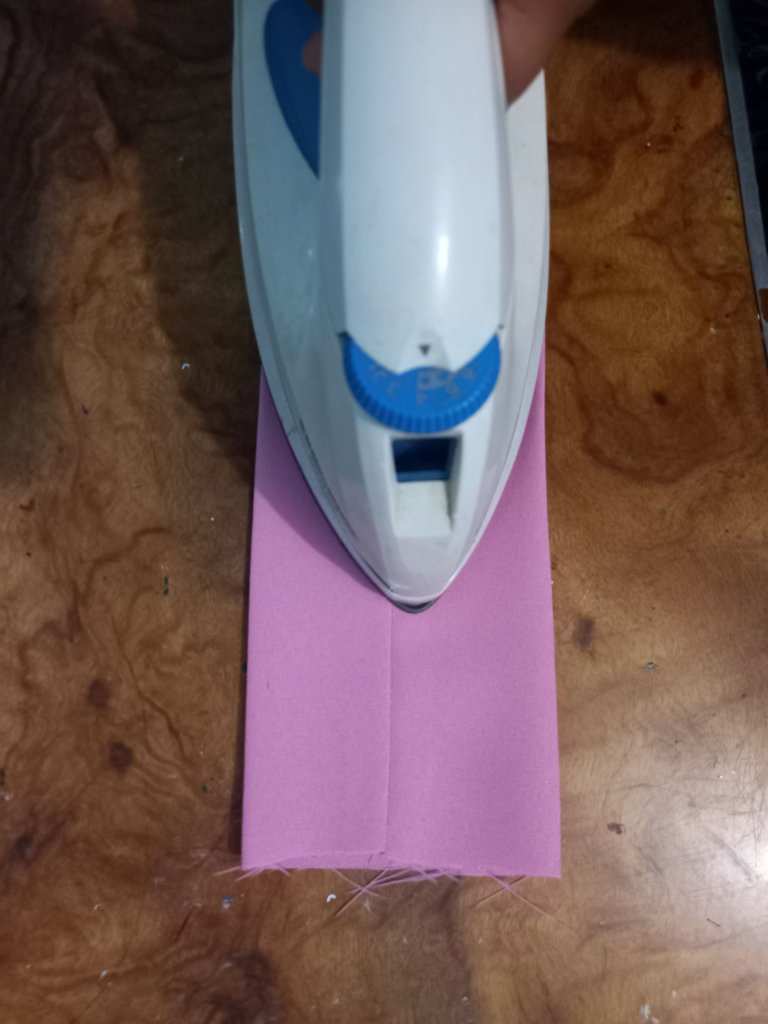
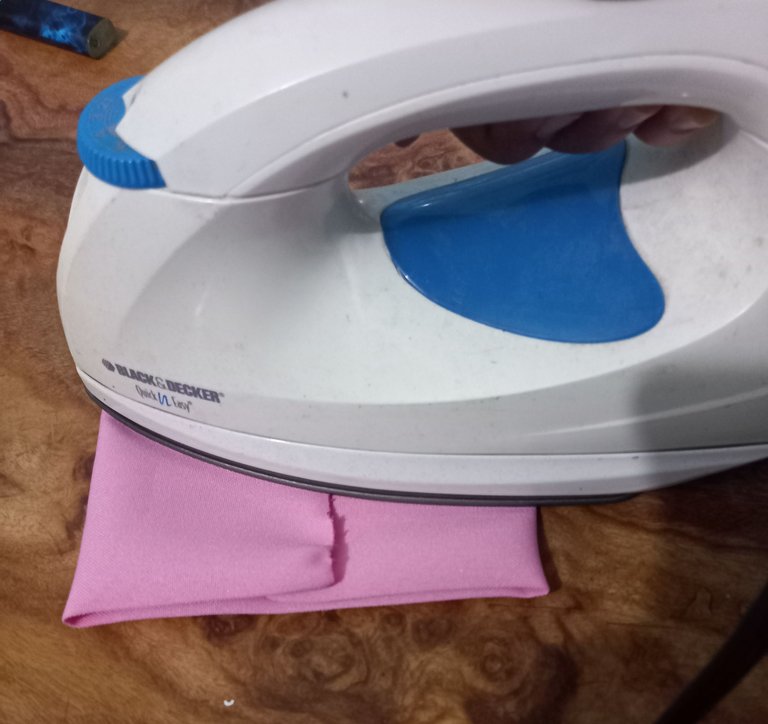
Después desdoblé el rectángulo y pasé la plancha por encima para que quede bien aplastadito y sus filos bien definidos.
Then I unfolded the rectangle and passed the iron over it so that it was flattened and its edges were well defined.
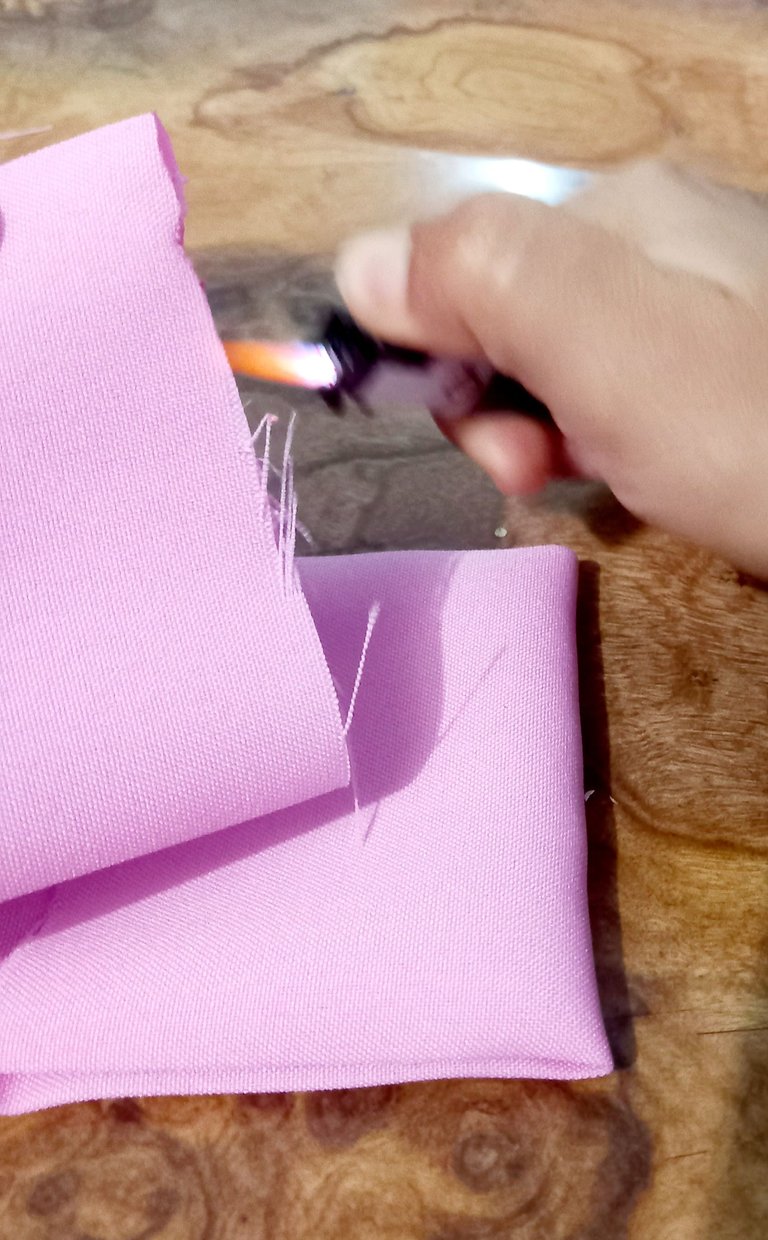
Con un encendedor quemé las orillas de los extremos del rectángulo, para que no se deshile.
With a lighter I burned the edges of the ends of the rectangle, so that it would not fray.
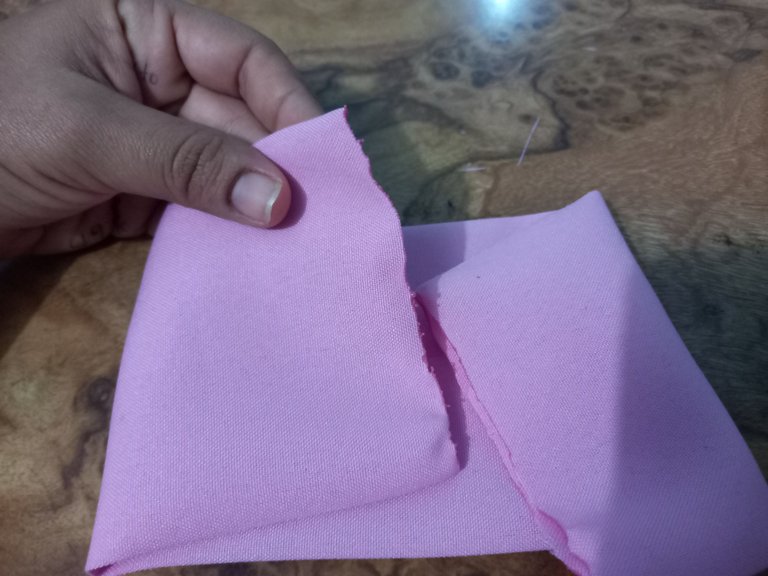
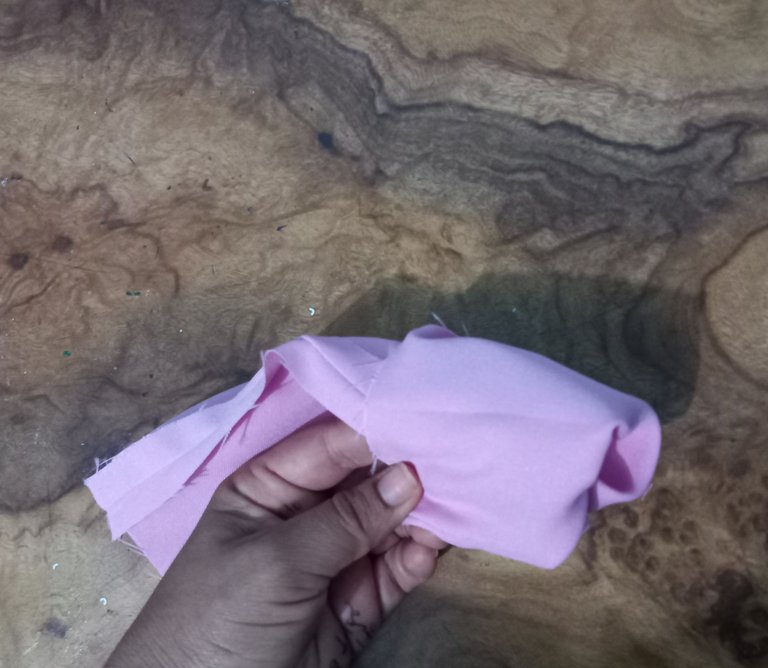
Llevé hacia el centro del rectángulo los extremos colocando uno encima del otro, planché toda la pieza tal cual, como estaba y pasé costura manual en hilván para unir estos dos puntos con el centro de la tela.
I brought the ends to the center of the rectangle, placing one on top of the other, and sewed by hand to join these two points with the center of the fabric.
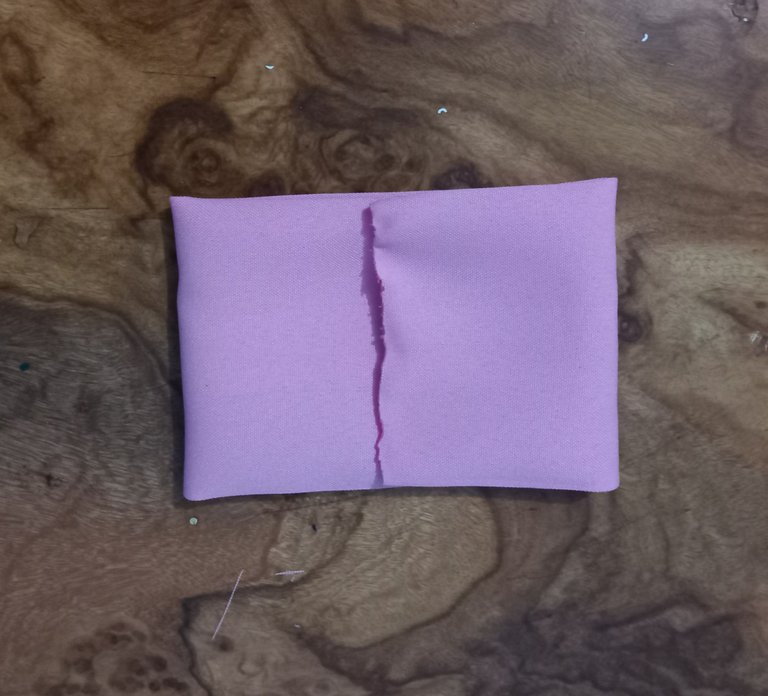
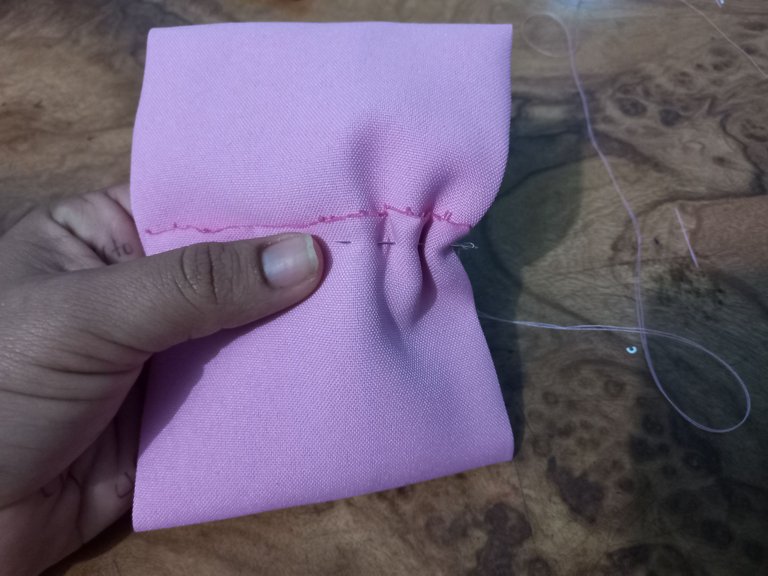
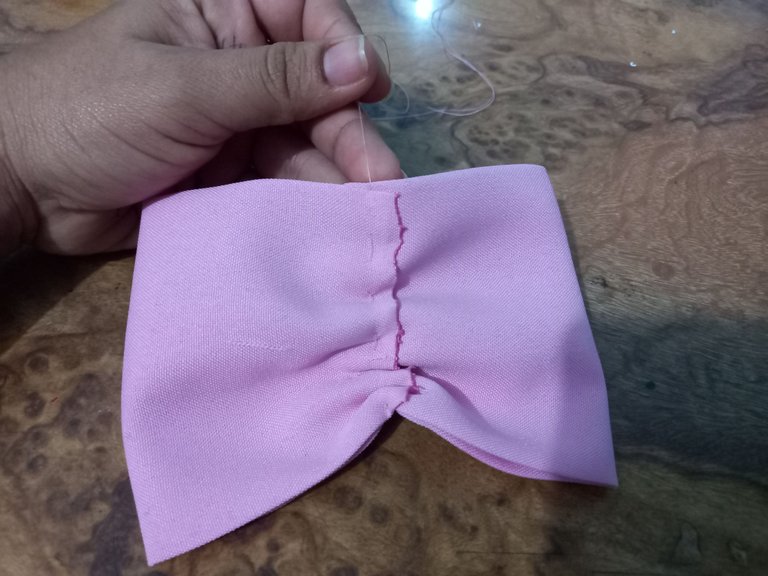
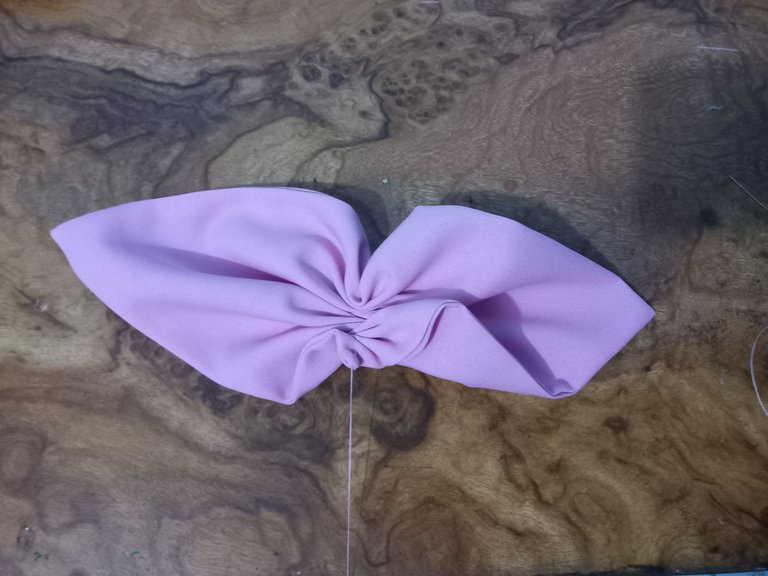
Posteriormente halé el hilo con que hice la costura en hilván para fruncir todo el centro y formar el lazo, es importante mencionar que después que fruncí el centro, aseguré el mismo, dando varias vueltas con hilo para asegurar de que éste no se suelte.
Then I pulled the thread with which I did the basting stitch to gather the whole center and form the loop, it is important to mention that after I gathered the center, I secured it, giving several turns with thread to ensure that it does not come loose.
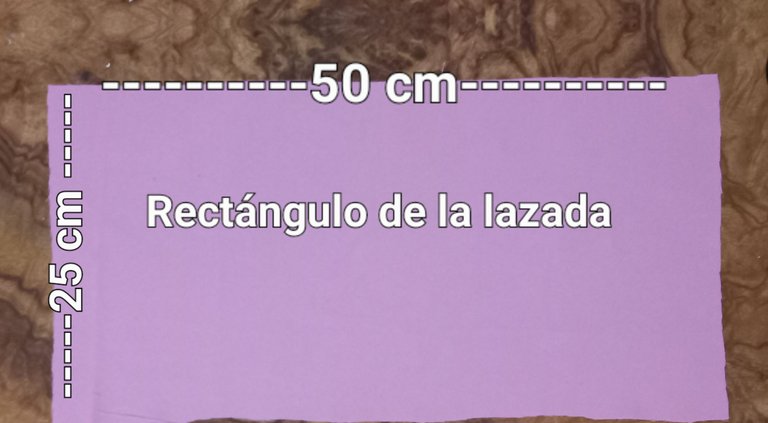
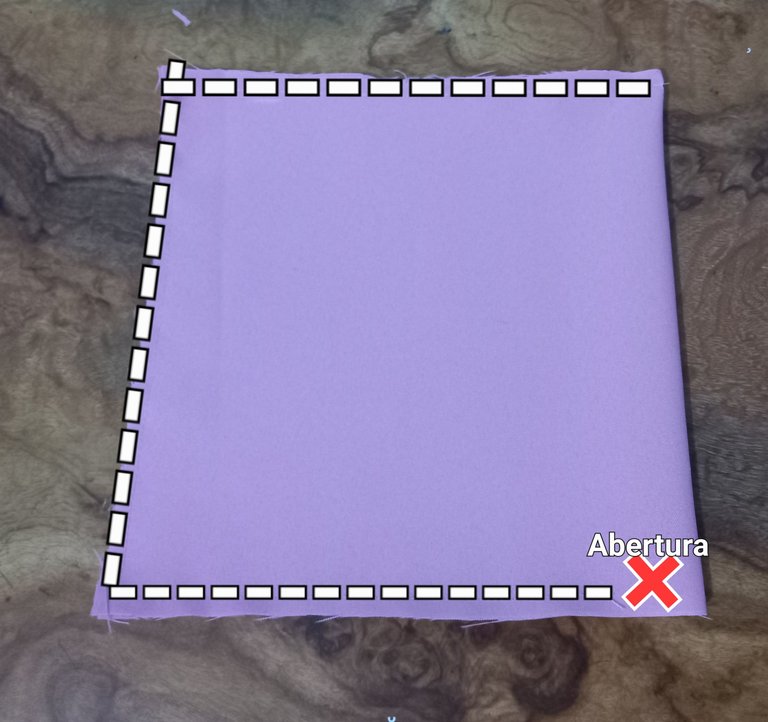
Una vez terminado el lazo, procedi a realizar la lazada, para ésta utilicé el rectángulo de 25 cm de alto y 50 cm de largo, lo doblé en dos para formar un cuadrado y cosí para unir las orillas dejando un pequeño espacio en una esquina, para desdoblar la tela.
Once the bow was finished, I proceeded to make the loop, for this I used the 25 cm high and 50 cm long rectangle, folded it in two to form a square and sewed to join the edges leaving a small space in one corner, to unfold the fabric.
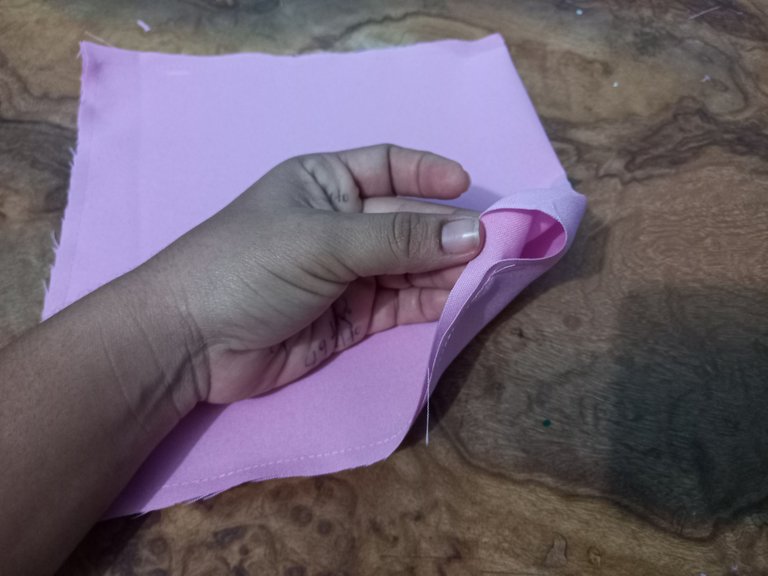
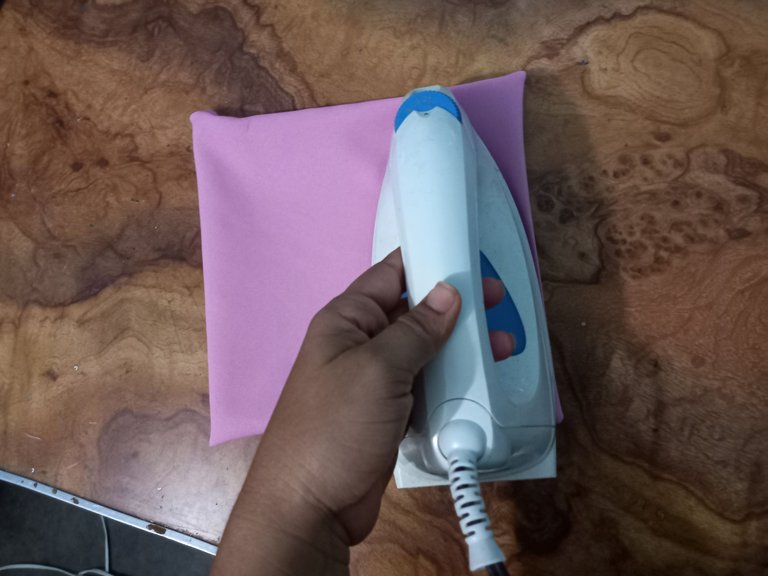
Cuando terminé de pasar las costuras por las orillas, procedí a desdoblar toda la pieza por el espacio que dejé sin costura y luego pasé la plancha por toda la pieza para darle un mejor acabado en las orillas.
When I had finished passing the seams along the edges, I proceeded to unfold the whole piece by the space I left without seams and then I passed the iron over the whole piece to give it a better finish on the edges.
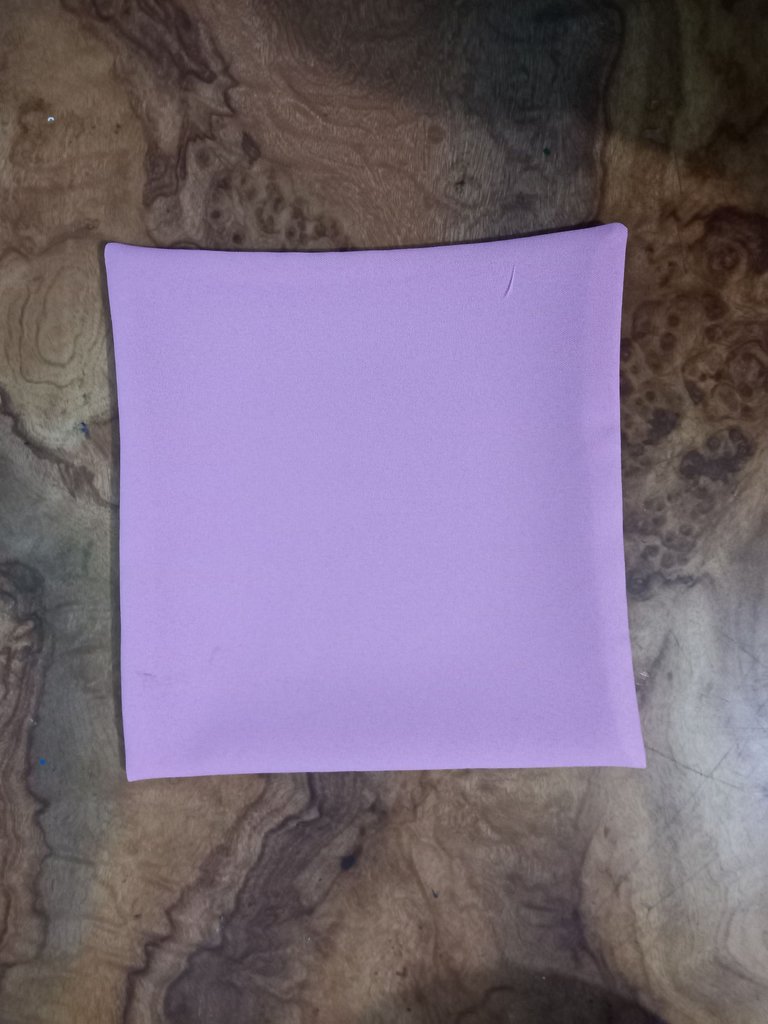
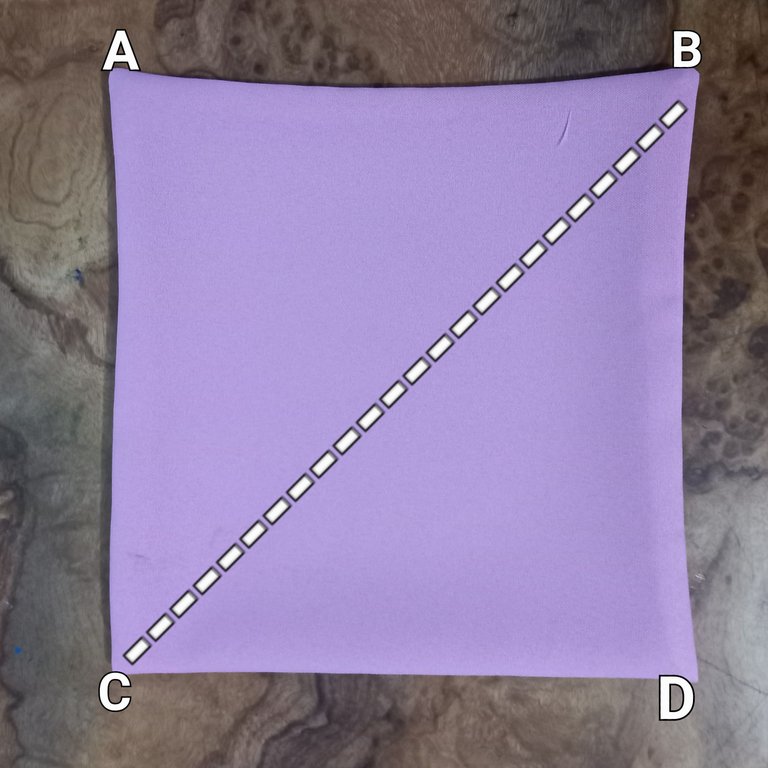
Para terminar la lazada,identifiqué las cuatro esquinas del cuadrado con letras para poder explicar éste paso, e hice una costura en hilván desde la esquina B de la abertura hacia la esquina C, frunci y aseguré.
To finish the loop, I identified the four corners of the square with letters to explain this step, and made a basting stitch from corner B of the opening to corner C, gathered and secured.
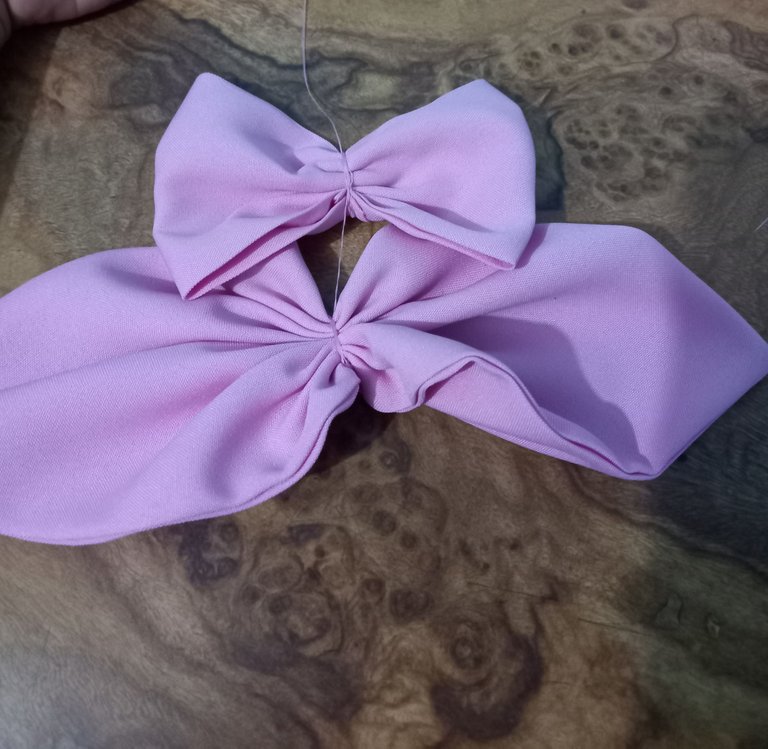
Después de haber terminado la lazada procedí, a unir el lazo con ésta, para esto hice una costura manual introduciendo por el centro de las dos piezas la aguja y aseguré.
After finishing the loop, I proceeded to join the loop with it, for this I made a manual seam introducing the needle through the center of the two pieces and secured it.
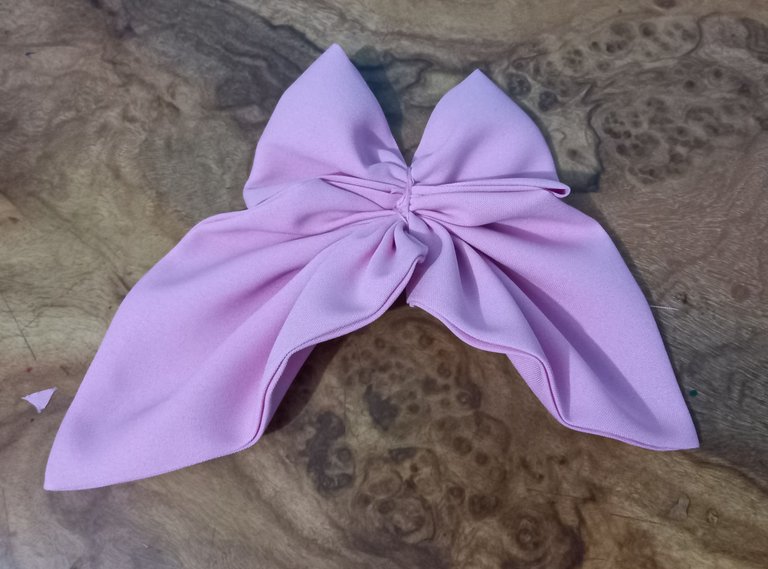
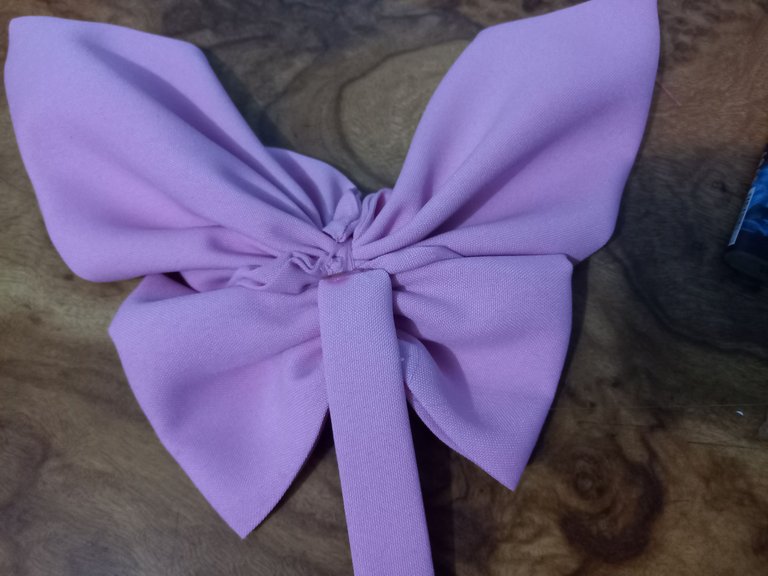
Luego corté un rectángulo de 5×12 para la cinta del centro del lazo; para armar la cinta lo que hice fue planchar hacia el centro de éste, las orillas del largo y luego doblé el centro hasta formar la cinta.
I then cut a 5×12 rectangle for the ribbon in the center of the loop; to assemble the ribbon, I ironed the edges of the length to the center of the loop and then folded the center over to form the ribbon.

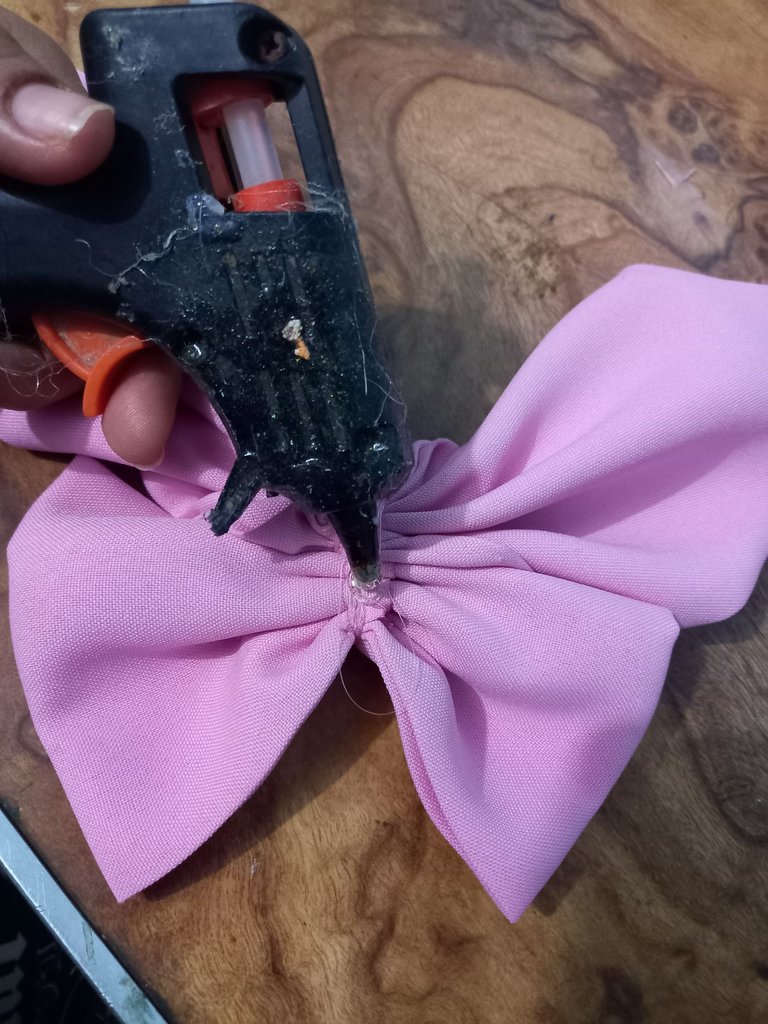
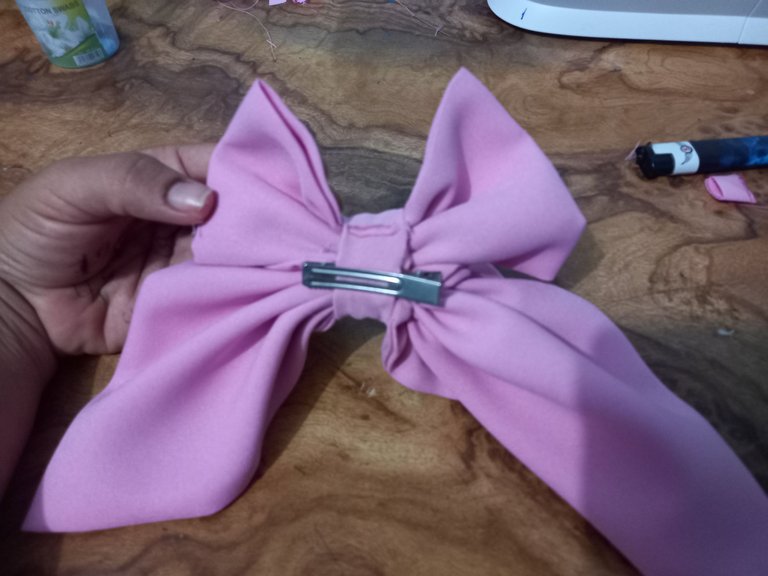
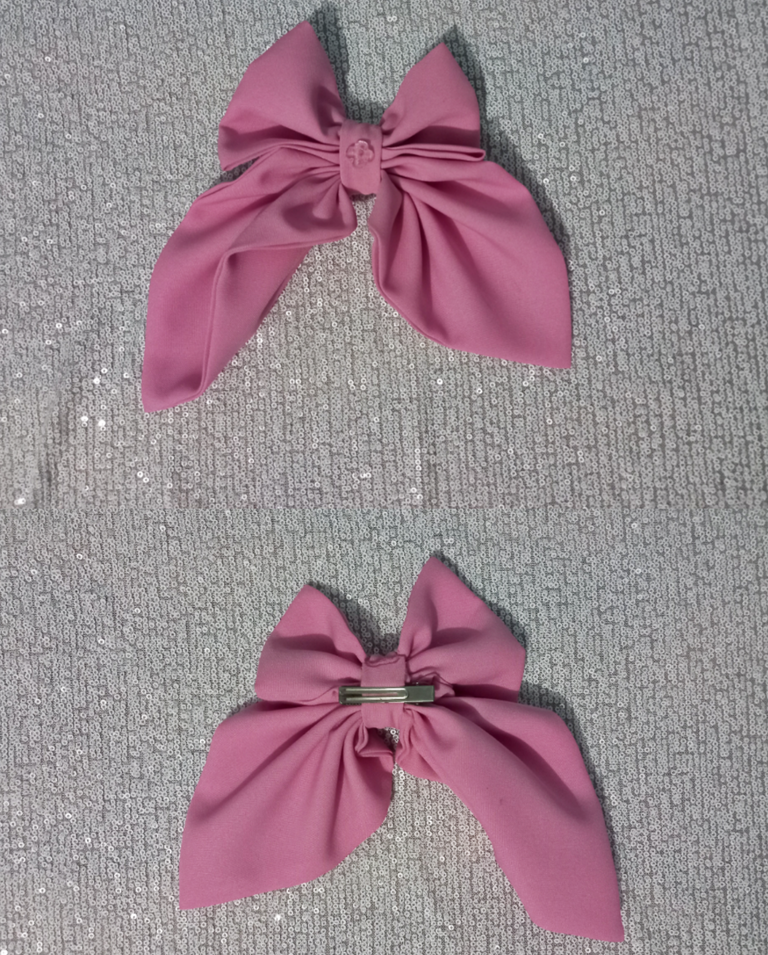
Ésta cinta la coloqué en el centro del lazo y antes de cerrar atrás, coloqué el gancho y cerré con silicón caliente.
I then cut a 5×12 rectangle for the ribbon in the center of the loop; to assemble the ribbon, I ironed the edges of the length to the center of the loop and then folded the center over to form the ribbon.
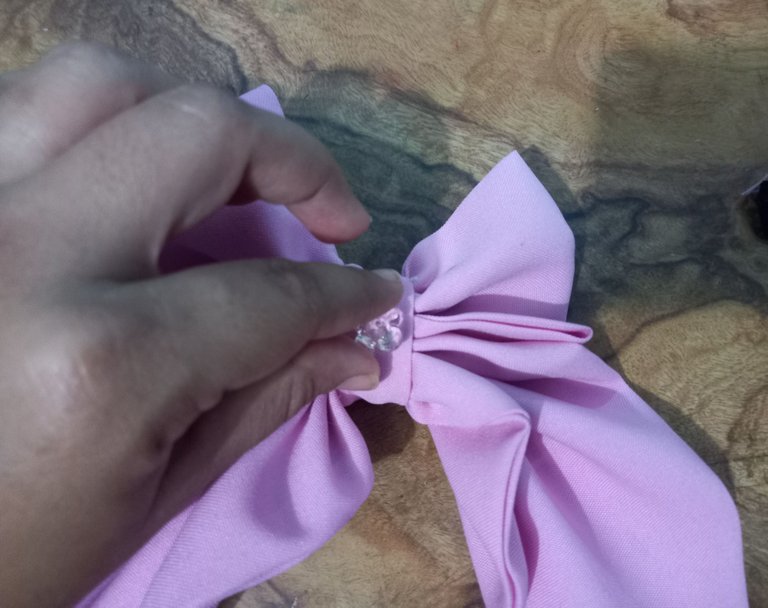
Finamente coloque un botón para adornar el centro del lazo.
Finely place a button to embellish the center of the ribbon.

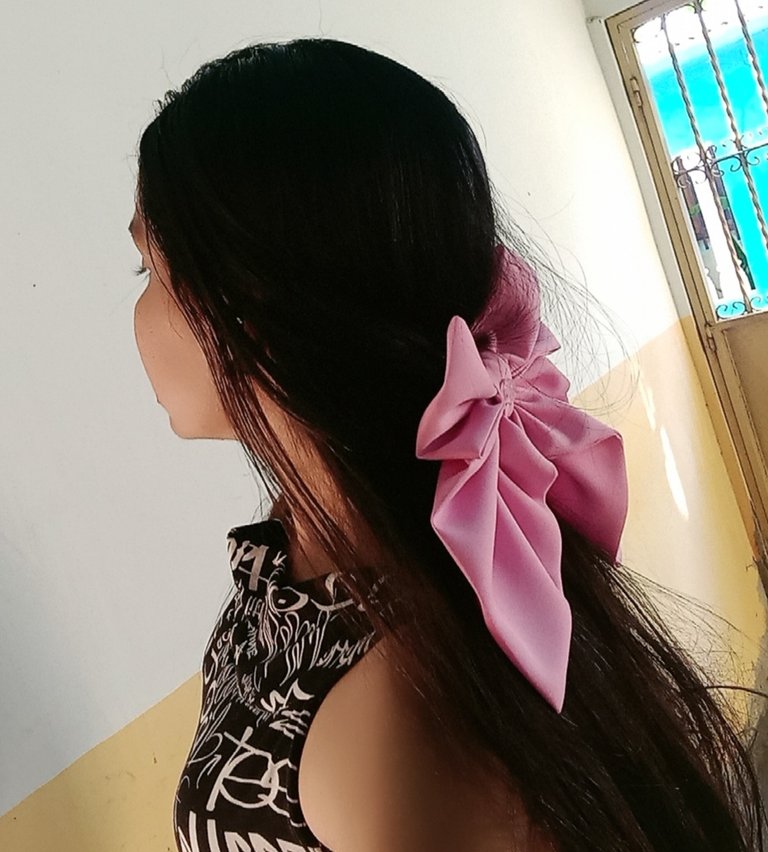
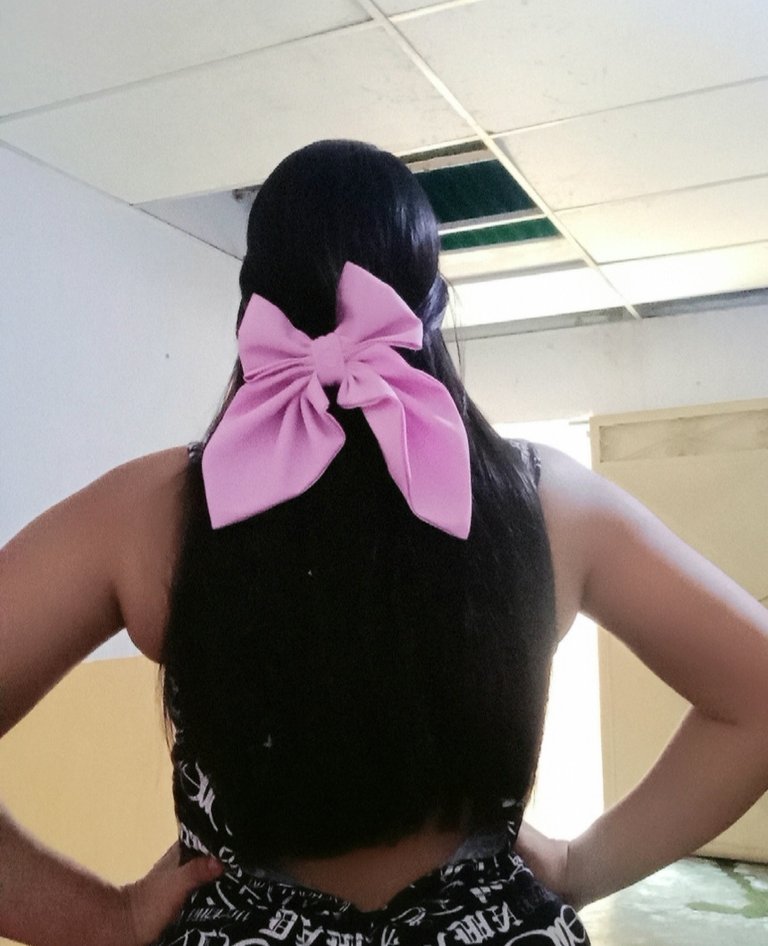
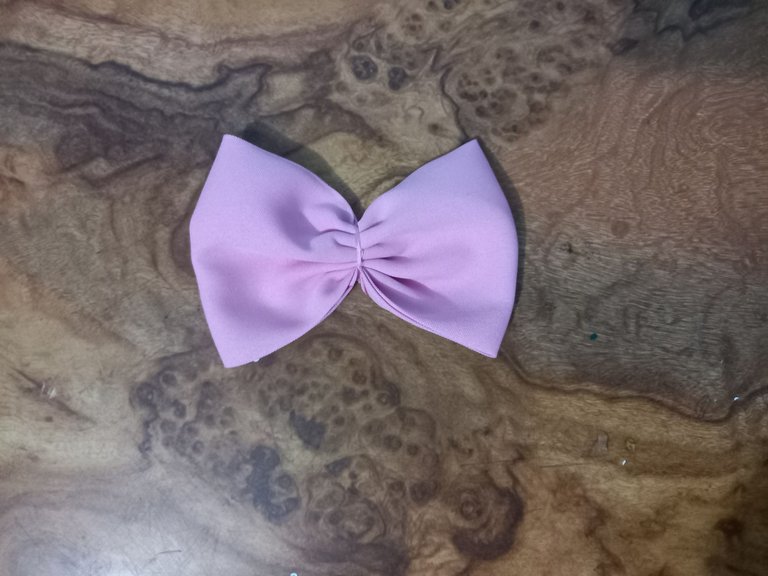
Éste ha sido el hermoso resultado de éste romántico Lazo Coquette, aplicando éstos pasos podrás obtener el tuyo y estar a la moda. Muchas bendiciones amigos 🙏🏻😊
This has been the beautiful result of this romantic Coquette Bow, applying these steps you can get yours and be fashionable. Many blessings friends 🙏🏻😊
Fotos de mi auditoria
Ediciones: Picsar
Photos of my audit
Editions: Picsar
That is a lovely bow, that would fit sny attire. Nice.
Gracias estimados @diyhub, tienes toda la razón, quedaría muy bien con cualquier atuendo, es un accesorio versátil. Gracias por el apoyo 😊🙏🏻
¡¡¡Buen trabajo!!! Gracias por publicar tu excelente contenido en Hive Diy.
Es de mucha motivación leer su comentario en mi publicación amigos de @hive-130560 y saber que ha sido bien recibido en en ésta creativa colmena. Muchas bendiciones 🙏🏻🤗