Very good afternoon on Monday, I wish you all here, in this community full of countless pure talents, who in one way or another send us their beautiful creations and in turn inspire us to make our own, today I show you, How to Make a cute and decorative organizer box made using cardboard and useful material, ideal for maintaining order in spaces where it is necessary to use different materials and facilitating its location, follow me read me and you will see, step by step how it is done.
Muy buena tarde del día lunes deseo tengan todos por acá, en esta comunidad llena de infinidad de talentos puros, que de una o otra manera nos hacen llegar sus lindas creaciones y a su vez nos inspiran a hacer las propias, hoy les muestro, Como Hacer una Linda y decorativa Caja organizadora hecha usando Cartón y material de provecho, ideal para mantener el orden en los espacios donde sea necesario usar diferentes materiales y facilitando su ubicación, sigueme léeme y verás, paso a paso cómo se hace
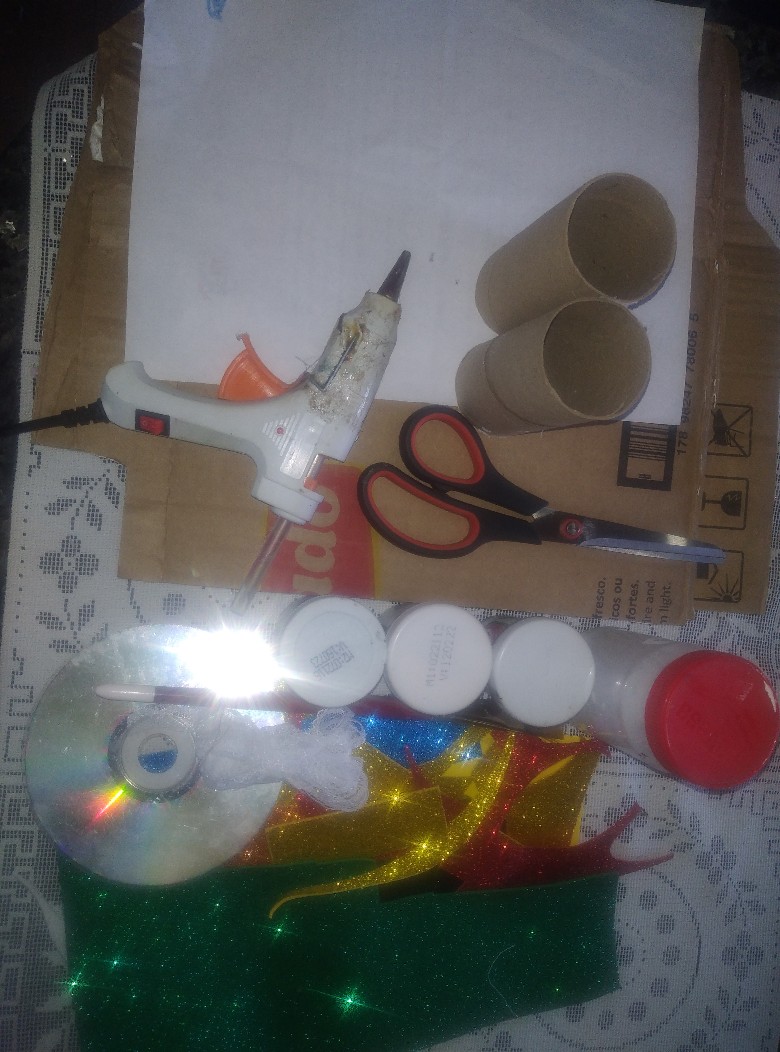
Materials/Materiales.
Paperboard.
. Foami cutouts different colors.
. paper to recycle
. Paint colors (yellow, black, brown.)
. brush
. black color marker
. Two tubes of toilet paper
. A CD
. white lace
. pencil to mark
. scissors
. hot silicone.
. Cartón.
. Recortes de foami diferentes colores.
. Papel para reciclar
. Pinturas colores( amarillo, negro, marrón.)
. Pince
. Marcador color negro
. Dos tubos de papel higiénico
. Un cd
. Encaje color blanco
. Lápiz para marcar
. Tijer
. Silicón caliente
Steps//Pasos.
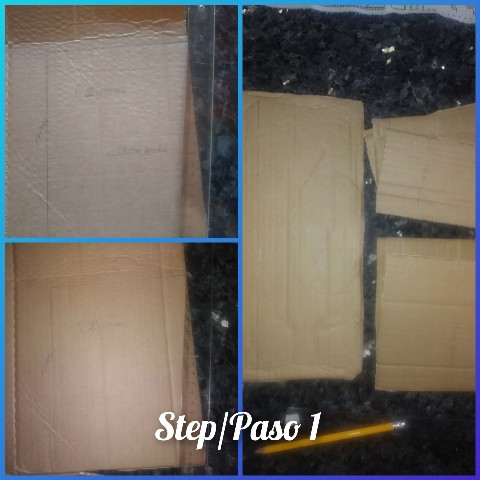
1.) Frame and cut out two pieces of cardboard 15cm wide by 19cm long, three pieces 9cm wide by 19cm long and one piece 30cm wide by 19cm long.
1.) Marco y recortó en el cartón dos piezas de 15cm de ancho por 19cm de largo,tres piezas de 9cm se ancho por 19 cm de largo y una pieza de 30cm de ancho por 19cm de largo.
2.) Applying silicone before I assembled the box, I lined it completely with the paper to be recycled and I applied cold yellow paint and let it dry for the necessary time.
2.) Aplicando silicón ante armó la caja, la forro completamente con el papel para reciclar y aplico pintura al frío color amarillo y dejo secar por el tiempo necesario.

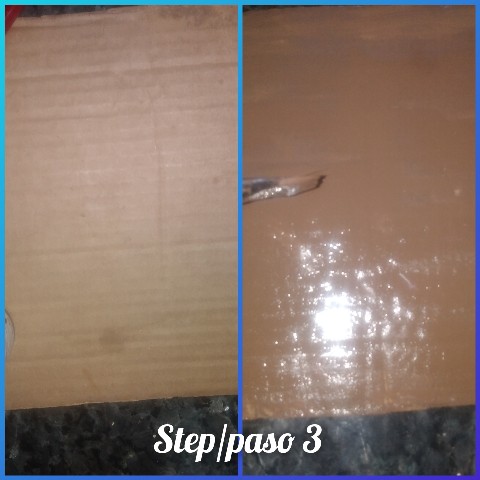
3.) I apply paint on both sides to the piece of cardboard 30cm wide by 19 long and let it dry.
3.) Aplico pintura por ambos lados a el trozo de cartón de 30cm de ancho por 19de largo y dejo secar.
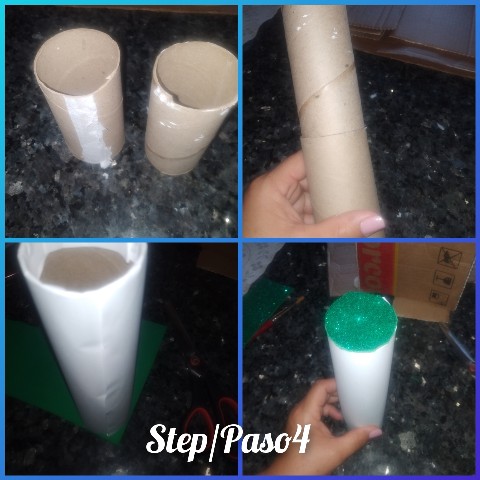
4.) I put plenty of silicone and join the two tubes of toilet paper, I line it with recyclable paper and to cover the holes I glue green foami.
I apply yellow paint.
4.) Pongo abundante silicón y uno los dos tubos de papel higiénico, la forro con papel reciclable y para tapar los orificios pego foami color verde.
Aplico pintura color amarillo.
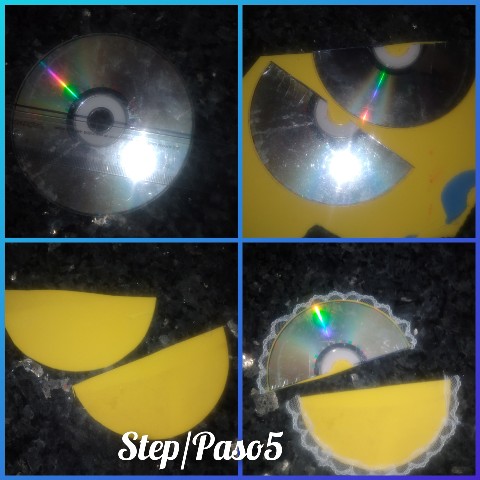
5.) Frame in equal parts and cut the cd, then I apply glue and cover with yellow foami and I glue lace around both pieces.
5.) Marco en partes iguales y corto el cd, luego aplico pegamento y forro con foami color amarillo y a ambas piezas pego encaje por el alrededor.
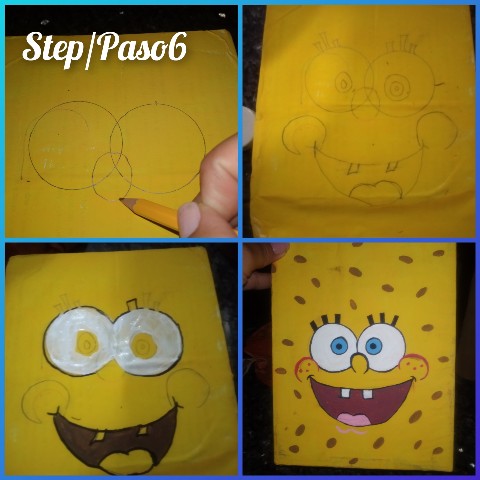
6.) I'm done drying the box and after applying two coats of yellow paint, I begin with a pencil to mark using an image of Spongebob as a reference to his face and apply the corresponding paint to it. I make several brown marks backing the entire body of the box with black.
6.) Listo el secado de la caja y después de aplicar dos manos de pintura amarilla, comienzo con lápiz a marcar usando una imagen de bob Esponja como referencia su cara y aplico la pintura correspondiente a la misma. Hago varias marcas marrones respaldando con negro a todo el cuerpo de la caja.
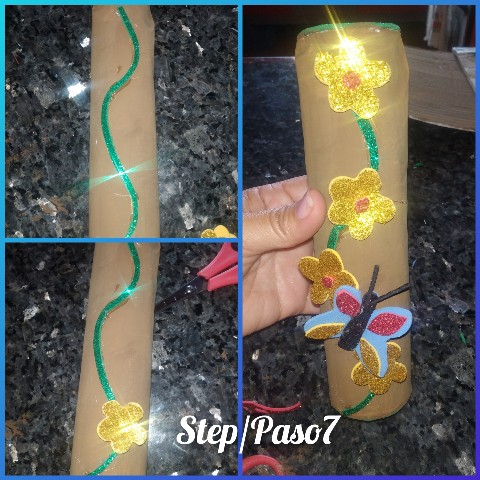
7.) I dry the toilet paper tube, cut a very thin strip of frosty green foami and glue it on the tube giving the appearance of a branch and paste several flowers that I have marked and cut out in foami and a pretty butterfly.
7.) Seco el tubo de papel higiénico, corto una tira muy delgada de foami color verde escarchado y pego sobre el tubo dando aparecencia de una rama y pego varias flores que he marcado y recortado en foami y una linda mariposa.
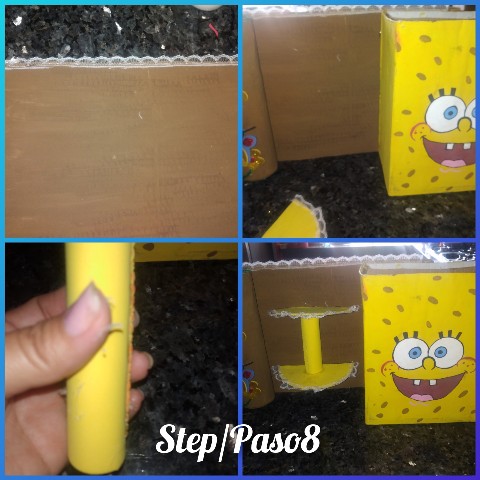
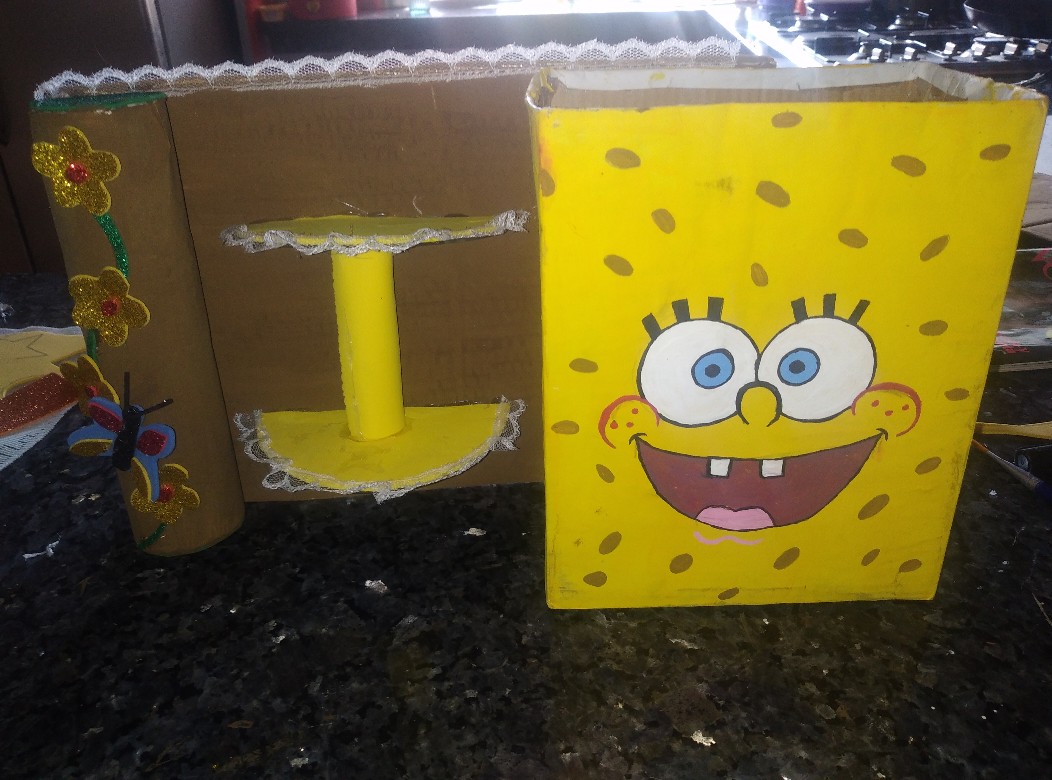
8.) I glue the edge to the cardboard and start to glue the pieces built in the previous steps, first I glue the box to one end and the decorated toilet paper tube to the other and in the middle of them the pieces of cd, to form a kind of compartment, but first I make a yellow foam tube and put it in the middle of the compartments to give more security and support.
8.) Pego encaje por los borde a el cartón y comienzo a pegar las piezas construidas en los pasos anteriores, primero pego en uno de los extremos la caja y en el otro el tubo de papel higiénico decorado y en medio de ellos los trozos de cd, para formar una especie de compartimiento, pero antes hago un tubo de foami color amarillo y metí en el medio de los compartimientos para dar más seguridad y soporte.
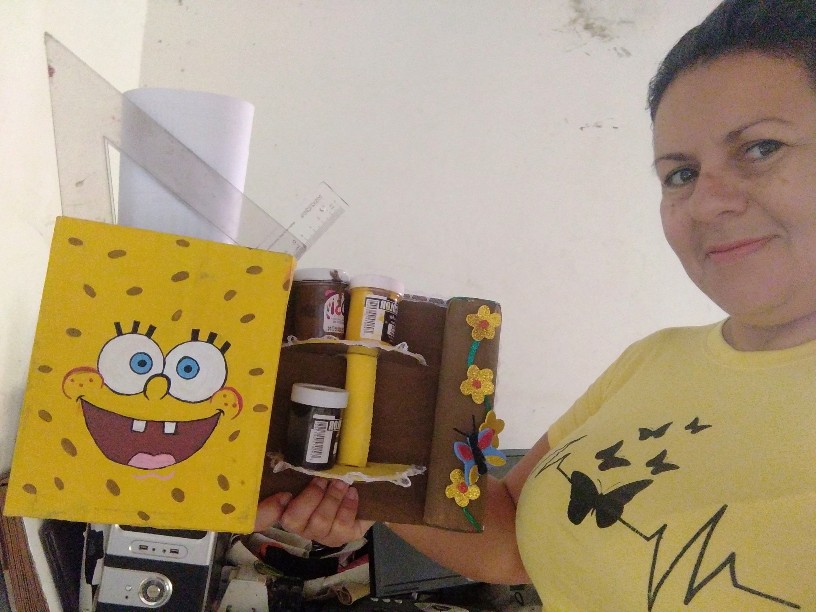
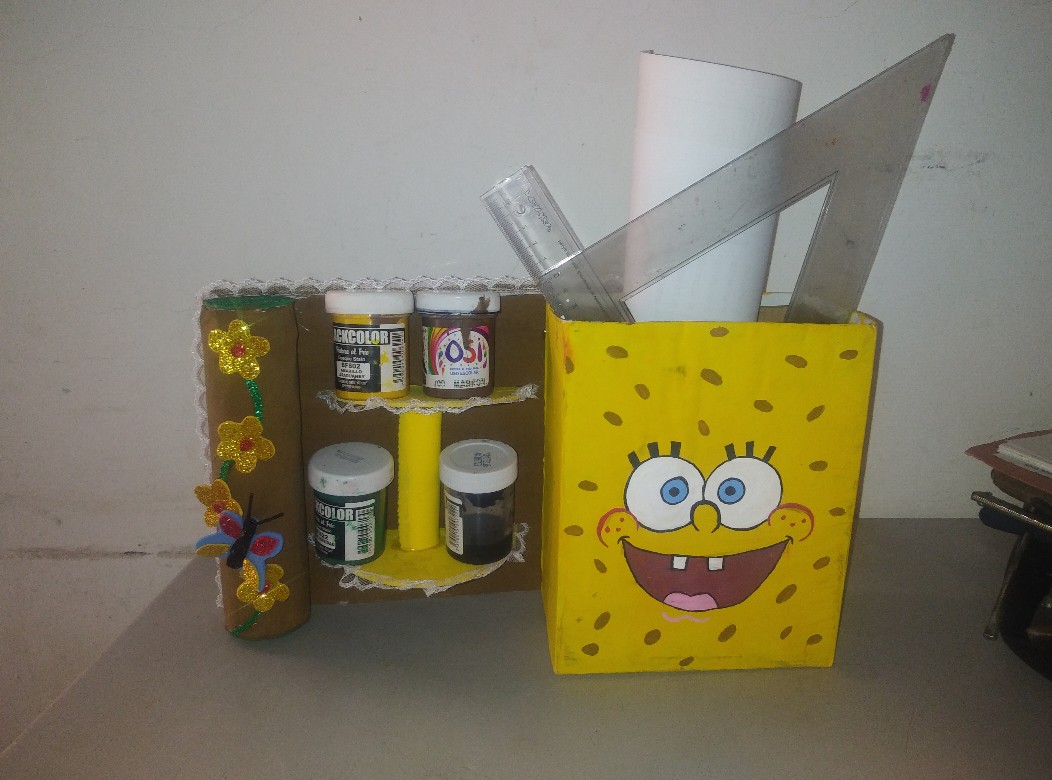
The organizing boxes are extremely important and useful since they allow us to maintain order in the spaces of our home, office or any other, it also makes it easier to locate our materials faster./Las cajas organizadoras son de suma importancia y utilidad ya que nos permite mantener el orden en los espacios de nuestro hogar, oficina o cualquier otro, además facilita ser mas rápida la ubicación de nuestros materiles.
Here I show you the finished work./Aquí les muestro el trabajo terminado.
. Use Reference Image.) Use Imagen de referencia.

. All photos are owned by me all with the smartphone
. Use Incollage, to show the step by step.
Use google translate.
. Todas las fotos son de mí propiedad todas con el teléfono inteligente
. Use Incollage, para mostrar el paso a paso.
Use traductor Google.
I appreciate you visiting my blog, until a soon publication./ Agradezco hayas visitado mí blog, hasta una pronta publicación.
Hola Kati, este Organizador de Bog Esponga quedo magnifico, me gusto mucho. Exitos y feliz dia.
Gracias cariño
Muy bello tu trabajo 😍. Gracias por compartir.
Muy linda y con bastante detalles. Me encantó. Ideal para organizar nuestros materiales de manualidades.
Gracias por dejarnos ver el diseño. Saludos.
Gracias, me alegra te haya gustado.