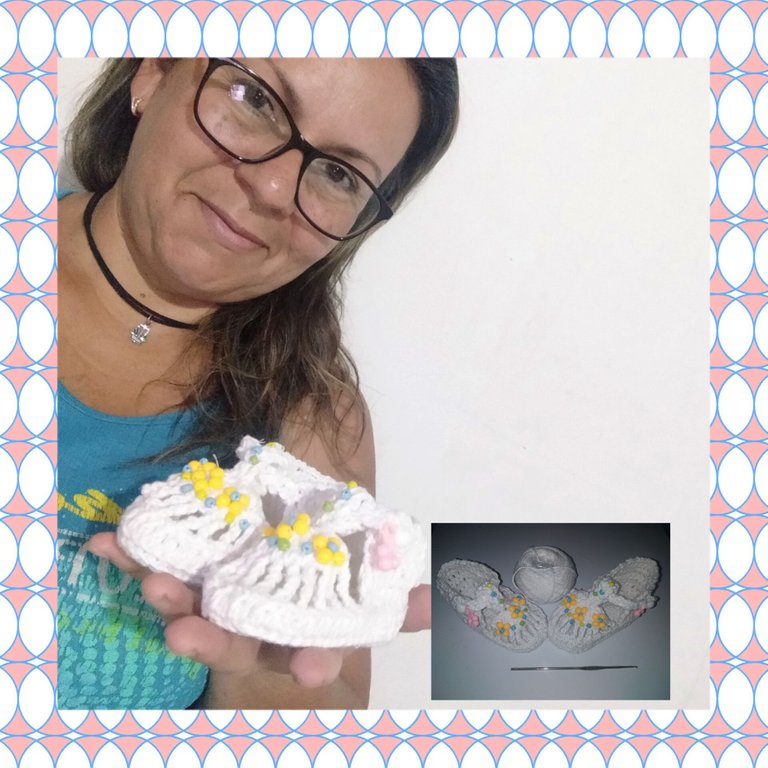
Hello everyone, have a great week dear hivers, it is a pleasure to be at @hivediy today, showing you a very simple tutorial, where I will show you how to make beautiful and elegant sandals, for the smallest princesses in the house, ideal for make them shine at any time and occasions
Showing off her cute little feet and making her look very striking. I invite you to follow me until the end, I hope you enjoy it and it inspires you to make some for your princesses.//
Hola a todos,que está sea una gran semana queridos hivers, es un placer estar hoy en @hivediy, mostrandoles un muy sencillos tutorial, dónde les mostraré cómo hacer unas hermosas y elegantes Sandalias, para las más pequeñas princesas de la casa, ideal para hacerlas lucir en cualquier momento y ocasiones
Haciendo lucir sus piecitos lindos y hacerla ver muy llamativas. Les invito a seguirme hasta el final, espero lo disfruten y los inspiren a hacer unos para su princesas.
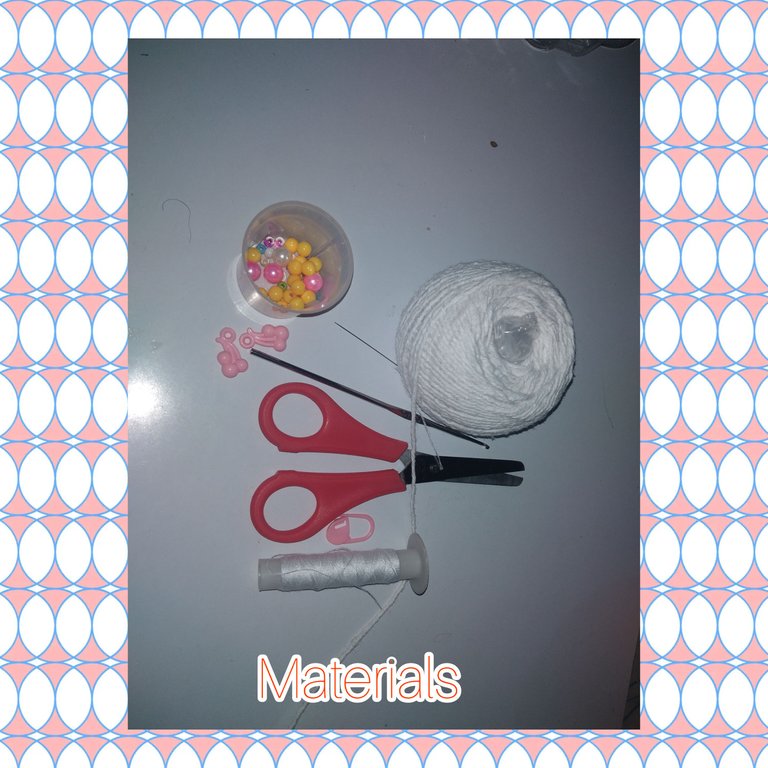
Materials/Materiales
White pavilo thread.
. Knitting needle
. White pearl buttons.
. Green, blue and yellow beads.
. Medium yellow beads.
. Needle and thread.
. Pink charms.
. Scissors
. Separator.//
. Hilo pavilo de color blanco.
. Aguja de tejer
. Botones perlados de color blanco.
. Chaquiras de color verde, azul y amarillas.
. Cuentas medianas de color amarillo.
. Aguja e hilo.
. Dijes rosados.
. Tijeras
. Separador.
Step/Pasos
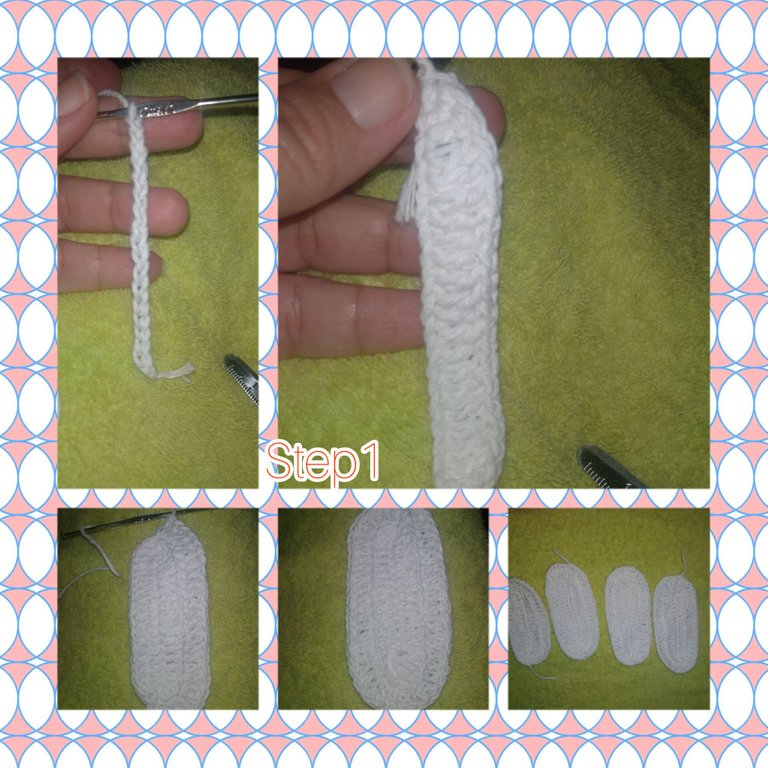
1.) I will start, knitting 20 chain stitches, I raise two more chain stitches, I take a yarn over and I introduce the needle in the chain stitch n20, and thus I repeat once more and I make an increase of three consecutive treble crochets at the ends, continue and knit a double crochet in each chain stitch, when I reach the next end, I increase three double crochets, and weave the next side, ending with a double crochet. I knit a second round, I will start by knitting two double crochets in each double crochet, that is, now, I will knit six increase stitches. In this way, I continue and weave a total of four templates of equal measurements.
1.) Iniciaré, tejiendo 20 puntos cadenas, levanto dos puntos cadenas más, tomo lazada e Introduzco la aguja en el punto cadena n20, y así repito una vez más y hago un aumento de tres puntos altos consecutivos en los extremos, continuo y tejo un punto alto en cada punto cadena, al llegar al siguiente extremo, hago el aumento de tres puntos altos, y tejo el siguiente lado, terminando con punto corrido. Tejo una segunda vuelta, comenzaré tejiendo dos puntos altos en cada punto alto, es decir ahora, tejere seis puntos de aumento. De esta manera, continuo y tejo un total de cuatro plantillas de igual medidas.
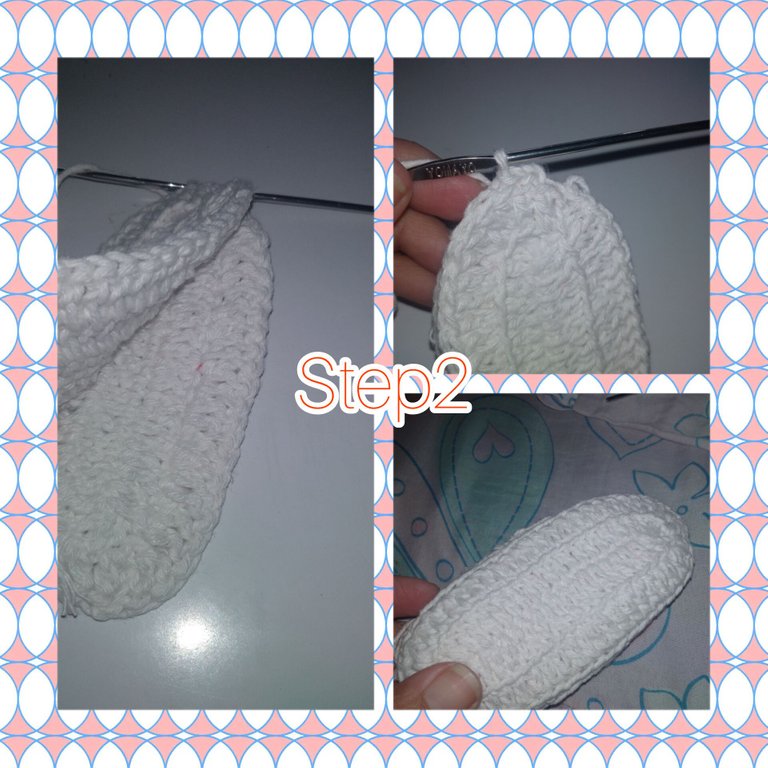
2.) Now, in this step I will join, placing two templates in a group and making the route, around the slipped stitch, starting from the middle of the template, where in the following steps I will begin to knit the front part of the Sandal.
2.) Ahora, en este paso unire, colocando en grupo de dos plantillas y haciendo el recorrido, por su alrededor de punto deslizado, comenzando desde la mitad de la plantilla, dónde en pasos siguiente comenzaré a tejer la parte delantera de la Sandalia.
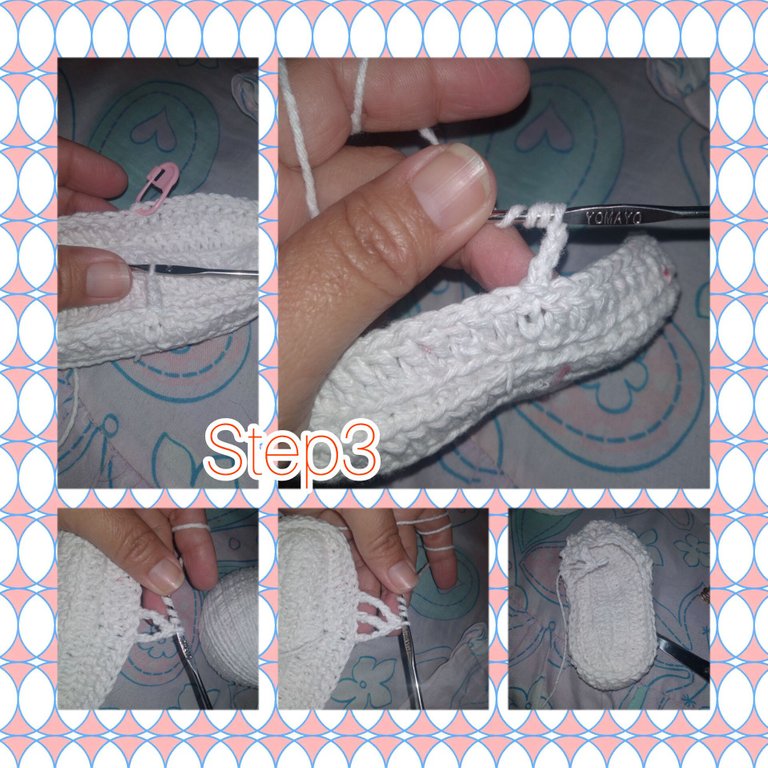
3.) Glued the templates, in a group of two, I will do a double crochet round, after the slipped stitches from the previous round. Arrived at the starting point, I close with a slip stitch and raise five chain stitches. Raised the five chain stitches, I will mark the other side with the spacer, to maintain the distance between the sides. I will take four yarn overs, leave a space and pick up a triple stitch, and thus, leaving a space between each stitch, I make the route, until I reach the separator.
3.) Pegadas las plantillas, en grupo de dos, daré una vuelta de puntos altos, luego de los puntos deslizados de la vuelta anterior. Llegado a el punto de partida cierro con punto deslizado y levanto cinco puntos cadenas. Levantado los cinco puntos cadenas, marcare con el separador el otro lado,para mantener la distancia entre los lados. tomaré cuatro lazadas, dejo un espacio y levanto un punto triple, y asi dejando un espacio entre cada punto, hago el recorrido, hasta llegar al separador.
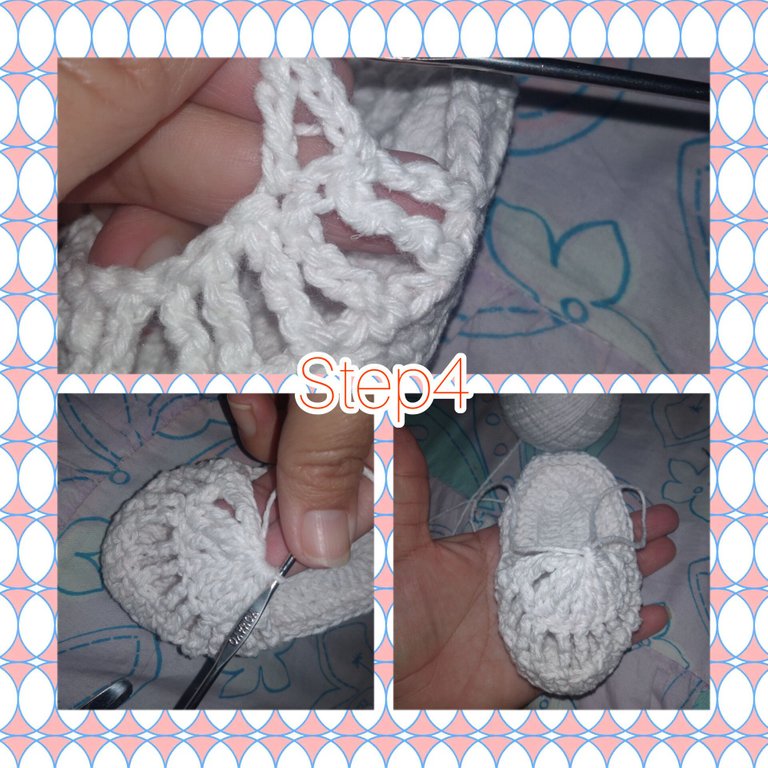
4.) I will circle the knitting, pick up three chain stitches and go around, inserting the knitting needle into each gap from the previous row, without completely sawing through the loops. Ready the tour I close together, leaving a kind of arc
4.) Daré vueltas a el tejido, levanto tres puntos cadenas y recorreré, introduciendo la aguja de tejer en cada espacio de separación de la vuelta anterior, sin serrar completamente las lazadas. Listo el recorrido cierro juntas, quedándome una especie de arco.
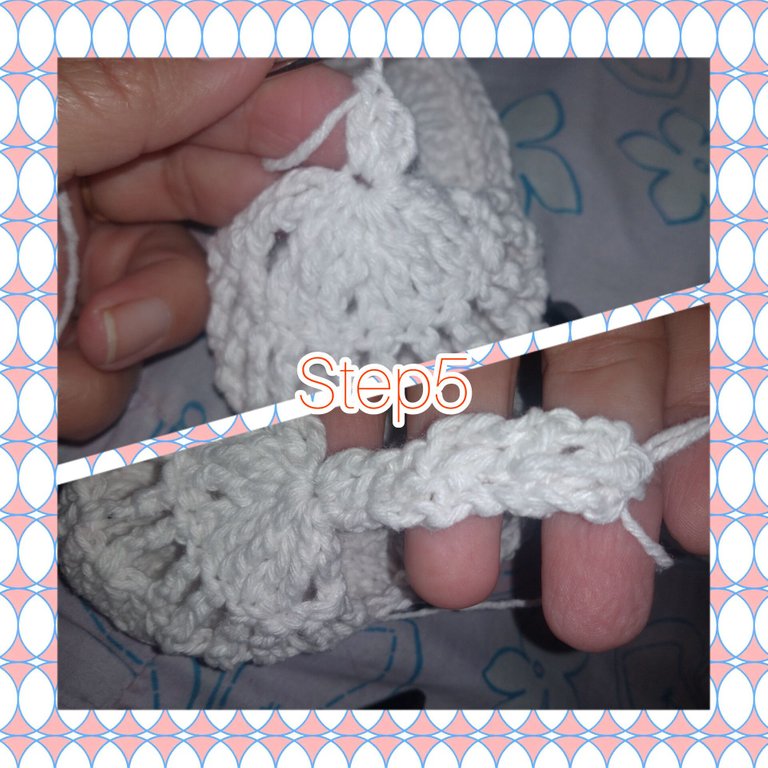
5.) Located in the arch, I will knit three high points, I will go around and knit six turns, finish off and cut the knitting thread. Then with a needle and thread, I fold it small and sew on the inside of the Sandal.
5.) Ubicada en el arco, tejere tres puntos altos, iré dando vueltas y tejere seis vueltas, remato y corto el hilo de tejer. Luego con aguja e hilo, doblo está pequeño listos y coser por la parte dentro de la Sandalia.
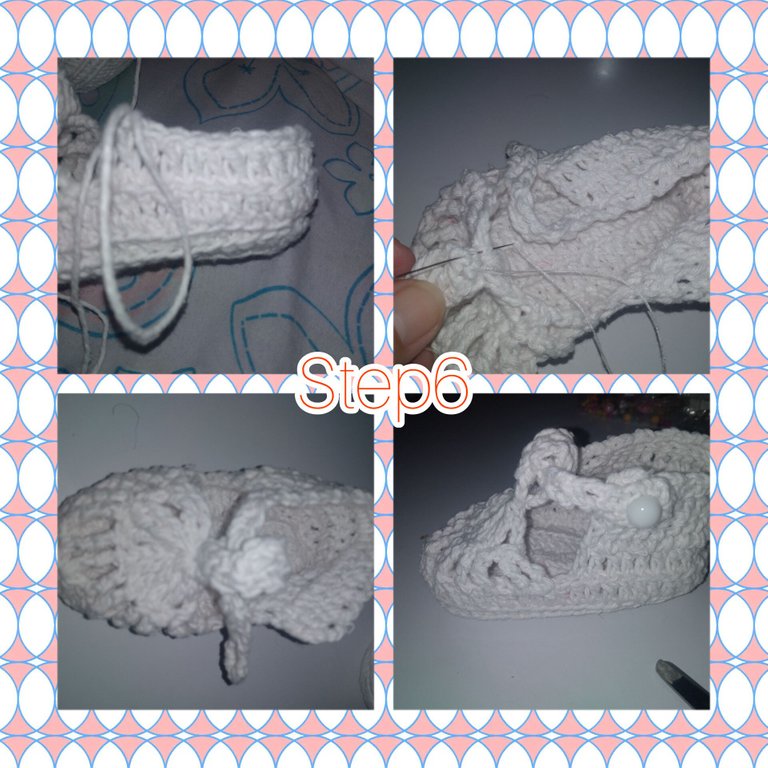
6.) I return to the crochet fabric, and I begin to knit double crochets in total, I will knit 25 double crochets, I go back and repeat two more rounds, I continue knitting three chain stitches and leaving a space, I will knit half stitches in the next space, like this form I will do the tour. I continue, knitting two high points, I repeat eight more times, until I make a small cord that allows me to pass through the loop in the center of the central part of the Sandal and reach the other side of it. Now I raise six chain stitches that I will fill in with six row stitches. This time subject to a button. In one sandal it will be on the right side and another on the left.
6.) Retomo el tejido a crochet, y comienzo a tejer puntos altos en total, tejere 25 puntos altos, me devuelvo y repito dos vueltas más, continuo tejiendo tres puntos cadenas y dejando un espacio tejere en el siguiente espacio medio puntos, de esta forma haré el recorrido. Continuo, tejiendo dos puntos altos, repito ocho veces más, hasta hacer un pequeños cordon que me permita traspasar el pasa cintas de el centro de la parte central de la Sandalia y llegar al otro lado de ella. Ahora levanto seis puntos cadenas a los que rellenare con seis puntos corridos. Este hora sujeto a un boton. En una sandalia estará en el lado derecho y otro en el izquierdo.
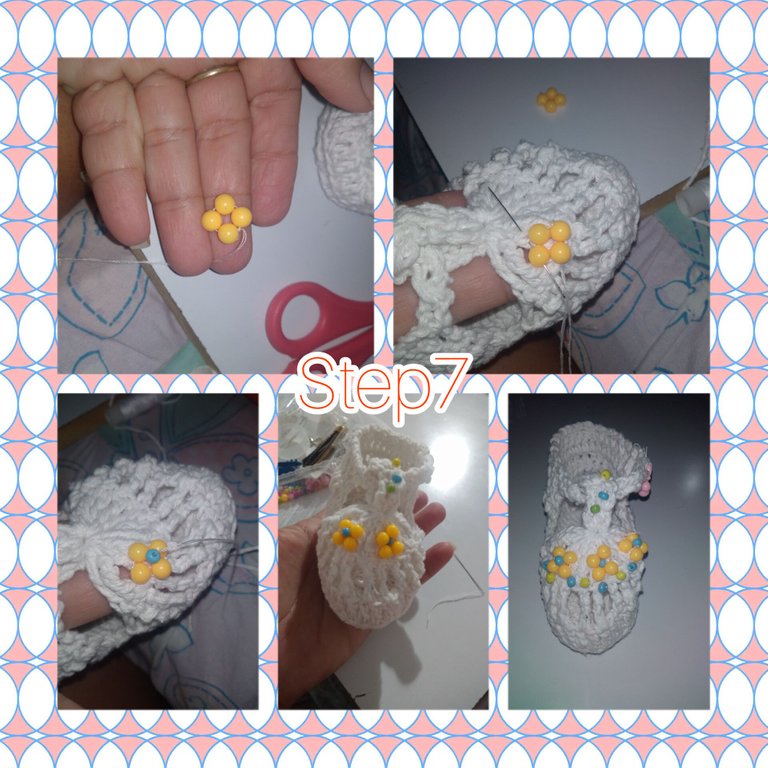
7.) To finish off, she made flowers from four beads, tied together tied with sewing thread and then sewn to the front of the Sandals. I will paste three flowers on each of the sandals, also placing them in the center, likewise I will alternate some colored beads.
7.) Para culminar, armó flores de cuatro cuentas, unidas entre sí atadas con hilo de coser y luego cosidas en la parte delantera de las Sandalias. Pegare tres flores en cada una de las sandalias, colocando además en el centro, así mismo alternare algunas chaquiras de colores.
Final result of today's project. I hope you liked it.//
Resultado final de el proyecto de el día de hoy. Espero les haya gustado.

All photos are my property, taken with my smartphone.
.Use InShot to show step by step.
. Use Google translate
Thank you for following me to the end, it will be until a next opportunity.//
Todas las fotos, son de mí propiedad, tomadas con mí teléfono inteligente.
.Use InShot para mostrar el paso a paso.
. Use traductor Google
Agrdaecida me hayas seguido hasta el final, será hasta una próxima oportunidad.
Lindísimas. Una paveria para la princesa. Gracias por compartir 😃
Hola querida @creacioneslelys, gracias que bueno te haya gustado...abrazos
Bellos zapaticos tejidos para las nenita más pequeñitas de la casa ....te quedaron genial
Gracias cariño, que bueno te haya gustado, abrazos @leidys01
Muy lindo trabajo amiga @katiuskamata te felicito. Unos zapatitos bien delicados y cuchis para una princesita. Saludos...
!DIY
Hola gracias cariño, que bueno te haya gustado...abrazos @dayadam.
Que honor, contar con su apoyo @diyhub