


Hello my dear readers, I hope you are having or have had a great day. We are in the middle of November and it smells like Christmas, for those people who have their children in school, this is the month when they start asking for materials to make decorations in the classrooms. The children start making crafts and are motivated to participate in any activity that the school does.
Since last year, the school has been allowing the children to wear hats, headbands or any accessory alluding to Christmas, with the idea of maintaining the Christmas atmosphere and for the children to have fun too.
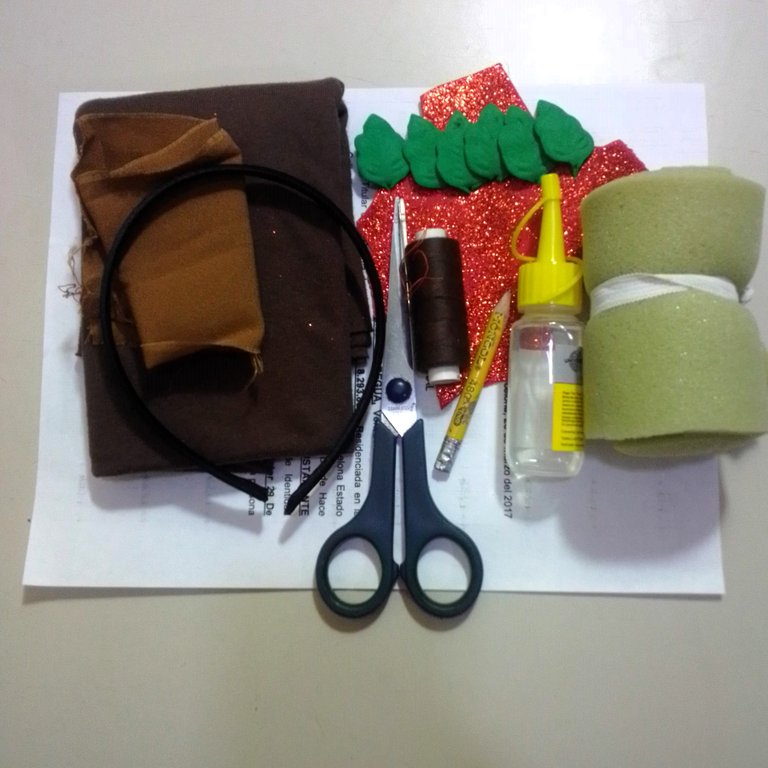
I wanted to make a decorative headband for my daughter and I chose several models for her, I was between a little tree, a snowman and Rudolph the reindeer's antlers. She liked the antlers the most, so I wanted to please her and here I show you how I made it. Without further ado I leave you the step by step.
STEP BY STEP:
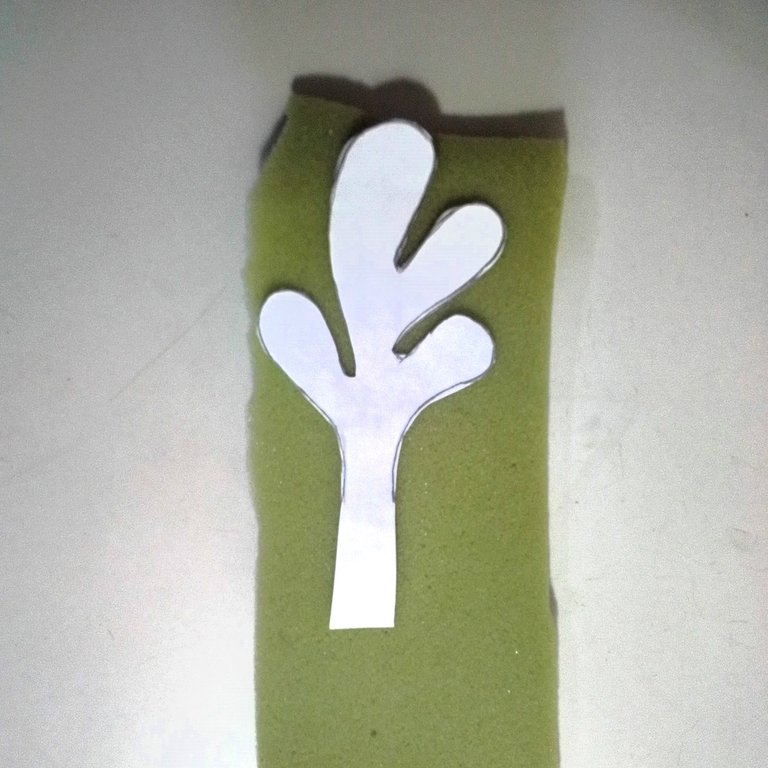
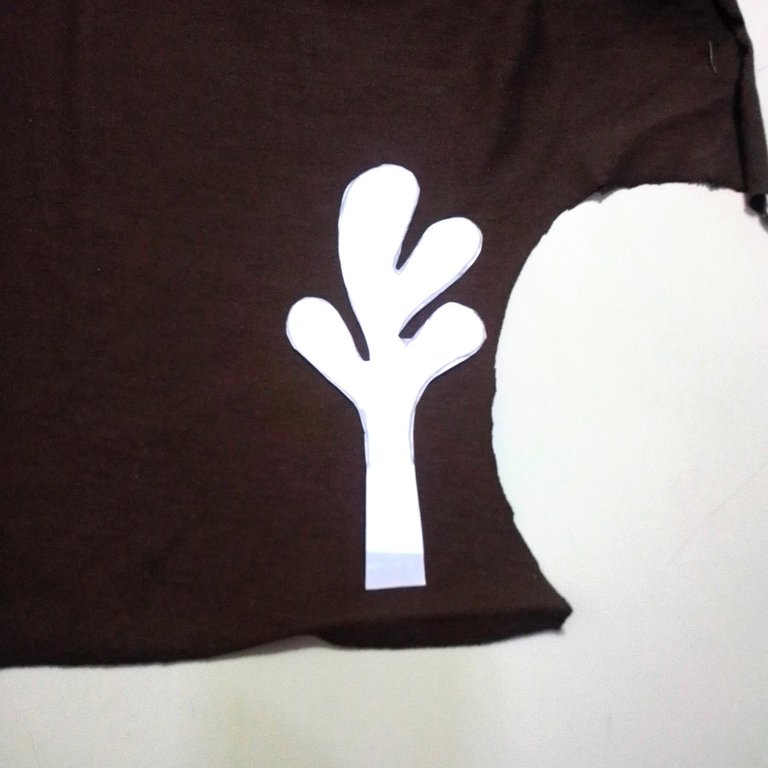
On the sheet of paper and with the help of a pencil, I made the pattern of what would be the horns and the ear, and then cut them out.

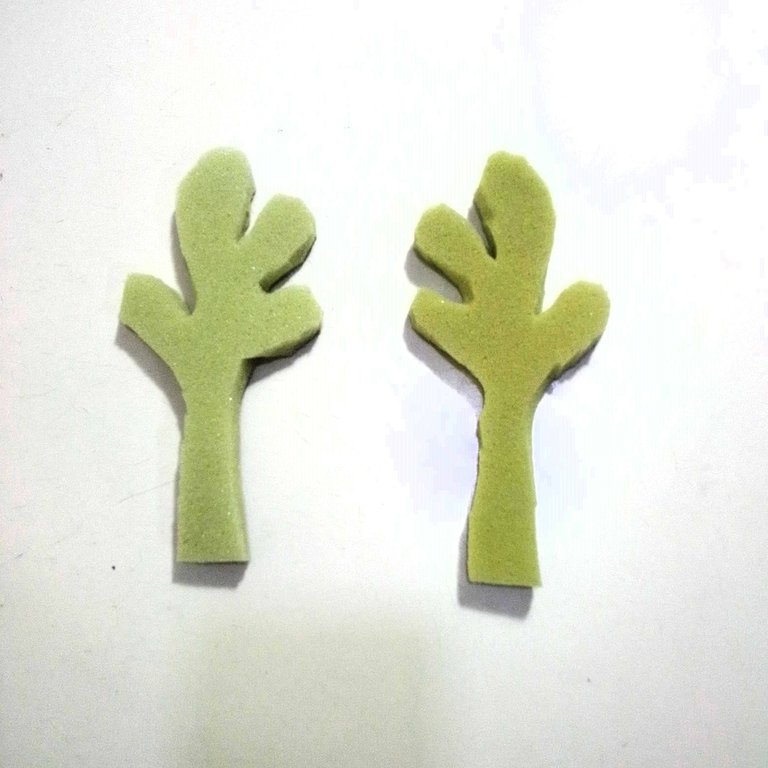
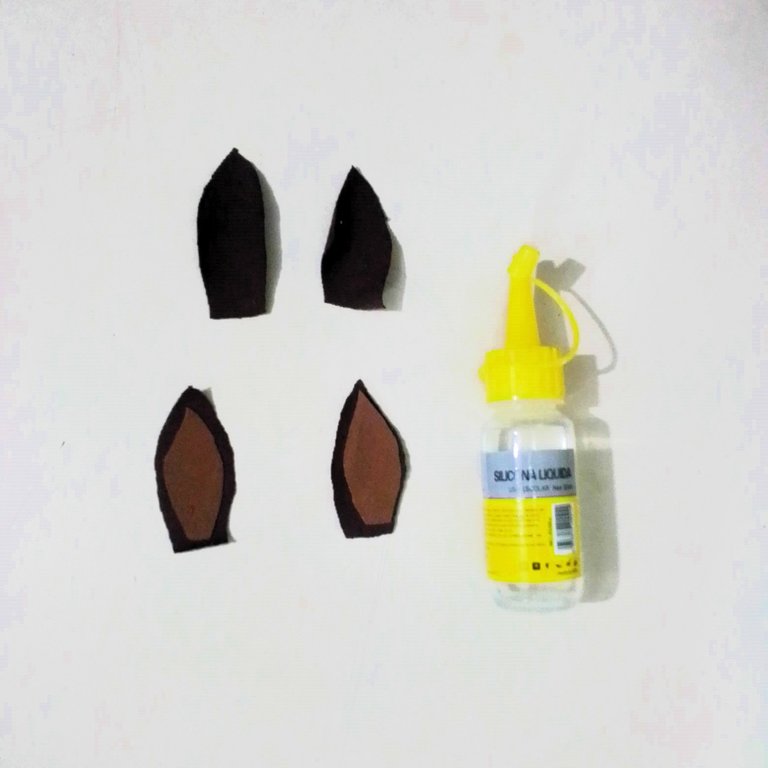
Once cut out, I will place it on top of the foam rubber (or polyurethane foam, as it is called in other countries) and cut out two pieces.
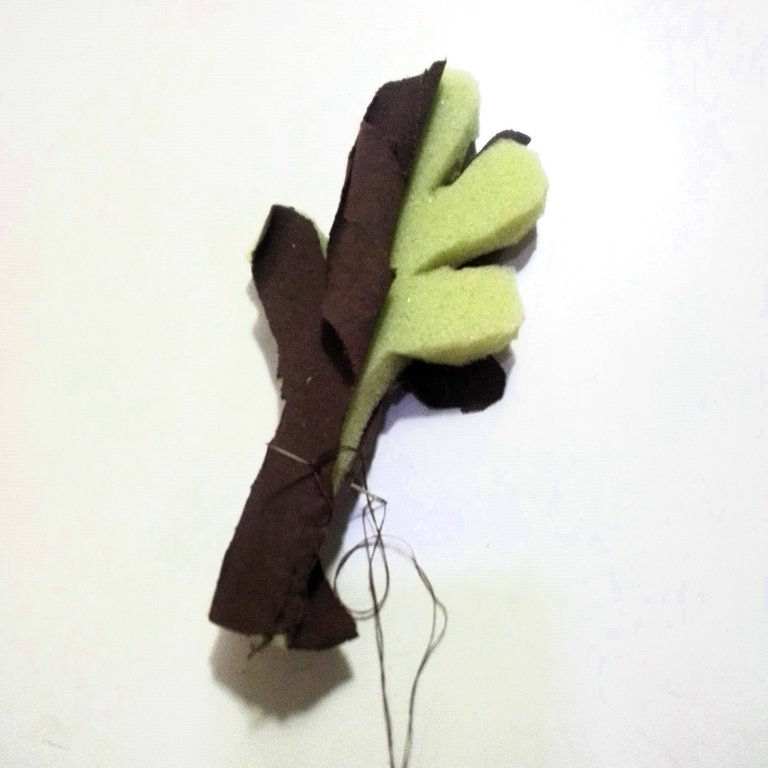
I will place the same figure on top of the brown fabric and cut out 4 pieces. Two of them I will place, one on top of the foam rubber and the other one underneath, as shown in the picture.

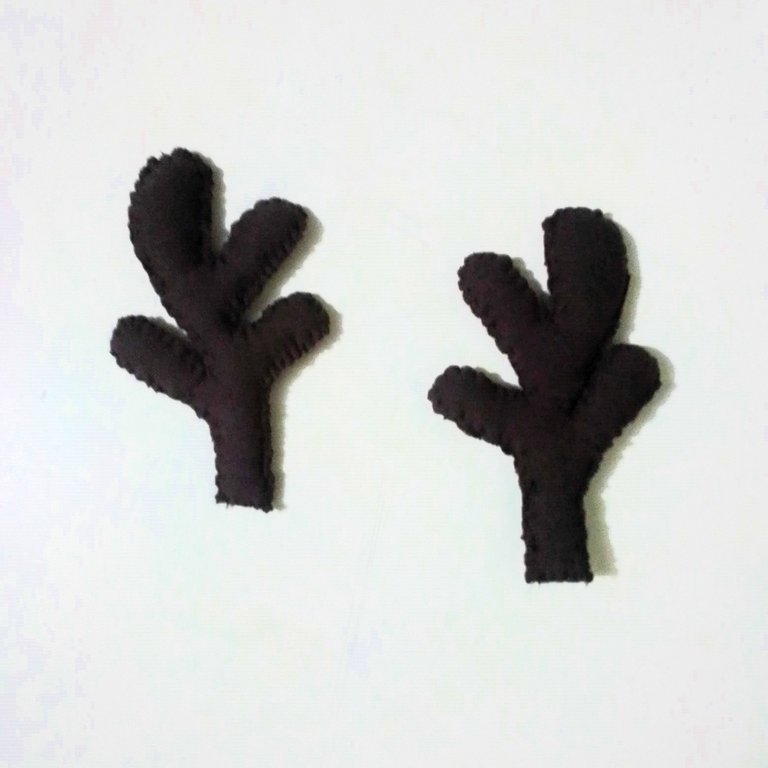
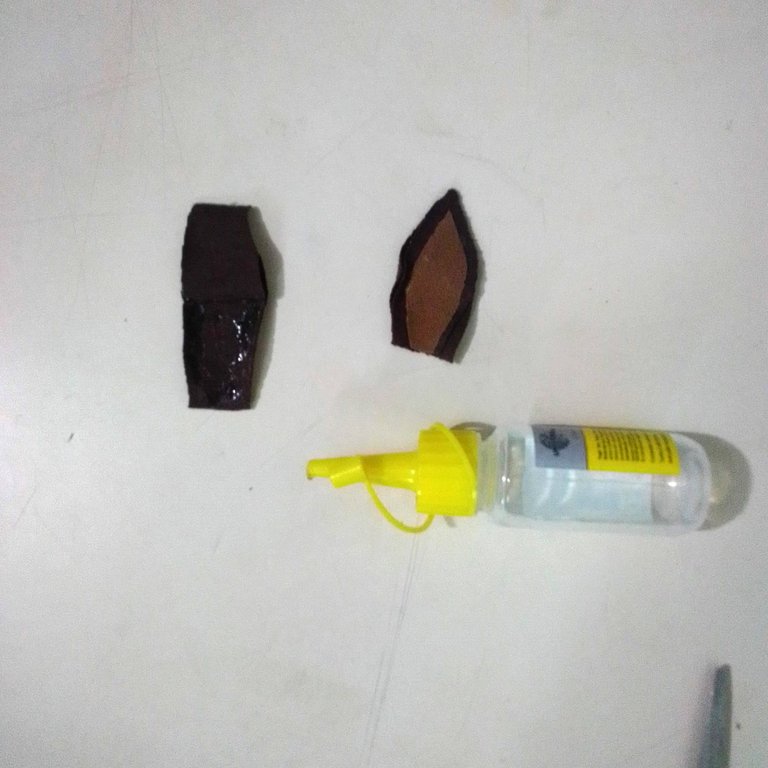
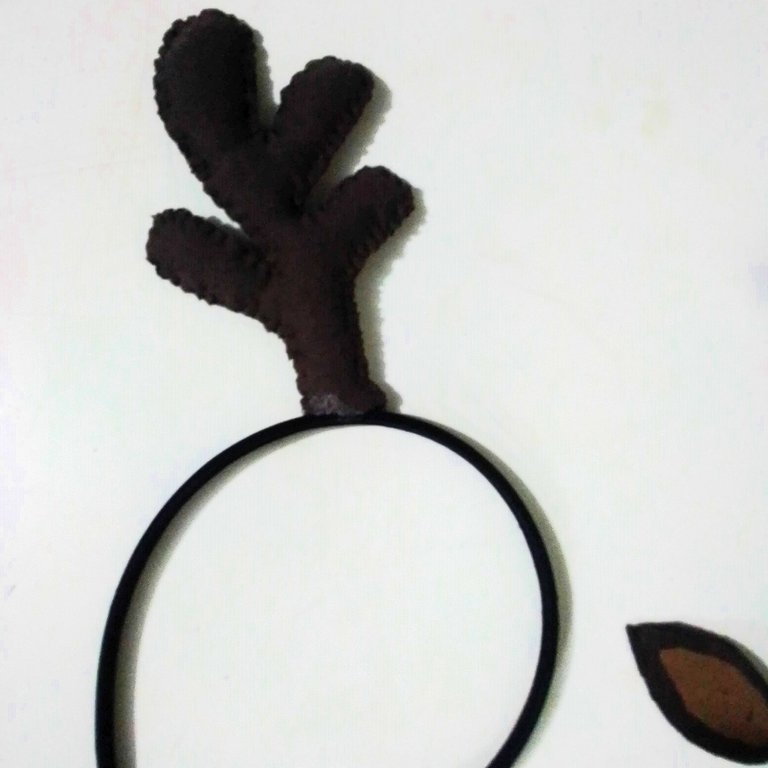
With the help of the needle, I will start sewing all around the horn. Joining the fabrics well so that the foam rubber doesn't show. For sewing I used the scallop stitch all around.
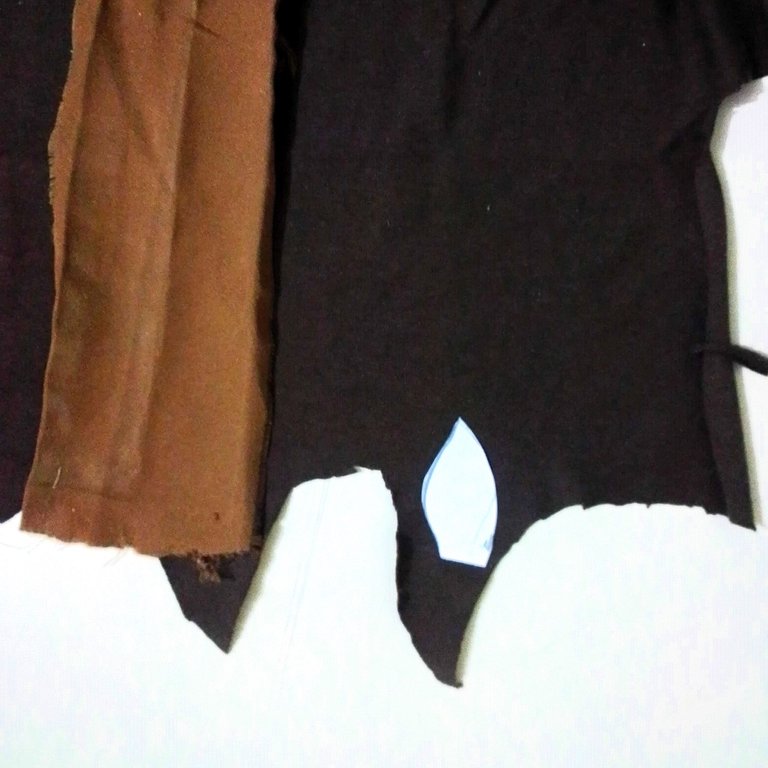
Now on the brown fabric I will cut out the ears and I will need 4 pieces. On the other fabric, light brown, I will cut out two ears a bit smaller than the previous one.
Then I will glue with silicone the light brown ears on top of the other two dark brown ones, as shown in the picture.
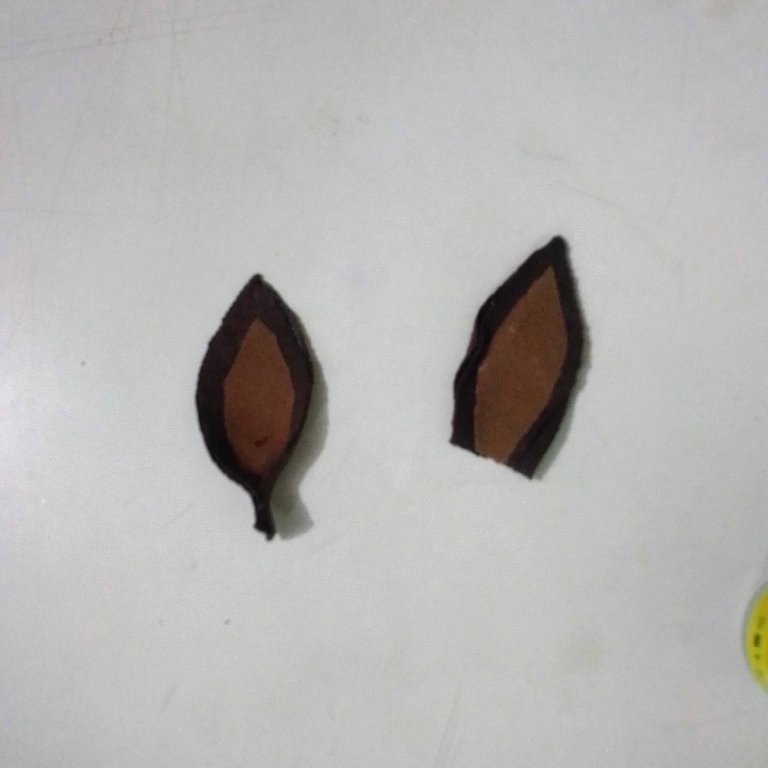
To continue with the ear, I will join the two brown pieces together with the silicone, then, at the bottom, I made a fold that I glued, as shown in the image.
Ahora que ya tengo todas las piezas listas, armaré el cintillo.
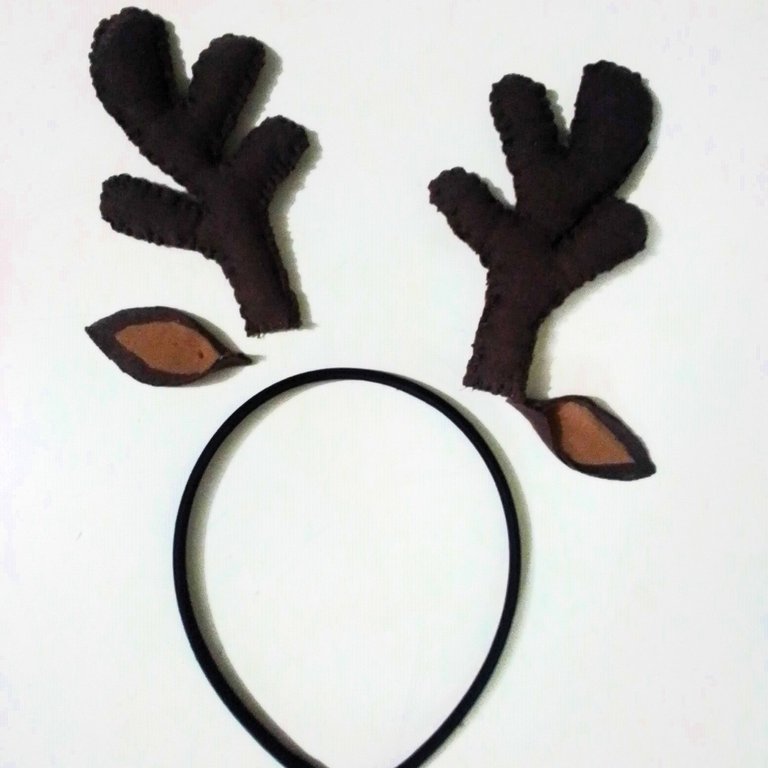
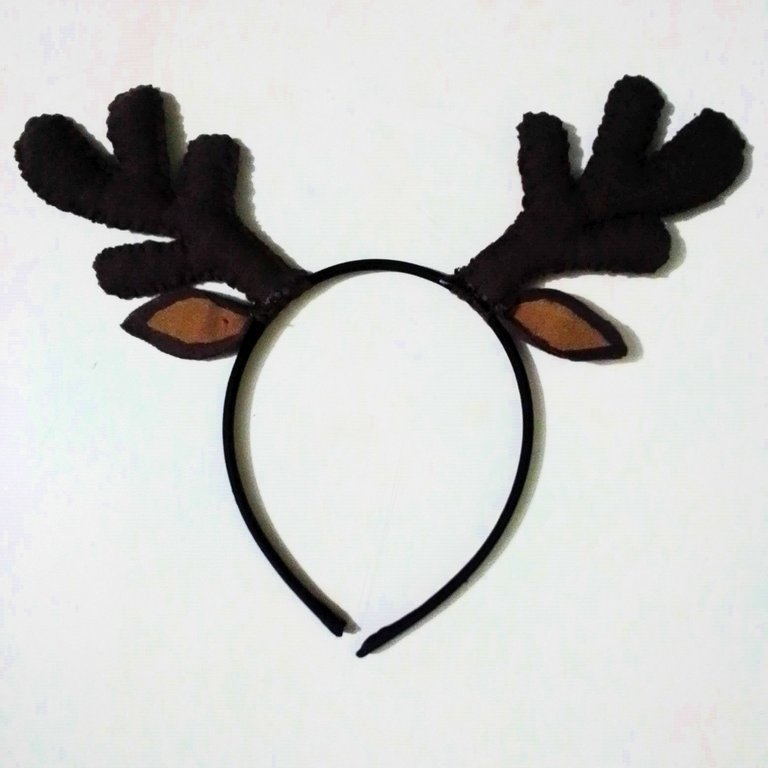
With the help of the silicone, I will glue the ear to one side of the headband at the top. Once it is dry, on one side of the horn, I will glue the ear. Repeat the same procedure on the other side, leaving a space of about 4 cm in the middle.
 |  |  |
|---|
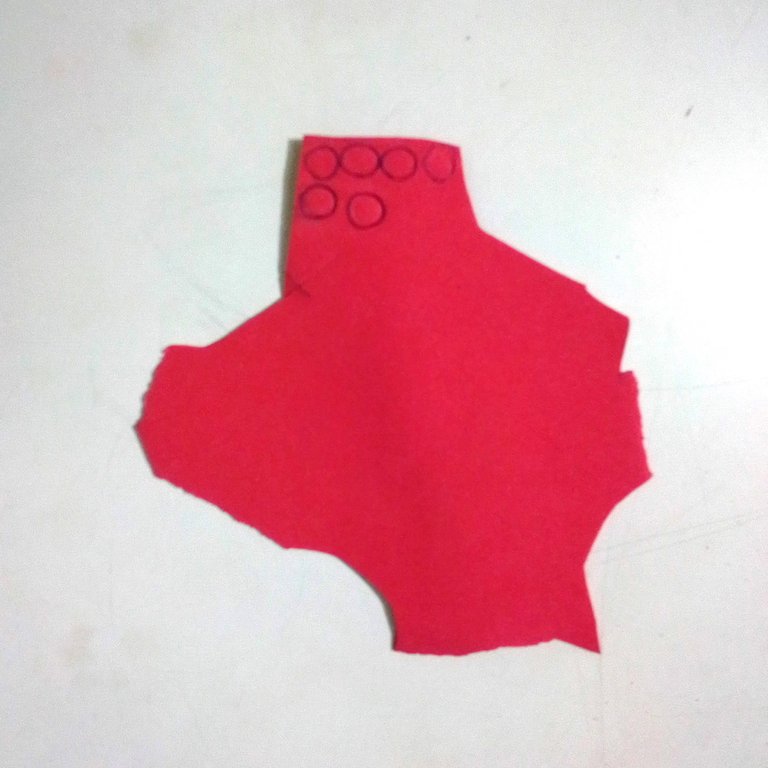
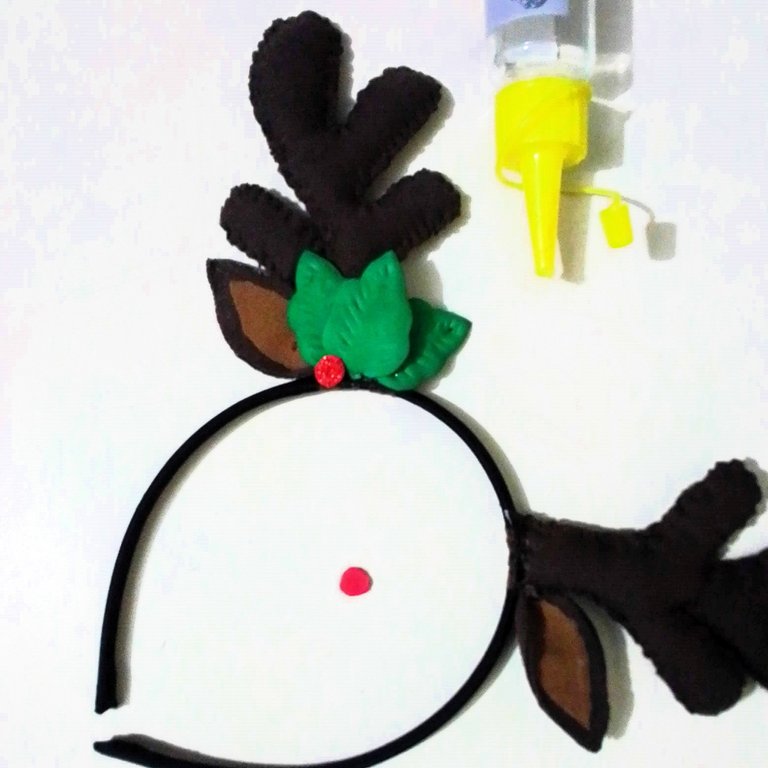
From the red foami, I will cut out 6 small circles.
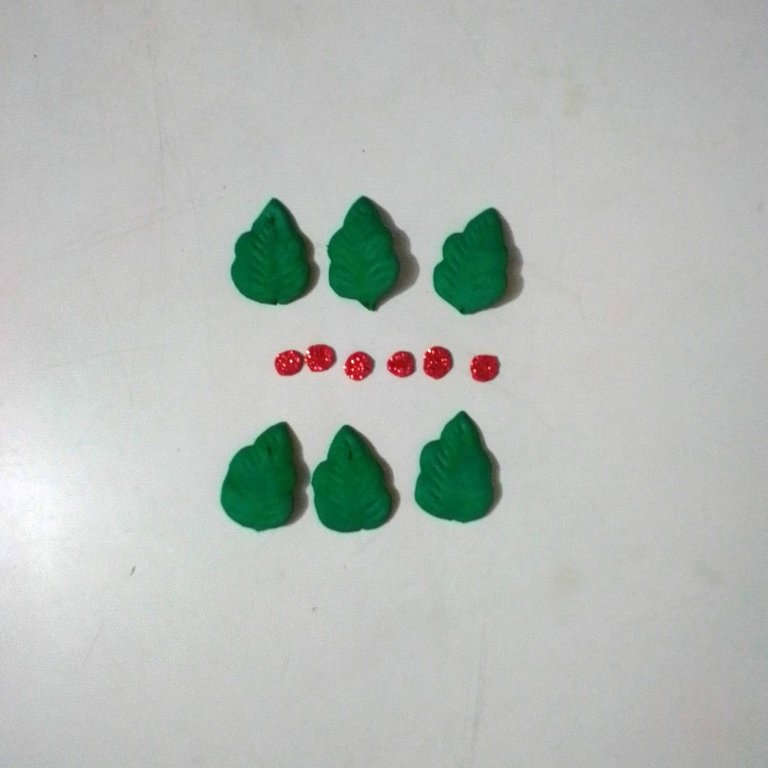
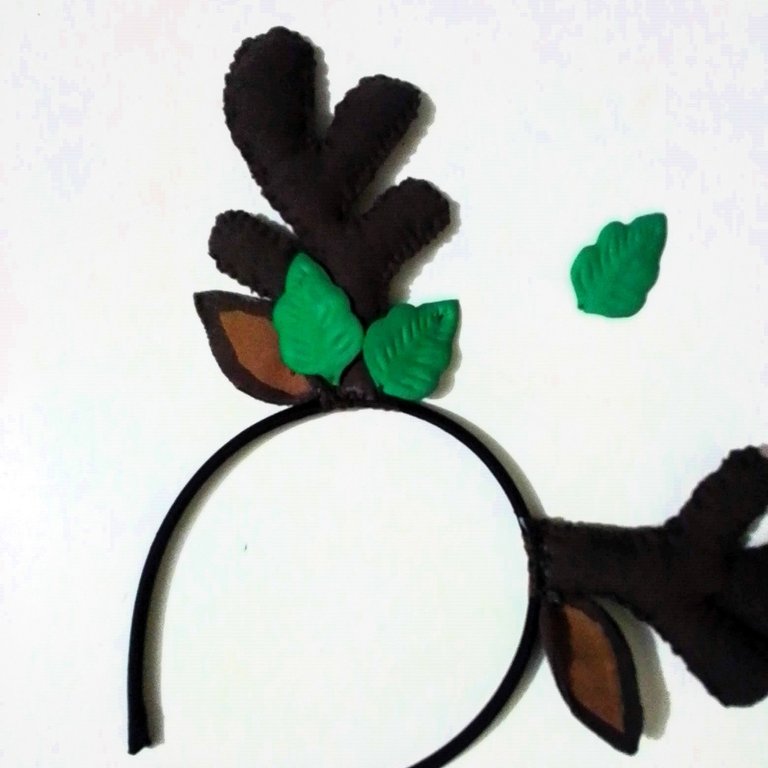
My mum had made some foami flowers some time ago and she had some leaves left over that she had die-cut, which are the ones I will use for this project, that's why the leaves already have their markings.
I will glue the leaves to the bottom of the horn with silicone, it will serve as decoration and at the same time to cover the union of the horns with the headband. And to cover the union of the leaves, I will place the red circles. And on the back, I also put a red strip to cover the joint.
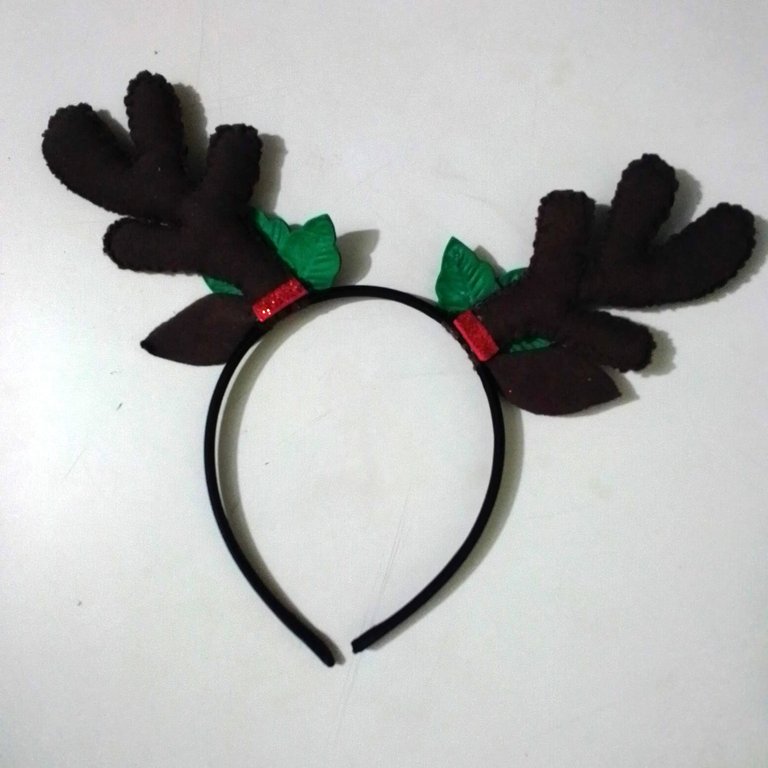
And now I have my headband with the Rudolph the Reindeer antlers ready. You saw that it is very easy to make and it looks very nice.
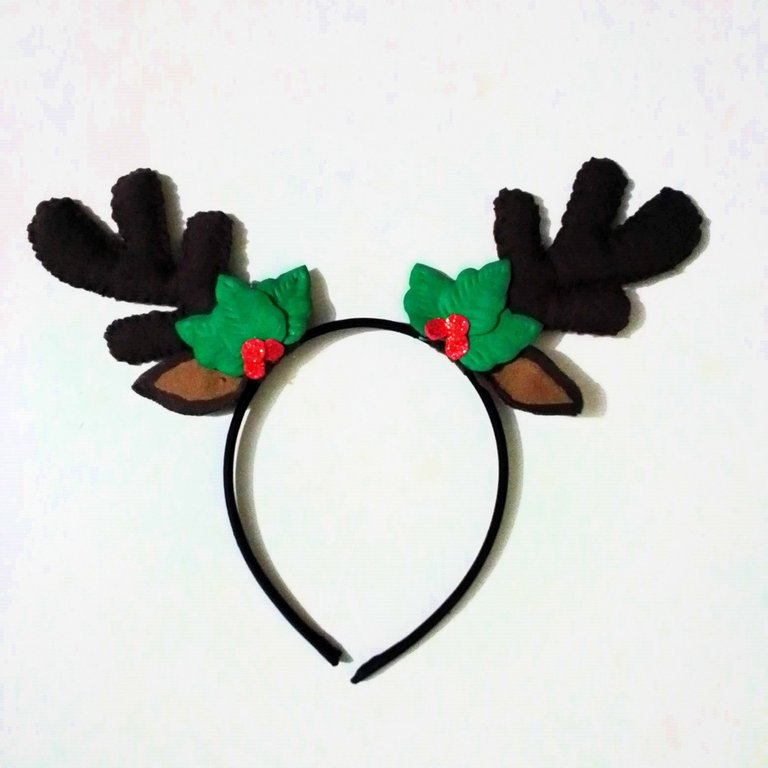
I hope you liked this tutorial that I gladly prepared for you. My daughter loved her headband and it doesn't look too bad to me, ha ha ha. What do you say?
I'll say goodbye as always, but not before thanking you for taking some of your valuable time to visit my blog and support me. Be well and take care of yourselves.

Content of the original creation:
❄️ All photos are mine taken and edited with my Alcatel phone.
⛄️ The cover image was made with the Canva application and edited by me.
🎅🏼 The images of the divider are taken from the website
❄️ The English translation was made with the help of DeepL.
https://www.glitter-graphics.com/graphics/848972
⛄️ The letters indicating the languages were taken from https://cooltext.com/.

Hola mis queridos lectores, espero que estén tengan o hayan tenido un excelente día. Estamos a mitad de noviembre y ya huele a navidad, para aquellas personas que tienen sus hijos en el colegio, este es el mes en que empiezan a pedir materiales para hacer decoraciones en los salones. Los niños empiezan hacer cualquier manualidad y los motivan a participar en cualquier actividad que realice el colegio.
Desde el año pasado, en el colegio, están permitiendo que los niños lleven gorritos, cintillos o cualquier accesorio alusivo a la navidad, con la idea de mantener ese ambiente navideño y que los niños se diviertan también.
Quise hacerle un cintillo decorativo a mi hija y para ella escogí varios modelos, estaba entre un arbolito, un muñeco de nieve y los cuernos de Rodolfo el reno. A ella le gusto más los cuernos, así que quise complacerla y aquí les muestro como lo realice. Sin más preámbulo les dejo el paso a paso.
PASO A PASO:
En la hoja de papel y con la ayuda del lápiz, hice el patrón de lo que sería los cuernos y la oreja, para después recortarlos.
Una vez recortado, lo colocaré encima de la goma espuma (o espuma de poliuretano, como le dicen en otros países) y recortaré dos piezas.
La misma figura la voy a colocar encima de la tela marrón y recortaré 4 piezas. Dos de ellas las colocaré, una encima de la goma espuma y la otra por debajo, tal como se muestra en la imagen.
Con la ayuda de la aguja, empezaré cociendo por todo el alrededor del cuerno. Uniendo bien las telas para que no se note la goma espuma. Para coser usé el punto festón por todo el alrededor.
Ahora en la tela marrón voy a recortar las orejas y necesitaré 4 piezas. En la otra tela, de color marrón claro, recortaré dos orejas un poco más pequeñas que la anterior.
Luego pegaré con el silicón las orejas marrón claro encima de las otras dos de marrón oscuro, tal como se muestra en la imagen.
Para continuar con la oreja, uniré las dos piezas en color marrón con el silicón, luego, en la parte de abajo, le hice un pliegue que pegue, tal como se muestra en la imagen.
Ahora que ya tengo todas las piezas listas, armaré el cintillo.
Con la ayuda del silicón, pegaré la oreja a un lado del cintillo en la parte de arriba. Una vez bien seca, a un lado del cuerno, pegaré la oreja. Y repetiré el mismo procedimiento del otro lado, dejando un espacio en el medio como de aproximadamente 4 cm.
| | |
|---|
Del foami rojo, recortaré 6 círculos pequeños.
Mi mamá hace tiempo había hecho unas flores de foami y le sobraron unas hojas que había troquelado, que son las que usaré para este trabajo, por eso las hojas ya tiene sus marcas.
Pegaré con silicón las hojas en la parte de abajo del cuerno, me servirá de decoración y a la vez para tapar la unión de los cuernos con el cintillo. Y para tapar la unión de las hojas, colocaré, los círculos rojos. Y por la parte de atrás, también le coloqué, una tira roja para tapar la unión.
Y ya tengo listo mi cintillo con los cuernos del Rodolfo El Reno. Vieron que es superfácil de hacer y queda muy bonito.
Espero que te haya gustado este tutorial que con mucho gusto les prepare para ustedes. A mi hija le encanto su cintillo y a mí no se me ve tan mal, ja ja ja. ¿Qué dicen ustedes?
Me despido como siempre, no sin antes agradecerte por tomarte un poco de tu valioso tiempo para visitar mi blog y apoyarme. Pórtense bien y cuídense mucho.
Contenido de la creación original:
❄️ Todas las fotos son mías tomadas y editadas con mi teléfono Alcatel.
⛄️ La imagen de portada, fue hecha con la aplicación Canva y editada por mí.
🎅🏼 Las imágenes del divisor están tomadas de la página web
❄️ La traducción al inglés se hizo con la ayuda de DeepL.
https://www.glitter-graphics.com/graphics/848972
⛄️ Las letras que indican los idiomas fueron tomadas de https://cooltext.com/.
Muchas gracias, me alegra mucho contar con su apoyo.
The results look cute ❤️ and great choice of the color as well
Muchas gracias, Y gracias por tu visita y apoyo.
Justo ayer ví varias personas en la calle con cintillos navideños y dije que necesitaba uno de esos🤭 Es mi época favorita del año, así que necesito demostrarlo con detalles así. Muchas gracias por compartir esta idea, definitivamente voy a intentarlo ✨💖
Hola, Si en la calle me he encontrado, no solo los niños, también adultos usando estos cintillos y quedan genial. Se ve que aún hay muchas personas que sienten ese espíritu de la navidad y eso hace que la gente se alegre. Gracias por tu visita y apoyo, espero que el tuyo quede espectacular también. 😉👍
Que idea tan creativa, me gusto mucho la diadema, es ideal para tomarse fotos navideñas con tus seres querido. Me gusto mucho tu tutorial💞
Amiga que lindo cintillo ideal para lucirlo en nuestra fiestas, bendiciones.