


Hello my dear readers, I hope you had an excellent day. This is my first publication of this year, unfortunately I was absent for a while due to lack of internet, but it has been solved.
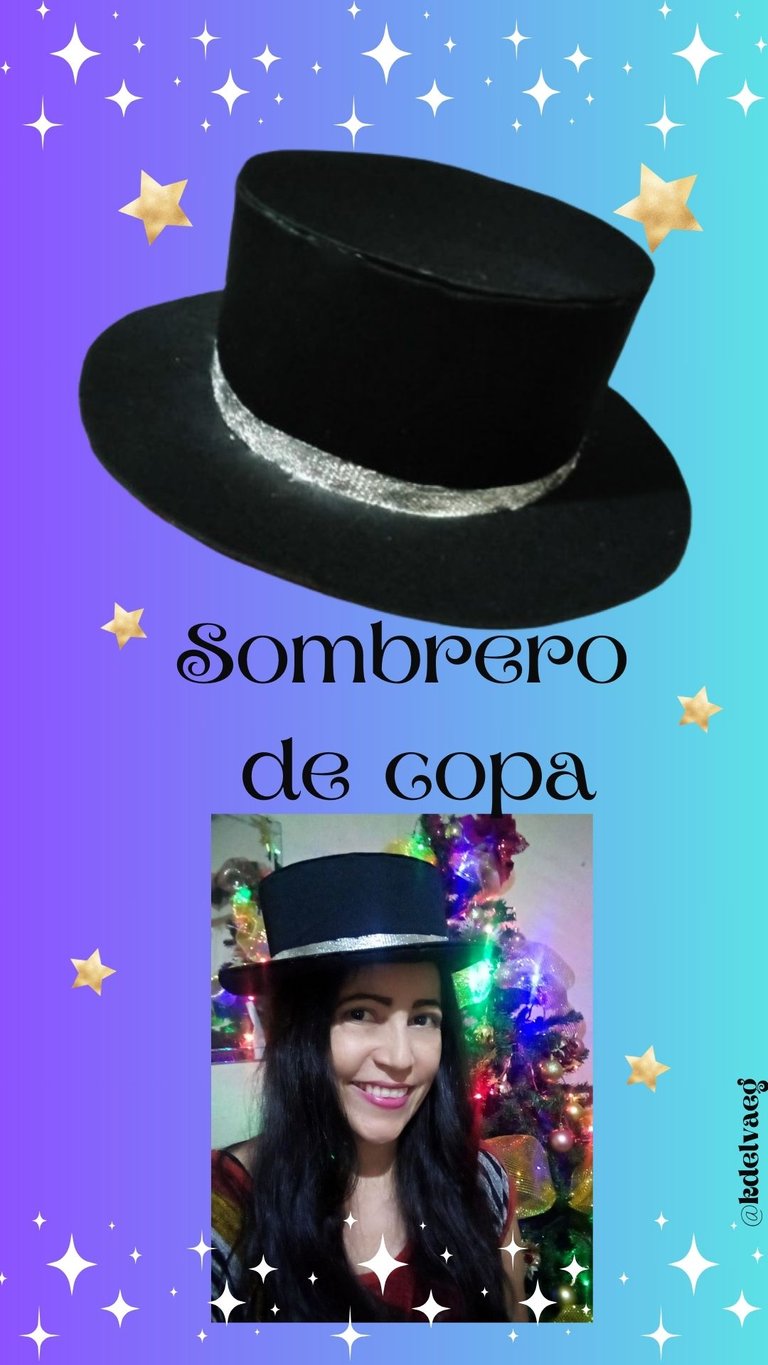
In December, in the schools, as it is becoming customary, they encourage the children to make a Christmas presentation in each classroom. My daughter, who is in first grade, had to dance to the Snowman song. I made a top hat to go with the costume I had her wear as well.
As I couldn't publish it at that time, I wanted to show you how to make a top hat, in case you ever need to make it and don't know how to do it.
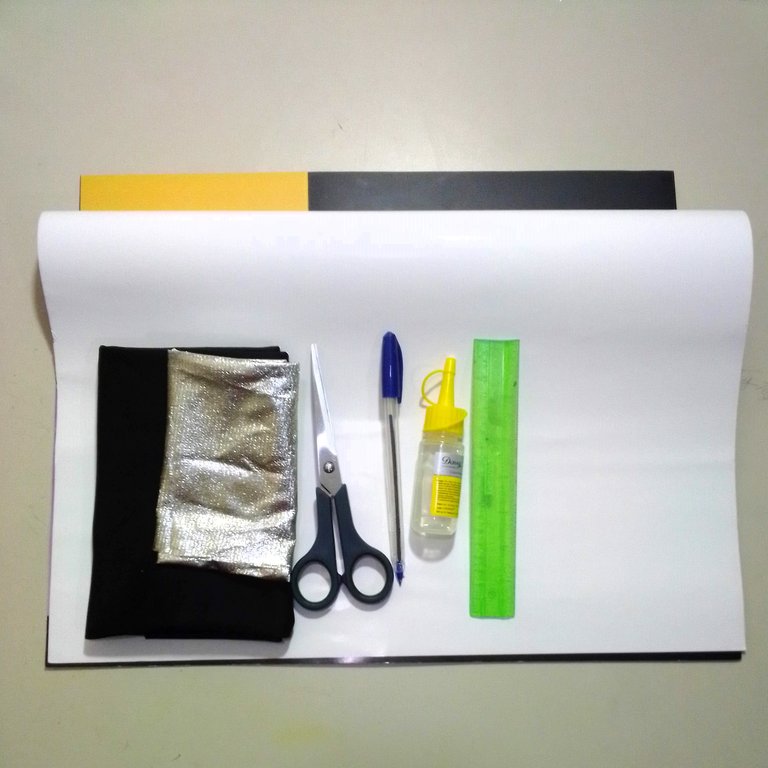
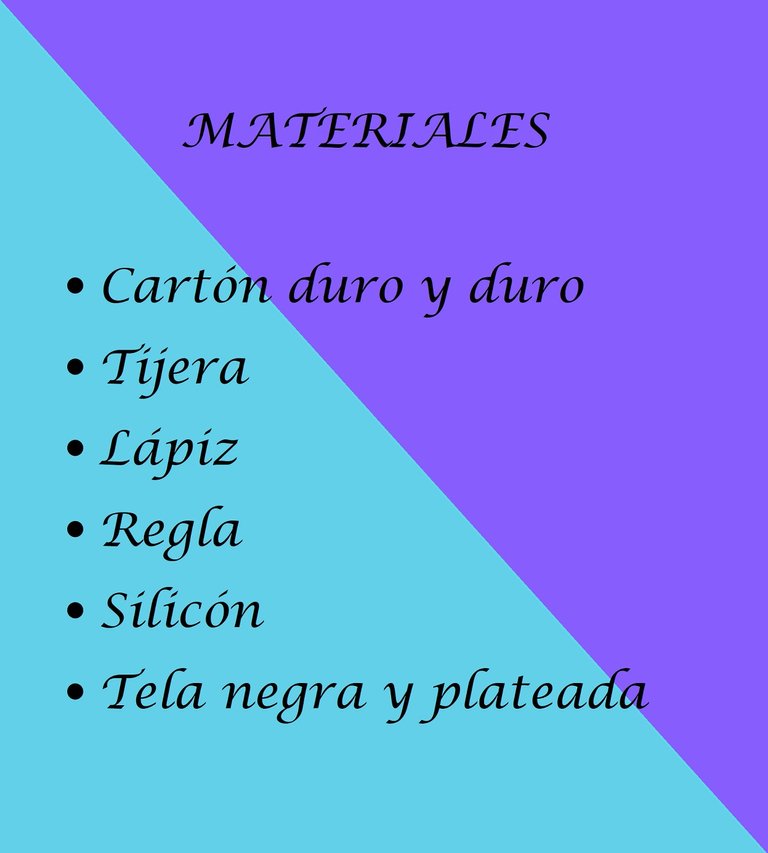
I made this hat with recycled material that I had left over from other jobs, so I didn't spend a lot of money.
Without further ado I show you the step by step of how to make it.
STEP BY STEP:
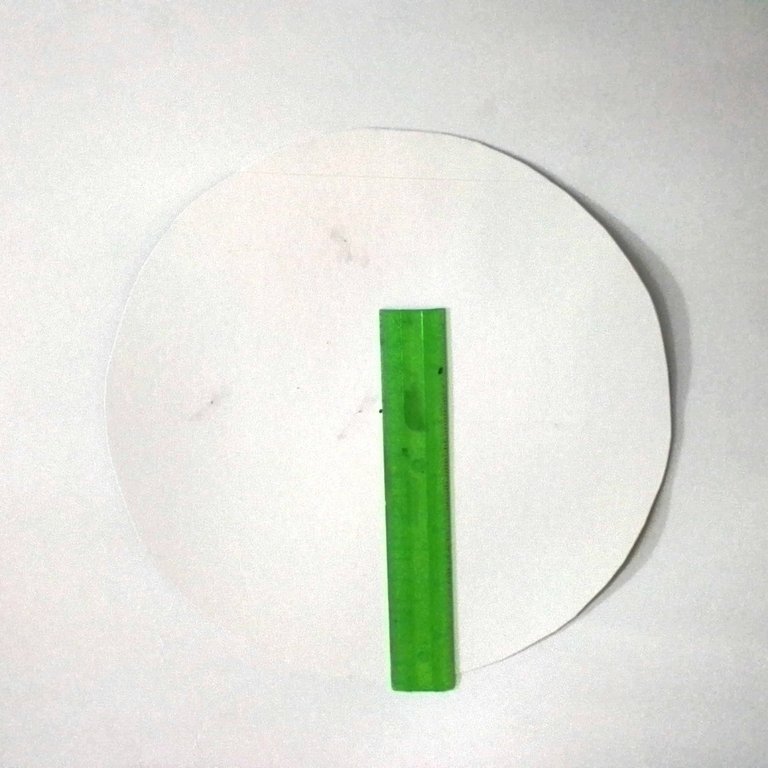
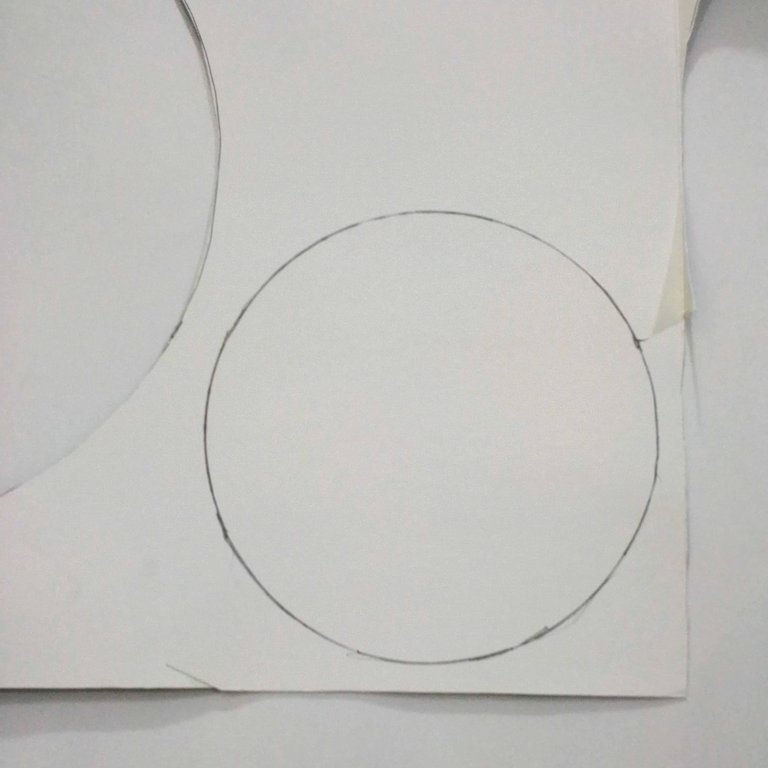
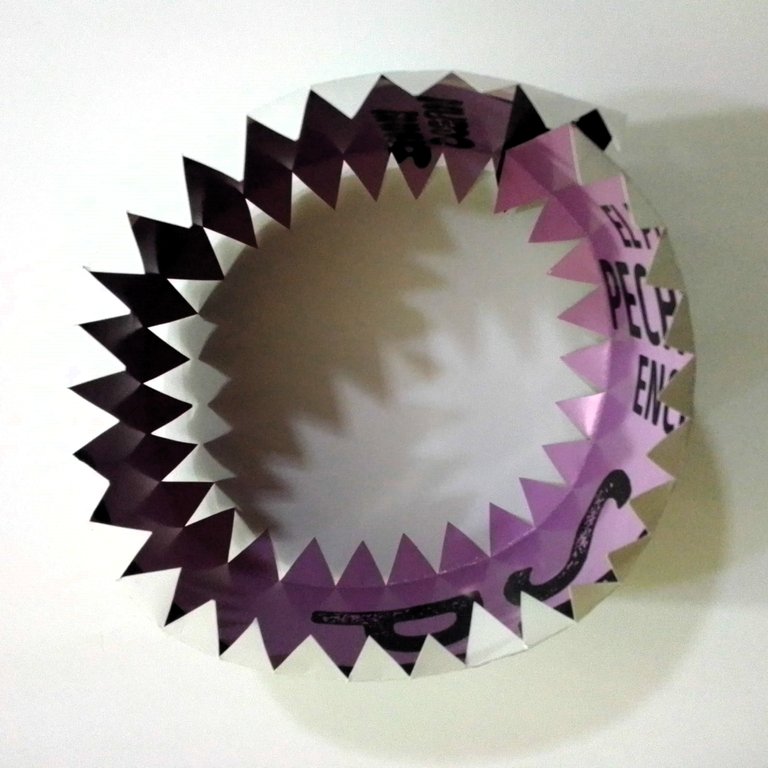
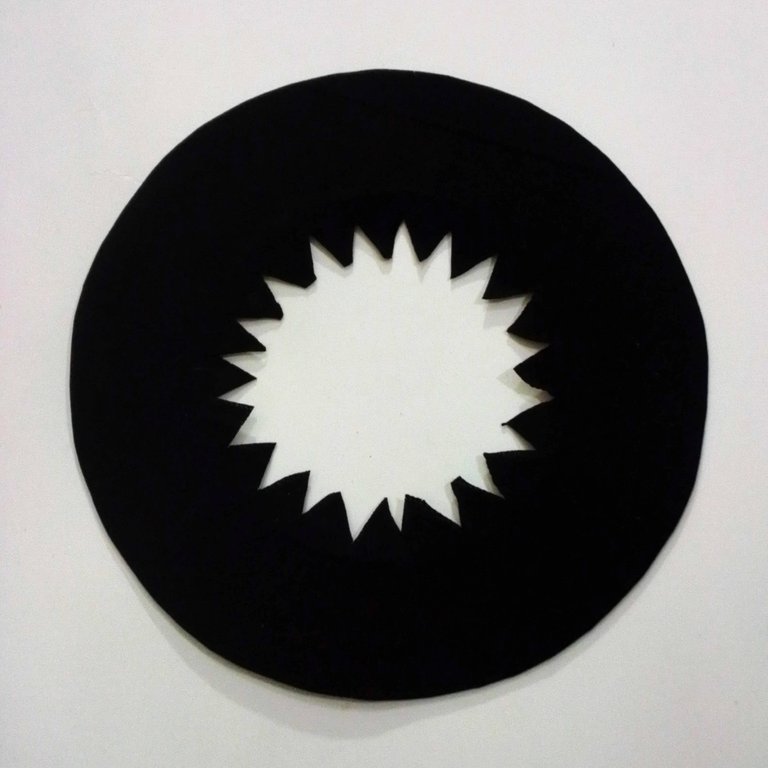
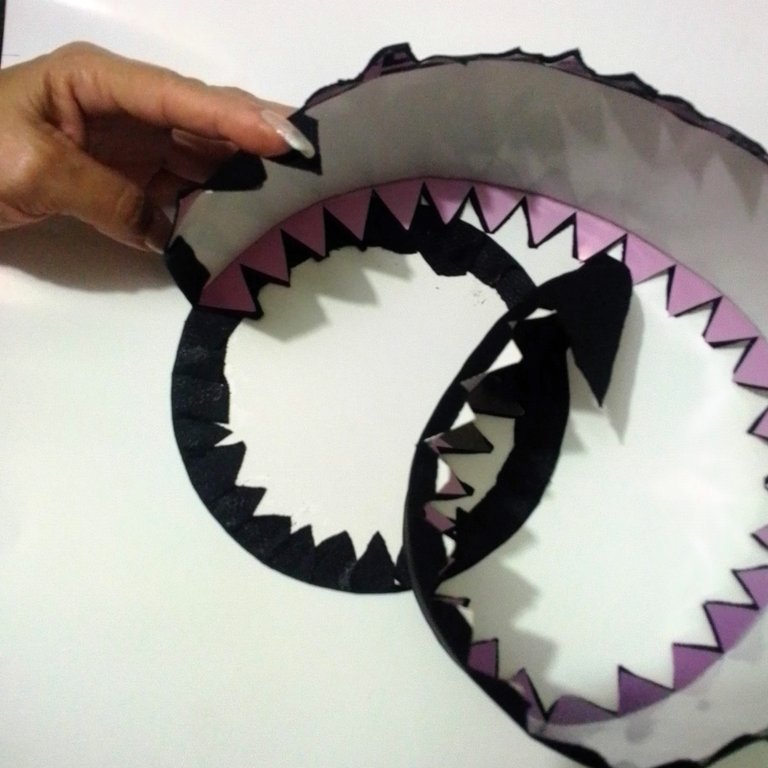
Use a cardboard that is semi-hard, with the help of a large pot lid, with a diameter of approximately 30 cm. Cut out a circle that I will use to make the flap of the hat.
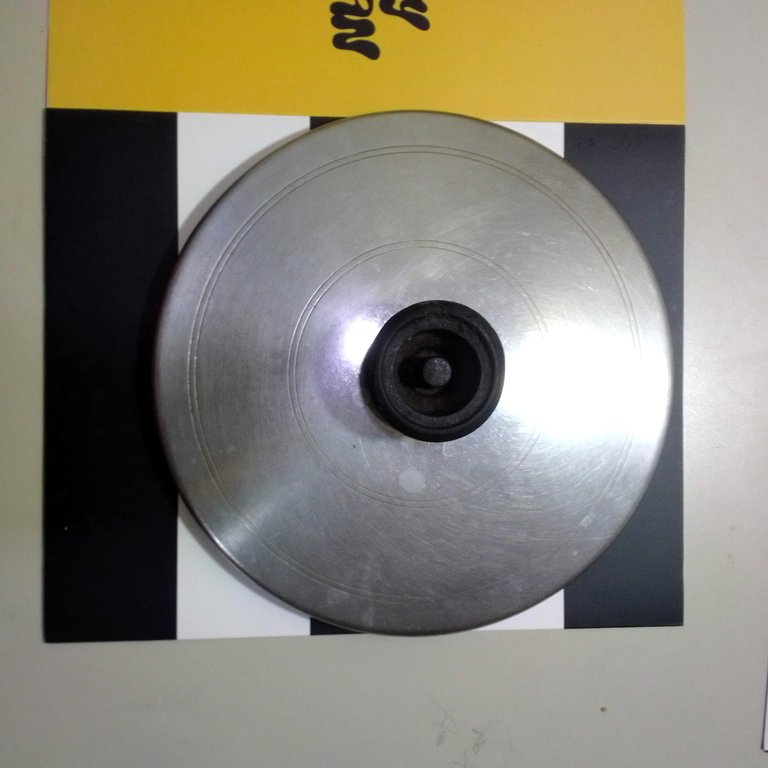
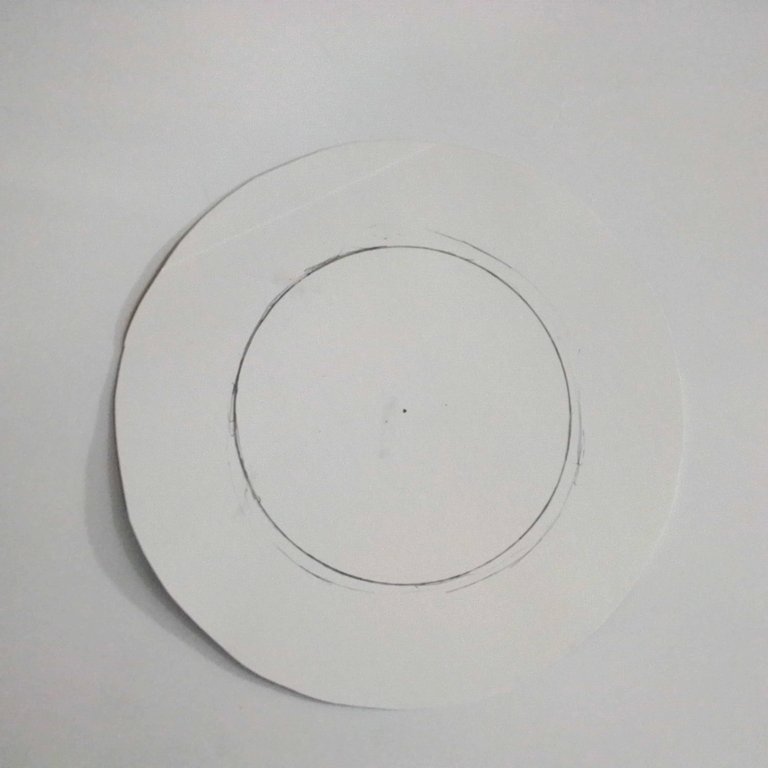
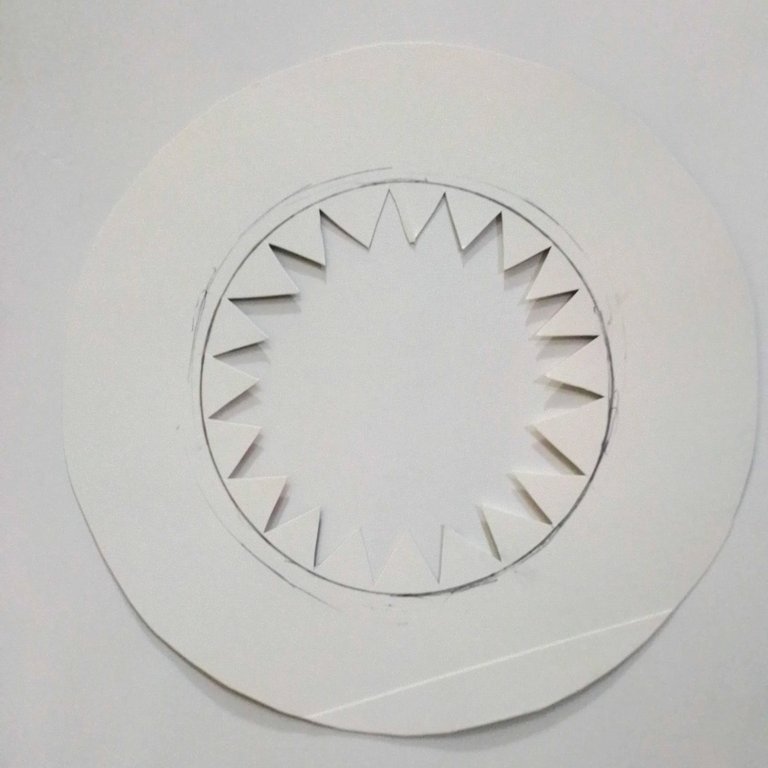
To that circle that I cut out, I will find the center and mark it. And with the help of another lid, about 4 cm smaller than the previous one, I will mark another circle.
.
 |  |  |
|---|
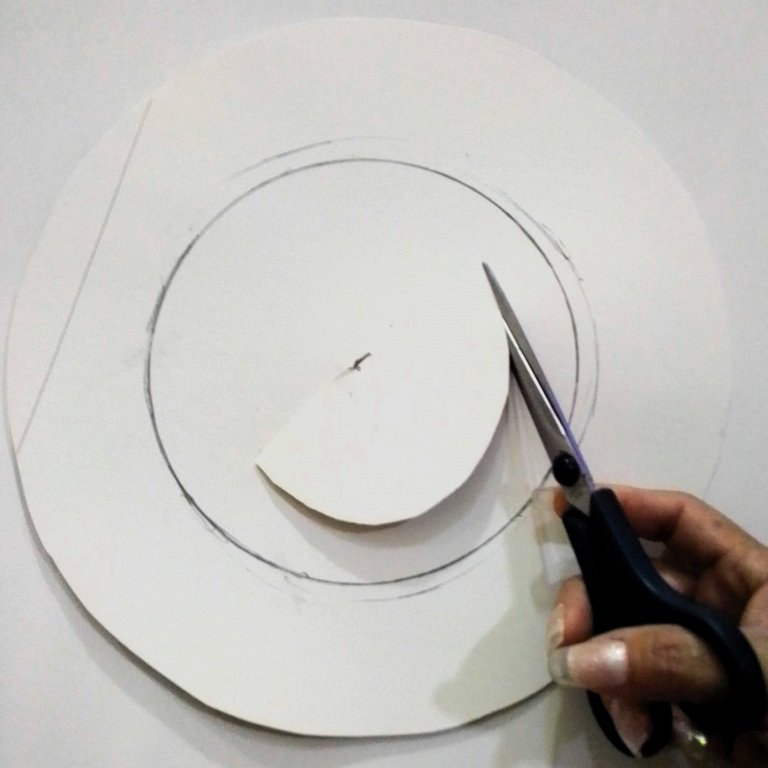
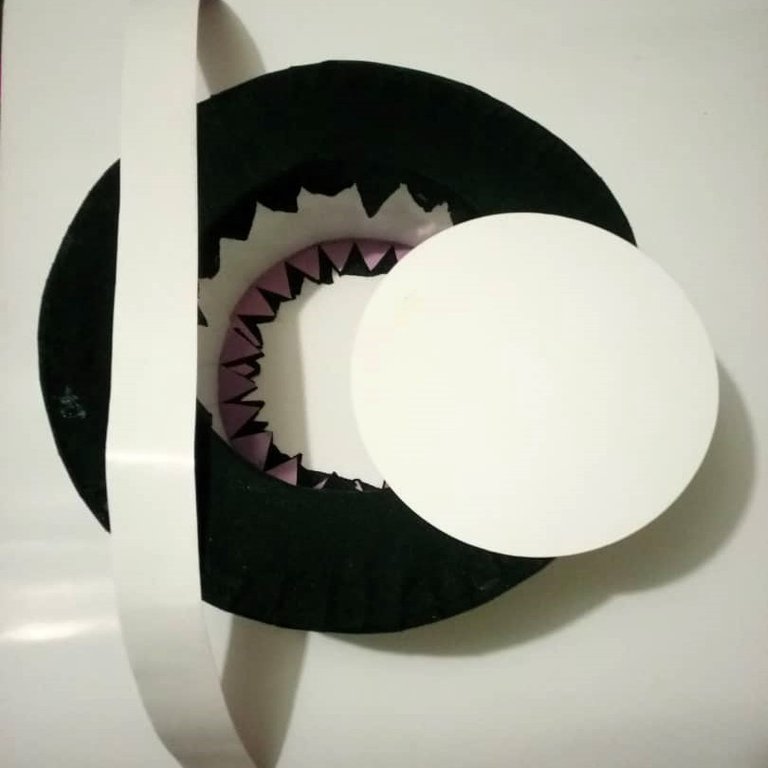
Once I have marked the inner circle, I proceed to cut out the center part, but leaving about 2 cm, so I can make some picks all around, as shown in the image.
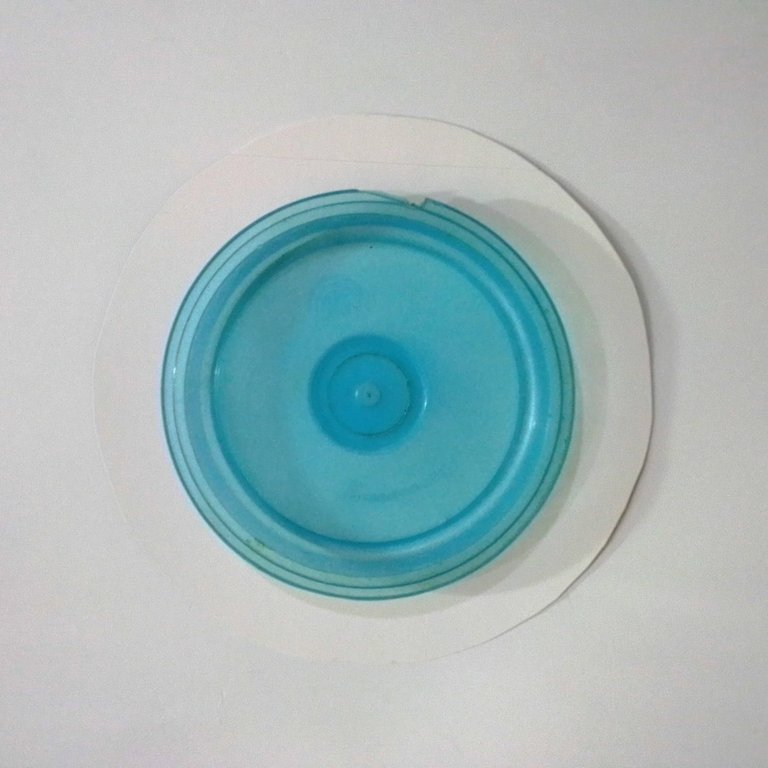
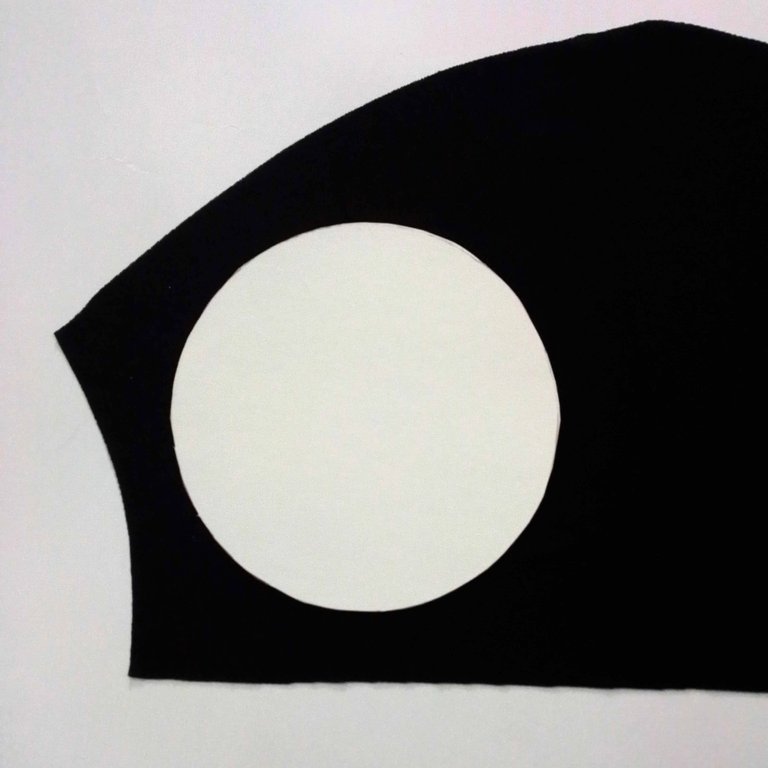
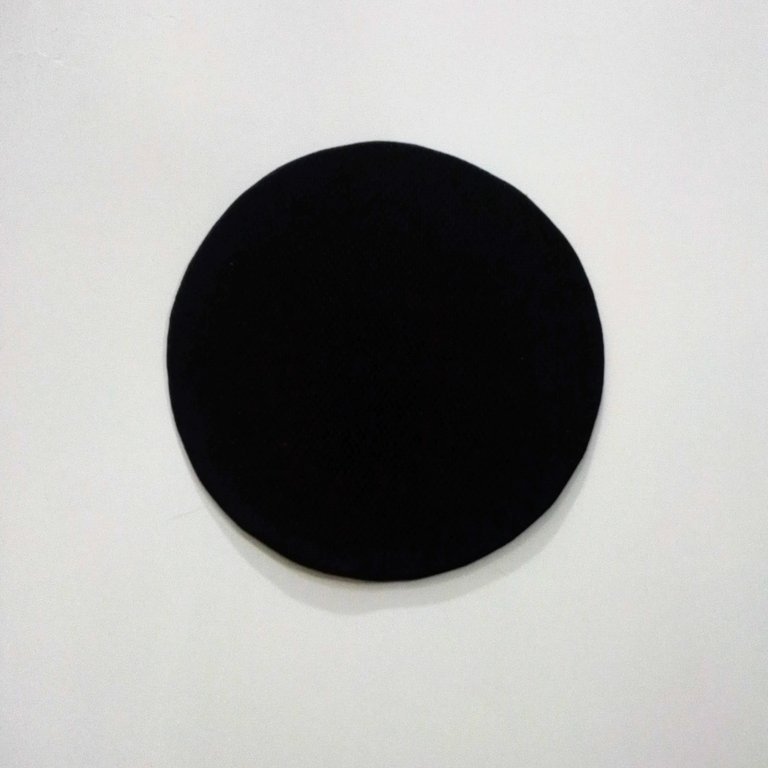
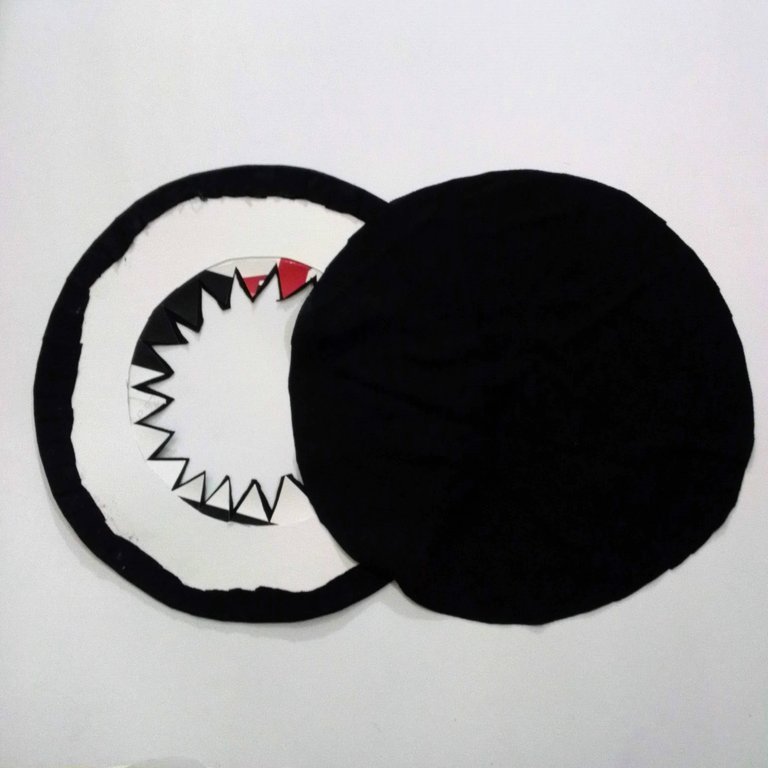
With the same top that I made the small circle, I will cut out another circle that I will use for the top of the hat.
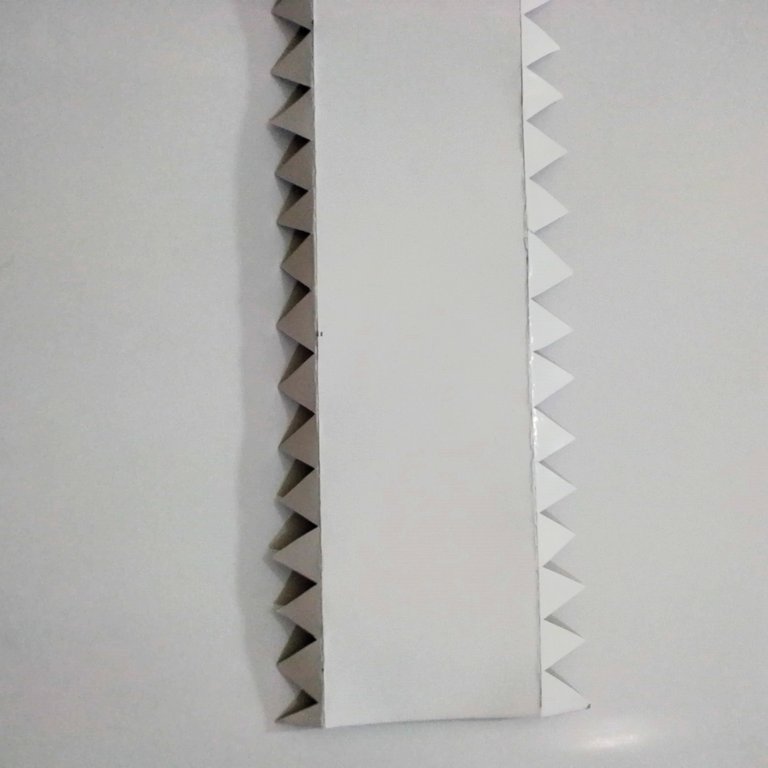
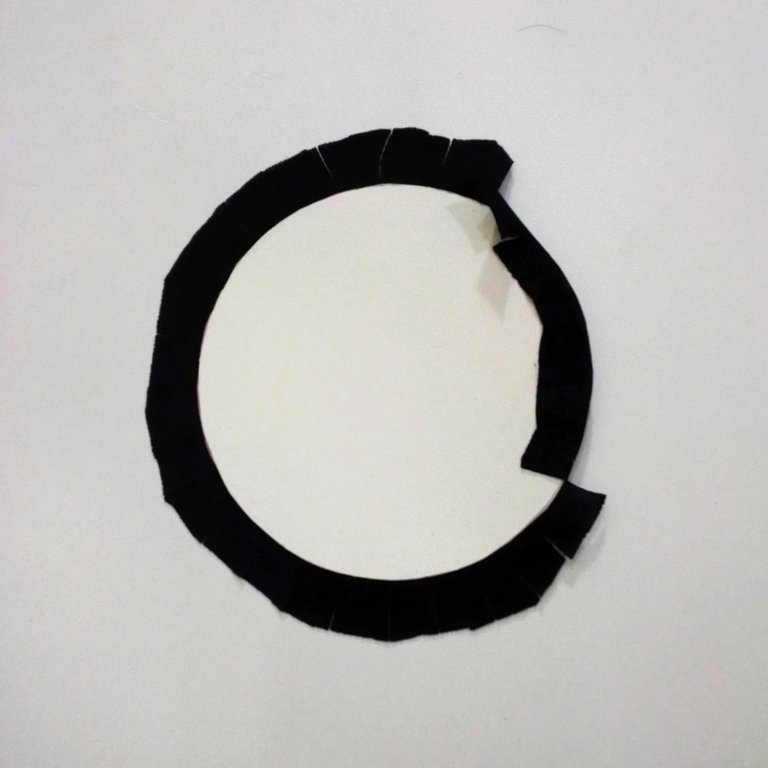
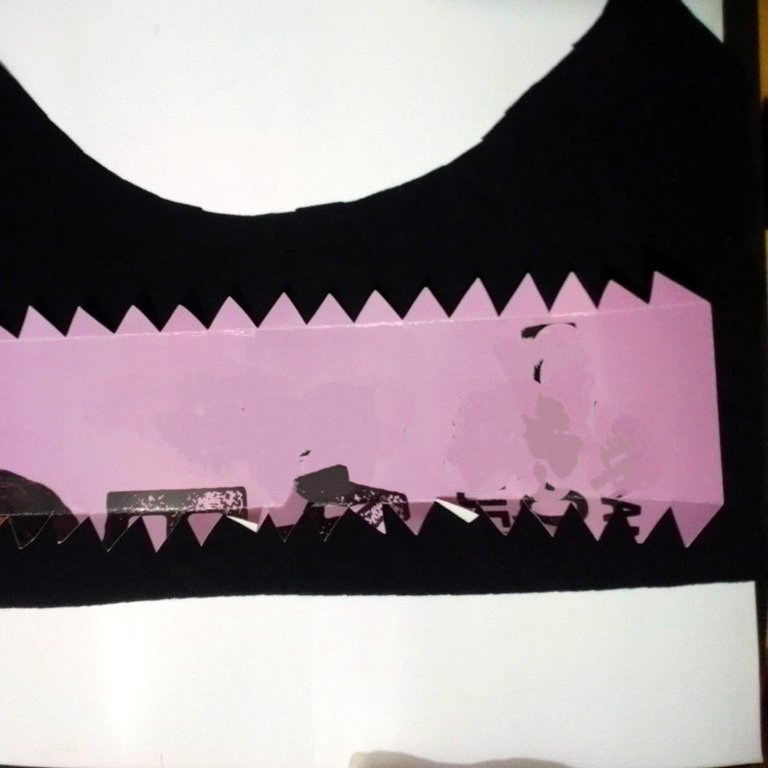
With a softer cardboard that can be easily folded, I will cut a long strip, which I will use to place around the hat. I cut this strip approximately 7 cm long and leaving 2 cm wide on both sides, so that I can make some pegs, as shown in the picture.
 |  |  |
|---|
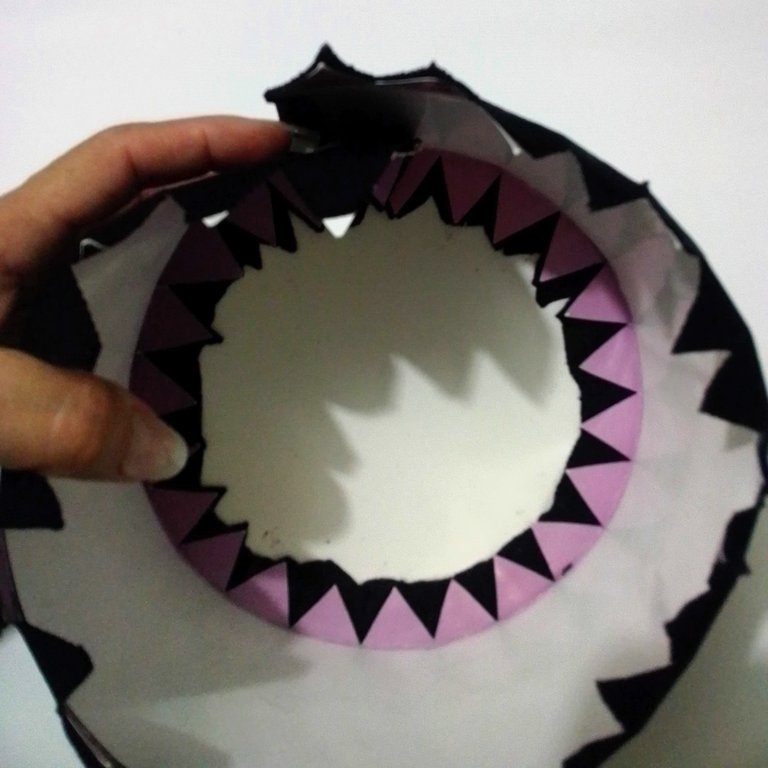
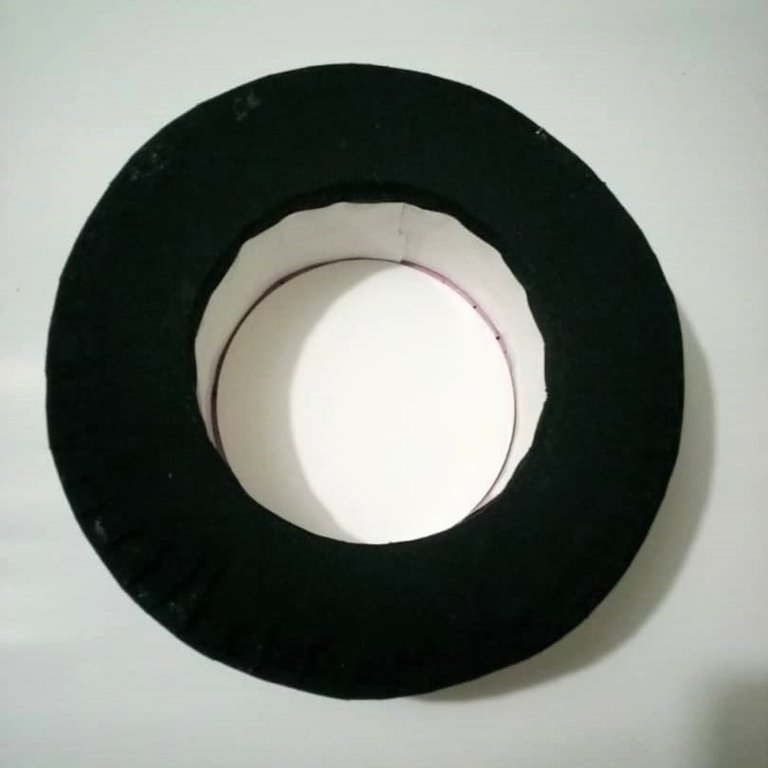
Now I will start lining the circle I cut out with the black fabric. I place the circle on the fabric and cut leaving a 2 cm margin to be able to make some picks and glue it around, so it will have a better finish.
I will also line the flap of the hat with the fabric, as shown in the image.
And I will do the same procedure with the long strip.
And once I have all the pieces ready, I will proceed to assemble the hat.
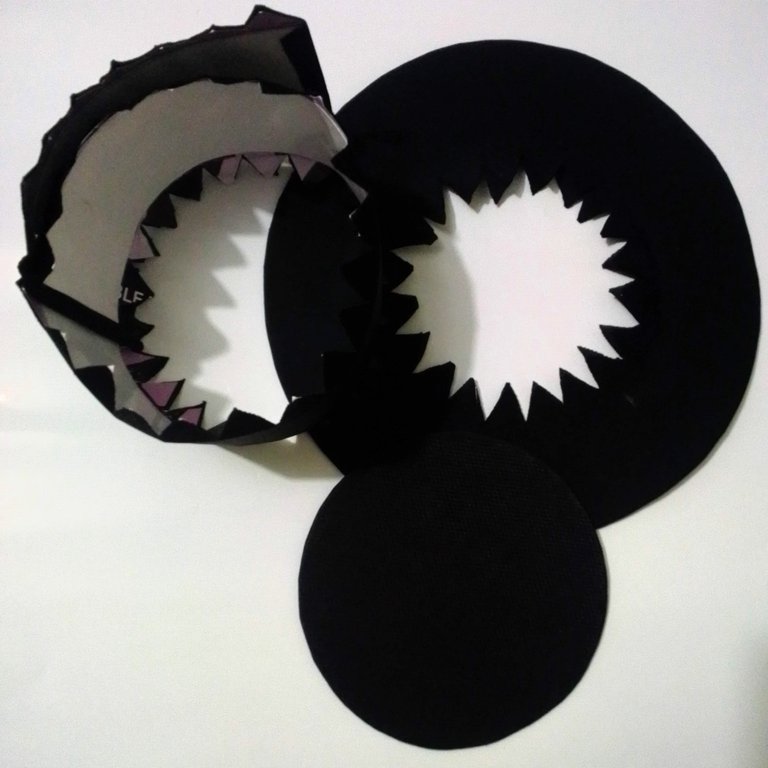
I will take the circle that I will line and very carefully, I will glue one side of the long strip, all around. Try to make sure that the edges match and that it does not stick out.
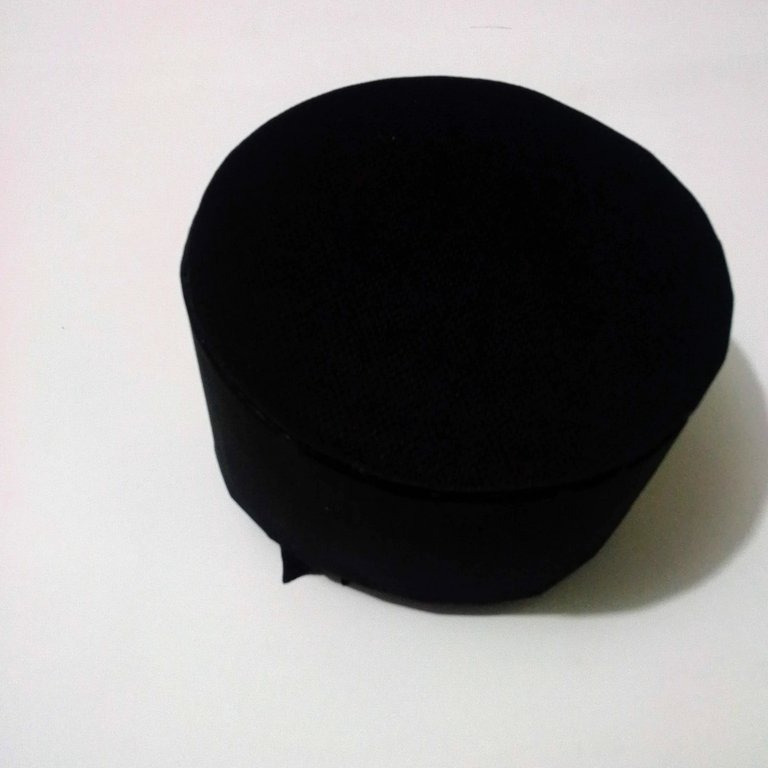
Once the hat crown is assembled, I will glue it to the flap, trying to make sure that the cuts on the flap are on the inside of the hat.
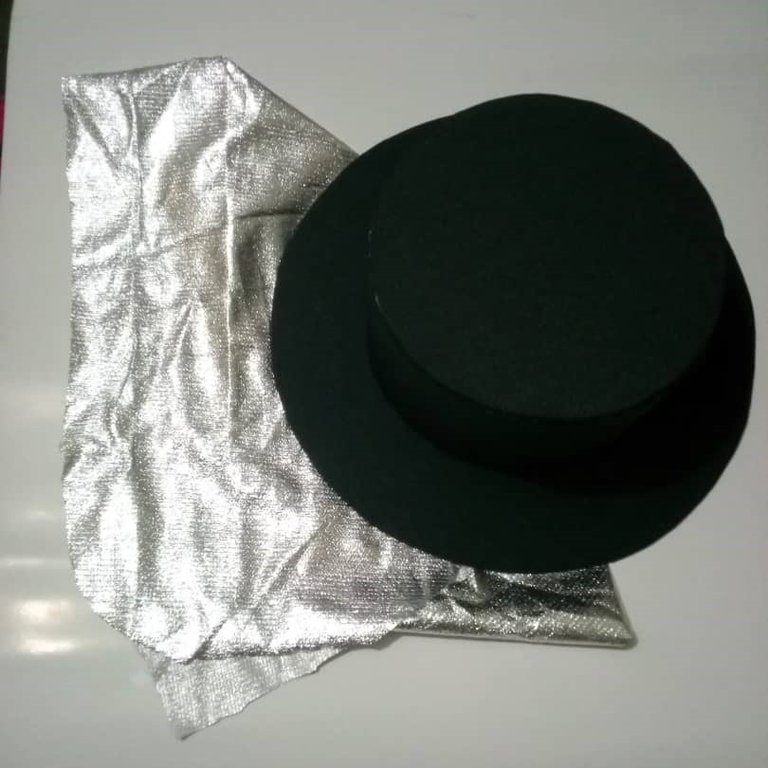
With the soft cardboard, cut out a circle that I will place on the inside to cover the joints of the cardboard. I will also cut out a strip to place around the inside to make the work look neater.
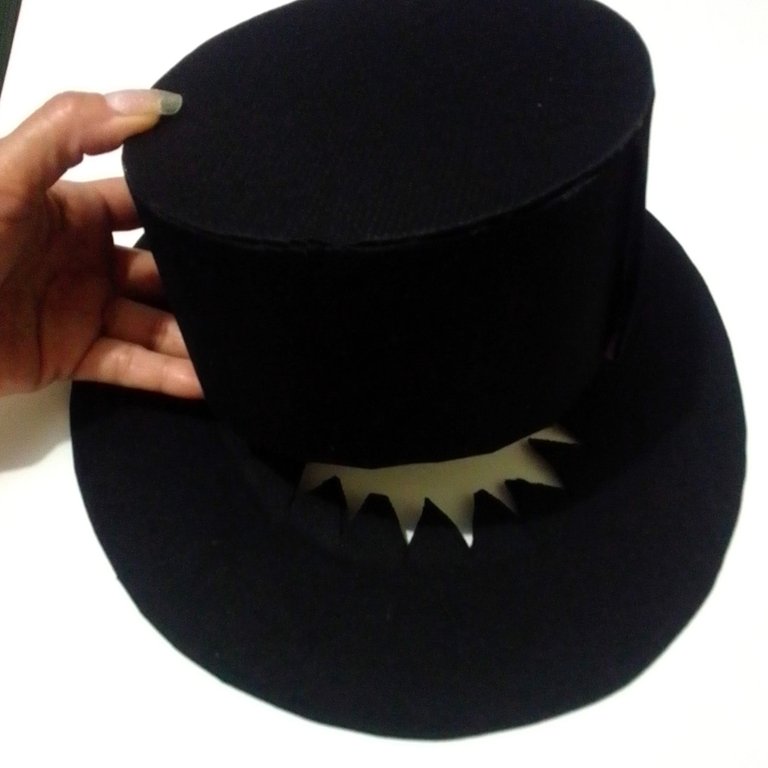
The school teacher asked that the hat be quite simple, without much decoration. So with the silver fabric, and to match the costume that the girl will wear, I will cut a long strip of 2 cm wide, to place it all around the hat, it will serve as decoration and at the same time, it will cover the joints.
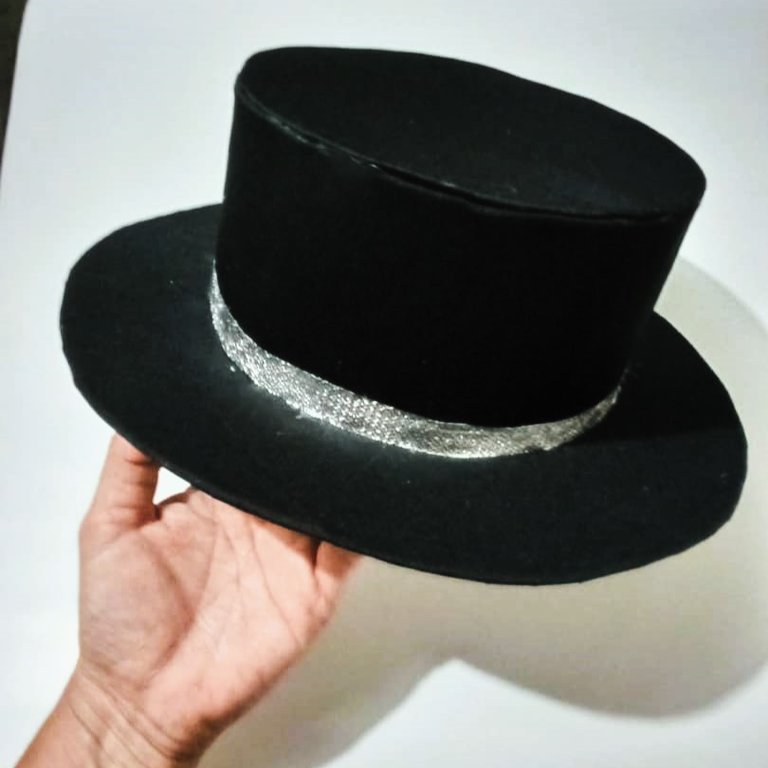
And that's how I got the top hat. The truth is that for the first time, I make a hat. It looks great.
Or what do you think?
And this is how my daughter looks in her Snowman costume, she was thrilled with her costume, and of course, I don't look bad either, ho, ho, ho, ho!


I hope you liked this tutorial that I gladly prepared for you. I say goodbye as always, but not before thanking you for taking a little of your valuable time to visit my blog and support me. And as the saying goes: "Do good and don't look at whom".
Content of the original creation:
❤️ All photos are mine, taken and edited with my Alcatel phone.
💛 The cover image, was made with the Canva app and edited by me.
💜 The divider images were taken from glitter-graphics.com.
💚 The English translation was done with the help of DeepL.
🧡 The letters indicating the languages were taken from cooltext.com.

Hola mis queridos lectores, espero que hayan tenido o tengan un excelente día. Esta es mi primera publicación de este año, lamentablemente estuve ausente un tiempo por falta de internet, pero ya se medió soluciono.
En diciembre, en las escuelas, como ya se está haciendo costumbre, animan a los niños a hacer una presentación navideña en cada salón. Mi hija, que estudia primer grado de primaria, le toco bailar la canción del Muñeco de nieve. Para ello realice un sombrero de copa, que acompañara al traje que le mande hacer también.
Como no pude publicarlo para aquel entonces, igual les quería mostrar como se realiza un sombrero de copa, por si en alguna ocasión lo necesite hacer y no sepa como hacerlo.
Este sombrero lo realicé con material reciclado, que me ha quedado de otros trabajos, así que no hice mucho gasto.
Sin más preámbulos les muestro el paso a paso de cómo lo realice.
PASO A PASO:
Use un cartón que es semiduro, con la ayuda de una tapa de una olla grande, con un diámetro de aproximadamente 30 cm. Recorte un círculo que lo usaré para hacer la solapa del sombrero.
A ese círculo que recorte, buscaré el centro y lo marcaré. Y con la ayuda de otra tapa, 4 cm aproximadamente, más pequeña que la anterior, marcaré otro círculo.
.
| | |
|---|
Una vez que tengo marcado el círculo de adentro, procedo a recortar la parte del centro, pero dejando como 2 cm, para poder hacer unos piquetes por todo alrededor, tal como se muestra en la imagen.
Con la misma tapa que realice el círculo pequeño, recortaré otro círculo que usaré para la parte de arriba del sombrero.
Con un cartón más suave y que se pueda doblar con facilidad, recortaré una tira larga, que usaré para colocarla alrededor del sombrero. Esta tira la recorté de 7 cm aproximadamente y dejando 2 cm de ancho por ambos lados, para poder hacer unos piquetes, tal como se aprecia en la imagen.
| | |
|---|
Ahora empezaré a forrar con la tela negra el círculo que recorte. Coloco el círculo sobre la tela y recorto dejando un margen de 2 cm para poder hacer unos piquetes y pegarlo alrededor, asi tendrá un mejor acabado.
También forraré con la tela, la solapa del sombrero, quedando de la manera como se muestra en la imagen.
Y haré el mismo procedimiento con la tira larga.
Y una vez que tengo todas las piezas listas, procederé a armar el sombrero.
Tomaré el círculo que forre y con mucho cuidado, iré pegando un lado de la tira larga, por todo el alrededor. Tratando de que las orillas coincidan y que no quede sobresaliente.
Ya armada la copa del sombrero, la pegaré a la solapa, tratando de que los cortes que tiene la solapa, me queden por dentro del sombrero.
Con el cartón suave, recorte un círculo que colocaré por dentro para tapar las uniones de los cartones. También recortaré una tira para colocar al rededor, por dentro y el trabajo se vea más prolijo.
La maestra del colegio pidió que el sombrero fuera bastante sencillo, sin mucha decoración. Así que con la tela plateada, y para que haga juego con el traje que llevara la niña, recortaré una tira larga de 2 cm de ancho, para colocarla por todo el alrededor del sombrero, me servirá de decoración y a la vez, tapará las uniones.
Y así me quedo el sombrero de copa. La verdad es que para ser la primera vez, que hago un sombrero. Quedo genial.
¿O que opinan ustedes?
Y así se ve mi hija con su traje de Muñeco de nieve, ella quedó encantadísima con su traje. ¡Y por supuesto, a mí tampoco se me ve mal, jo, jo, jo!
Espero que te haya gustado este tutorial que con mucho gusto preparé para ustedes. Me despido como siempre, no sin antes agradecerles por tomarse un poco de su valioso tiempo, para visitar mi blog y apoyarme. Y como dice el dicho: "Hagan bien y no miren a quién".
Content of the original creation:
❤️ Todas las fotos son mías tomadas y editadas con mi teléfono Alcatel.
💛 La imagen de portada, fue realizada con la aplicación Canva y editada por mí.
💜 Las imágenes divisorias fueron tomadas de la página de glitter-graphics.com.
💚 La traducción al inglés fue hecha con la ayuda de DeepL.
🧡 Las letras que indican los idiomas, fueron tomadas de la página cooltext.com.
Congratulations @kdelvaeg! You have completed the following achievement on the Hive blockchain And have been rewarded with New badge(s)
Your next target is to reach 500 comments.
You can view your badges on your board and compare yourself to others in the Ranking
If you no longer want to receive notifications, reply to this comment with the word
STOPTo support your work, I also upvoted your post!
Check out our last posts:
The top hat turn beautifully well. I love it. I bet your daughter loved it. Amazing work!
!discovery 36
Hello, thank you very much for your comment, sorry I didn't respond at the time. And yes, my daughter loved the hat, the whole outfit and even more to be a snowman, in this hot area. Mom said, I don't feel hot anymore, because I'm made of snow, ha ha, innocence is beautiful.
This post was shared and voted inside the discord by the curators team of discovery-it
Join our Community and follow our Curation Trail
Discovery-it is also a Witness, vote for us here
Delegate to us for passive income. Check our 80% fee-back Program
This is lovely dear and it fits your daughter well. I never thought we could make this by ourselves and was hoping that only an expert will be able to do until now that you have shared us some amazing tutorials that makes it easy to make
Well done dear
So sorry about the network issue
It’s good to have you back
Hi how are things. Sorry I didn't respond right away. The truth is that I didn't believe I could do something like that and all the other things I've done either. But I think it's all a matter of doing it and seeing what comes out, if it goes well, great and if it goes wrong, no way, we'll try it again, until it comes out. Thank you for your comment and support.
A very nice hat, if design reminds me a bit of the ones they used in musicals.
Hello, sorry I didn't respond immediately. Yes, it is quite similar to those that appear in musicals. In fact, my daughter did a dance and it turned out very nice, I just couldn't upload it. Thank you for your visit and comment.