

Español
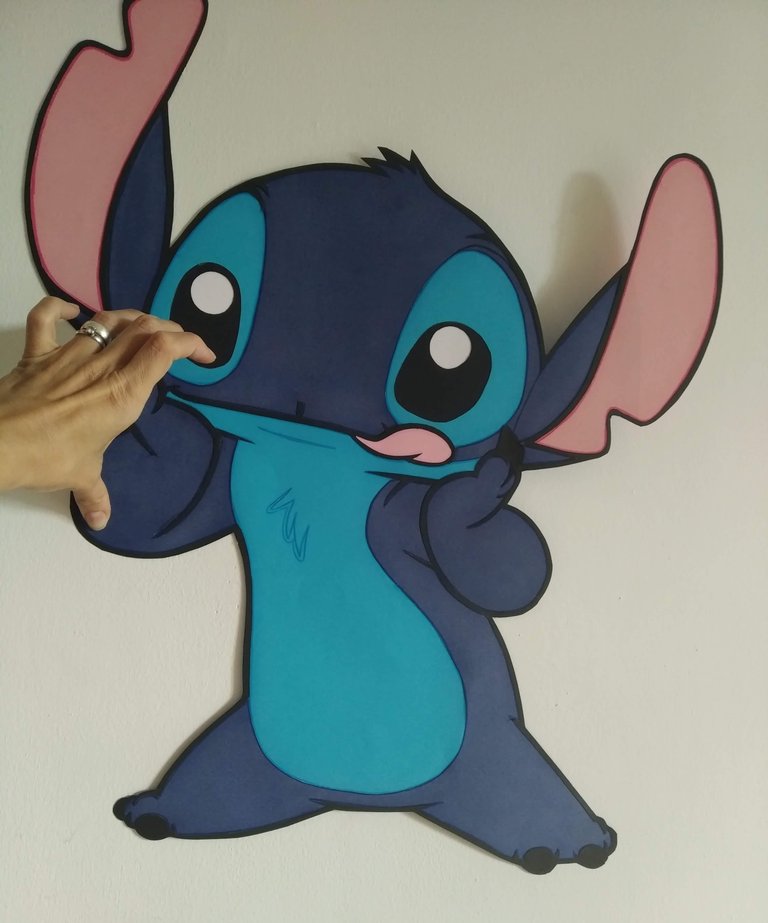
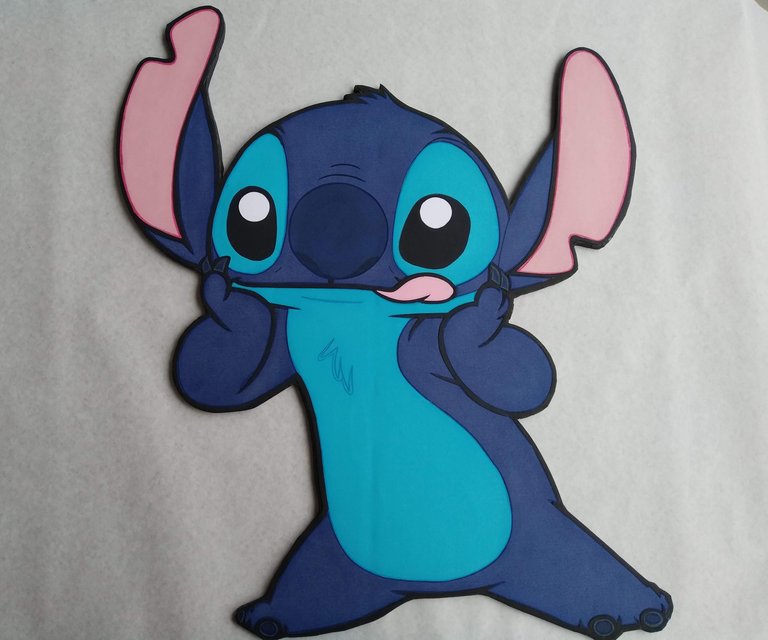
Luisangela es amante al personaje Stitch, de la comiquita “lilo y Stitch”… ¿y quién es Luisangela? Es la hija de una amiga maravillosa que adoro con mi todo mi corazón. Cuando luisangela cumplió 15, mi amiga “Dubra” me dijo ella quería la temática de su cumpleaños de Stitch y de Beyota, un personaje de otra comiquita.
Sí lo sé, son personajes distintos pero así lo quería la cumpleañera y su mamita la complació, la fiesta fue de dos temas a la vez, y parte de su decoración central se la realicé yo al hacerle estos afiches personalizados.
Son afiches realizados con materiales sencillos y súper económicos… Sin más, y esperando disfruten del trabajo realizado les dejo los materiales utilizados, el proceso y las fotos finales del trabajo realizado.
- Plantilla con diseño del personaje.
- Cartulinas de colores (láminas grandes) para este personaje se utilizó: azul, negro,rosado,turquesa y blanco.
- Cartón doble canal (grueso).
- Papel carbón.
- Cutter.
- Tijera.
- Marcadores de Colores.
- Silicón frio.
- Lápiz
English
Luisangela loves the character Stitch, from the cartoon “Lilo and Stitch”... and who is Luisangela? She is the daughter of a wonderful friend that I adore with all my heart. When Luisangela turned 15, my friend “Dubra” told me she wanted her birthday to be themed after Stitch and Beyota, a character from another cartoon.
Yes I know, they are different characters but that's how the birthday girl wanted it and her mom pleased her, the party had two themes at the same time, and part of her central decoration was made by me when I made her these personalized posters.
They are posters made with simple and super economical materials ... Without further ado, and hoping you enjoy the work done I leave you the materials used, the process and the final photos of the work done.
- Template with character design.
- Color cardboard (large sheets) for this character we used: blue, black, pink, turquoise and white.
- Double channel cardboard (thick).
- Carbon paper.
- Cutter.
- Scissors.
- Color markers.
- Cold silicone.
- Pencil
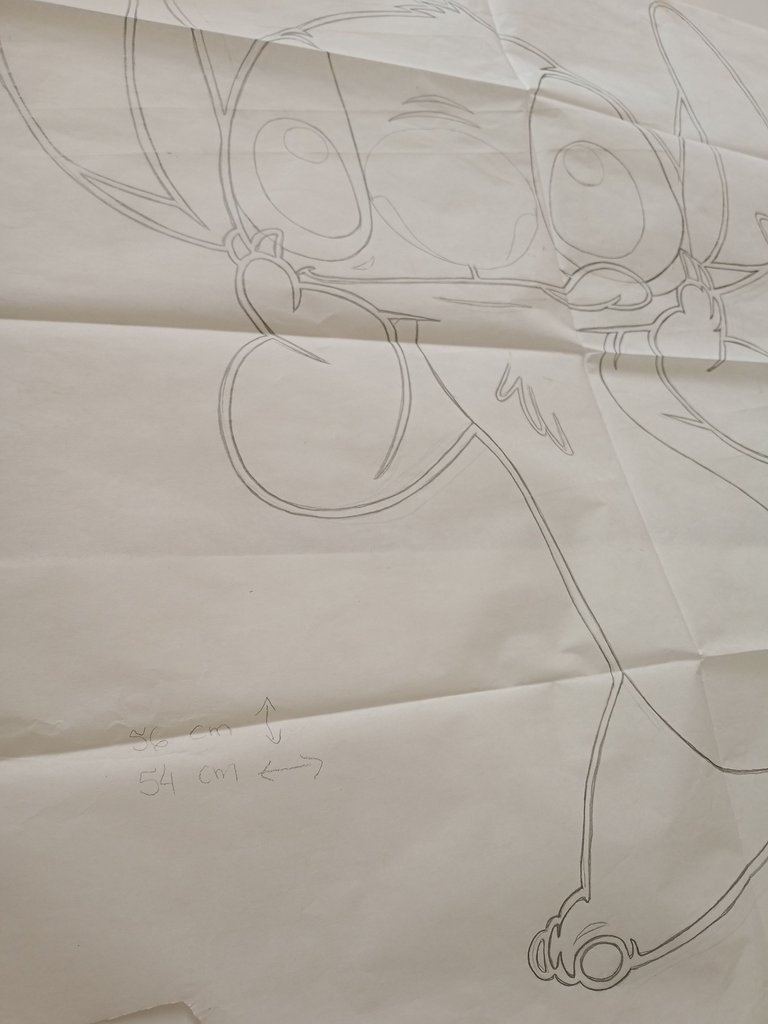
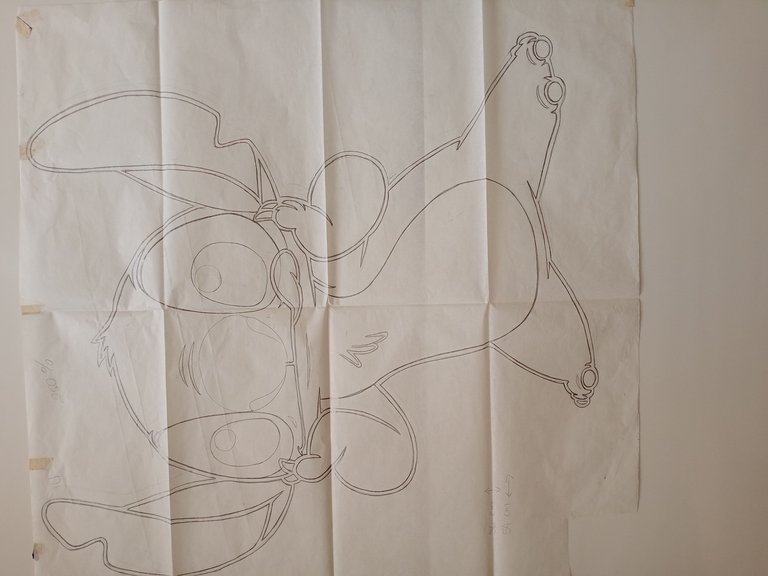
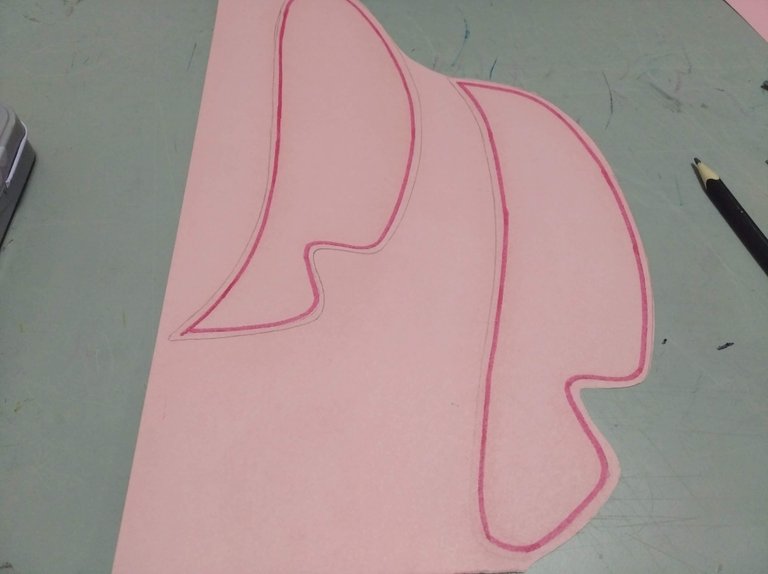
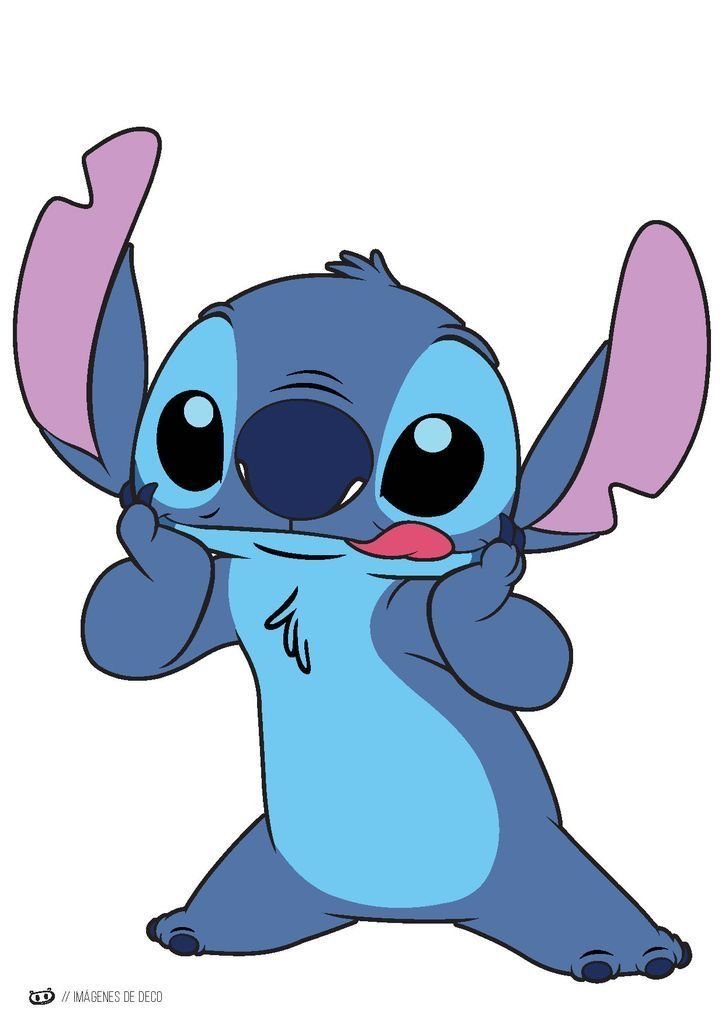
1.- Definir el tamaño y el diseño del personaje y plasmarlo en papel blanco (nuevo o reciclado) para poder crear la plantilla de trabajo que permita luego transferirlo a la cartulina de colores con el uso de papel carbón. La medida de este trabajo fue aproximadamente de 56x54 centímetros.
1.-Define the size and design of the character and capture it on white paper (new or recycled) in order to create the work template that will later be transferred to the colored cardboard with the use of carbon paper. The size of this work was approximately 56x54 centimeters.
 |  |
|---|
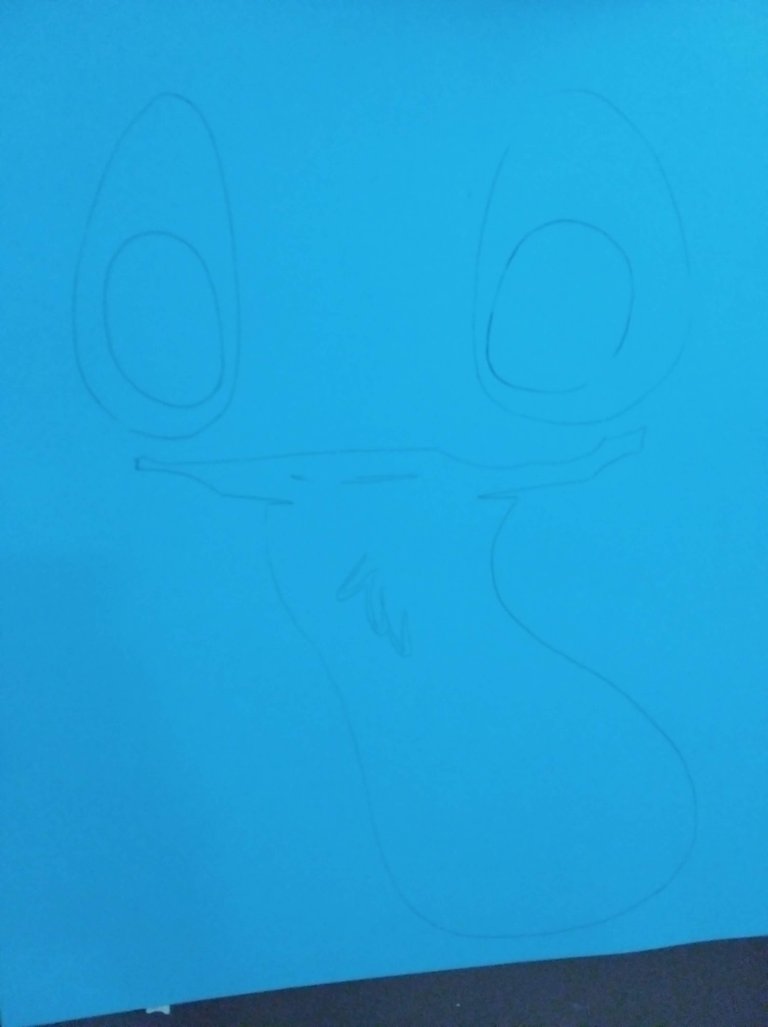
2.- Con el uso del papel carbón transferir las distintas piezas del diseño a las cartulinas de colores. Remarcar las mismas con marcadores de colores para darle mas alegría a la pieza en general.
2.-With the use of carbon paper transfer the different pieces of the design to the colored cardboard. Highlight them with colored markers to give more joy to the overall piece.
 |  |  |
|---|
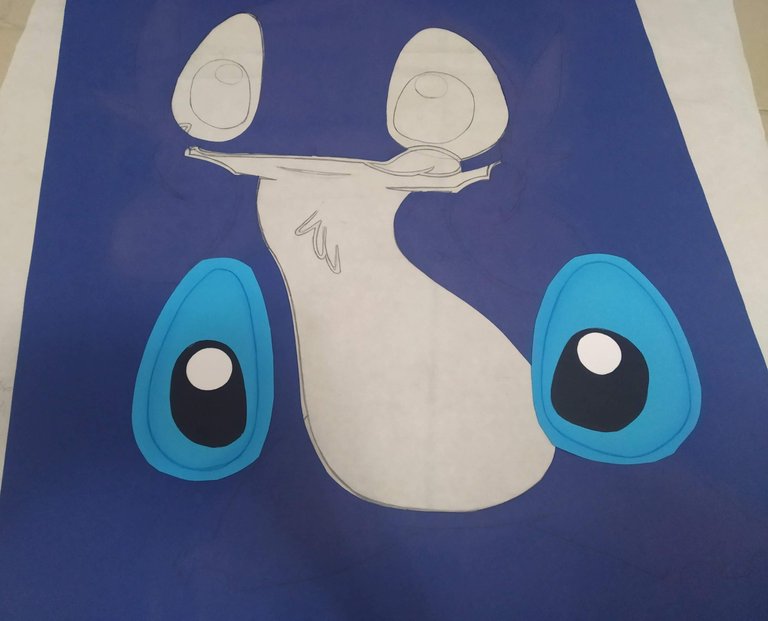
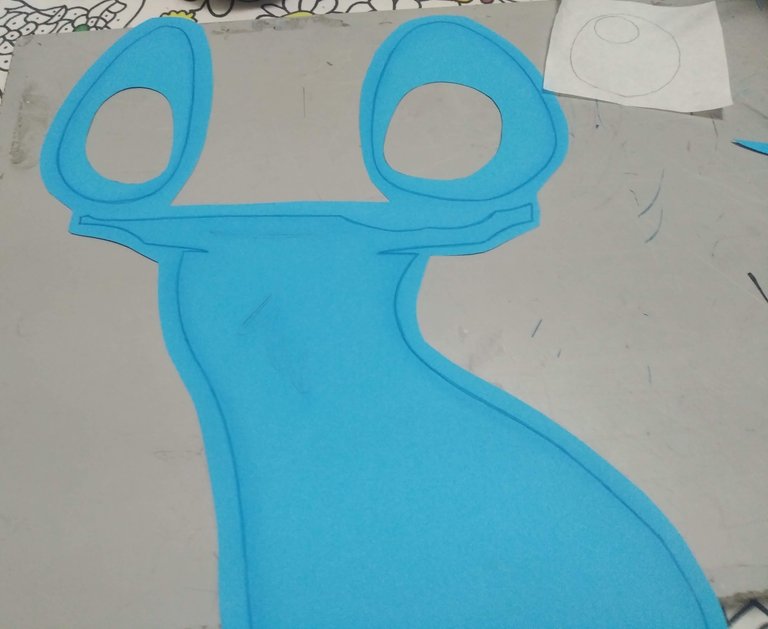
3.- Trabajadas las piezas con los marcadores y resaltes necesarios, recortar las mismas, teniendo la precaución de dejar pequeños bordes en las partes que se ubican al fondo a fin de poder aplicar el silicón y pueda ensamblarse la pieza general.
3.- Once the pieces have been worked with the necessary markers and highlights, cut them out, taking care to leave small edges on the parts that are located at the bottom so that the silicone can be applied and the overall piece can be assembled.
 |  |  |
|---|
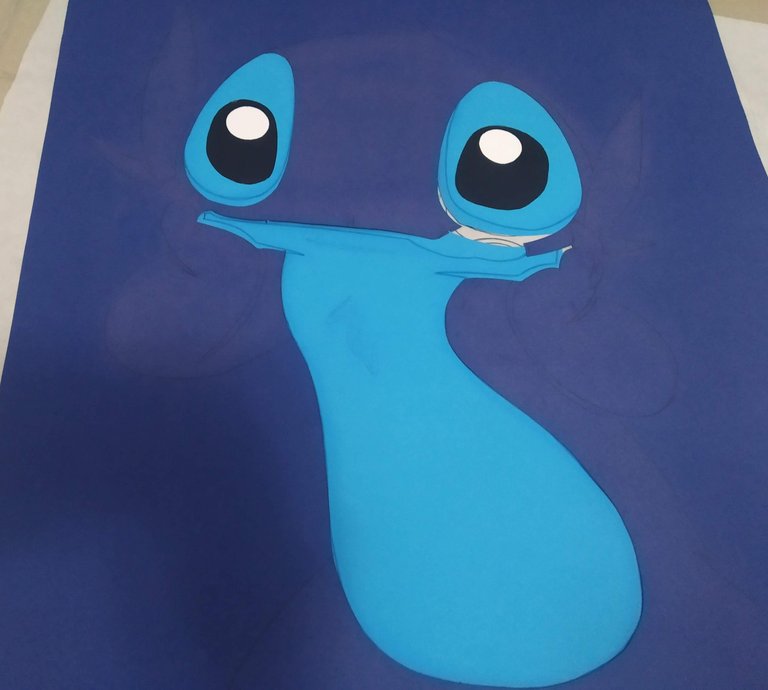
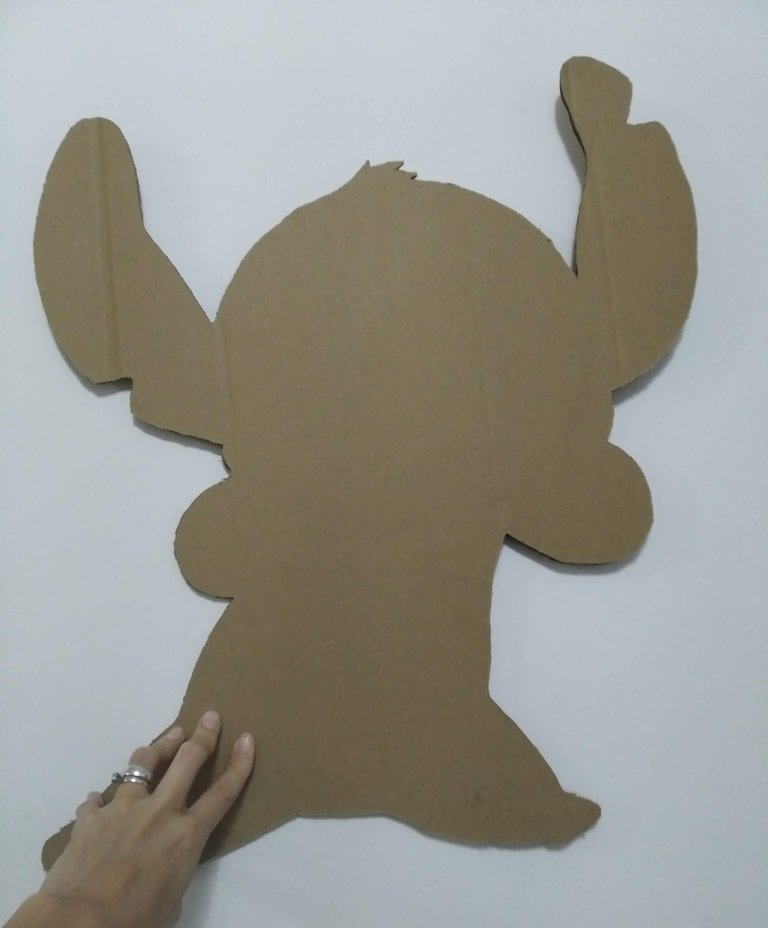
4.- Unir las piezas según el diseño y teniendo la figura lista, marcar y recortar el cartón con el cutter por todo el borde, cuidando de no dañar el cartón. Una vez recortado el cartón, cubrir los bordes con cartulina negra para que se vea prolijo el trabajo final.
4.-Join the pieces according to the design and having the figure ready, mark and cut the cardboard with the cutter all around the edge, taking care not to damage the cardboard. Once the cardboard is cut out, cover the edges with black cardboard to make the final work look neat.
 |  |
|---|
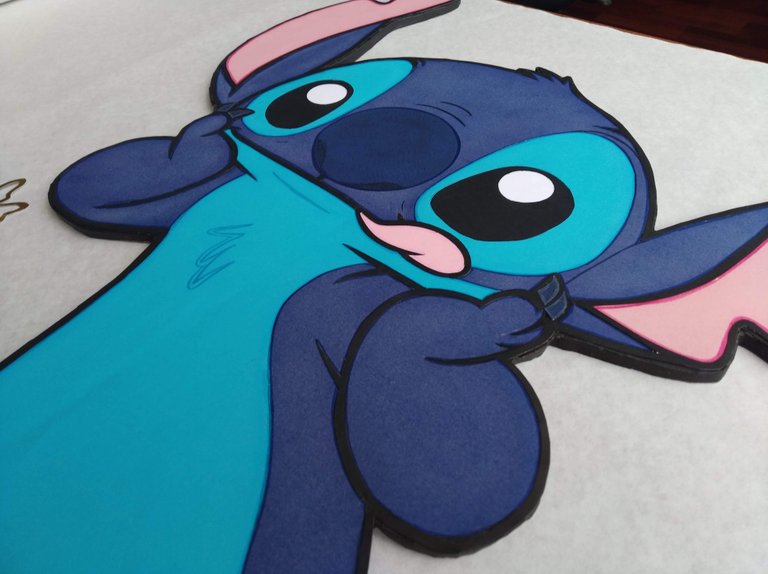
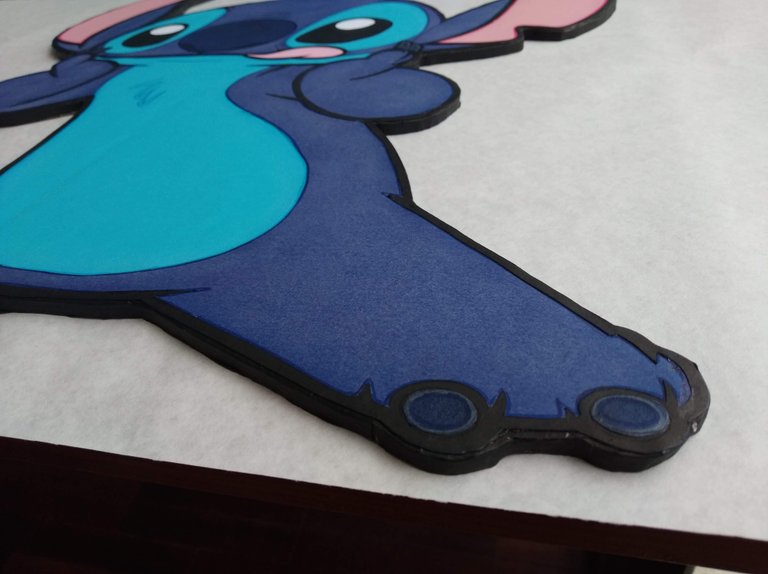
5.- Para finalizar, pegar la pieza al cartón, cuidando de no aplicar demasiado silicón, terminar dando los ajustes finales de marcador y detalles y listo… ¡a disfrutar de lo creado!
5.-Finally, glue the piece to the cardboard, taking care not to apply too much silicone, make the final adjustments with the marker and details and that's it... enjoy what you have created!
 |  |  |
|---|
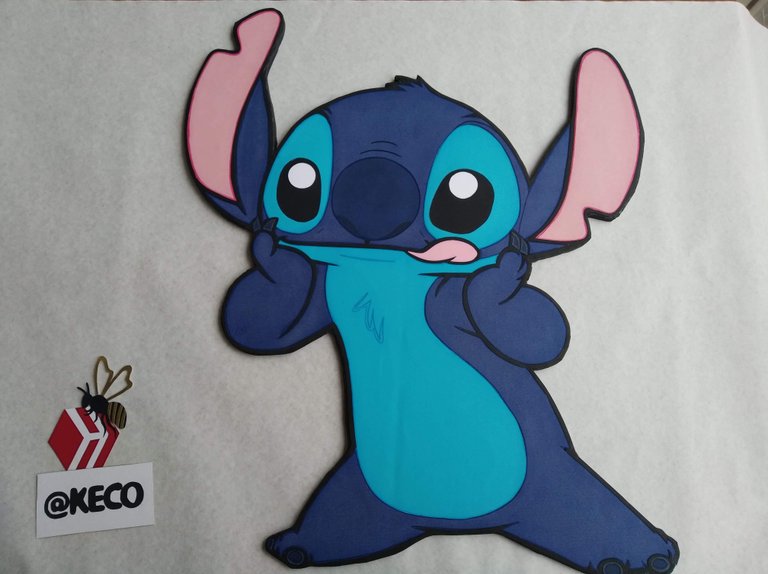
Espero les haya gustado y sobre todo se entusiasmen a crear algo parecido para sorprender a familiares y amigos.
I hope you liked it and, above all, I hope you get excited to create something similar to surprise your family and friends.
Fuente
SALUDOS / REGARDS

Todas las Fotos fueron tomadas con mi teléfono
Contenido original de @keco (fotos y texto) - Todos los derechos reservados para ser Publicado en HIVE así como en mis distintas redes: Instagram y X
All photos were taken with my phone
Original content by @keco (photos and text) - All rights reserved to be posted on HIVE as well as on my various networks: Instagram and X
This Stitch-themed birthday poster is such a fun and creative idea. Great work.
Te quedó muy bien el dibujo, qué bonito, espero que le guste a la cumpleañera. 🩷 Me imagino que debe ser complicado trabajar de esa forma con el cartón. 😮
Quedó perfecto 🥹
Te quedó verdaderamente hermoso y el paso a paso genial.
Desde la curación manual del testigo de @hispapro te deseamos éxitos en tus proyectos.
you are very creative. the results are very beautiful.
Congratulations @keco! You have completed the following achievement on the Hive blockchain And have been rewarded with New badge(s)
Your next target is to reach 25000 upvotes.
You can view your badges on your board and compare yourself to others in the Ranking
If you no longer want to receive notifications, reply to this comment with the word
STOPCheck out our last posts:
Discord Felicitaciones, su publicación ha sido votada por @ dsc-r2cornell. Puedes usar el tag #R2cornell. También, nos puedes encontrar en