Hola gente!
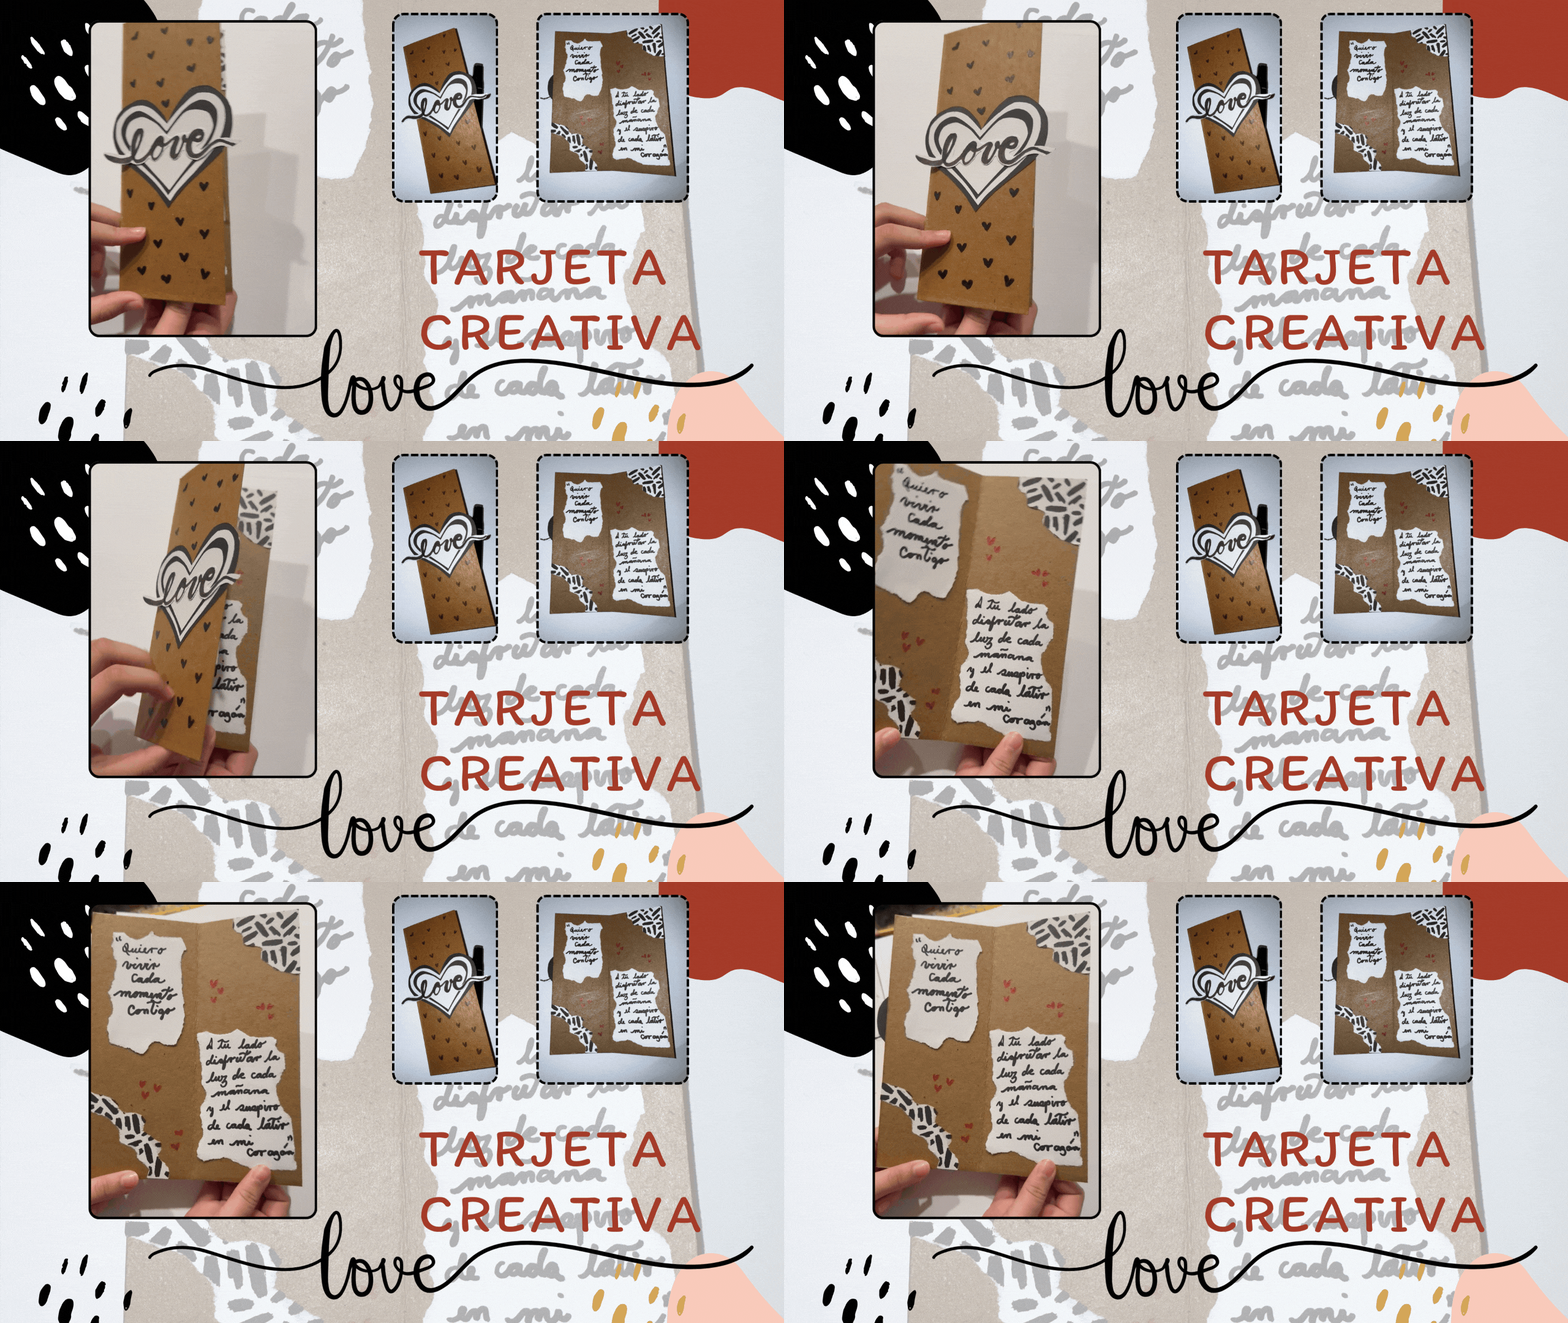
Estos días de frío, mucho frío y encierro porque las calles se han congelado, he aprovechado para hacer unas tarjetitas, así que hoy vengo a enseñarles el proceso de una de ellas, es una tarjetita diferente a las que suelo hacer, diferente con respecto al color, normalmente mis tarjetitas son muy coloridas, juego con muchos colores, pero esta es algo más neutra.
Hello people!
These days of cold, very cold and confinement because the streets have been frozen, I took the opportunity to make some little cards, so today I come to show you the process of one of them, it is a different card to those I usually do, different with respect to color, usually my cards are very colorful, I play with many colors, but this is something more neutral.

- 🖤 Cartulina negra
- 🖤 Cartulina blanca
- 🖤 Cartulina estampada
- 🖤 Pega
- 🖤 Tijera
- 🖤 Regla
- 🖤 Marcadores
- 🖤 Black cardboard
- 🖤 White cardboard
- 🖤 Stamped cardboard
- 🖤 Glue
- 🖤 Scissors
- 🖤 Ruler
- 🖤 Markers

Paso 1 🖤
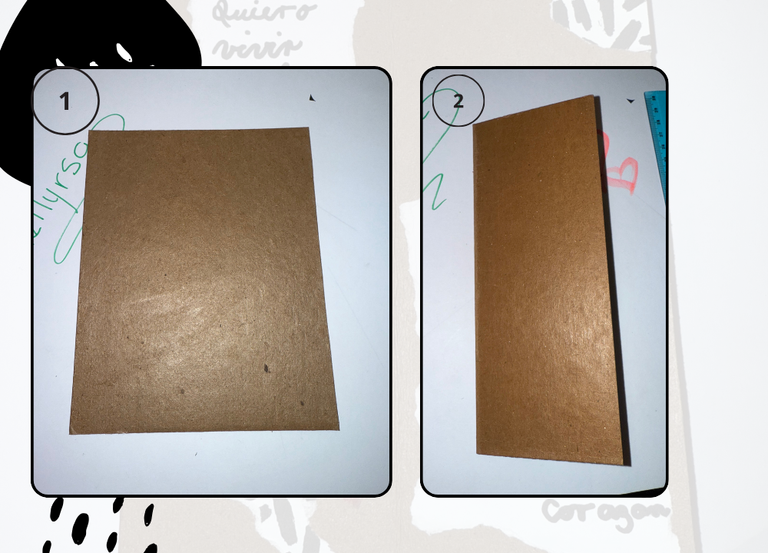
- Para empezar, he doblado la cartulina por la mitad.
El tamaño de la cartulina es de 15 cm x 22 cm.
step 1 🖤
- To start, I folded the cardstock in half.
The size of the cardboard is 15 cm x 22 cm.

Paso 2 🖤
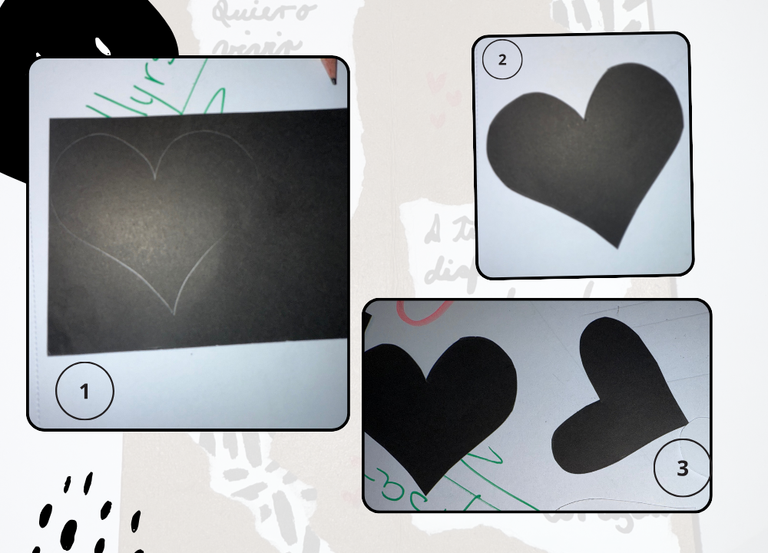
- Dibujé un corazón en cartulina negra, luego lo utilicé como guía para hacer otro corazón blanco, pero a éste le quitaré medio centímetro aproximadamente y repetiré el procedimiento para hacer otros dos corazones blancos y negros.
step 2 🖤
- I drew a heart on black cardboard, then used it as a guide to make another white heart, but I will remove about half a centimeter from this one and repeat the procedure to make two more black and white hearts.

Paso 3 🖤
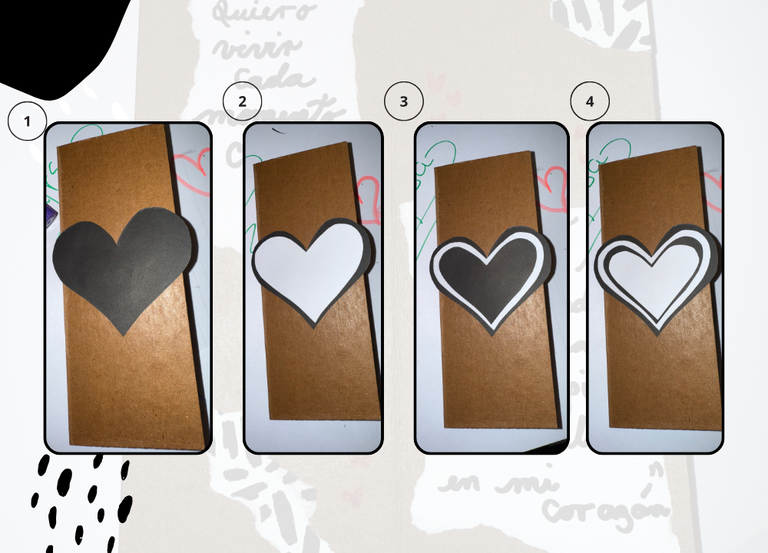
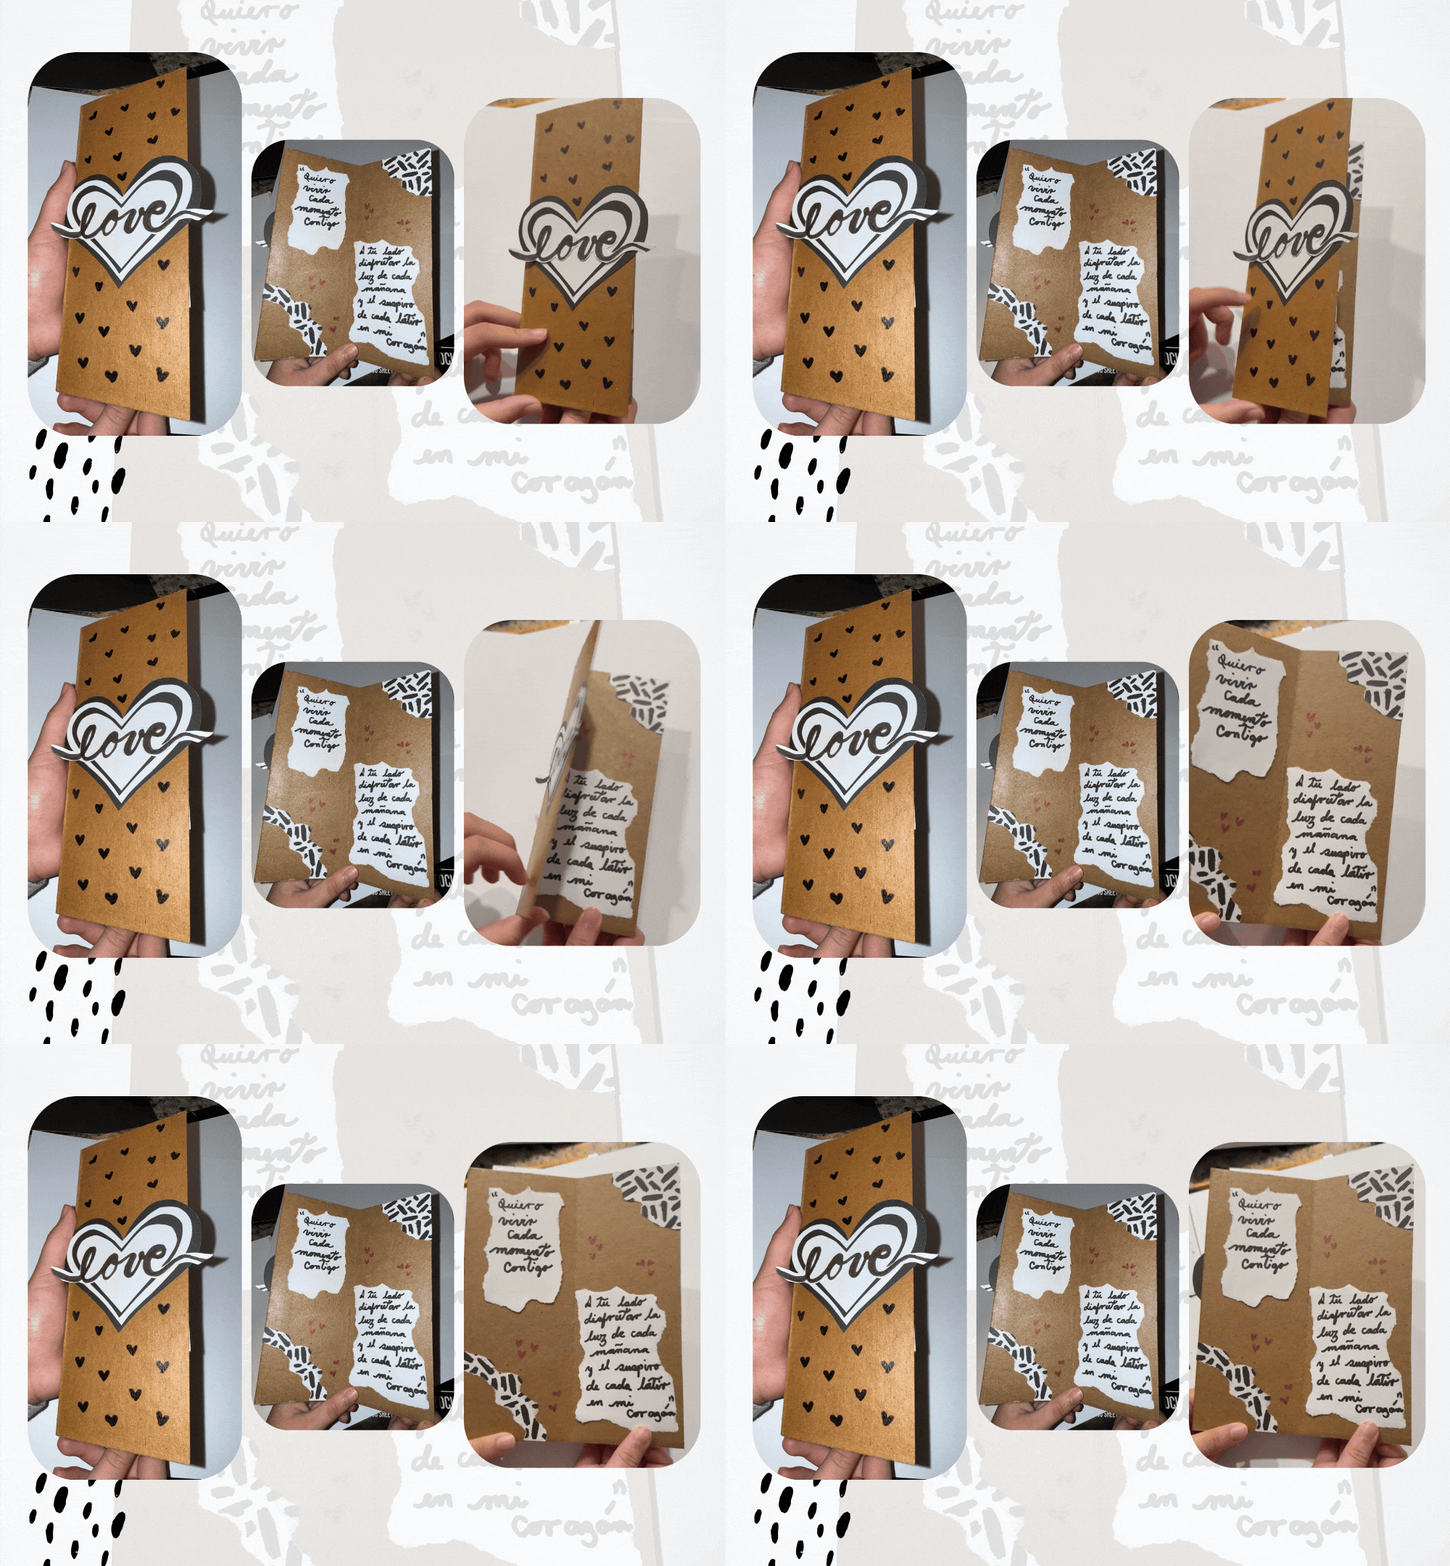
- Con los corazones listos, los pegué en el centro de la cubierta de la tarjeta. Colocándolos del más grande al más pequeño, de forma que el blanco y el negro quedaran intercalados.
step 3 🖤
- With the hearts ready, I glued them in the center of the card cover. Placing them from the largest to the smallest, so that the black and white were interspersed.

Paso 4 🖤
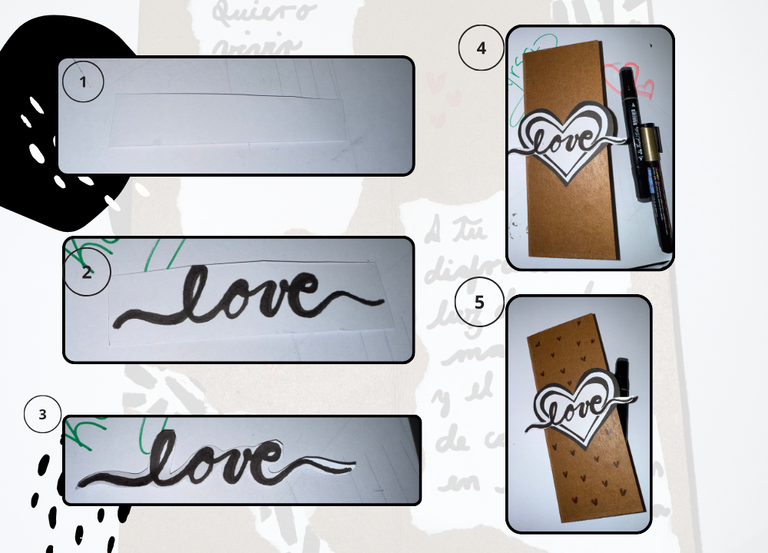
- En una tira de cartulina blanca escribí con rotulador negro la palabra ¨Love¨ . Recorté todo el borde de la palabra y luego la pegué en el centro del corazón. Por toda la portada hice corazoncitos en negro.
step 4 🖤
- On a strip of white cardstock, I wrote with black marker the word ¨Love¨. I cut out the entire edge of the word and then glued it in the center of the heart. All over the cover I made little hearts in black.

Paso 5 🖤
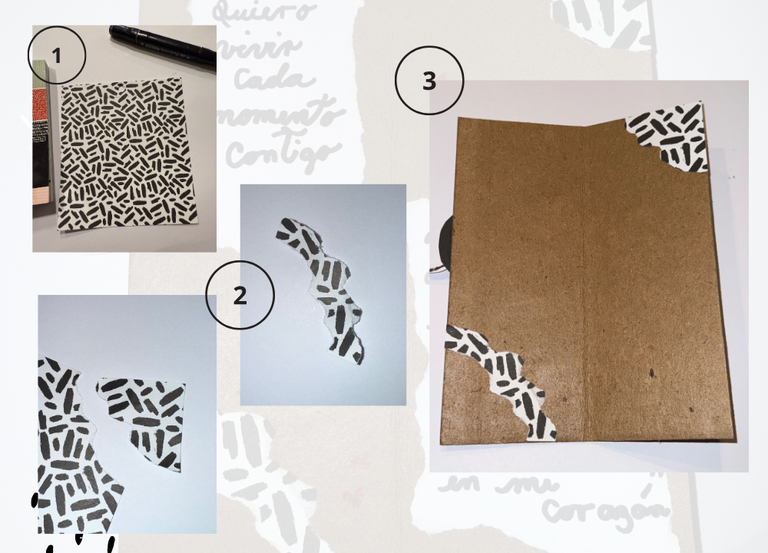
- Con una cartulina estampada en blanco y negro, rasgué dos trozos para pegarlos en una esquina superior e inferior.
step 5 🖤
- Using a black and white patterned cardstock, tear two pieces to glue in a top and bottom corner.

Paso 6 🖤
- En cartulina blanca hice dos cuadrados y los rasgué por todo el borde,los pegue de un lado arriba y del otro abajo y en ellos escribi un texto: «Quiero vivir cada momento contigo» y en el otro lado “A tu lado disfrutar de la luz de cada mañana y del suspiro de cada latido de mi corazón”.
step 6 🖤
- On white cardboard I made two squares and ripped them all around the edge, glued them on one side up and on the other side down and on them I wrote a text: “I want to live every moment with you” and on the other side “By your side enjoy the light of every morning and the sigh of every beat of my heart”.
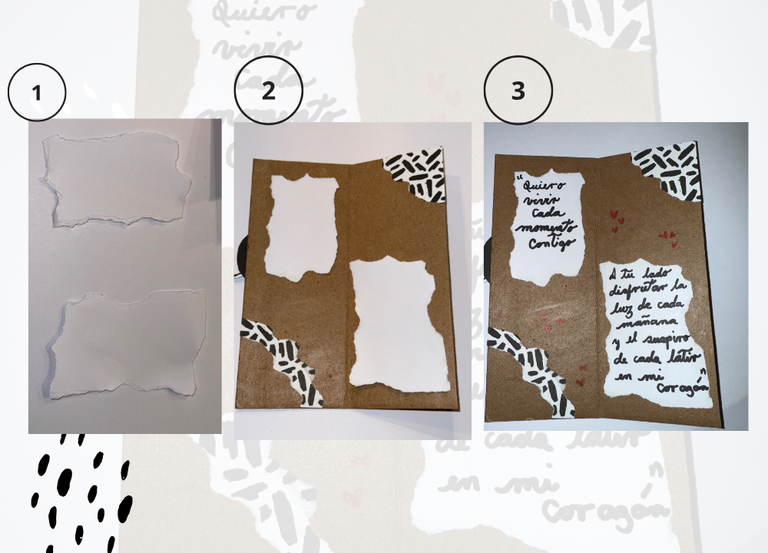

- Resultado 🖤
- Result 🖤

Estaré encantada de leer y responder a sus comentarios. Gracias totales a todos los que aprecian mi contenido, y que se toman el tiempo de leer y dejar un comentario, gracias, muchas gracias. Les deseo lo mejor.
Hasta pronto.
I will be happy to read and respond to your comments. Total thanks to all of you who appreciate my content, and who take the time to read and leave a comment, thank you, thank you very much. I wish you all the best.
See you soon.
Otros trabajos similares :
| DIY - Creative card for mom ENG/SPA | DIY - Surprise gift box ENG/ESP | DIY "A card dedicated to my favorite hiver " ENG/ESP | Creative wedding anniversary card ENG/SPA | DIY- Tarjeta creativa de cumpleaños 🧁 |
|---|---|---|---|---|
 |  |  |  |  |

Fotografías de mi propiedad tomadas con el celular iPhone 📲 16 pro max, editadas en canva
Traducción realizada con la versión gratuita del
traductor DeepL
Todos los diseños fueron creados en canva
Photographs of my property taken with the IPhone 📲 16 pro max, edited in canva
Translation made with the free version of
translator DeepL
All designs were created in canva
Hola.. Disculpa el abuso, Puedes apoyar con un voto a mi esposo @albertocoachbl en este concurso?? Te dejo el link del post 🙏
Gracias de antemano 🥰🥰
https://peakd.com/hive-140169/@lordbutterfly/help-us-decide-the-winner-of-vibes-week-27-community-poll
Es un diseño sencillo pero quedó muy bonito. Usar tonos neutros para tarjetas así está bien para las personas mayores, aunque hay viejitos que se muestran fascinados por los colores.
Hermosa tarjeta. Definitivamente que es un arte hacerlas a mano. Saludos 💛.
Es muy placentero para mí crear estas tarjetas y más aún compartir el proceso con ustedes, me alegra que te haya gustado. Saludos!! 🌺
Hasta pronto!