ESPAÑOL
Hola amigos de #hive hoy quiero mostrarle esta creación que a mi particularmente me gusta mucho es muy práctica, fácil y de gran utilidad para esta navidad, ya que la puedes usar de distintas maneras, como porta regalos, para guardar dulces, entre otras cosas.
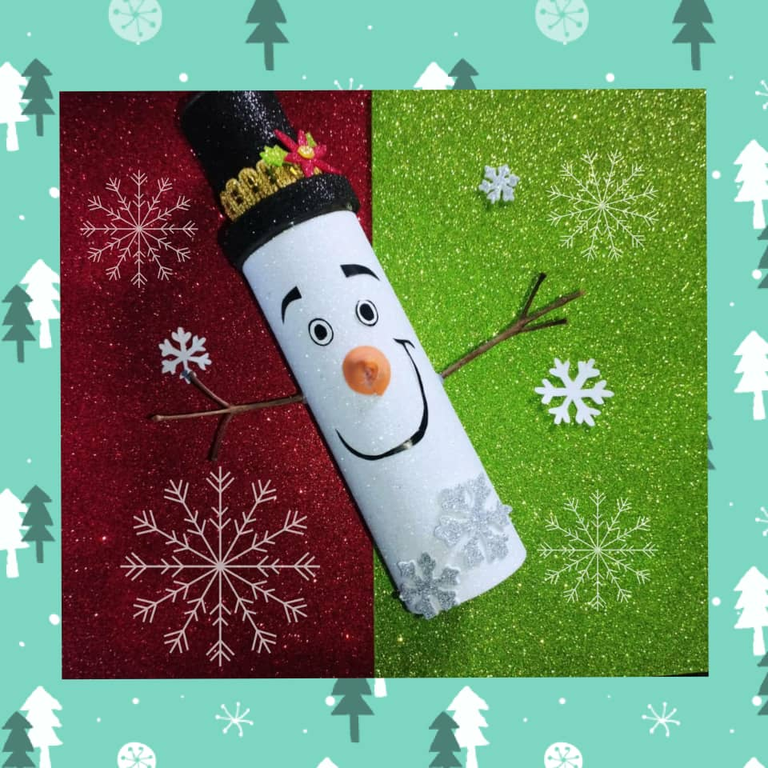
La época de navideña es una de las más hermosas y esperadas al año en todo el mundo. Una fiesta religiosa motivado a el nacimiento del Niño Dios, es una temporada maravillosa en donde adornamos nuestros hogares, parques, calles etc. Y además colocamos adornos con nuestros símbolos navideños como santa, los reyes magos y el muñeco de nieve. Mi creación de hoy es un muñeco de nieve elaborado con un envase de forma cilíndrica reciclado les va a gustar y es fácil de elaborar.
Para nuestra creación necesitaremos los siguientes materiales:

Materiales:
- 1 foami escarchado color blanco.
- 1 foami escarchado color negro.
- 1 Pequeño pedazo de papel lustrillo negro para los ojos.
- 1 pedacito de aproximadamente 5x5cm de foami naranja.
- 1 pedacito de aproximadamente 5x5cm de foami rojo.
- 1 pedacito de aproximadamente 5x5cm de foami verde.
- 1 pedacito de aproximadamente 5x5cm de foami plateado escarchado.
- Silicón frío.
- Silicón caliente.
- Pistola de silicón.
- 1 regla.
- Lápiz
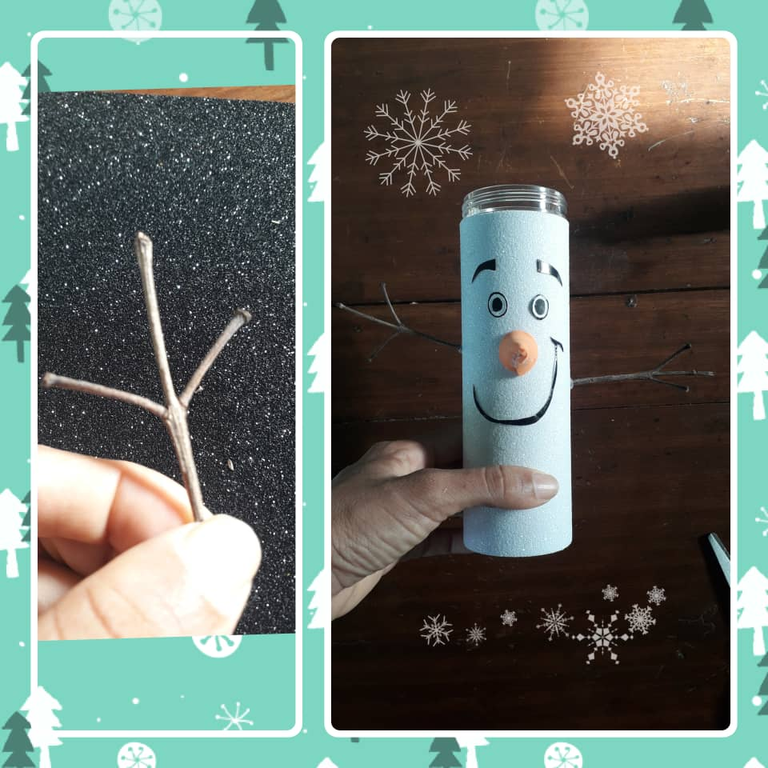
- 1 par de ramitas secas.
Ya con todos nuestros materiales iniciamos con nuestro paso a paso:
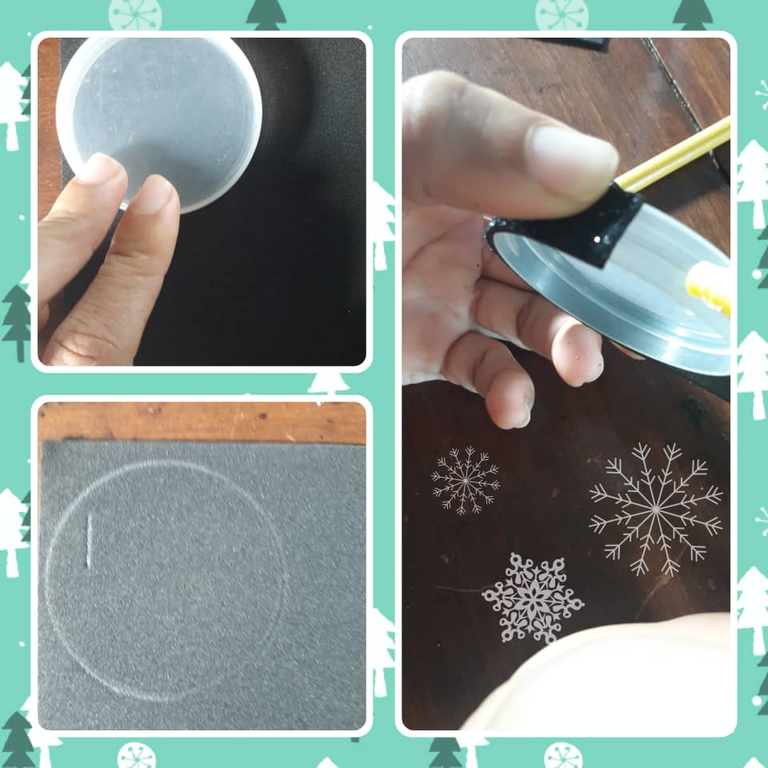
Paso 1:
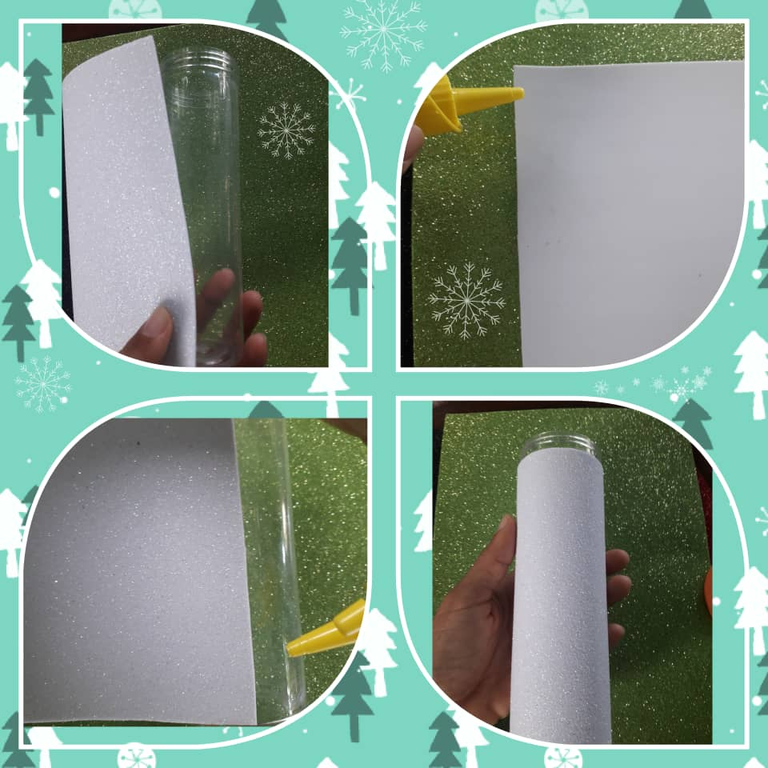
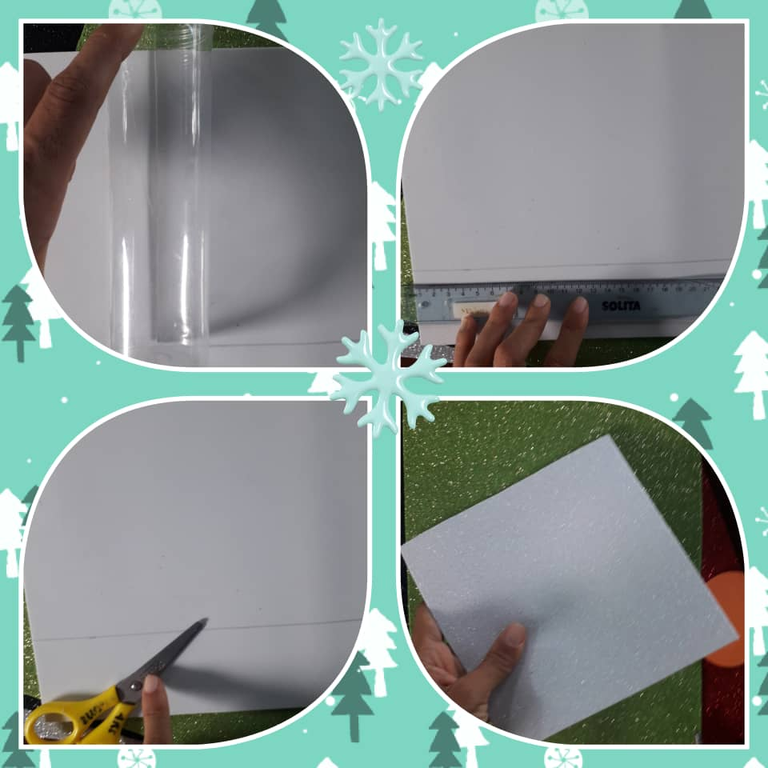
Tomamos el foami blanco y con el envase marcamos dejando por fuera donde va la tapa del envase, trazamos una línea con la regla y recortamos.
Paso 2:
Procedemos a pegar el foami en el envase quedándonos de esta forma.
Paso 3:
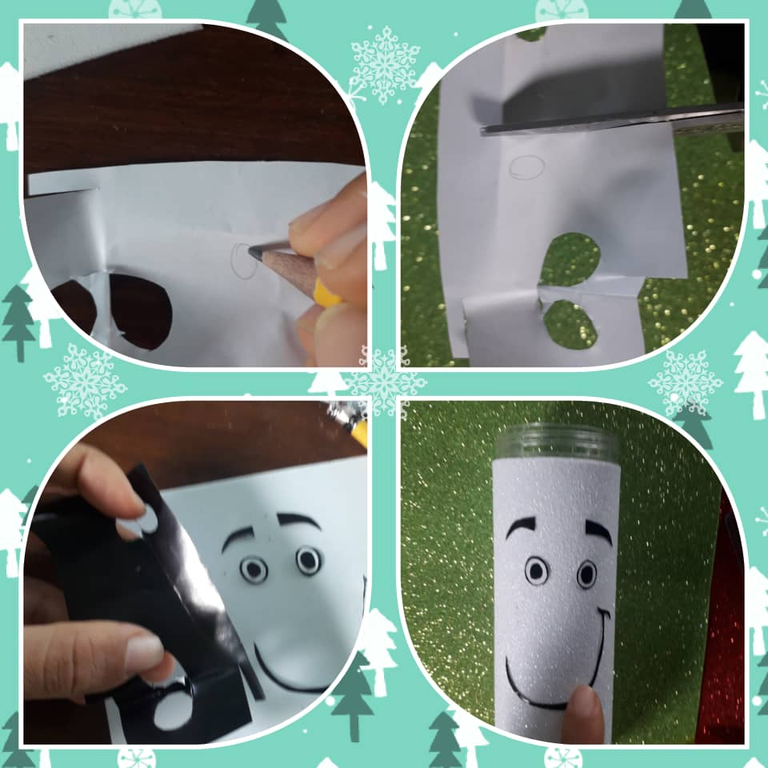
Con el papel lustrillo marcamos los ojos y la boca recostamos y procedemos a pegar. Si no son muy expertos para marcarlos libremente cálquelos.
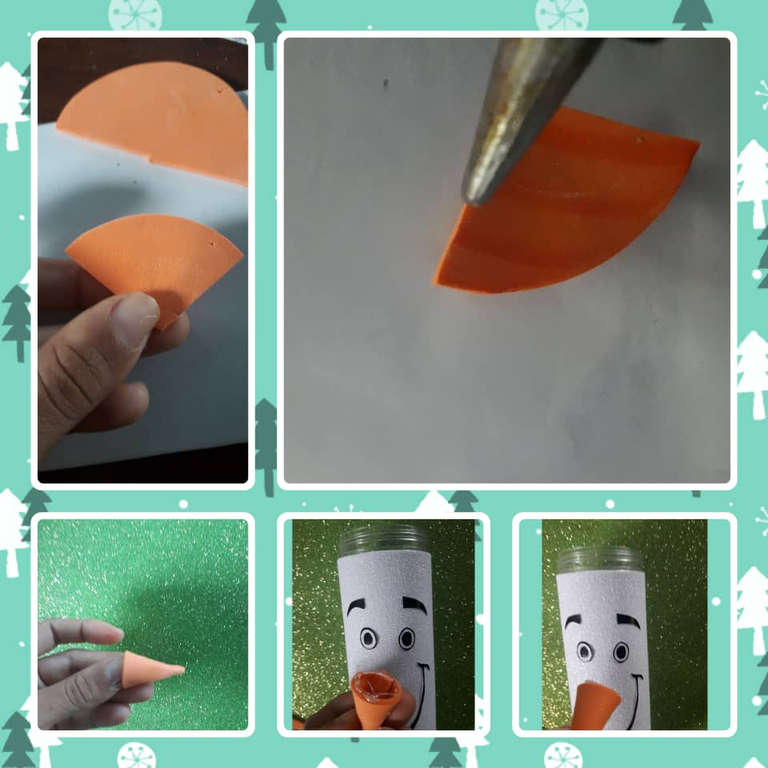
Paso 4:
Tomamos el pedacito de foami color naranja hacemos un cono de aproximadamente 3cm de altura, esta sería la nariz de nuestro muñeco de nieve.
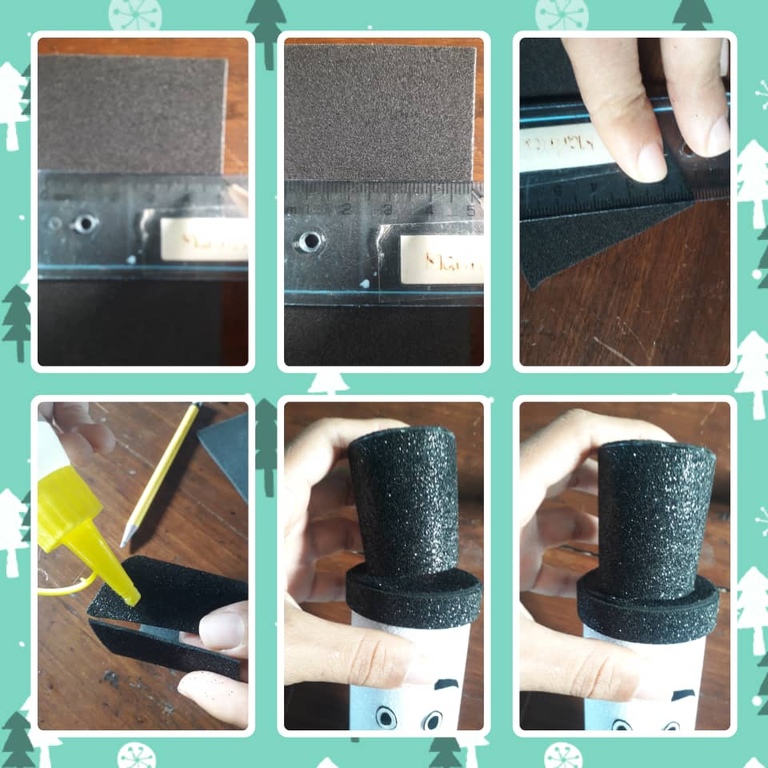
Paso 5:
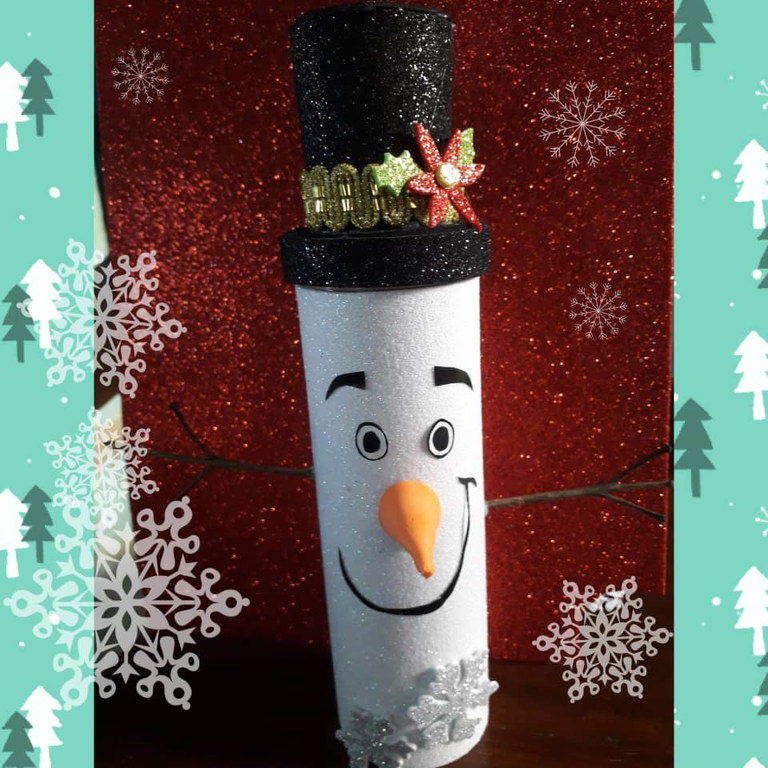
Con el foami negro marcamos la tapa y recortamos luego cortamos una tira de 1cm para proceder a forrar la tapa que sería parte del sombrero de nuestro muñeco de nieve.
Paso 6:
Luego marcamos un cuadro de 5 x 5 cm para la parte superior de nuestro sombrero recortamos y en los lados hacemos una marca diagonal y recortamos quedándonos una figura como una trapecio; enrollamos pegamos ambos lados para luego proceder a pegar a la tapa y así terminaríamos nuestro sombrero.
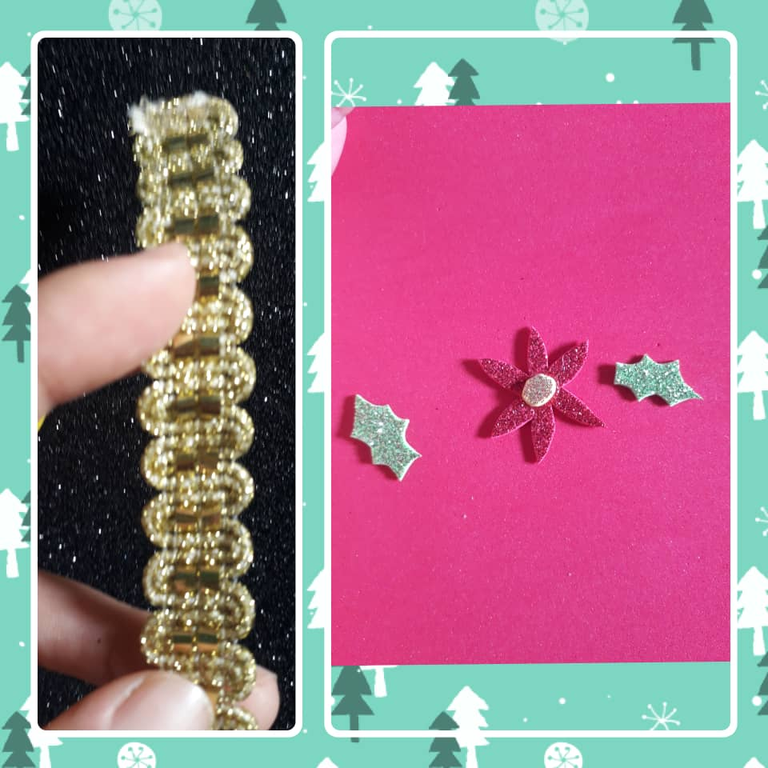
Paso 7:
Vamos a decorar nuestro sombrero yo le coloque una cinta dorada y con el foami verde y el rojo elabore una flor navideña queda muy hermoso. La decoración del sombrero usted la puede hacer como desee.
Paso 8:
Con las raminas haríamos sus manos pegando de esta forma.
Paso 9:
Con el foami plateado yo hice unos copos de nieve que pegue a la parte inferior del muñeco. (Esto sería opcional, puede dejarlo así o pegarle otros detalles). Y de esta forma culminaríamos nuestro hermoso muñeco de nieve.
Bueno mis amigos esta creación que les comparto a ustedes con todo mi cariño, espero les sea útil para cualquier detalle que quieran regalar en esta navidad. Se les quiere Dios los bendiga hasta otra oportunidad.

Las fotos son de mi propiedad tomada con mi teléfono SAMSUNG J6, modificando las fotos con el programa Foto Collage Grid Art, traducido con el programa Deelp traductor versión gratis.
ENGLISH
Hello friends of #hive today I want to show you this creation that I particularly like a lot is very practical, easy and very useful for this Christmas, because you can use it in different ways, as a gift holder, to store candy, among other things.
The Christmas season is one of the most beautiful and awaited times of the year all over the world. A religious holiday motivated to the birth of the Child God, is a wonderful season where we decorate our homes, parks, streets etc.. And we also place decorations with our Christmas symbols such as Santa, the wise men and the snowman. My creation today is a snowman made with a recycled cylindrical container, you will like it and it is easy to make.
For our creation we will need the following materials:
Materials:
- 1 white frosted foami.
- 1 black frosted foami.
- 1 small piece of black lustrillo paper for the eyes.
- 1 small piece of approximately 5x5cm of orange foami.
- 1 small piece of approximately 5x5cm of red foami.
- 1 small piece of approximately 5x5cm of green foami.
- 1 small piece of approximately 5x5cm of silver frosted foami.
- Cold silicone.
- Hot silicone.
- Silicone gun.
- 1 ruler.
- Pencil
- 1 pair of dry twigs.
Now with all our materials we start with our step by step:
Step 1:
We take the white foami and with the container we mark leaving on the outside where the lid of the container goes, we draw a line with the ruler and cut out.
Step 2:
We proceed to glue the foami on the container staying like this.
Step 3:
With the lustrillo paper we mark the eyes and mouth we lay down and proceed to glue. If you are not too skilled to mark them freely mark them.
Step 4:
We take the little piece of orange foami we make a cone of about 3cm high, this would be the nose of our snowman.
Step 5:
With the black foami we mark the lid and cut out then cut a 1cm strip to proceed to line the lid which would be part of the hat of our snowman.
Step 6:
Then we mark a square of 5 x 5 cm for the top of our hat we cut out and on the sides we make a diagonal mark and cut out leaving us a figure like a trapezoid; we roll up we glue both sides to then proceed to glue to the lid and thus we would finish our hat.
Step 7:
Let's decorate our hat I put a gold ribbon and with the green and red foami I made a Christmas flower it looks very beautiful. The decoration of the hat you can do it as you wish.
Step 8:
With the twigs we would make your hands by gluing in this way.
Step 9:
With the silver foami I made some snowflakes that I glued to the bottom of the doll. (This would be optional, you can leave it like that or glue other details). And in this way we would culminate our beautiful snowman.
Well my friends this creation that I share with you with all my love, I hope you find it useful for any detail you want to give this Christmas. I love you God bless you until another opportunity.
The photos are my own taken with my phone SAMSUNG J6, modifying the photos with the program Foto Collage Grid Art, translated with the program Deelp translator free version.
Hola @kelvimari2023 👋
Se ve muy bonito tu muñeco de nieve. La verdad es que la navidad 🎄 nos permite y da muchas razones para crear. Me encantó este diseño de ☃️
Ay que bonito está. Me gustan las decoraciones, lo que más me gusta es la nariz. Es tierno
Congratulations @kelvimari2023! You have completed the following achievement on the Hive blockchain And have been rewarded with New badge(s)
Your next target is to reach 40 posts.
You can view your badges on your board and compare yourself to others in the Ranking
If you no longer want to receive notifications, reply to this comment with the word
STOPTo support your work, I also upvoted your post!
Check out our last posts:
It looks pretty cool. This is the time we can decorate our homes in different ways. Nice work! Keep it up!
Gracias.
Que simpática idea has compartido hoy, me gustó mucho ya que como dices es muy útil por la variedad de usos que se le puede dar. Me encanta como quedó la cara.
Gracias si a mi me gustó mucho, traté de hacerla con mucho cuidado para obtener ese resultado. Se ve muy simpático. Jajaja....
Que lindo! gracias por compartir tan lindo tutorial.
Saludos.
De nada me gusta mucho compartir mi trabajo y saber que les gusta, me hacer sentir muy contenta. Gracias por dedicarte a ver mi publicación.
Que lindo y adorable hombre de nieve, un hermoso adorno para decorar en esta época 😍
Si y es muy práctico puedes usarlo para muchas cosas.