Estoy super contenta de estar aquí nuevamente con ustedes para compartir mi más reciente manualidad (sensación de orgullo acompañada de un suspiro). Se se trata de un Cuadro Decorativo de Naruto Uzumaki. Esta pieza es ideal para decorar nuestra habitación o algún espacio, también super funcional para obsequiar a algún amante de este anime. En mi caso, es para colocarle en mi habitación, les he comentado anteriormente que amo el anime y también dibujar, así que estoy elaborando piezas únicas para ambientar mi habitación personal.
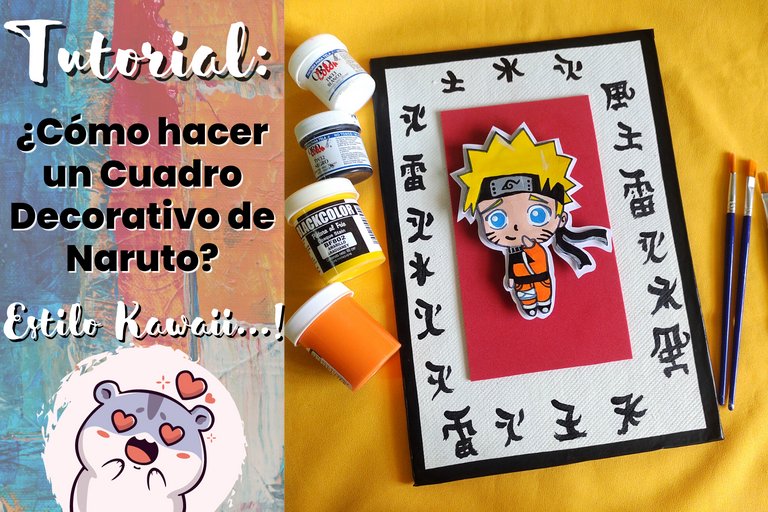
El estilo del personaje es Kawaii, sus líneas redonditas y ojos super tiernos son un encanto!. Claro que esto no sigue la línea de diseño del anime de origen, sino más bien apunta al lado más adorable de Naruto.
¿Por qué Naruto Uzumaki?
Es el principal personaje de una serie de anime llamada Naruto. Este es un niño que tiene un nacimiento bastante triste aparatoso, que lo deja sin madre y padre de manera instantánea. Crece siempre solo y señalado por la gente de la aldea, porque en su interior había sido sellado una especie de demonio (kyubi) que tenía una fuerza (chakra) increíble, las personas le temían y se alejaban de él. Pese a todo eso, Naruto quien se desarrolla travieso y ocurrente, siempre tiene su mejor sonrisa y ánimo para atravesar cualquier situación adversa. Está decidido a ser alguién importante para su aldea, convertirse en Hokage y proteger a sus amigos.
Naruto es uno de mis personajes favoritos del anime por esas razones, por la calidad de persona que es y como protege a sus seres cercanos a toda costa, enseñando que los vínculos emocionales tienen alta importancia en el mundo ninja. Naruto nunca se rinde, y si algo es difícil, simplemente se esfuerza más para superar la dificultad. Allí la fuerza del personaje.
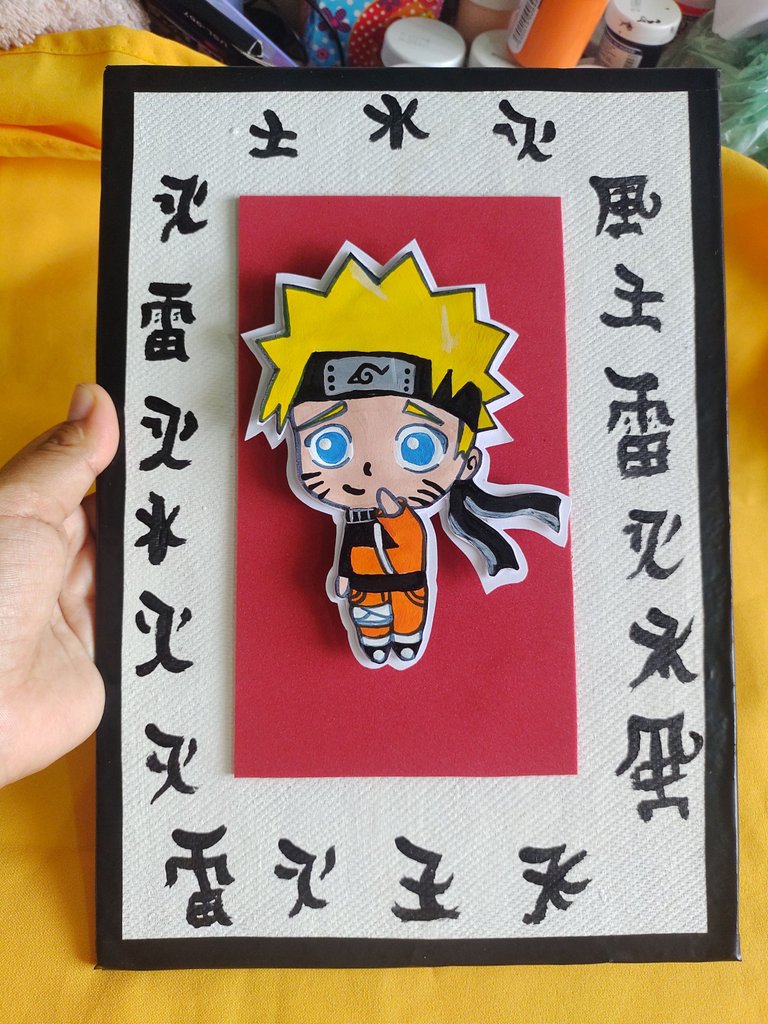
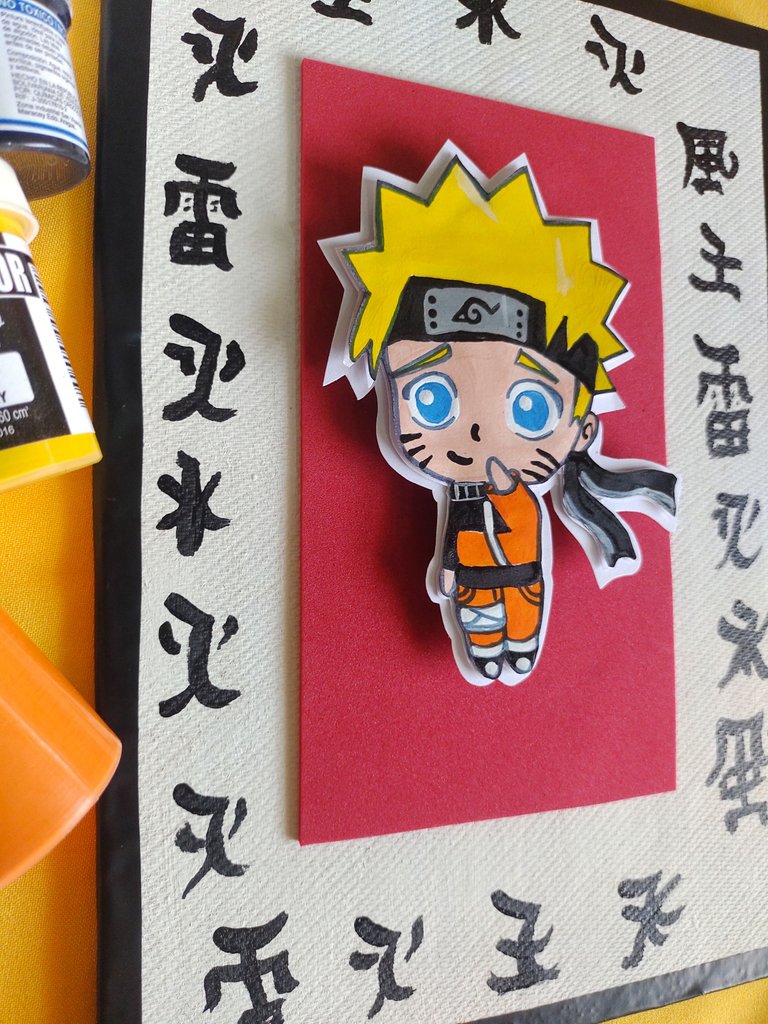
Para elaborar este cuadro decorativo, he usado una combinación de diversos materiales que incluyen madera, pintura, foami y cartón. Tenía un trozo de madera que estaba sin uso en casa y le di dos capas de color blanco. En cuanto a los detalles de letras aleatorias que rodean al personaje, son las 5 naturalezas del chakra, hice lo mejor posible por recrear los símbolos. Los bordes los he decorado con papel contact en color negro, dándole mejor perfil a los bordes. En cuanto al personaje, le he dado relieve colocándole sobre dos bases de cartulina blanca, además de un par de bases con cartón. En realidad, el personaje queda como tipo relieve.
Ahora pongamos una de mis canciones favoritas (Lost in Paradise- Ending de Jujutsu Kaisen) y manos a la obra para crear este Cuadro Decorativo de Naruto Uzumaki al mejor estilo Kawaii:

Materiales
- Rectángulo de madera.
- Rectángulo de foami en color rojo.
- Pinturas en color: Negro, blanco, amarillo, naranja y azul.
- Cartulina sencilla de block de dibujo.
- Pinceles.
- Tijera.
- Silicon/ pistola de silicon.
- Cartón.
- Cintas de papel contact negro.
- Marcador negro para detalles (opcional).
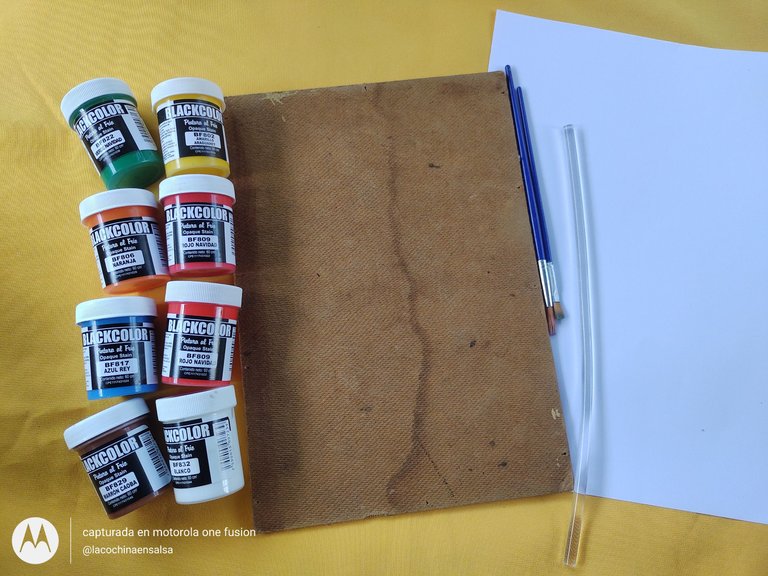
Fotografía alusiva, faltan materiales por agregar
¿Cómo hacerlo?
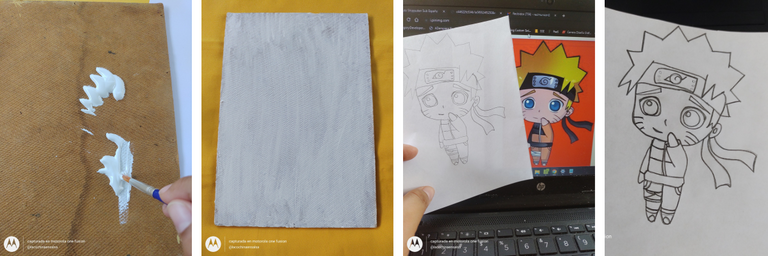
- Iniciaremos pintando la base de madera para que mientras trabajamos el dibujo de Naruto aparte. Así nuestra base de madera va a ir teniendo su tiempo de secado entre capa y capa. Dibujamos o calcamos el personaje de Naruto, si desean calcarlo pueden colocarle zoom a su pantalla y con papel fino trazan las líneas con cuidado. Teniéndolo listo, lo pasamos a la cartulina blanca sencilla, y trabajaremos sobre este. La imagen de Naruto que he usado, es la siguiente: Naruto
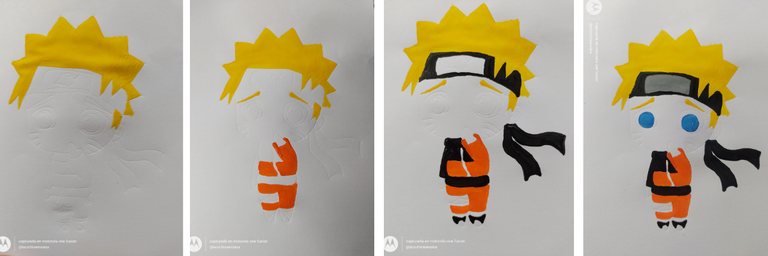
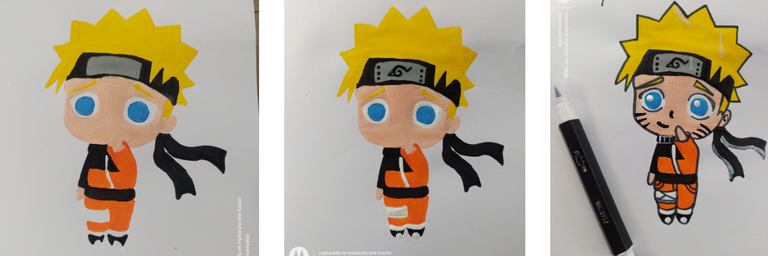
- Iniciamos a pintar a Naruto. He empezado por el cabello y cejas, sucesivamente con la ropa y detalles de la banda. Los ojos son azules y también daremos color a la piel. Con blanco, daremos color a las zonas blancas y agregamos las luces. Con marcador de brocha, haremos los delineados. Me parece así más fácil. Sin embargo puedes hacerlo con pintura también si así te parece más cómodo.
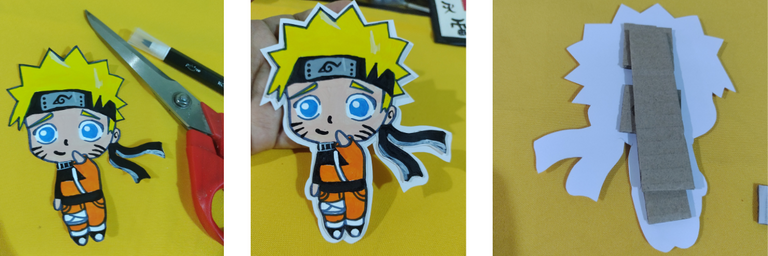
- Al tener nuestro Naruto listo le fijaremos sobre una cartulina blanca sencilla. y cortamos con un borde mínimo simple. Repetiremos el proceso, pero el espacio de borde será mayor. Por detrás de nuestro personaje fijaremos trozos de cartón para agregar más relieve cuando fijemos el personaje en la base futura. En este punto, estamos listo por esta parte y reservamos.
- Trabajemos ahora la base de madera después de darle la doble capa de color blanco. Iniciamos dibujando los símbolos de la naturaleza del chakra, dejando el centro libre porque allí es donde colocaremos luego a nuestro personaje. Cortamos un rectángulo de color rojo y fijamos en el centro del espacio libre. Con listones de papel contact, cubriremos los bordes. Cuidamos de que sean rectos y prolijos.
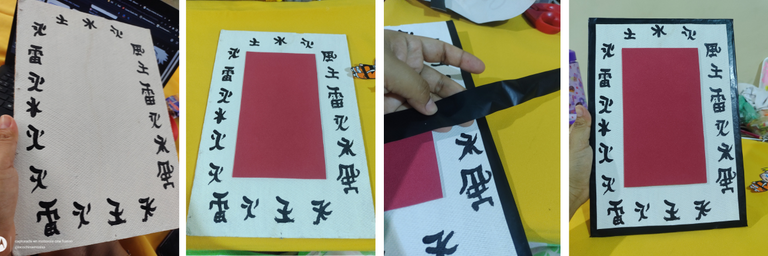
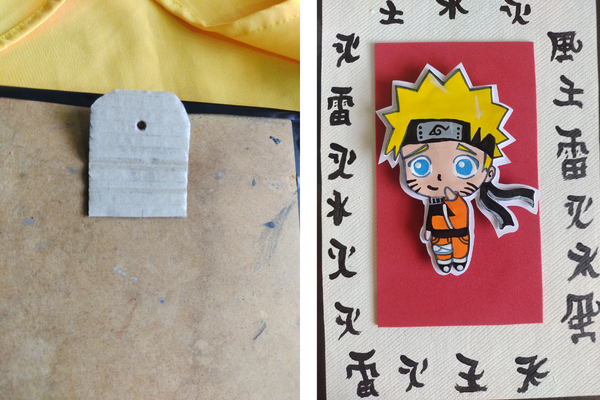
- Cortamos un trozo de cartón para colocarlo en la parte posterior y le abrimos un agujero. Por allí se podrá colgar en la pared. Por último fijamos nuestro Naruto en el centro del foami rojo.
Nuestro cuadro de Naruto al Estilo Kawaii esta listo:
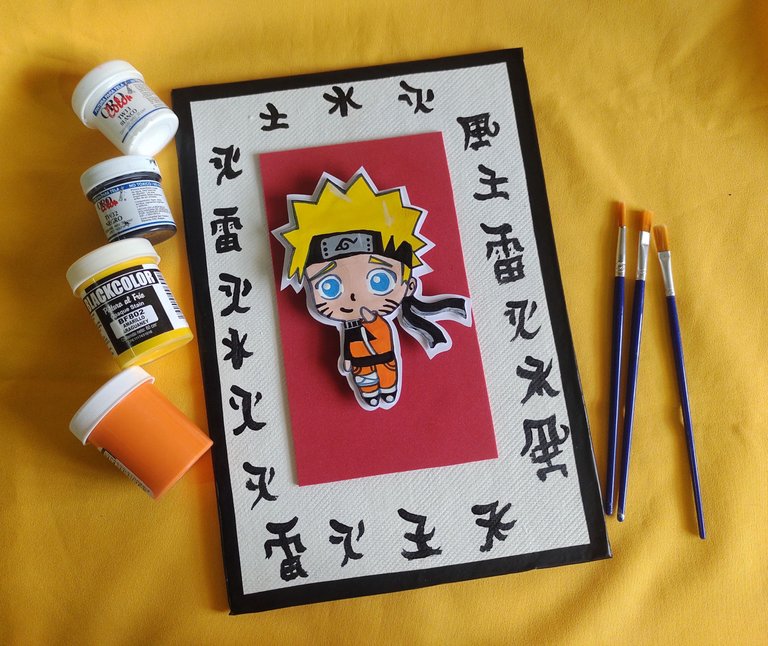
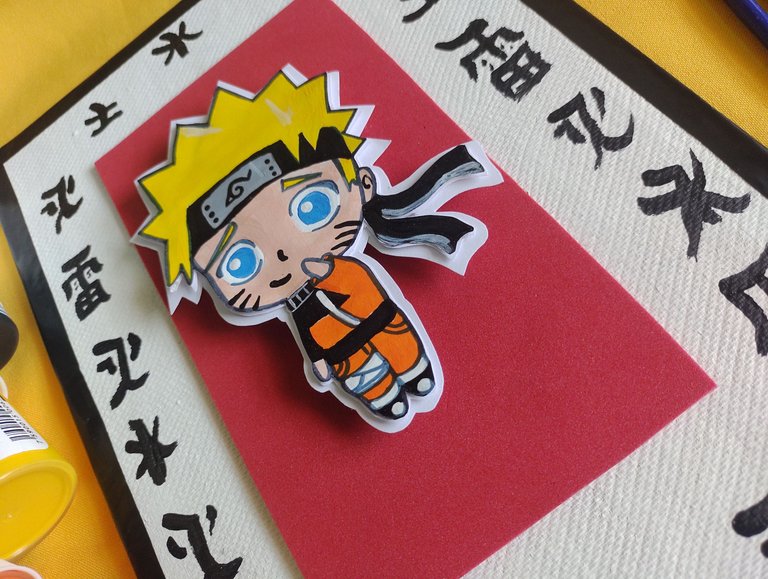
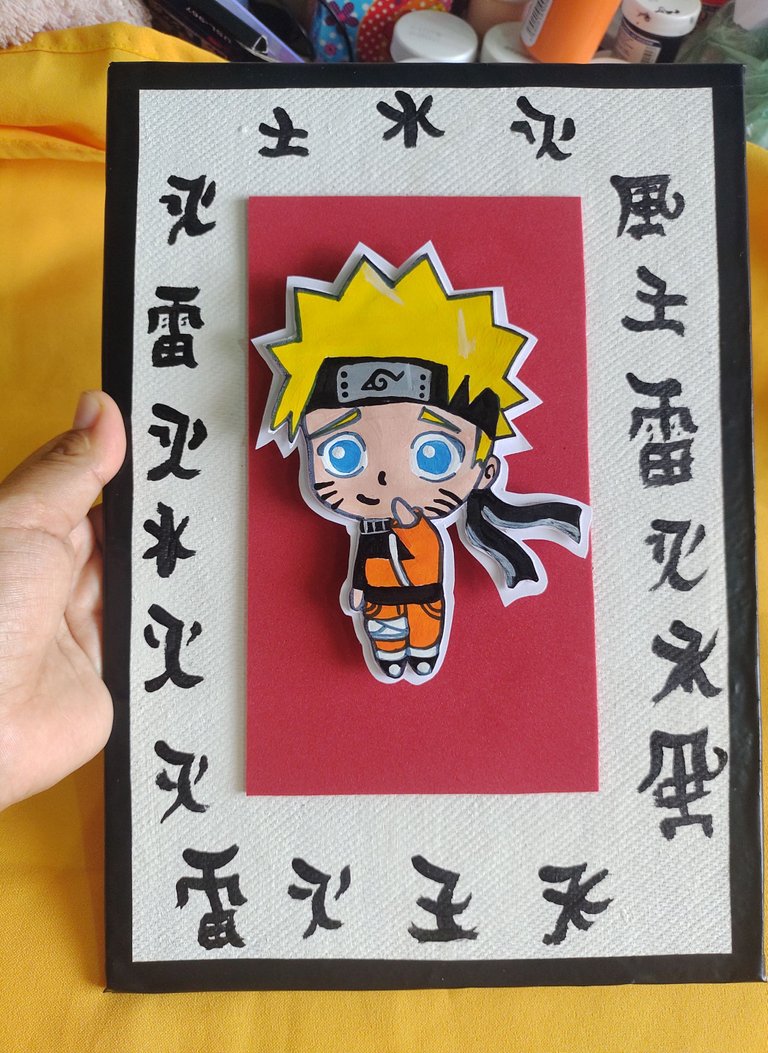
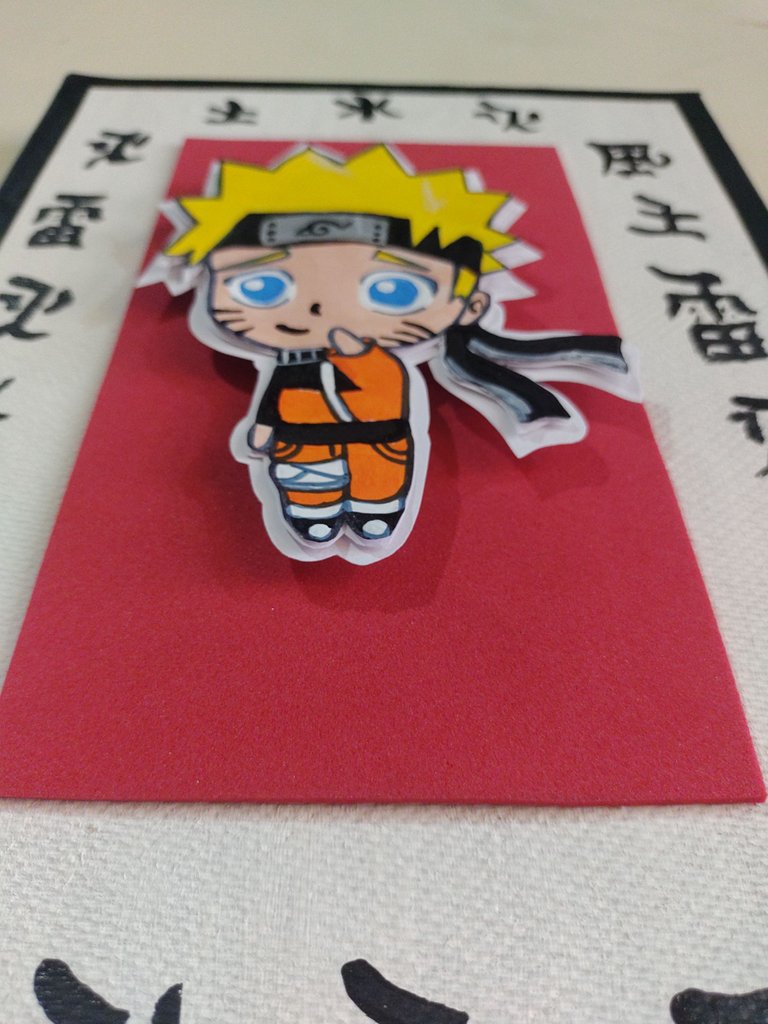
He amado el resultado, me super encanta!. Soy muy fan de Naruto, y me encanta tener este hermoso cuadro hecho por mí. Sin duda, estaré elaborando algunas manualidades más para mi habitación 😊. Aquí una foto del cuadro colgado en mi pared:
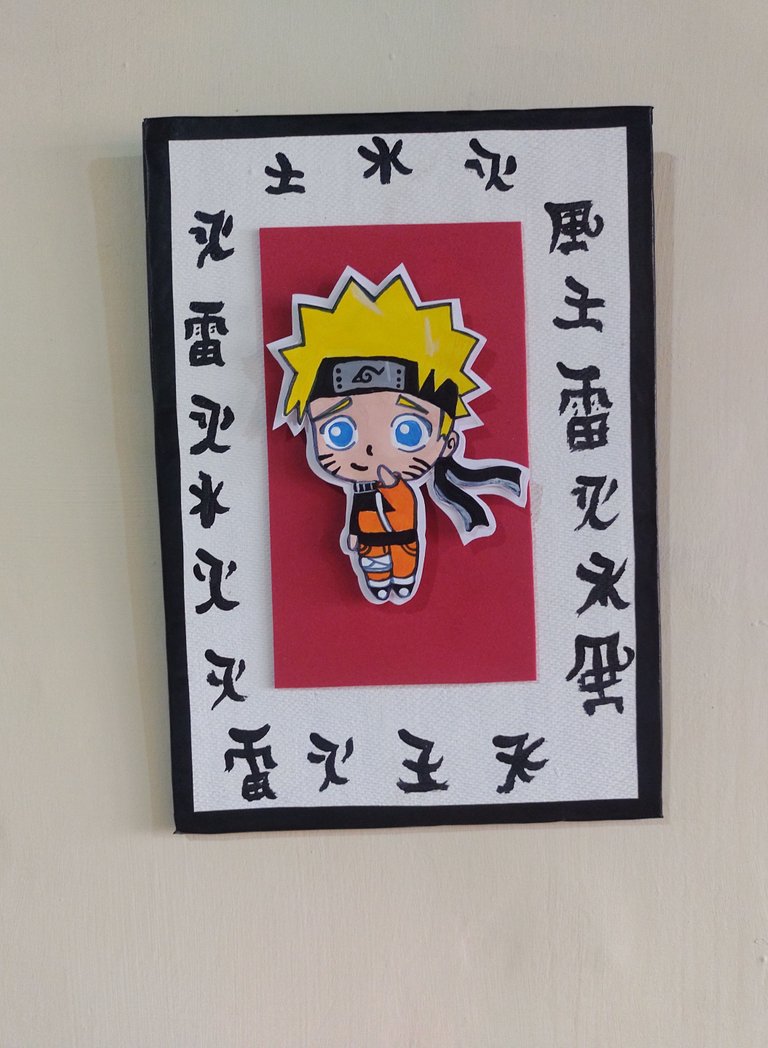

Imágenes de las instrucciones editadas en Canva Pro.
Traducción: Google Traductor.


I'm super happy to be here with you again to share my latest craft (feeling of pride accompanied by a sigh). It is a Decorative Picture of Naruto Uzumaki. This piece is ideal to decorate our room or any space, also super functional to give as a gift to a lover of this anime. In my case, it is to place it in my room, I have told you previously that I love anime and also draw, so I am making unique pieces to set my personal room.

The style of the character is Kawaii, the round lines and super tender eyes of her are charming! Of course, this does not follow the design line of the original anime, but rather points to the more adorable side of Naruto.
Why Naruto Uzumaki?
He is the main character of an anime series called Naruto. This is a child who has a rather sad cumbersome birth, leaving him instantly motherless and fatherless. He always grows alone and pointed out by the people of the village, because a kind of demon (kyubi) that had incredible strength (chakra) had been sealed inside him, people feared him and moved away from him. Despite all this, Naruto who develops mischievous and witty, always has the best smile and encouragement from him to go through any adverse situation. He is determined to be someone important to his village, become Hokage and protect his friends.
Naruto is one of my favorite anime characters for those reasons, because of the quality of person he is and how he protects those close to him at all costs, teaching that emotional ties are highly important in the world. ninja. Naruto never gives up, and if something is difficult, he just tries harder to overcome the difficulty. There the strength of the character.

To make this decorative box, I have used a combination of different materials that include wood, paint, foami and cardboard. I had a piece of wood that was not used at home and I gave it two coats of white. As for the details of random letters surrounding the character, they are the 5 chakra natures, I did my best to recreate the symbols. I have decorated the edges with black contact paper, giving the edges a better profile. As for the character, I have given it relief by placing it on two white cardboard bases, as well as a couple of cardboard bases. In reality, the character remains as a relief type.

Now let's play one of my favorite songs (Lost in Paradise- Ending by Jujutsu Kaisen) and get to work to create this Decorative Painting of Naruto Uzumaki in the best Kawaii style:

Materials
- Wooden box.
- Red foami rectangle.
- Color paintings: Black, white, yellow, orange and blue.
- Simple drawing block cardboard.
- Brushes.
- Scissor.
- Silicon / silicone gun.
- Paperboard.
- Black contact paper tapes.
- Black marker for details (optional).

Allusive photography, materials are missing to add
How to do it?
- We will start by painting the wooden base so that while we work on the drawing of Naruto apart. So our wooden base will have its drying time between layer and layer. We draw or trace the character of Naruto, if you wish to trace it you can zoom in on your screen and carefully trace the lines with thin paper. Having it ready, we pass it to the simple white cardboard, and we will work on it. The image of Naruto that I have used is the following: Naruto

- We started to paint Naruto. I have started with the hair and eyebrows, successively with the clothes and details of the band. His eyes are blue and we will also give color to the skin. With white, we will color the white areas and add the highlights. With a brush marker, we will make the outlines. I find it easier that way. However, you can also do it with paint if it seems more comfortable for you.


- When we have our Naruto ready we will fix it on a simple white cardboard. and cut with a simple minimal border. We will repeat the process, but the border space will be larger. Behind our character we will fix pieces of cardboard to add more relief when we fix the character on the future base. At this point, we are ready for this part and reserve.

- Now let's work on the wooden base after giving it the double layer of white. We begin by drawing the symbols of the nature of the chakra, leaving the center free because that is where we will later place our character. We cut a rectangle of red color and fix it in the center of the free space. With contact paper ribbons, we will cover the edges. We take care that they are straight and neat.

- We cut a piece of cardboard to place it on the back and we opened a hole. There you can hang it on the wall. Finally we fix our Naruto in the center of the red foami.

Our Kawaii-Style Naruto painting is ready:


I loved the result, I love it so much! I am a big fan of Naruto, and I love having this beautiful painting done by me. I will definitely be making some more crafts for my room 😊. Here is a picture of the painting hanging on my wall:


Instruction Images edited in Canva Pro.
Translation: Google Translator.

!discovery 30
Gracias por tu apoyo 😊
Que hermoso trabajo, a mi nieto le encanta ese personaje, que se vea en relieve lo hace más bonito. Bendiciones y felices fiestas
Muchas gracias! Que buen gusto tiene tu nieto, a mi me encanta también 😊
Amén, felices fiestas y bendiciones para ti y tu familia también. 🙏
The rewards earned on this comment will go directly to the people( @lacochinaensalsa ) sharing the post on Twitter as long as they are registered with @poshtoken. Sign up at https://hiveposh.com.
This post was shared and voted inside the discord by the curators team of discovery-it
Join our community! hive-193212
Discovery-it is also a Witness, vote for us here
Delegate to us for passive income. Check our 80% fee-back Program
Thank you for sharing this post on HIVE!
Your content got selected by our fellow curator stevenson7 & you just received a little thank you upvote from us for your great work! Your post will be featured in one of our recurring compilations which are aiming to offer you a stage to widen your audience within the DIY scene of Hive. Stay creative & HIVE ON!
Please vote for our hive witness <3
Gracias, por tu preciado apoyo 😊