Hello dear crafters of this beautiful community.
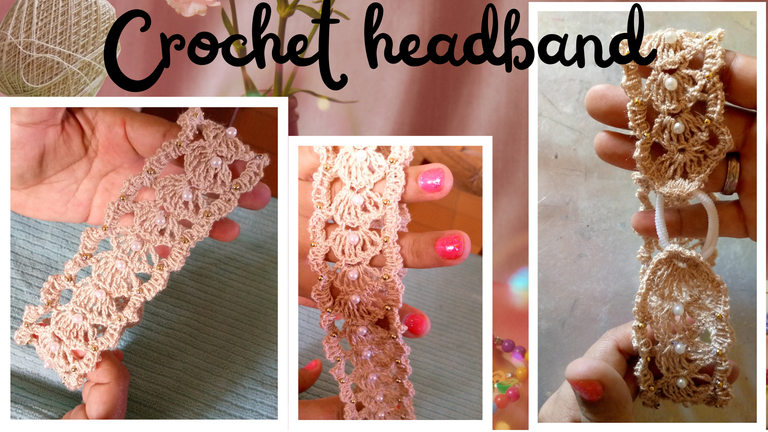
Today I share with you my first tutorial to make a nice crochet headband.
Starting the year I have been focusing on improving my crochet skills, today I feel that I have challenged what I have practiced for almost 2 years, which was when I started making the first stitches, after being an adult, in fact, this time I have managed to do what I have struggled to master, and that is to work crochet with thin thread, for me it was a stress and I ended up knitting with double thread, and although the double thread is a nice texture, and is useful for what we want to do, I also wanted to learn to do it both ways, which has significantly changed my mood.
to do it both ways, which has significantly changed my mood in this creative plane.
I hope you like it. Happy crocheting day to all of you.
Hola queridos artesanos de esta hermosa comunidad.
El día de hoy les comparto mi primer tutorial para hacer un lindo cintillo en crochet.
Comenzando el año me he estado enfocando en mejorar mis habilidades en crochet, hoy siento que he desafiado lo que he practicado durante ya casi 2 años, que fue cuando comencé hacer las primeras puntadas, después de ser una adulta, de hecho, en esta oportunidad he logrado hacer lo que tanto me ha costado dominar, y es trabajar el crochet con hilo delgado, para mí era un estrés y terminaba tejiendo con doble hilo, y a pesar de que el hilo doble resulta una bonita textura, y es útil para lo que queramos hacer, también quería aprender
hacerlo de ambas formas, lo que ha cambiado significativamente mi estado de ánimo en este plano creativo.
Espero que les guste. Feliz día para todos.
Las fotografías que verán a continuación, fueron tomadas con mi teléfono modelo TECNO SPARK GO 2024.

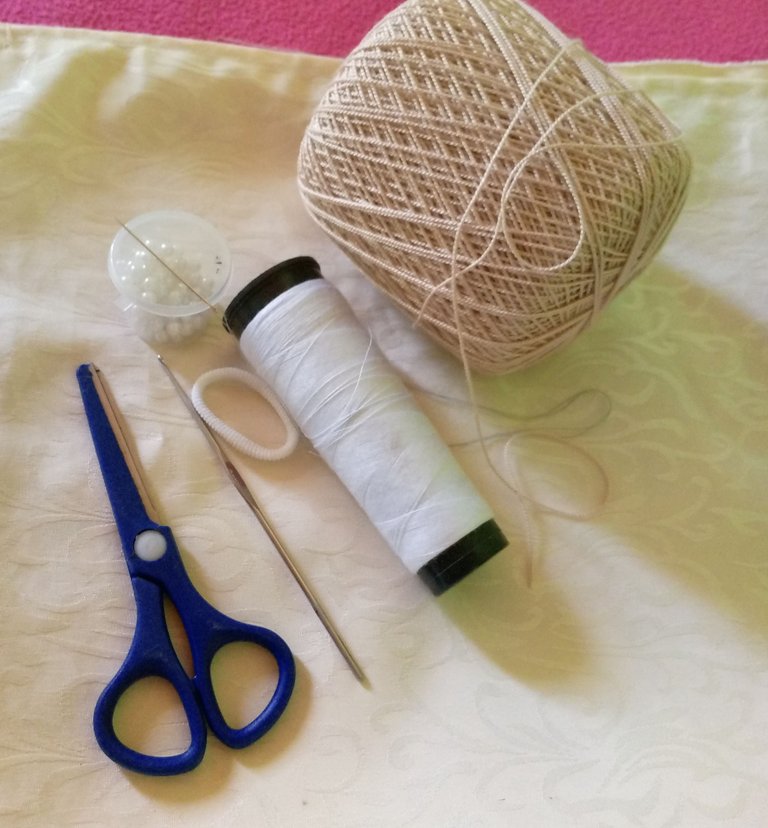
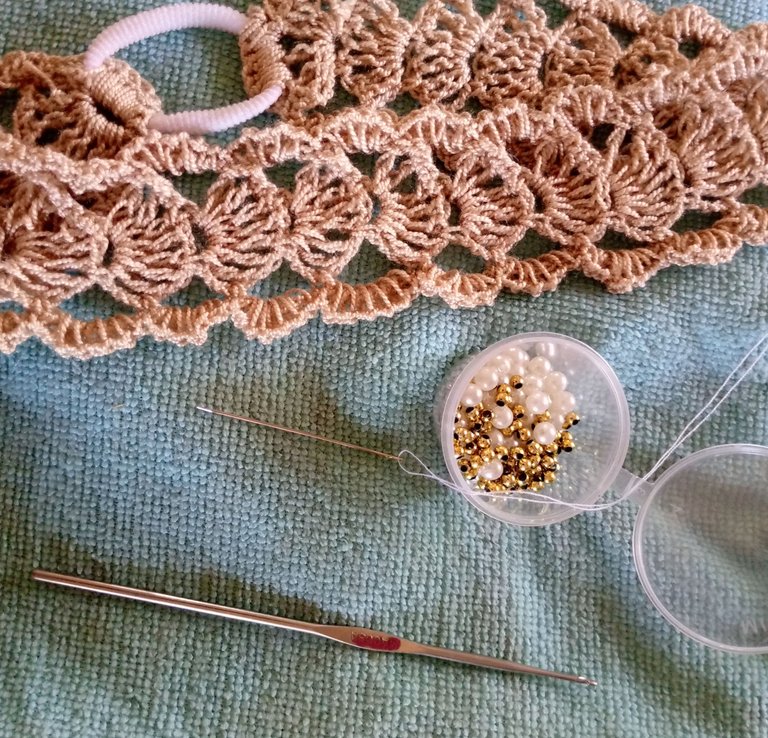
The materials we will use are as follows:
🐞 Crochet thread.
🐞 1 mm crochet needle.
🐞 Acrylic beads
🐞 Thread and needle
🐞 Scissors
🐞 hair ponytail
Los materiales que utilizaremos son los siguientes:
🐞 Hilo de crochet
🐞 Aguja de ganchillo de 1 mm
🐞 Perlas acrílicas
🐞 Hilo y aguja
🐞 Tijera
🐞 Cola para el cabello
 |  |  |  |
|---|
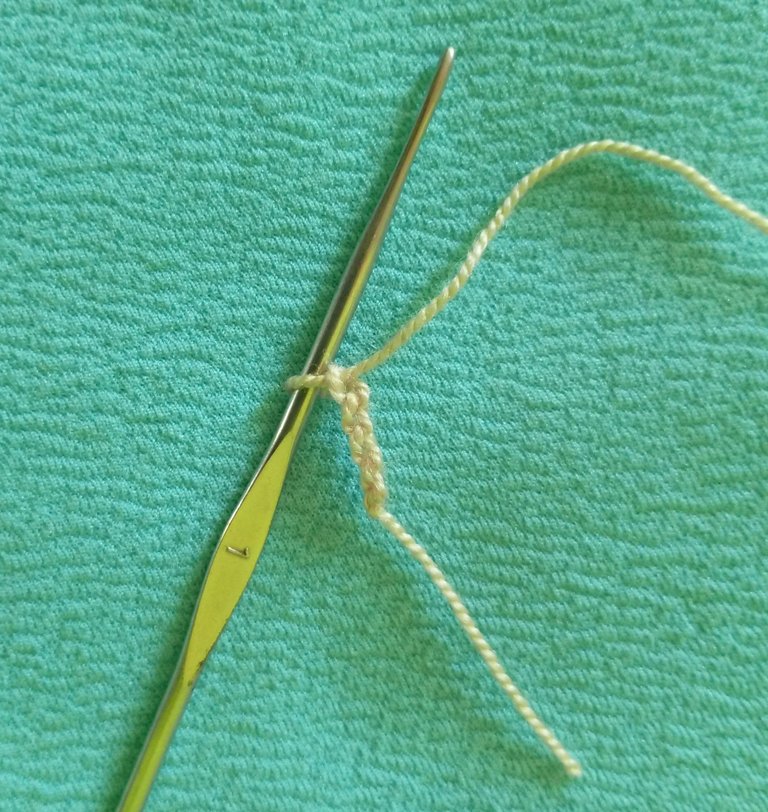
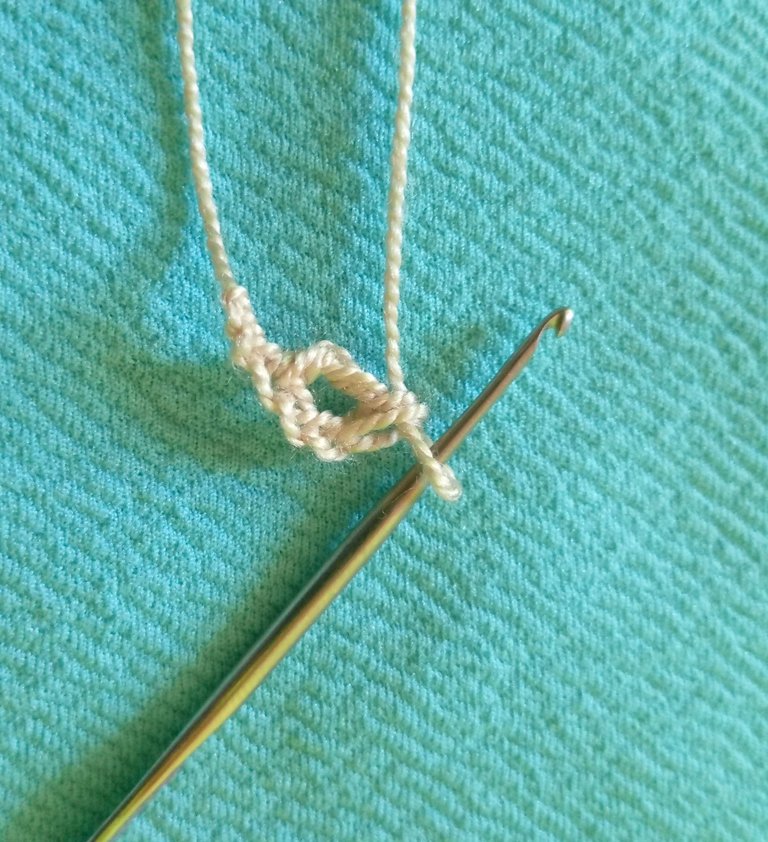
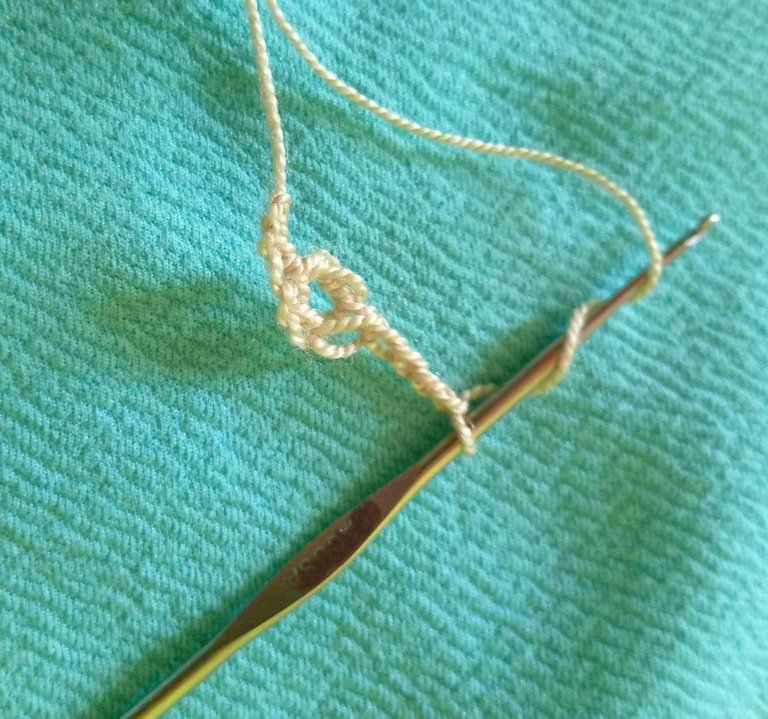
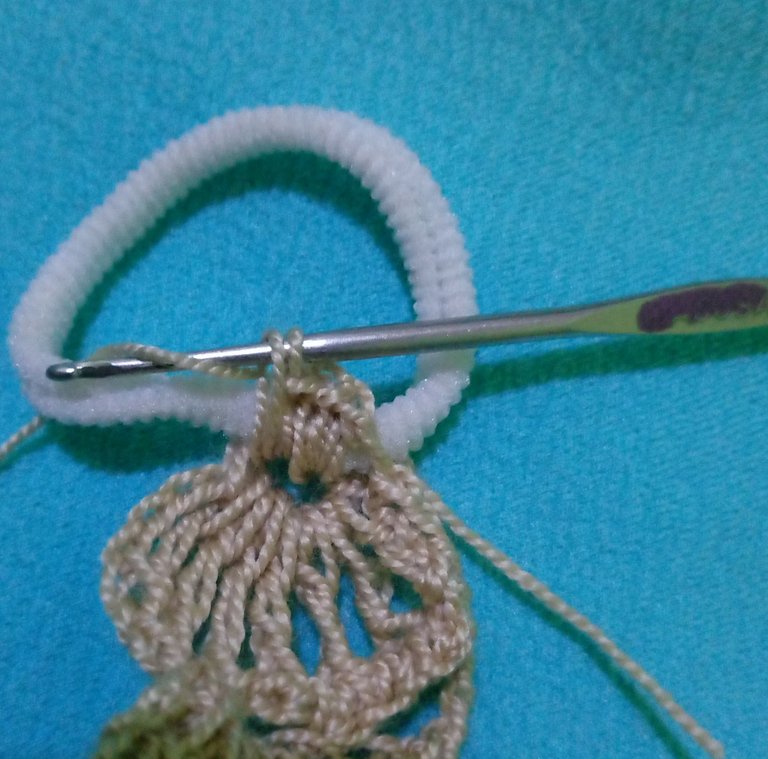
To start knitting the first 4 basic steps, we will begin by knitting 4 chain stitches, + 1 double crochet, again we will knit 4 chain stitches, 1 double crochet.
Para comenzar a tejer los primeros 4 pasos básicos, vamos a comenzar tejiendo 4 puntos de cadena, + 1 punto alto, nuevamente tejeremos 4 puntos de cadena,1 punto alto.
 |  |  |  |
|---|
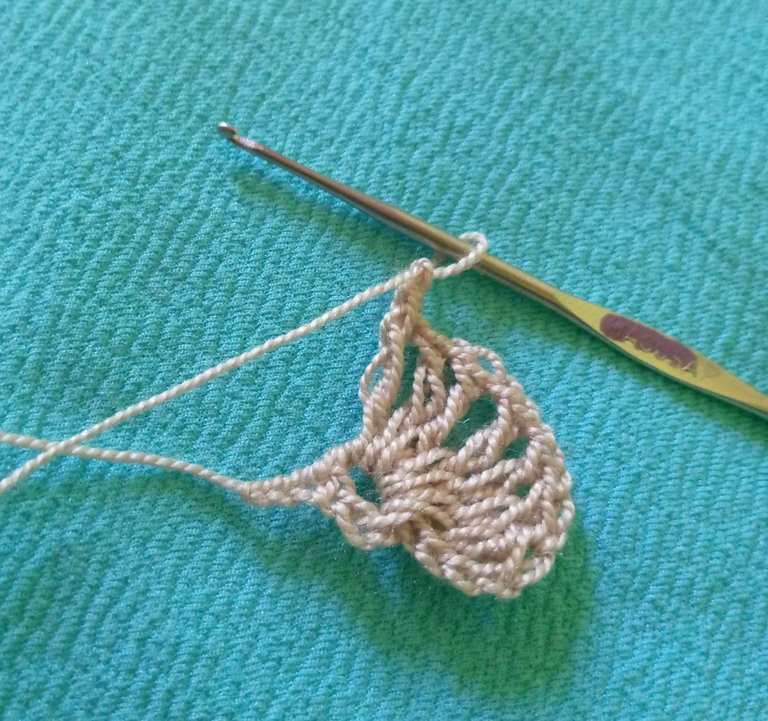
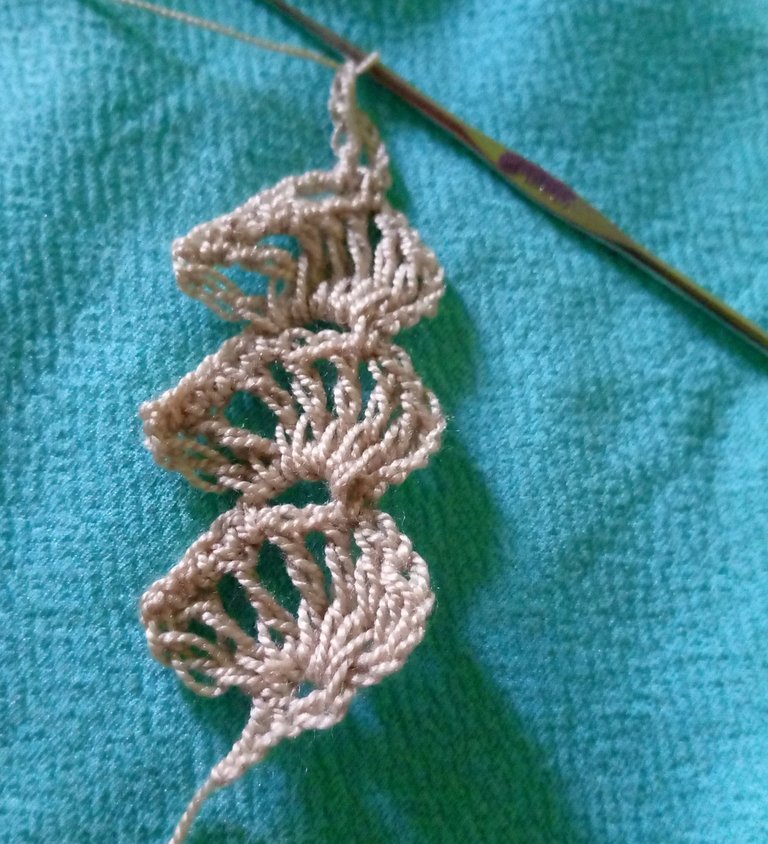
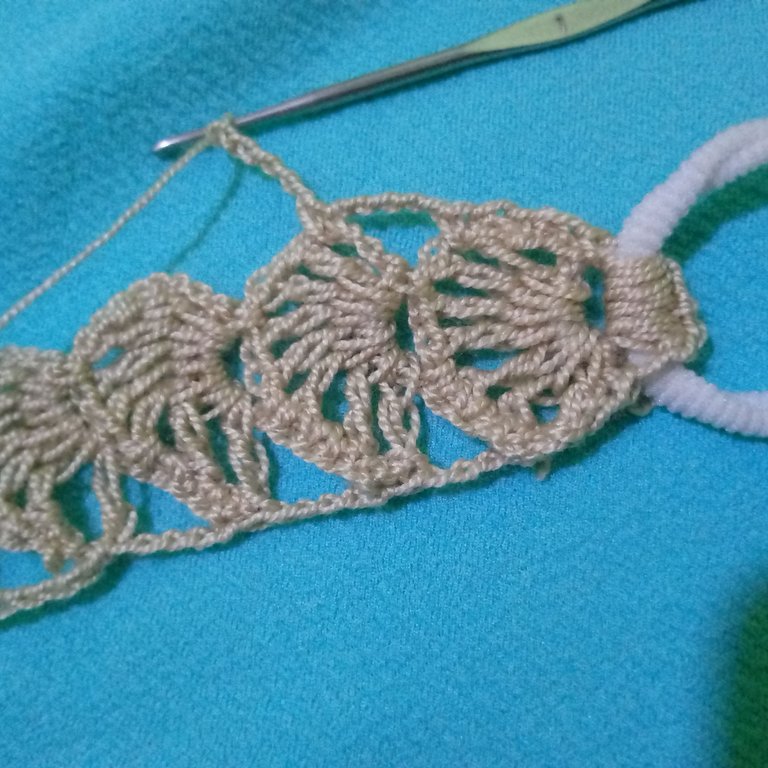
We continue repeating these stitches until completing a total of 8 stitches, the same would be, for the beginning of the shape, we will knit 4 chain stitches, followed by 7 double high stitches, and we finish closing with 1 chain stitch.
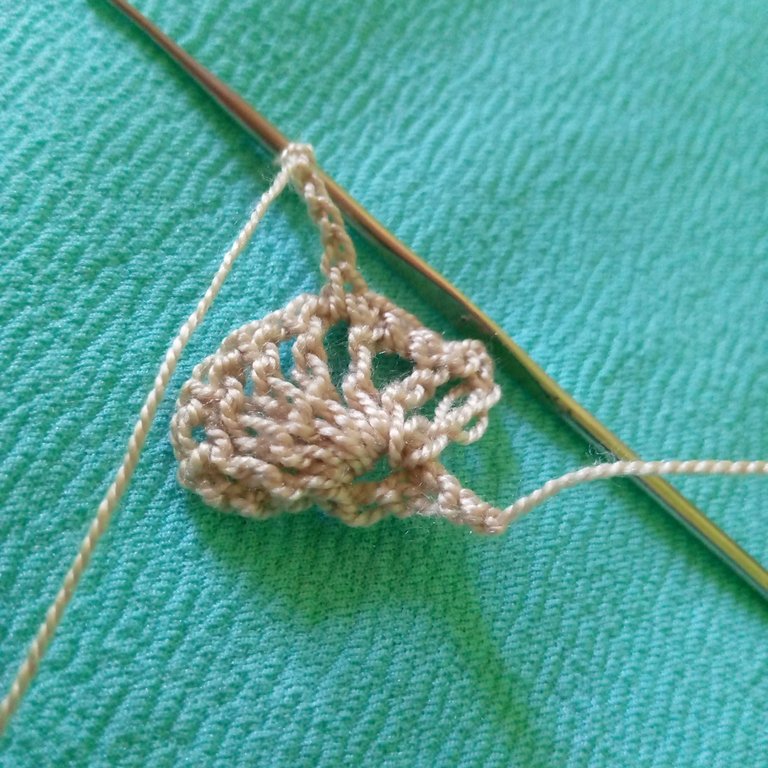
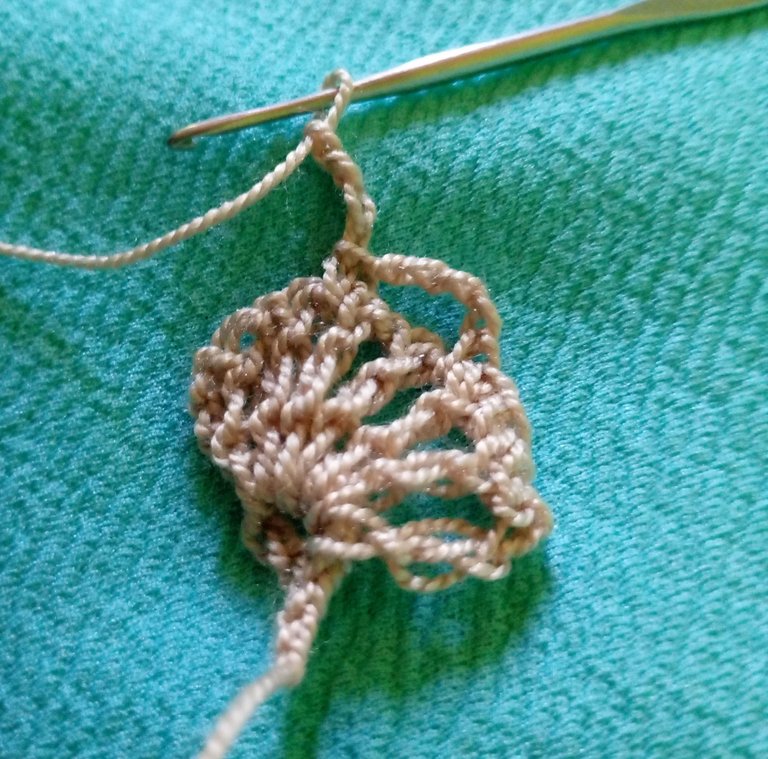
We will turn the fabric and begin to knit in the high stitch, 2 with slipped stitches, up to stitch 4, then we raise a chain of 4 stitches, we close it with a slipped stitch in stitch 6 leaving 2 stitches in the center, we turn to begin to knit 8 high stitches as the previous step, until completing a total of 12 parts.
Continuamos repitiendo estos puntos hasta completar un total de 8 puntos, los mismos serían, para el inicio de la forma, tejeremos 4 puntos de cadena, seguido de 7 puntos altos doble, y terminamos cerrando con 1 puntos de cadena.
Voltearemos el tejido y comenzaremos a tejer en el punto alto, 2 con puntos deslizados, hasta el punto 4,luego levantamos una cadena de 4 puntos, lo cerramos con un punto deslizado en el punto 6 dejando 2 puntos en el centro, volteamos para comenzar a tejer 8 puntos altos como el paso anterior, hasta completar un total de 12 partes.
 |  |  |  |
|---|
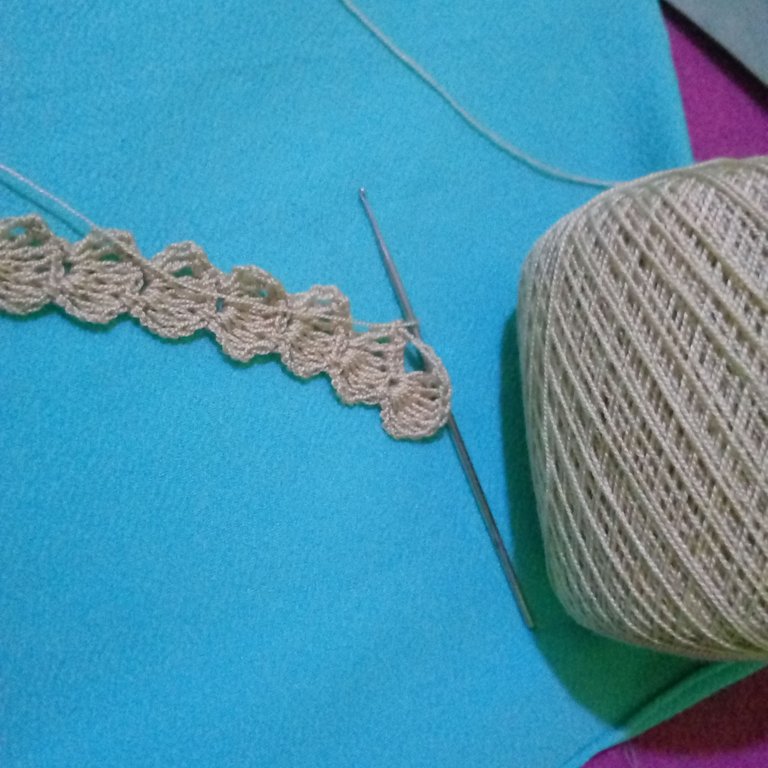
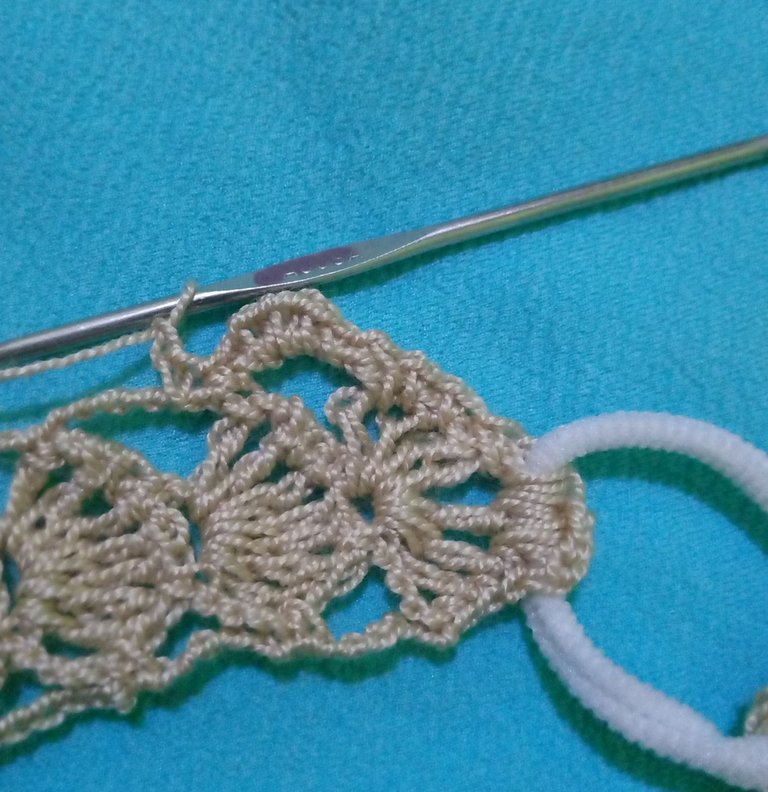
We finish the 12 forms of high stitches and we will begin to fix the tail in the headband, this we will sew with slipped stitches that we will take to the edge of the first form which is like an oyster or fan, then we will knit 5 chain stitches that we will glue in each of the tips of the form throughout the fabric to complete the 2 sides.
Terminamos las 12 formas de puntos altos y comenzaremos a fijar la colita en el cintillo, esta la vamos a coser con puntos deslizados que llevaremos hasta el borde de la primera forma la que es como una ostra o abanico, después vamos a tejer 5 puntos de cadena que iremos pegando en cada una de las puntas de la forma por todo el tejido hasta completar los 2 lados
 |  |  |
|---|
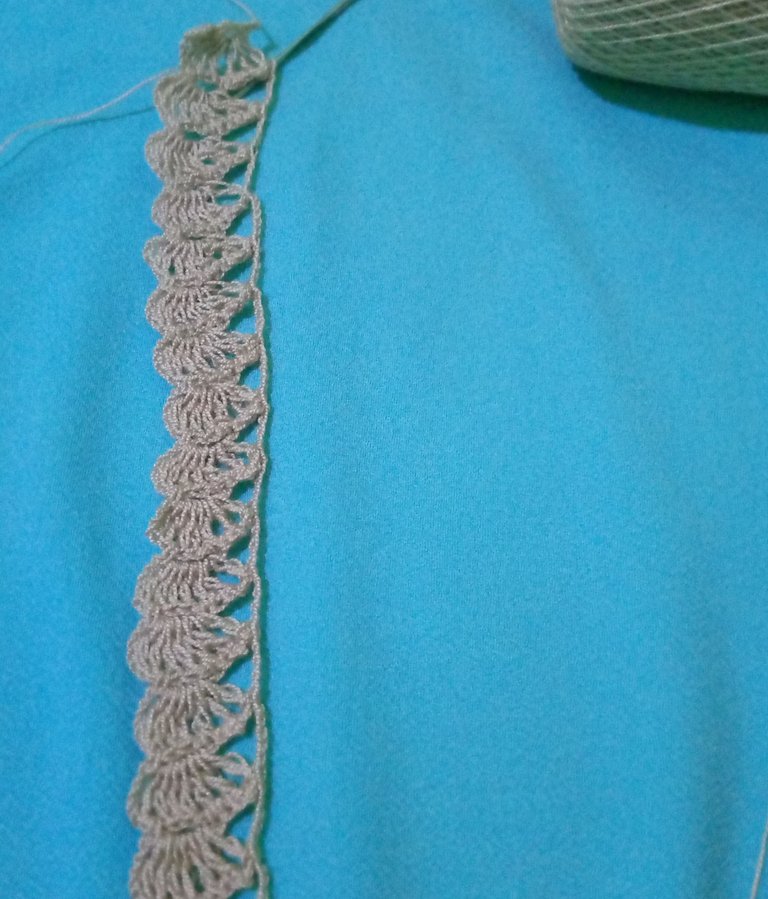
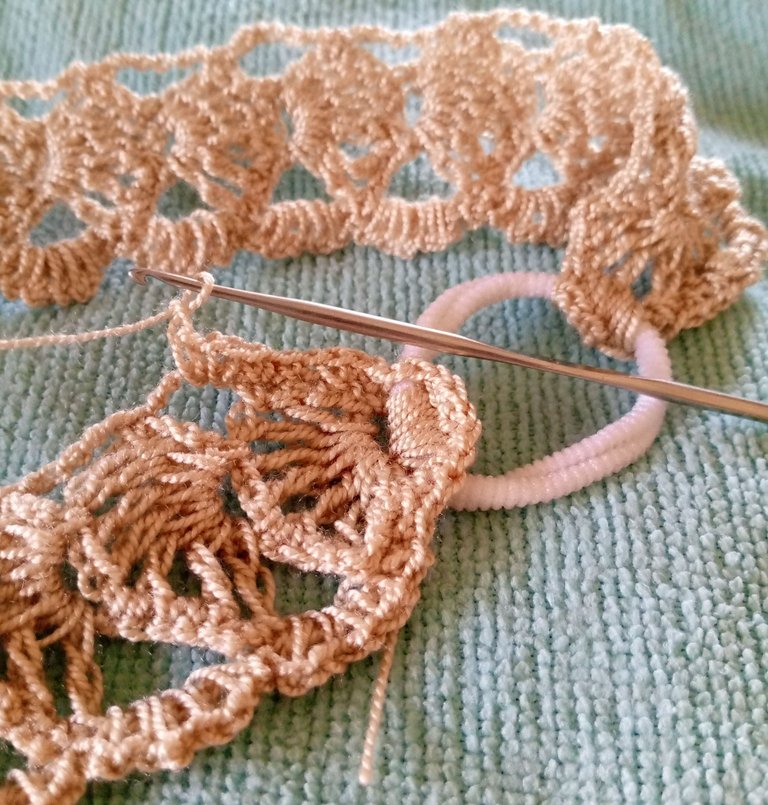
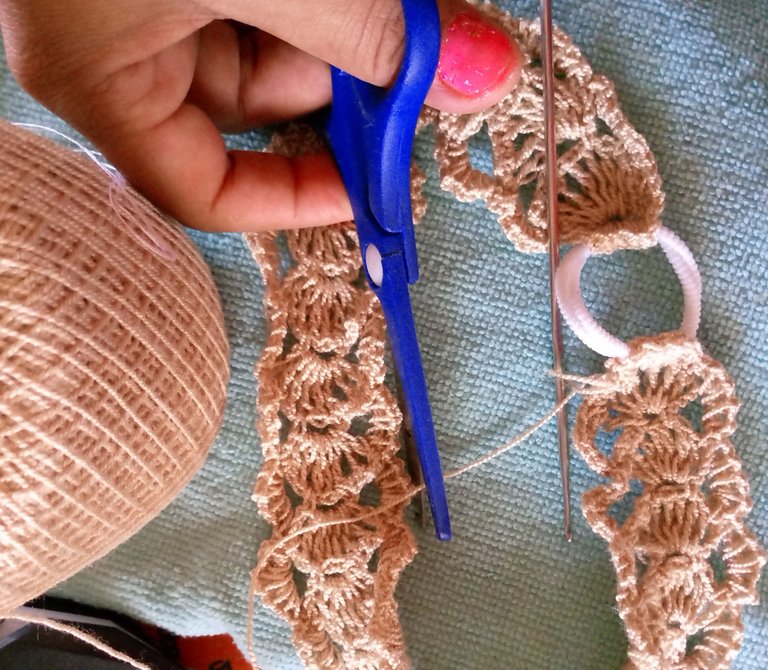
On these 5 stitches of each chain, we will knit 5 slipped stitches to give more shape and texture to the fabric until both sides are completed, finally I knot the yarn and cut, at this point the headband is ready, the only thing left to do is to make the decoration.
Sobre estos 5 puntos de cada cadena, vamos a tejer 5 puntos deslizados para darle más forma y textura al tejido hasta completar ambos lados, por último anudo el hilo y corto, en este punto el cintillo está listo solo queda hacer la decoración.
 |  |
|---|
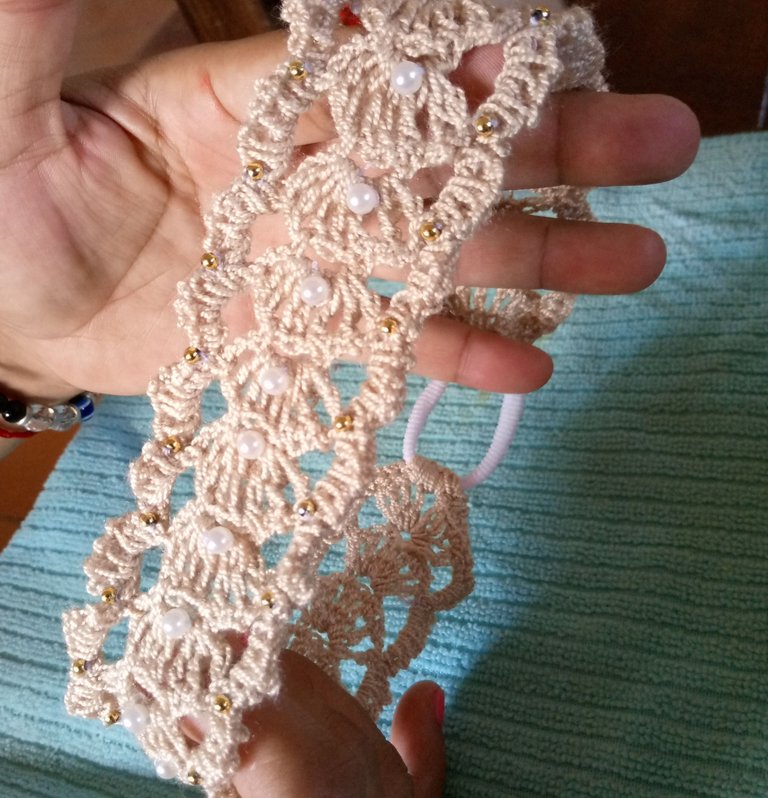
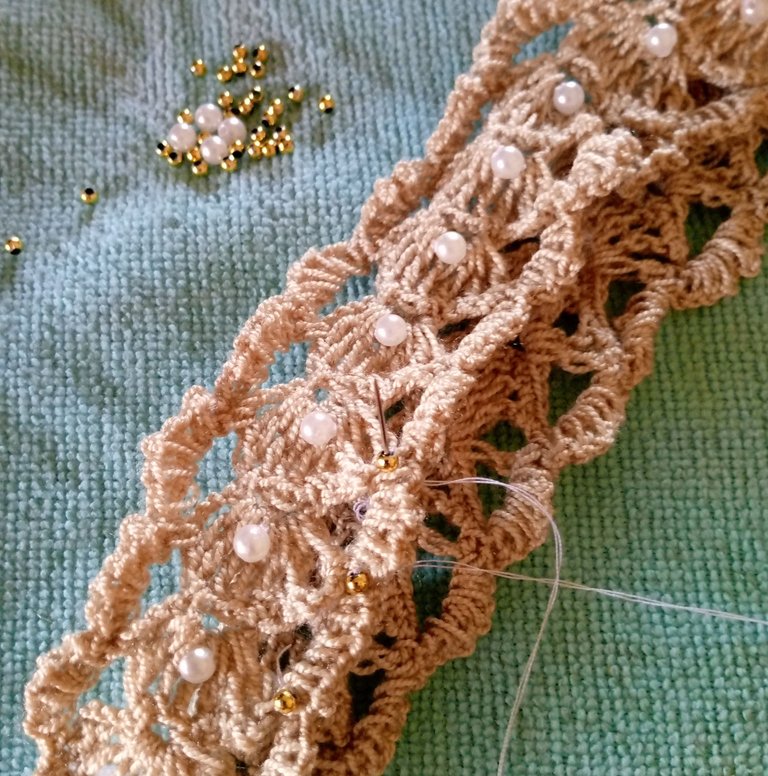
To decorate it I had thought of just white pearls, but then I had the idea of adding some golden pearls that look splendid; however, you can play with the decoration and embellish your headband to your liking. It is a headband that caught the attention of my family, since I saw it in a tutorial and I took some ideas, but it was adapted to my own style.
With this step we can be sure, that we are going to wear a headband that will attract the attention of the spoiled of the house.
I hope you are well and have a happy weekend.
Don't forget to comment on my work of the day.😘😘😘😘😘😘😘😘😘💙💞
Para decorarlo había pensado en solo perlas blancas, pero después me surgió la idea de colocarle unas perlas doradas que le lucen espléndidas; sin embargo, ustedes pueden jugar con la decoración y embellecer su cintillo a su gusto es un cintillo que llamo la atención de mi familia, ya que lo vi en un tutorial y tome algunas ideas, pero fue adaptado a mi propio estilo.
Con este paso podemos estar seguros, que vamos a lucir un cintillo que va a llamar la atención de las consentidas de la casa.
Se les quiere mucho, espero que estén bien y pasen un bendecido fin de semana.
No olviden hacer sus acotaciones sobre mi trabajo del día.😘😘😘😘😘😘😘😘😘💙💞
social networks / redes sociales
Traductor Deepl
Translated Deepl
Ediciones Canva
Editions Canva


Posted Using INLEO
Congratulations @lauracraft! You have completed the following achievement on the Hive blockchain And have been rewarded with New badge(s)
Your next target is to reach 33000 upvotes.
You can view your badges on your board and compare yourself to others in the Ranking
If you no longer want to receive notifications, reply to this comment with the word
STOPCheck out our last posts:
🙂❤️
Your help will be much appreciated. Thank you!
👌
Beautiful headband and wonderful tutorial, this well-detailed tutorial would be beneficial to anyone who wishes to make a cute headband like yours. You did a great job, well done, and thanks for sharing.
I feel very happy with this great work that I have been able to do.🙂🙂🙂🙂✨Thank you very much for all your support,@diyhub it is a great pleasure for me to be part of this great hive.
Que hermosa 😍 Mi hija está aprendiendo a tejer en crochet, se lo voy a mostrar a ver si se anima a intentar hacerlo ¡Excelente trabajo! Gracias por compartir el procedimiento 🌻
Gracias querida amiga, sería muy emocionante si ella se anima.😊
No entiendo mucho de crochet, pero lo que sí sé es que está preciosa.
Los colores y el patrón son muy bonitos, es sencillo pero hermoso y delicado. ✨
Cualquier accesorio de ese estilo es muy bello. !DIY
Que bella, gracias!! Aunque no entiendas mucho, estás apreciando mi trabajo, muchas gracias de nuevo, me alegra que te haya gustado.😊
You can query your personal balance by
@celely just sent you a DIY token as a little appreciation for your post dear @lauracraft! Feel free to multiply it by sending someone else !DIY in a comment :) You can do that x times a day depending on your balance so:!DIYSTATSLo amé, es tan elegante y bello <3
¡Ay qué linda, gracias!!!!😘
Que linda diadema amiga, me encata el color y el detalle de las perlas, es elegante y delicada.
Saludos!
Gracias querida amiga, me alegra que te guste este color, y la forma como lo combine con las perlas, yo adoro este tono beige.
Muchos abrazos y bendiciones.💞
Esas bandas para el cabello son tan funcionales para mantener el cabello alejado de la cara, ideal para ir al gimnasio. Saludos @lauracraft.
Muy atractivas para lucir amiga, ideales para esta actividad. Gracias por apreciar mi trabajo.😘 Feliz noche, abrazos.
Muy lindo cintillo, se ve que has hecho un gran trabajo acá a pesar que se te dificulte un poco el tema del tejido con este hilo.
Wow si amigo, he estado trabajando mucho en ello. Gracias por pasar querido, feliz noche.
Que bonita quedó, me gusta el color ☺️
Gracias amiga, a mí también siempre me ha gustado este color, me alegra que te haya gustado.🤗😘
Lindo cintillo, excelente trabajo me encanto el paso a paso, felicidades.
Muchas gracias querida amiga. ¡Saludos.!!