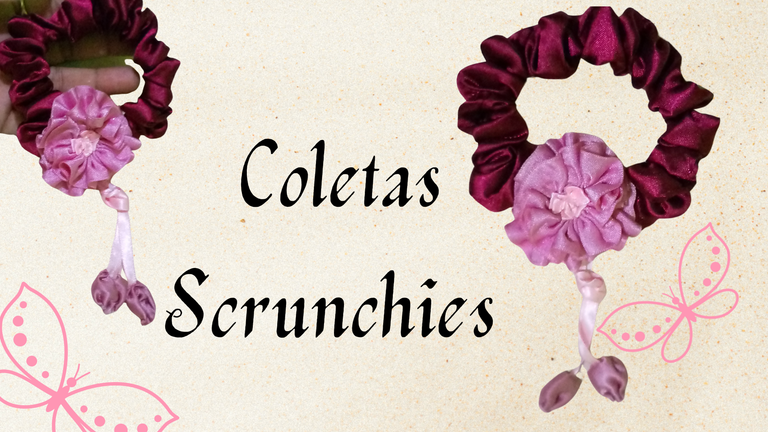
Feliz jueves y bendecido jueves para todos mis amigos creativos de esta linda comunidad de arte.
Me complace volver a encontrarme con ustedes en este espacio para mostrarles mi nueva iniciativa, se trata de un tutorial para aprender hacer Scruchies o coletas a mi manera, sé que hay un sin fin de tutoriales por internet para hacer, pero no son míos jajajaj, así que hoy están invitados a acompañarme a confeccionar esta coleta, que tanto usamos para ir al colegio cuando éramos unas niñas, y que por mucho tiempo no se ponían en tendencia como lo están ahora, recuerdo que le decíamos colas, moñeras, coletas, pero realmente yo personalmente, no las conocía como Scruchies, creo que volvieron actualizadas, y con más atractivos complementos decorativos que la hacen más influyente para el emprendimiento.
Es una prenda que se puede usar sin distinción de edades, la quedemos usar, madres, abuelas, niñas, y sobre todo aquellas que tienen un cabello abundante, ya que el elástico lo podemos elegir y colocarle uno más resistente, si la hacemos en casa.
También podemos decorarlas a nuestro gusto, la importancia de las artesanías es que podemos hacer, lo que se nos ocurra hacer, y personalizar a nuestro gusto. Entretener a las niñas haciendo sus propias coletas, es un momento emocionante, espero disfruten hacerlas.
Las fotografías que verán a continuación, fueron tomadas con mi teléfono modelo TECNO SPARK GO 2024.
Happy Thursday and blessed Thursday to all my creative friends of this beautiful art community.
I am pleased to meet you again in this space to show you my new initiative, this is a tutorial to learn how to make Scruchies or ponytails my way, I know there are endless tutorials on the internet to do, but they are not mine hahahahahah, so today you are invited to join me to make this ponytail, that we used so much to go to school when we were little girls, and that for a long time were not in trend as they are now, I remember that we called tails, buns, ponytails, but really I personally did not know them as Scruchies, I think they came back updated, and with more attractive decorative accessories that make it more influential for entrepreneurship.
It is a garment that can be used without distinction of age, we can use it, mothers, grandmothers, girls, and especially those who have abundant hair, since we can choose the elastic and place a more resistant one, if we make it at home.
We can also decorate them to our taste, the importance of the crafts is that we can do, whatever we can think of doing, and customize to our liking. Entertaining the girls by making their own pigtails, is an exciting moment, I hope they enjoy making them.
The pictures you will see below, were taken with my phone model TECNO SPARK GO 2024.

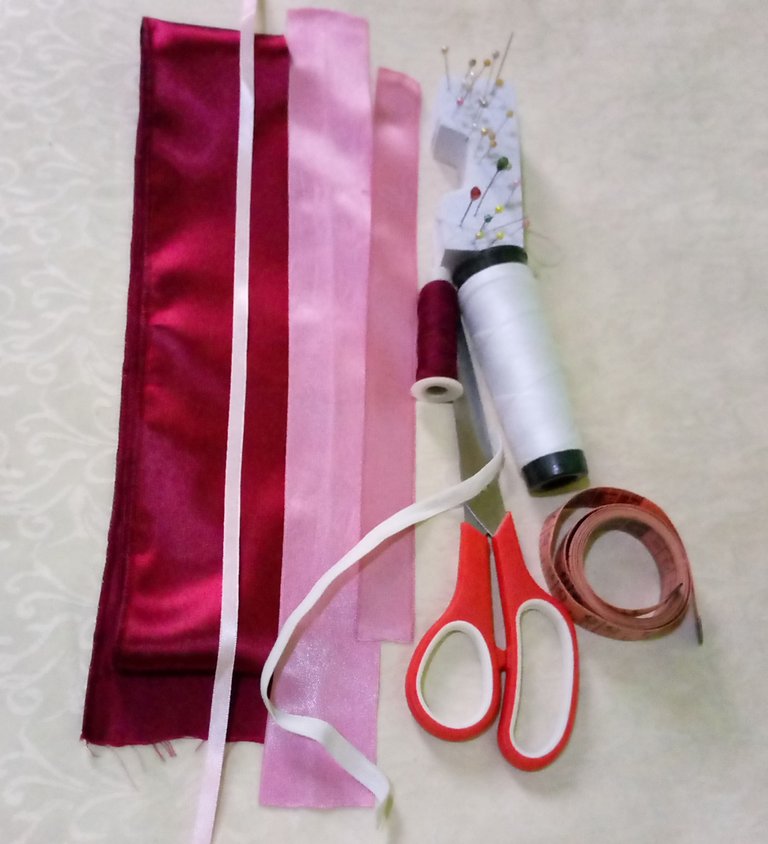
Materiales:
🌸80 cm de tela satén
🌸Cintas de Raso
🌸Cinta bebe
🌸Hilo
🌸Elástico de 23 cm
🌸cinta para medir
🌸Alfileres
🌸Aguja
🌸tijera
🌸Máquina de coser o costura a mano
Materials:
🌸80 cm satin fabric.
🌸Satin ribbons
🌸Baby ribbon
🌸Thread
🌸 Elastic of 23 cm
🌸 Measuring tape
🌸Pins
🌸 Needle
🌸Scissors
🌸Sewing machine or hand sewing machine
 |  |  |
|---|
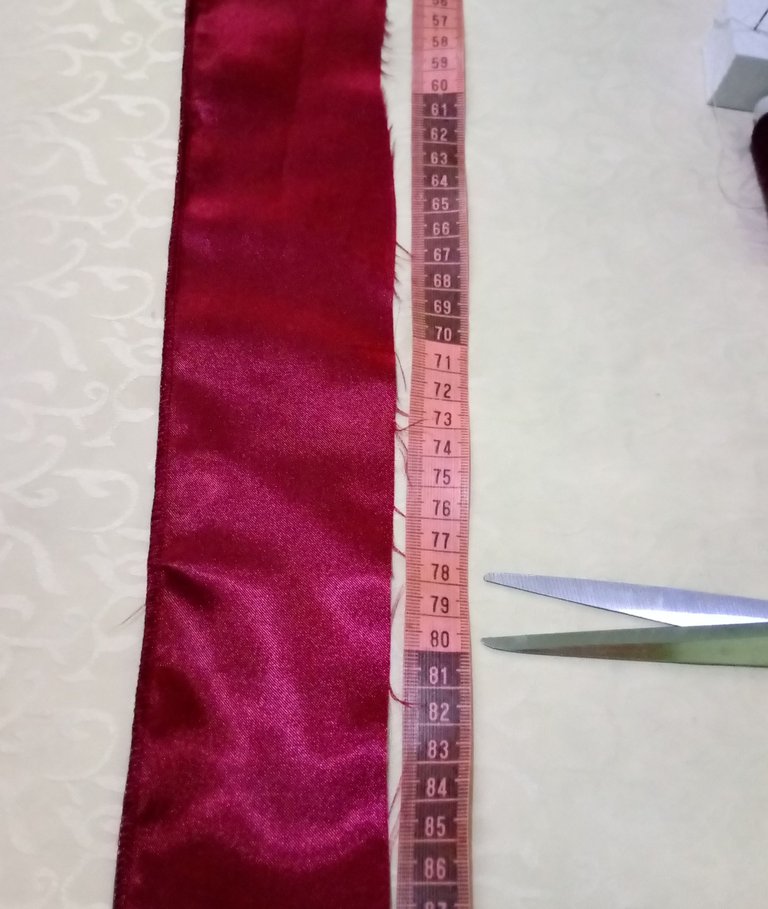
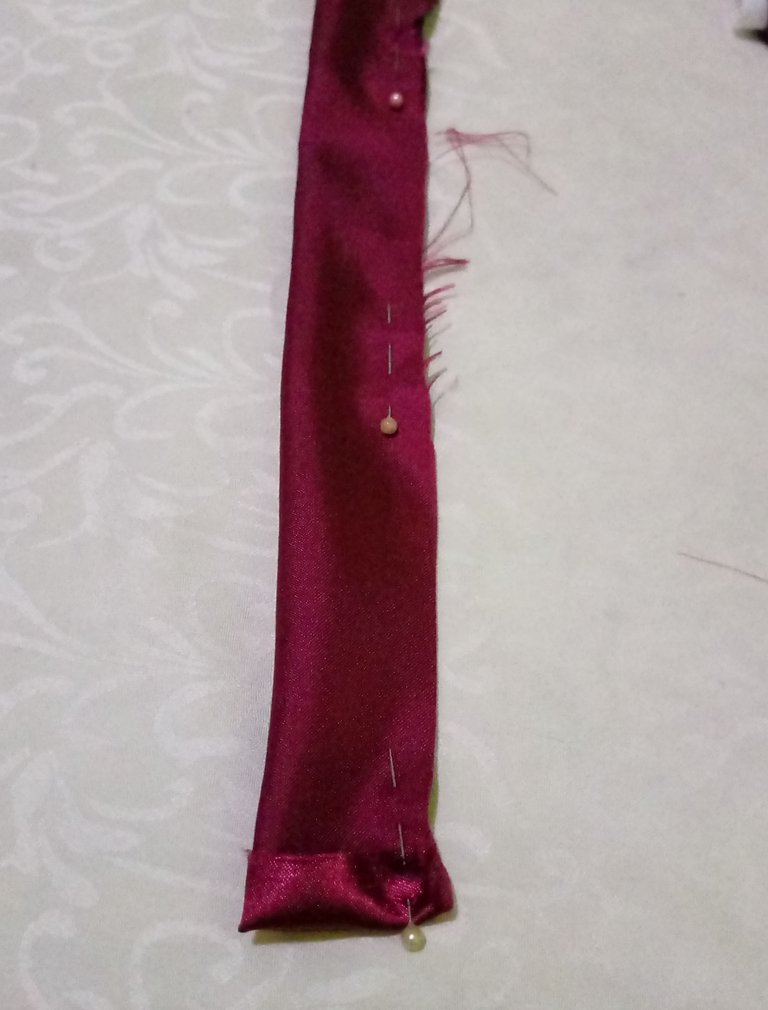
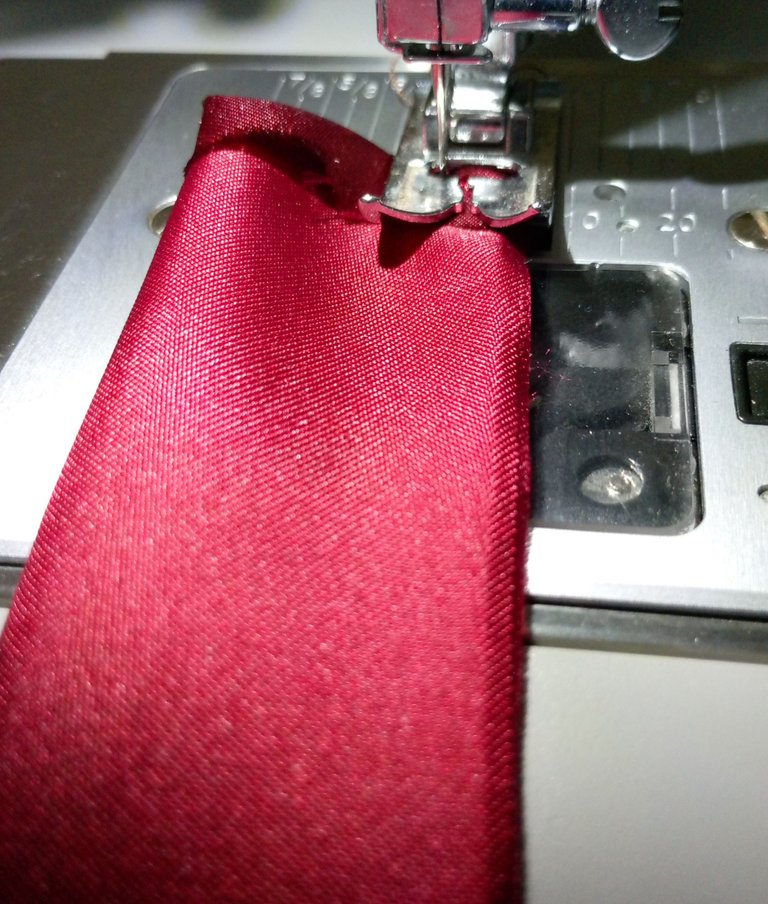
Lo primero que vamos a hacer es medir el largo y ancho de la tela, en este caso 80 cm de largo X 9 cm de ancho, se dobla por la mitad, se coloca alfileres para coser, a un margen de 1/2 cm a 1 cm, y en una de las puntas de dobla 1 cm, se cose con costura recta y se remata con zigzag si es posible.
The first thing we are going to do is to measure the length and width of the fabric, in this case 80 cm long X 9 cm wide, fold it in half, place pins to sew, at a margin of 1/2 cm to 1 cm, and at one of the ends fold 1 cm, sew with straight seam and finish with zigzag if possible.
 |  |  |
|---|
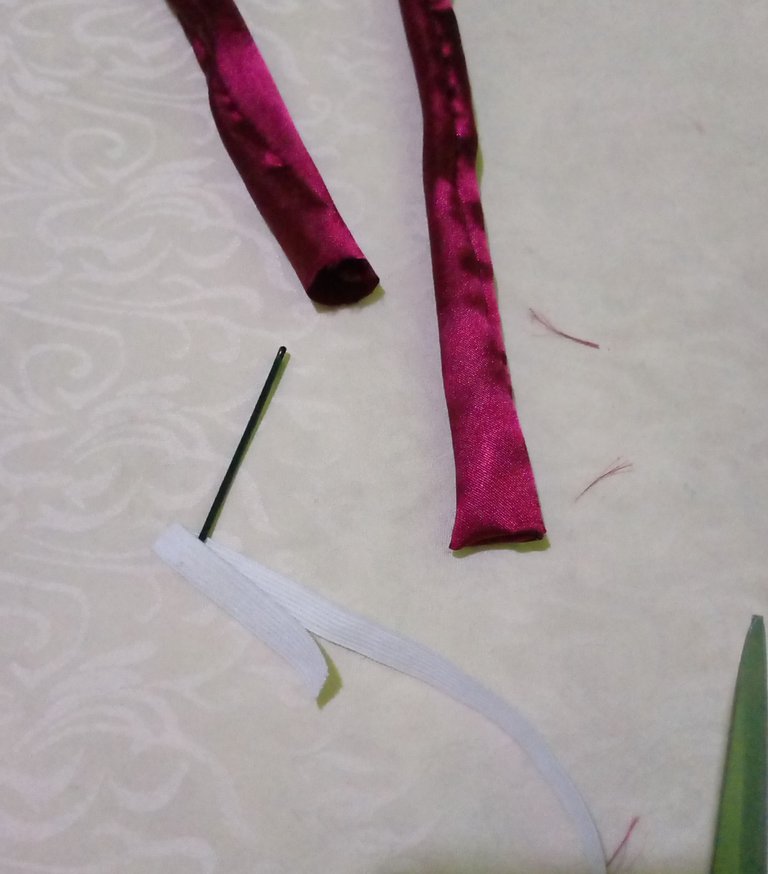
Después de coser se voltea con un alfiler, gancho, palito, o como lo hice, con la punta de la tijera, que sea punta larga.
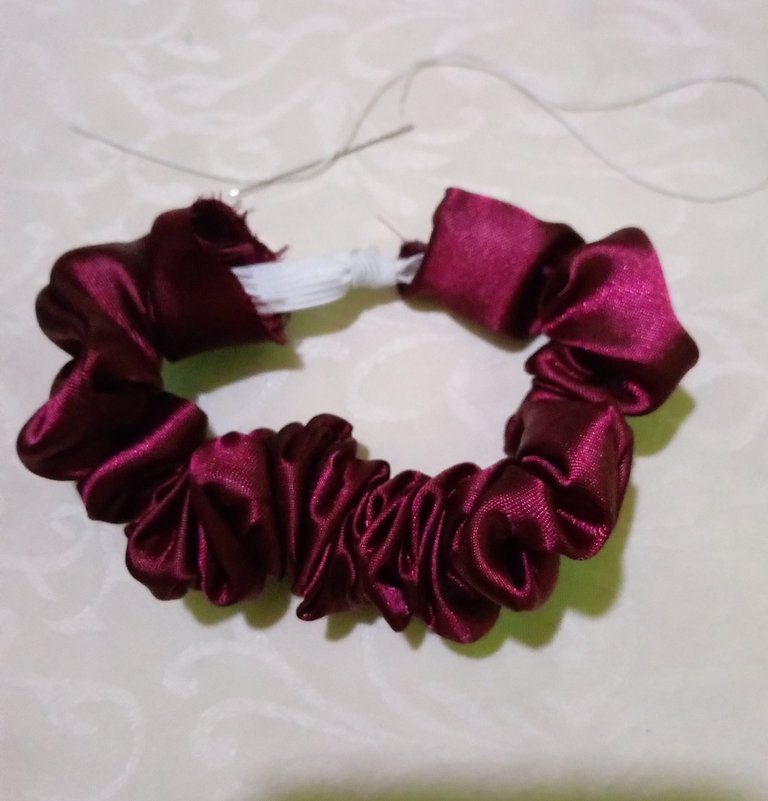
Luego se coloca el elástico, con un ganchito de pelo de los más largos, sostienes el elástico con una mano y vamos a ir introduciendo el elástico con cuidado de no soltarlo, porque si lo soltamos, empezaríamos de cero a volver a colocarlo.
After sewing, turn it over with a pin, hook, stick, or as I did, with the tip of the scissors, which is a long tip.
Then place the elastic, with a hair clip of the longest, hold the elastic with one hand and we are going to introduce the elastic being careful not to release it, because if we release it, we would start from scratch to put it back in place.
 |  |  |
|---|
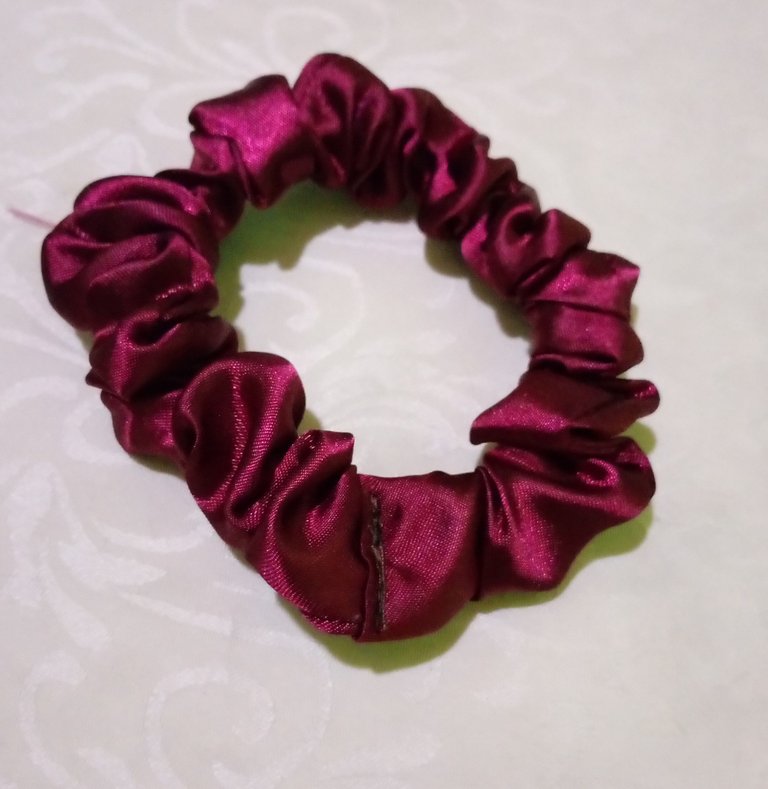
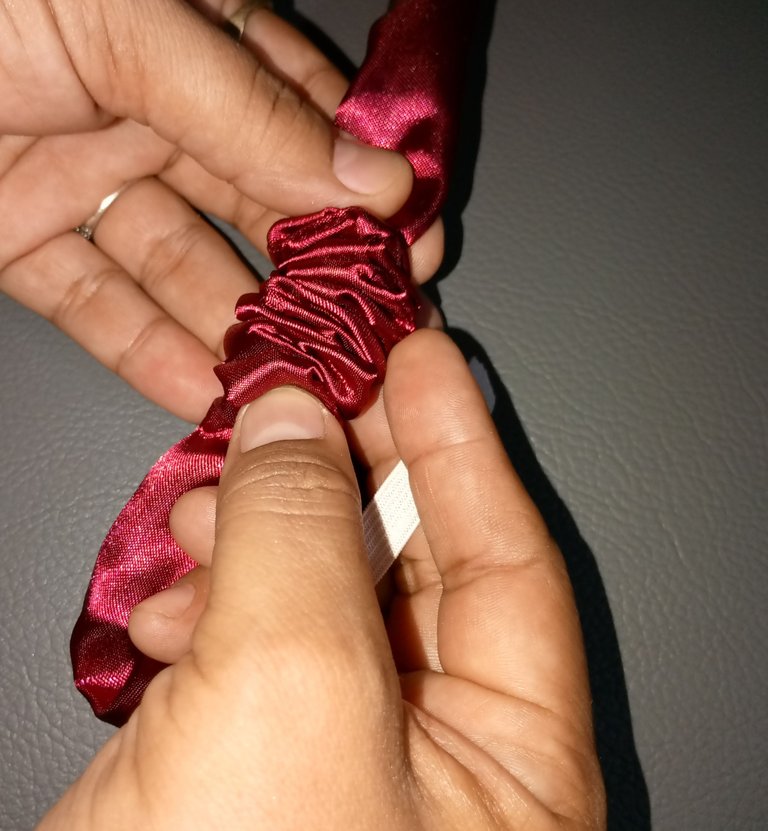
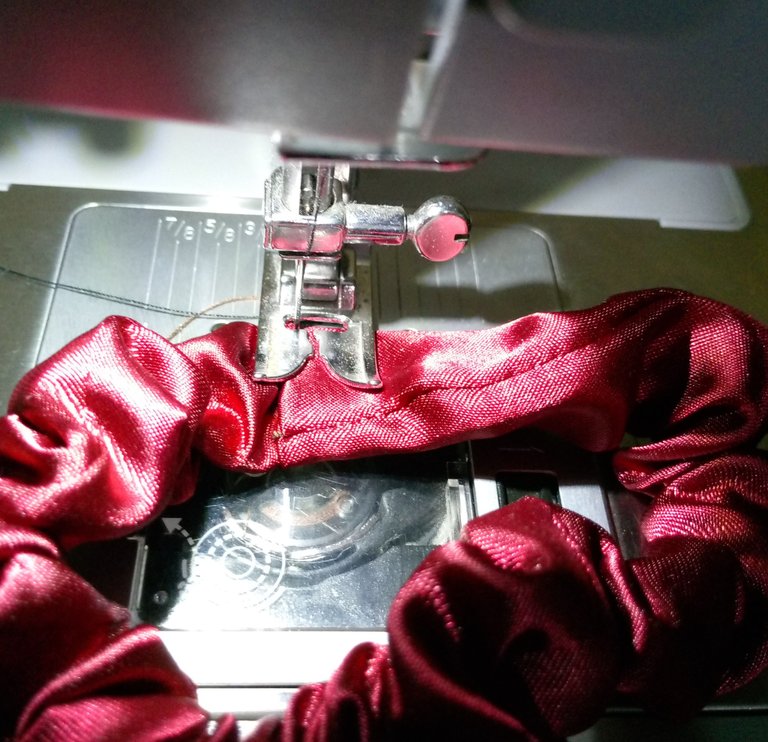
Sujetamos bien el elástico, doblamos y cosemos las puntas, del elástico, con la máquina, o a mano con la aguja.
Lo siguiente, es introducir una de las puntas, por dentro de la otra, que está doblada, para darle un bonito acabado, cosemos en la máquina, o a mano, y queda perfecta.
We hold the elastic well, fold and sew the ends of the elastic with the machine or by hand with the needle.
Next, introduce one of the ends, inside the other, which is folded, to give it a nice finish, sew in the machine, or by hand, and it is perfect.
 |  |  |
|---|
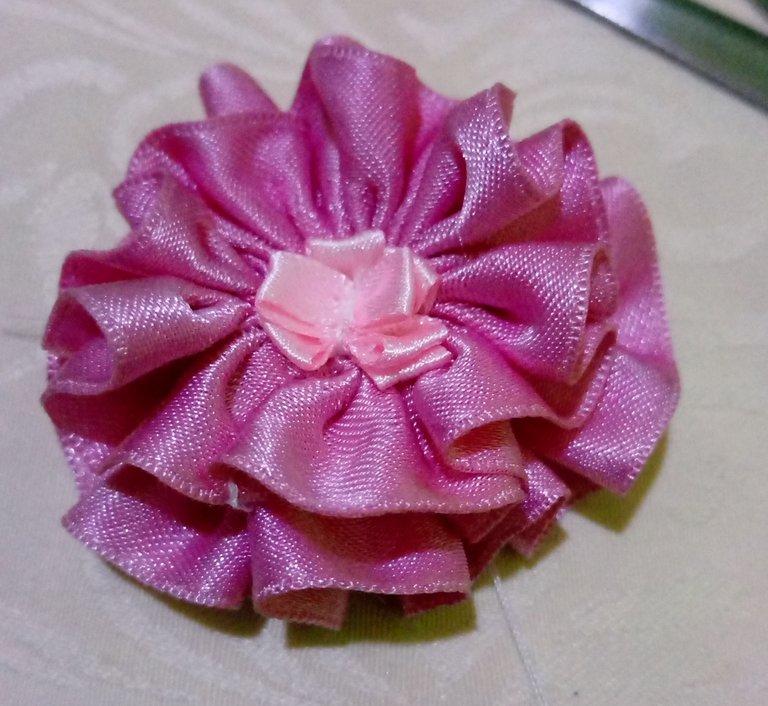
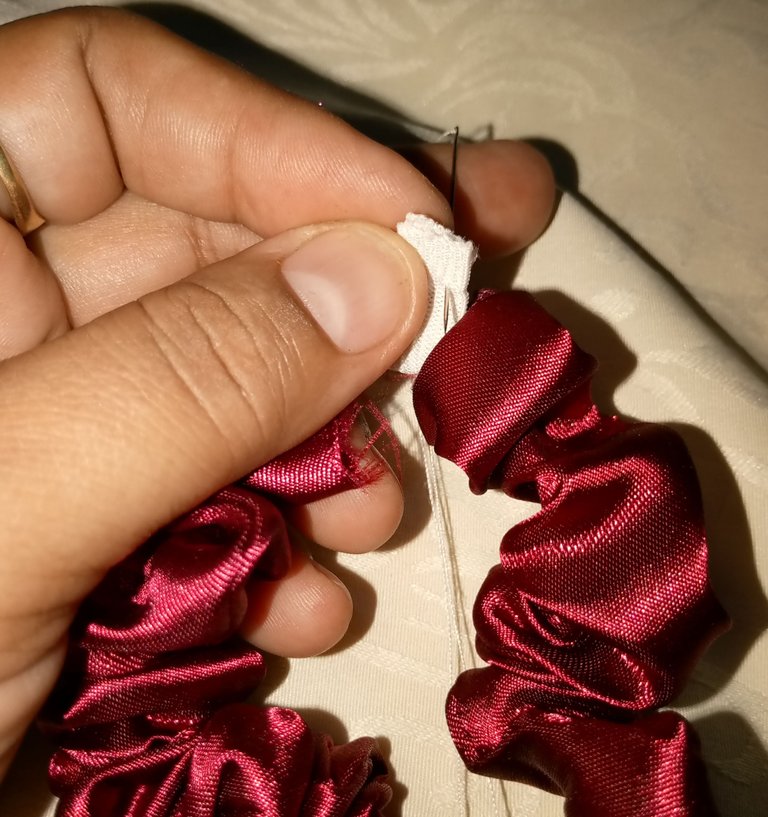
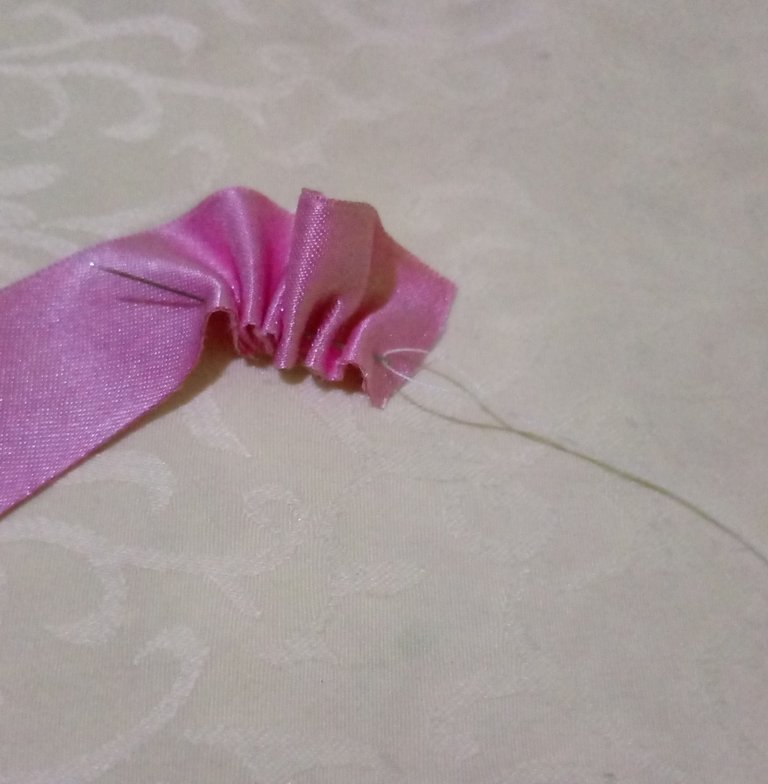
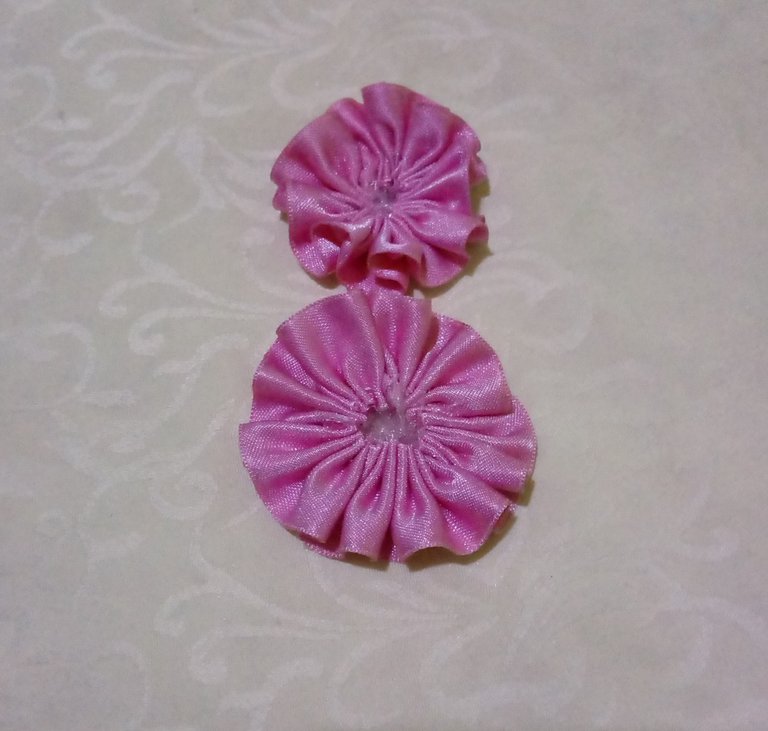
Lo que sigue es la decoración de la coleta, en este caso se decora con una flor de color rosa doble.
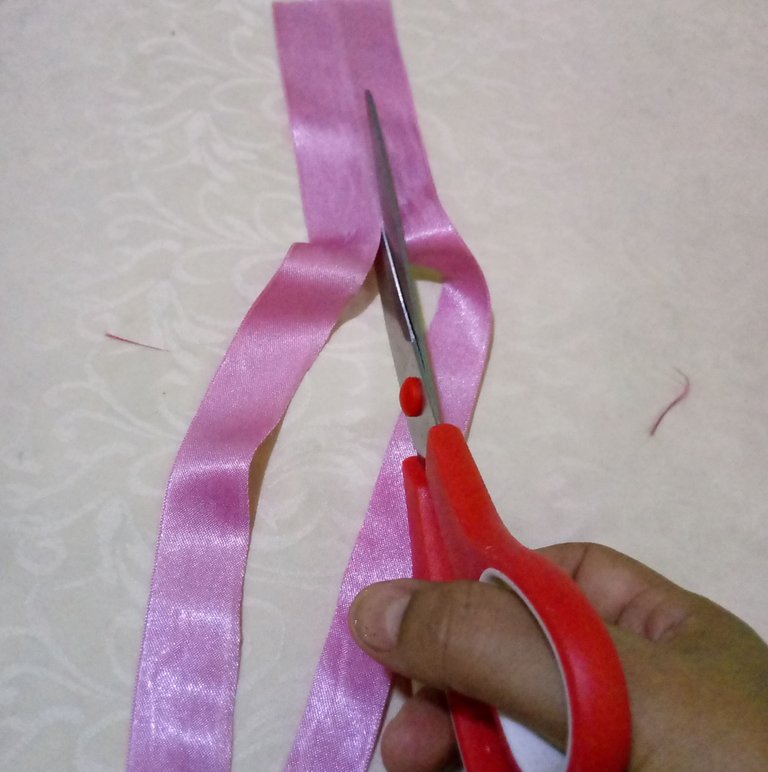
Con la cinta de color rosado de 25 cm de largo y 8 cm de ancho, cortamos por la mitad, sacamos 2 cintas, 1 de 25 cm y 1 de 23 cm, con la aguja e hilo, haremos unas puntadas simples, luego vamos a fruncir, para formar una rosa y cosemos las puntas, colocaremos una flor sobre la otra, decoramos con unos lazos de cinta bebe en el centro de la flor y listo.
What follows is the decoration of the ponytail, in this case it is decorated with a double pink flower.
With the pink ribbon 25 cm long and 8 cm wide, cut in half, take out 2 ribbons, 1 of 25 cm and 1 of 23 cm, with the needle and thread, we will make a few simple stitches, then we will gather, to form a rose and sew the ends, we will place a flower on the other, decorate with a few ribbons of baby ribbon in the center of the flower and ready.
 |  |  |
|---|
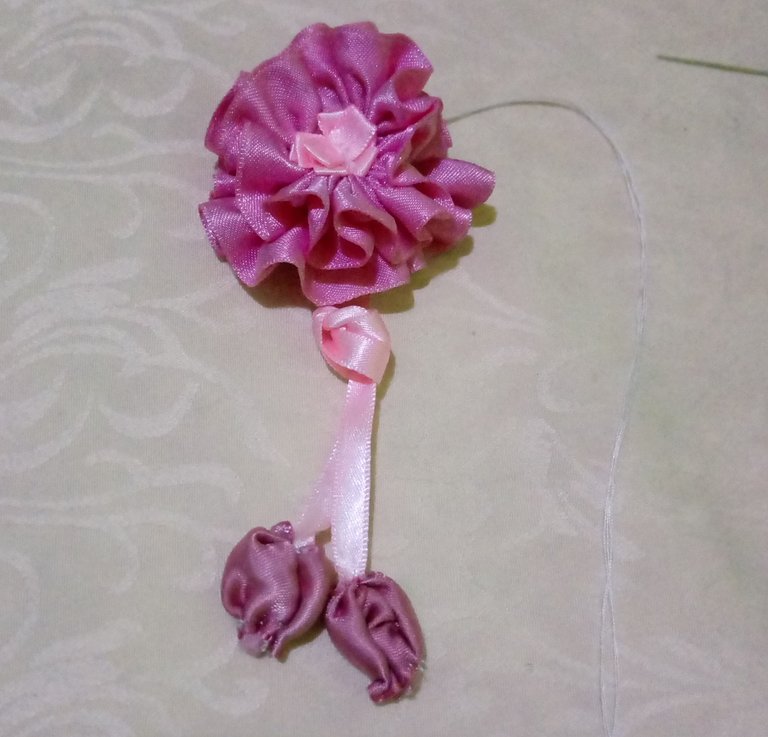
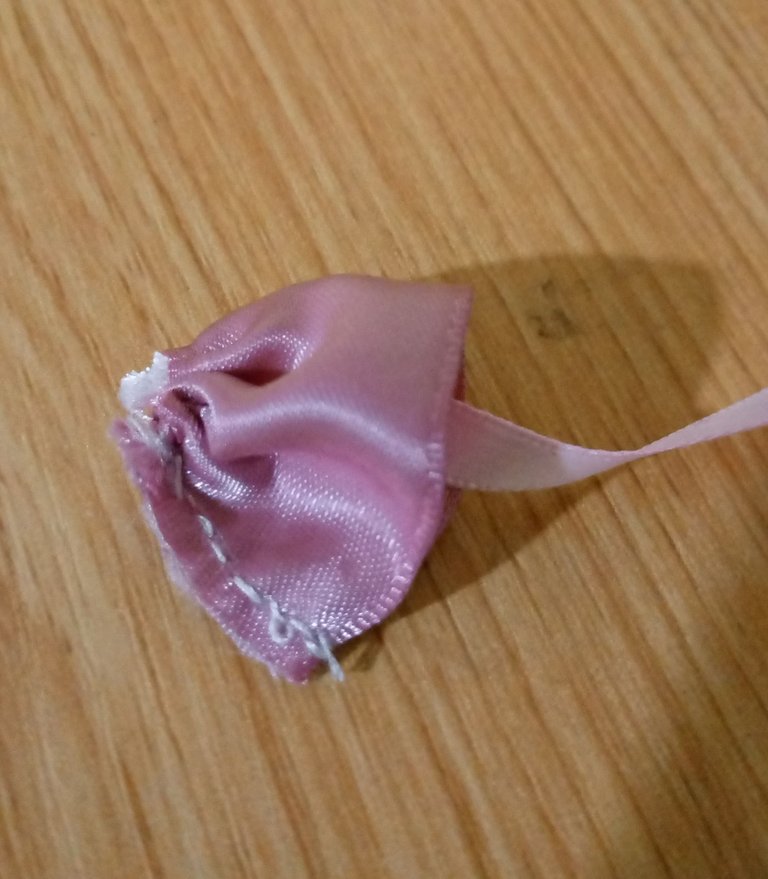
Como queremos más belleza, le vamos a colocar unos botones de rosa, con una cinta de 8 cm de largo y de color rosa pálida, fruncimos la cinta cosemos los extremos y volteamos, después vamos a fruncir la parte inferior del botón y es así como quedan los botones de la rosa, colgando en unas cintas delgadas, para que esta flor tenga más belleza, también se puede anudar la cinta de los botones o simplemente dejarlos sueltos, en mi caso me gusto hacerle ese nudo que pueden ver allí.
As we want more beauty, we are going to place some rose buttons, with a ribbon of 8 cm long and pale pink, we gather the ribbon sew the ends and flip, then we will gather the bottom of the button and this is how the buttons of the rose, hanging on thin ribbons, so that this flower has more beauty, you can also knot the ribbon of the buttons or just leave them loose, in my case I like to make that knot that you can see there.
 |  |
|---|
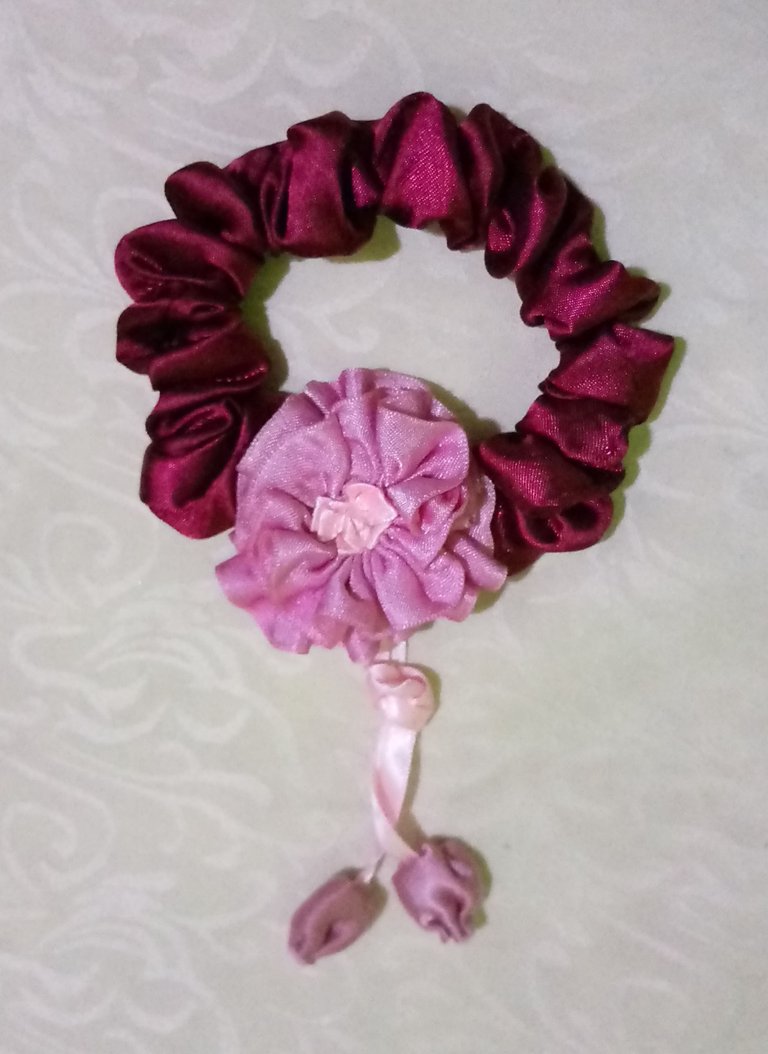
Para finalizar vamos a coser la flor en la parte donde cerramos la coleta, para cubrir ese detalle con la rosa, y así obtener una coleta preciosa, con una estética profesional.
Espero que disfruten de este tutorial que hago para ustedes con mucho cariño.
Saludos con amor, espero sus mejores comentarios.
Gracias por estar aquí.
Finally we are going to sew the flower in the part where we close the ponytail, to cover that detail with the rose, and thus obtain a beautiful ponytail, with a professional aesthetic.
I hope you enjoy this tutorial that I make for you with love.
Greetings with love, I look forward to your best comments.
Thank you for being here.
social networks / redes sociales
Traductor Deepl
Translated Deepl
Ediciones Canva
Editions Canva


Justo estaba buscando un tutorial donde explicaran como hacerla con flores y no lo encontré! Qué preciosa te quedó, me encantó la elección de colores y los pequeños colgantes que le agregaste. 🩷✨
Ah, pero que buena noticia, me alegro que te haya gustado, y que este tutorial te pueda ayudar, se que te va a quedar muy bonito.
It is charming, stylish, and beautiful. Love its design. It shows your creativity and skills. Well done!
Thank you very much, dear community, for so much support for my projects.😚
Discord Server.This post has been manually curated by @bhattg from Indiaunited community. Join us on our
Do you know that you can earn a passive income by delegating to @indiaunited. We share more than 100 % of the curation rewards with the delegators in the form of IUC tokens. HP delegators and IUC token holders also get upto 20% additional vote weight.
Here are some handy links for delegations: 100HP, 250HP, 500HP, 1000HP.
100% of the rewards from this comment goes to the curator for their manual curation efforts. Please encourage the curator @bhattg by upvoting this comment and support the community by voting the posts made by @indiaunited.
I hope to be able to do it very soon🙏
Otro producto para emprender, ya poco a poco tendrás material para tener un catálogo. Éxitos.
😊Si mi querida amiga, es una de las expectativas.
Oh wow! Thanks for sharing this, I can make my ponytail, I don't have a sewing machine maybe I can use it by hand for stitching 😍
Absolutely my dear friend, you can sew it by hand without any problem.👏❤️
Nice😍thanks for sharing it ☺️
It is a pleasure dear friend.😀
Your skills are extraordinary, my friend, the results are so amazing.
I'm very flattered, my dear, thank you very much I'm glad you liked it.😊🌸
Quedó linda, no sabía que también tenían este nombre, yo siempre las he conocido como moñeras o colas jajaj ☺️
Thank you for your witness vote!
Have a !BEER on me!
To Opt-Out of my witness beer program just comment STOP below
Jajajaja así es amiga, me paso igual, ahora este es el nuevo nombre, pero para mi siempre van a ser coletas o colas y moñeras, a lo más criollo.😄