Hola amigos de #hivediy, espero se encuentren bien al lado de sus seres queridos, me ha sido un poco difícil publicar mas seguido por diferentes motivos, pero hoy les traigo un tutorial de cómo elaborar un bello cuadro con la técnica que tanto me gusta, el filigrana, que consiste en enrollar tiras de papel y luego formar cosas lindas, cuadros, figuras en 3d, bisutería, todo lo que se nos apetezca.
Hello friends of #hivediy, I hope you are well with your loved ones, it has been a little difficult for me to publish more often for different reasons, but today I bring you a tutorial on how to make a beautiful picture with the technique that I like so much, the filigree, which consists of rolling strips of paper and then form beautiful things, pictures, 3d figures, costume jewelry, everything we want.
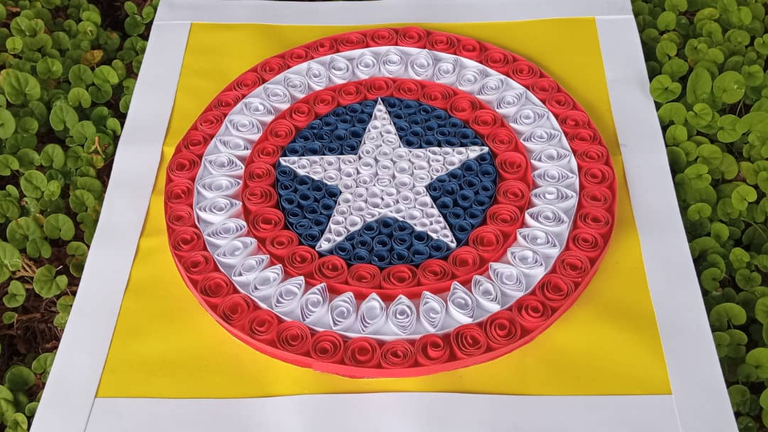
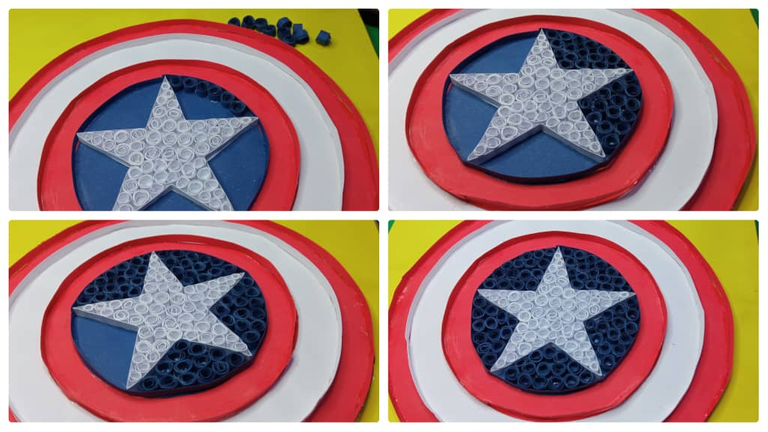
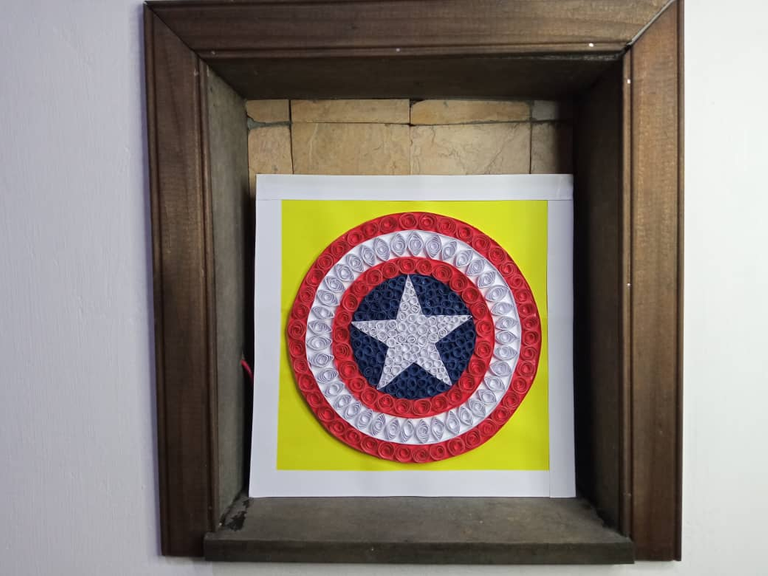
Para el cuadro de hoy quise inspirarme en algo especial par mi; Las películas de Marvel, a mi familia y a mi siempre nos a encantado el universo del UCM, desde sus grandes personajes hasta las escenas icónicas. Hacer este cuadro fue una muy linda experiencia, inspirándome en mi personaje favorito: El Capitán América, este personaje tiene un gran lugar en mi corazón y como me gusta tanto quise representar algo de el y, ¿Qué mejor que el escudo de este super héroe?
For today's painting I wanted to be inspired by something special for me; Marvel movies, my family and I have always loved the UCM universe, from its great characters to the iconic scenes. Making this painting was a very nice experience, inspired by my favorite character: Captain America, this character has a big place in my heart and as I like him so much I wanted to represent something of him and, what better than the shield of this super hero?
Estos trabajos en filigrana son muy sencillos de elaborar y los materiales usados son muy económicos y fácil de adquirir, como siempre les digo lo único que necesitamos es paciencia, tiempo y mucho cariño por las cosas que hacemos, bueno vamos acompáñame al paso a paso.
These filigree works are very simple to make and the materials used are very inexpensive and easy to acquire, as I always say the only thing we need is patience, time and a lot of love for the things we do, well come with me to the step by step.
Cuadro escudo del Capitán América en filigrana
Picture shield of Captain America in filigree
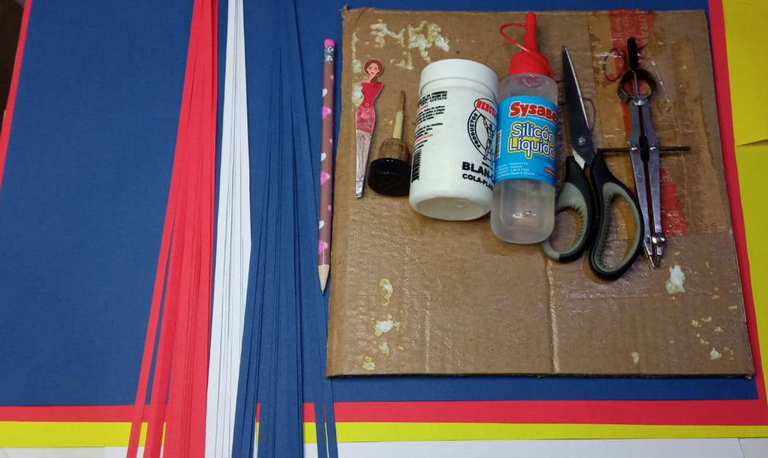
Materiales
Materials
Pasos para la elaboración
Steps for processing
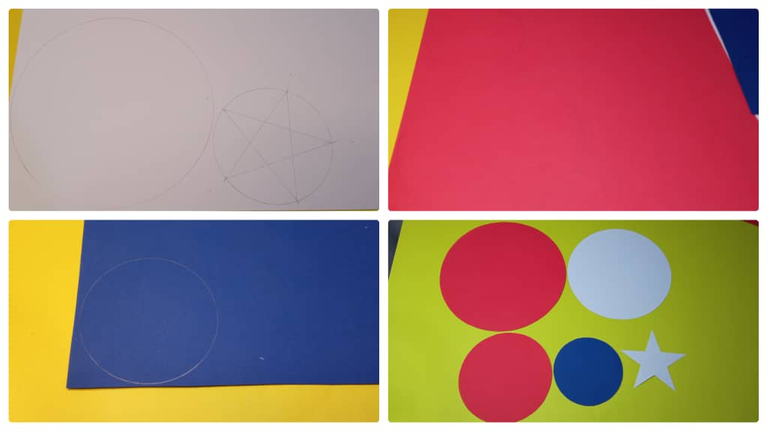
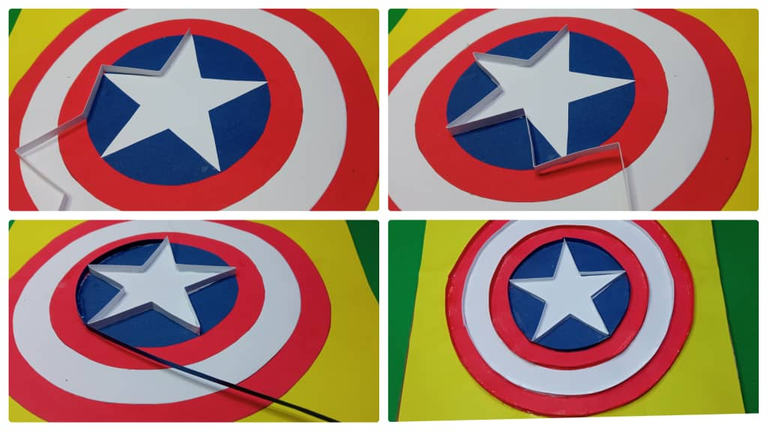
Paso 1
Lo primero que haremos es dibujar el escudo del capitán américa, iniciaremos dibujando círculos en cada cartulina nos ayudaremos con un compás, en la cartulina blanca haremos la estrella, luego recortamos con cuidado para no estropear nuestro trabajo.Step 1
The first thing we will do is draw the shield of captain america, we will start drawing circles on each cardboard we will help us with a compass, on the white cardboard we will make the star, then we cut carefully so as not to spoil our work.
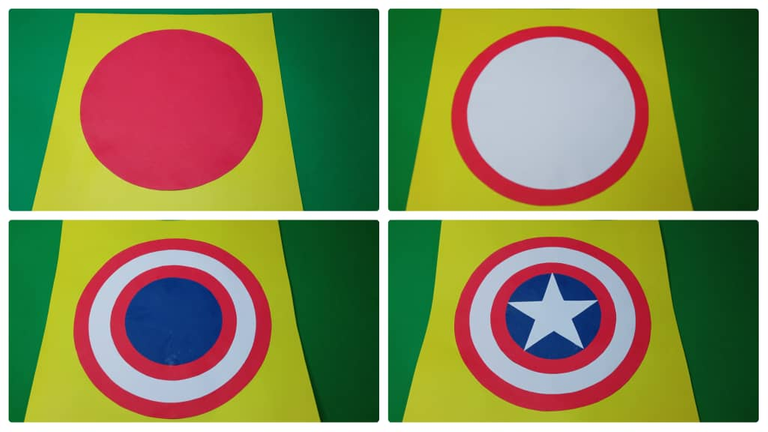
Paso 2
Seguidamente pegamos el círculo rojo en la cartulina amarilla que será la base de nuestro cuadro, después continuamos con el blanco, el rojo y el círculo azul, por último pegamos la estrella.Step 2
Next we glue the red circle on the yellow cardboard that will be the base of our picture, then we continue with the white, the red and the blue circle, finally we glue the star.
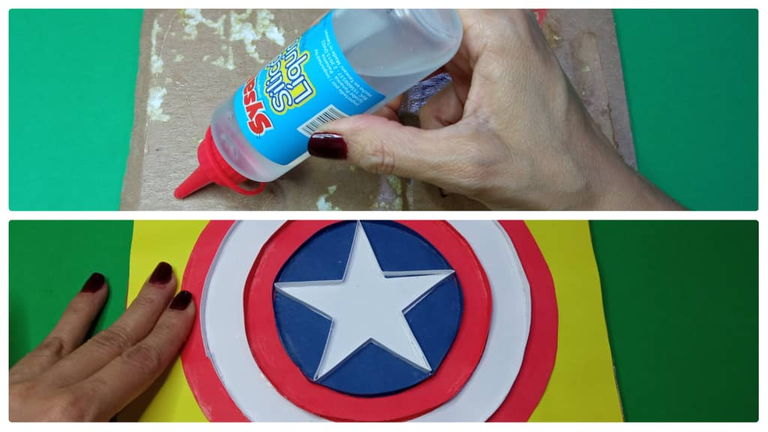
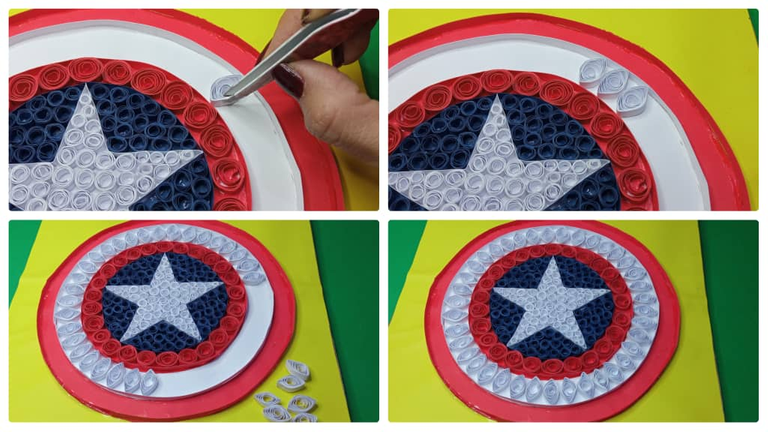
Paso 3
Después tomamos tiras de 0.5 mm por 20 cm y vamos bordeando toda la imagen, comenzando por la estrella, luego los círculos, este paso es un poco tedioso pero debemos tener paciencia al realizarlo, estas tiras las pegamos con pega blanca.Step 3
Then we take strips of 0.5 mm by 20 cm and we border the entire image, starting with the star, then the circles, this step is a little tedious but we must have patience to do it, these strips we glue with white glue.
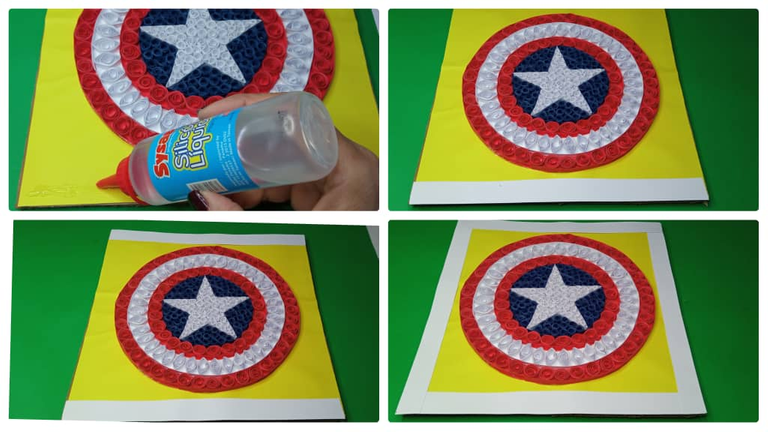
Paso 4
Ahora pegaremos pondremos silicón sobre el cartón y pegamos para darle mas fuerza a nuestro cuadro.Step 4
Now we will put silicone on the cardboard and glue to give more strength to our picture.
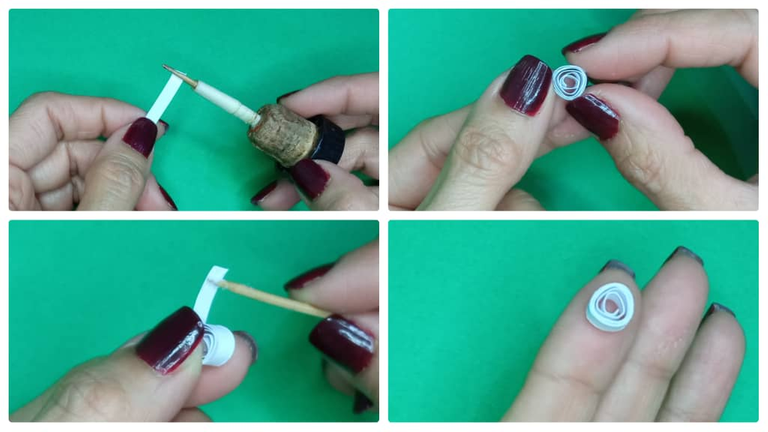
Paso 5
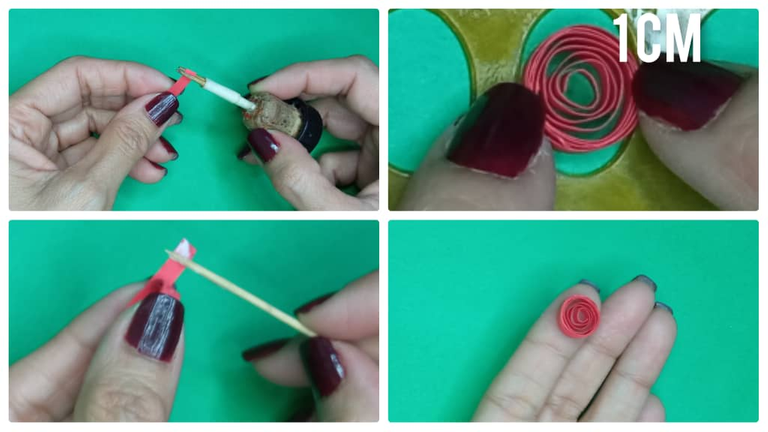
Después formaremos círculos abiertos para empezar a rellenar la estrella de el escudo, tomamos una tira blanca de 0.5 mm por 10 cm, introducimos la punta en el enrollador y vamos dando vueltas sobre ella misma hasta llegar al final, luego con cuidado soltamos un poco y pegaremos con un punto de pega blanca.Step 5
Then we will form open circles to start filling the star of the shield, we take a white strip of 0.5 mm by 10 cm, we introduce the tip in the winder and we go around it until we reach the end, then we carefully release a little and we will glue with a point of white glue.
Paso 6
Luego rellenamos la estrella con los círculos blancos, vamos pegando uno al lado del otro con orden para que nos quede lindo.Step 6
Then fill the star with the white circles, gluing one next to the other in order to make it look nice.
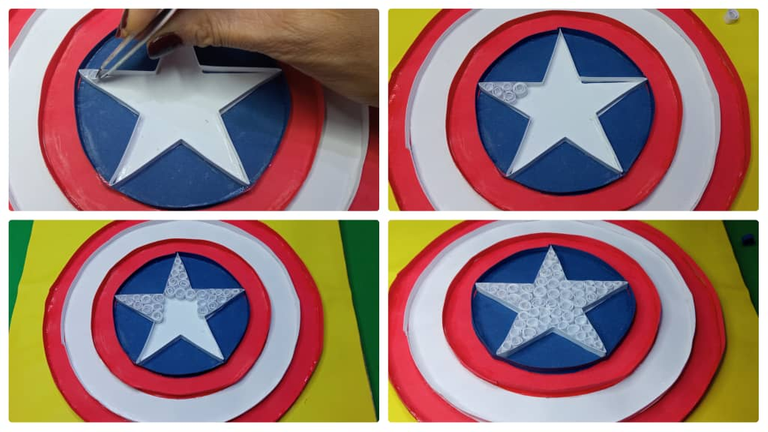
Paso 7
Para la parte azul hacemos pequeños círculos abiertos usando el procedimiento del paso 4, luego vamos pegando hasta rellenar completamente toda la zona.Step 7
For the blue part we make small open circles using the procedure of step 4, then we glue until the whole area is completely filled.
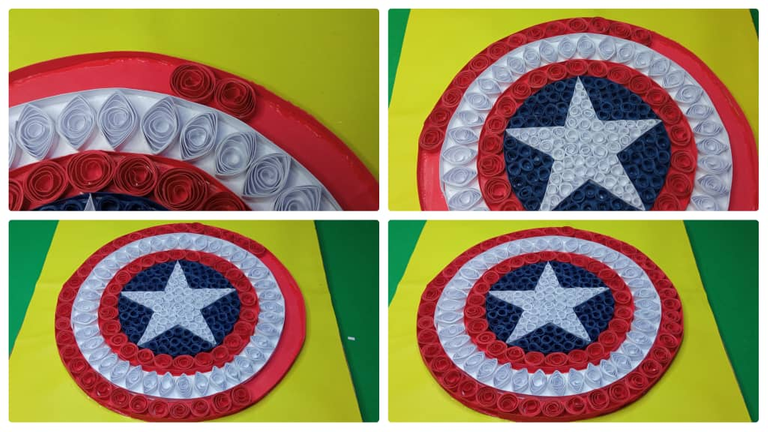
Paso 8
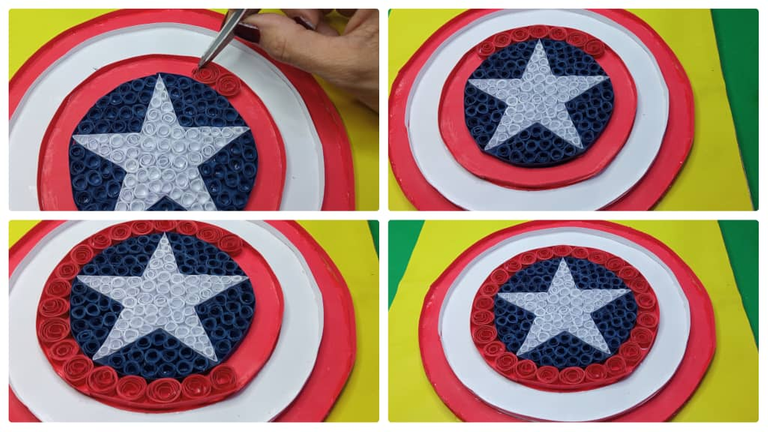
Después haremos círculos abiertos rojos ya explicamos el procedimiento solo que para estos usaremos tiras de 15 cm debido a que son mas grandes.Step 8
Then we will make red open circles as we explained the procedure but for these we will use 15 cm strips because they are larger.
Paso 9
Después de que hagamos muchos círculos rojos comenzamos a pegar uno al lado del otro, bordeando toda la franja roja.Step 9
After we make many red circles we start gluing one next to the other, bordering the whole red stripe.
Paso 10
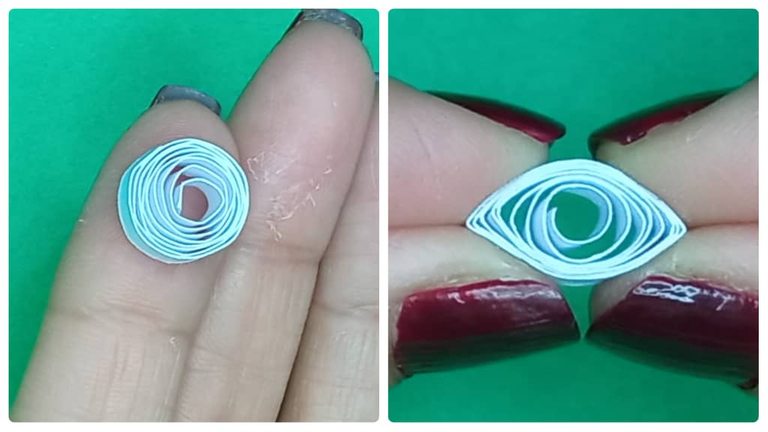
Partiendo de un círculo abierto haremos la forma de óvalo y lo haremos haciendo presión con los dedos índice y pulgar de ambas manos, es una de las formas básicas mas sencillas de la técnica del filigrana.Step 10
Starting from an open circle we will make the oval shape and we will do it by pressing with the index finger and thumb of both hands, it is one of the simplest basic shapes of the filigree technique.
Paso 11
Pegamos los óvalos blancos en la franja correspondiente, ya nuestro escudo se ve mas lindo.Step 11
Paste the white ovals on the corresponding strip, our shield looks nicer.
Paso 12
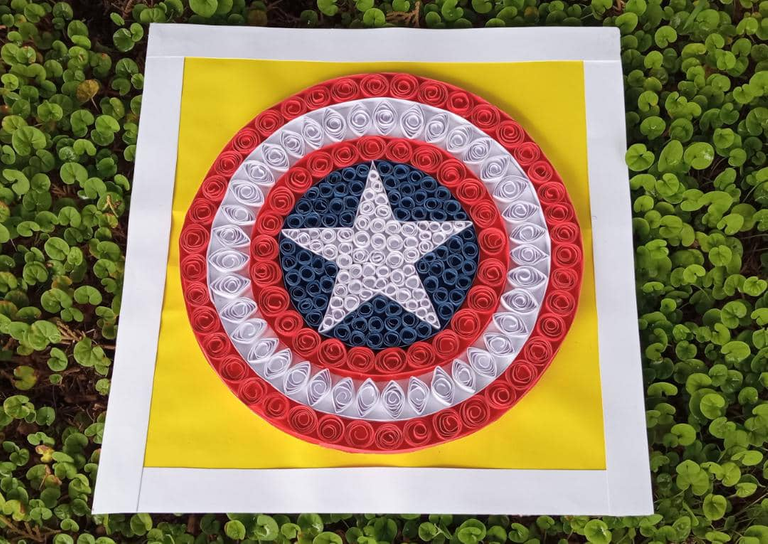
Para finalizar rellenamos con mas círculos rojos y así terminamos el bello escudo.Step 12
Finish with more red circles to complete the beautiful shield.
Paso 13
Por ultimo pegamos tiras blancas formando un marco, así nuestro cuadro se vera con mejor presentación y mas lindo.Step 13
Finally we glue white strips forming a frame, so our picture will look better and prettier.
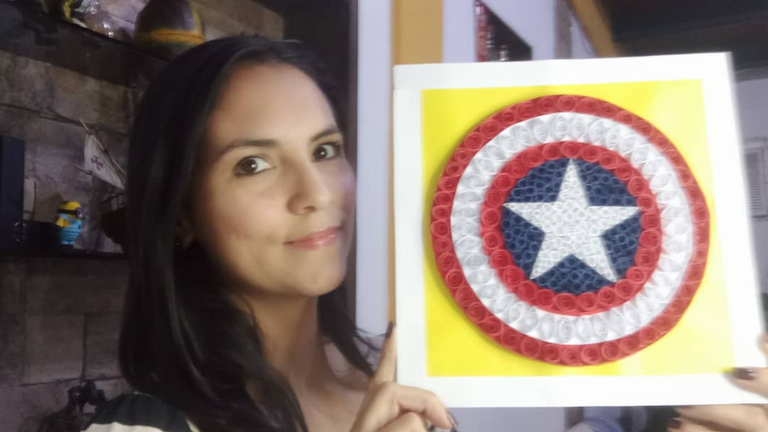
Listo amigos así quedo mi lindo cuadro, espero que sea del agrado de todos ustedes
Ready friends, this is how my beautiful painting turned out, I hope you all like it.

Todas las fotos son tomadas de mi teléfono Redmi 9, para los collages usé la aplicación collage maker y para la traducción usé el traductor Deepl.
All photos are taken from my Redmi 9 phone, for the collages I used the collage maker application and for the translation I used Deepl translator.
Te quedo hermoso amiga @lilianap15. Abrazos, saludos y mil bendiciones. 💖✨
Gracias amiga, amén.
Que bello quedó el escudo del capitán América en esta hermosa técnica😍, realmente hiciste un gran trabajo amiga, felicidades🥳
Hola amiga, muchas gracias.
that looks lovely I enjoyed the fact that u used more than just a circle shape for example the white ones in the shape of eyes
Gracias, si quise usar esa forma para darle un toque distinto.
¡Felicidades! Esta publicación obtuvo upvote y fue compartido por @la-colmena, un proyecto de Curación Manual para la comunidad hispana de Hive que cuenta con el respaldo de @curie.
Si te gusta el trabajo que hacemos, te invitamos a darle tu voto a este comentario y a votar como testigo por Curie.
Si quieres saber más sobre nuestro proyecto, acompáñanos en Discord: La Colmena.
Muchas gracias por el apoyo.
Your content has been voted as a part of Encouragement program. Keep up the good work!
Use Ecency daily to boost your growth on platform!
Support Ecency
Vote for new Proposal
Delegate HP and earn more
Gracias.
Thank you for sharing this amazing post on HIVE!
Your content got selected by our fellow curator @priyanarc & you just received a little thank you via an upvote from our non-profit curation initiative!
You will be featured in one of our recurring curation compilations and on our pinterest boards! Both are aiming to offer you a stage to widen your audience within and outside of the DIY scene of hive.
Join the official DIYHub community on HIVE and show us more of your amazing work and feel free to connect with us and other DIYers via our discord server: https://discord.gg/mY5uCfQ !
If you want to support our goal to motivate other DIY/art/music/homesteading/... creators just delegate to us and earn 100% of your curation rewards!
Stay creative & hive on!
Muchas y por el apoyo.
Congratulations @lilianap15! You have completed the following achievement on the Hive blockchain and have been rewarded with new badge(s):
Your next target is to reach 2250 upvotes.
You can view your badges on your board and compare yourself to others in the Ranking
If you no longer want to receive notifications, reply to this comment with the word
STOPCheck out the last post from @hivebuzz:
Support the HiveBuzz project. Vote for our proposal!